Like other web browsers, Brave lets you allow or block website notifications. The option to receive website notifications can help you stay updated on interesting topics. But, some websites may use this as an opportunity to send you a barrage of notifications on irrelevant topics, which can get annoying. So in this article, we will help you learn different ways to allow or block notifications on the Brave browser.

Related | 3 Ways to Disable Sponsored Images, Ads in Brave Browser
Allow or Block Notifications in Brave Browser
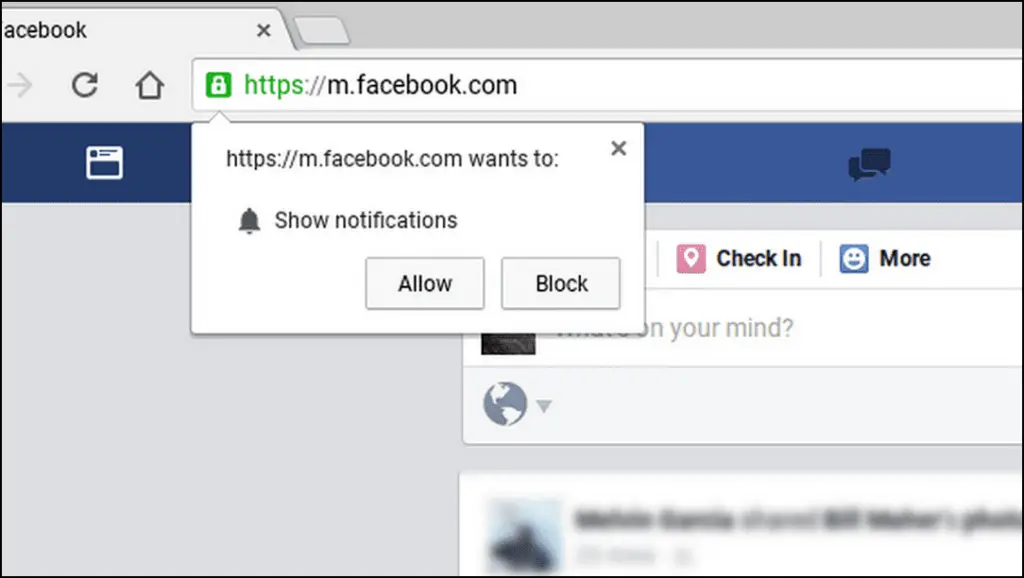
Whenever you visit a website for the first time, you will see a prompt up top asking to Show notifications like the one in the image below. You can click on Allow to accept notifications from that website or Block to never receive notifications.
We have curated a list of five methods to allow or block notifications on the Brave browser. Since Brave is a chromium-based web browser, most methods discussed here will also work with other popular web browsers like Google Chrome and Microsoft Edge.
Method 1: Change Notification Behaviour in Brave Settings
You can change how Brave handles website notifications with the help of the notification behaviors option located within Brave settings.
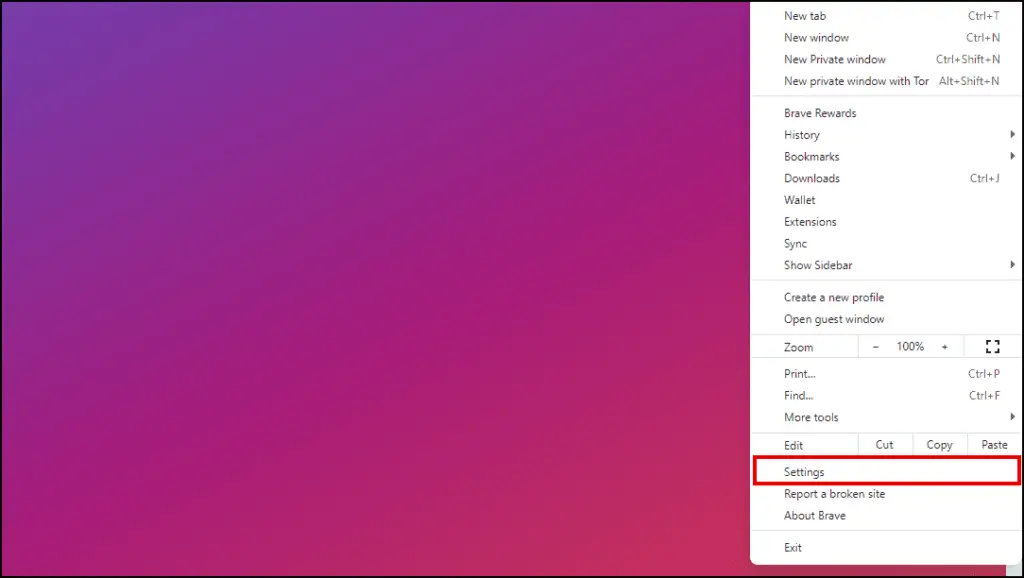
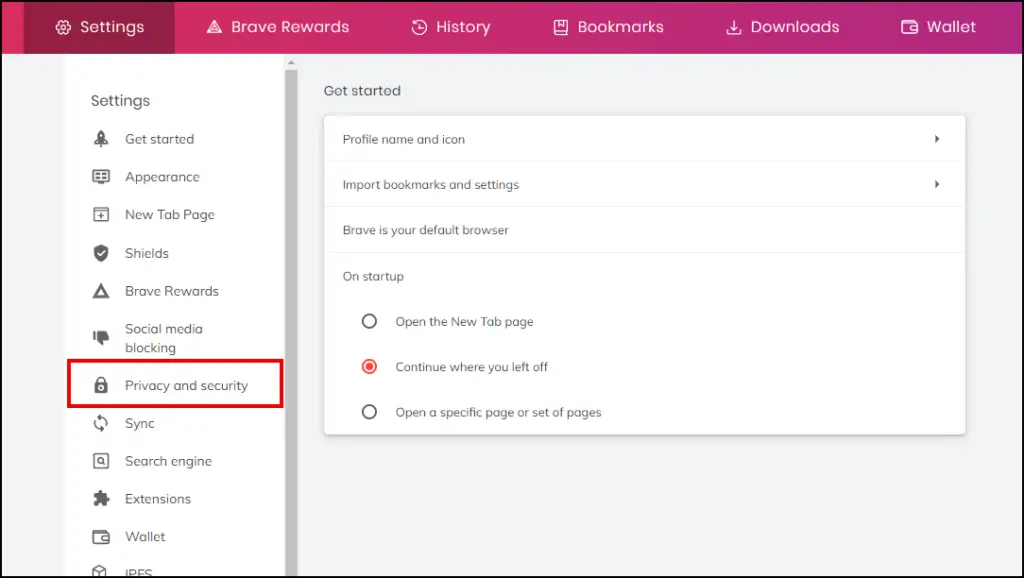
Step 1: Click on the hamburger menu ≣ at the top right corner.

Step 2: Go to Settings.
Step 3: Select Privacy & security from the sidebar menu.
Step 4: Click on Site and Shields Settings.
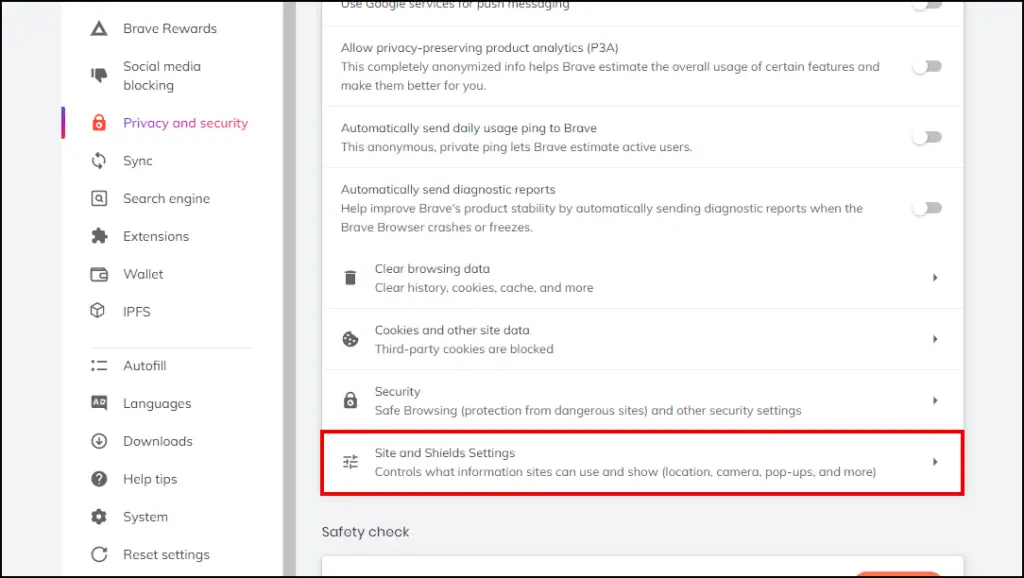
Step 5: Scroll down and click on Notifications.
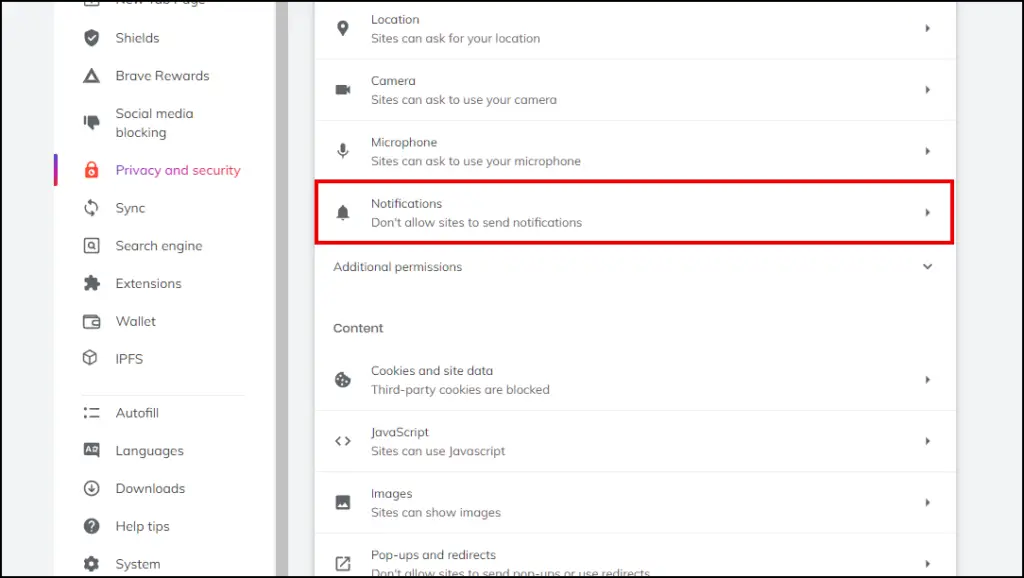
Here, you can select the Default behavior of websites for notifications.
Step 6: You can choose Sites can ask to send notifications to allow websites to ask you to send notifications or Don’t allow sites to send notifications which will block all notifications.
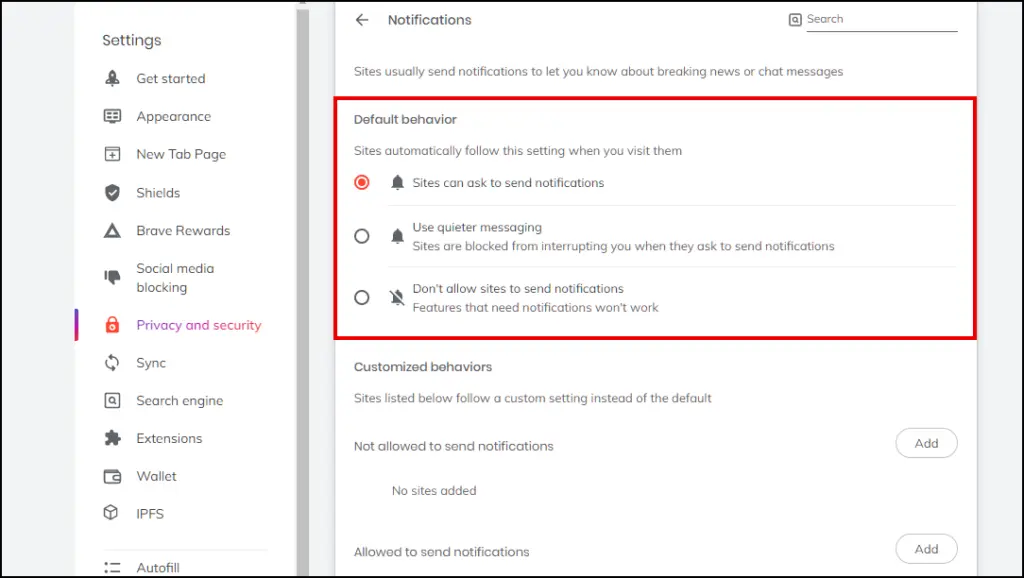
Selecting either option will apply to all websites that you visit from now onwards.
Method 2: Enable Customized Behavior for Specific Websites
If you want to only allow or block notifications on certain websites, you can add them to Customized behavior.
Step 1: Open Brave and click on the hamburger menu ≣ at the window’s top right corner.
Step 2: Visit Settings.
Step 3: Click on Privacy & security.
Step 4: Select Site and Shields Settings.
Step 5: Click on Notifications.
Step 6: To block a website from sending notifications, click Add next to Not allowed to send notifications.
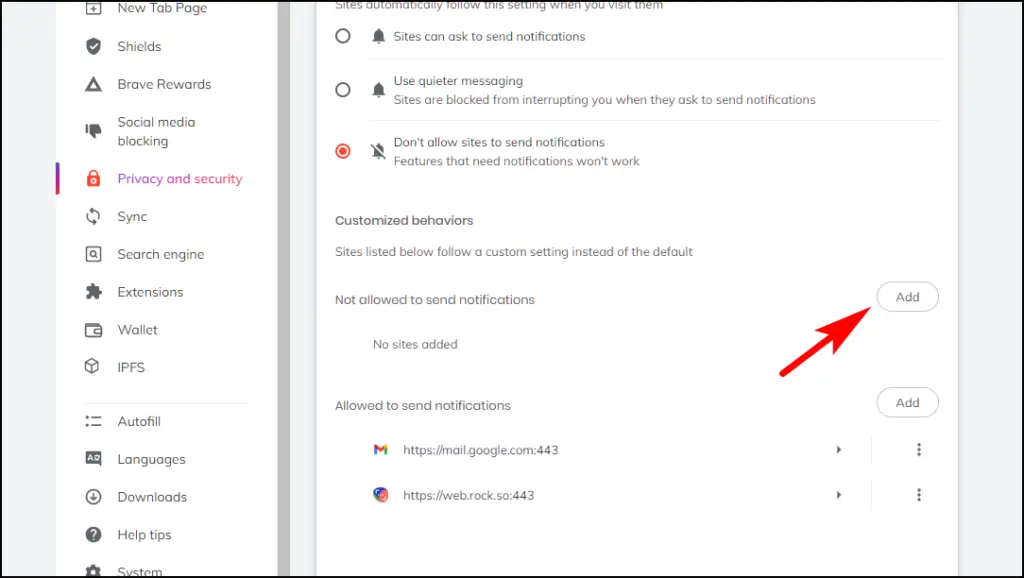
Step 7: Enter the URL of the website and then click on Add again.
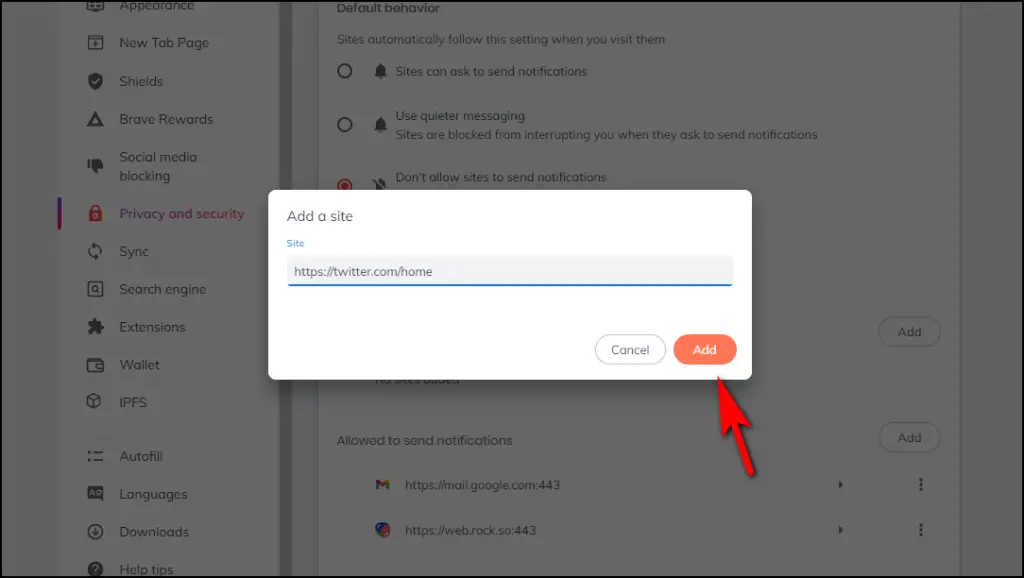
All notifications from that website will be blocked.
Step 8: Click Add next to Allowed to send notifications to allow notifications from a specific website.
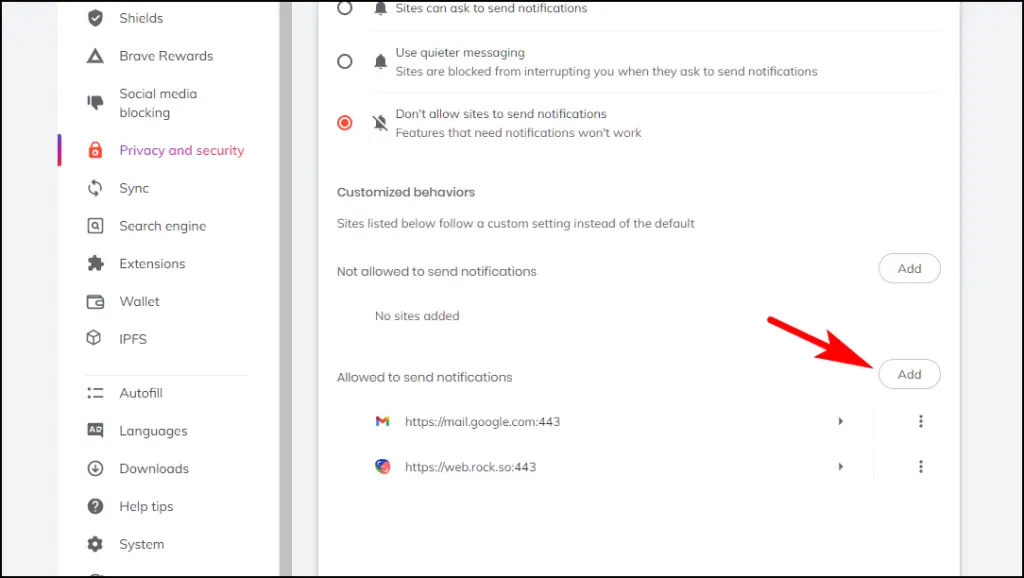
Step 9: Enter the URL of the website and click Add.
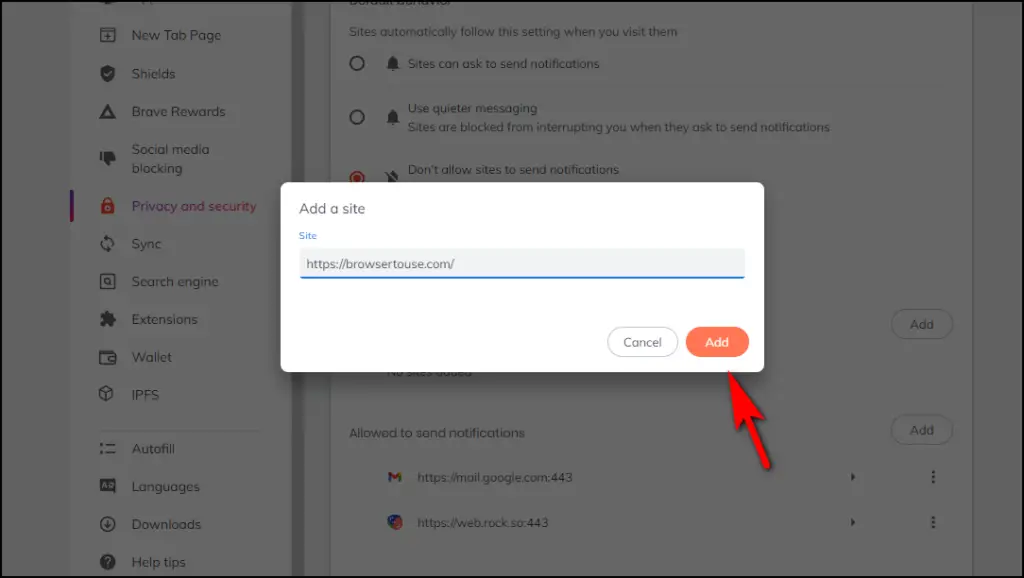
Only that particular website can send you notifications from now on.
Method 3: Allow or Block Notifications from the Address Bar
Using this method, you can customize and change a website’s notification settings directly from the address bar on the Brave browser.
Step 1: Visit the website where you want to change notification settings.
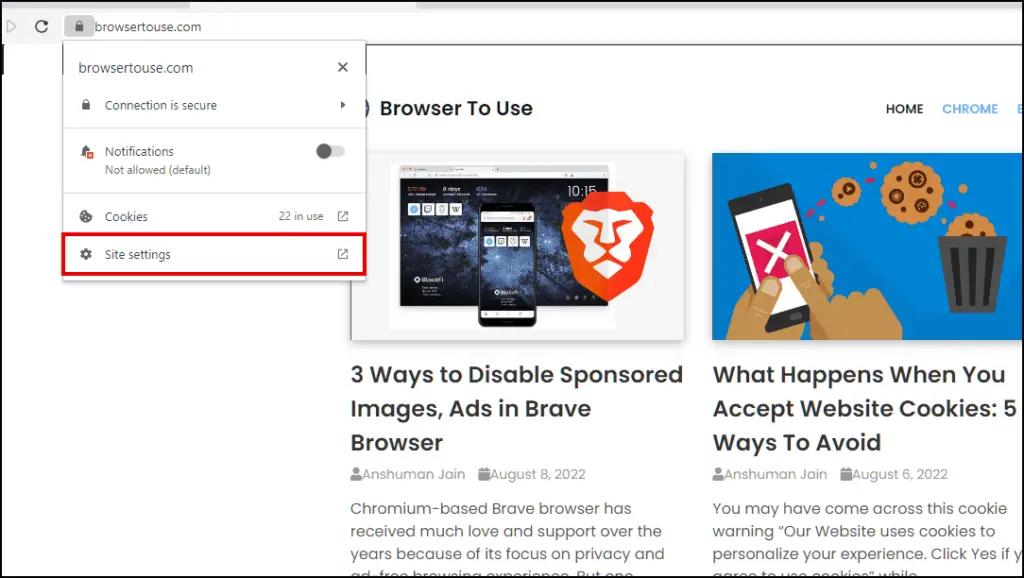
Step 2: Click on the padlock icon next to the website URL.
Clicking on the padlock icon will open up a list of options.
Step 3: Select Site settings.
Step 4: Here, click on the box next to Notifications and select Allow or Block option.
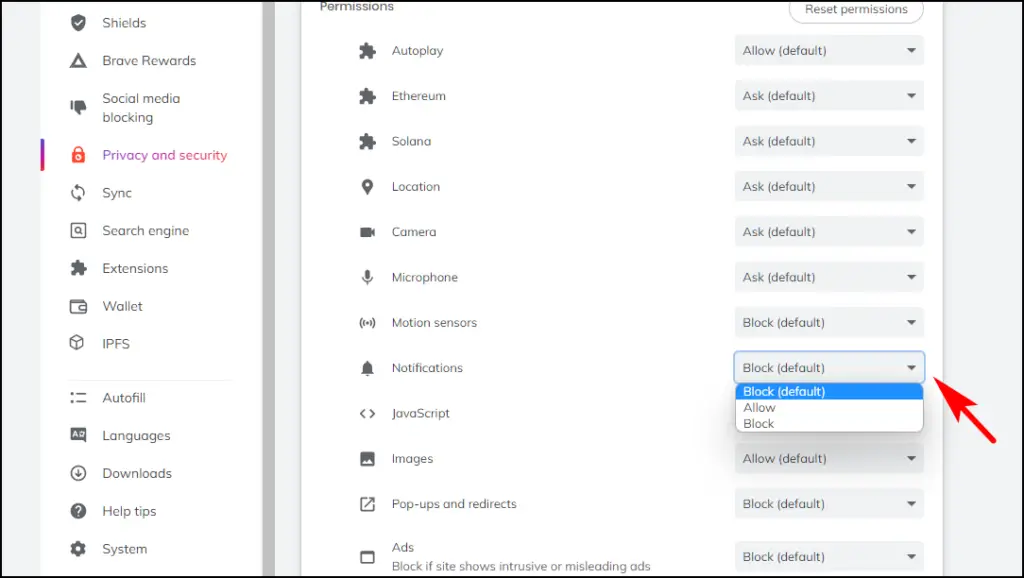
Your notification settings will be changed when you close the current tab. You will start or stop receiving notifications from that website depending on the option you selected.
Method 4: Manage Brave Notifications on Windows 11/ 10
Windows users can also allow or block notifications from the Brave browser through the Settings menu. Windows also lets you change the priority of the notifications.
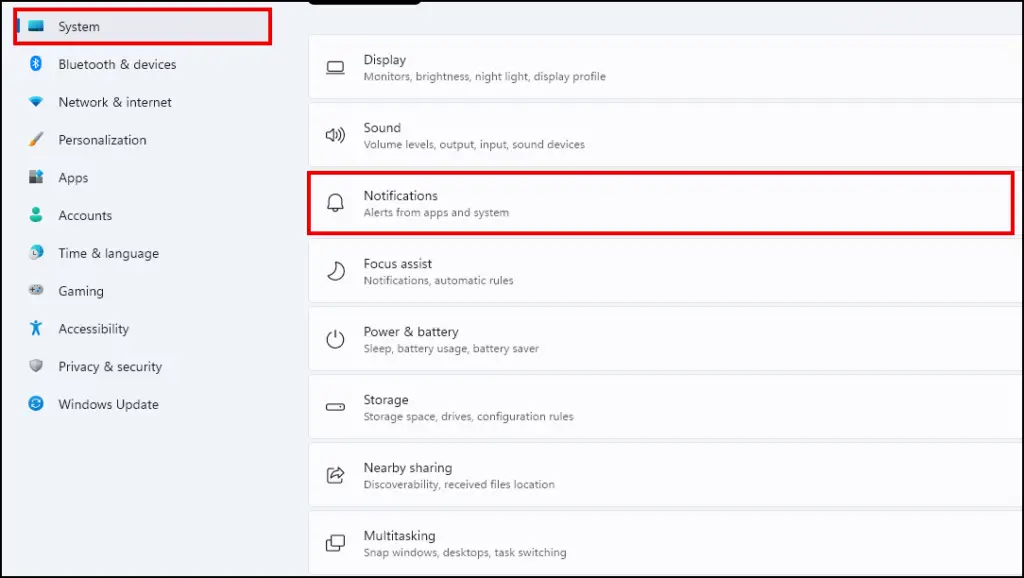
Step 1: Open Settings on your Windows PC.
Step 2: Go to System and select Notifications.
Step 3: Toggle On or Off Brave notifications depending on your preference.
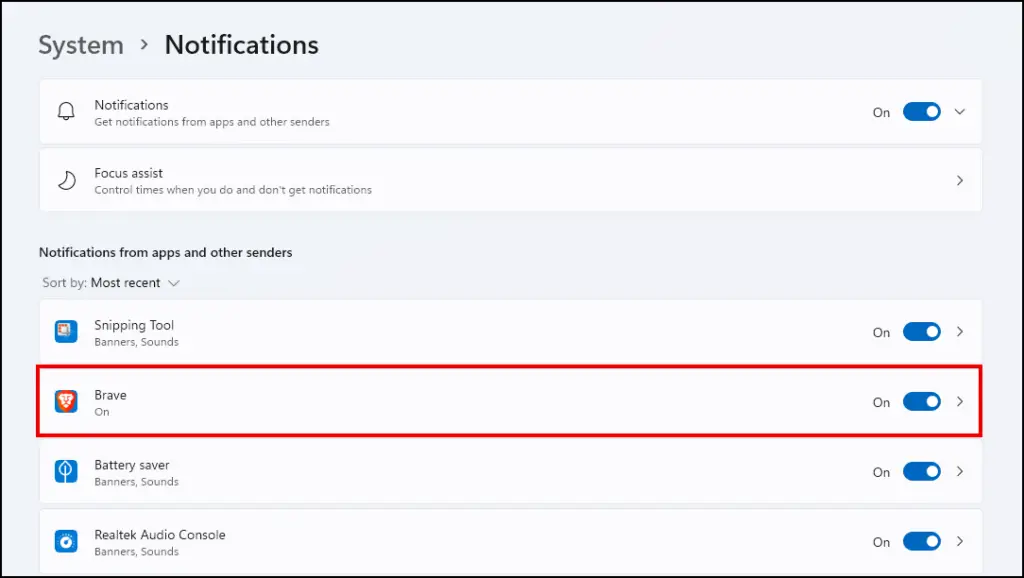
Step 4: To access more notifications settings, click on the arrow > next to the toggle.
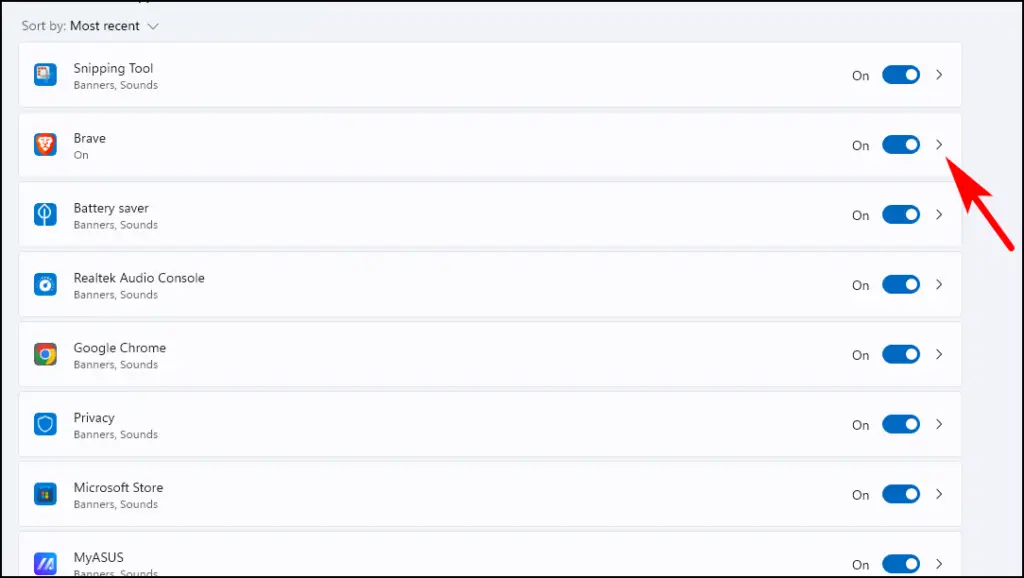
Here you can hide notification content on the lock screen, play sound, or change notification priority.

Do note that this will also affect the Brave rewards ad notifications.
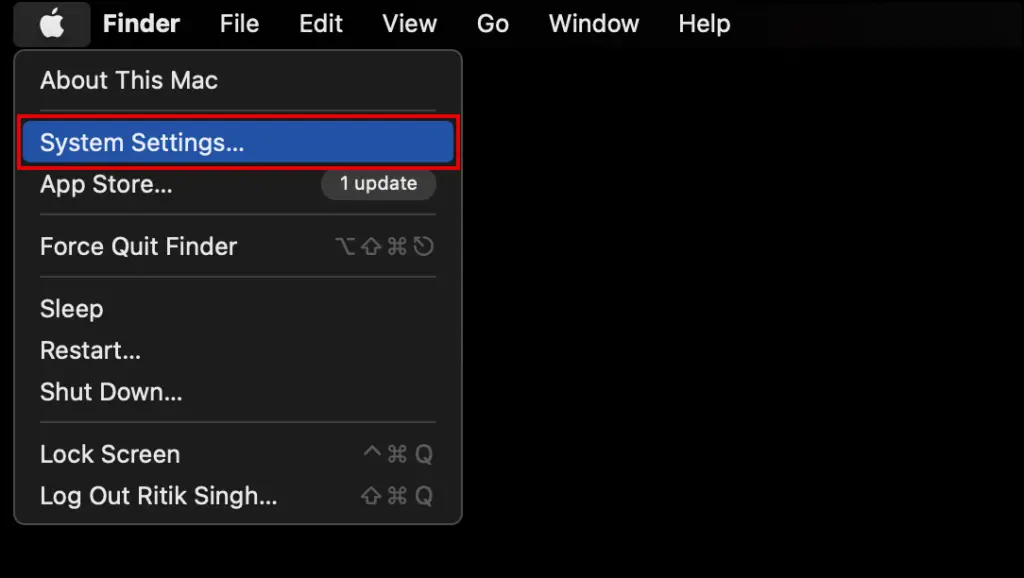
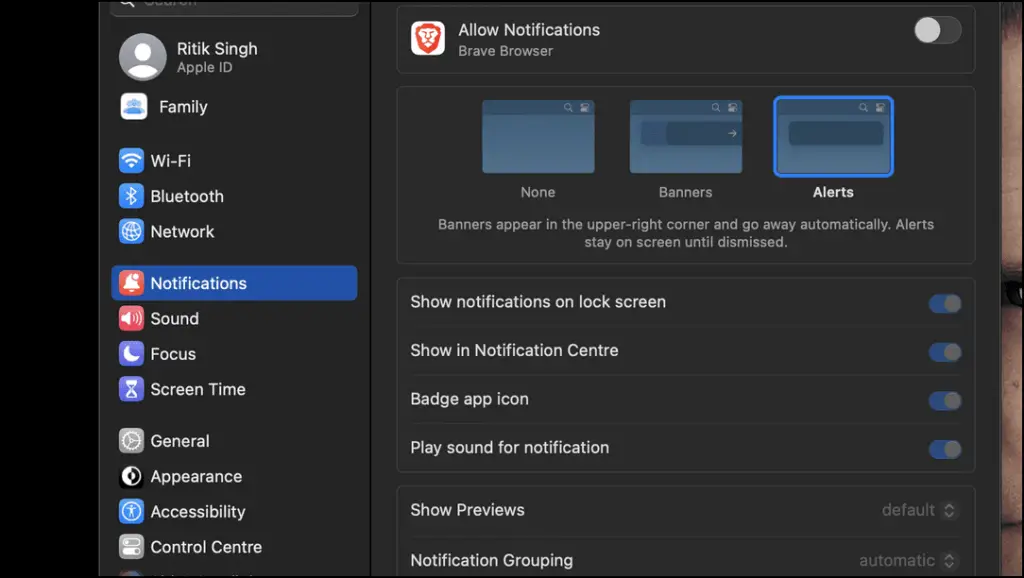
Method 5: Manage Brave Notifications on Mac
macOS also lets you customize notifications on a per-app basis. Using these settings, we will manage Brave notifications.
Step 1: Click on the Apple icon and go to System preferences…
Step 2: Go to the Notifications tab and select Brave browser.

Step 3: On the next page, Enable or Disable notifications by clicking on the toggle next to Allow notifications.
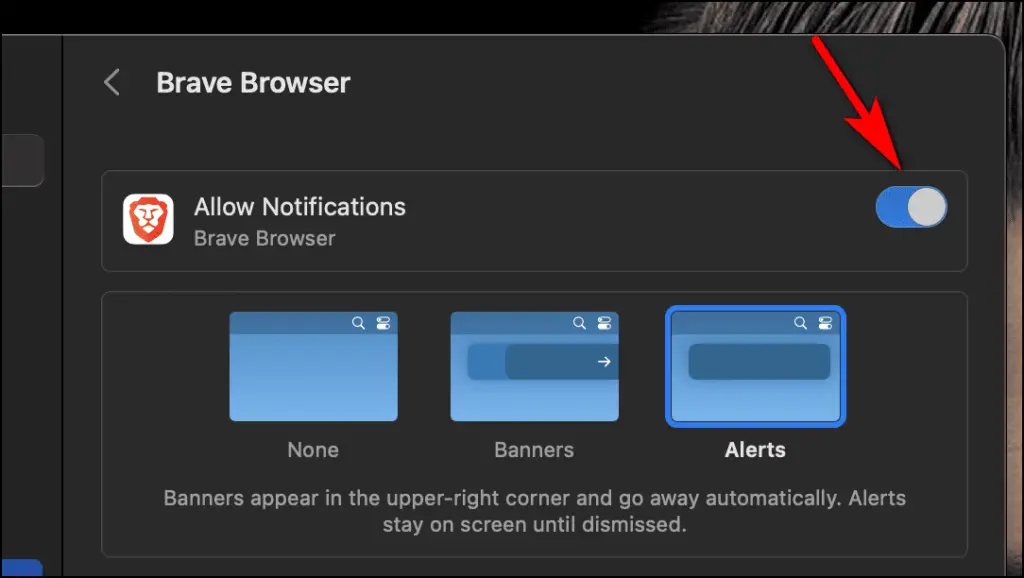
You can find more options to customize notification behavior below the toggle.
Wrapping Up
This was all about how you can allow or block notifications in the Brave browser. Website notifications can be helpful, especially if they are work-related. But most websites misuse this feature to send clickbait articles and posts that the user never even requested. The Chromium team should work on granular notification controls so the user can block certain types of notifications instead of completely blocking all notifications. Stay tuned for more such updates.
Related: