
Google Chrome, by default, uses the Times New Roman font, which is easily readable while looking formal at the same time. However, several users have come across an issue where the browser randomly switched to another font type or its size. This issue is quite prevalent, which is why, in this article, we will discuss ways to fix changed fonts in Google Chrome.
How to Fix Fonts Changed in Google Chrome?
Users have encountered this issue on various occasions. Sometimes it gets fixed on its own while at times, one has to find a solution for this issue. However, we did find various troubleshooting tips that should help fix it, compiled below.
Method 1- Check Google Chrome Font Settings
The first thing that you should do if you are getting an unknown font type on web pages is to verify font settings in Google Chrome. Here, you can check for the font size and type. These settings are located under the Appearance section of the browser, and the following are the steps to reset fonts to their default state.
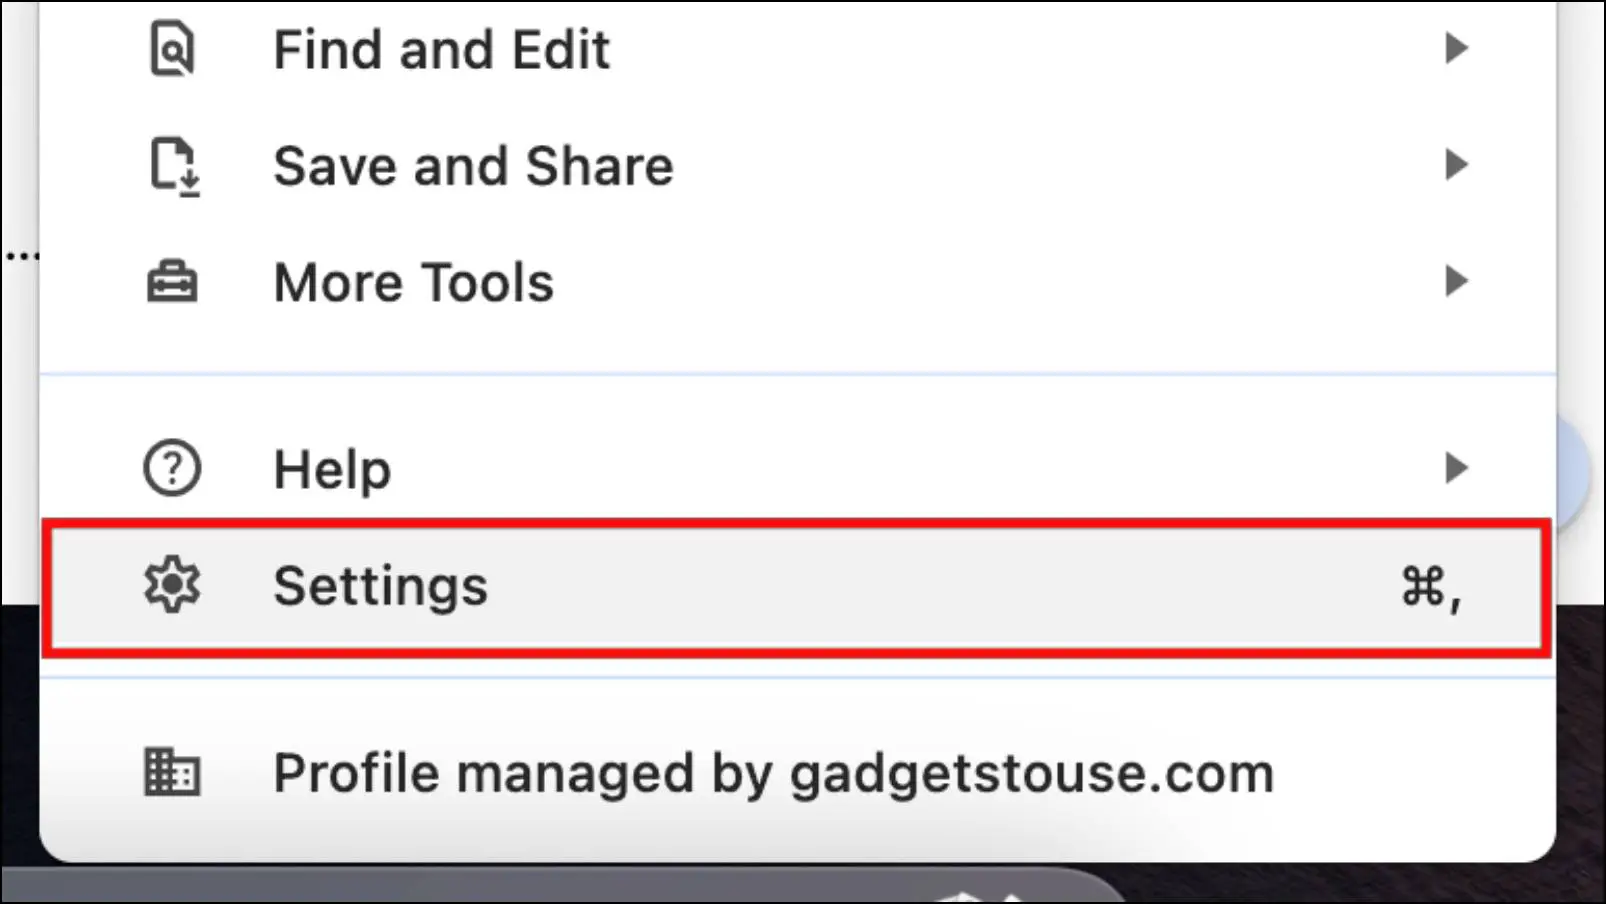
Step 1: Open Google Chrome and click on the three-dot menu.

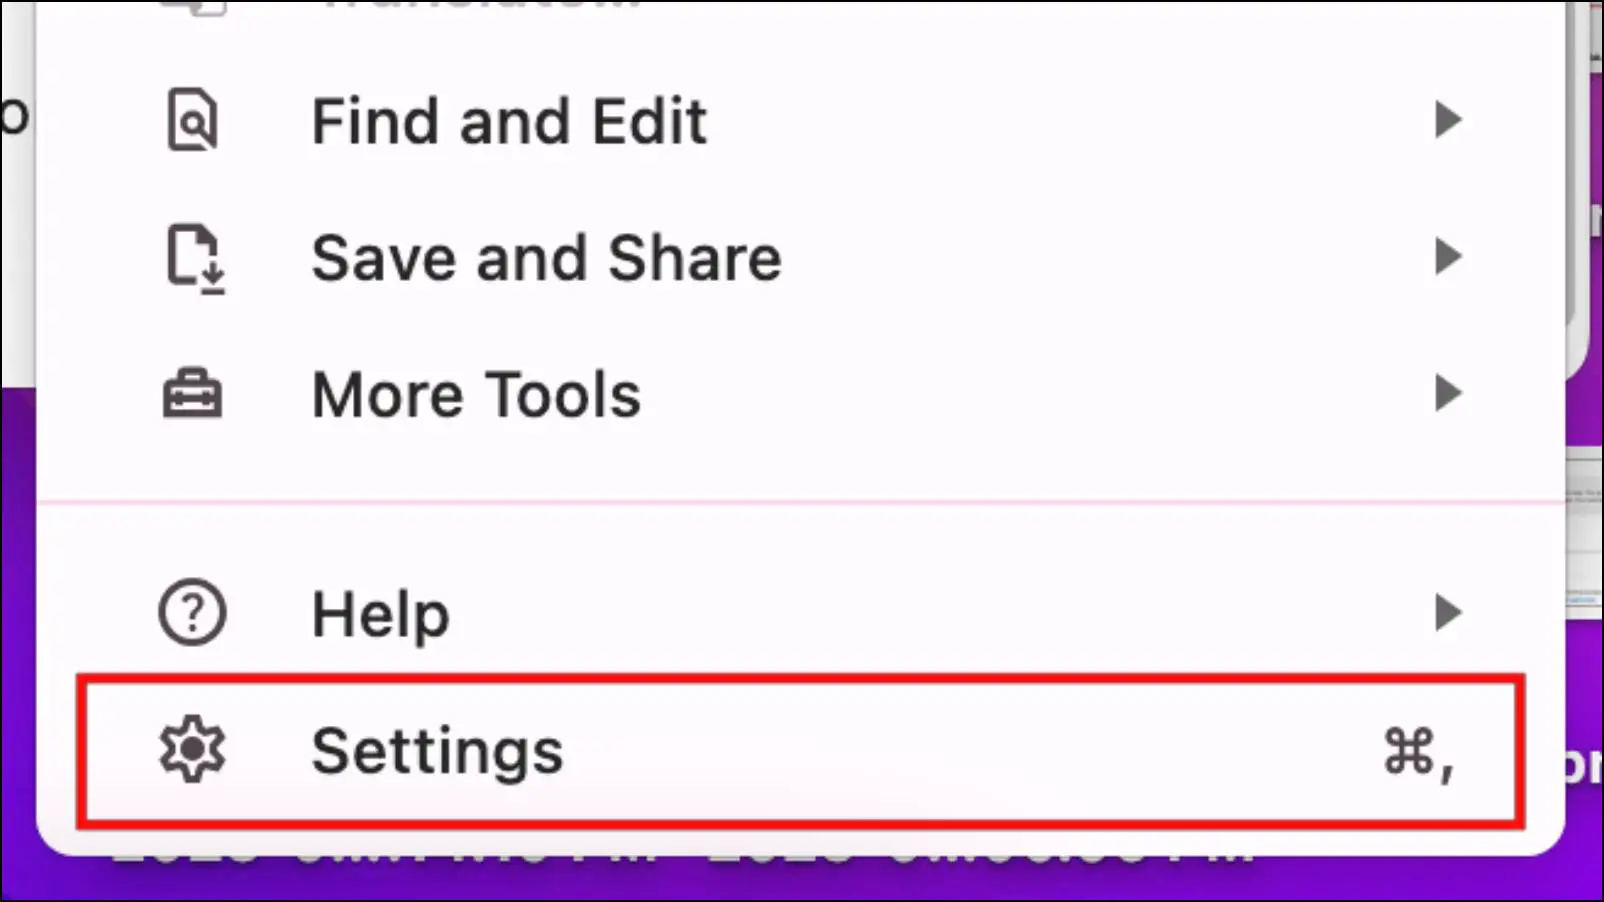
Step 2: Head over to Settings.
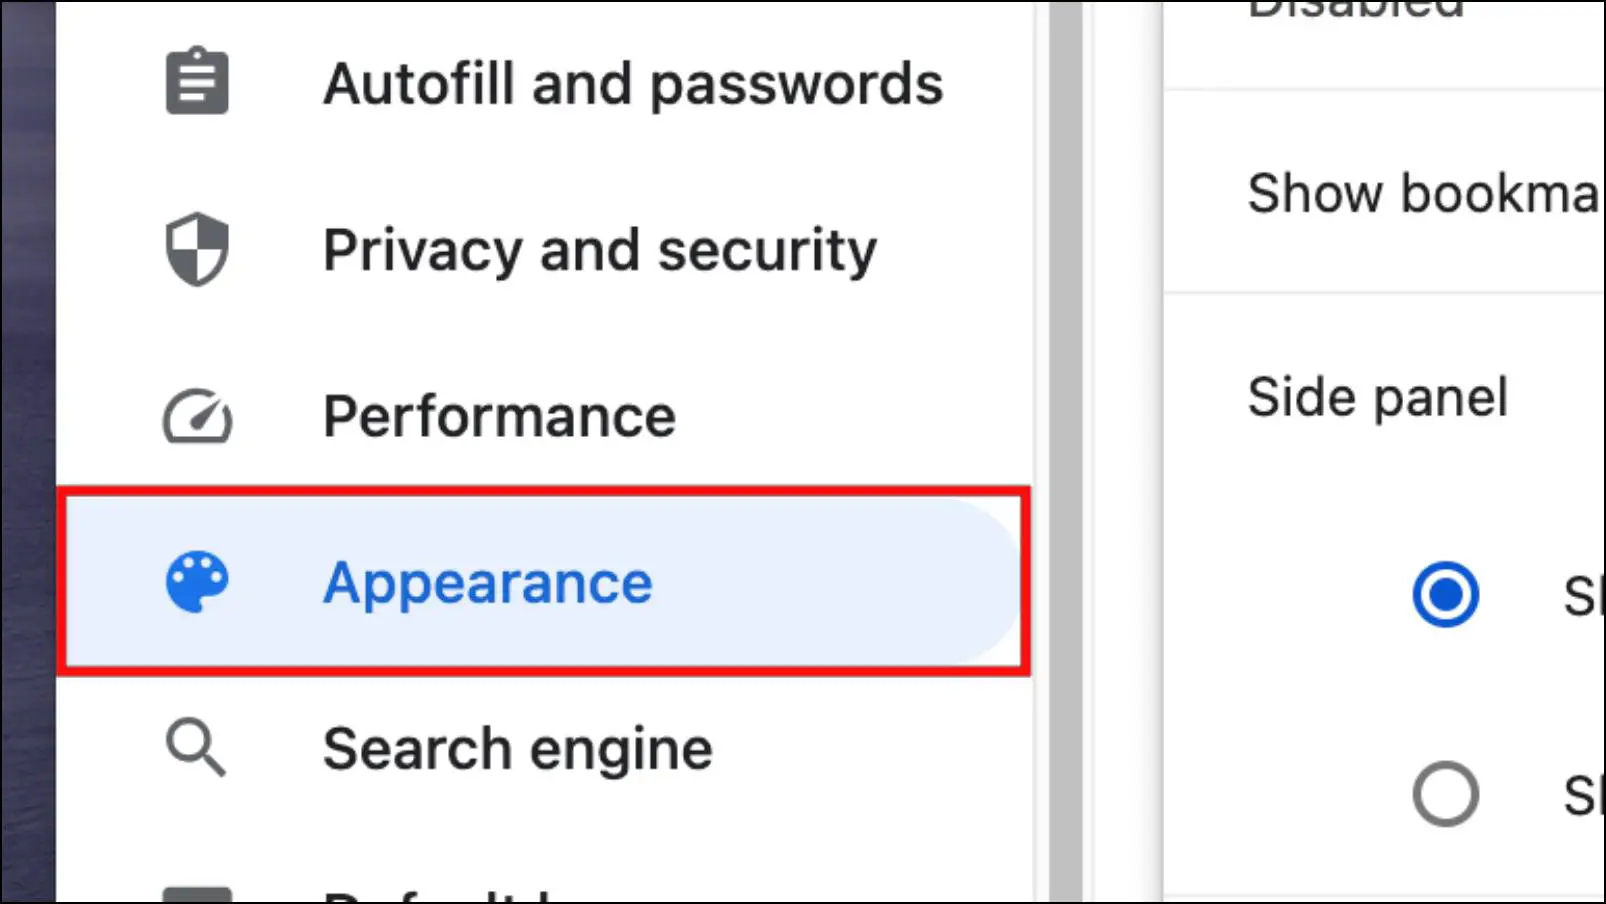
Step 3: Go to the Appearance section from the sidebar menu.
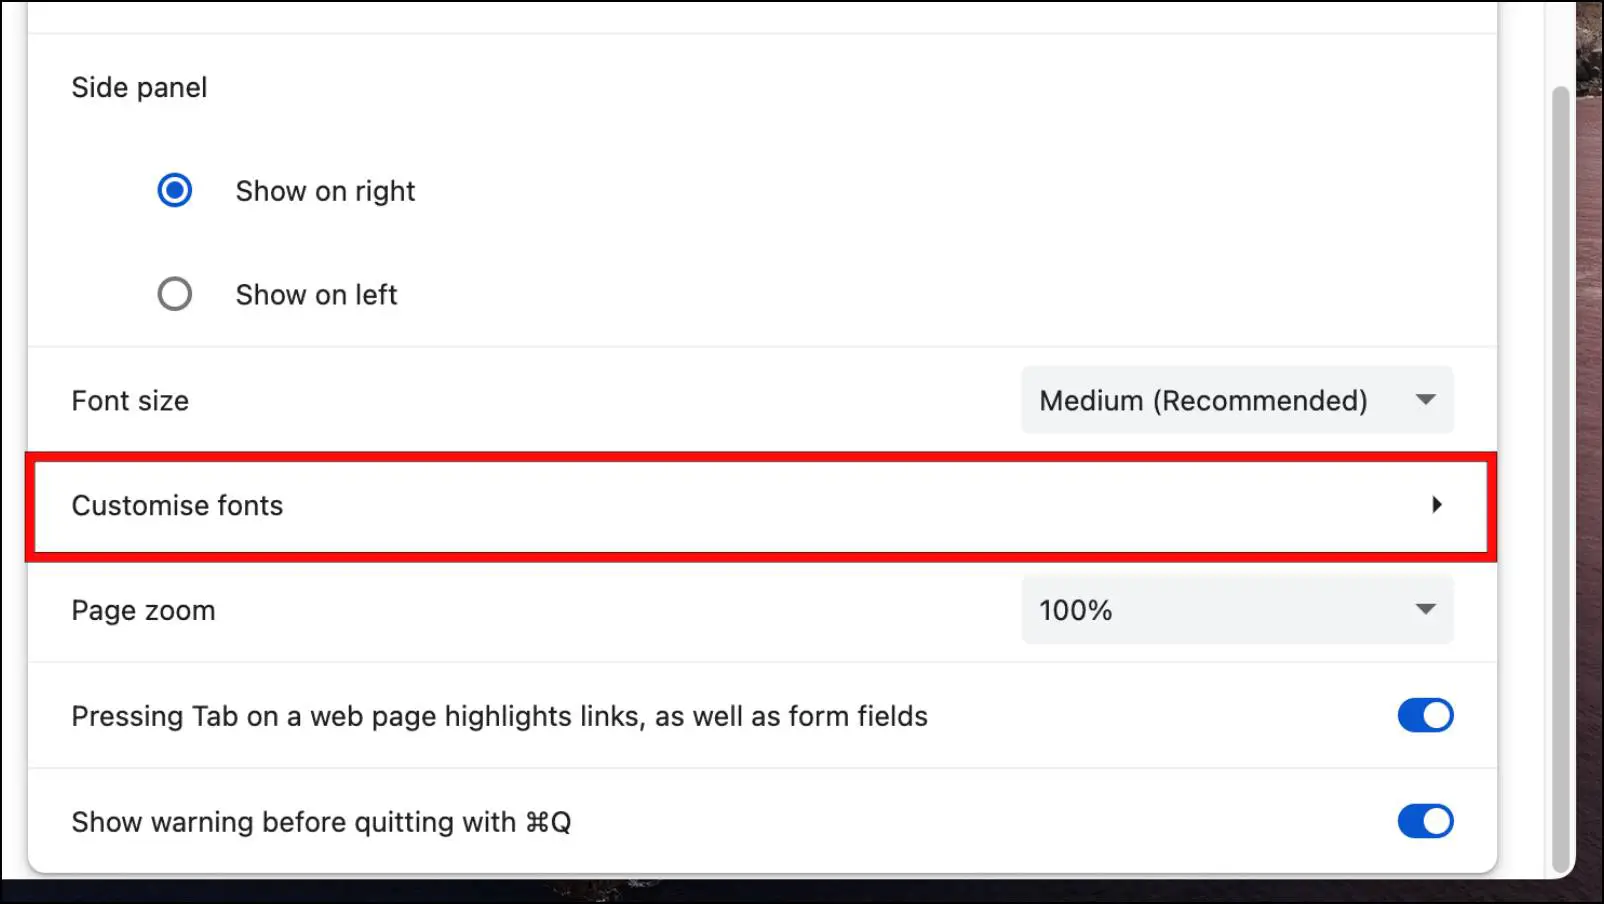
Step 4: Click on Customize fonts.
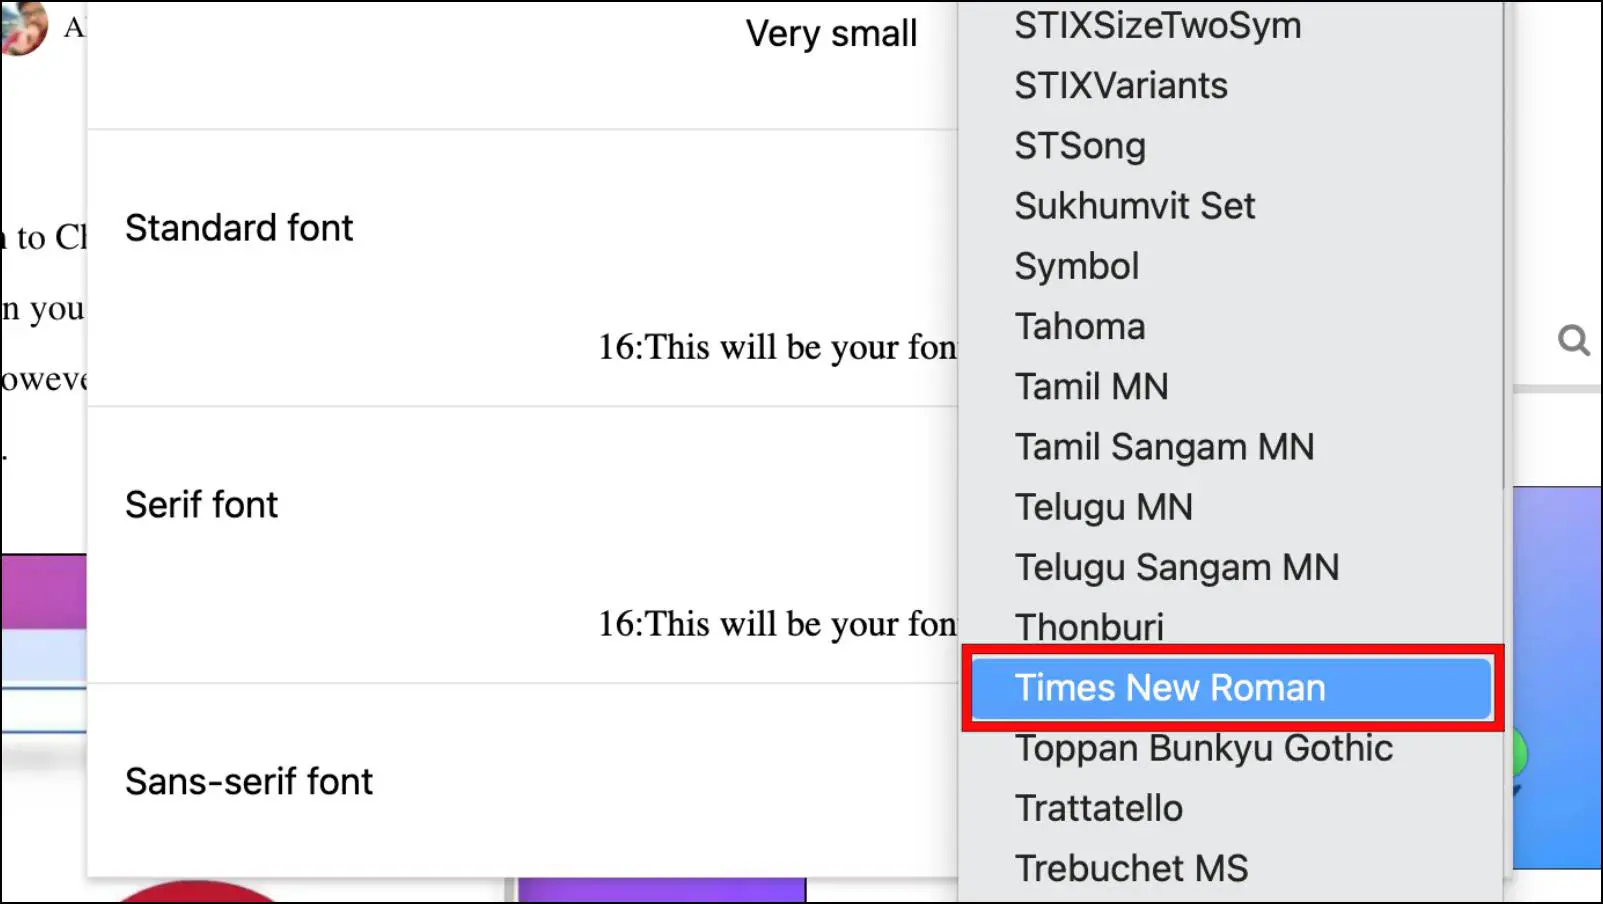
Step 5: Click on the drop-down menu to select a font type for each category.
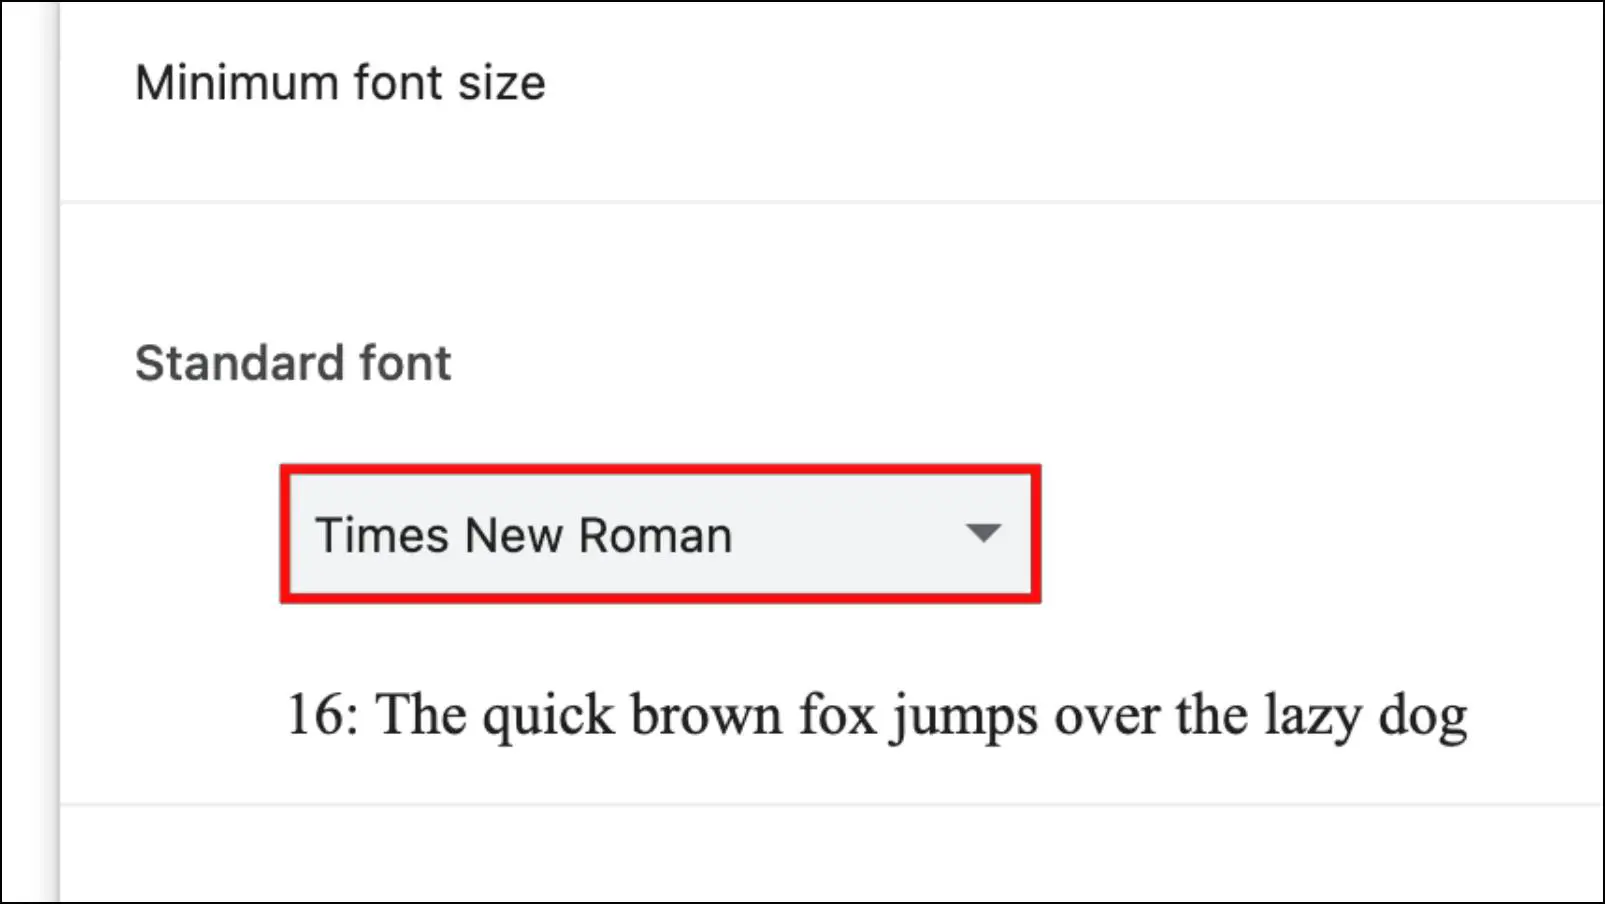
Refer below for the default font settings in Chrome:
- Font size: Medium
- Standard font: Times New Roman
- Serif font: Times New Roman
- Sans-serif font: Helvetica
- Fixed-width font: Menlo
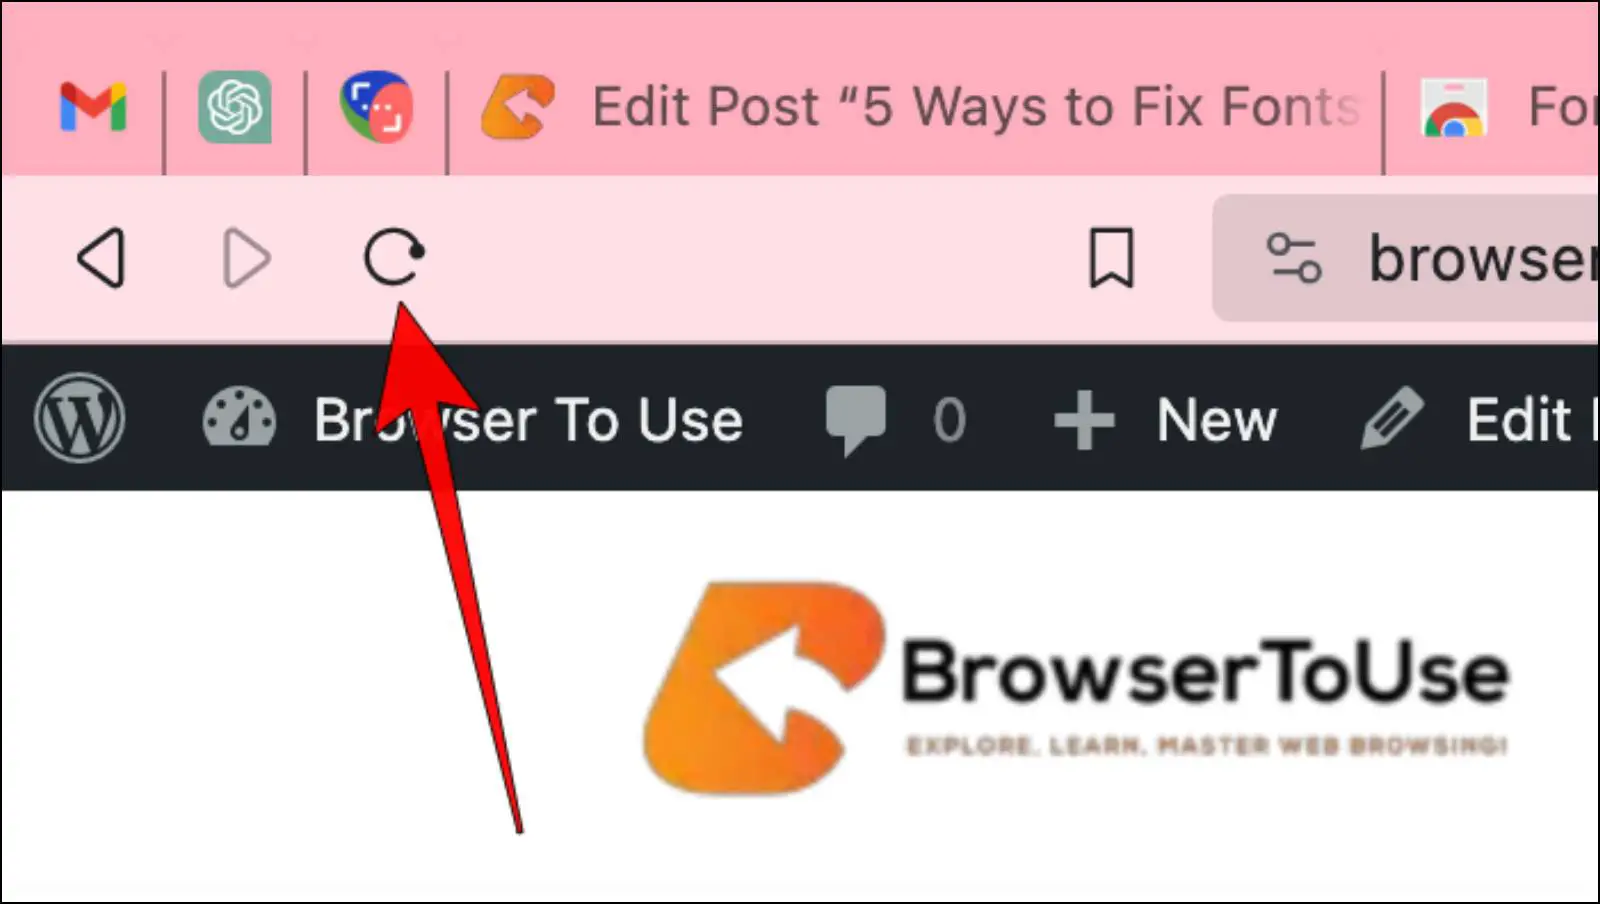
Once you have made the required changes, we would recommend you refresh tabs to view changes.
Method 2- Adjust Font Text Size in Windows Settings
You or a program you are using might have changed the default text size in your Windows PC. This can cause the browser to show webpages in weird font sizes that can be difficult to read. Therefore, you should look up the current text size in your Windows machine to adjust the font size to its regular state, as shown below:
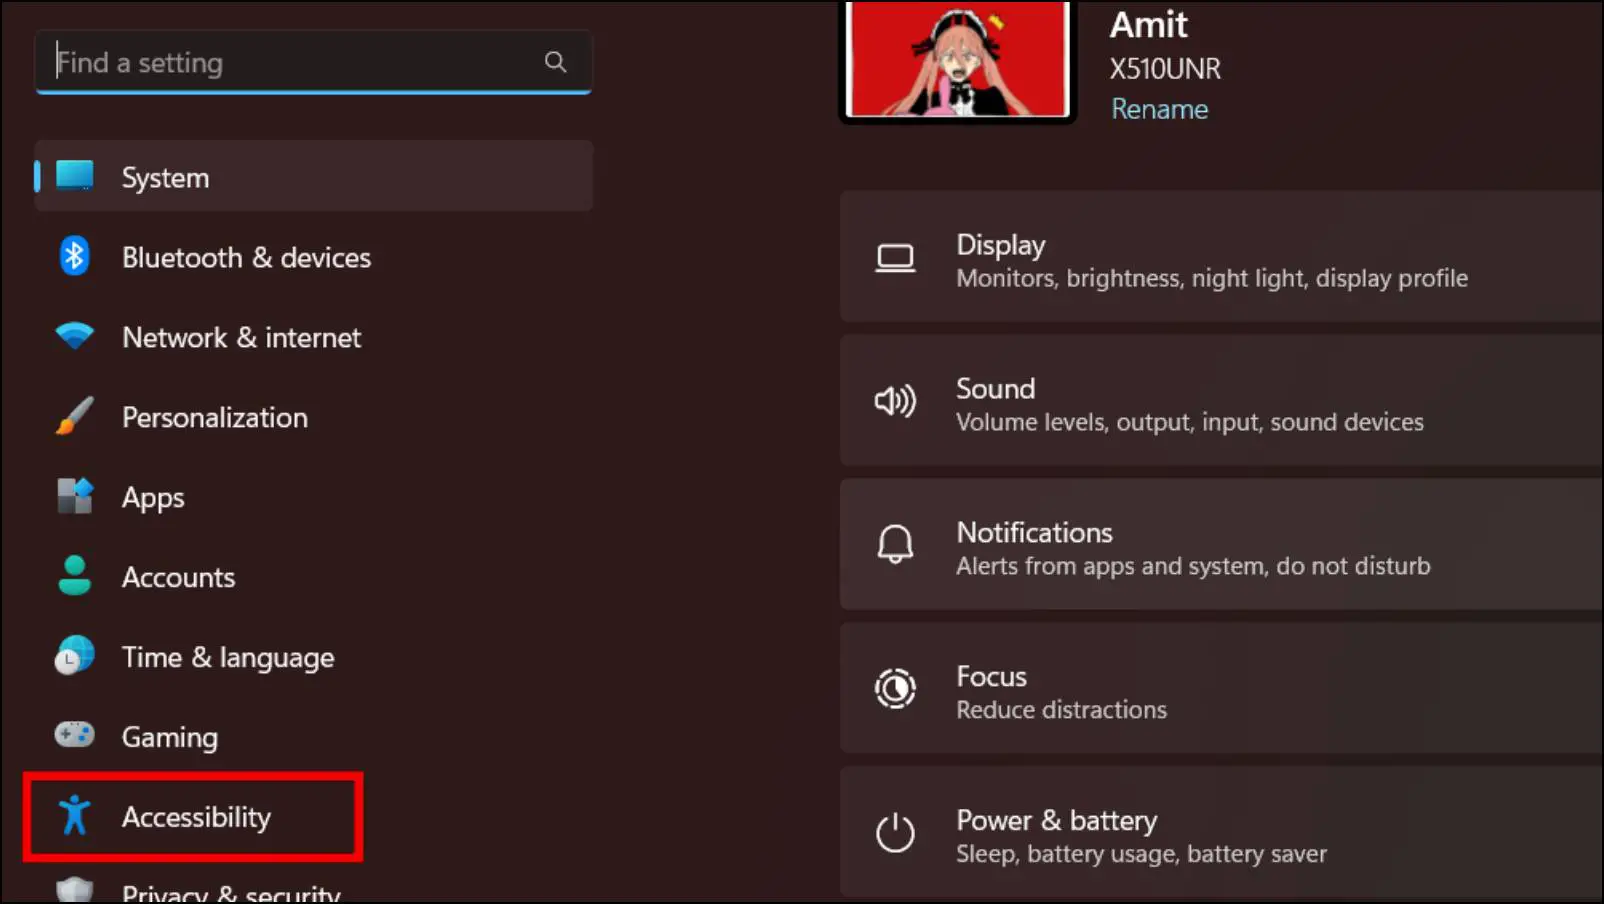
Step 1: Press the Windows key + I button on your keyboard.
Step 2: Choose the Accessibility option from the sidebar.
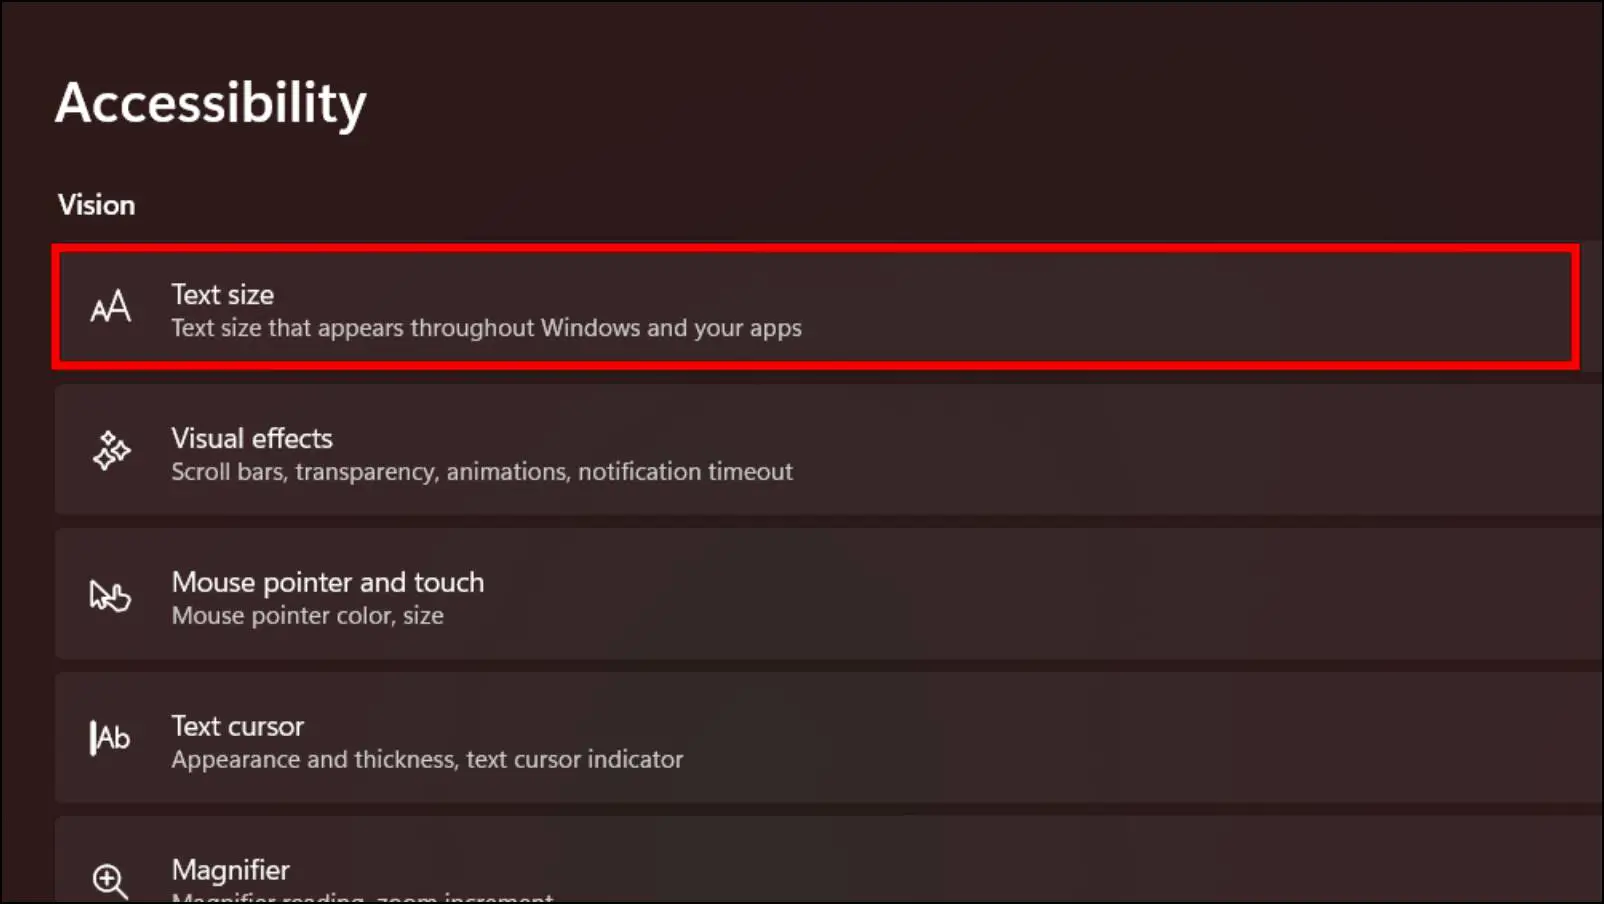
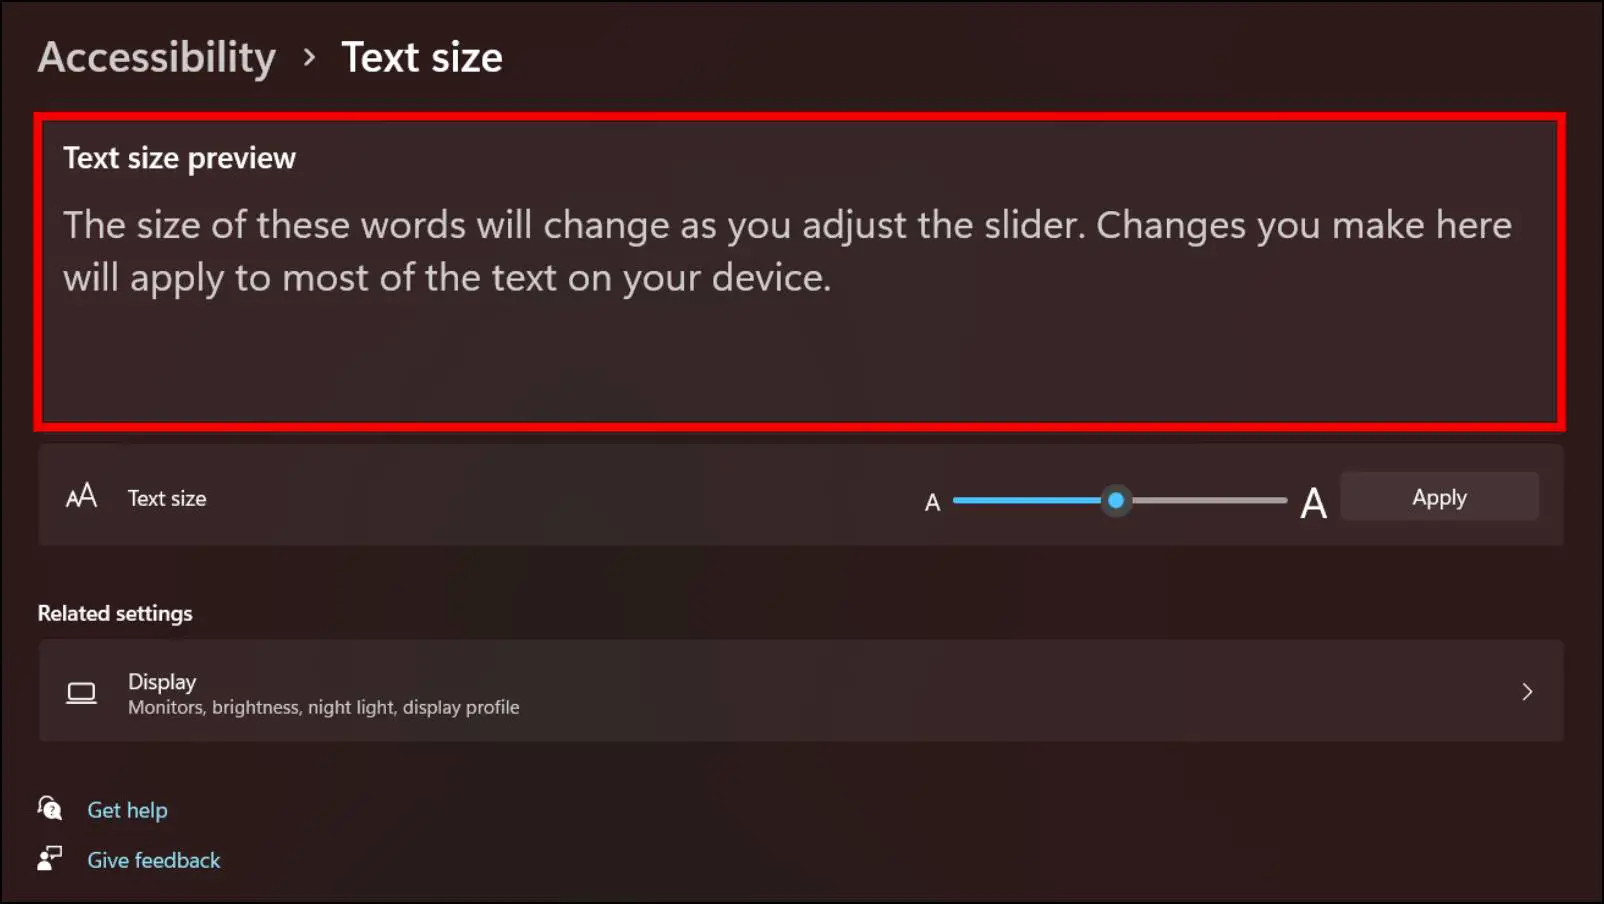
Step 3: Click on Text size.
Step 4: From here, you can drag the slider to increase or decrease the font text size according to your preference.
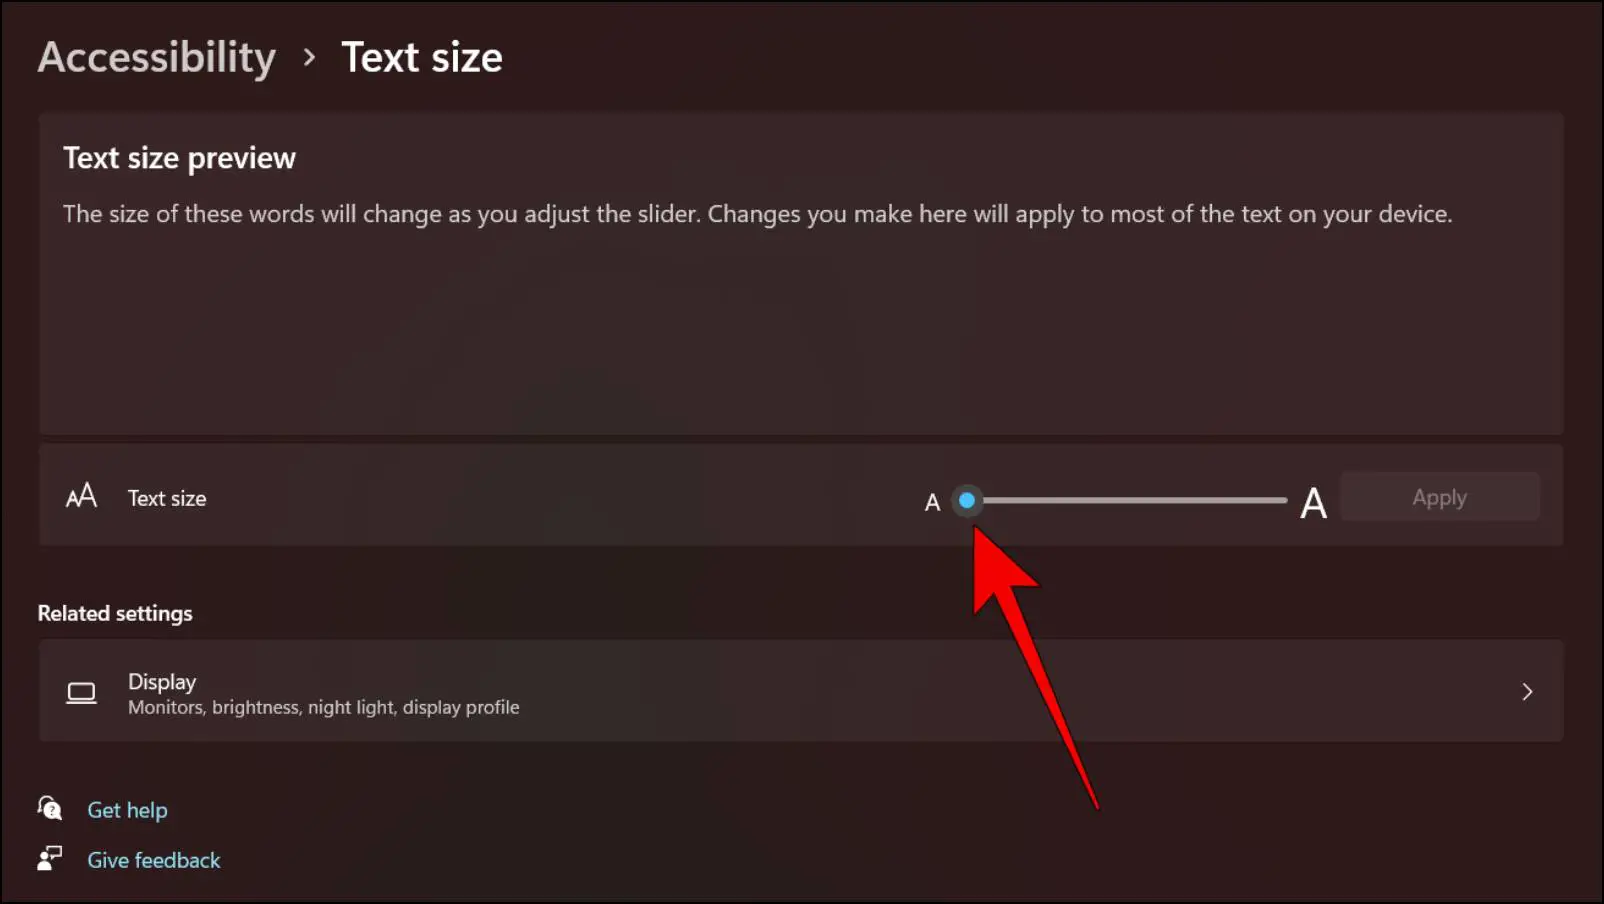
You can see the preview of the changed font size in the box above.
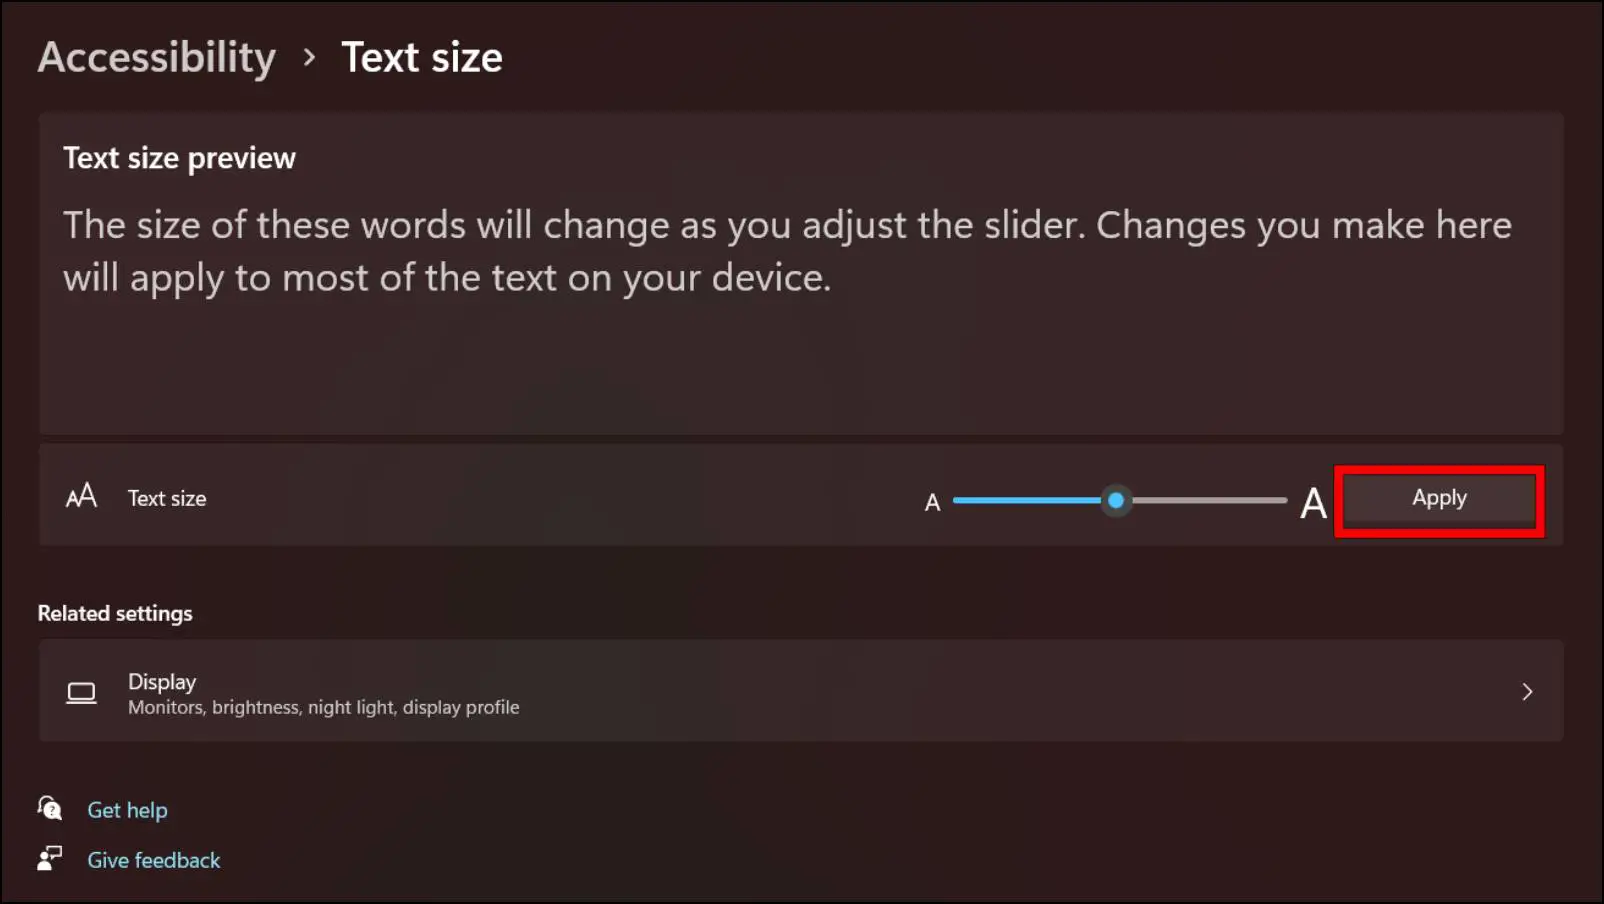
Step 5: Click on Apply to save changes.
Method 3-Install Advanced Font Settings Extension
If you are browsing a webpage that is in a different language and getting an unknown font, then you should install the Advanced Font Settings extension for Chrome. This allows you to set font style on a per-language basis so you can have different or the same fonts for English and another language.
However, the extension will only work if the website has specified the language of the content and has not specified a font for it. Here is how you can install and use it.
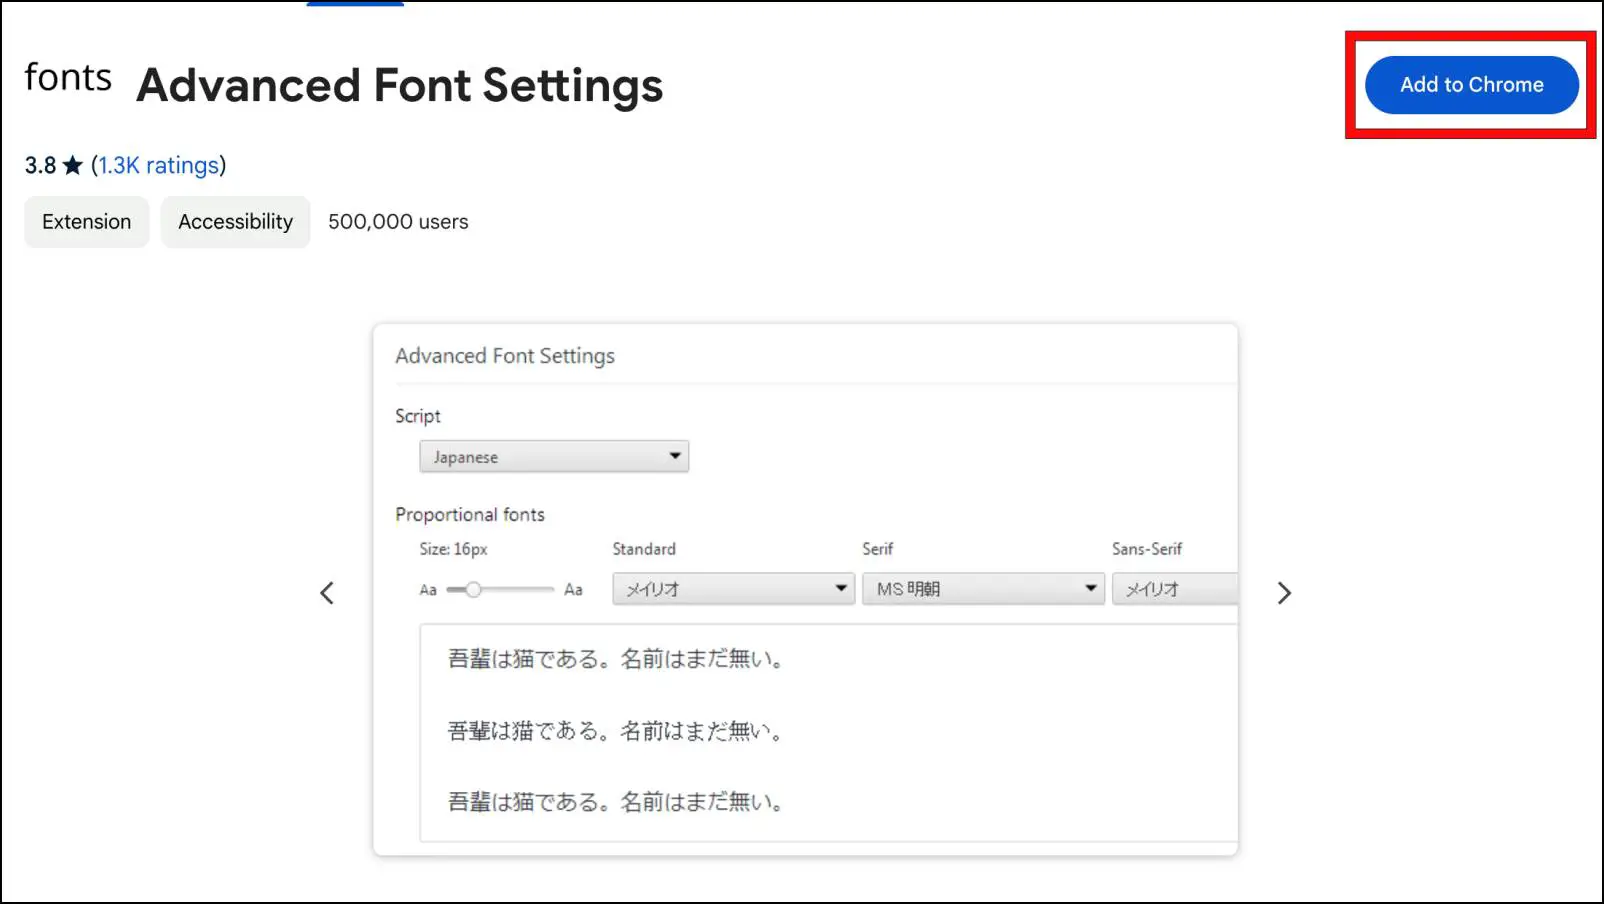
Step 1: Download the Advanced Font Settings extension from the Chrome Web Store.
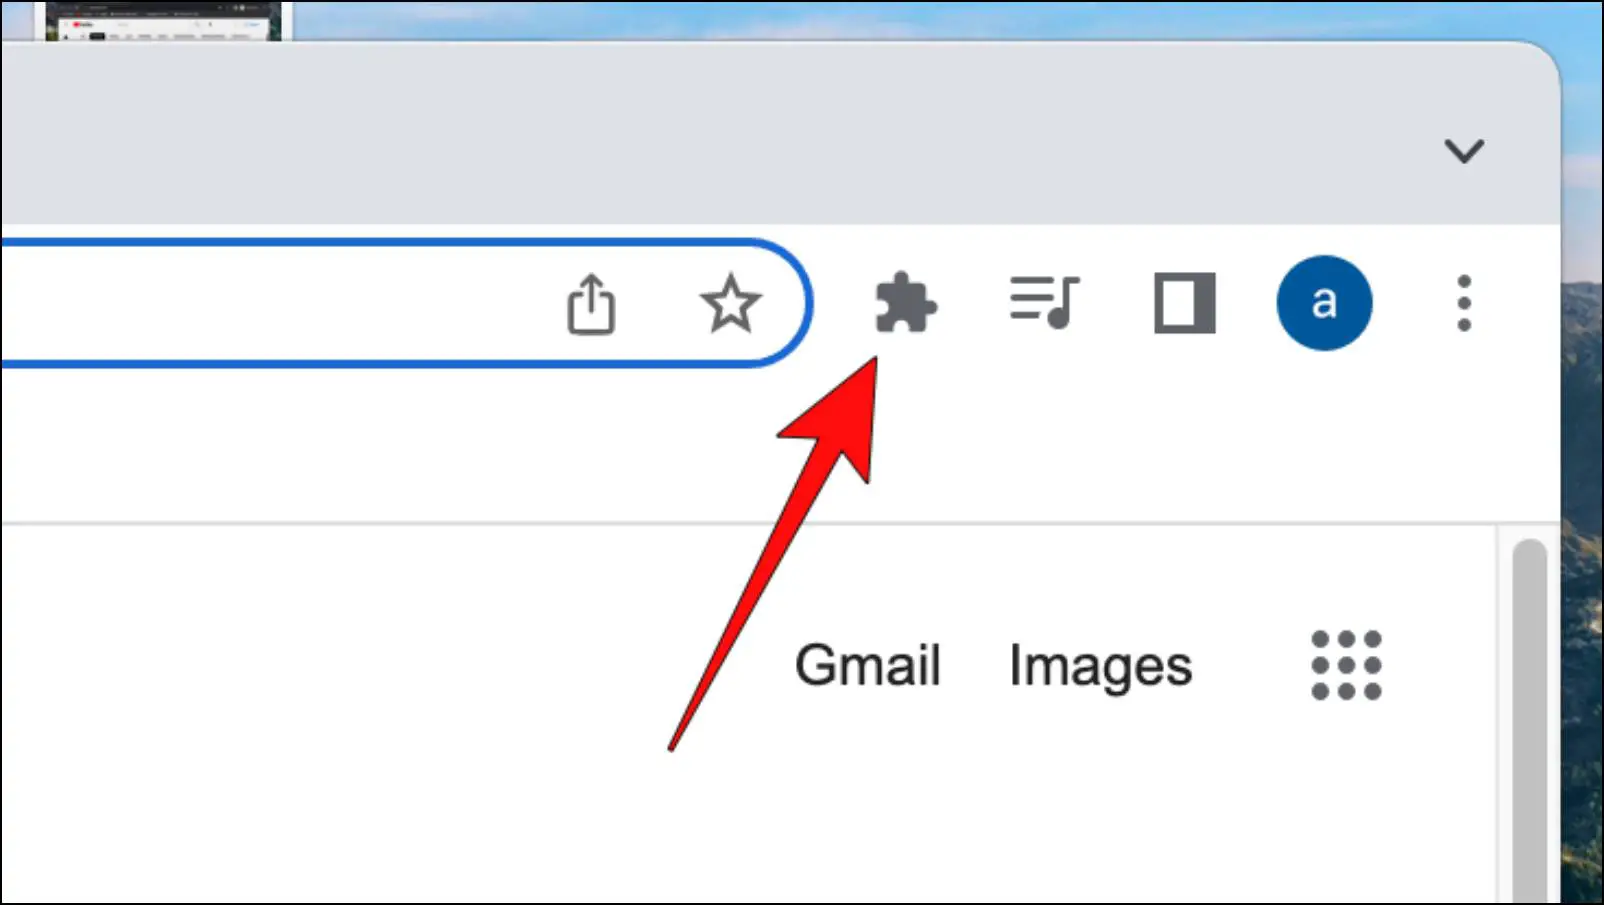
Step 2: Once downloaded, click on the extension icon.
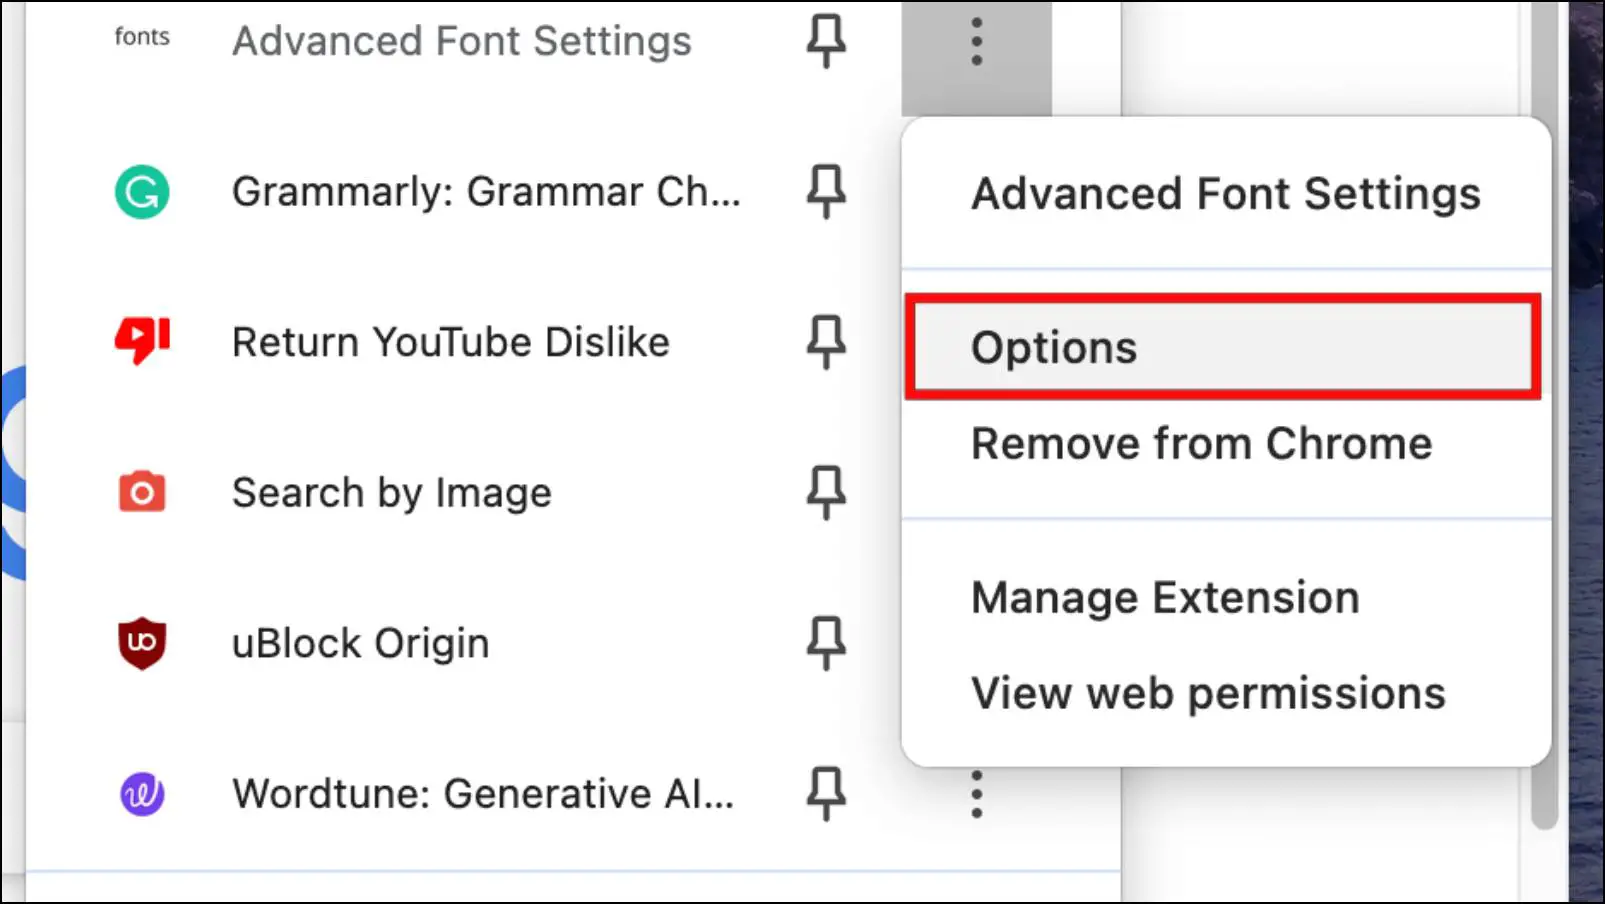
Step 3: Click on the three dots menu next to the Advanced Font Settings extension.
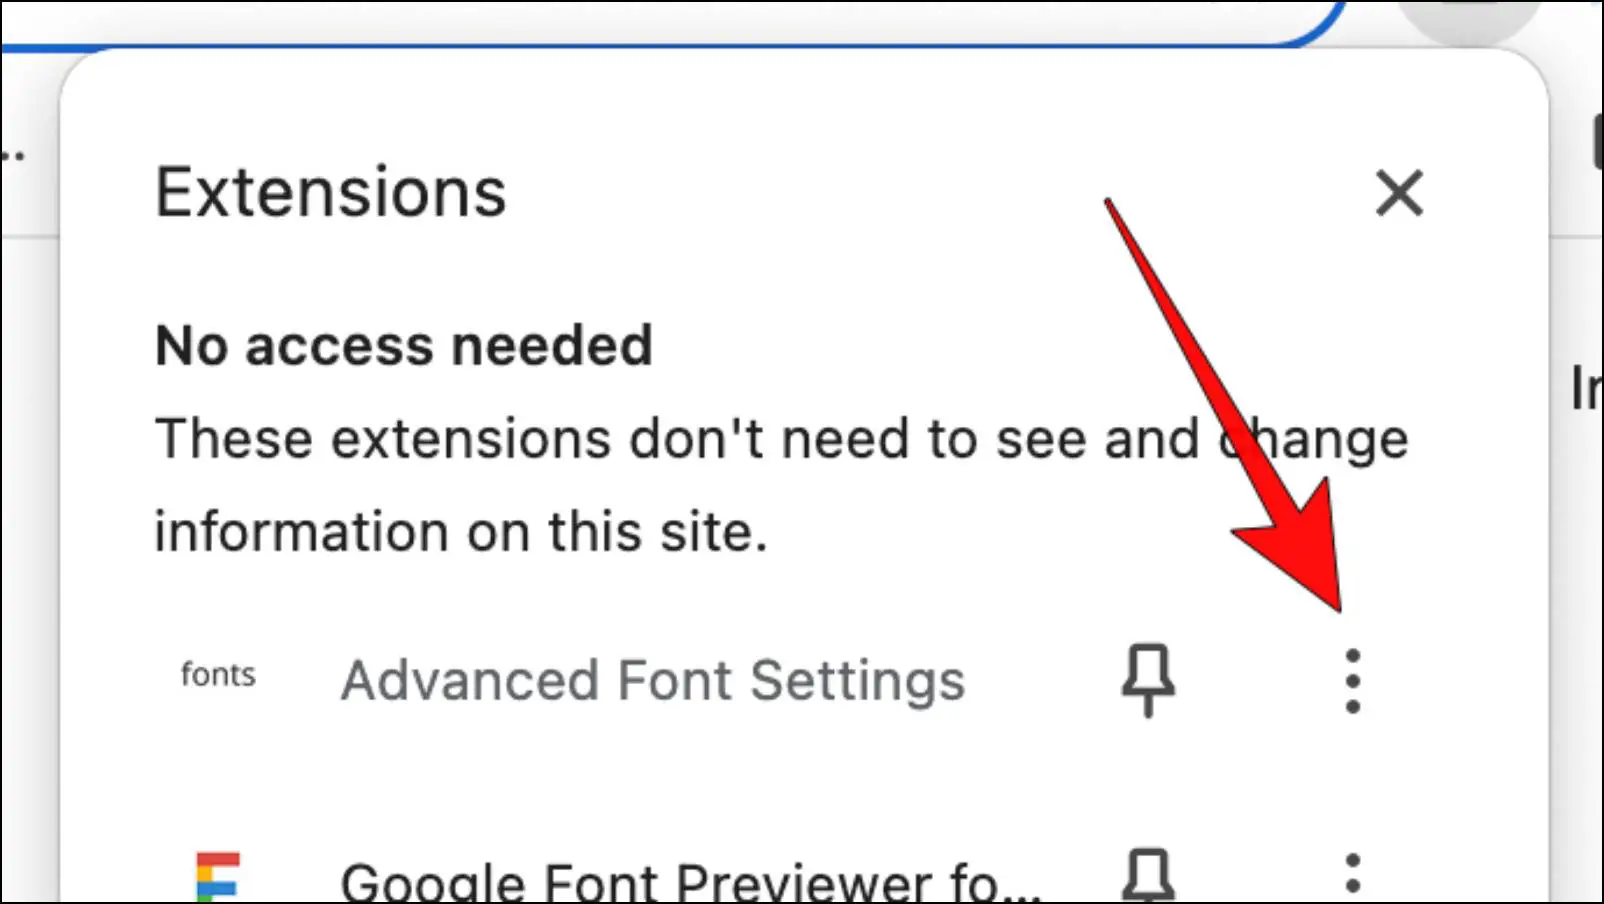
Step 4: Go to Options.
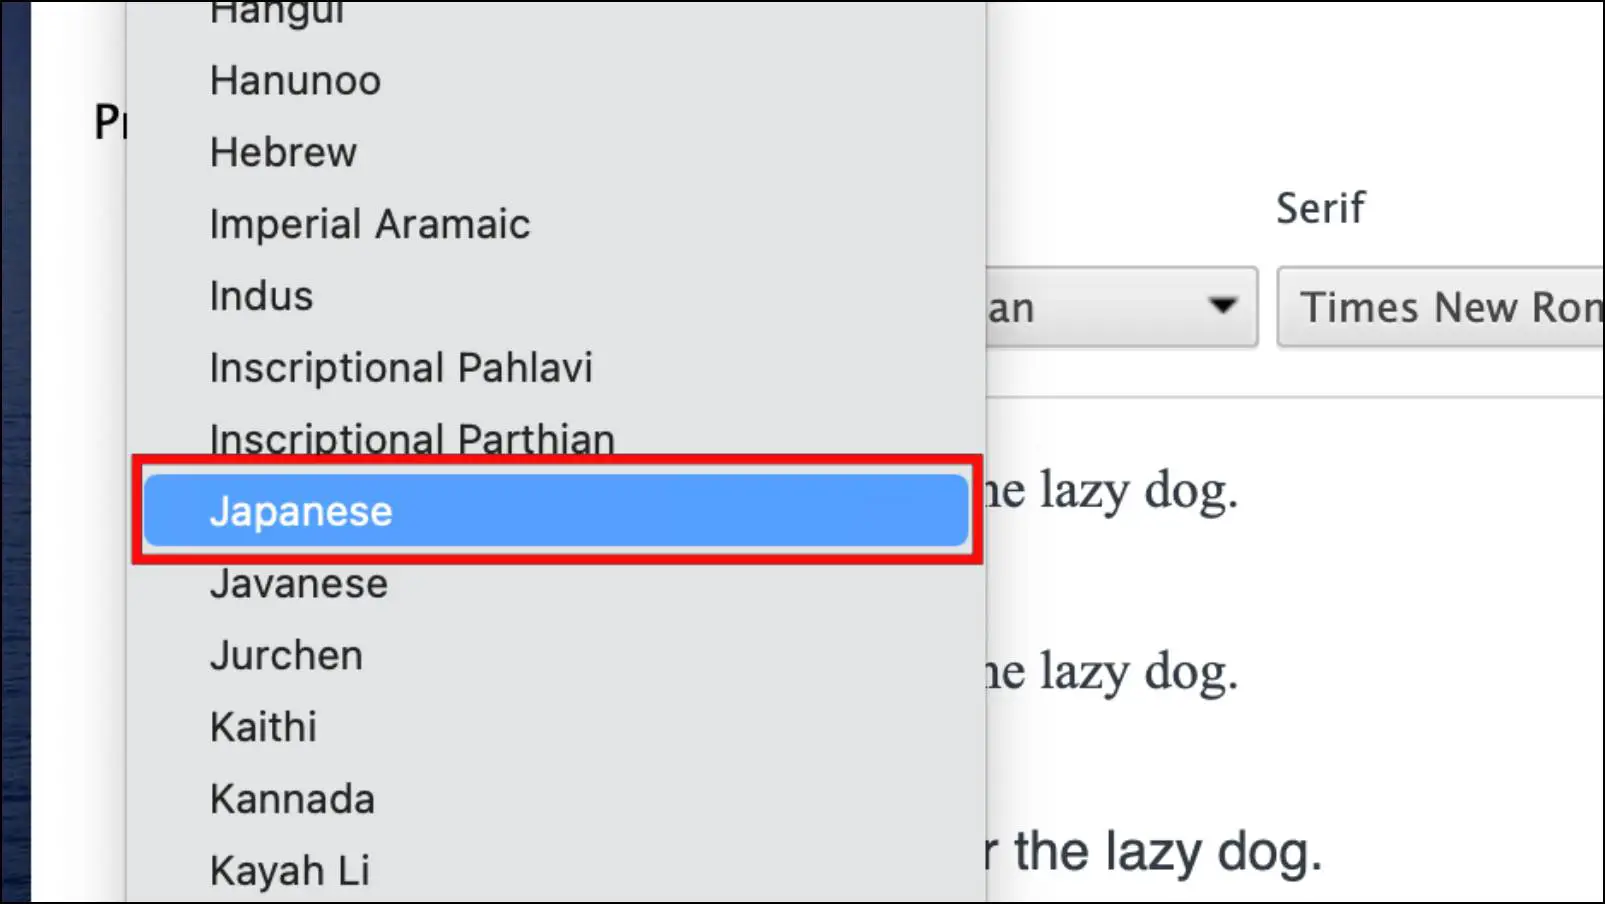
Step 5: Here, click on the drop-down menu under Script.
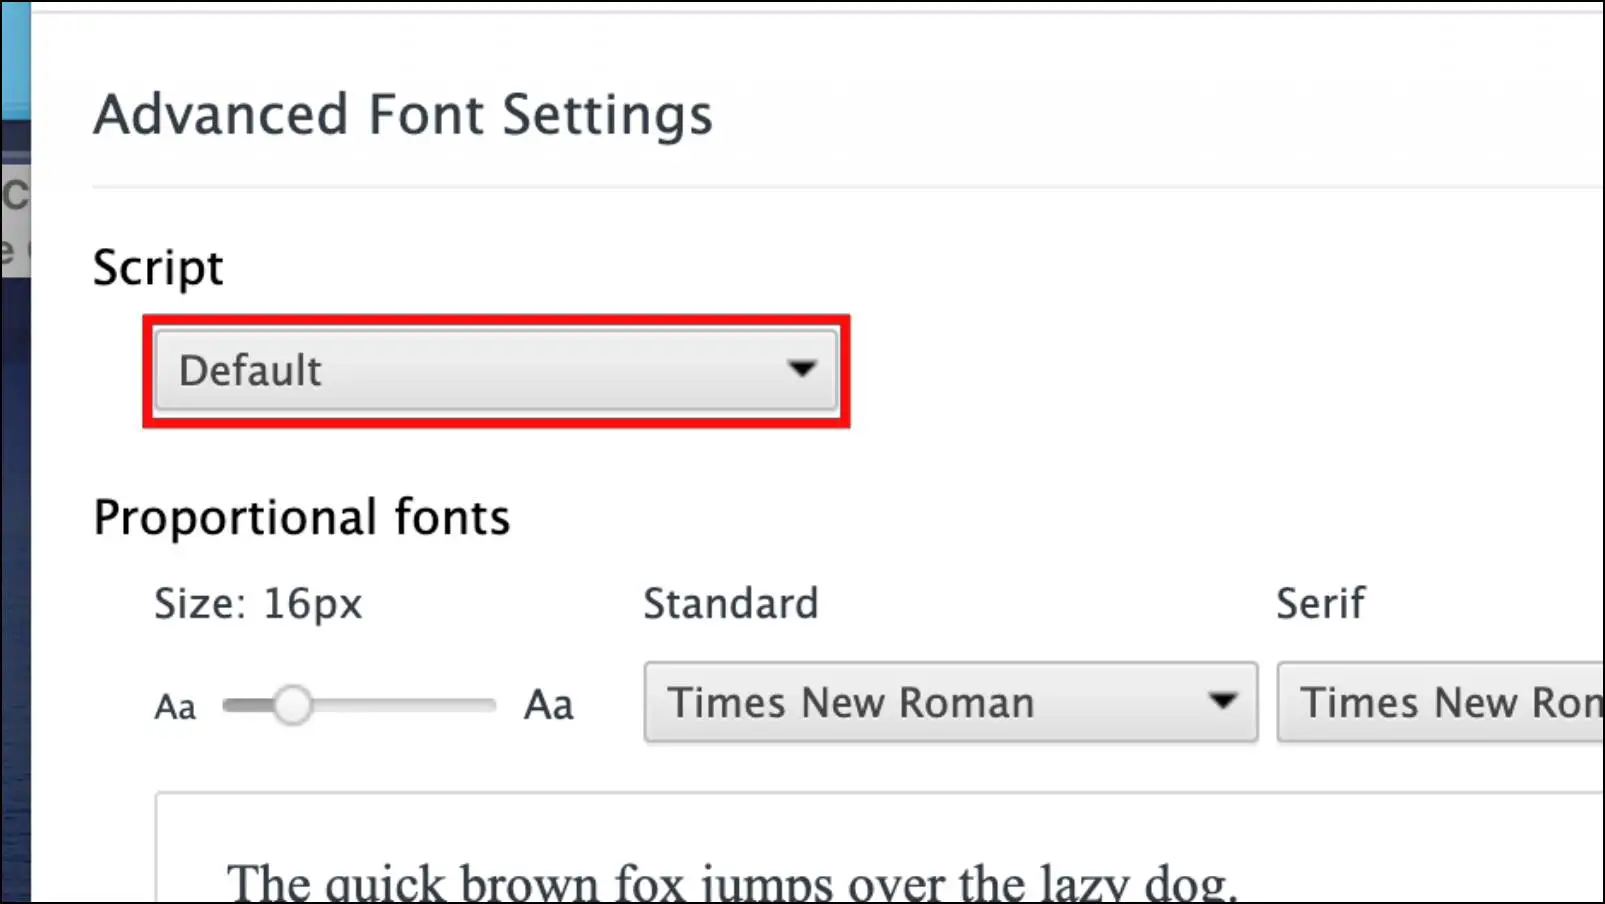
Step 6: Choose the language for which you want to change the font.
Step 7: Under Proportional fonts, you can adjust the font size and change the font type for Standard, Serif, and Sans-Serif.
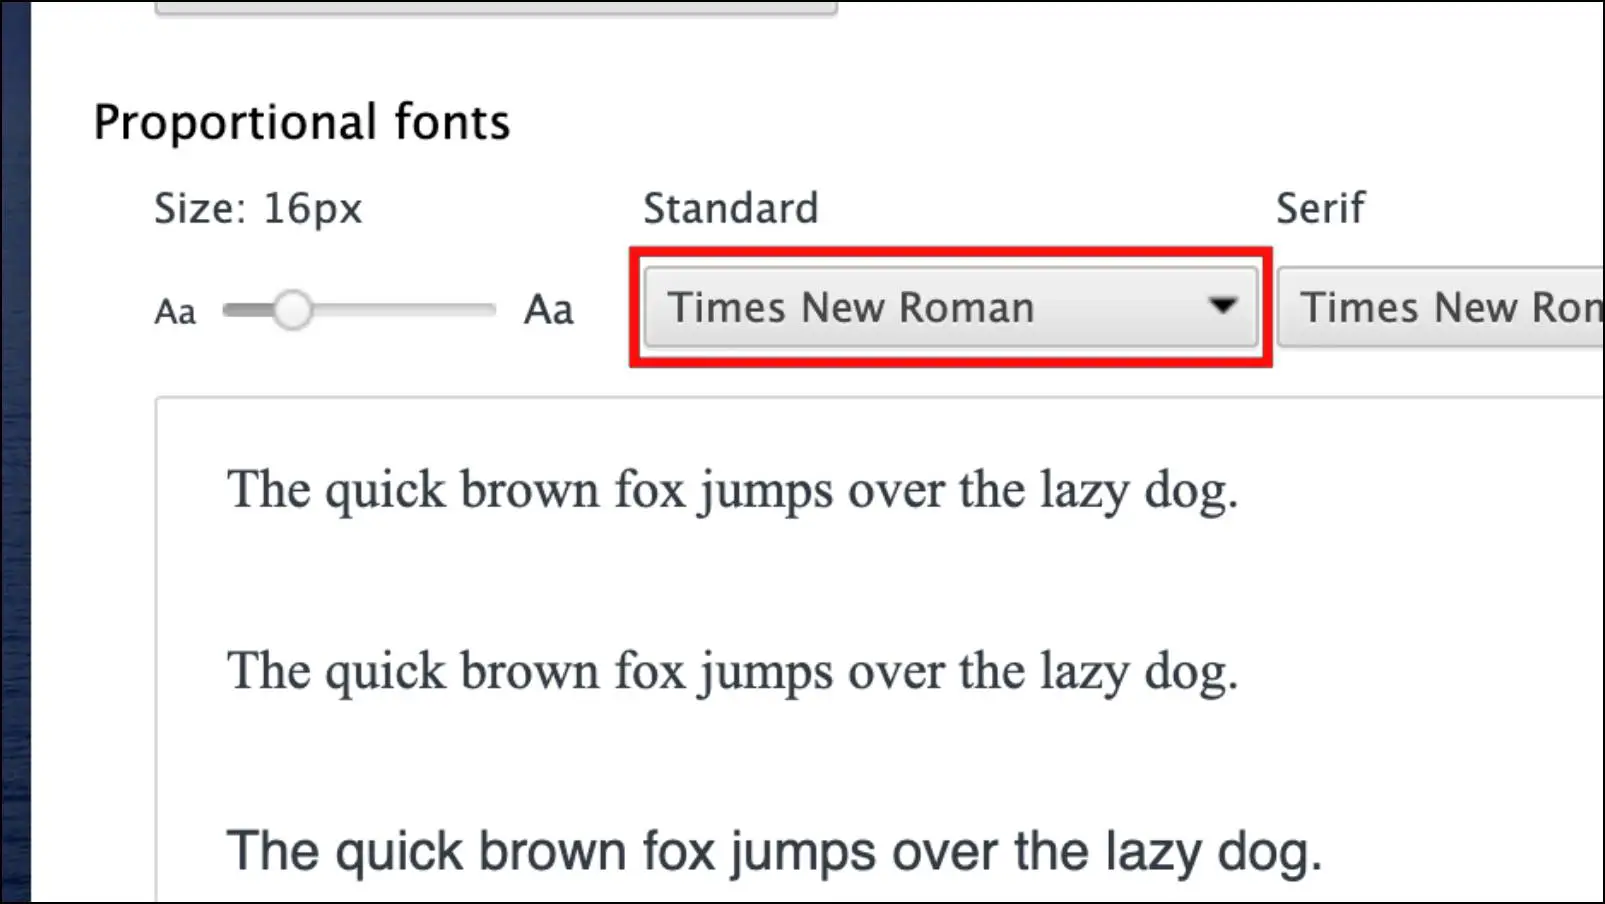
Step 8: Lastly, click on Apply settings.
In my usage, I have noticed that the extension does work quite well, although certain languages like Hindi are missing from the list.
Method 4- Change Chrome Font Style with Fonts Changer Extension
If you are facing the font change problem with only a few select websites, but the rest of the browser and other sites are unaffected, then you should use the Fonts Changer extension. This will help you change the font of the current webpage from an easy-to-access menu. This is how it works.
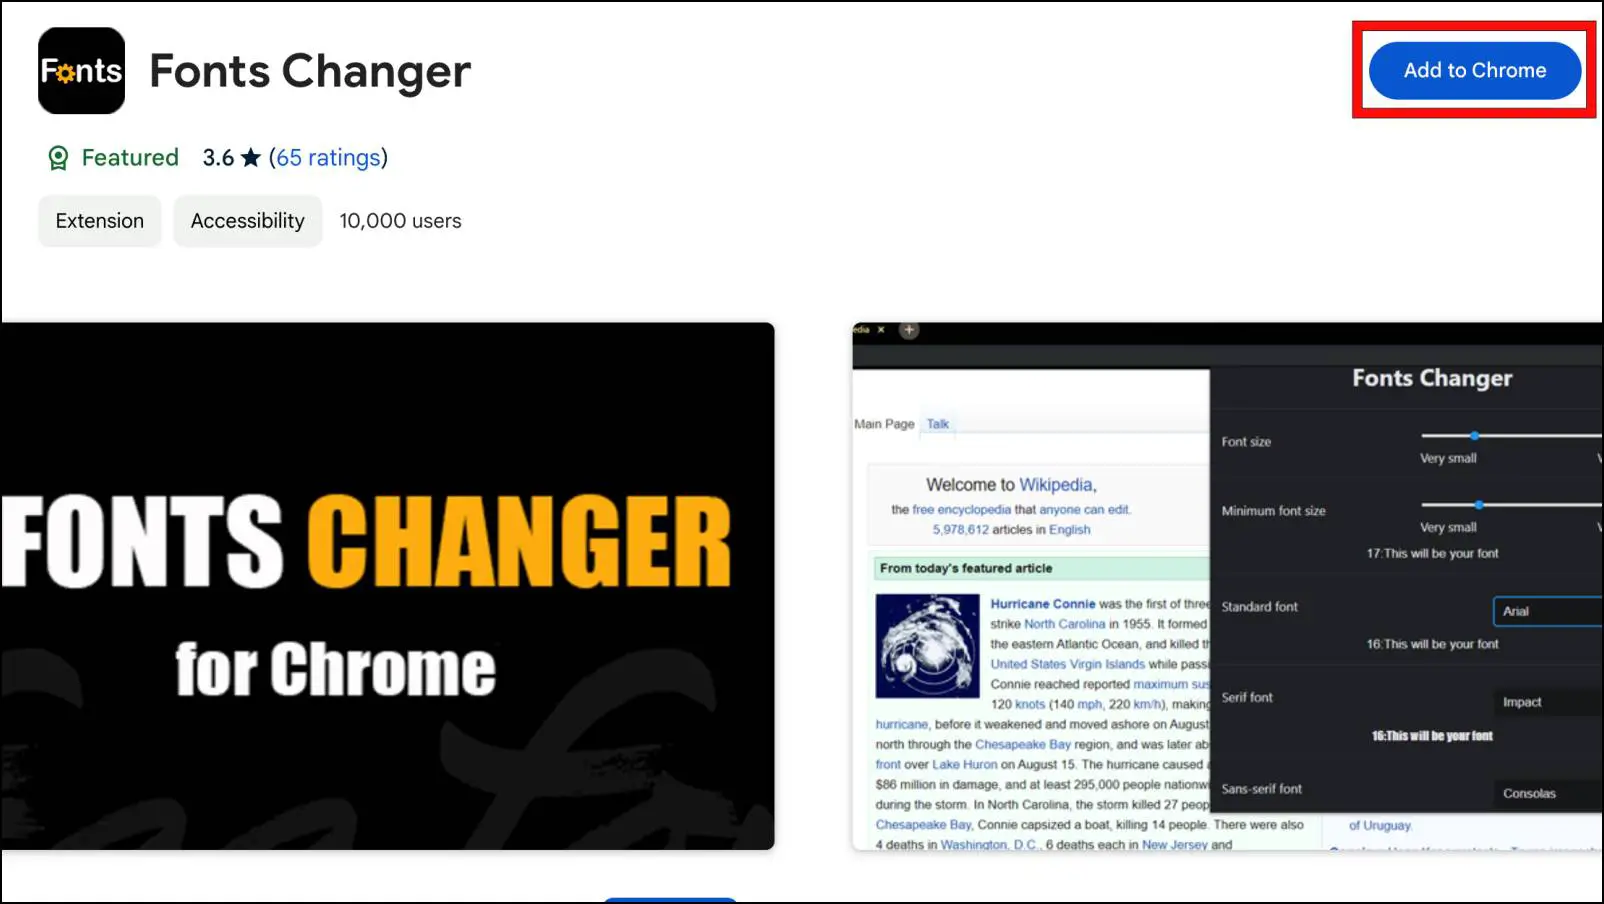
Step 1: Download the Font Changer extension from the Chrome Web Store.
Step 2: Now, click on the extension icon on the right side of the Chrome toolbar.
Step 3: Next, click on the thumbp pin icon next to the Font Changer extension.
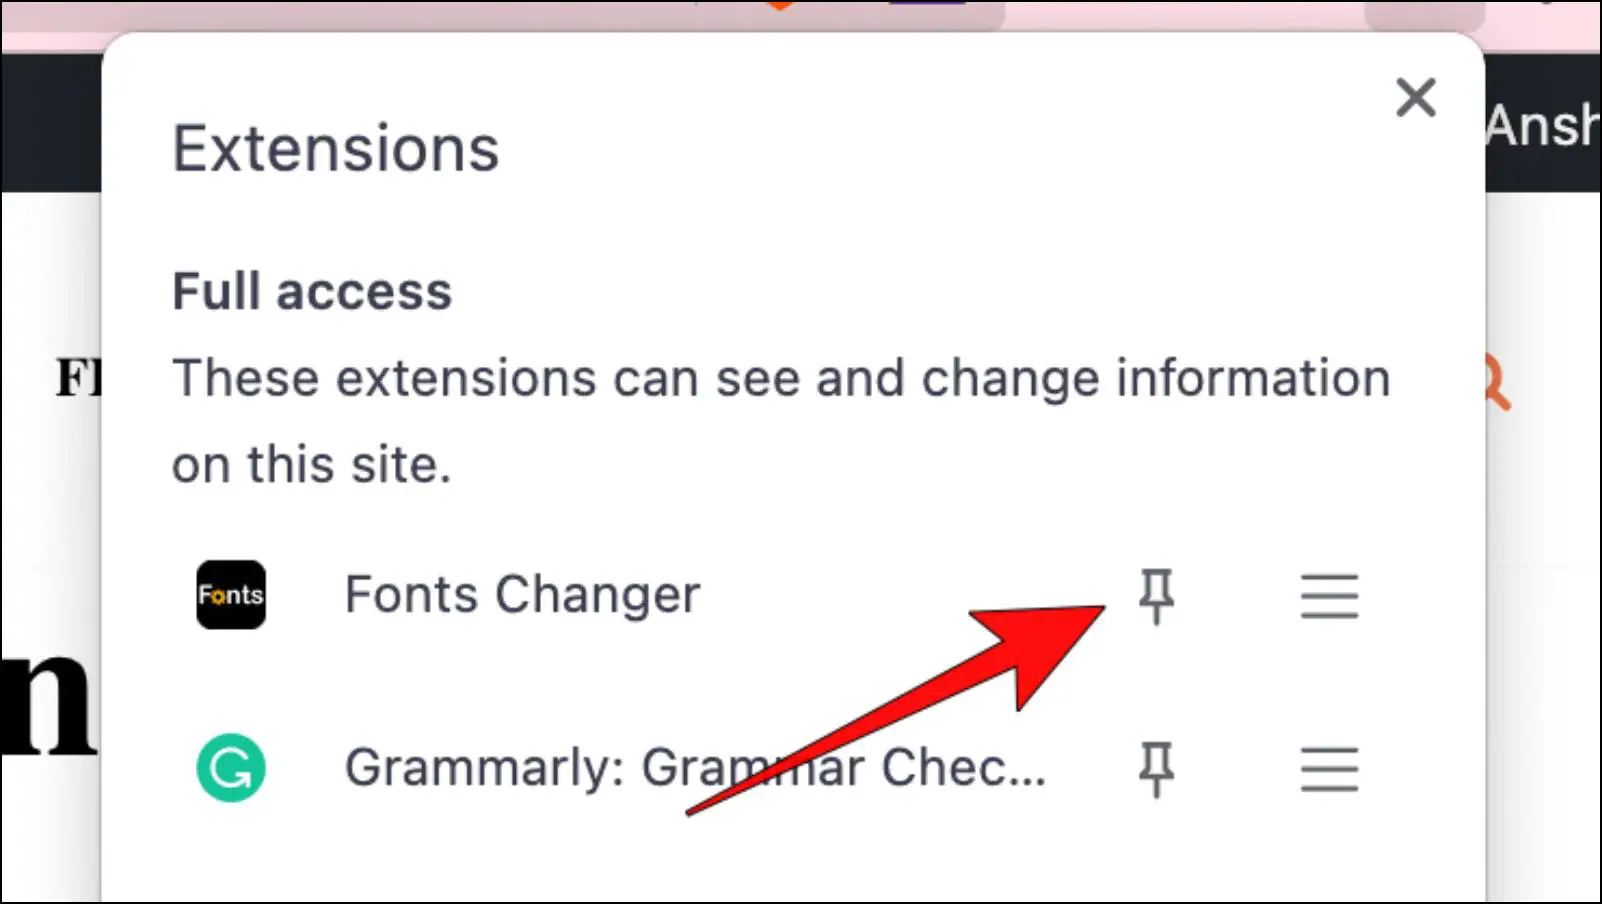
Doing so will pin the extension to the toolbar for easier access.
Step 4: Then click on the Font Changer extension icon to change the current font style of a webpage.
The extension will show a small menu from which you can pick the font you want to use for the page.
Step 5: Click on the drop-down menu next to the type of font you want to change.
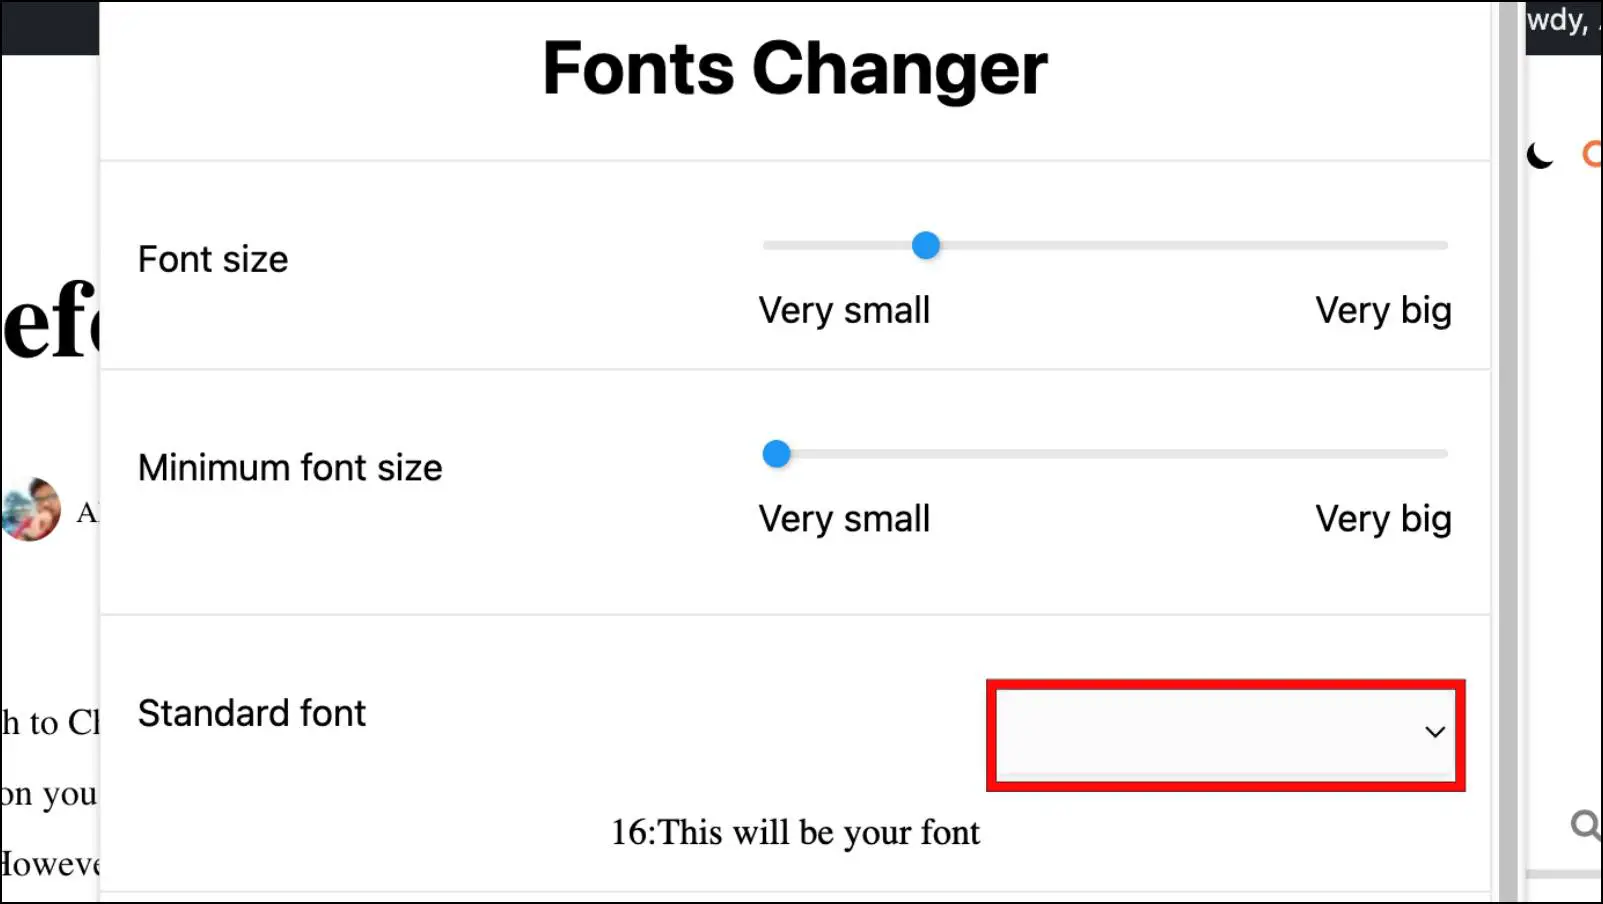
Step 6: Pick the Font you want to use.
Step 7: Reload the webpage to see changes.
Method 5- Remove Unwanted Extensions
Since we are on the topic of extensions, you should note that some extensions can meddle with browser settings. And may even change the font type for some or all web pages if they have the required permissions. So if you suspect that a recently added or unwanted extension might be the root of the issue, then use these steps to remove it.
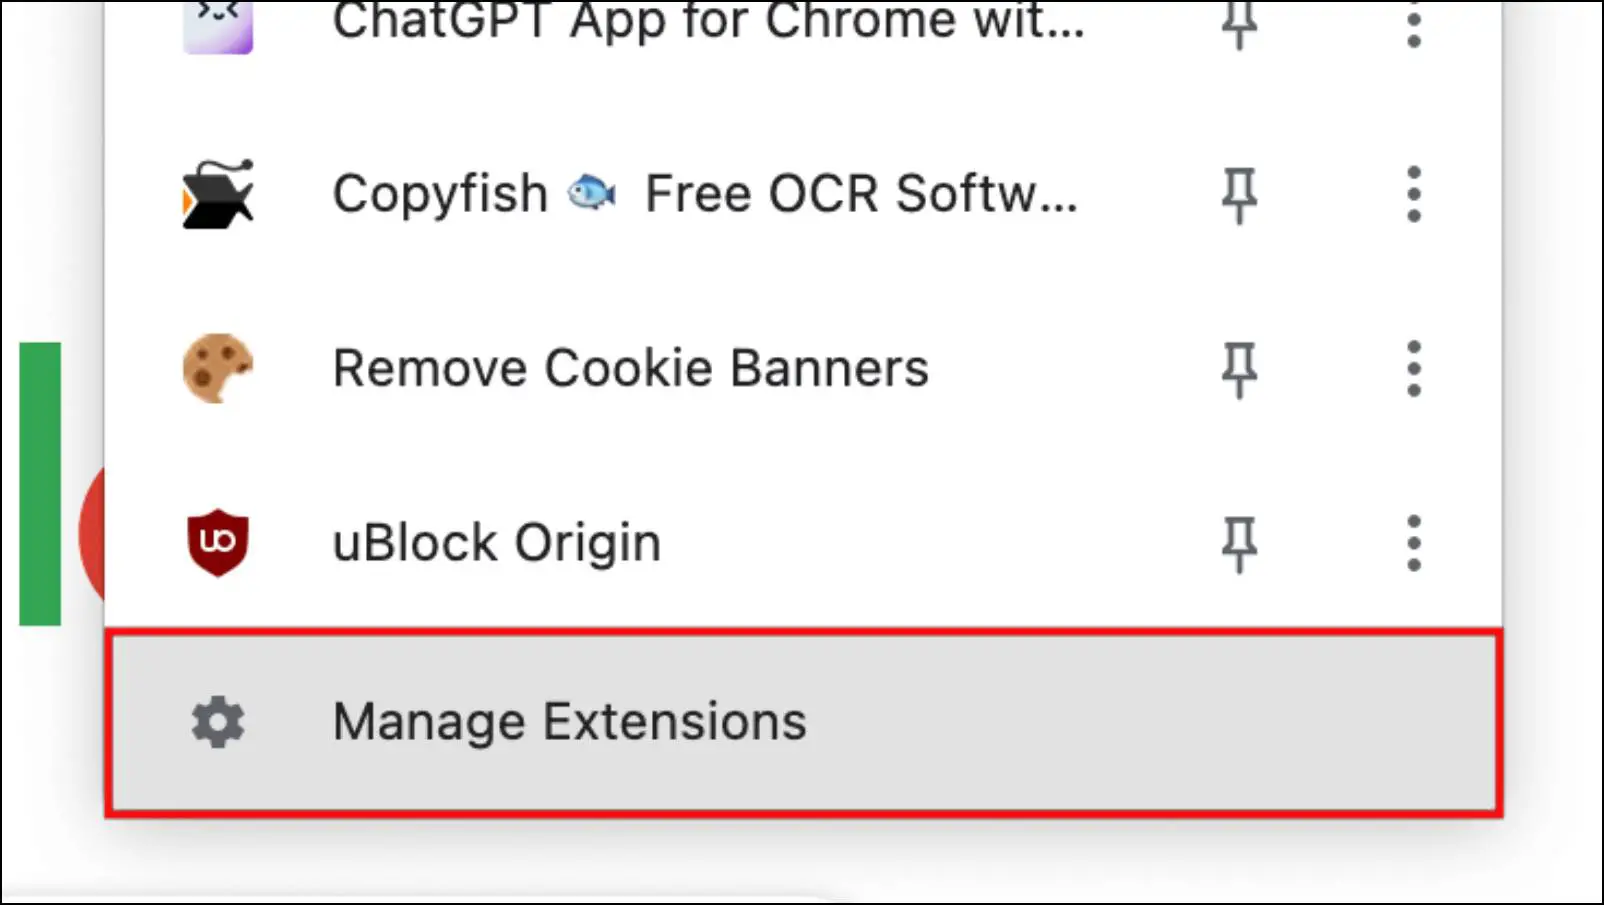
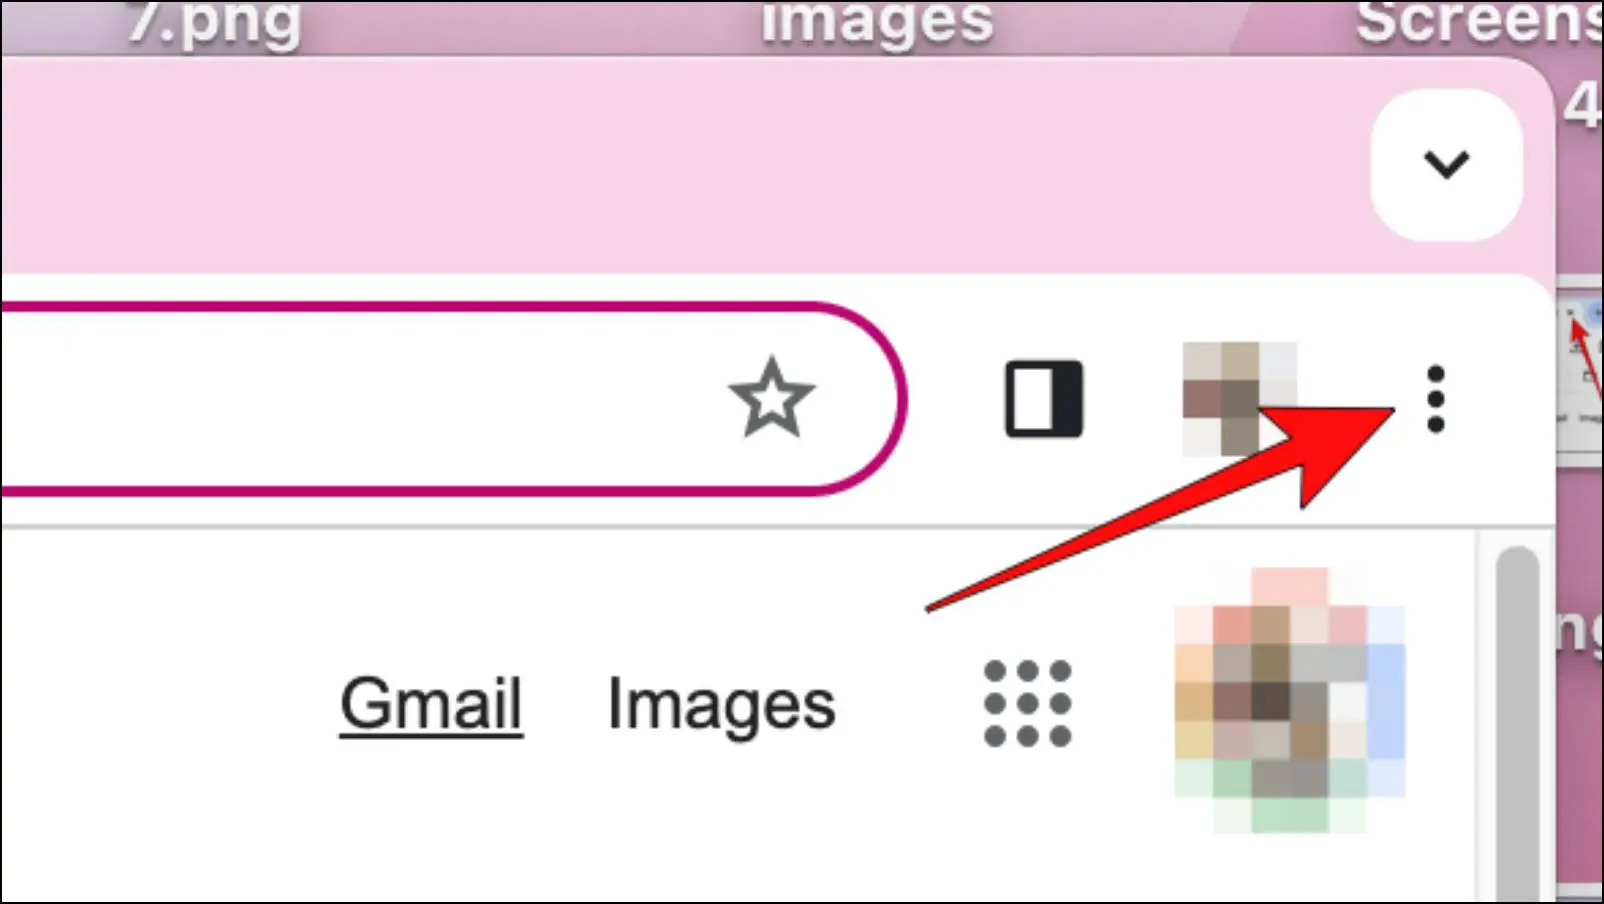
Step 1: On Chrome, click on the extension icon in the toolbar.
Step 2: Here, click on Manage Extensions.
Step 3: Turn off the toggle for the extension you suspect.
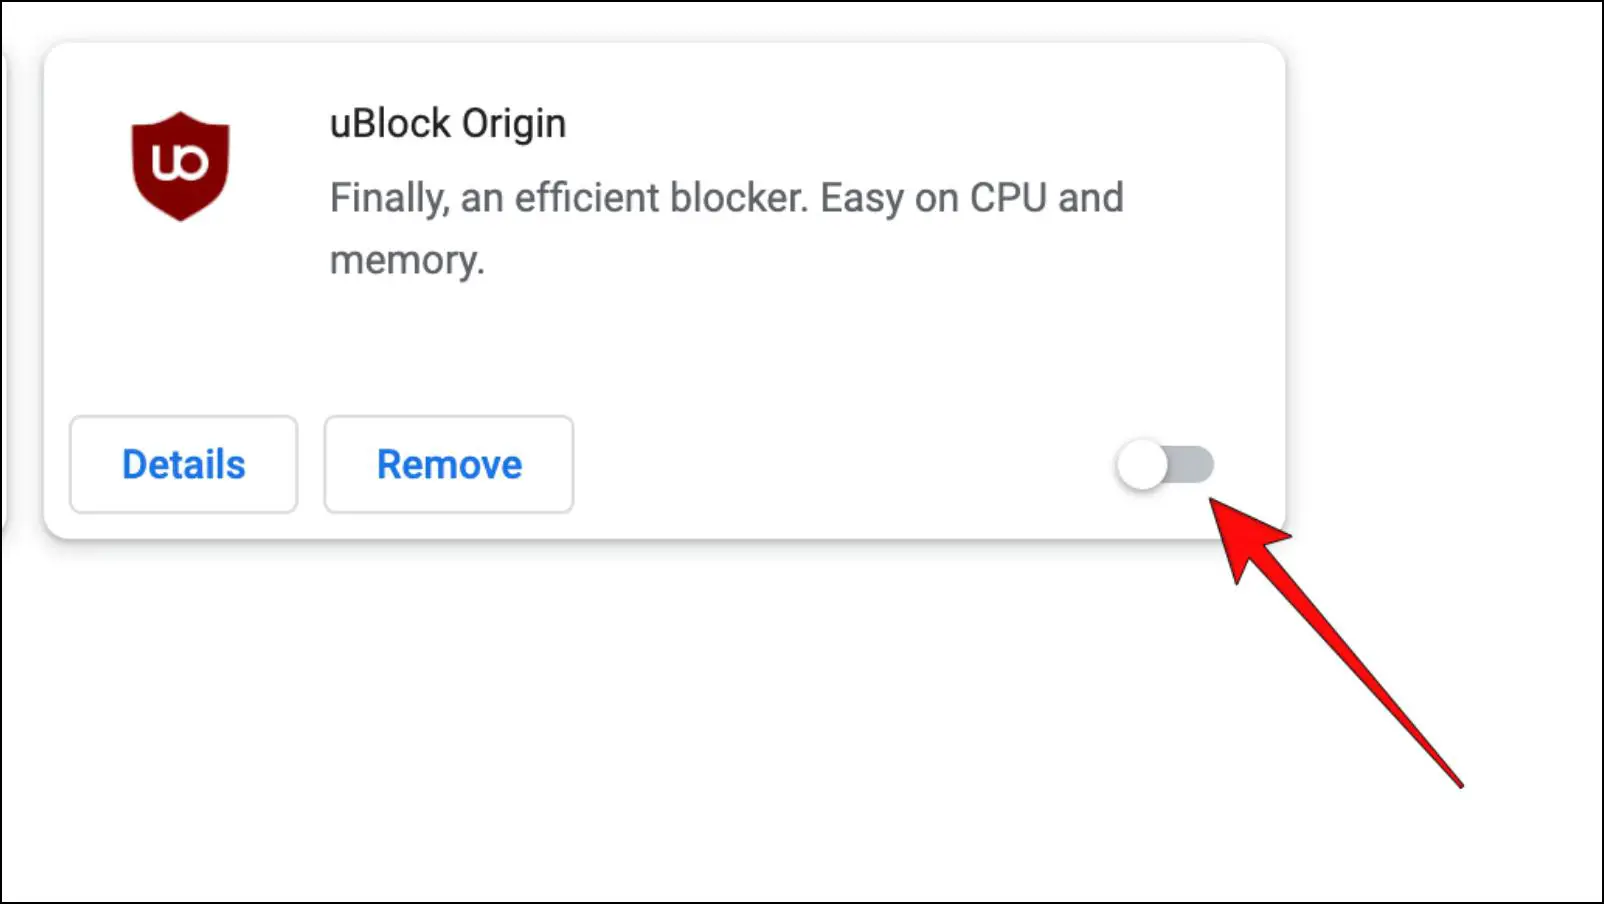
Doing so will disable the said extension. Now, go back to the webpage, refresh it, and then check whether the font issue has been addressed. If it has been, then this confirms the suspected extension was the one causing all such problems.
Step 4: To remove an extension, click on the Remove button as shown below.
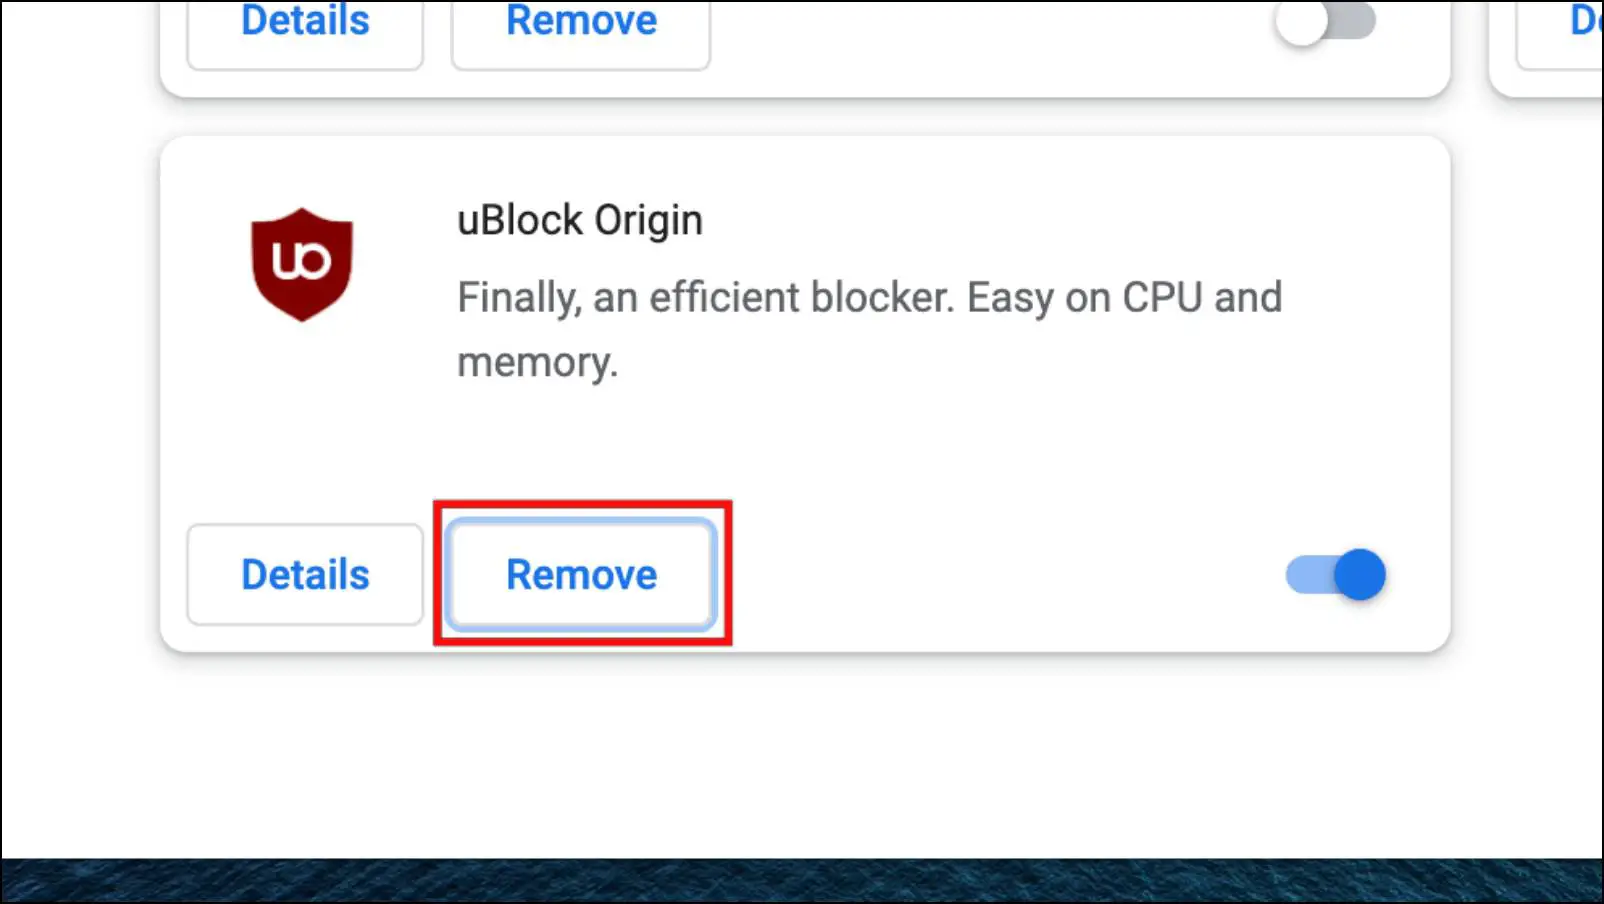
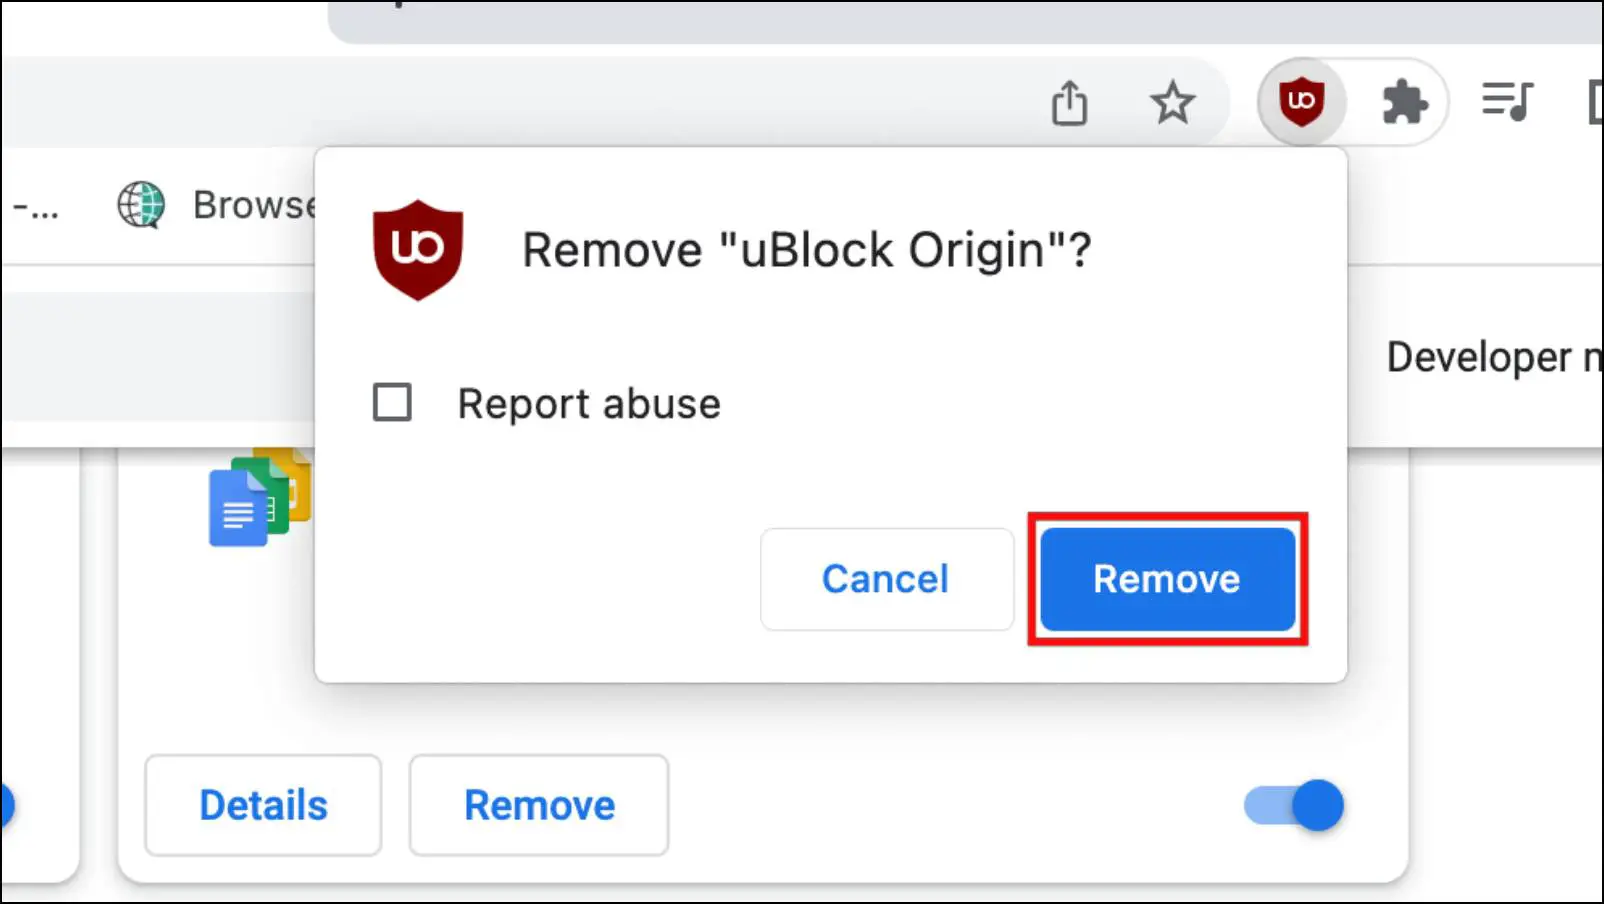
Step 5: In the confirmation prompt, click on Remove again.
Make sure to only install extensions that have a rating on the Web Store and are considered to be trustworthy. Also, make sure to check for their reviews.
Method 6- Clear Browser Cache and Data
Clearing cache data can resolve font-related issues, as cached data in your browser may become corrupted or bloated over time, causing problems. To address font style issues on Chrome, we recommend that you consider clearing your browser’s cache and browsing data. Keep in mind that after clearing the cache, websites may load slower the first time but will subsequently perform normally.
Step 1: To clear the cache, click on the three-dot menu in the top right corner of the Chrome window.
Step 2: Pick the Settings option.
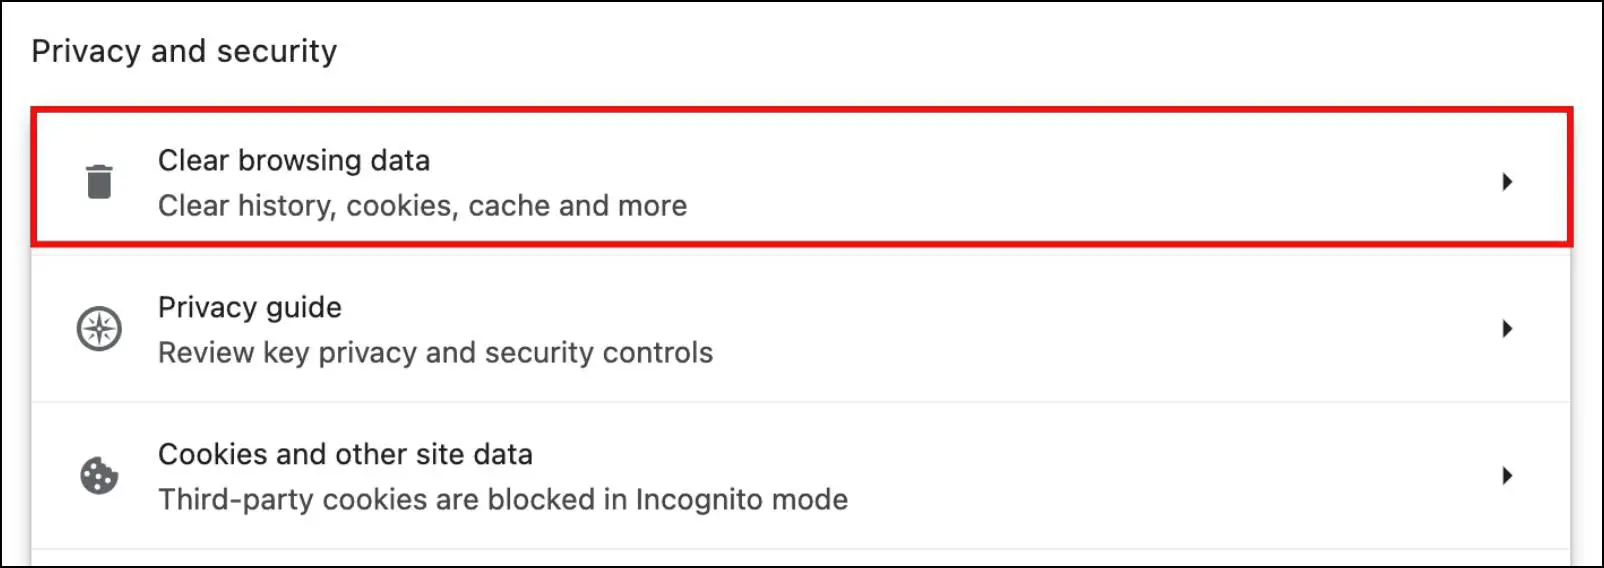
Step 3: Choose Privacy and Security from the left sidebar.

Step 4: Click on Clear browsing data.
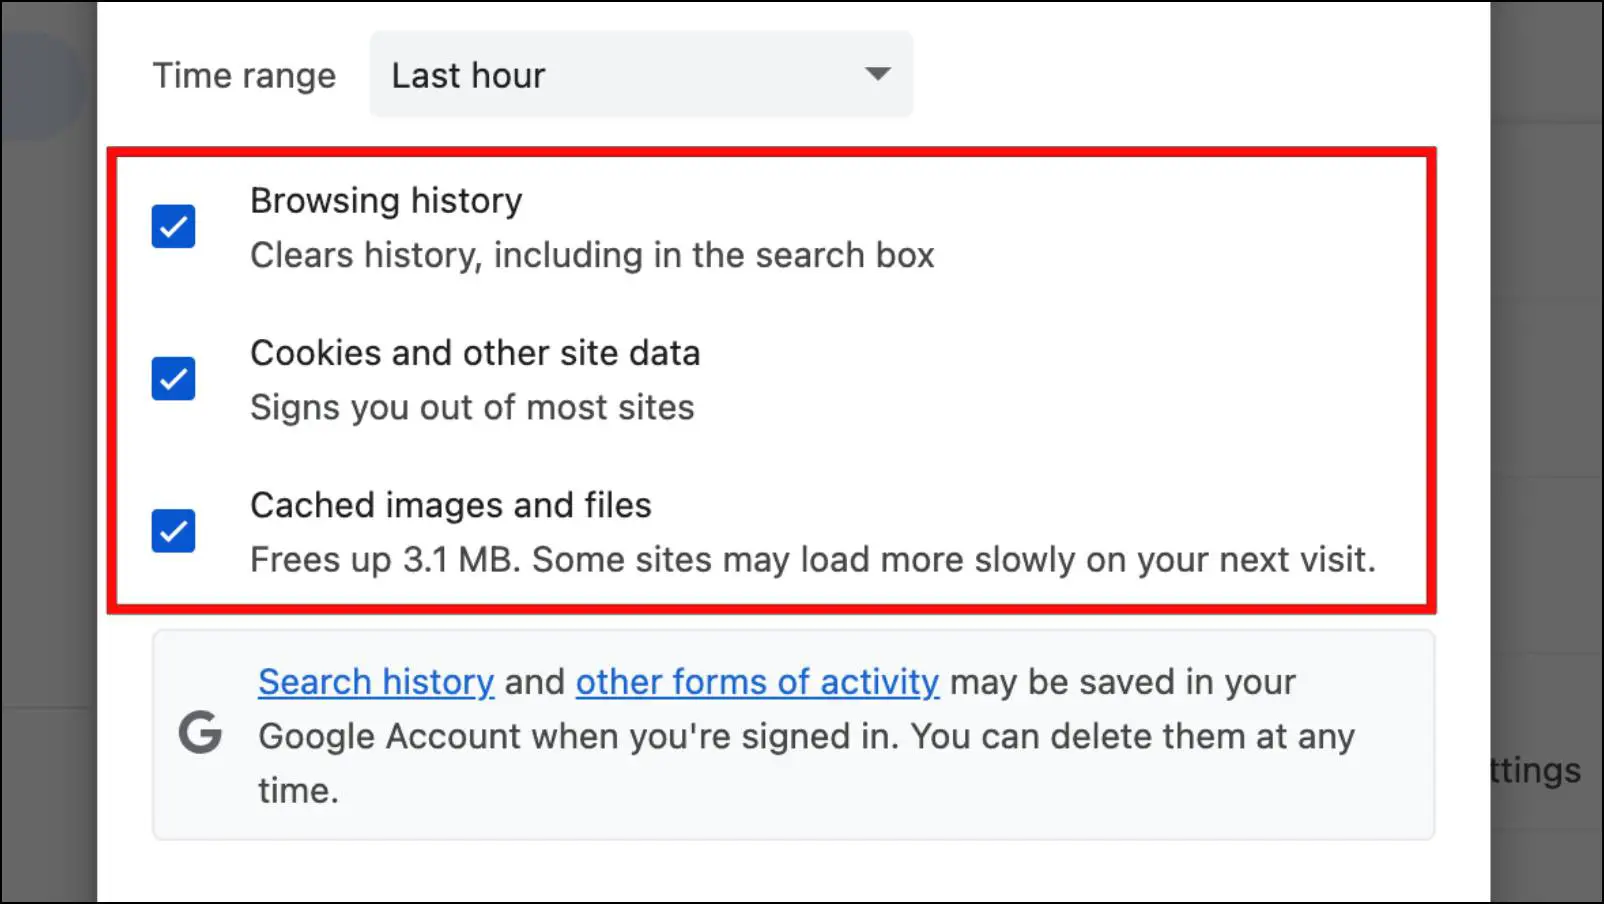
Step 5: Tick the box next to all three items.
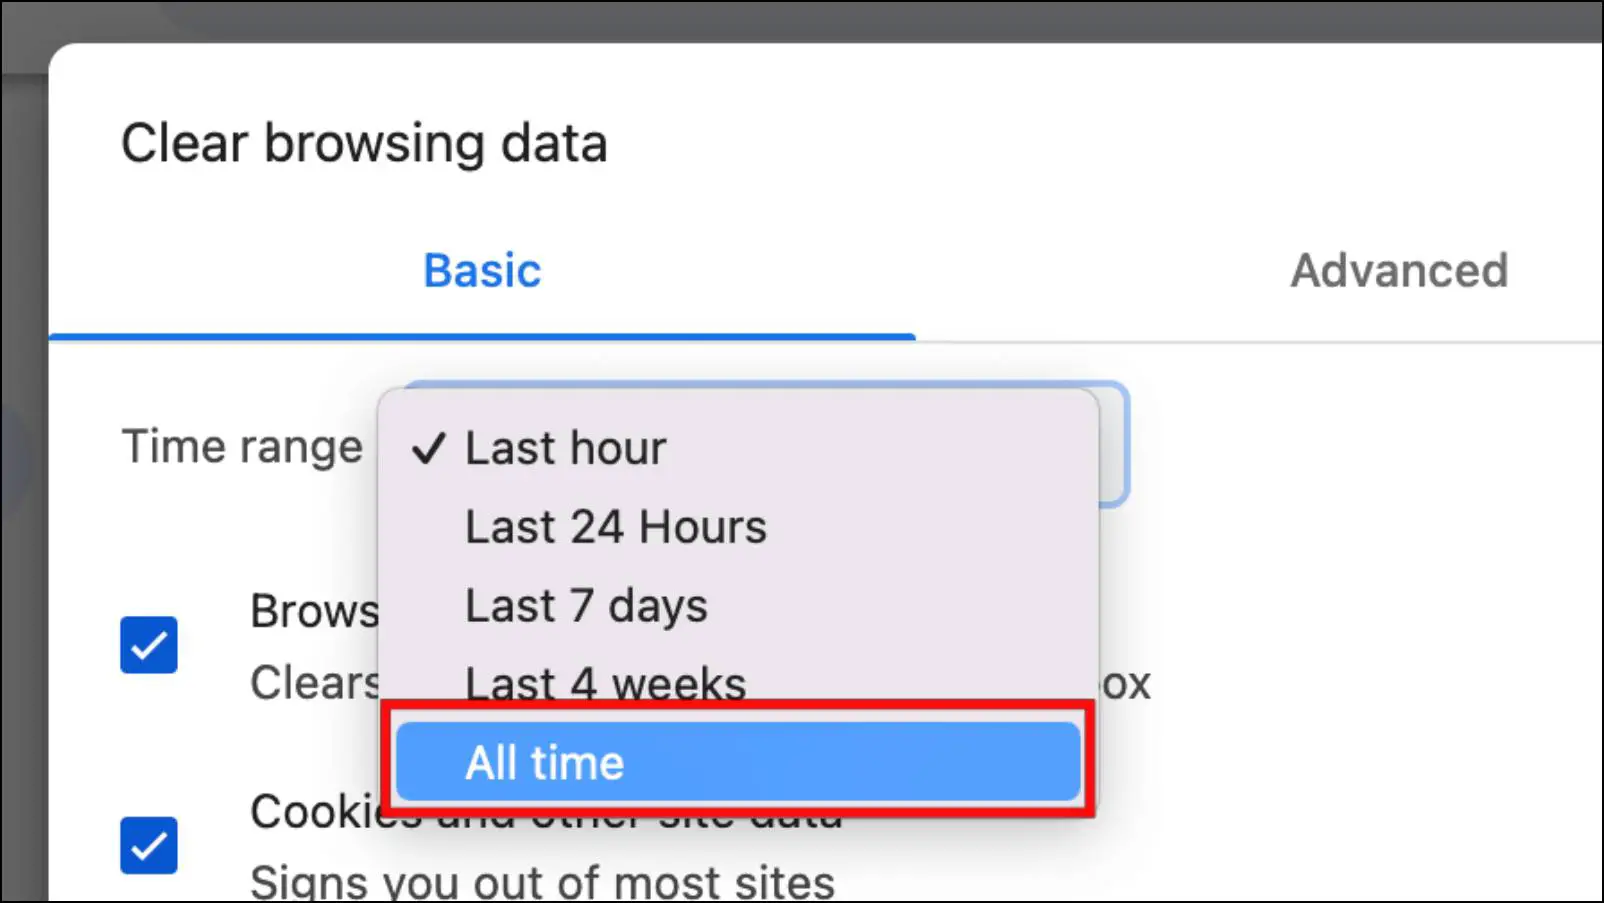
Step 6: Now click on the drop-down menu next to the Time range and select All Time.
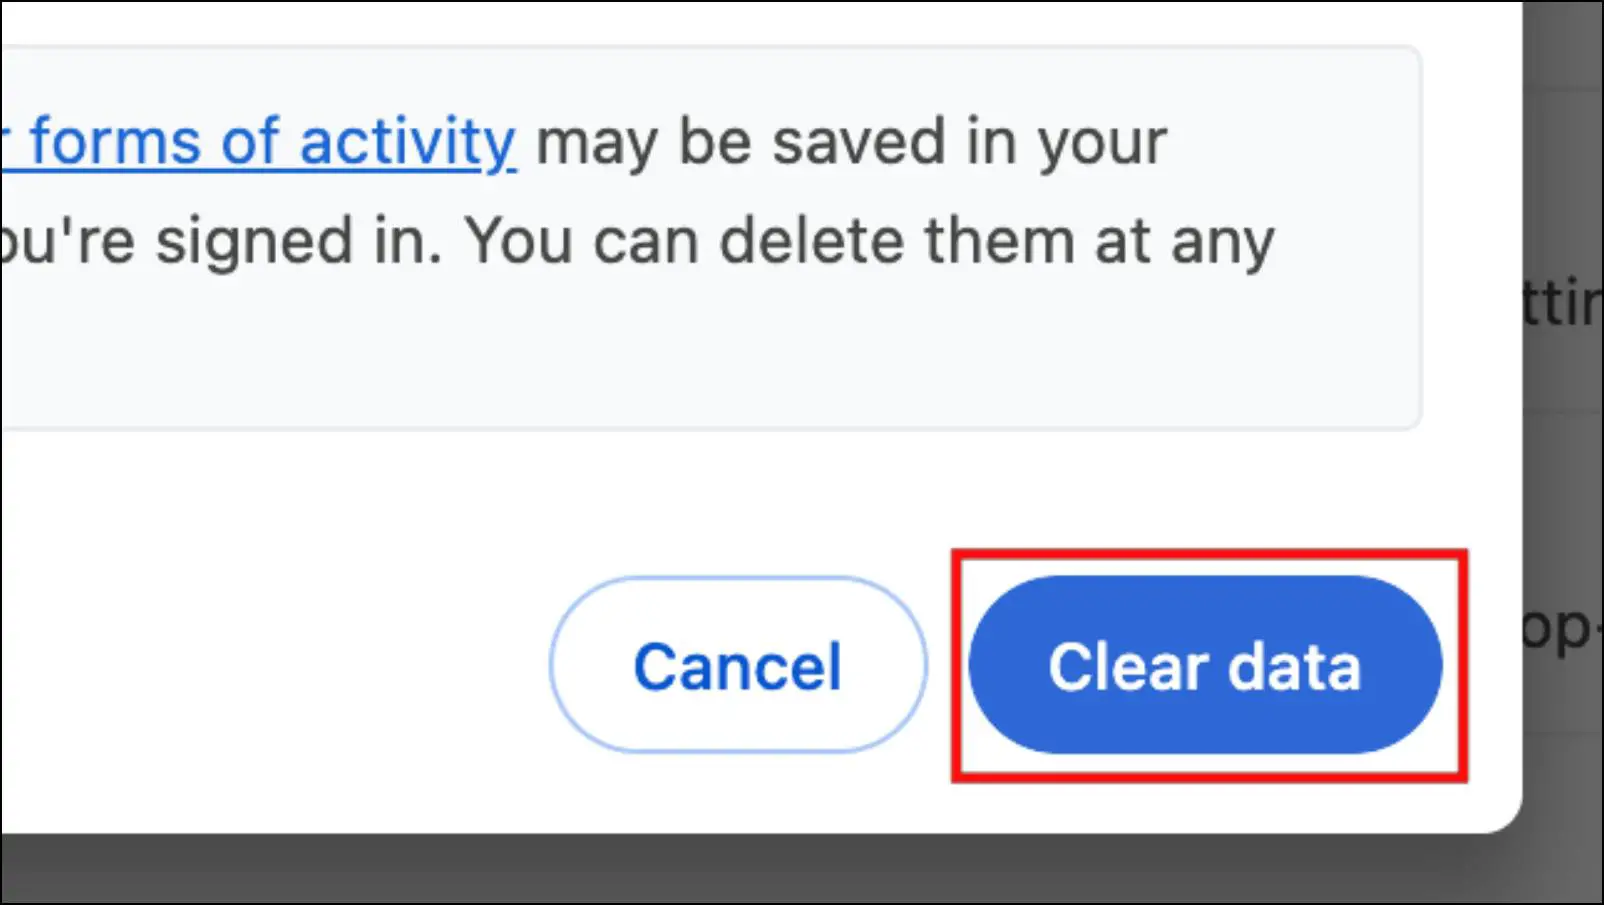
Step 7: Then click on Clear data.
This will get rid of all unnecessary data stored within your browser, including your browsing history.
Method 7- Reset All Chrome Settings
If the above-discussed methods have been of not much help to you, then we would recommend that you reset your browser settings. This will reset all the settings in Chrome to their default state, including fonts. However, resetting the browser will result in all your extensions being removed. However, your bookmarks and browsing history will remain intact. This is how you can reset Google Chrome.
Step 1: On Chrome, click on the three-dot menu as shown below.
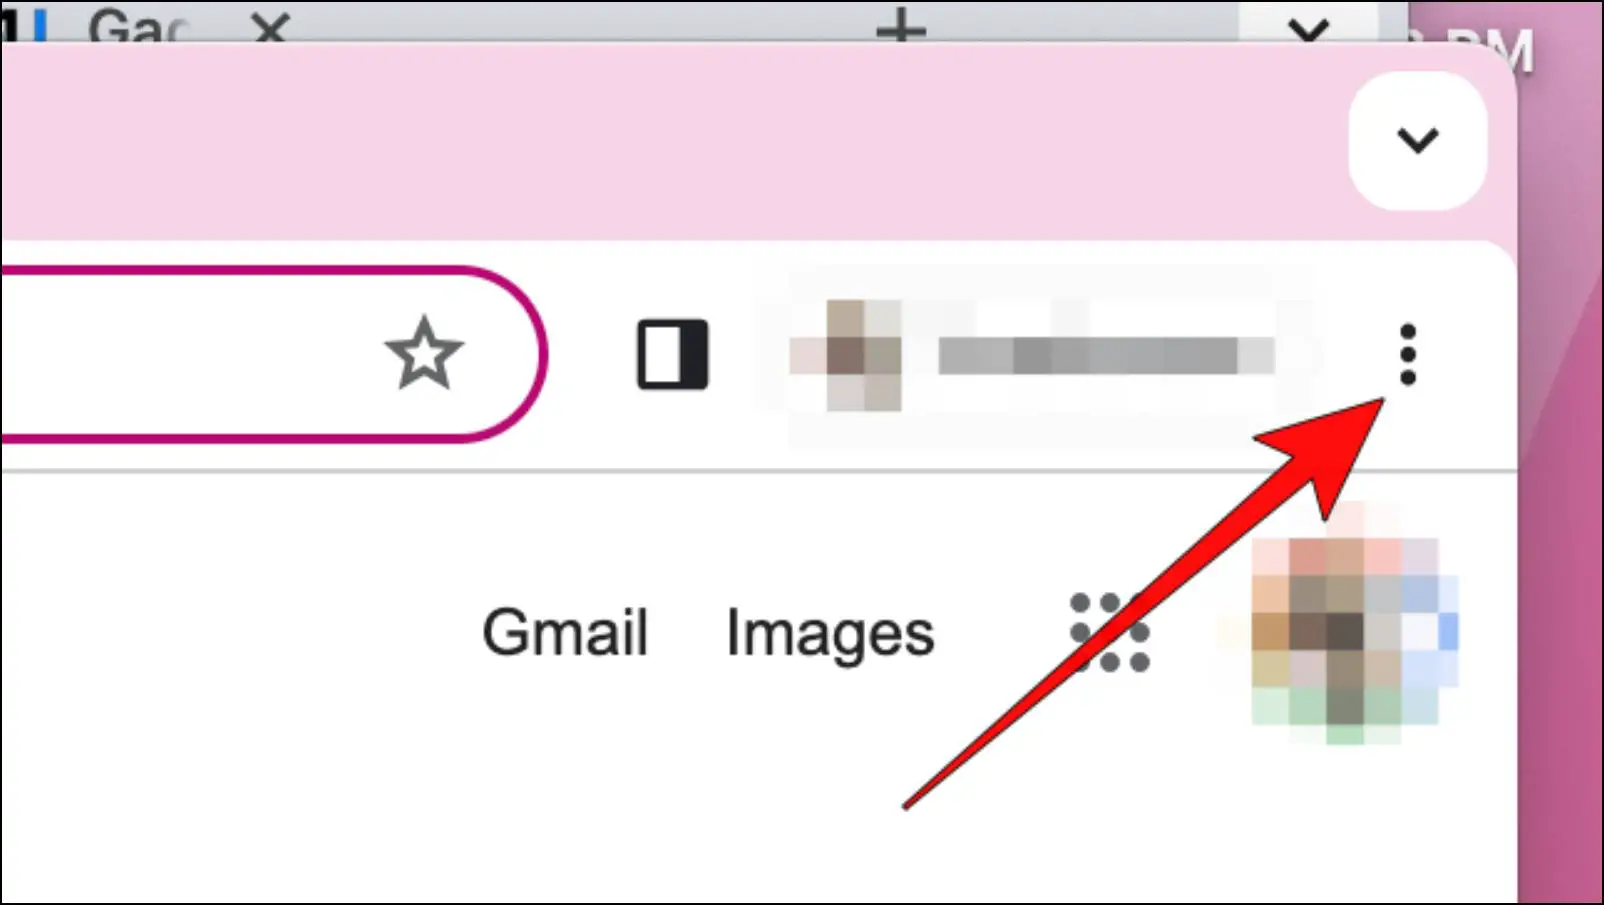
Step 2: Open the Settings menu.
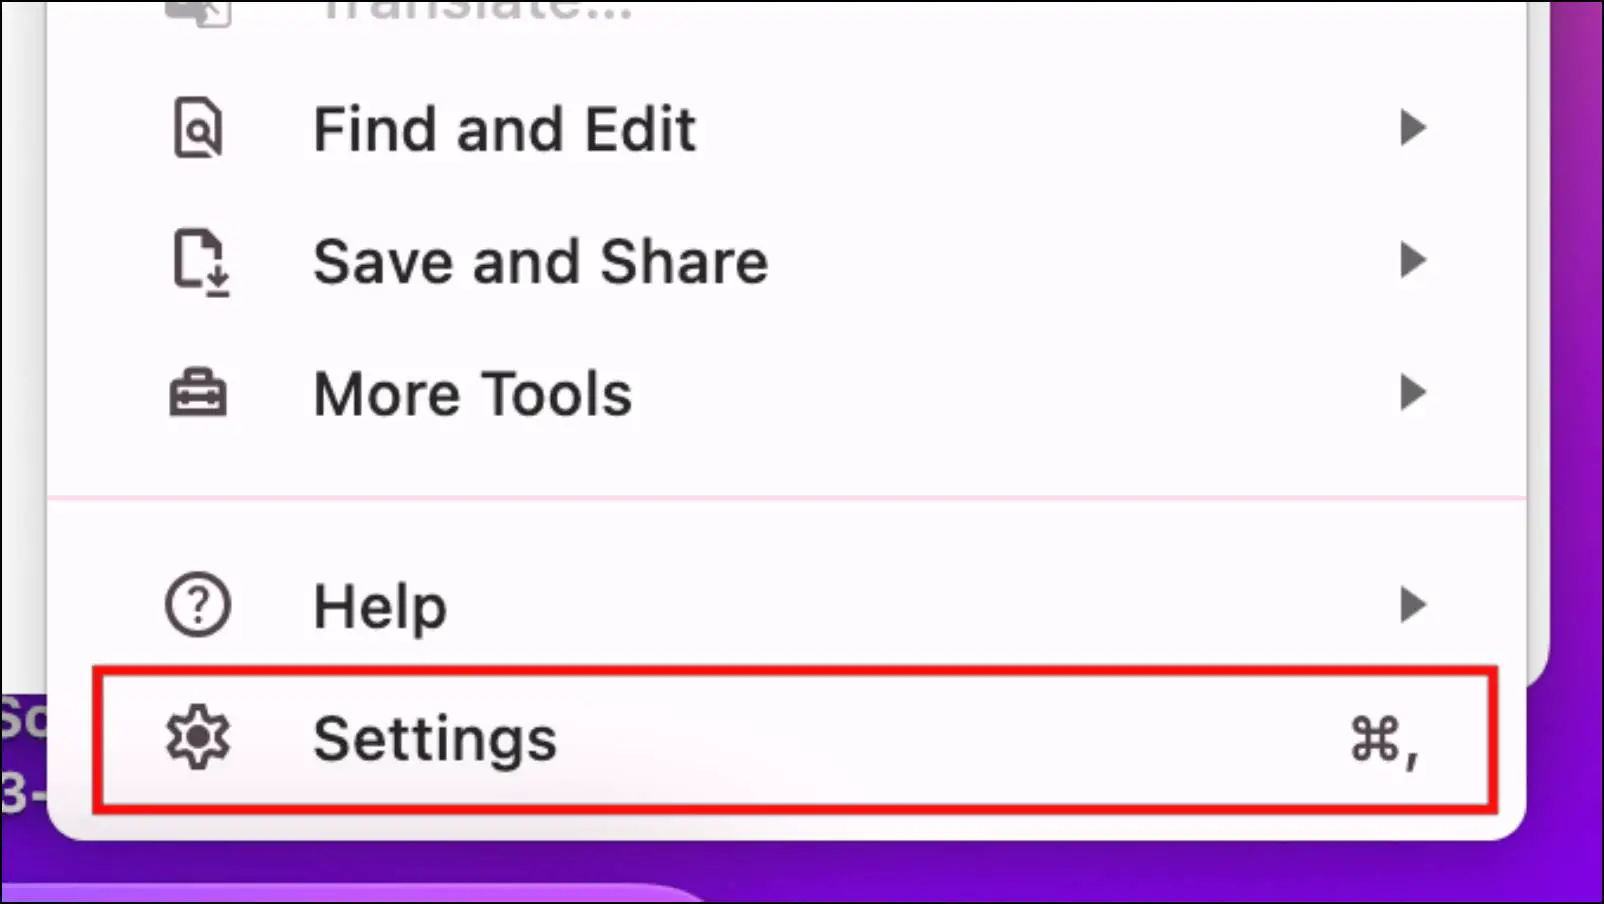
Step 3: Go to Reset settings from the sidebar menu.
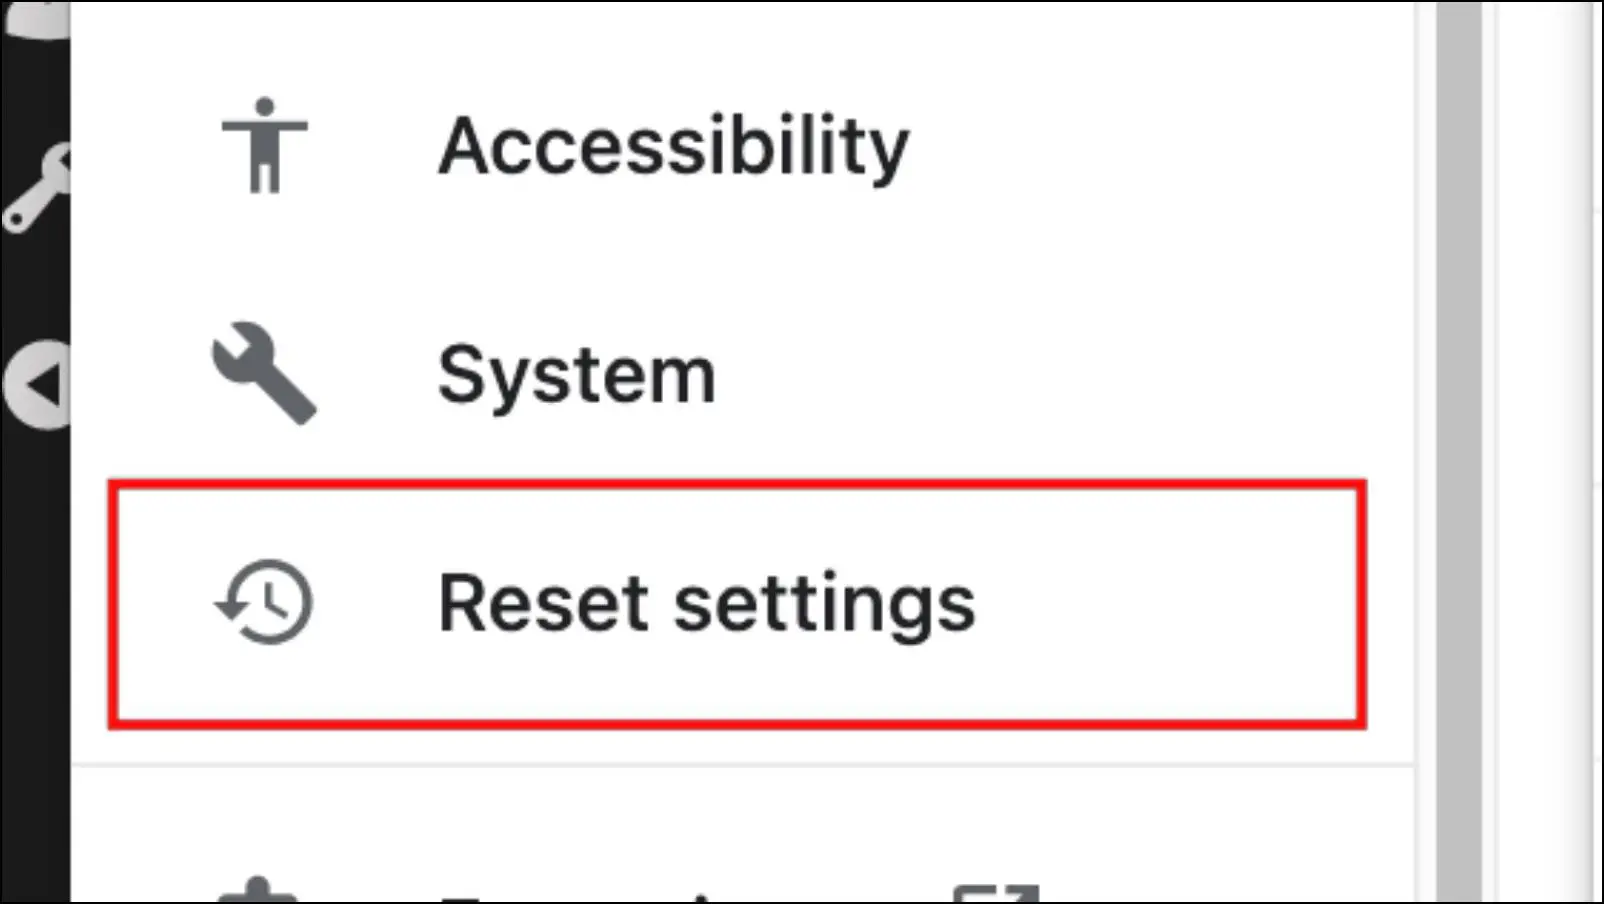
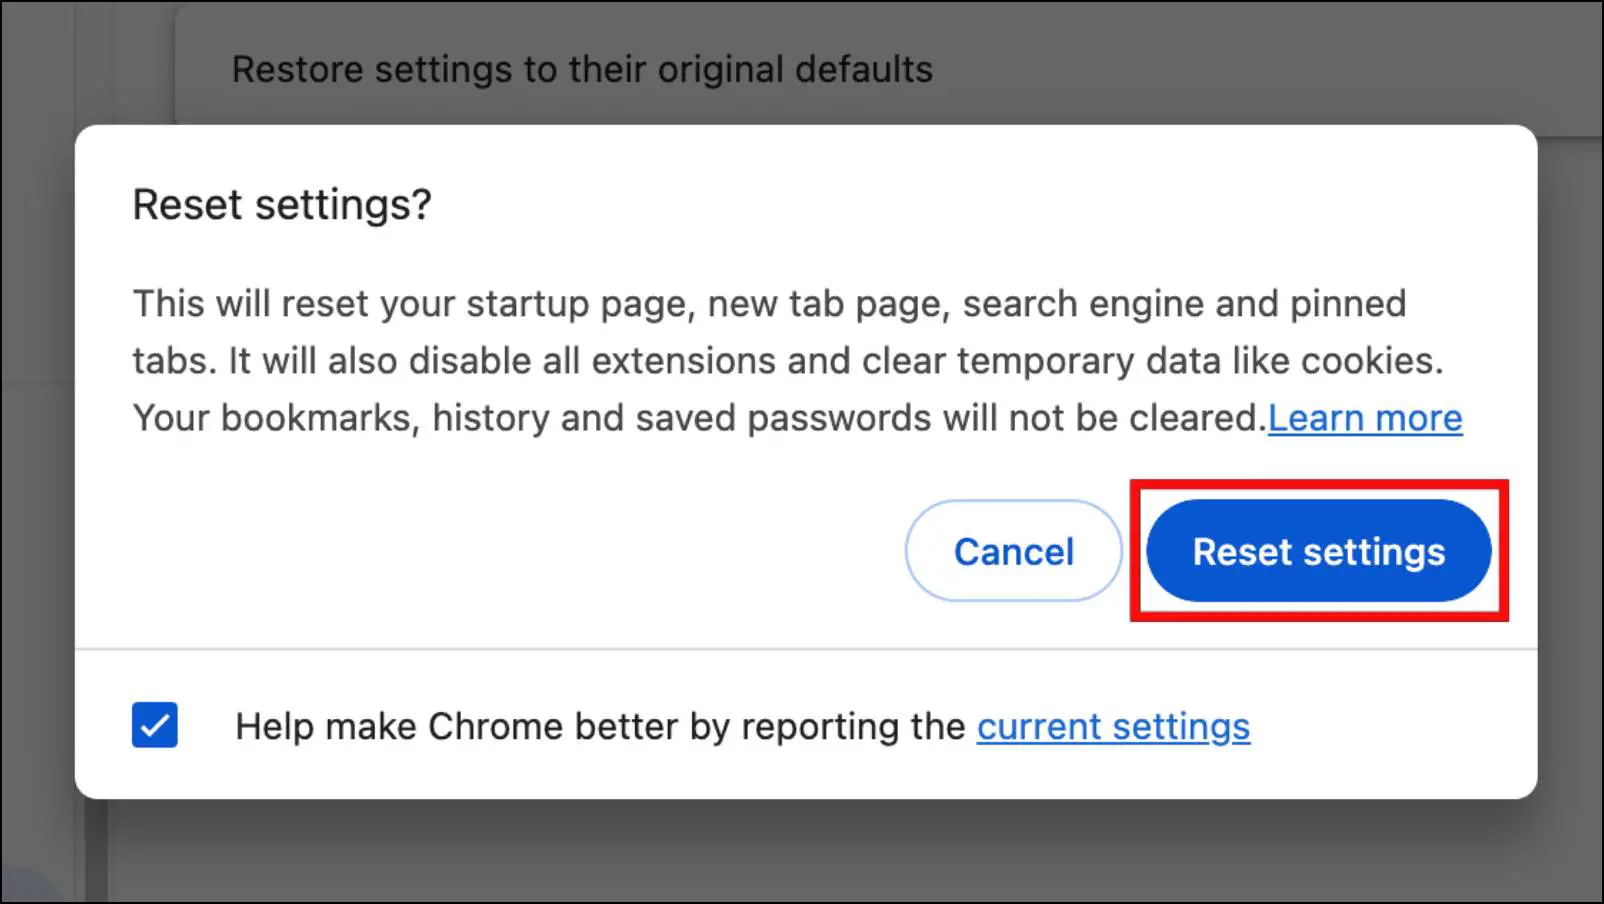
Step 4: Click on Restore settings to their original defaults.
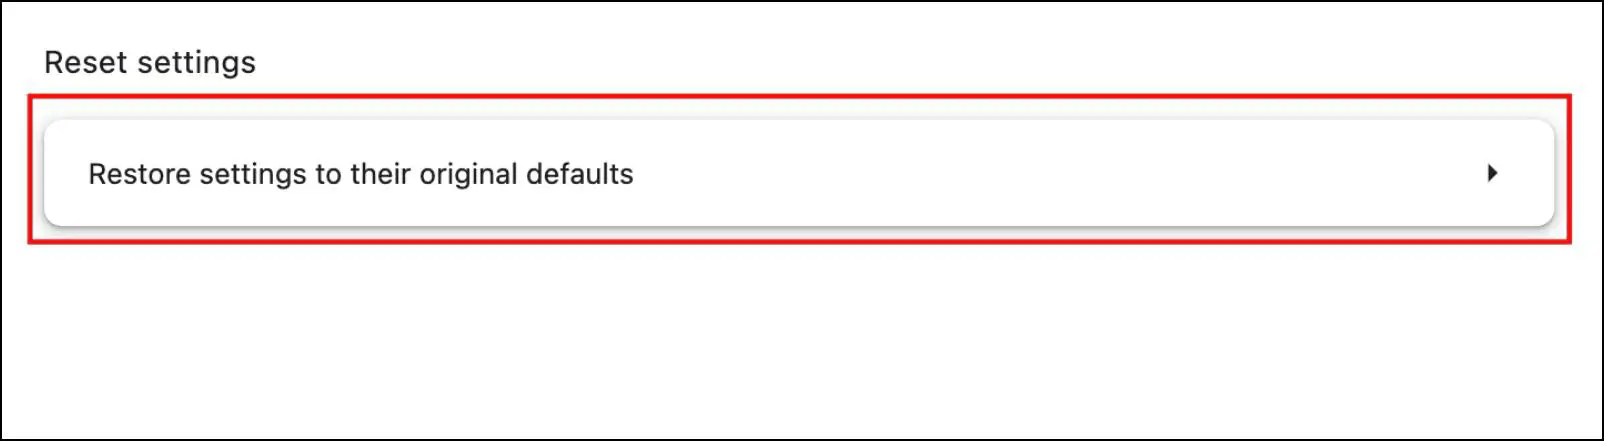
Step 5: In the confirmation pop-up. select Reset settings.
Once the settings have been reset, close and restart Chrome to check if the font issue has been resolved.
Wrapping Up
These are some of the ways that should help to resolve and fix issues with fonts being changed in Google Chrome. It is a good thing that despite being a pretty basic browser, Chrome does provide options to customize fonts and font styles. In case you have any queries related to this article, then do reach out to us. Till then, stay tuned on BrowserToUse for more such articles, guides, and How-To’s.
Related:


