The spotlight search function in Apple’s macOS is a system-wide desktop search that allows users to open any applications or documents stored in the system quickly. However, sometimes, it may encounter an unusual glitch that prevents the Safari browser from displaying search results. In this read, you will learn how to fix Safari not showing up in Spotlight search on Mac.
How to Fix Safari Not Showing in Spotlight Search?
Safari may not appear or show up in Spotlight Search for various reasons. This may include incorrect search queries, database issues, problems with Spotlight index, and more. Below, we have added tried and tested methods to bring back Safari results in Spotlight Search on Mac. Keep reading.
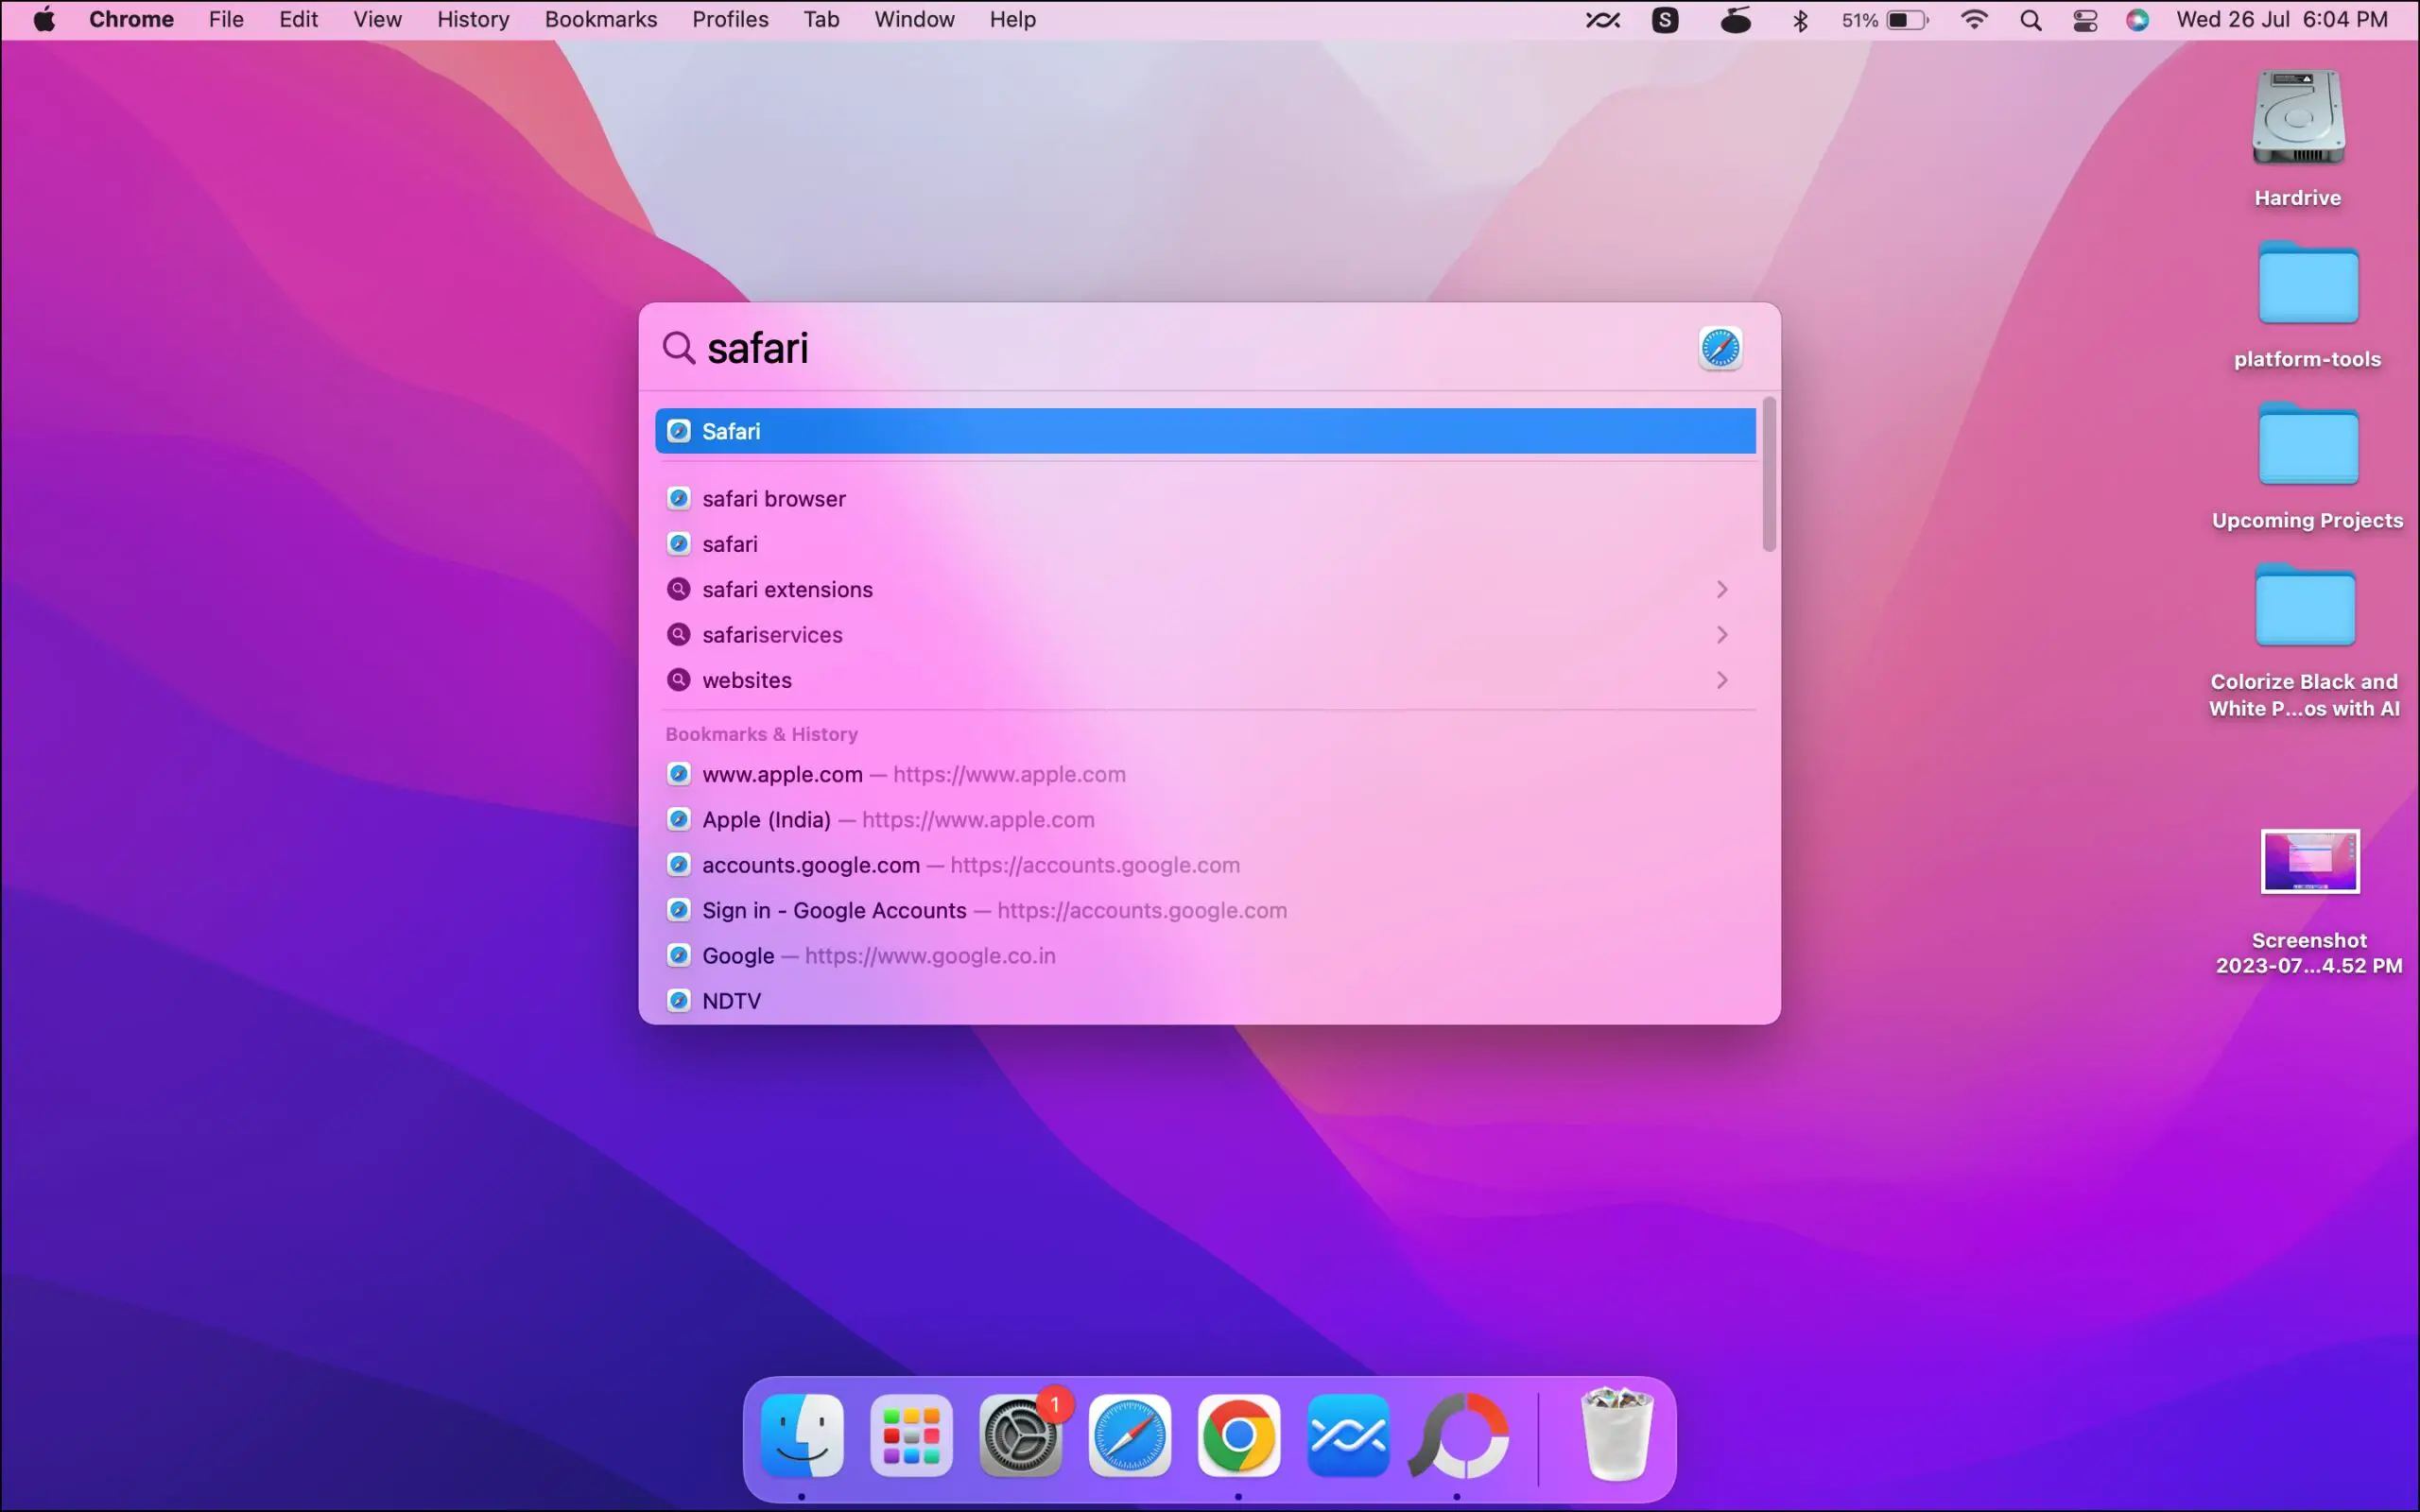
Method 1- Check your Text
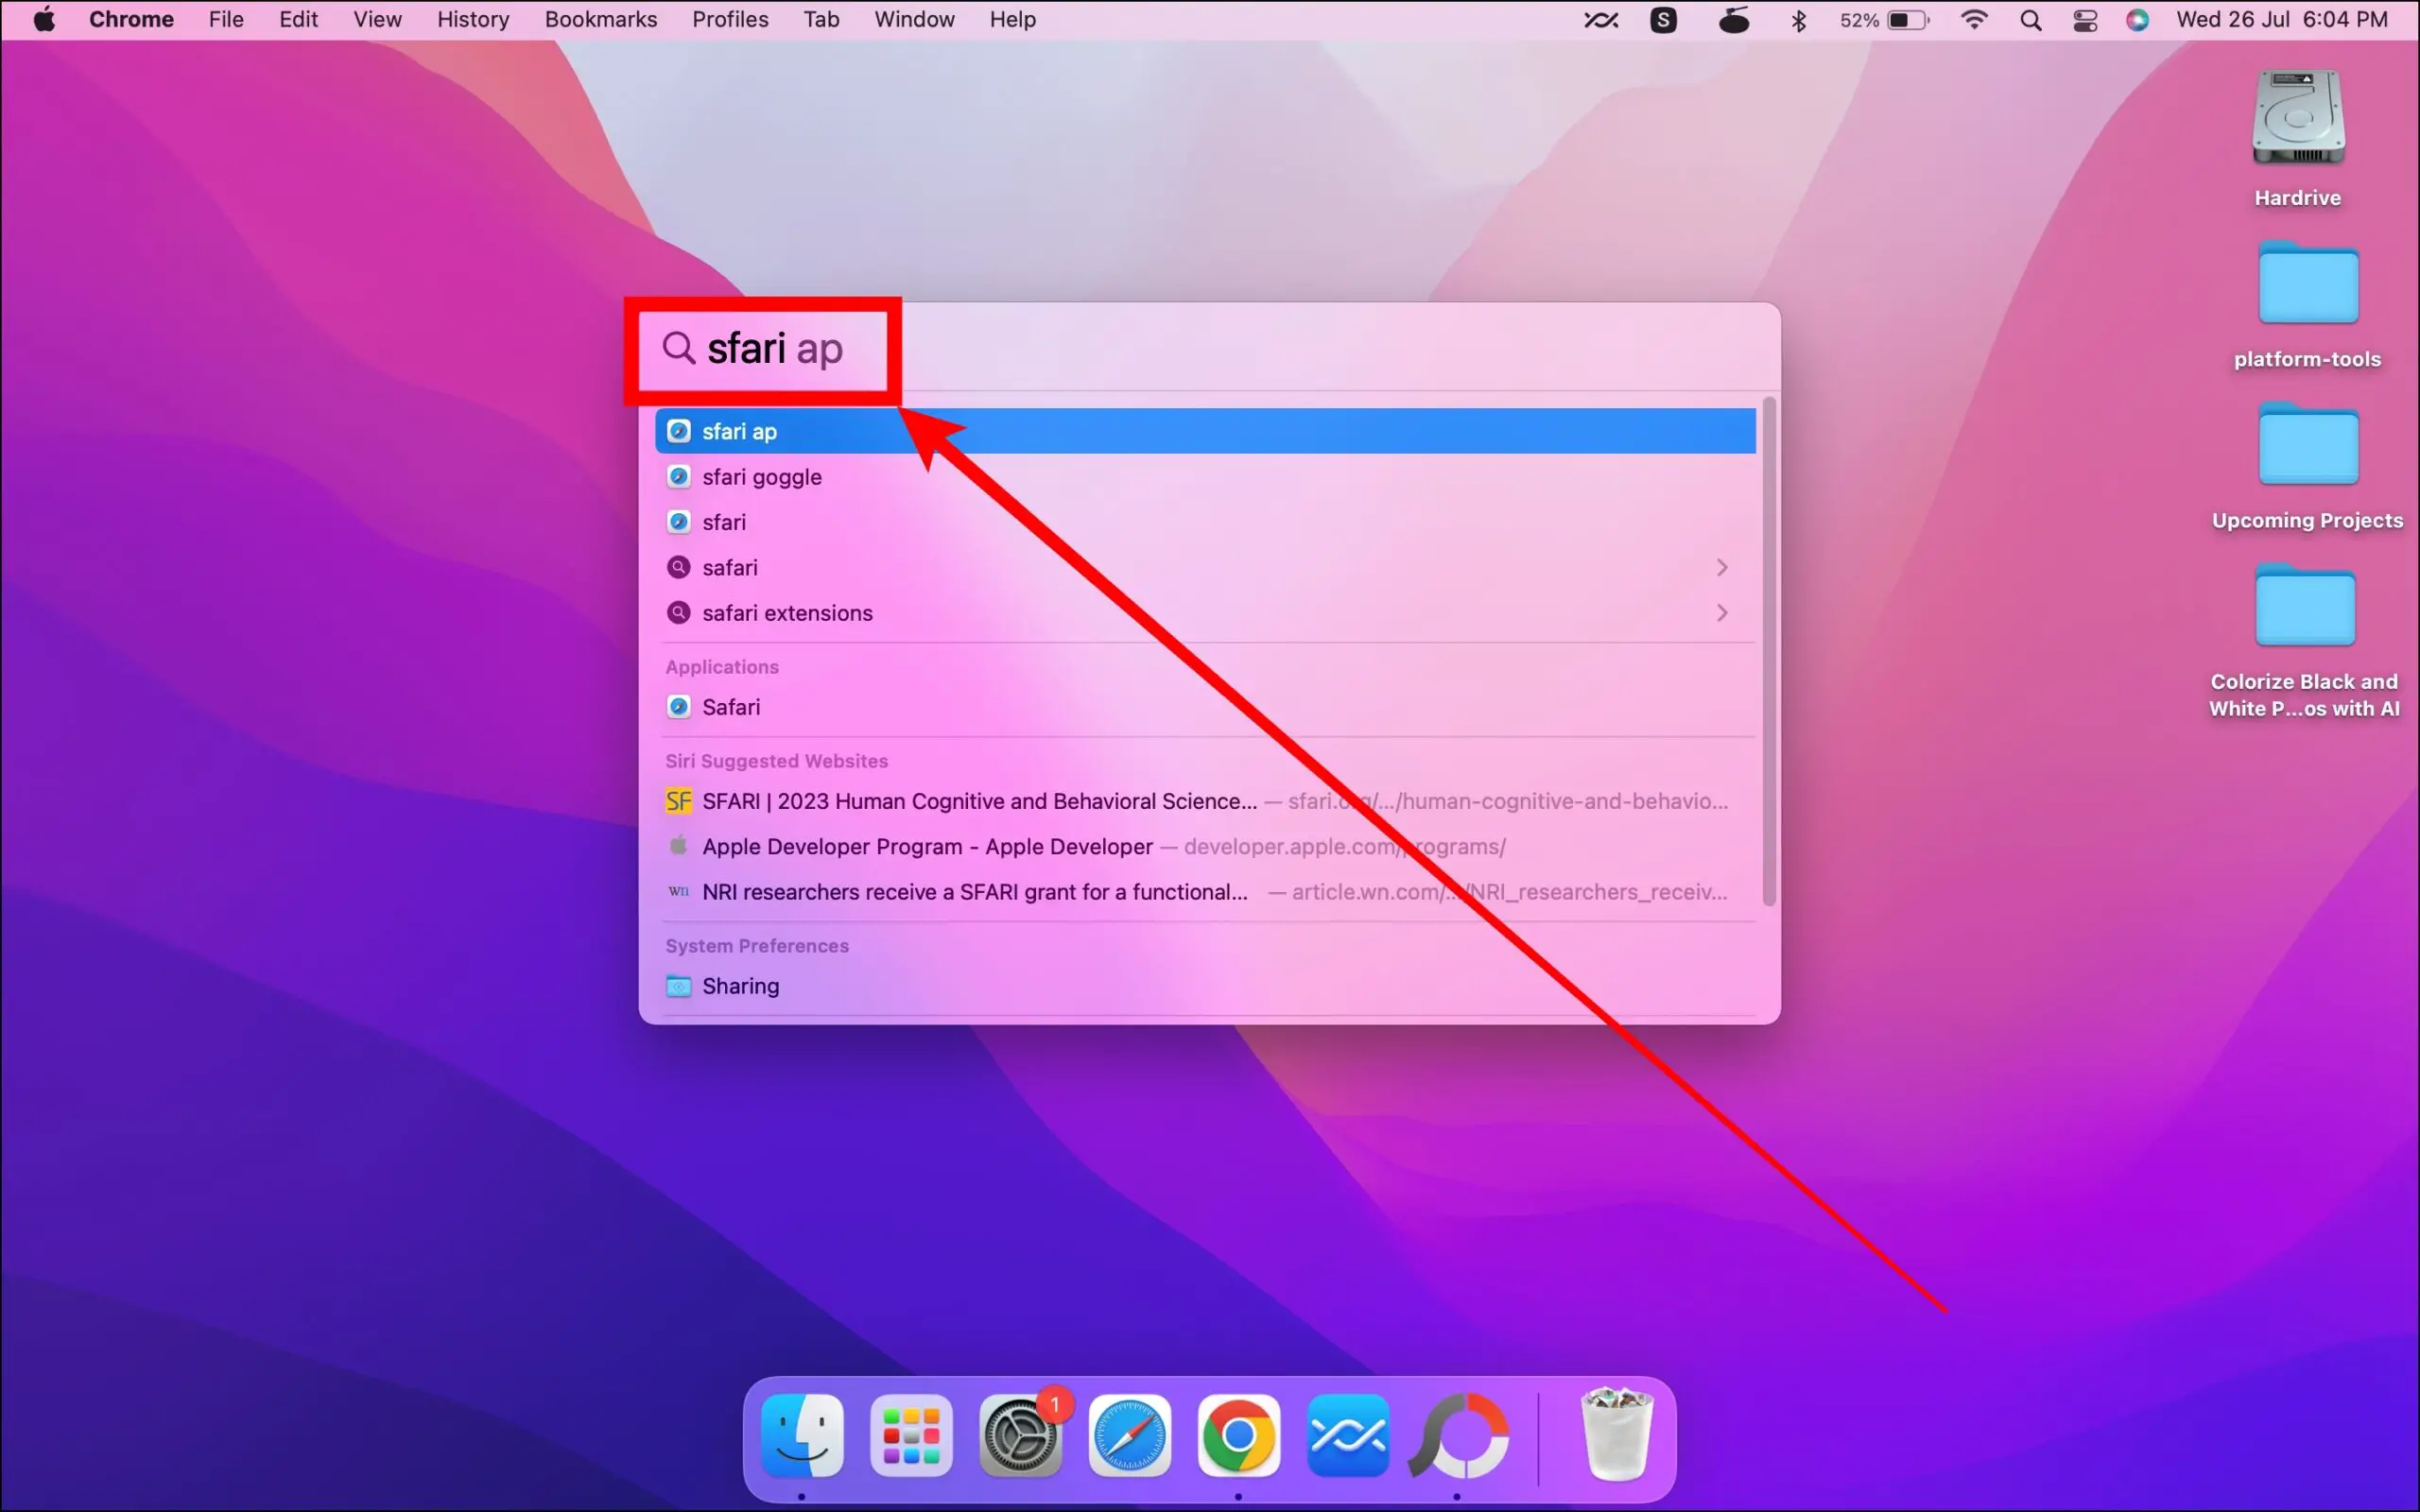
If the Spotlight Search does not show Safari in the results, ensure you have not made any typing mistakes in the search. To receive the right results, type the keywords accurately. By reviewing your typing and ensuring accuracy, you increase the chances of Safari appearing in the Spotlight Search results.
Method 2- Add the Applications Folder to Spotlight Search
If you are having trouble with Safari or another application, it is possible that the Applications folder is being eliminated from your Spotlight search. Here’s how you can check and include it in your Spotlight search:
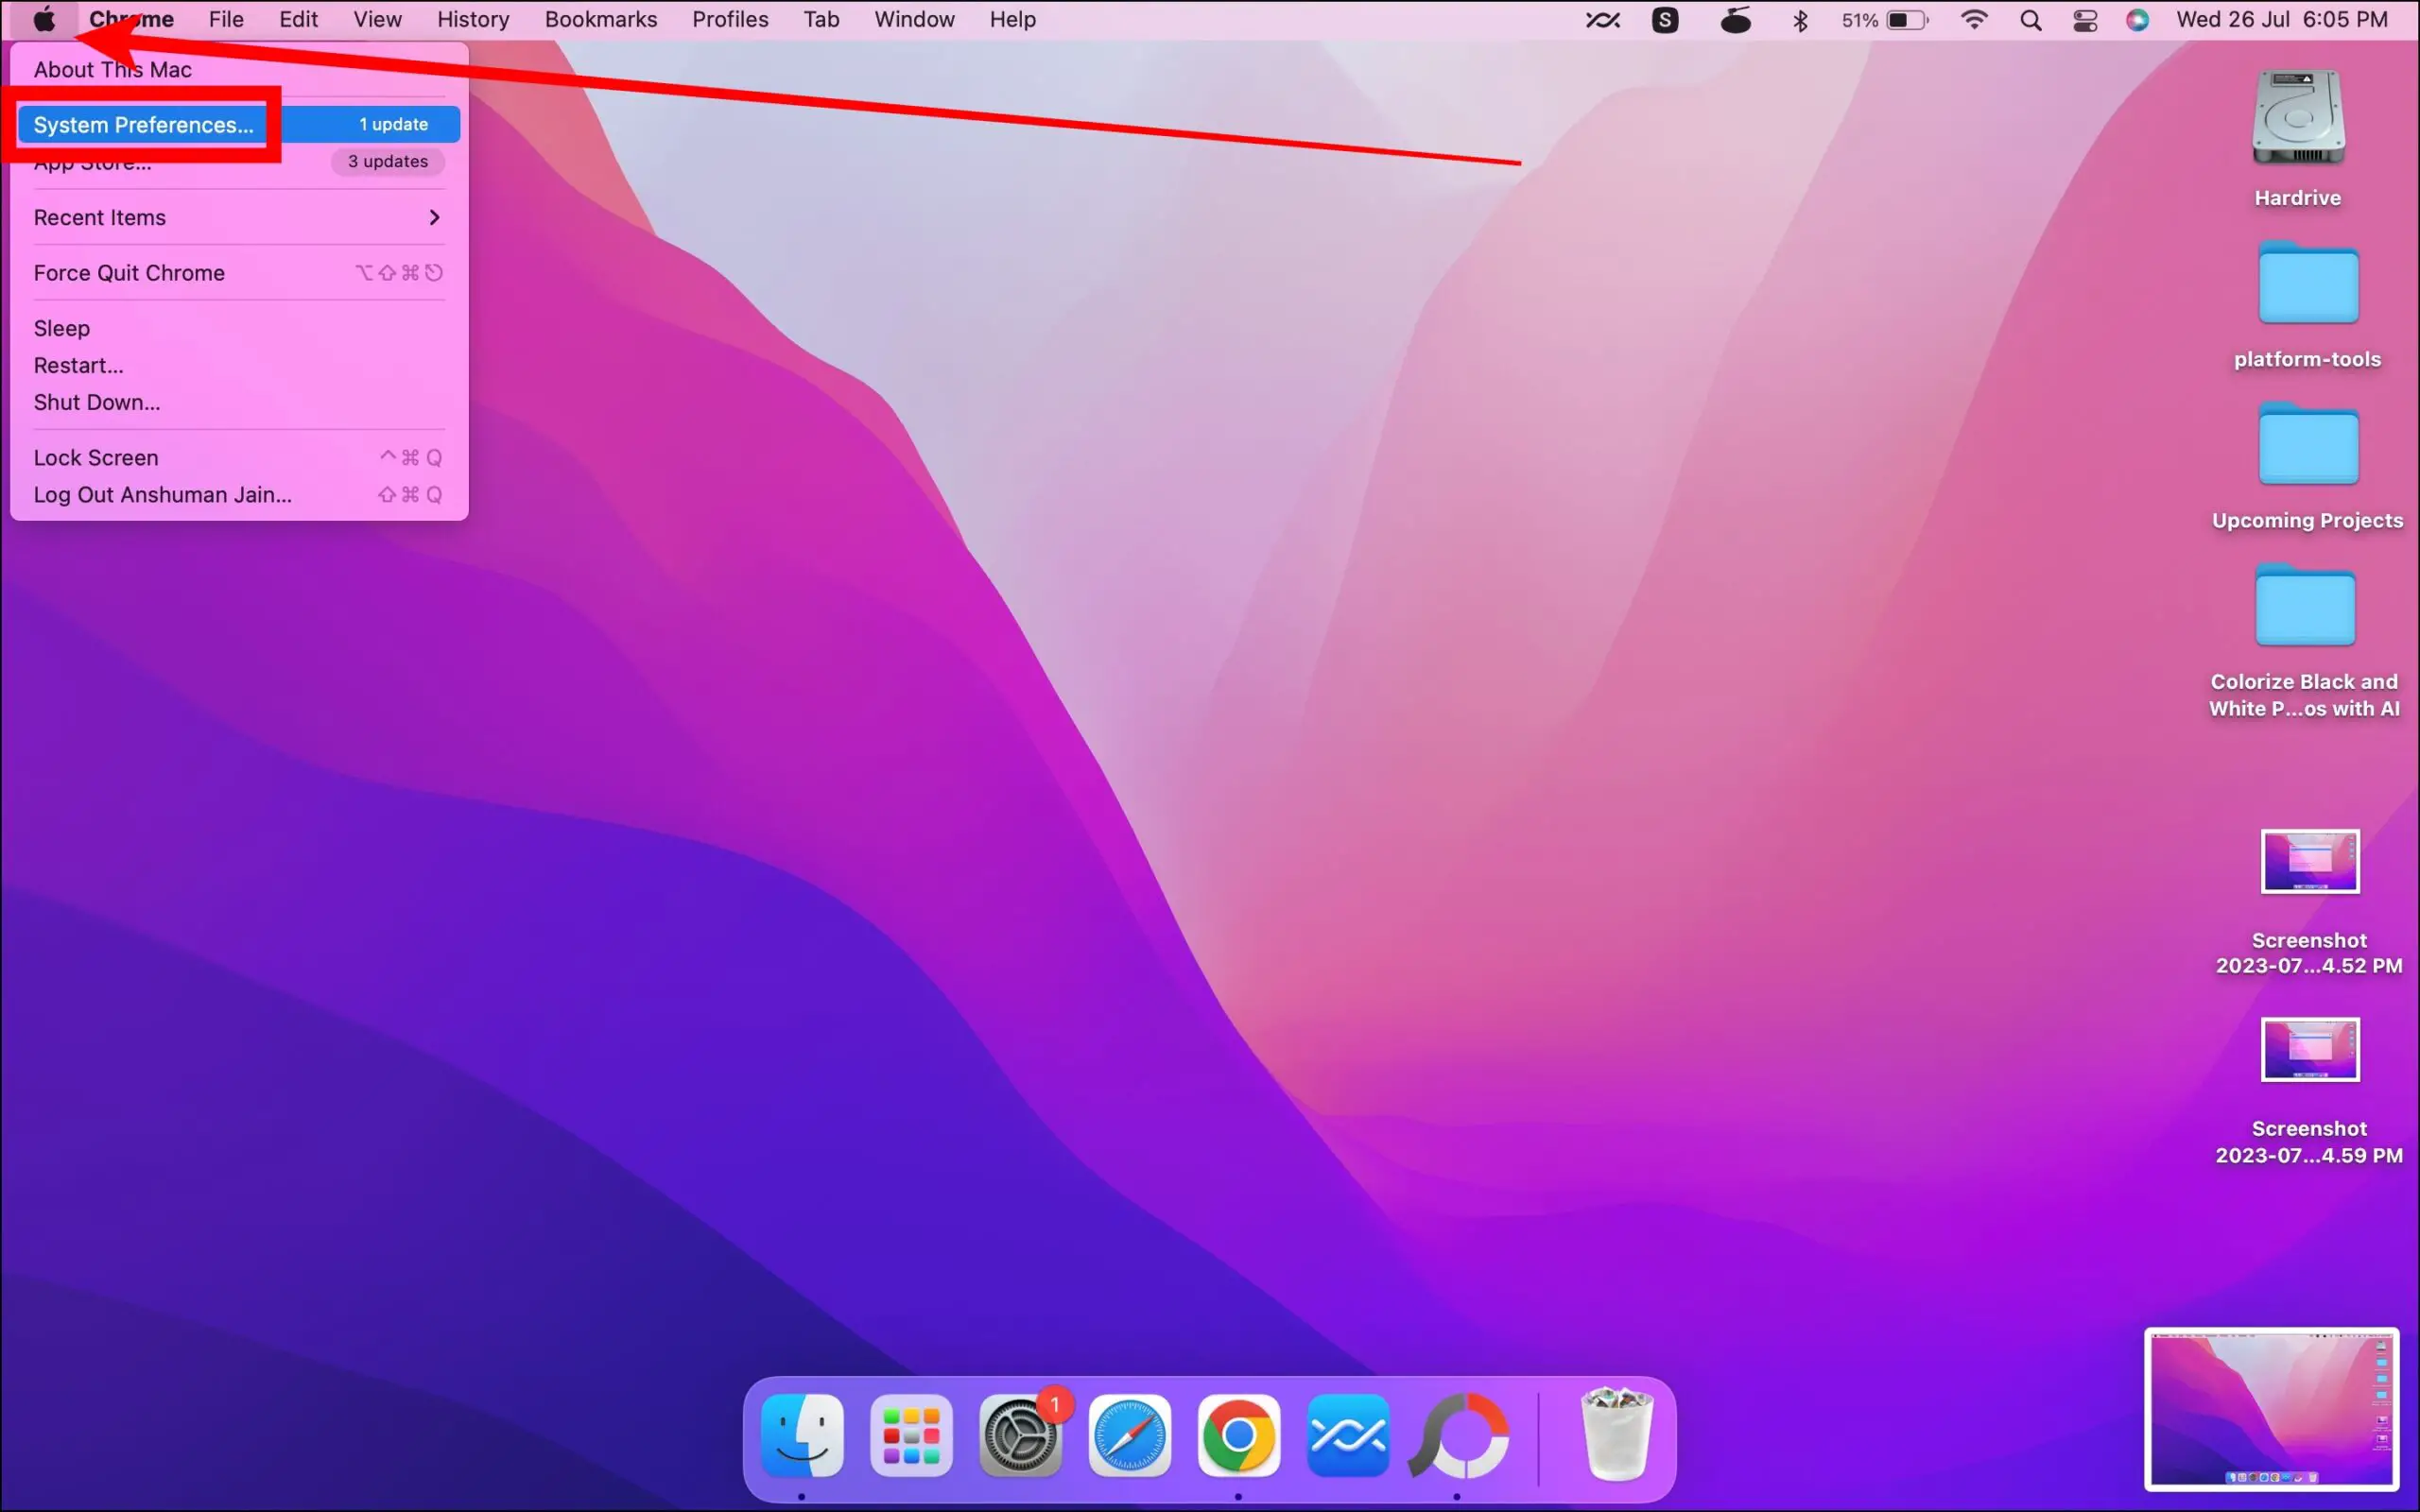
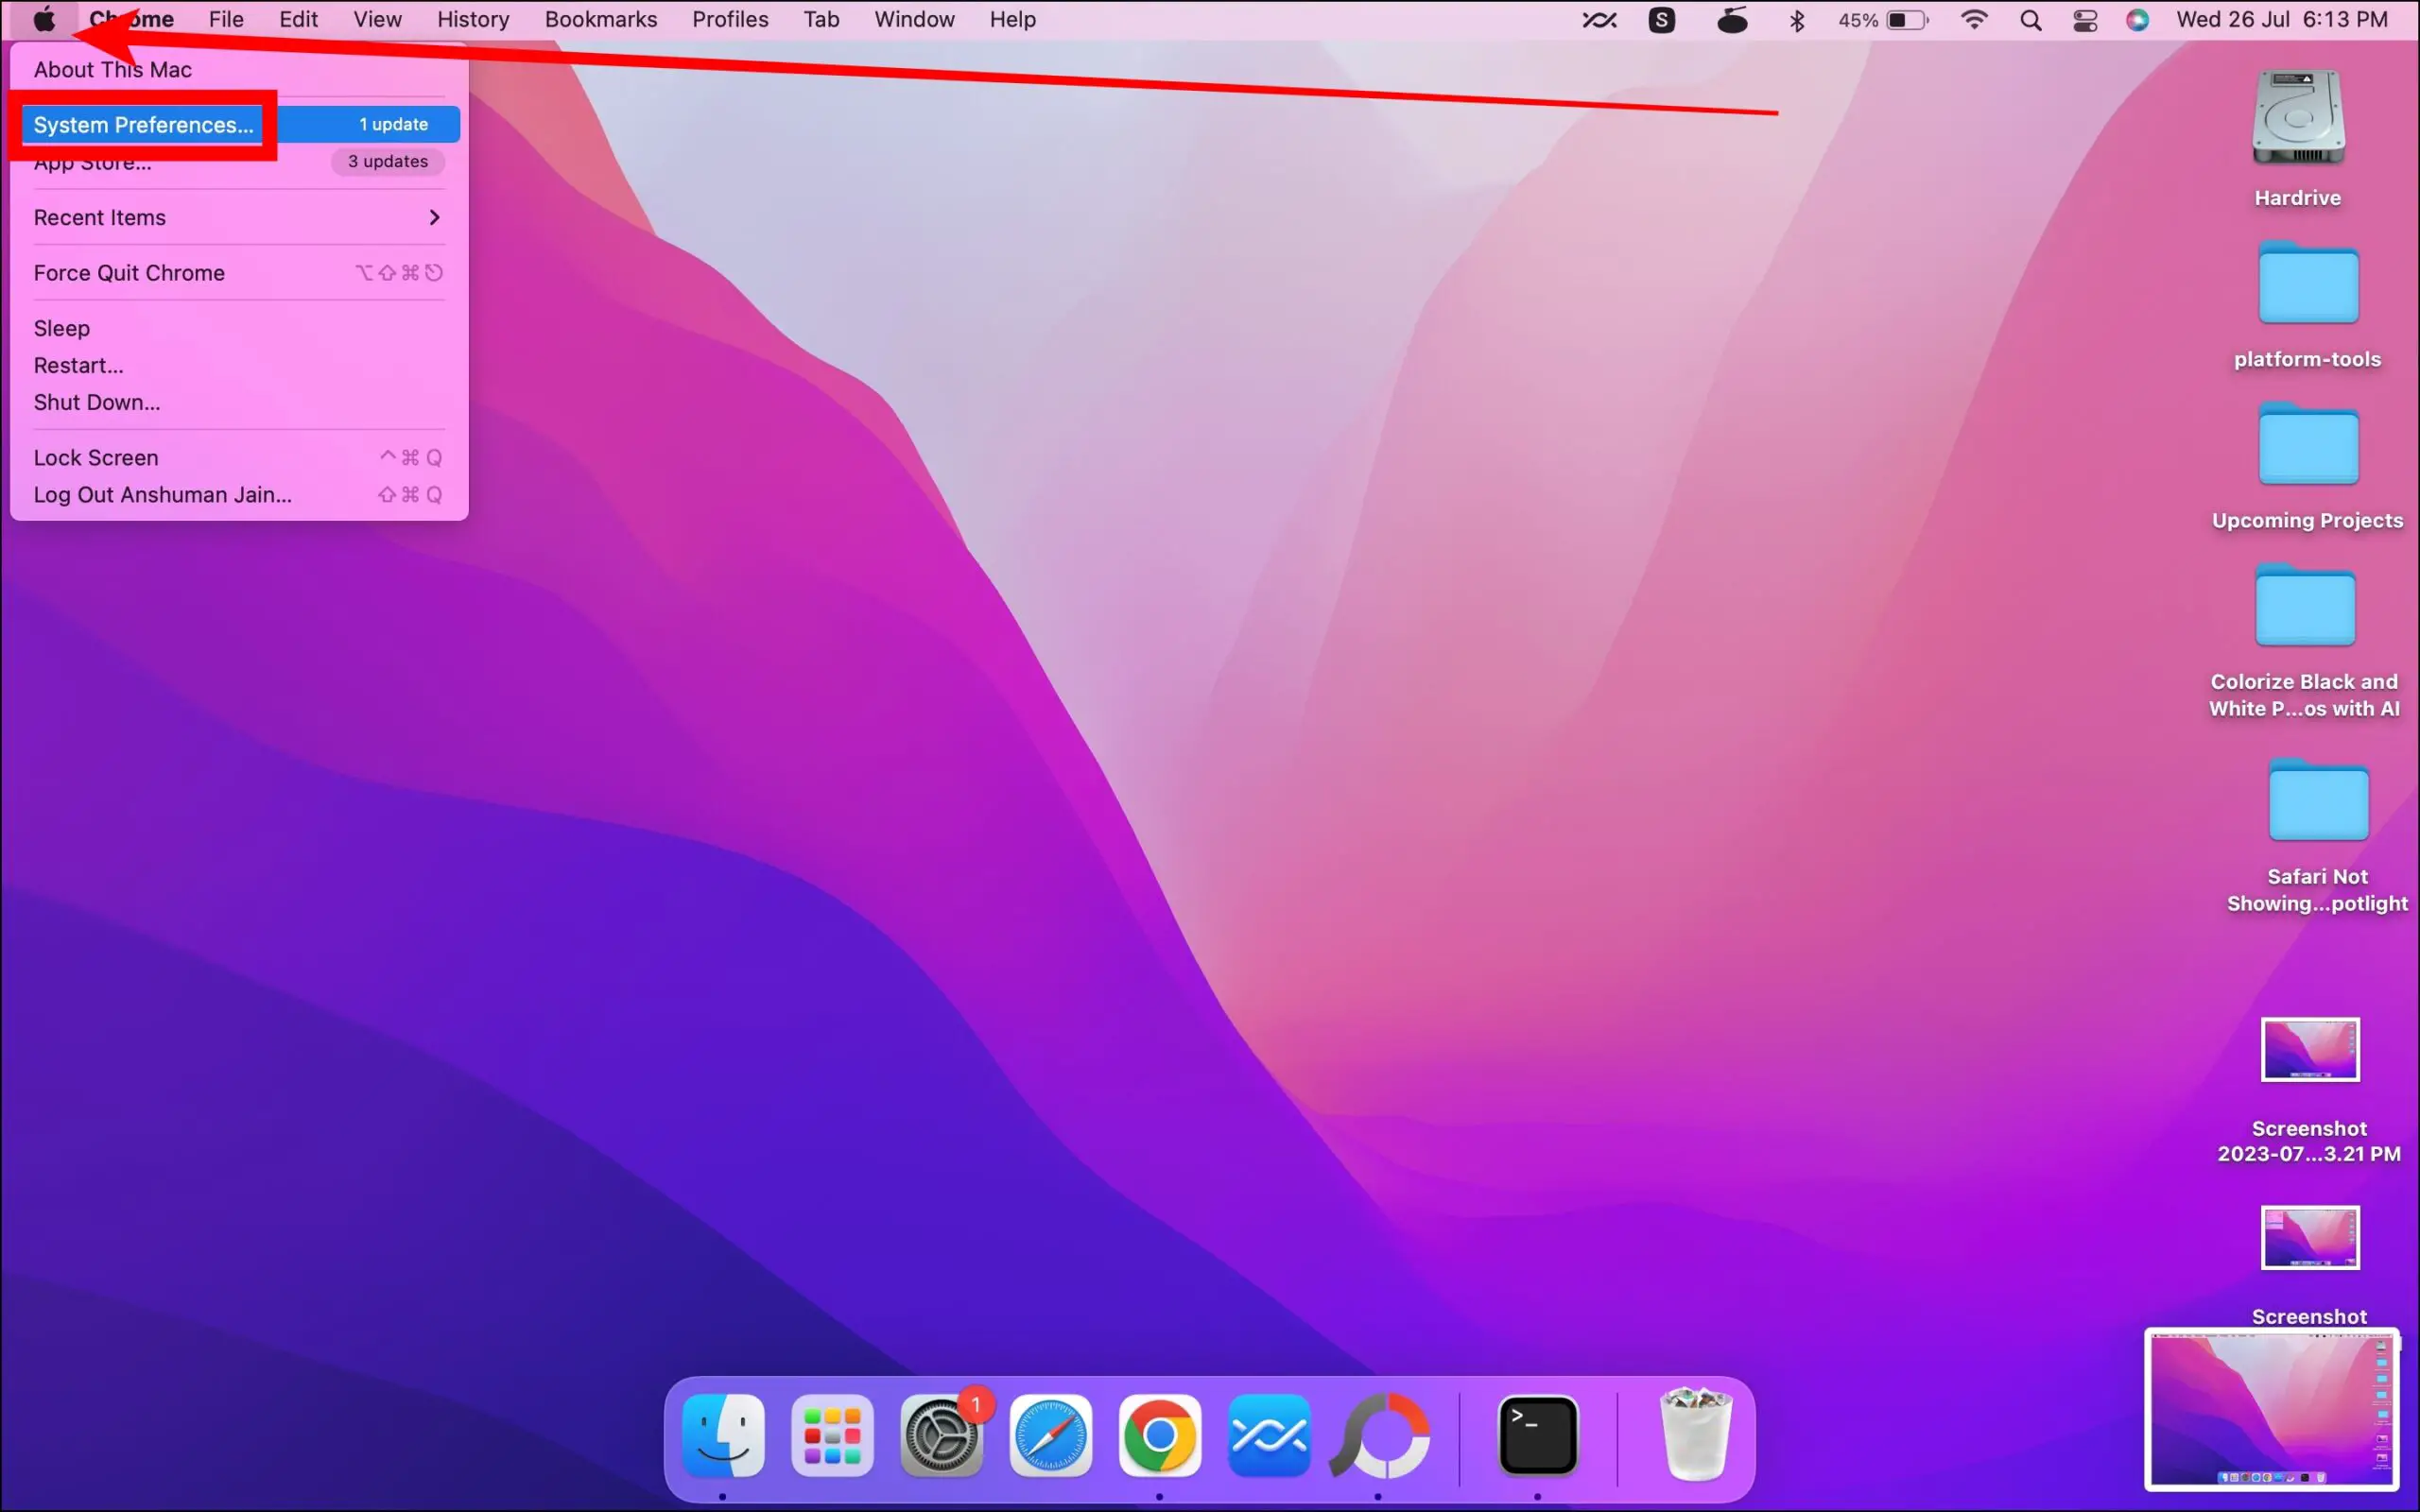
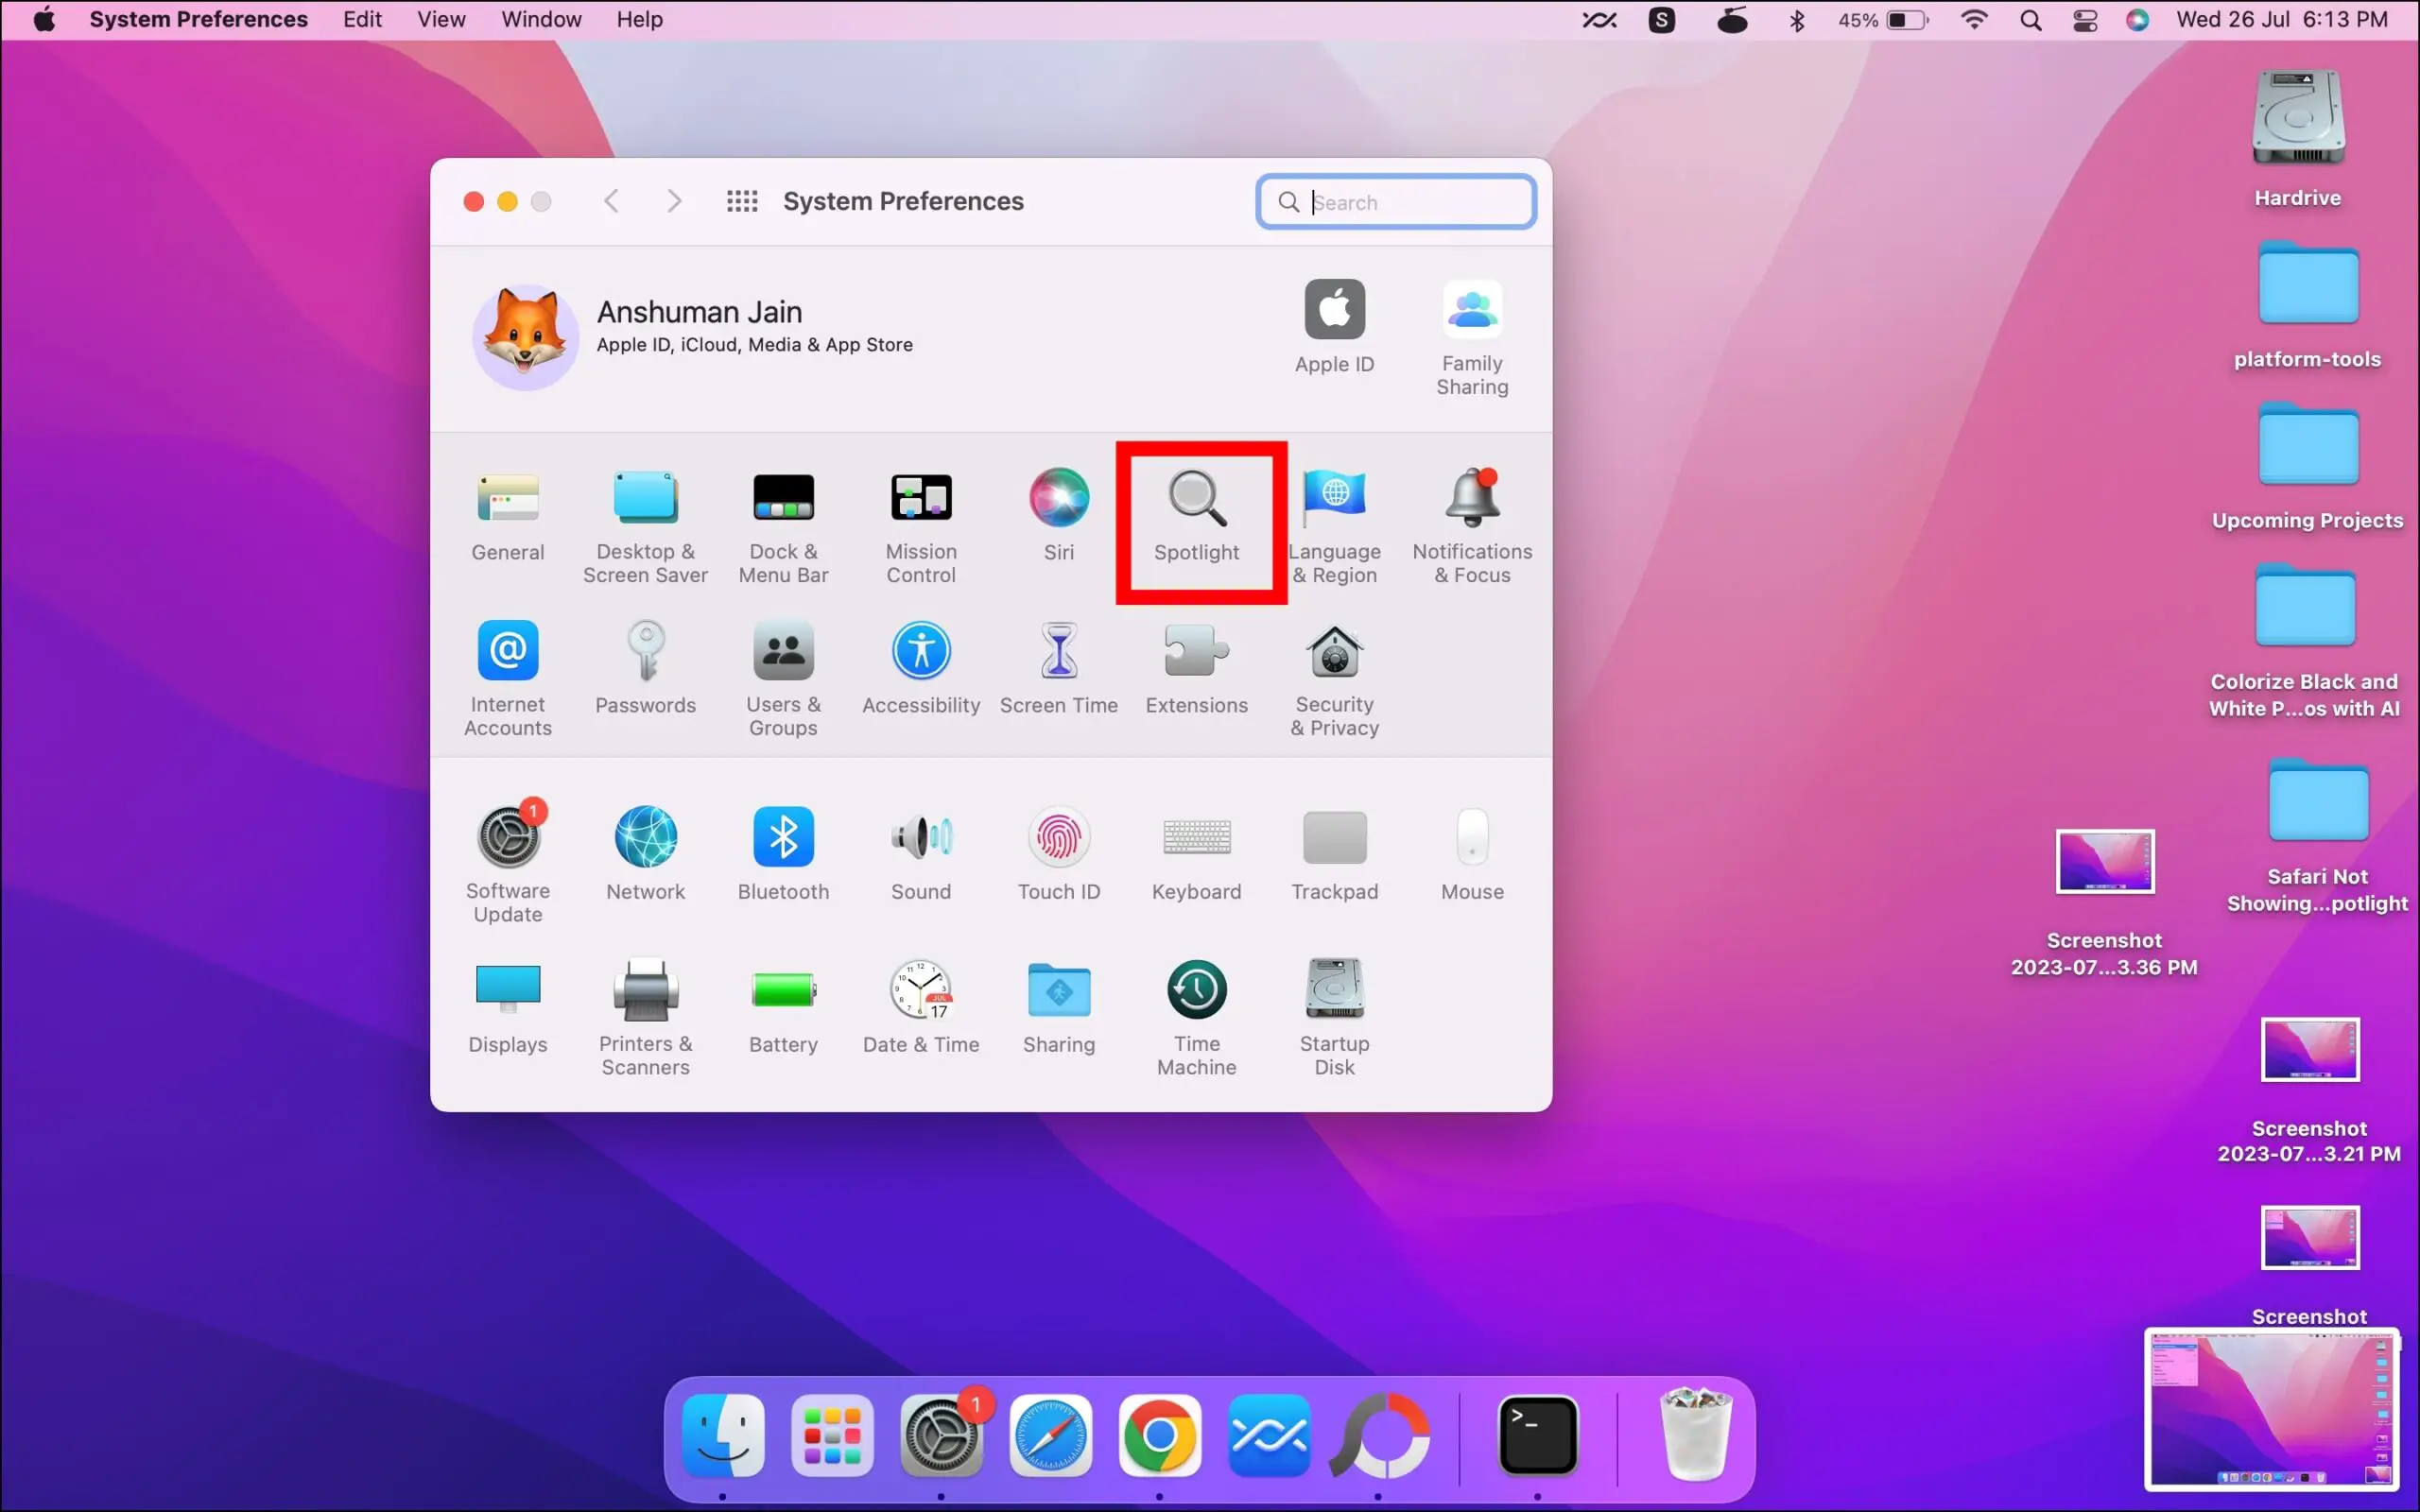
Step 1: Click on the Apple logo at the top-left corner.
Step 2: Select System Preferences from the menu that appears.
Step 3: Tap on Spotlight.
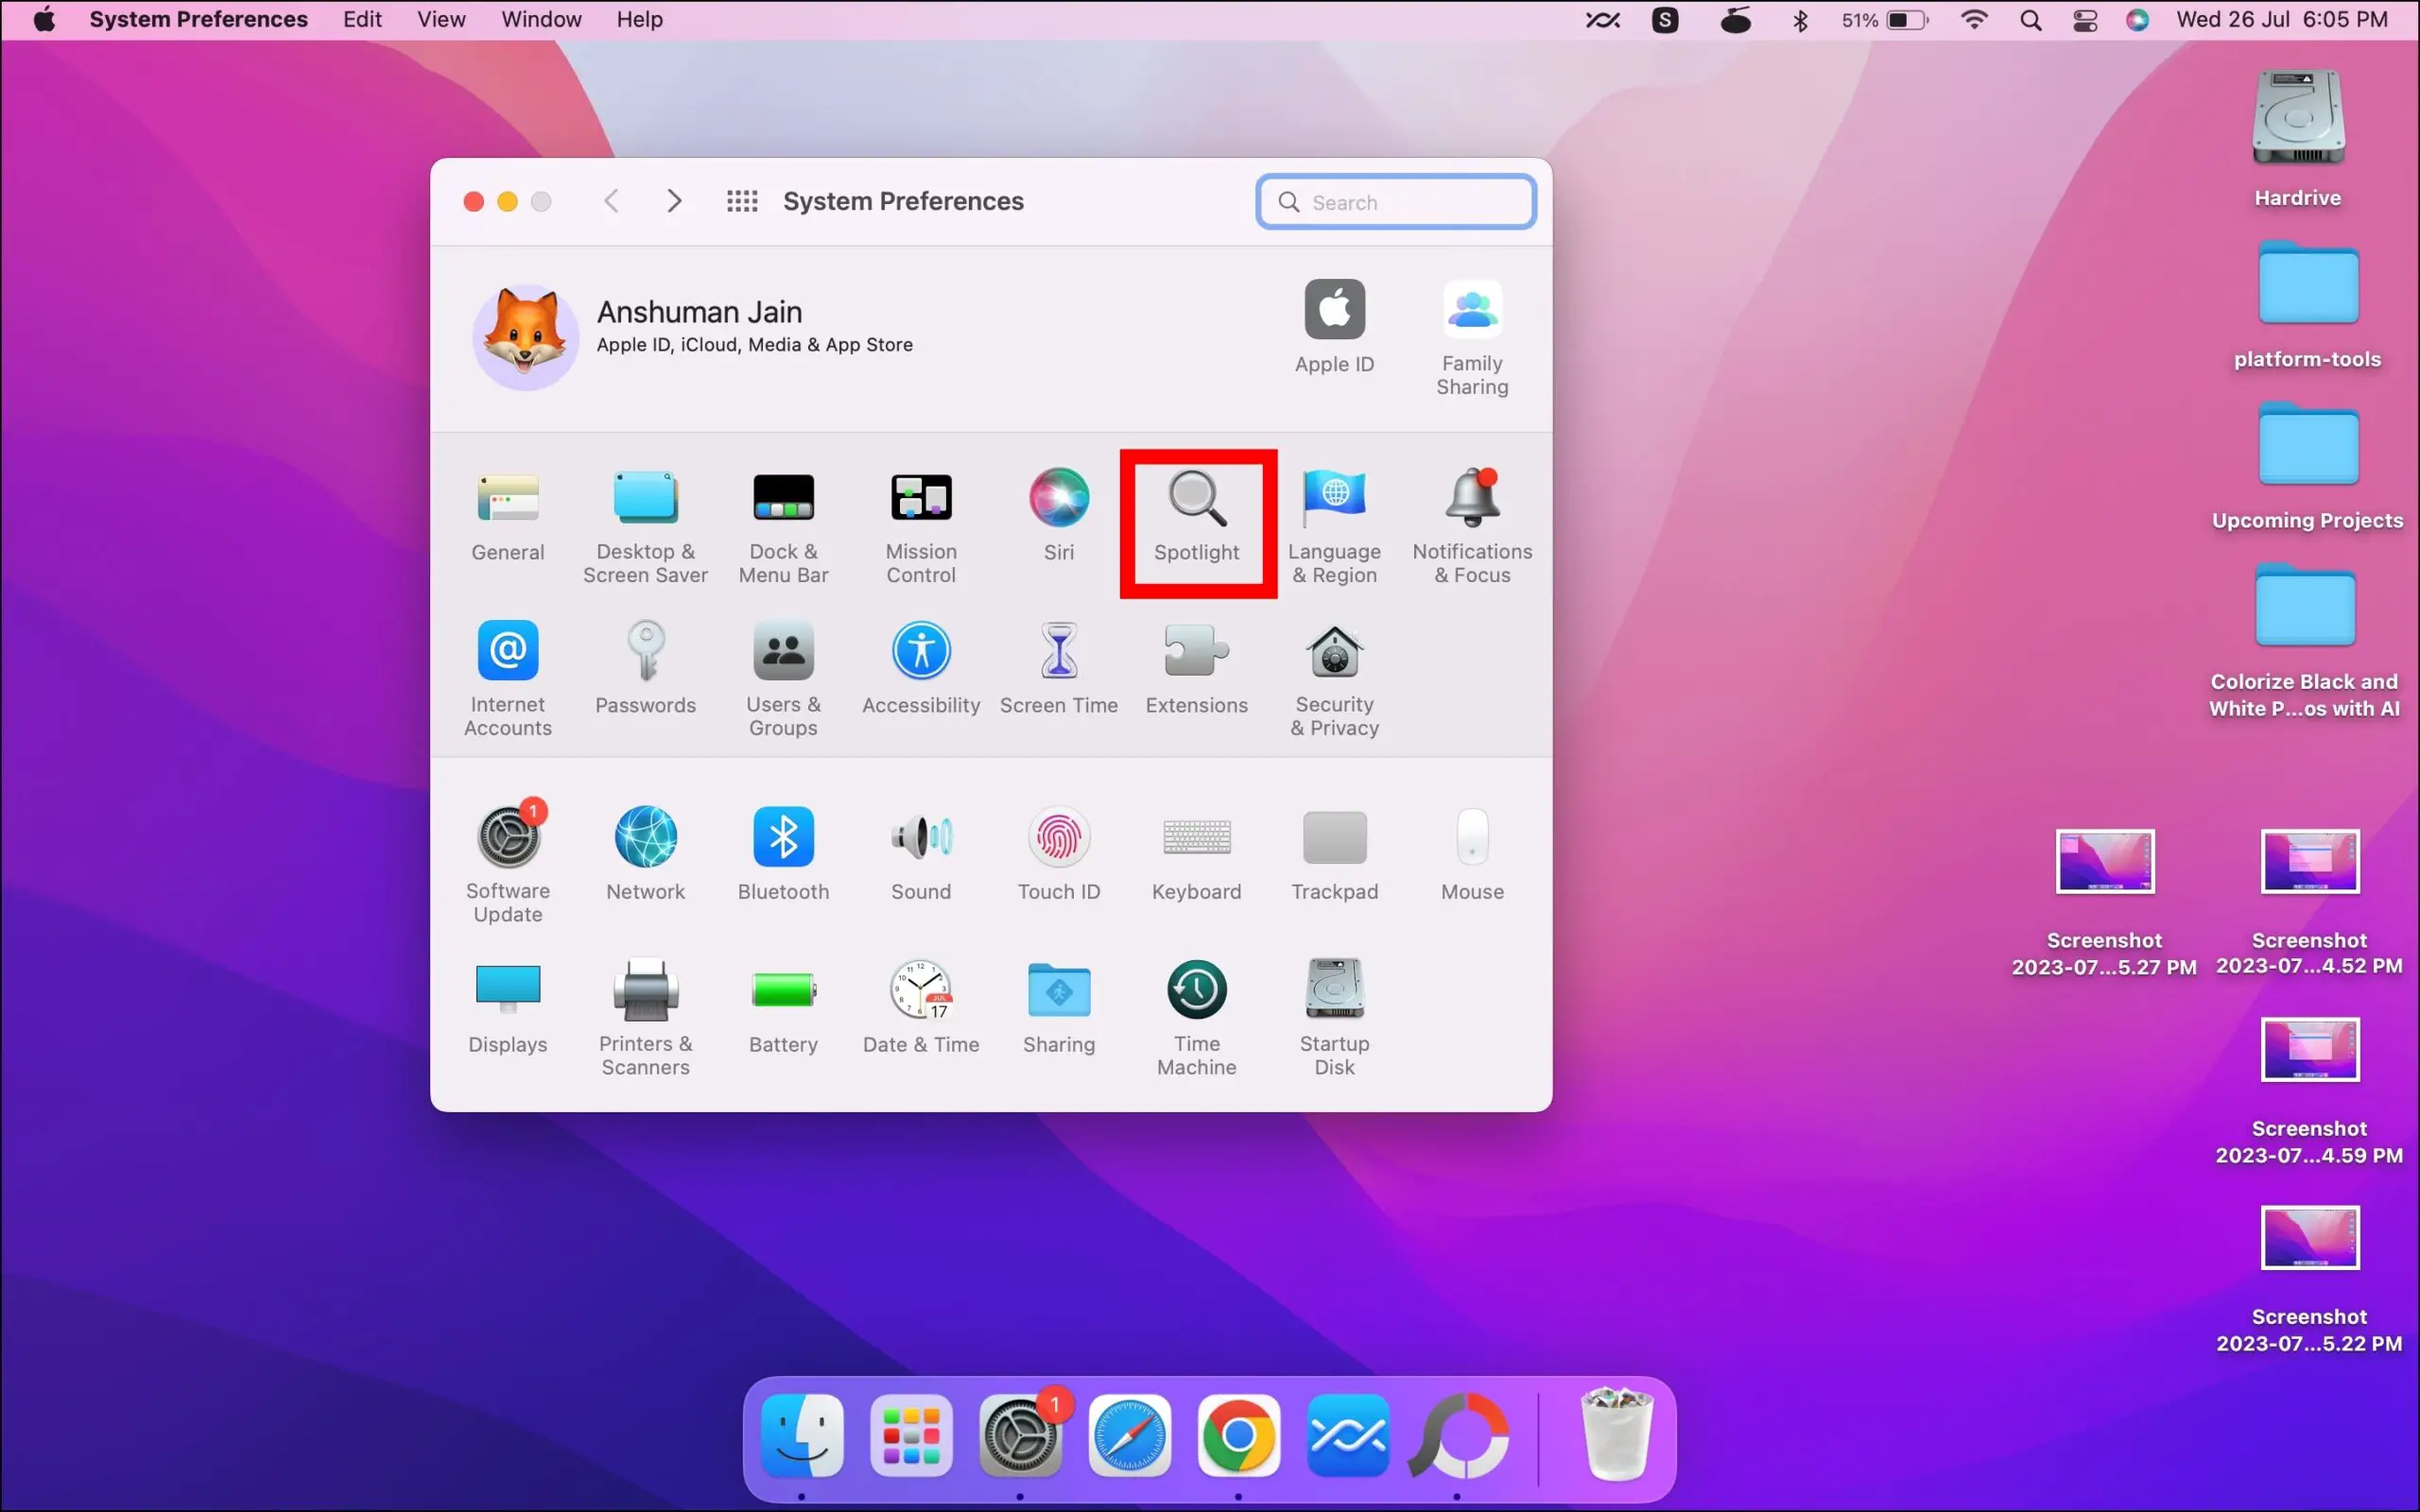
Step 4: Select the checkbox for Applications under the Search Results section.

Once you do, Safari will show up in the Spotlight search results as the app is inside the Applications folder.
Method 3- Reset the Launch Services database
You can also try resetting the launch services data, which has helped many users show Safari in Spotlight searches. Here’s how you can reset it:
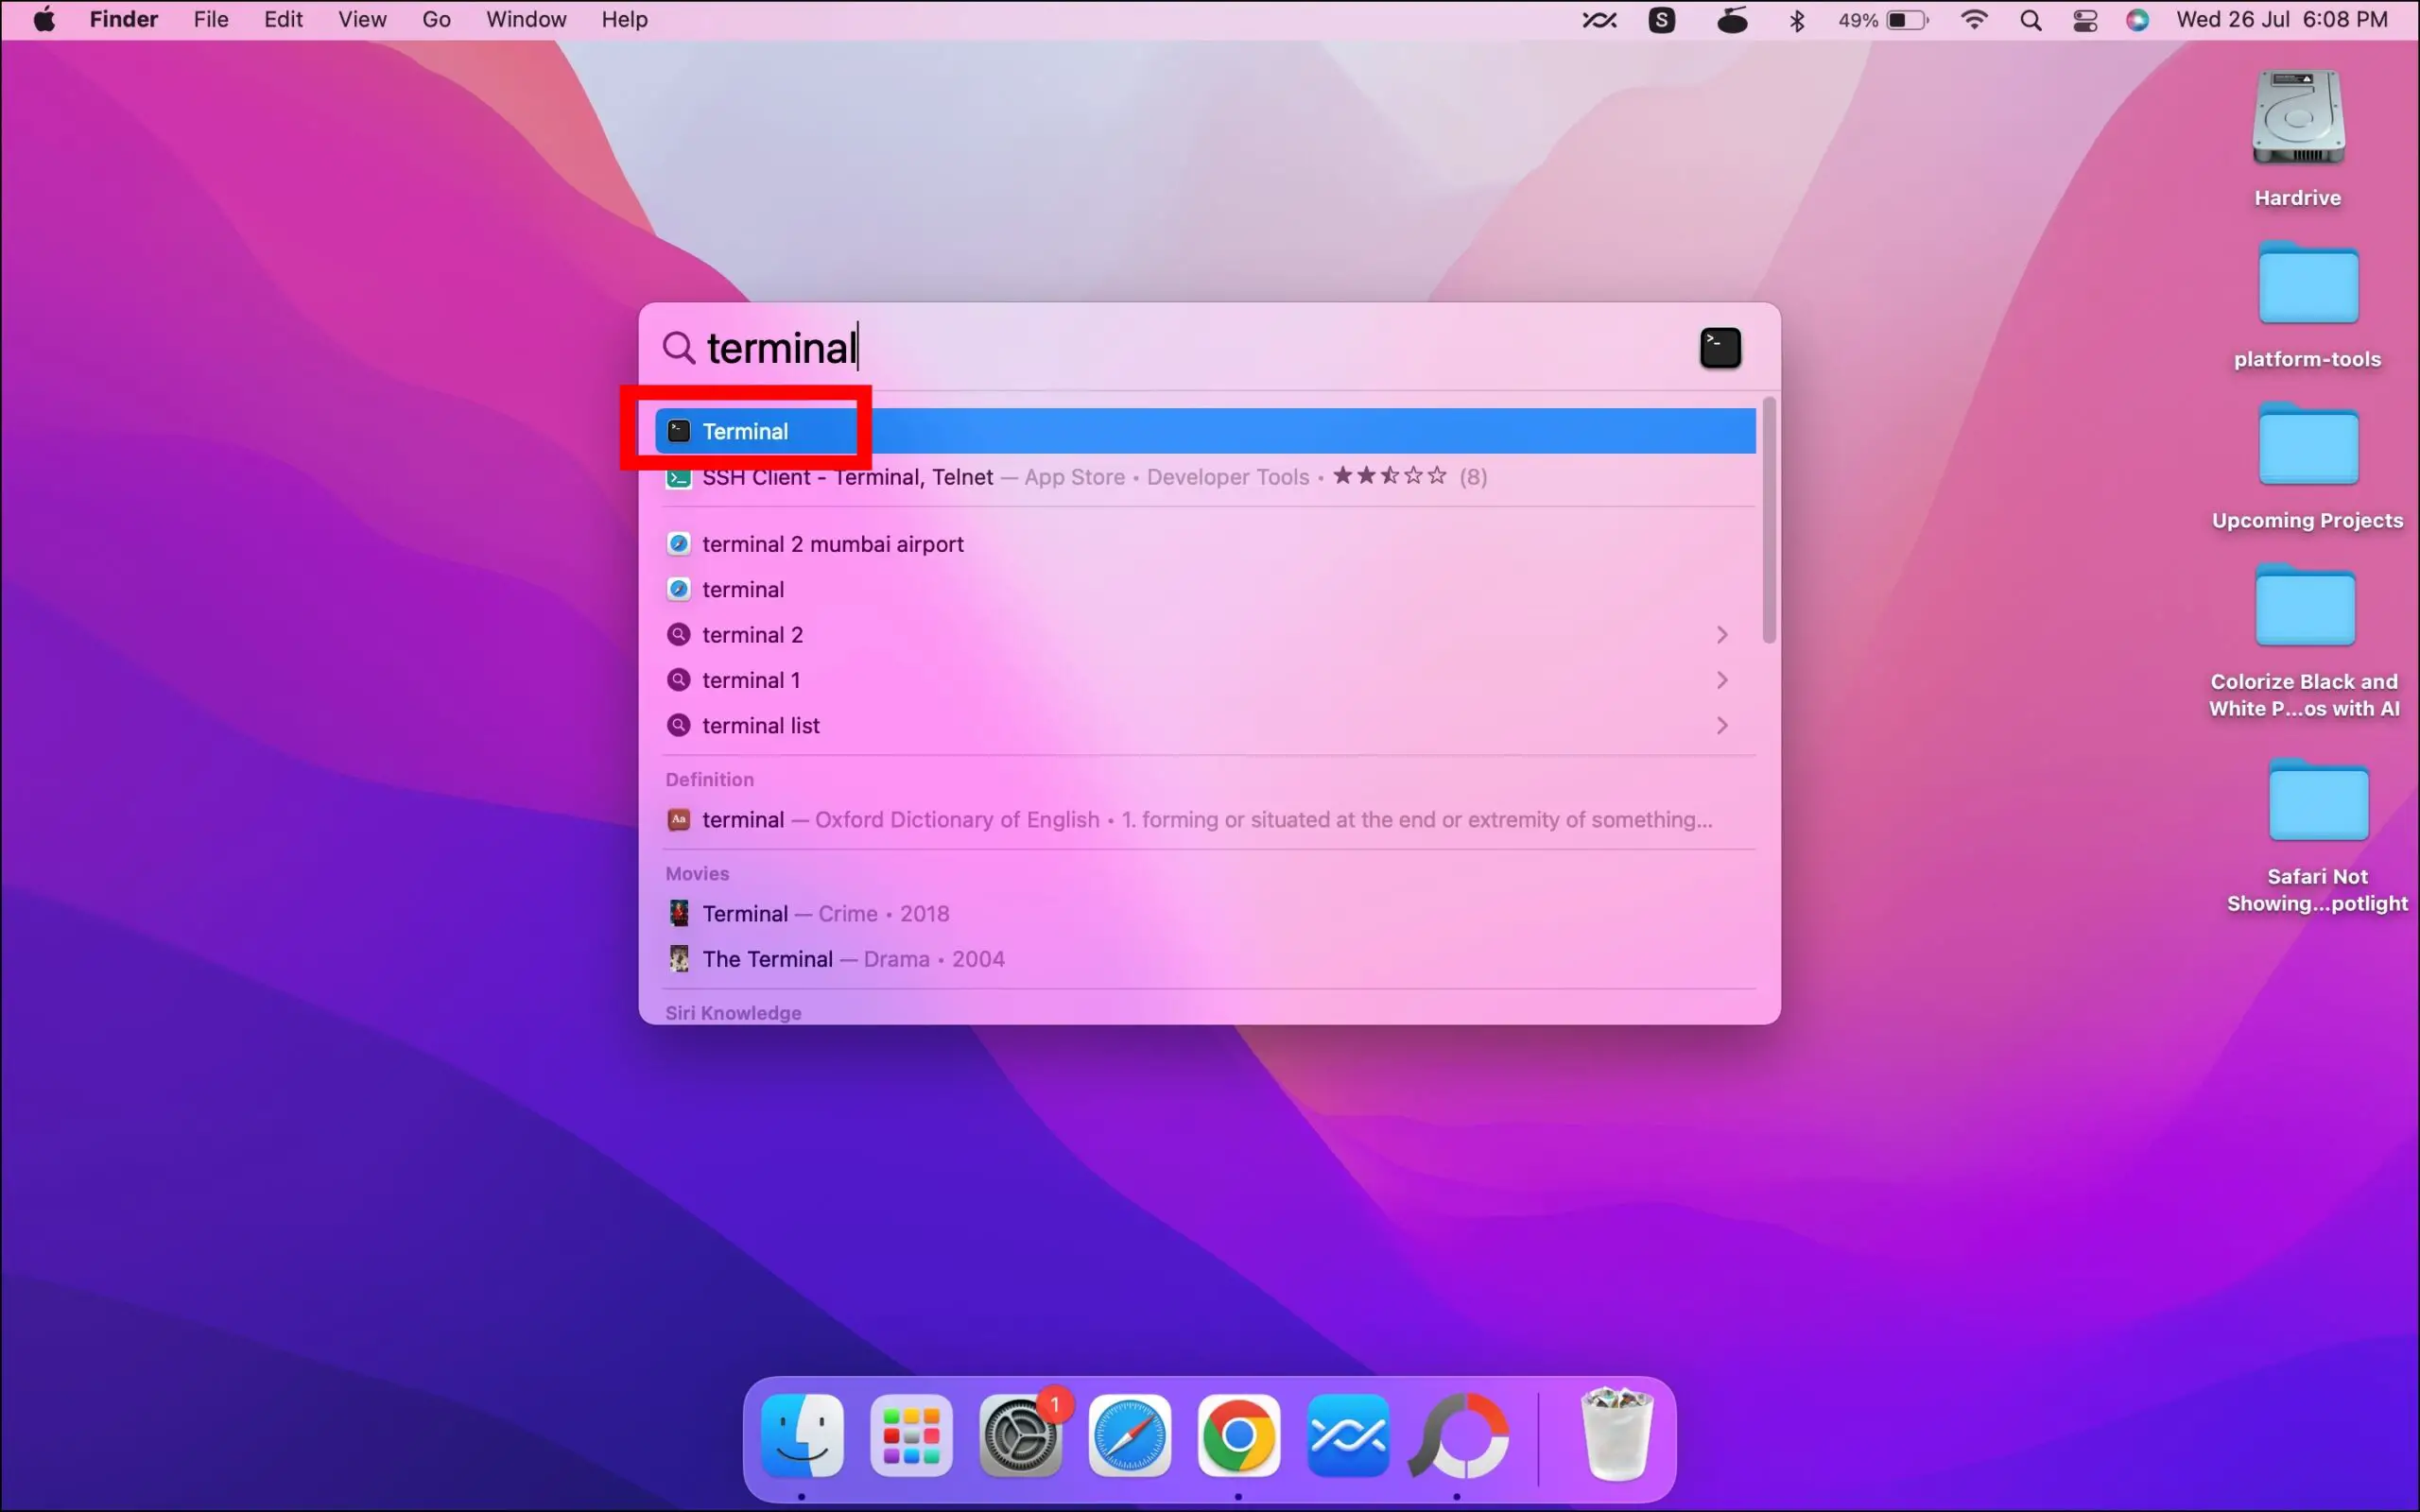
Step 1: Open the Terminal emulator on your Mac computer.
Step 2: Type /System/Library/Frameworks/CoreServices.framework/Versions/A/Frameworks/LaunchServices.framework/Versions/A/Support/lsregister -kill -seed and hit enter.
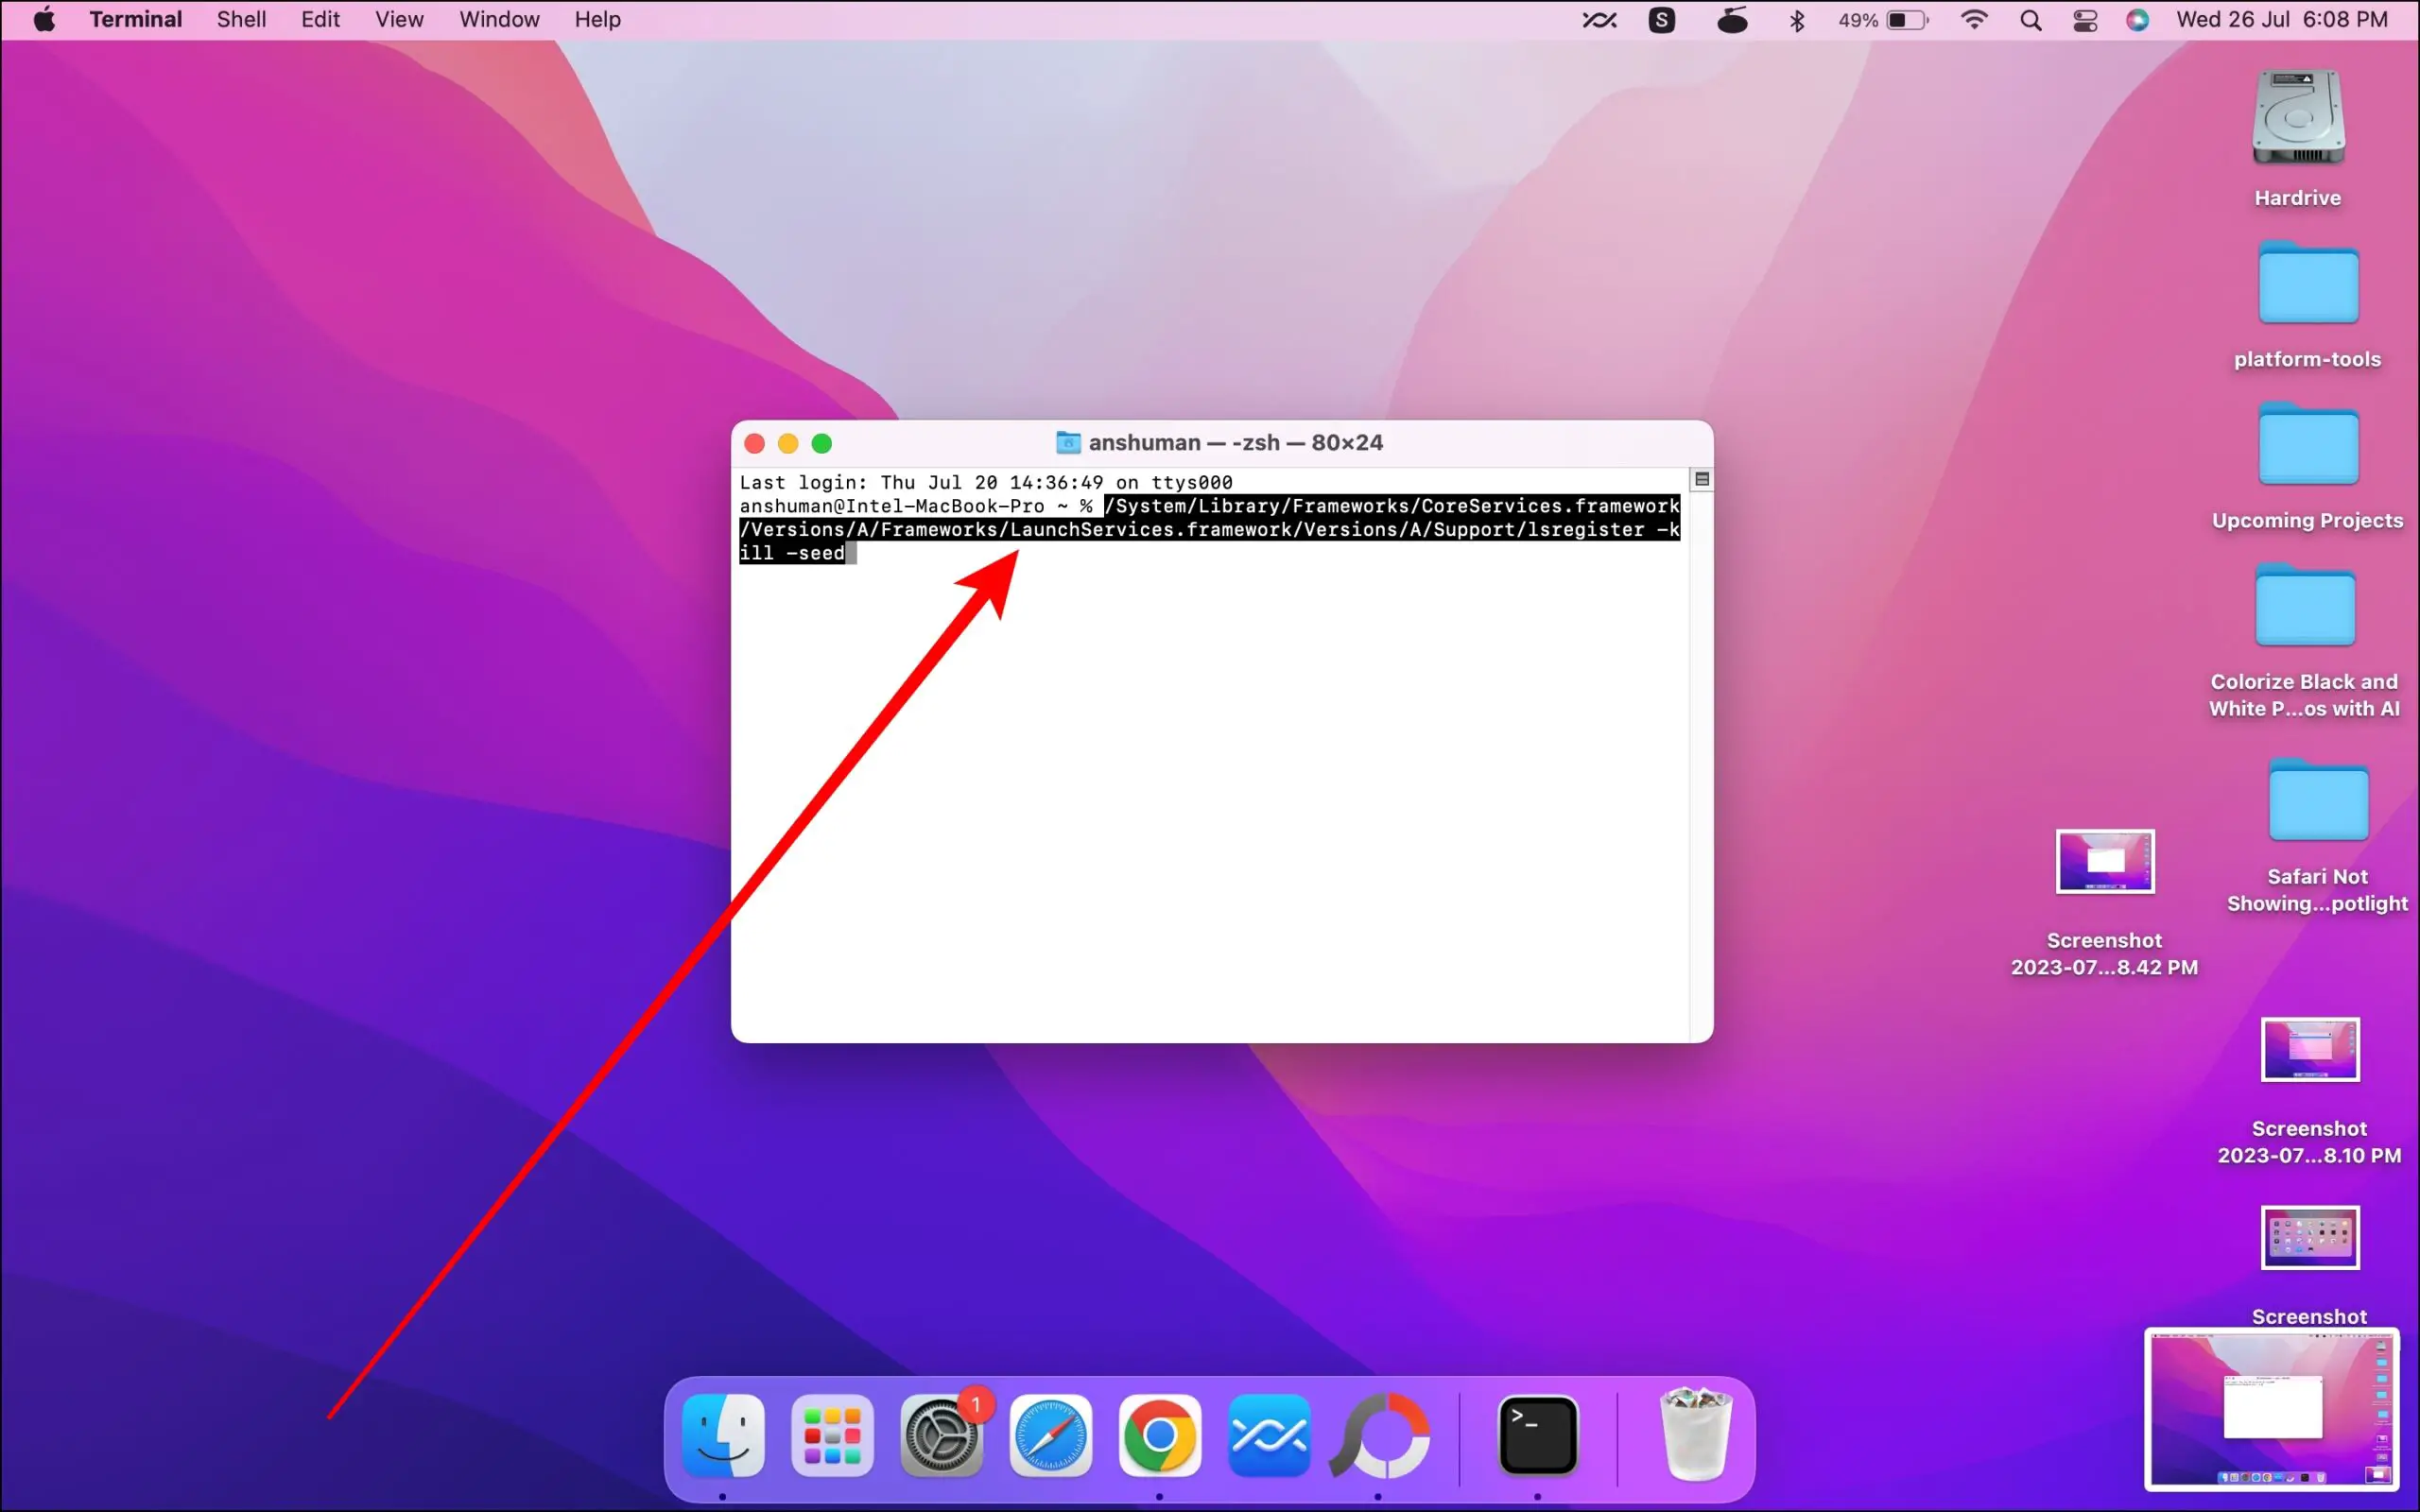
Step 3: Wait for the command to complete, which could take a few minutes.
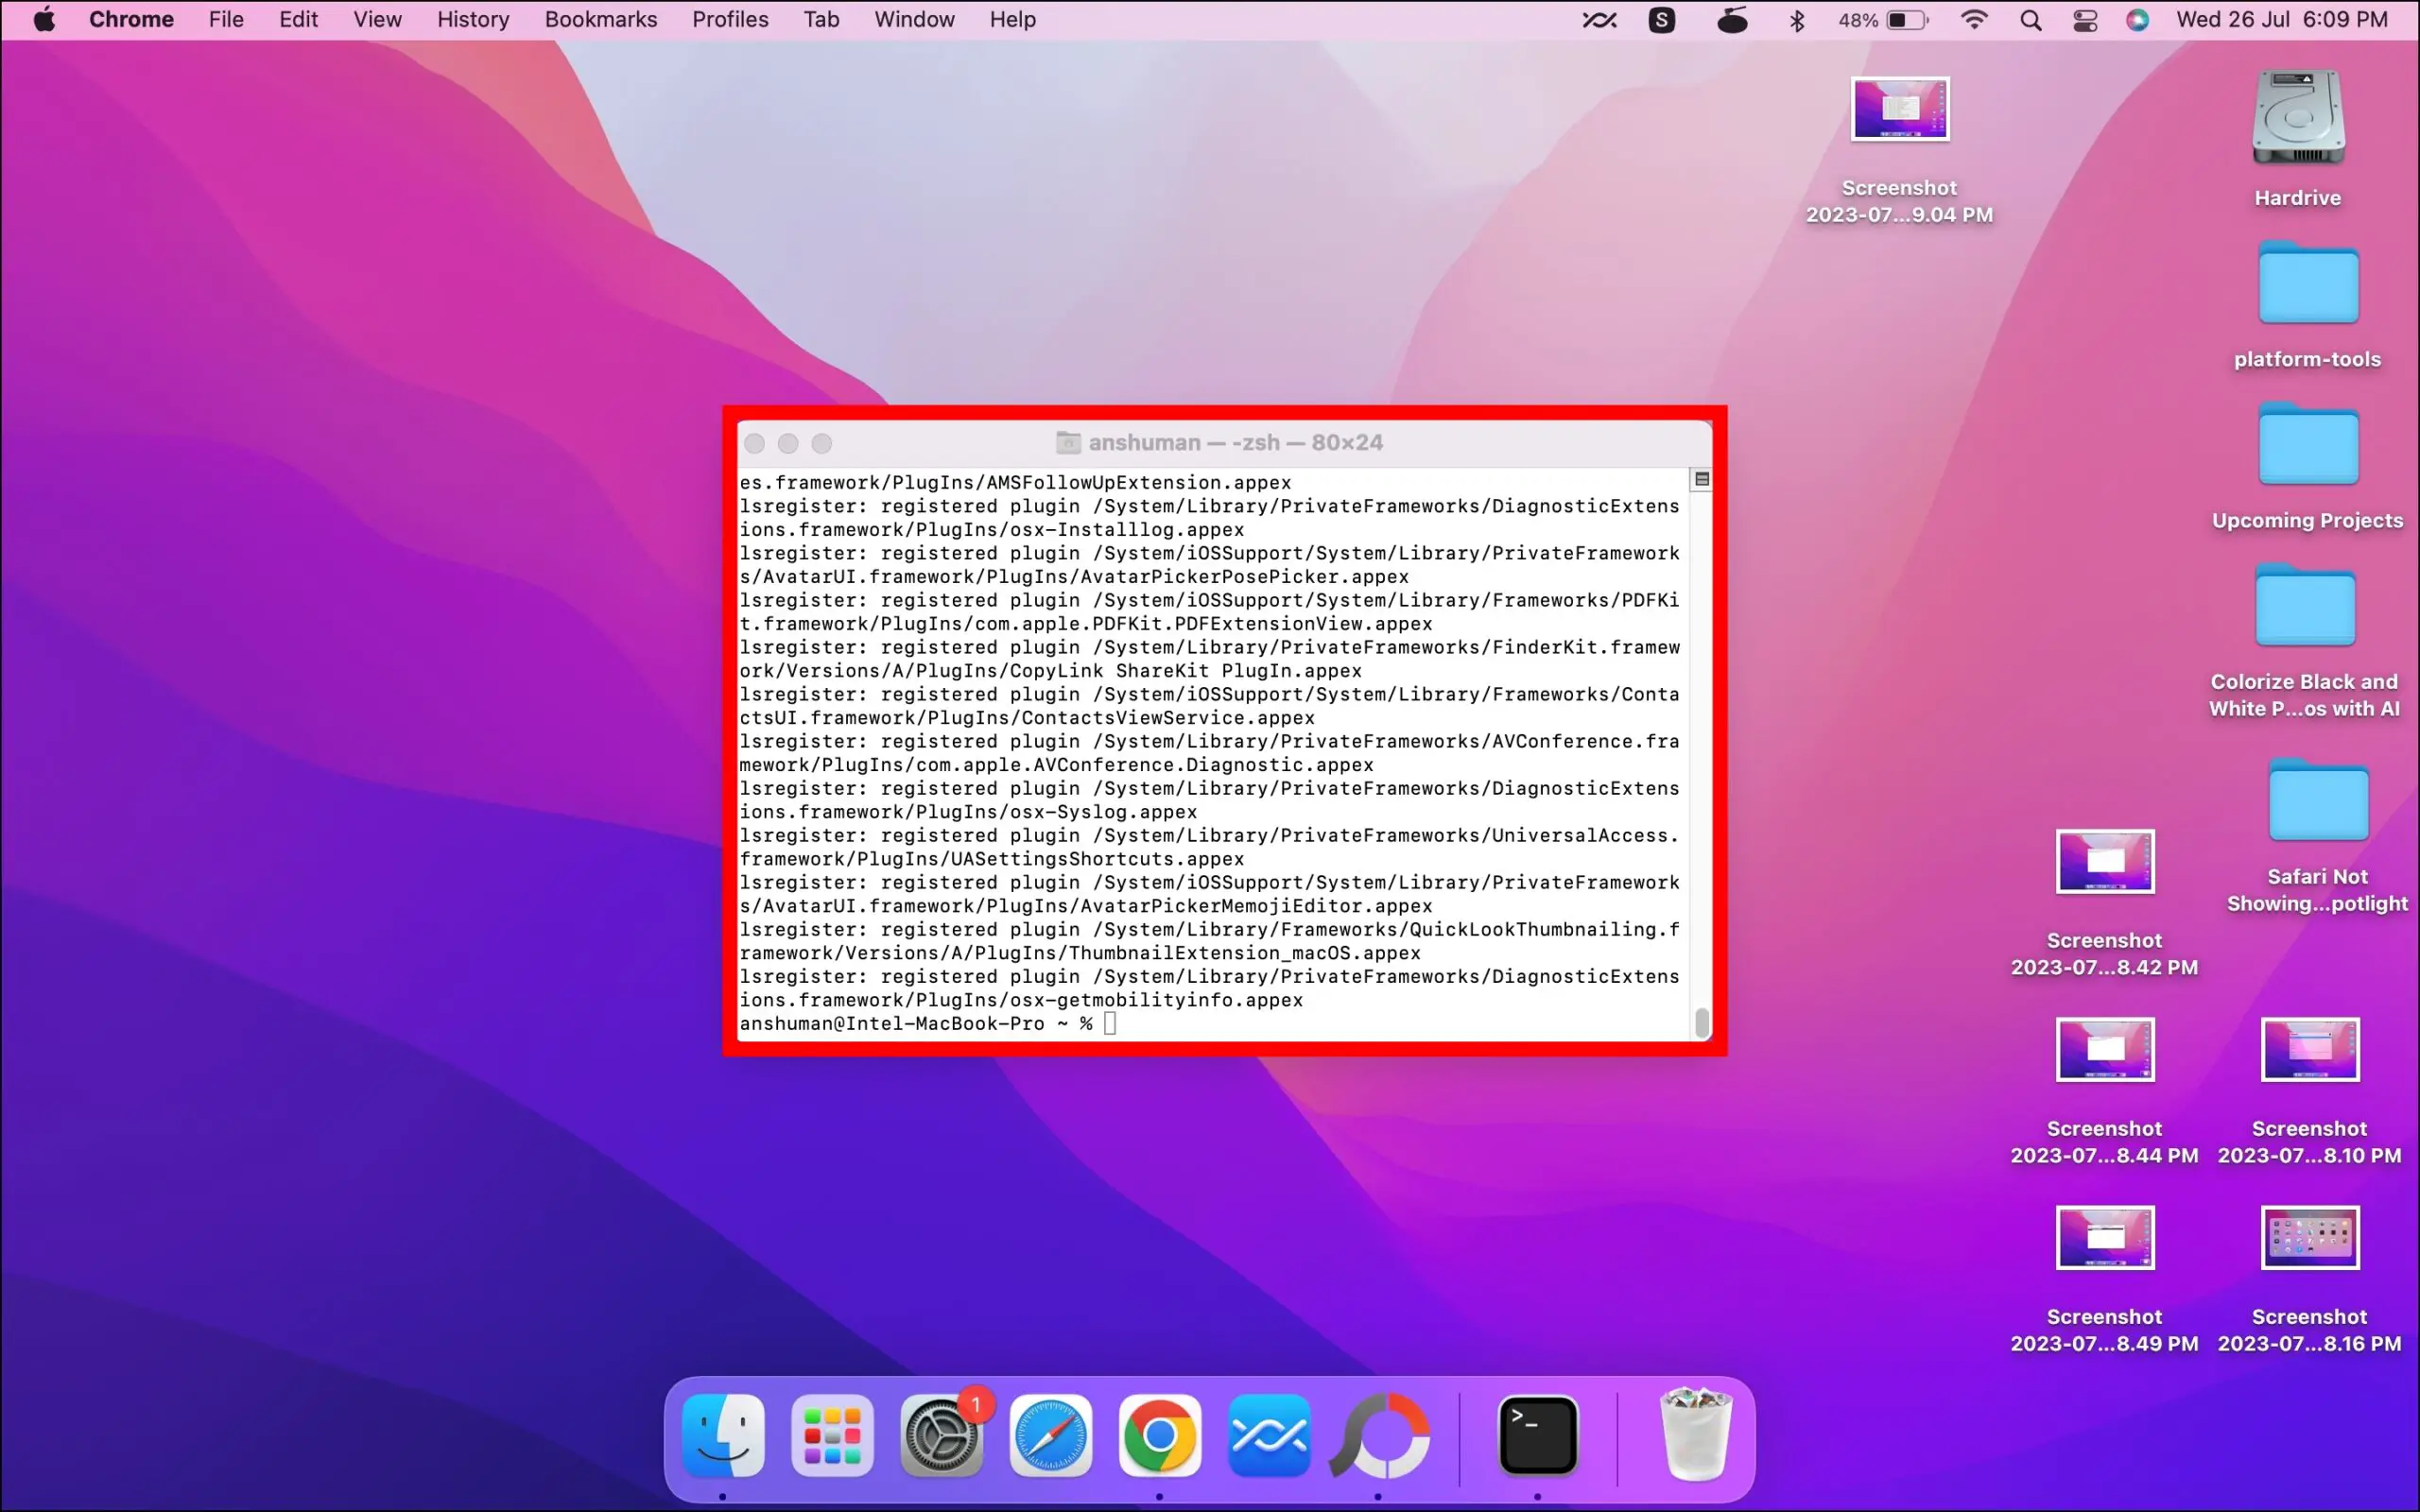
Step 4: Once done, restart your Mac computer.
After the computer restarts successfully, try searching for Safari again.
Method 4- Reset the Permissions of the Applications folder
If resetting the Launch Services database does not work for you, then you need to reset the permissions of the Application folder on your Mac. Follow the steps below to do so.
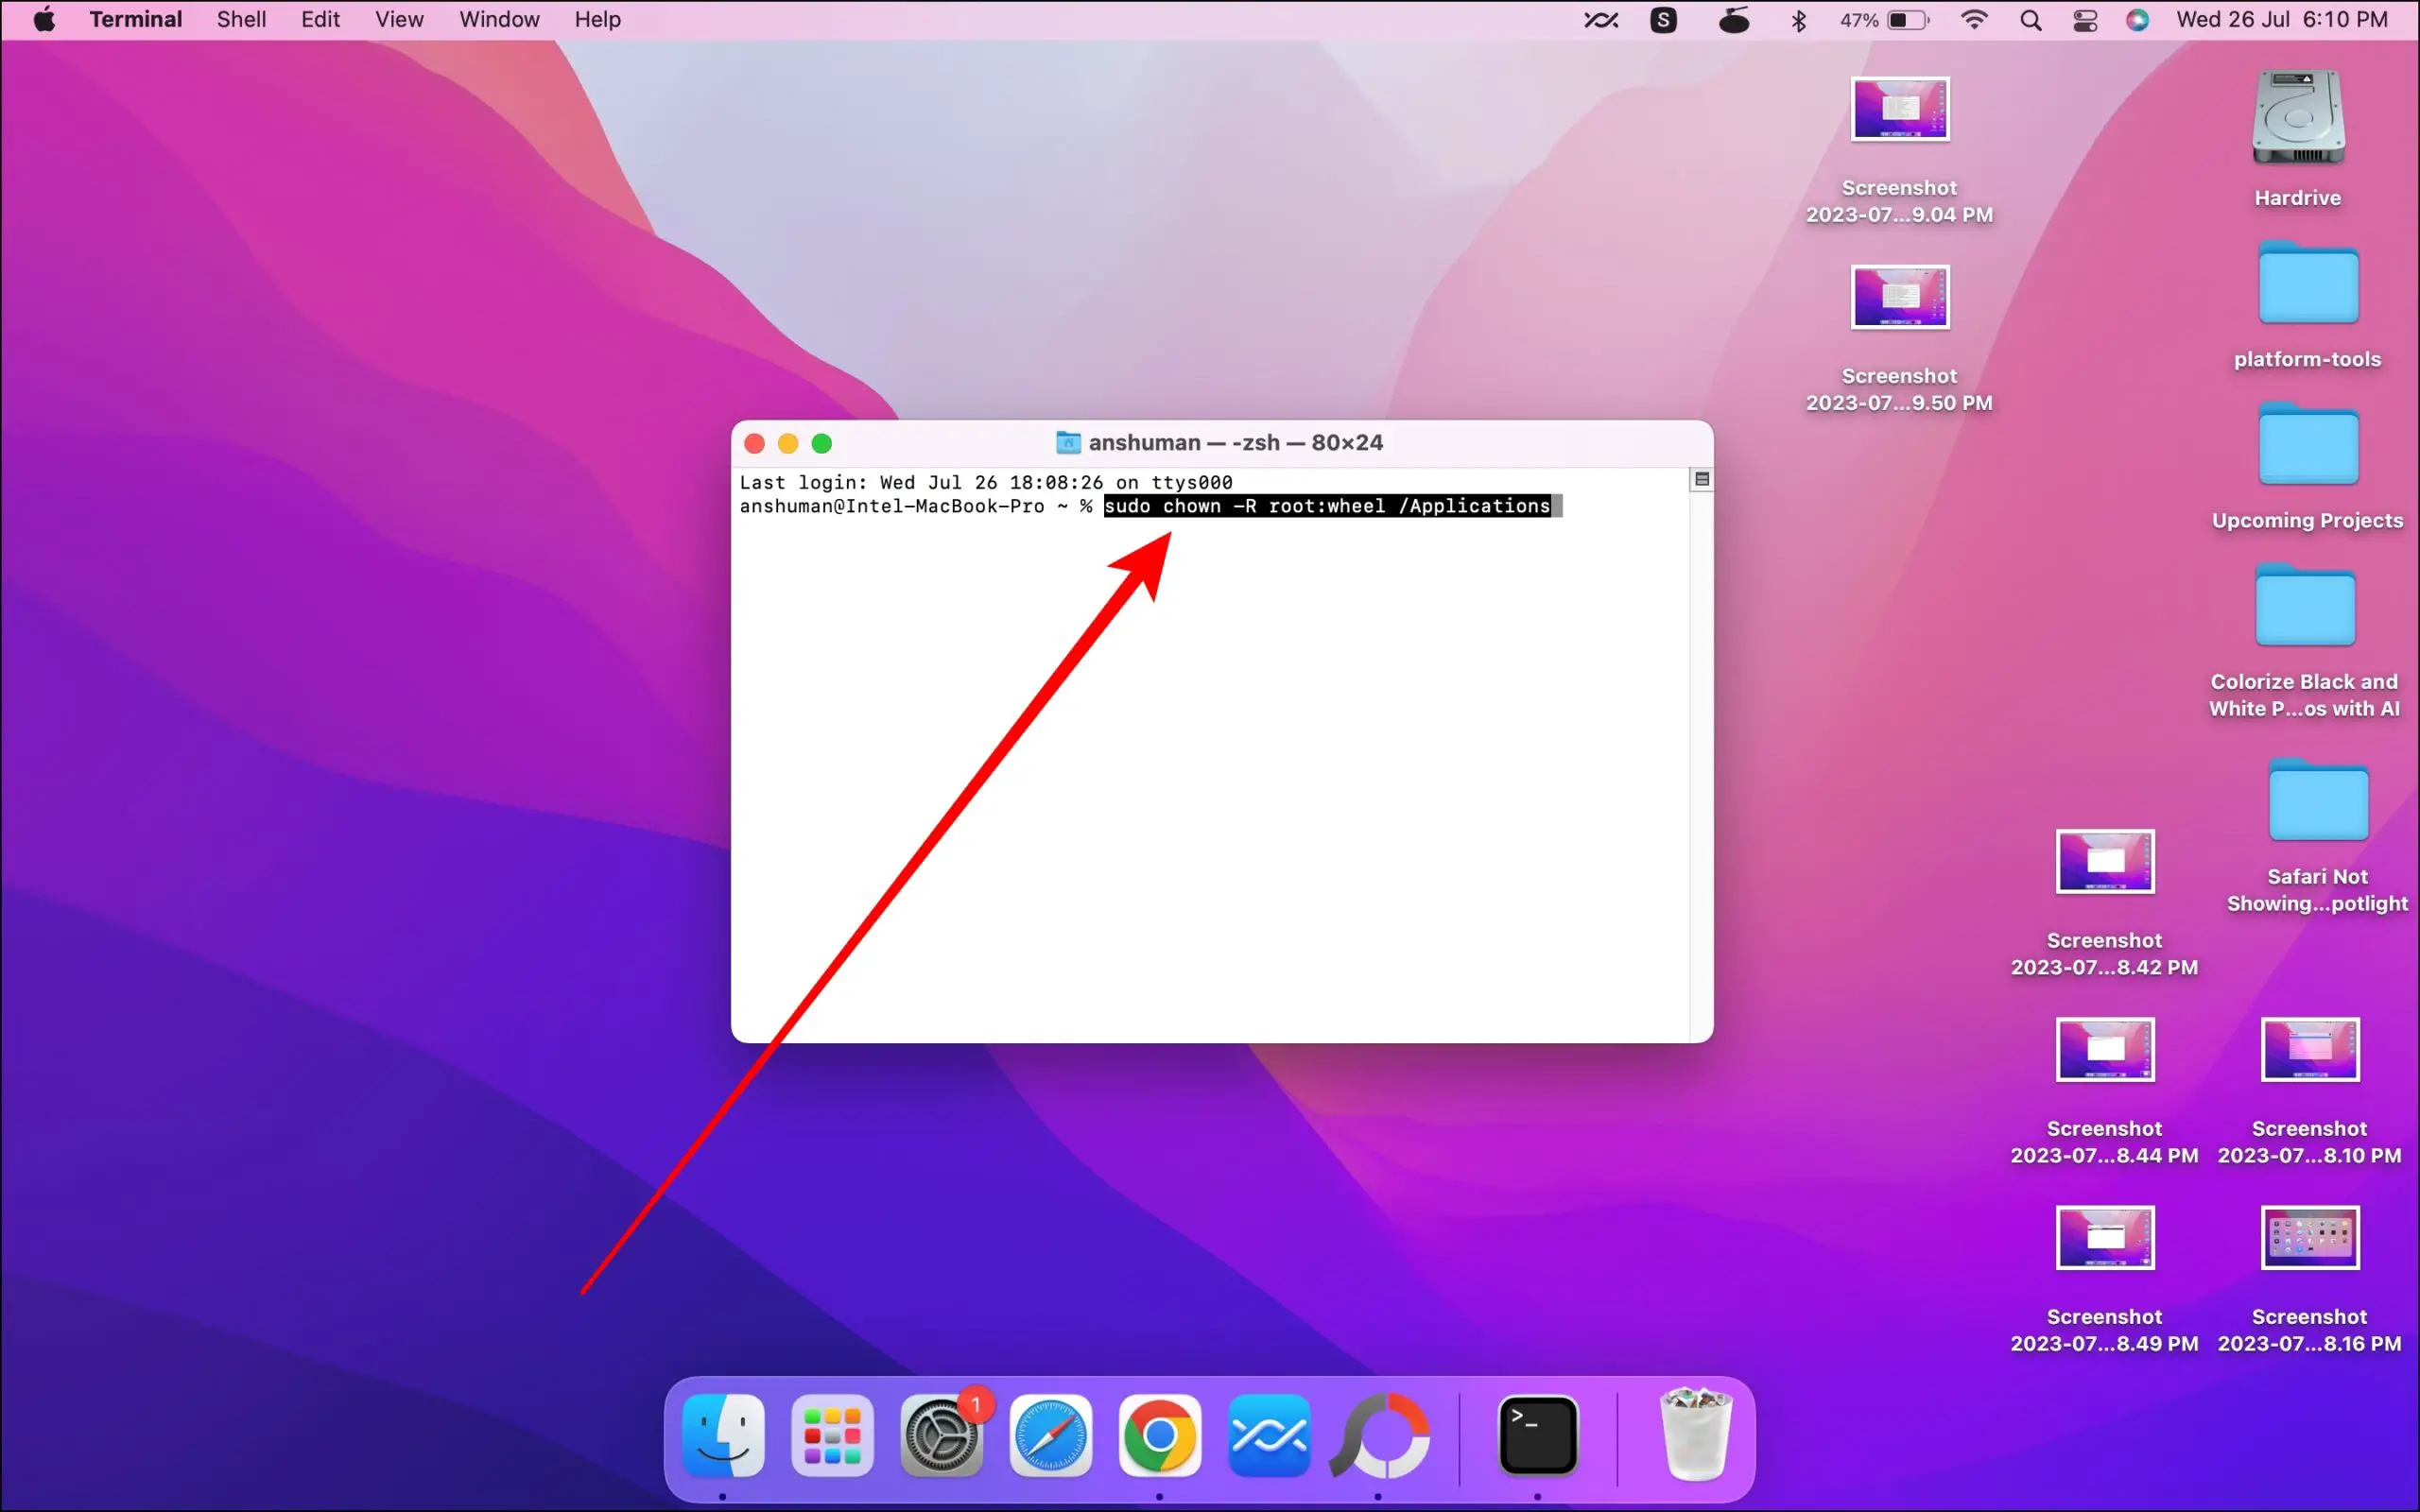
Step 1: Open the Terminal app on your system.
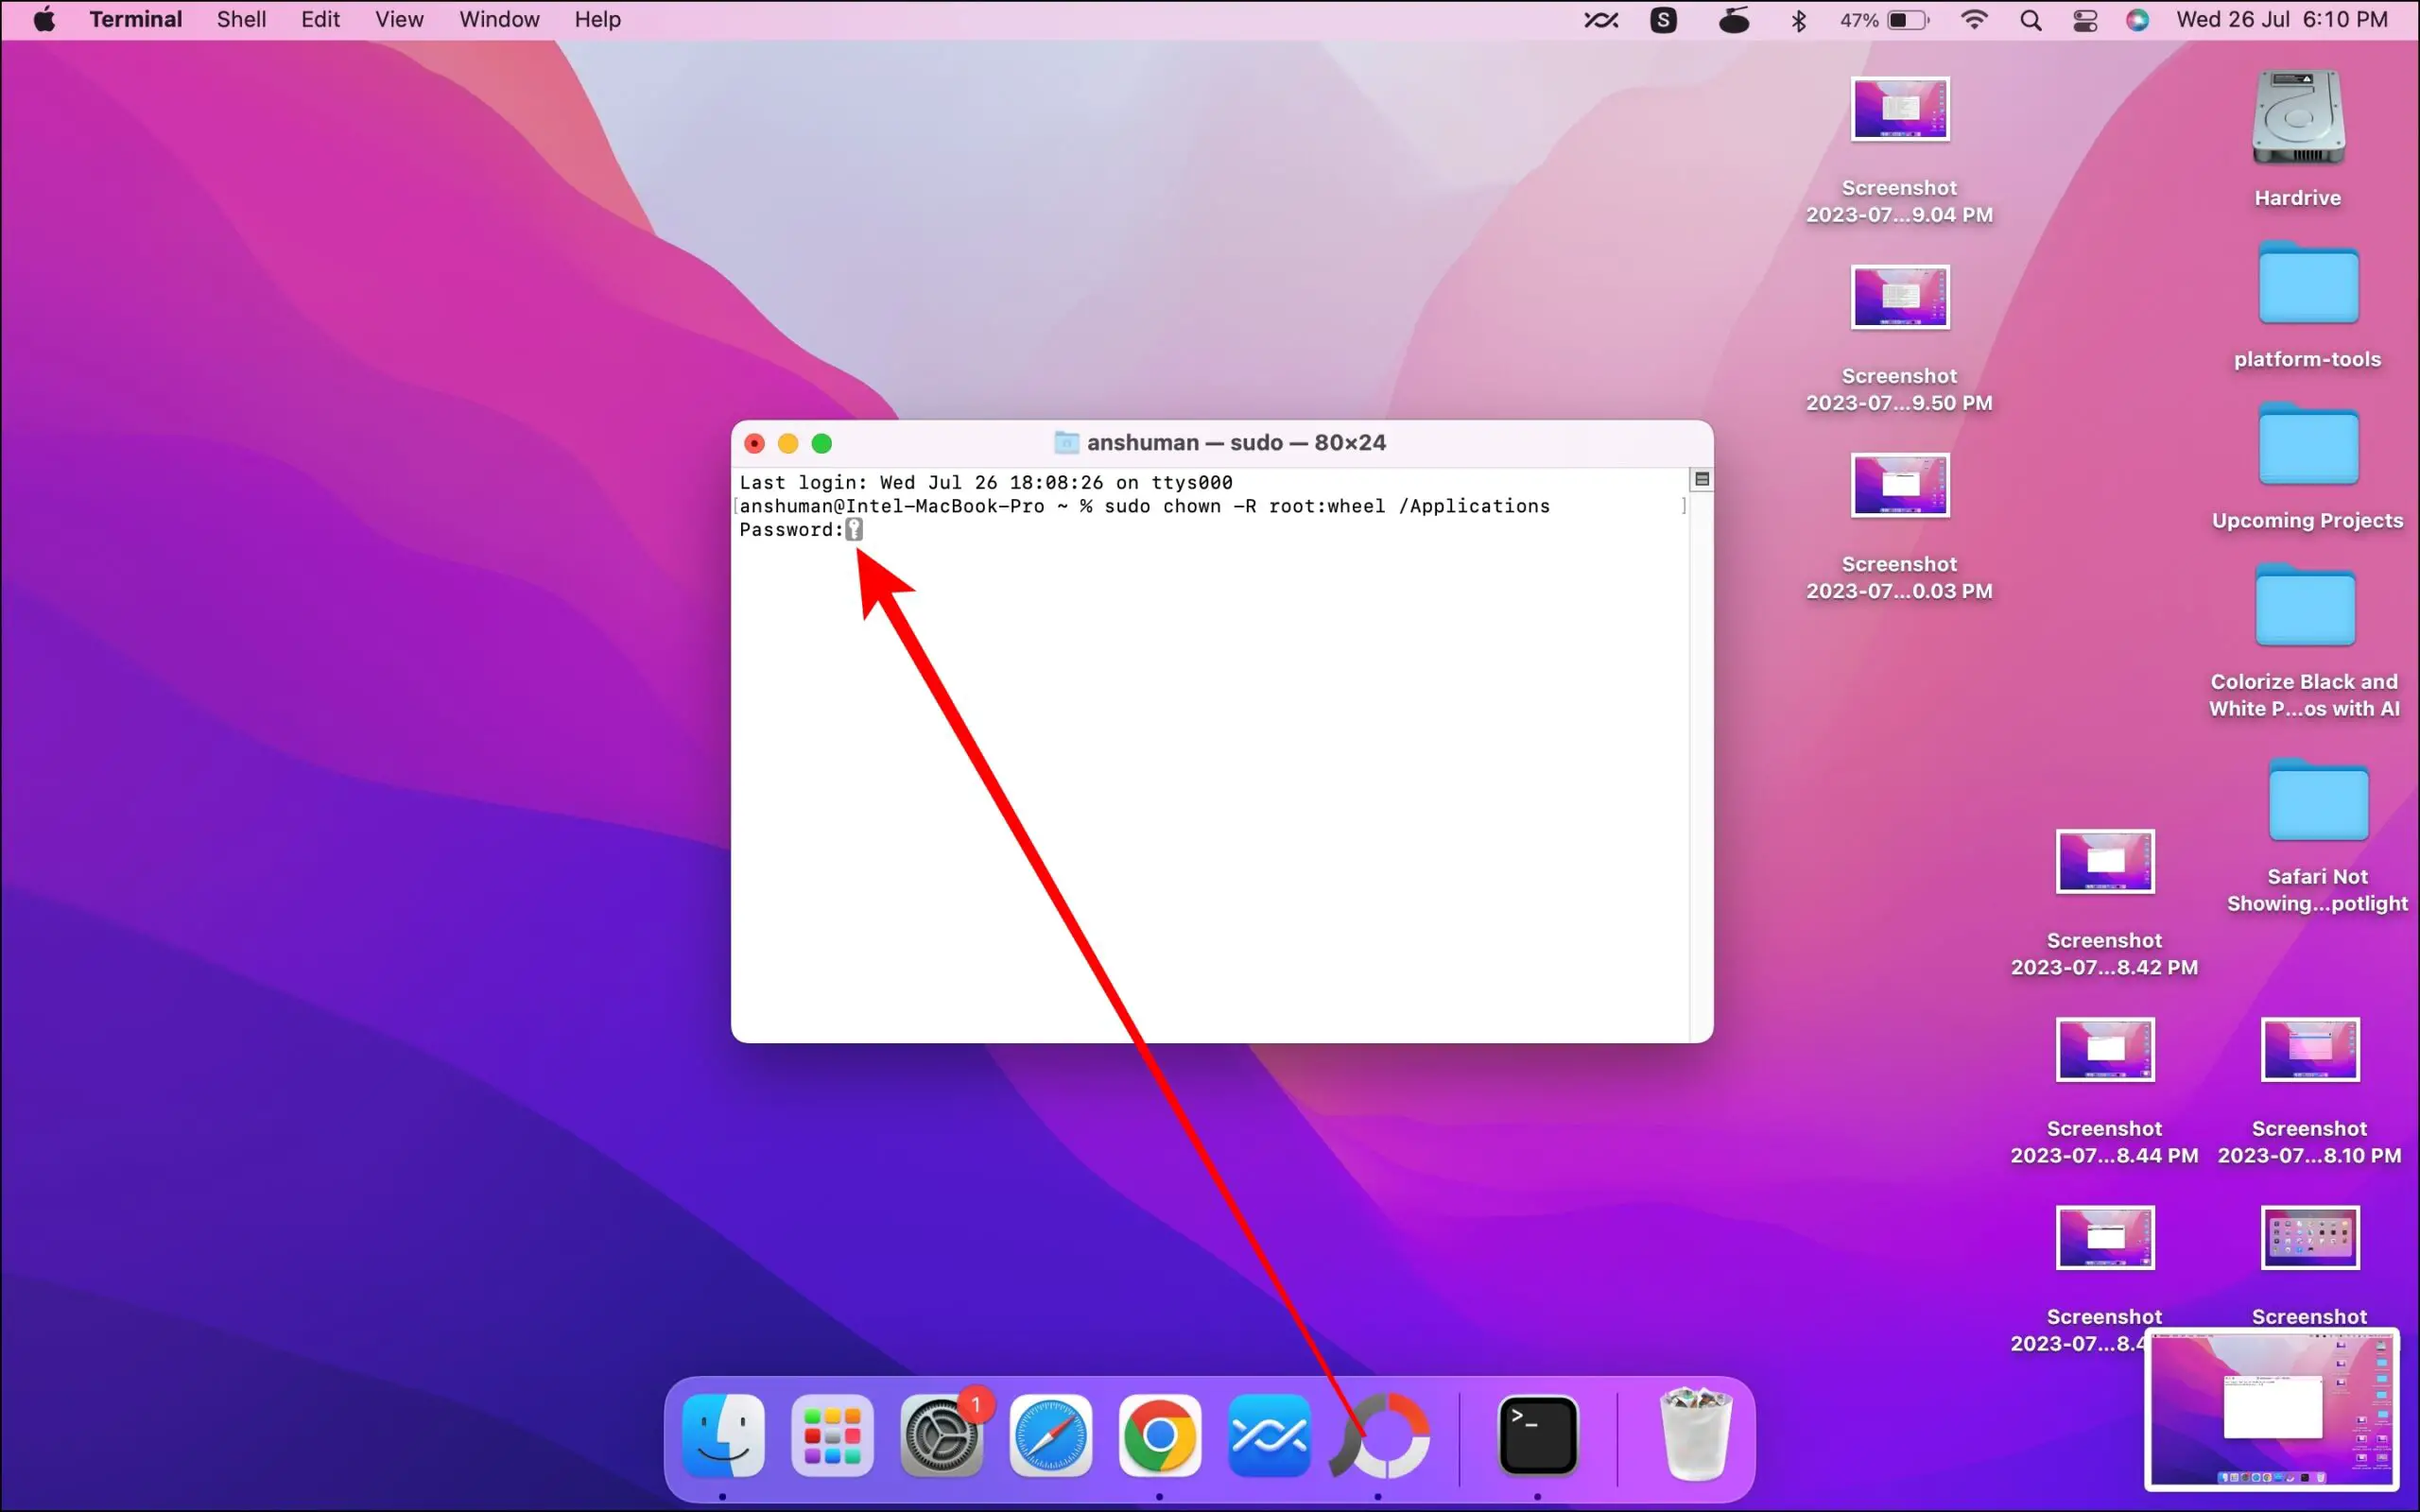
Step 2: Type sudo chown -R root:wheel /Applications and hit enter.
Step 3: Enter your admin password if asked or prompted.
Step 4: Wait for a few moments until the command completes.

Step 5: Once done, restart your system and try searching for Safari again in the Spotlight search.
Method 5- Rebuild the Spotlight Index
You may need to rebuild your Spotlight search as well. This procedure differs depending on the version of macOS you are running. The options are different between earlier and later versions. Here’s how you can do it:
On Ventura
Follow the below steps to rebuild the Spotlight index on the latest Ventura version.
Step 1: Click on the Apple logo at the top-left side.
Step 2: Select System Preferences from the menu that appears.
Step 3: Tap on Spotlight.
Step 4: Click on the Privacy tab.
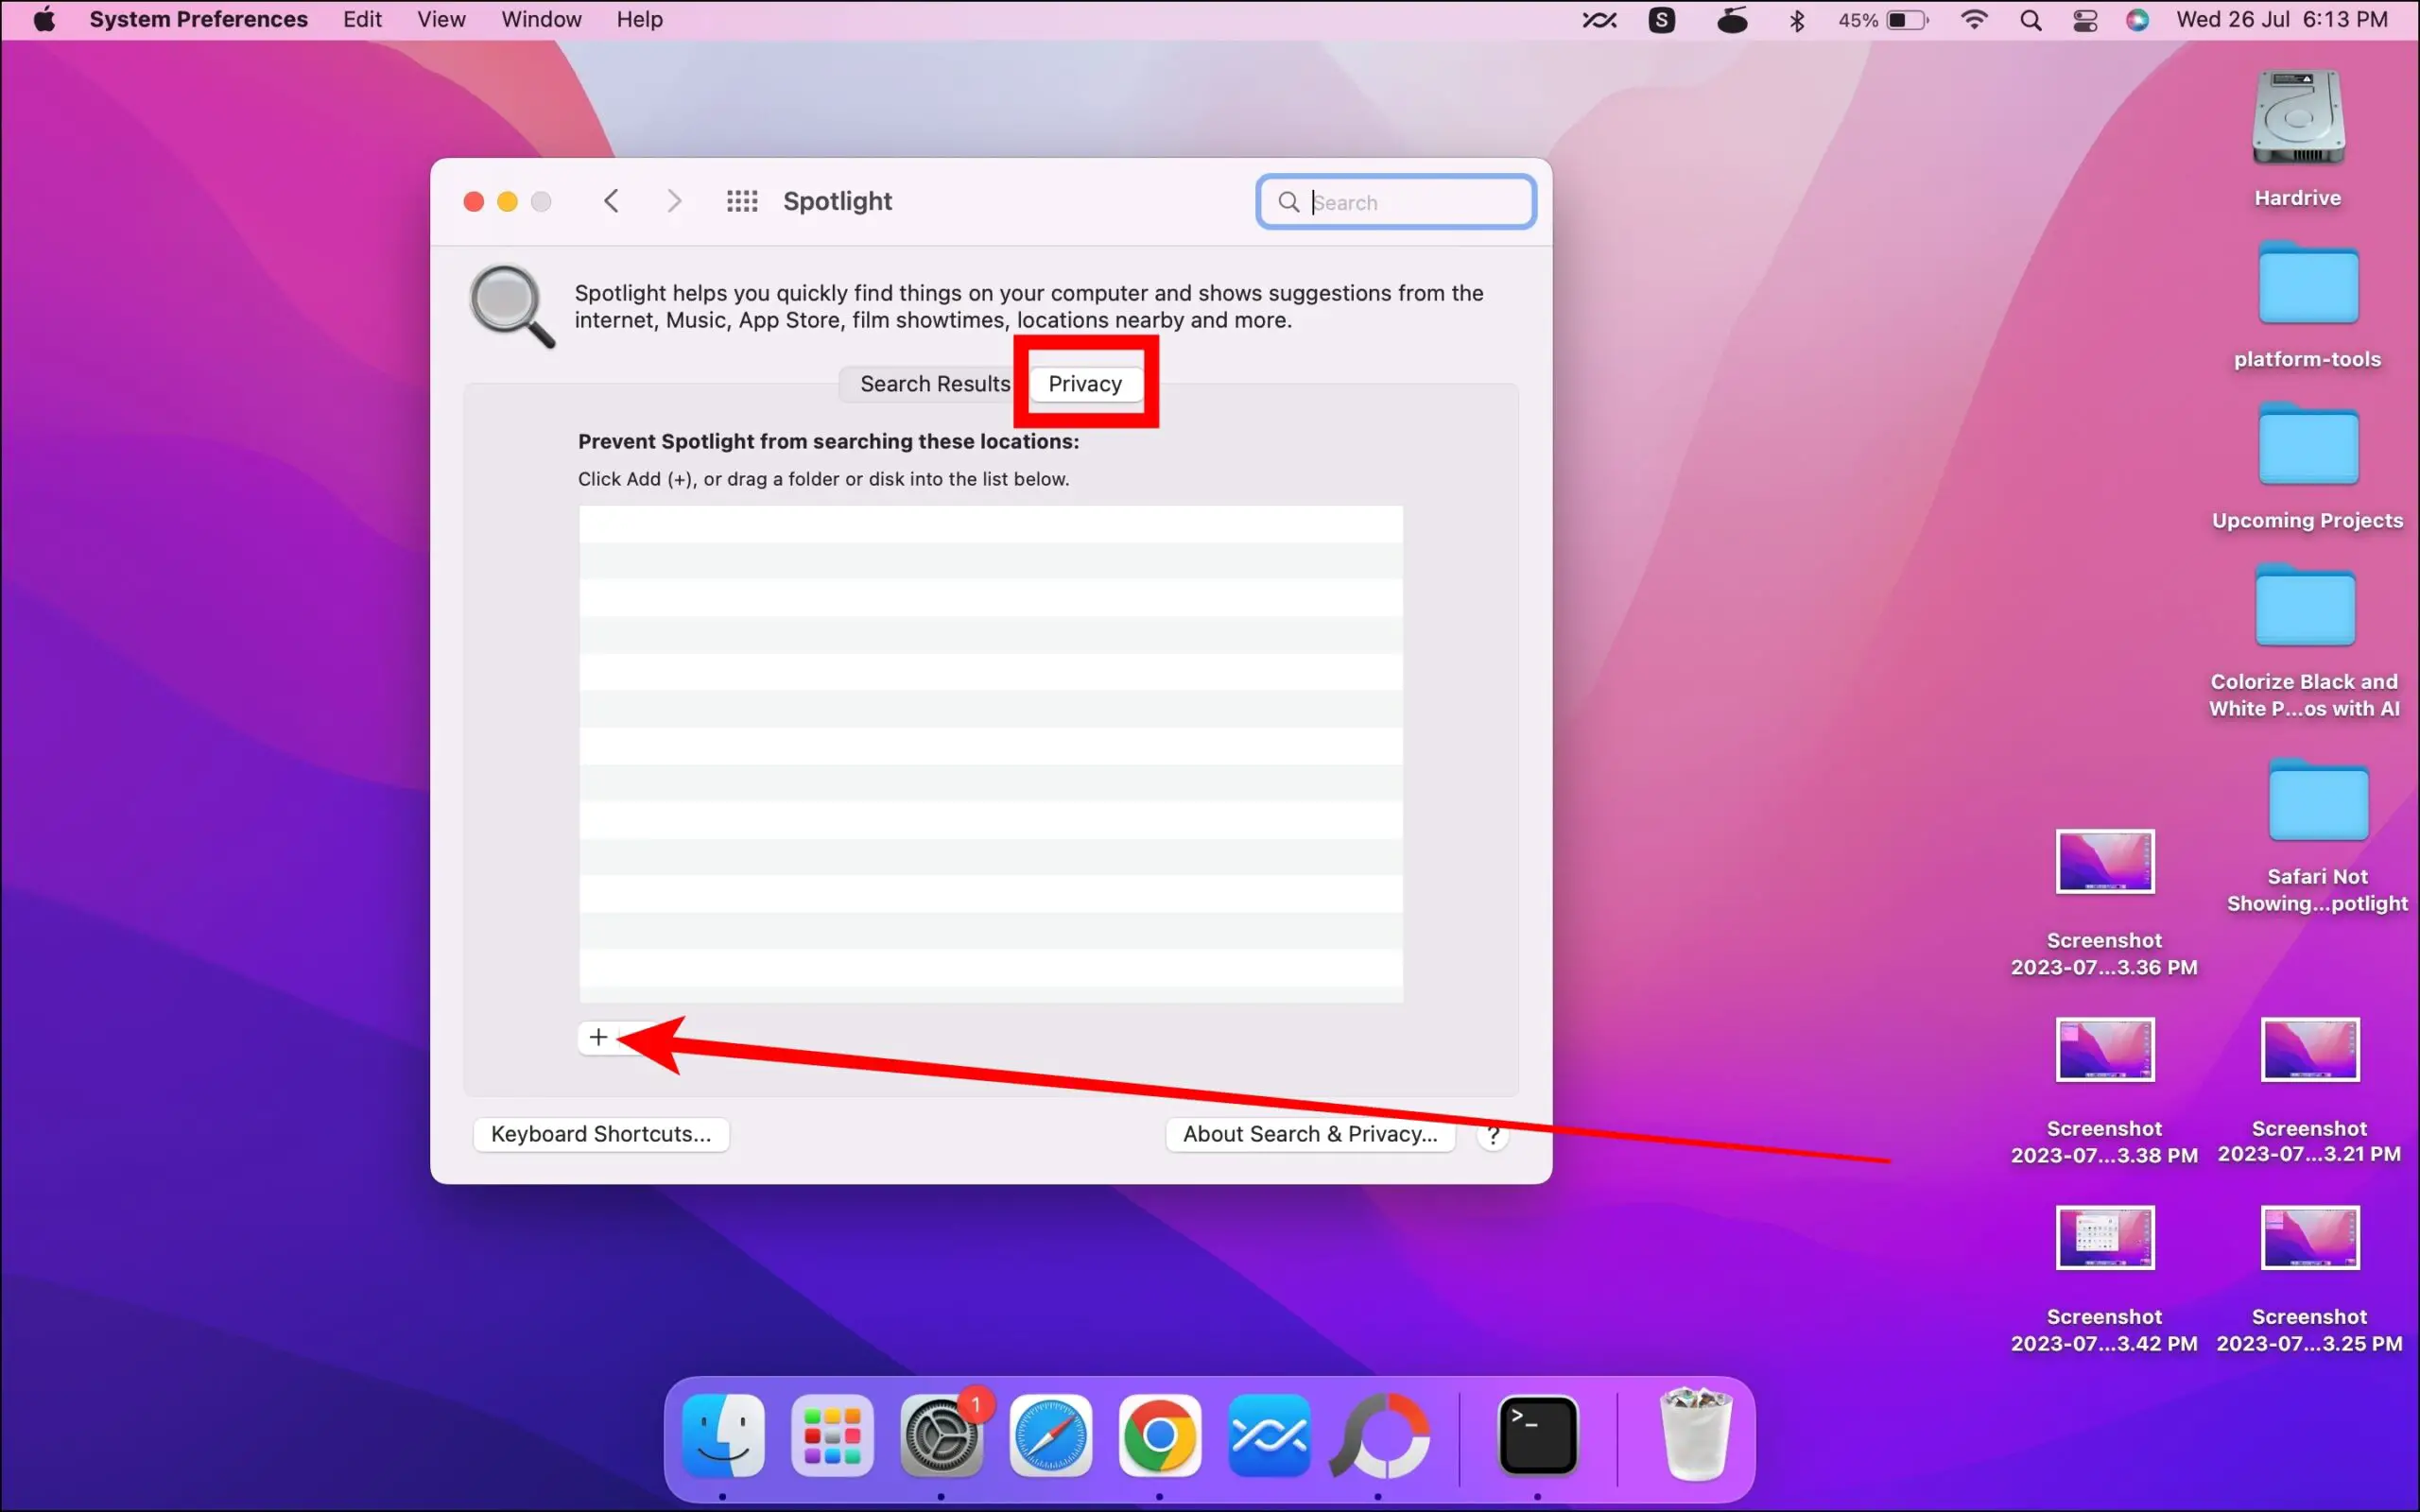
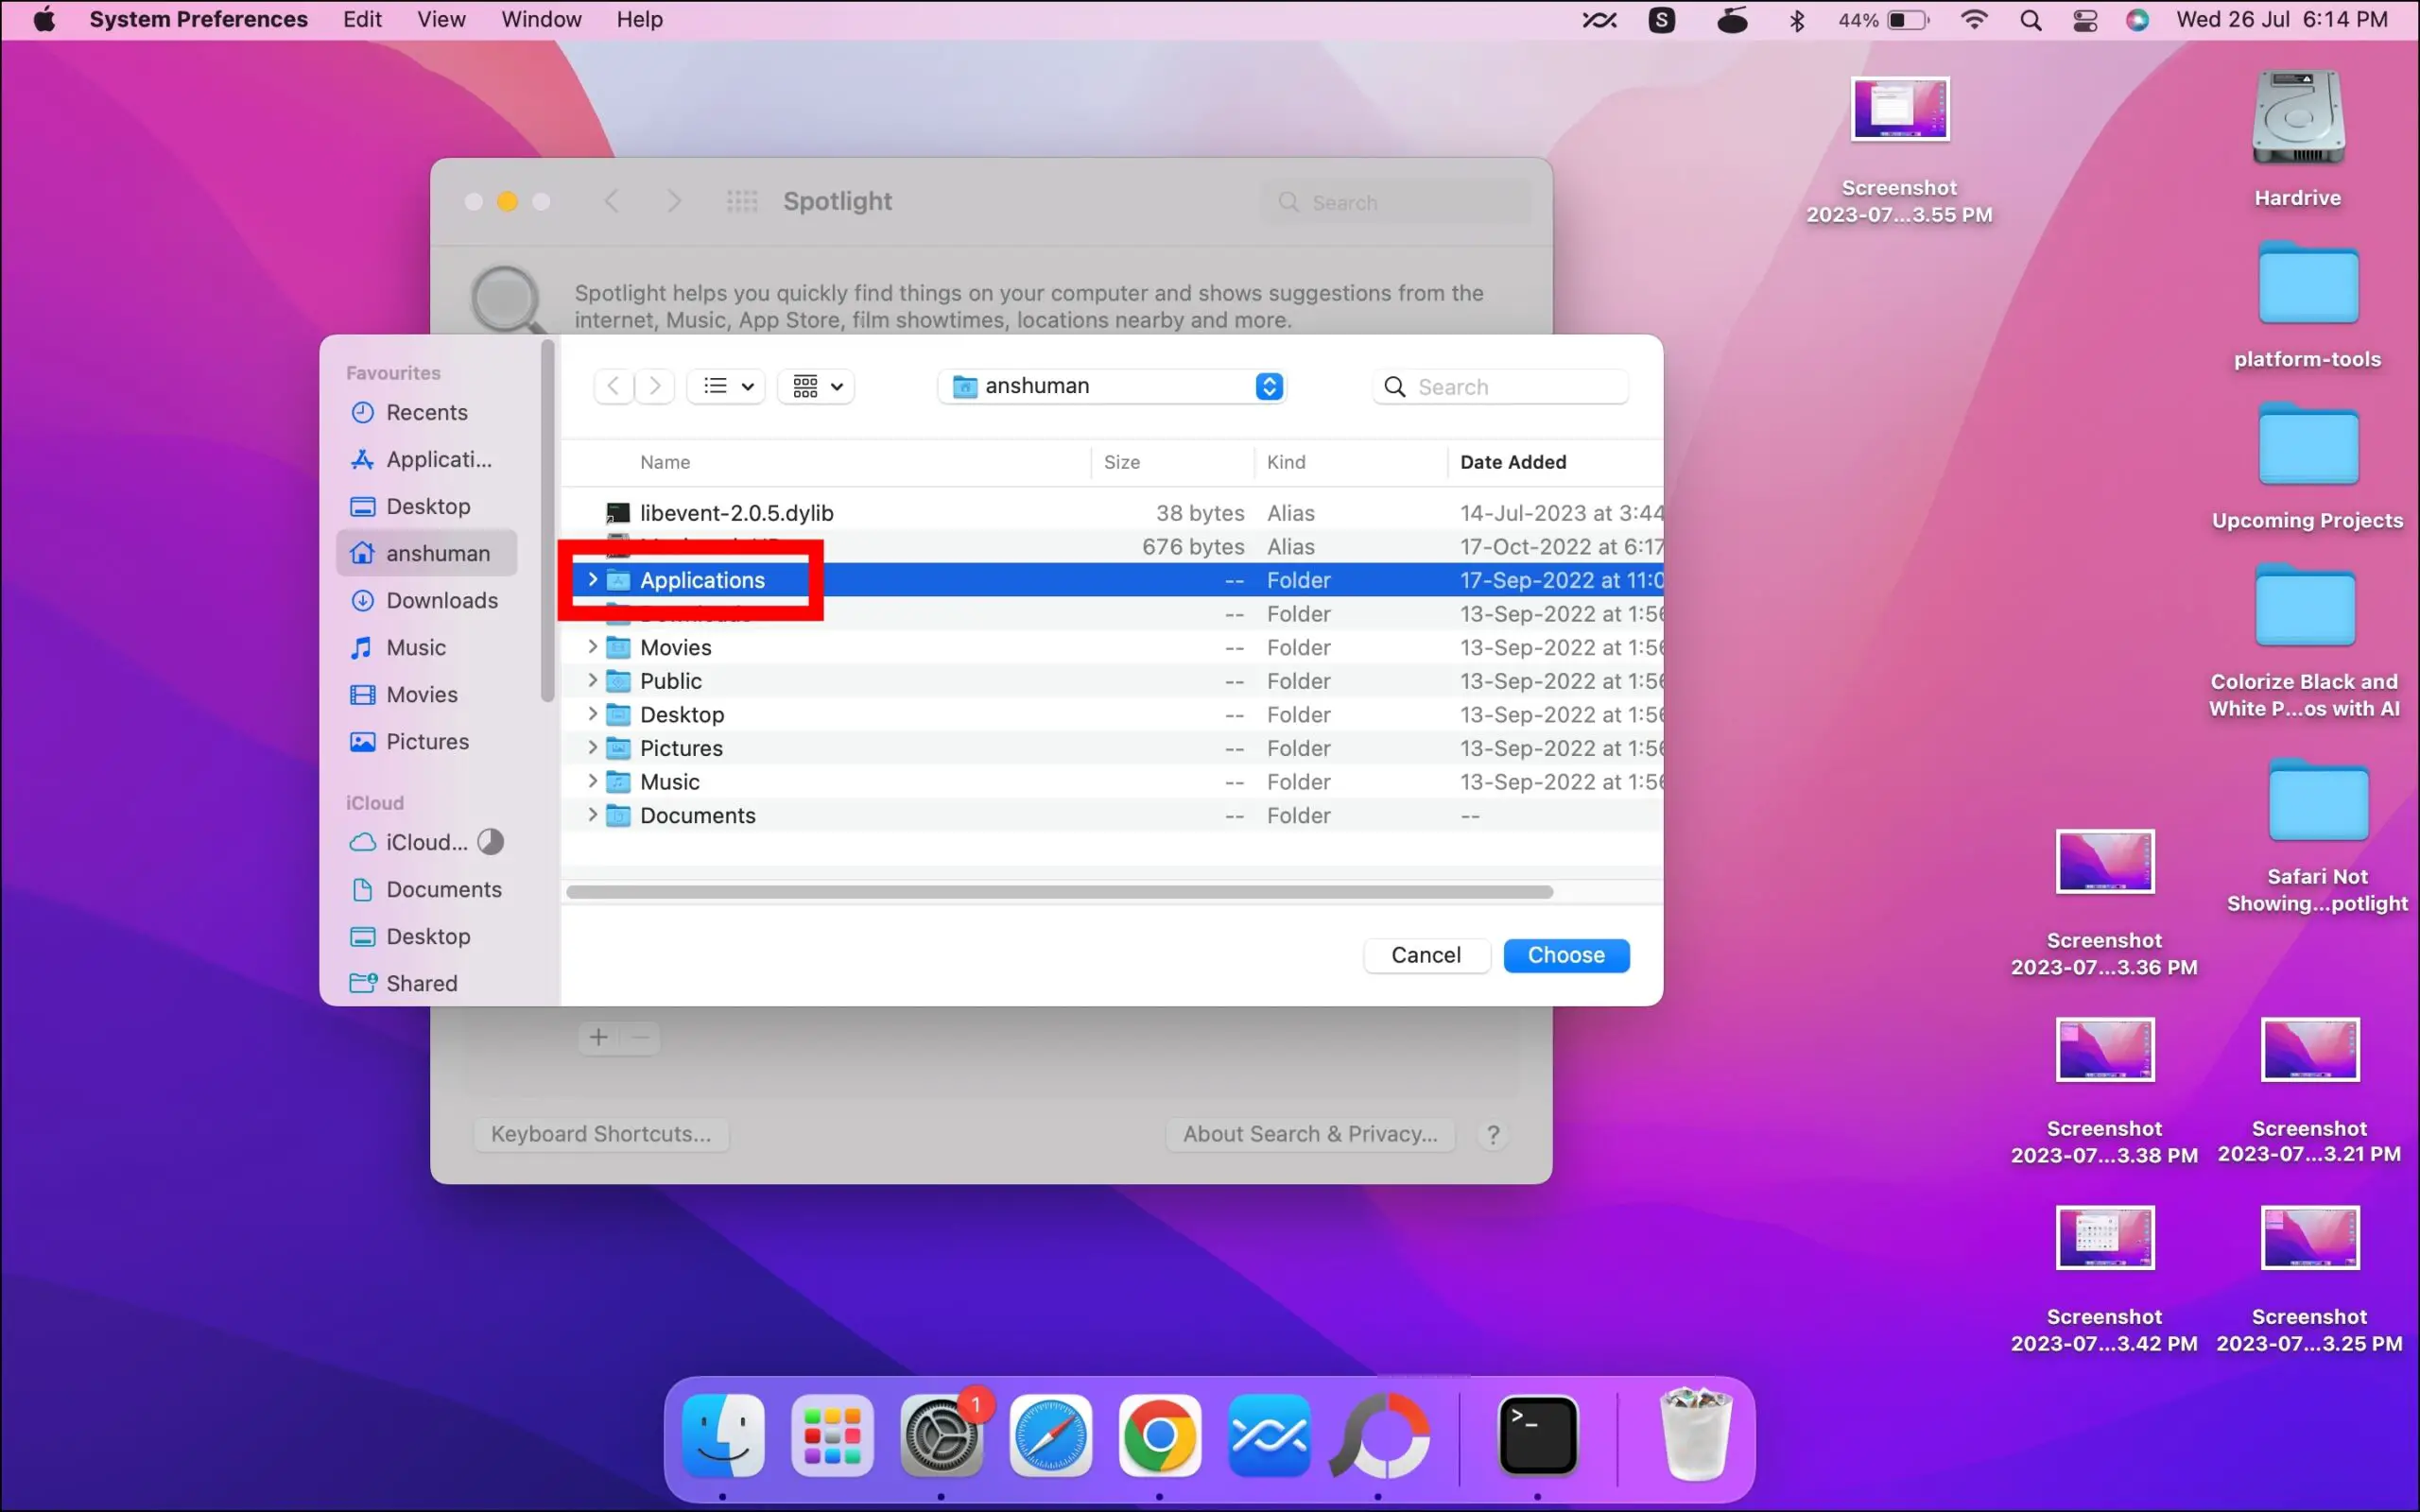
Step 5: Click on the ‘+’ icon and add the Applications folder by selecting it.
Step 6: After adding it, tap Done.
Step 7: Again, open Spotlight Privacy and select the Applications folder, then tap on the ‘-‘ icon to remove it.
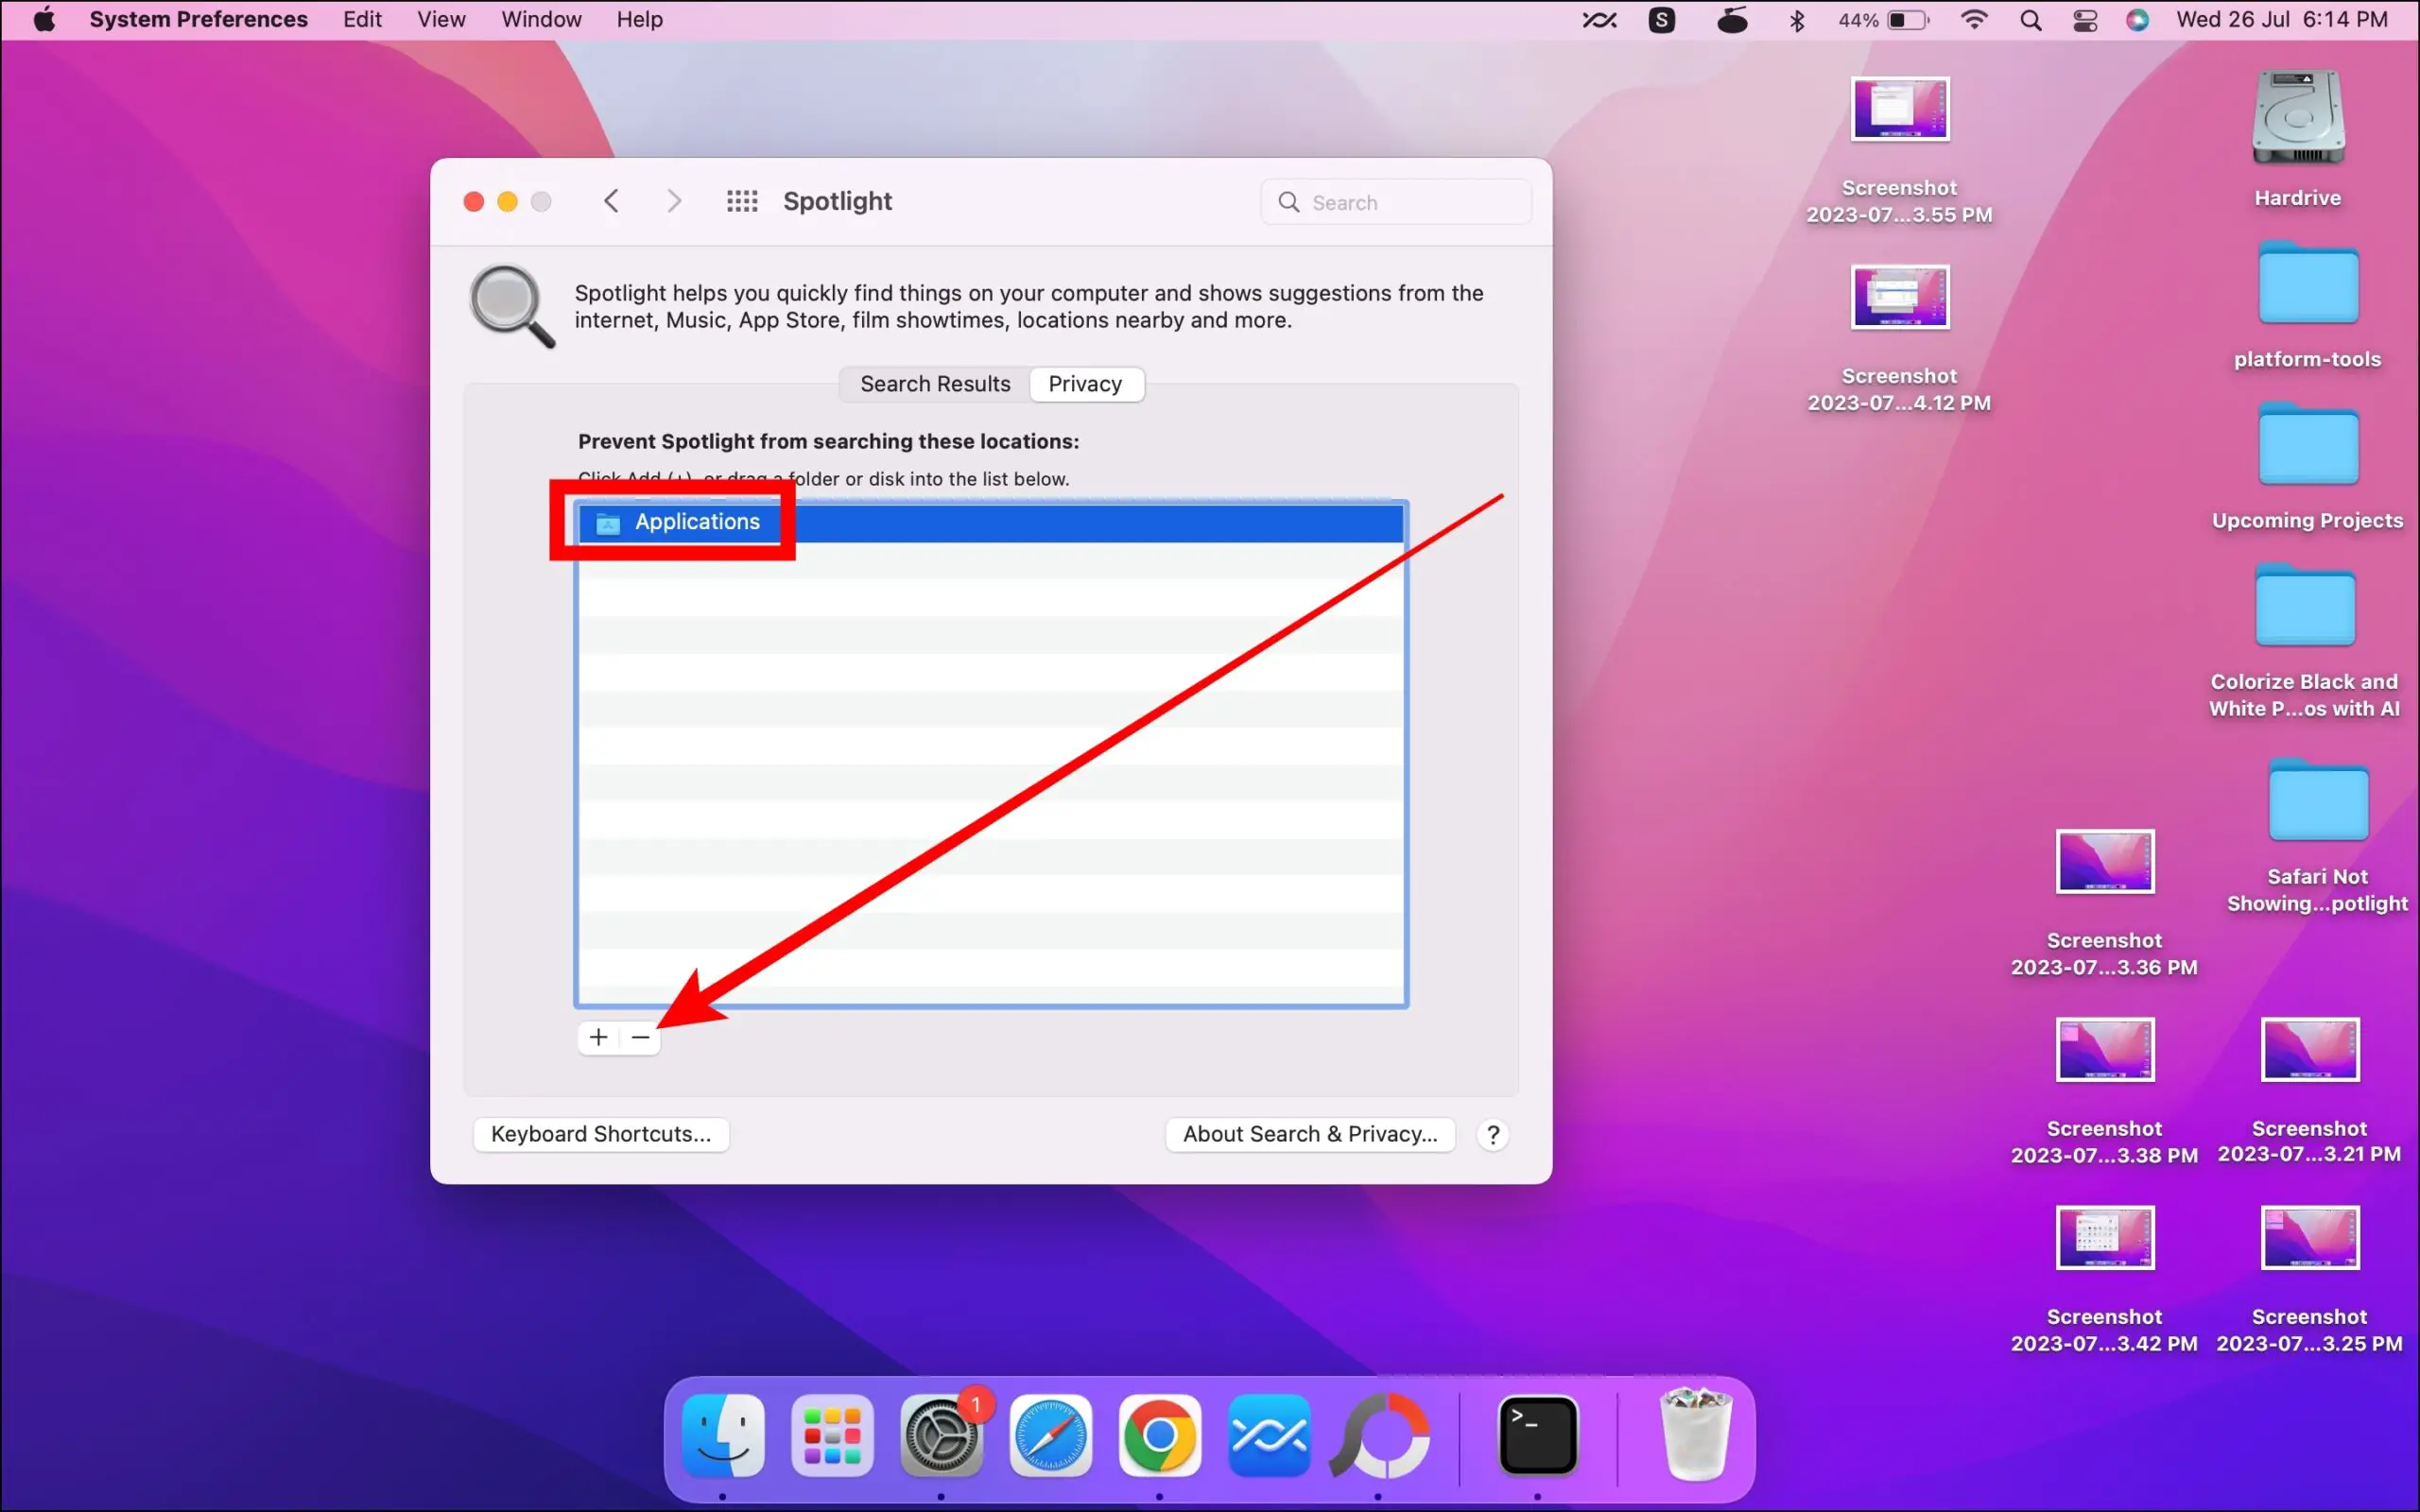
Step 8: Finally, click on the Done button.
Now, Spotlight will reindex the folder’s contents, which can take some time, depending on the amount of information being indexed. Wait for the indexing to complete, then try searching for Safari in the Spotlight Search.
On Earlier Versions
Step 1: Tap on the Apple logo and select System Preferences.
Step 2: Select Spotlight and tap on the Privacy tab at the top.
Step 3: Click on the ‘+’ icon and add the Applications folder. You can also add it by dragging and dropping the folder.
Step 4: Now, choose the Applications folder, then tap on the ‘-‘ icon to remove it.
Wait for a few moments, and Spotlight will reindex the folder’s contents.
Method 6- Restart Your Mac
Minor software issues can sometimes be resolved by simply restarting your device. To restart your device, follow these steps:
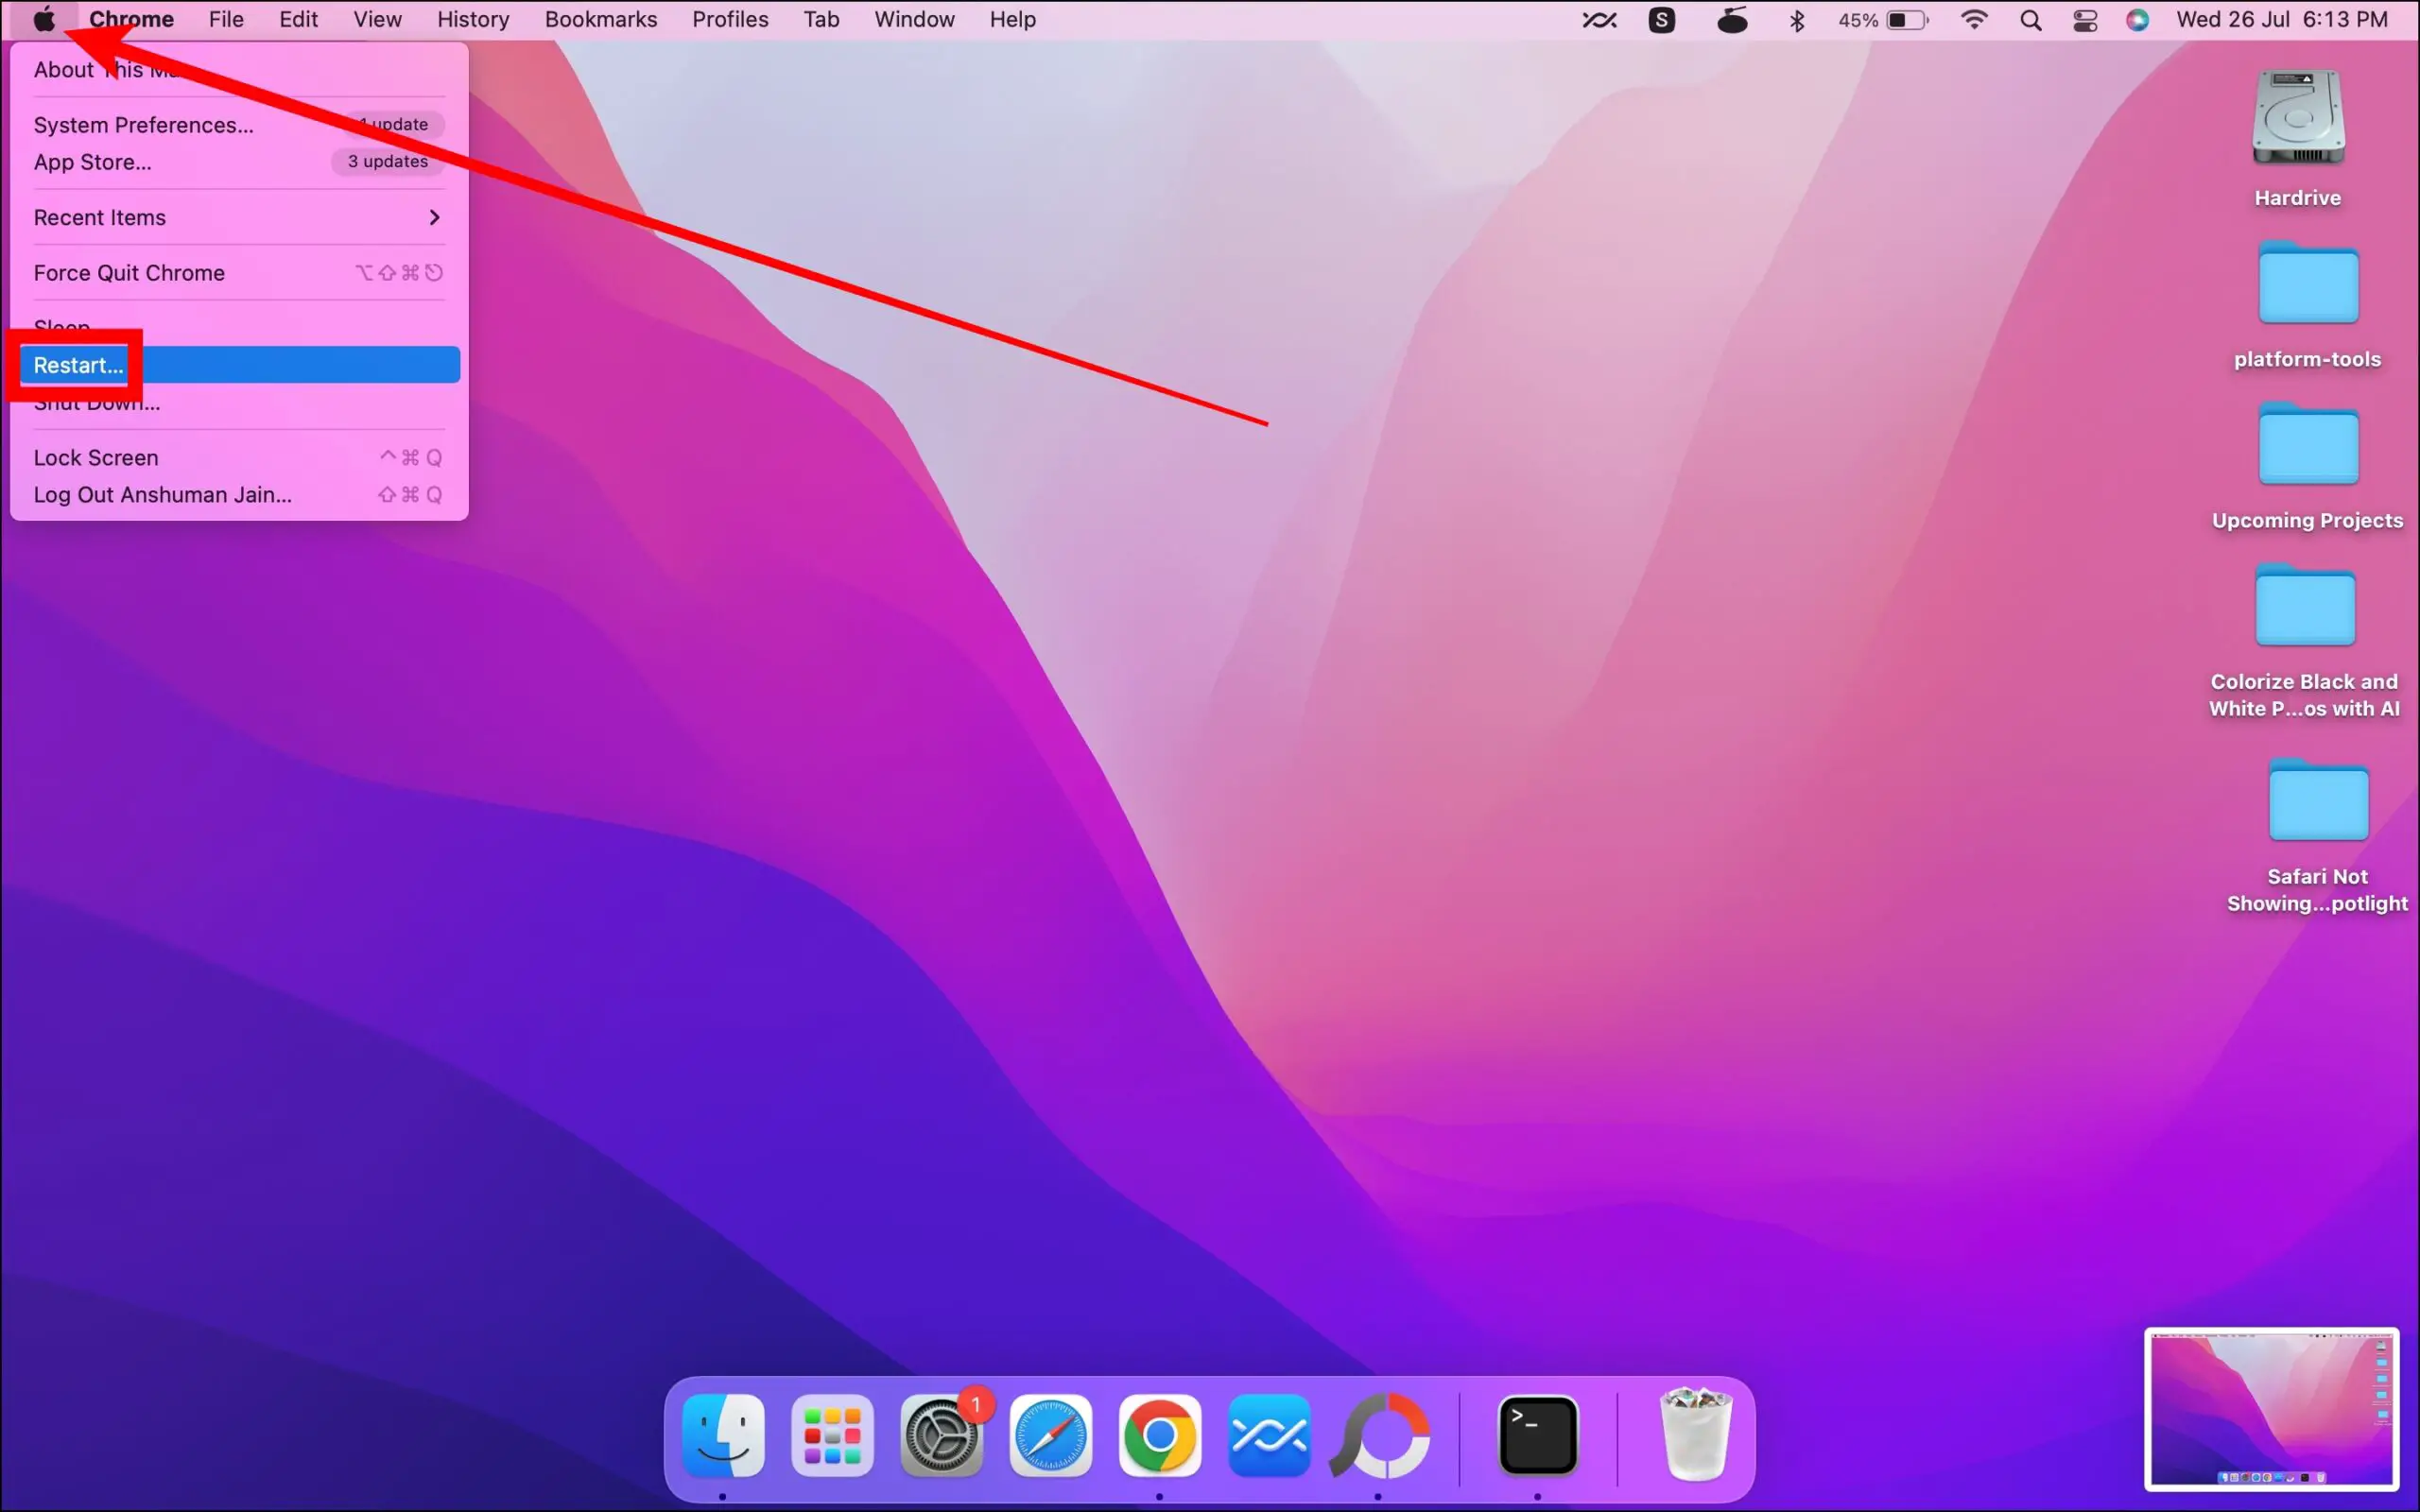
Step 1: Tap on the Apple logo at the top-left side.
Step 2: Select Restart from the menu that appears.
Wait for a few minutes, and your device will be restarted. Restarting your device clears temporary cache files and refreshes the system, which may resolve any Spotlight Search difficulties.
(Resolved) Safari Not Showing in Spotlight Search
This is how you fix Safari not appearing or showing up in Spotlight searches. I hope the above article helps you make Safari results visible in the Spotlight Search. If you have any queries related to the article, let us know, and stay tuned on BrowserToUse for more such articles and how-tos.
Related: