
Bitwarden is a popular password manager service where trusted by millions of users across the globe. But lately, several users have been reporting issues with Bitwarden’s browser extension after the recent update. Though the developers at Bitwarden are hard at work to fix those issues, we have listed working solutions to help fix the Bitwarden extension not working issue in Chrome, Firefox, and Safari.
What are Some Common Issues with Bitwarden Extension?
Bitwarden is an open-source password management service that lets you store all your passwords along with other login details and important documentation. It encrypts your data and stores it in a secure vault which can only be accessed via a master password. Most users started facing issues after the rollout of a recent update for the Bitwarden extension in February.
Below is a list of common issues faced by Bitwarden users:
- The master password is required to login in on every website.
- The browser extension fails to load at times.
- Unable to unlock the Bitwarden Vault with biometrics.
- Chrome shows an error after logging in to Bitwarden.
- The extension does not prompt two-factor authentication.
- The Bitwarden extension vault timeout is not working.
- The extension keeps logging out the user.
How to Fix Bitwarden Extension Not Working in Chrome, Safari, Firefox
Now that we understand the common issues and problems with the Bitwarden browser extension. Let us take a look at some troubleshooting methods to fix these issues. We have mentioned steps by step instructions for each browser separately.
Method 1- Clear Cache and Site Data
Cache data like images, texts, and other elements get stored in your web browser for optimization purposes. This cache data can accumulate a lot of space over time and get corrupted, causing random issues with your web browser and the installed extensions. So it is recommended that you clear all this data to fix the Bitwarden extension.
Google Chrome
Here are the steps to clear cache and other site data in Google Chrome.
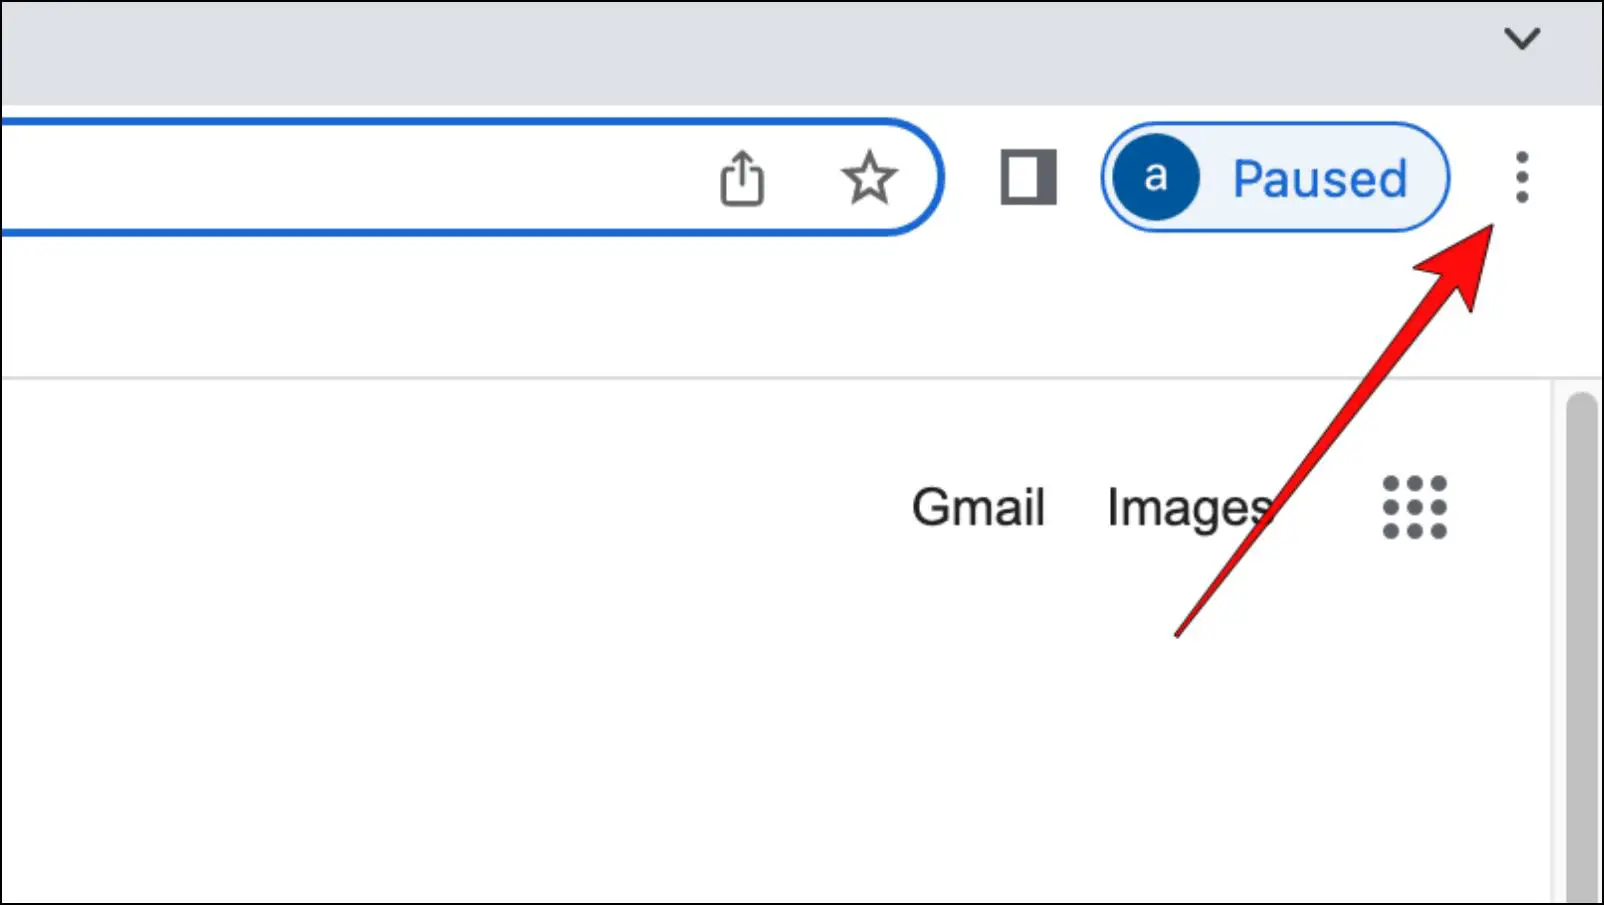
Step 1: Open Chrome and click on the three-dot menu in the top right corner.
![]()
Step 2: Go to More Tools and select Clear Browsing Data…
![]()
Step 3: Select all three options.
![]()
Step 4: Click on the box next to the Time range and select All time.
![]()
Step 5: Next, click on the Clear Data button.

Step 6: Close and reopen Chrome to check if the LastPass issue is resolved.
Mozilla Firefox
Here are the steps to clear the cache and other site data in Firefox.
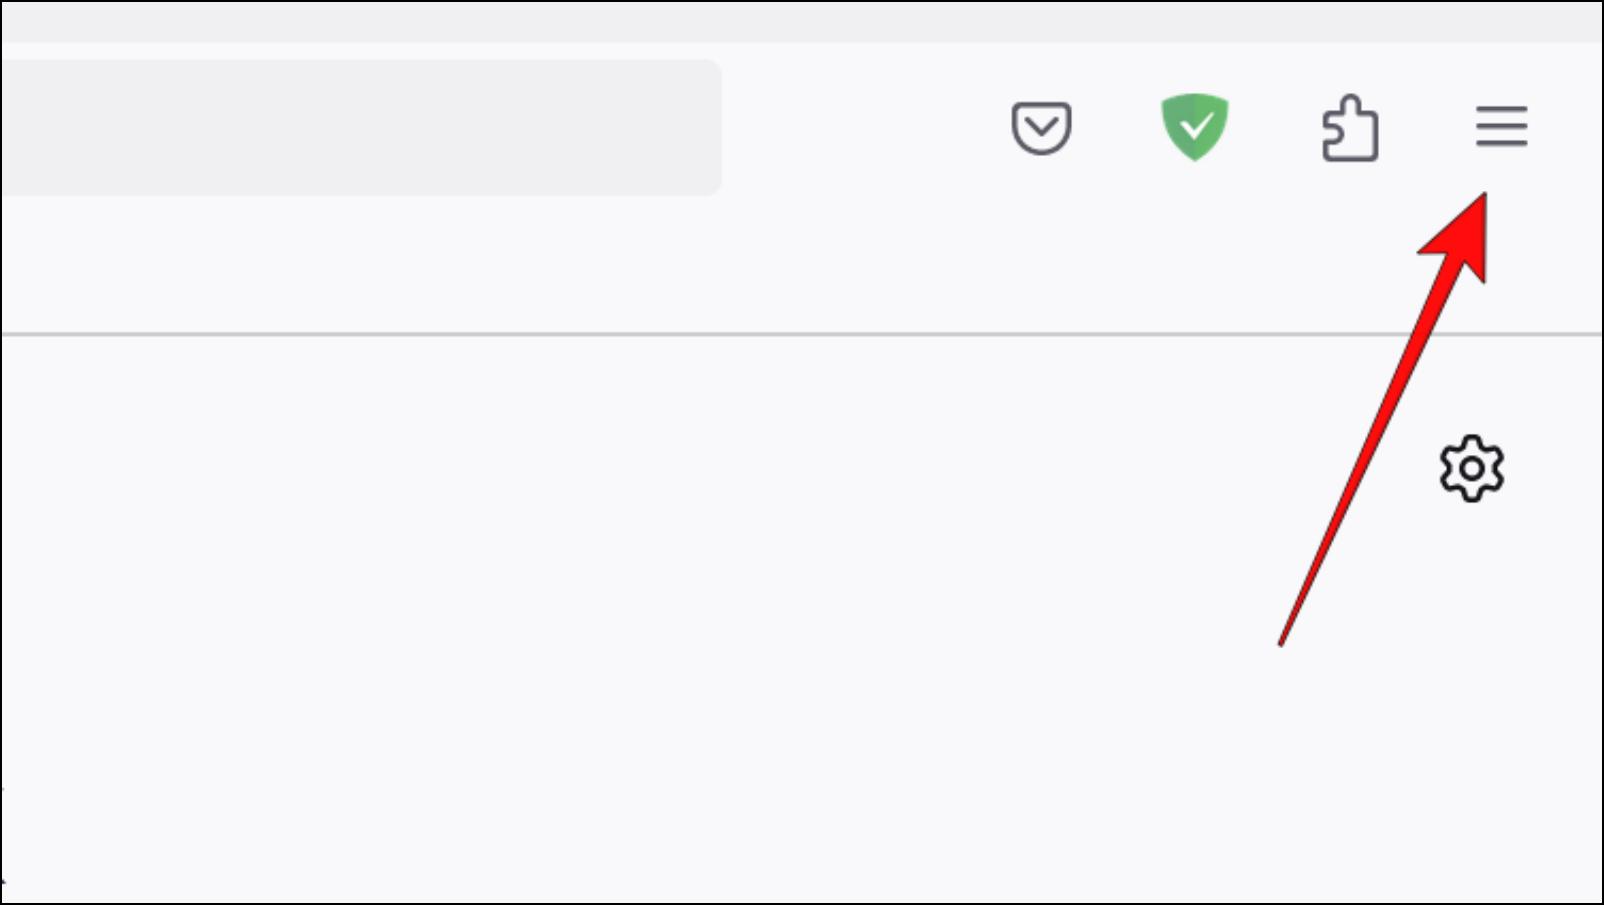
Step 1: Click on the hamburger menu in the Firefox toolbar.
Step 2: Open Settings.

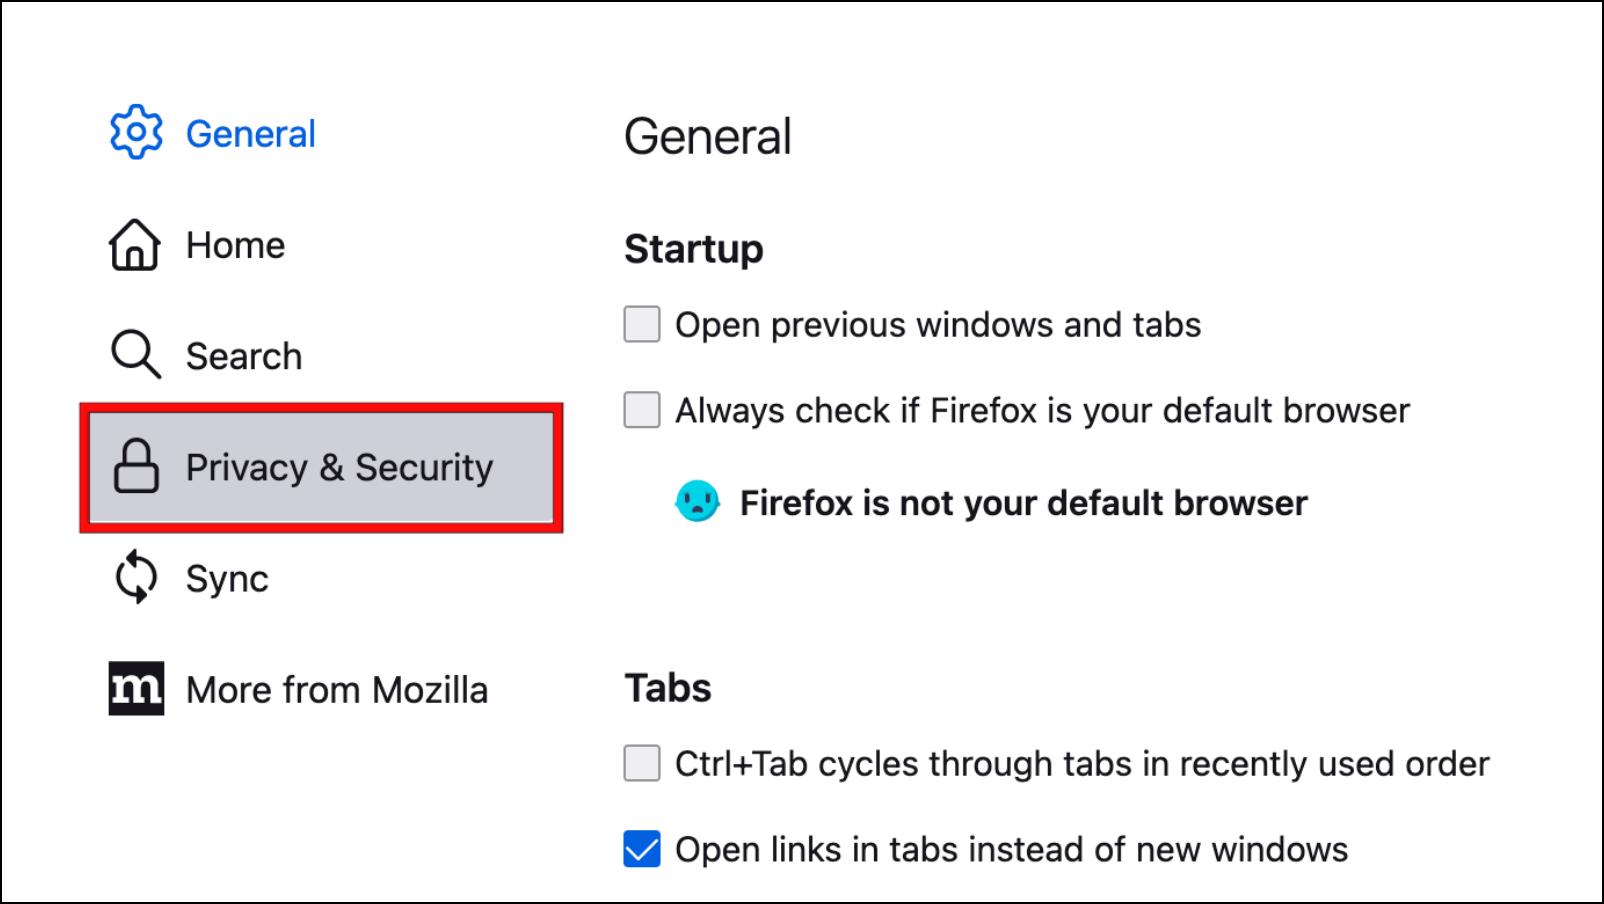
Step 3: Go to Privacy & Security using the left sidebar.
Step 4: Scroll down to Cookies and Site Data.
Step 5: Click on the Clear Data… button.
![]()
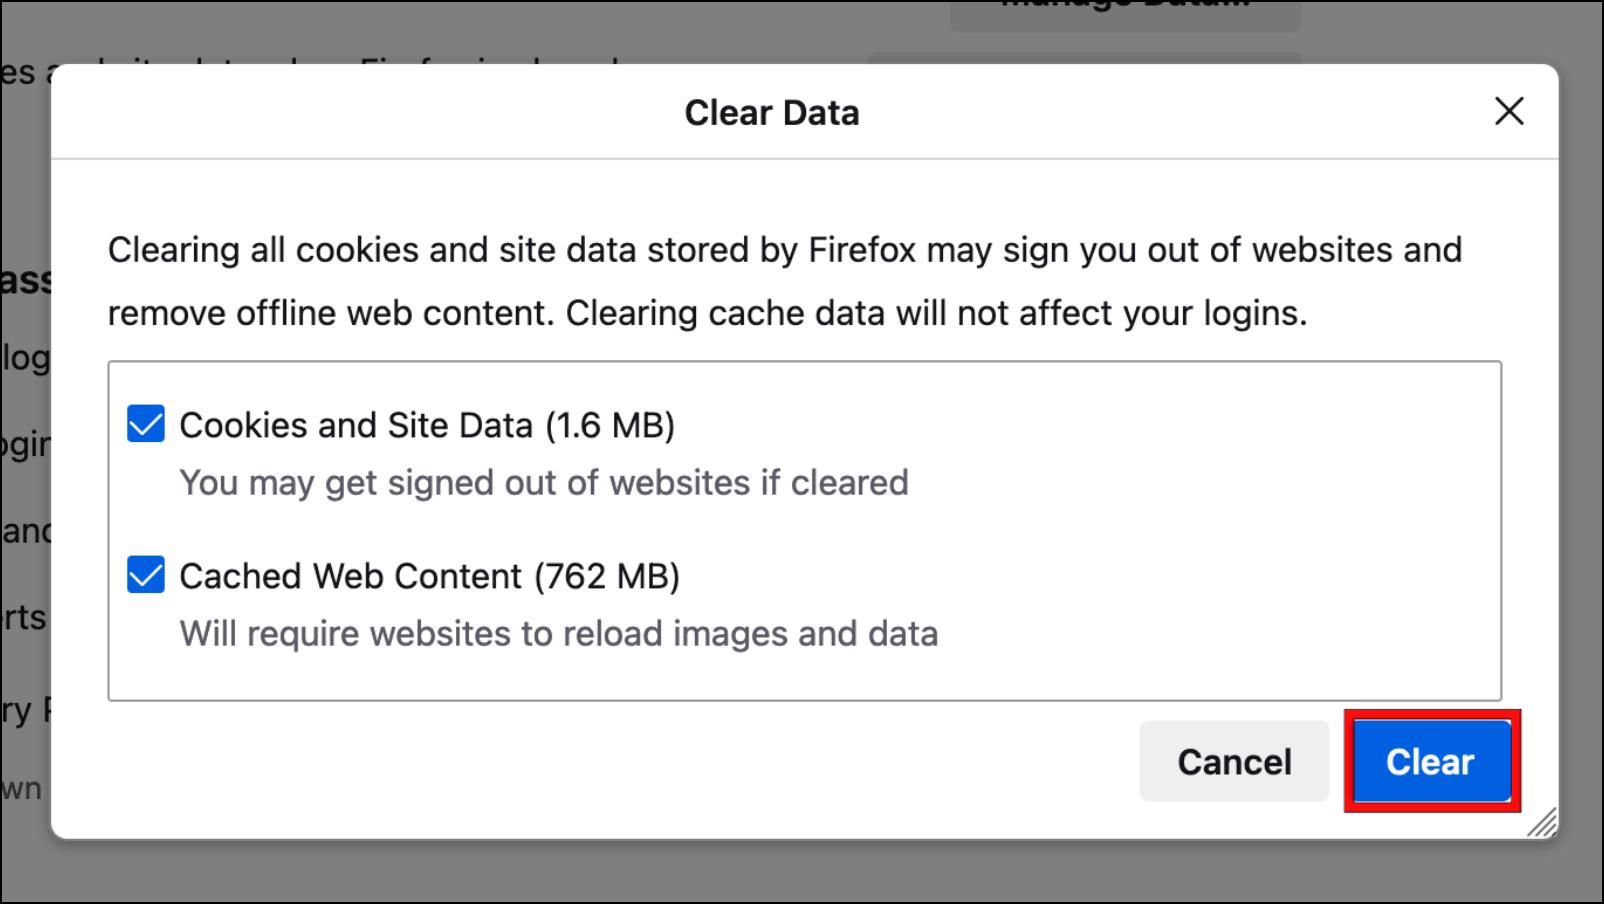
Step 6: Tick the box next to both options.
![]()
Step 7: Lastly, click on the Clear button.
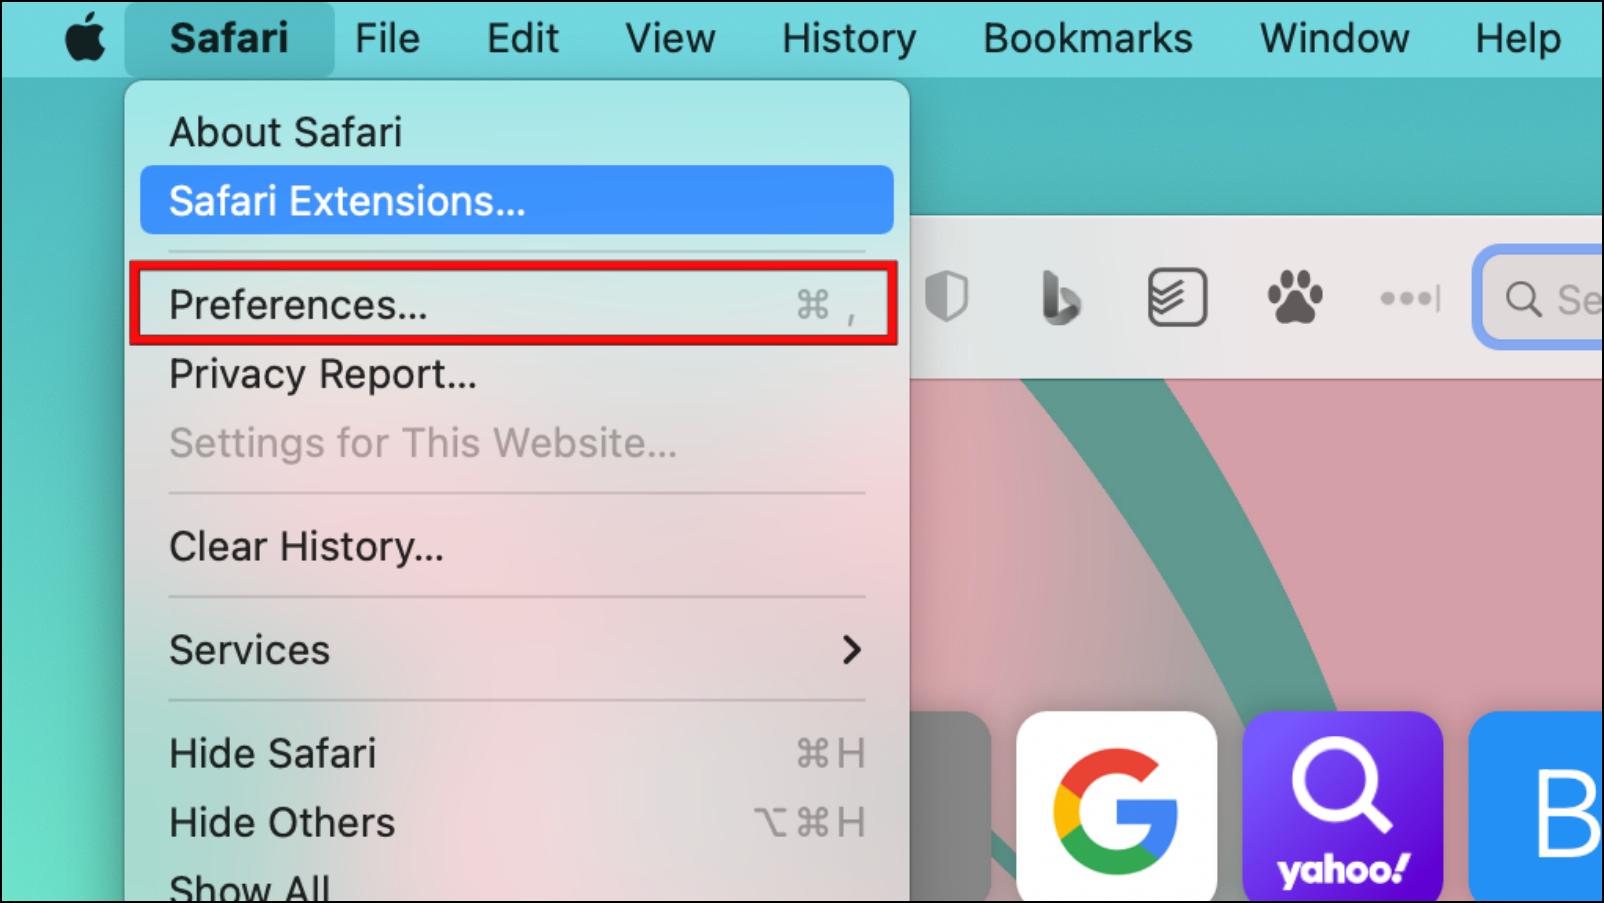
Safari
Here are the steps to clear the cache and other site data in Safari.
Step 1: For Safari, click on the Safari menu in the status bar above.
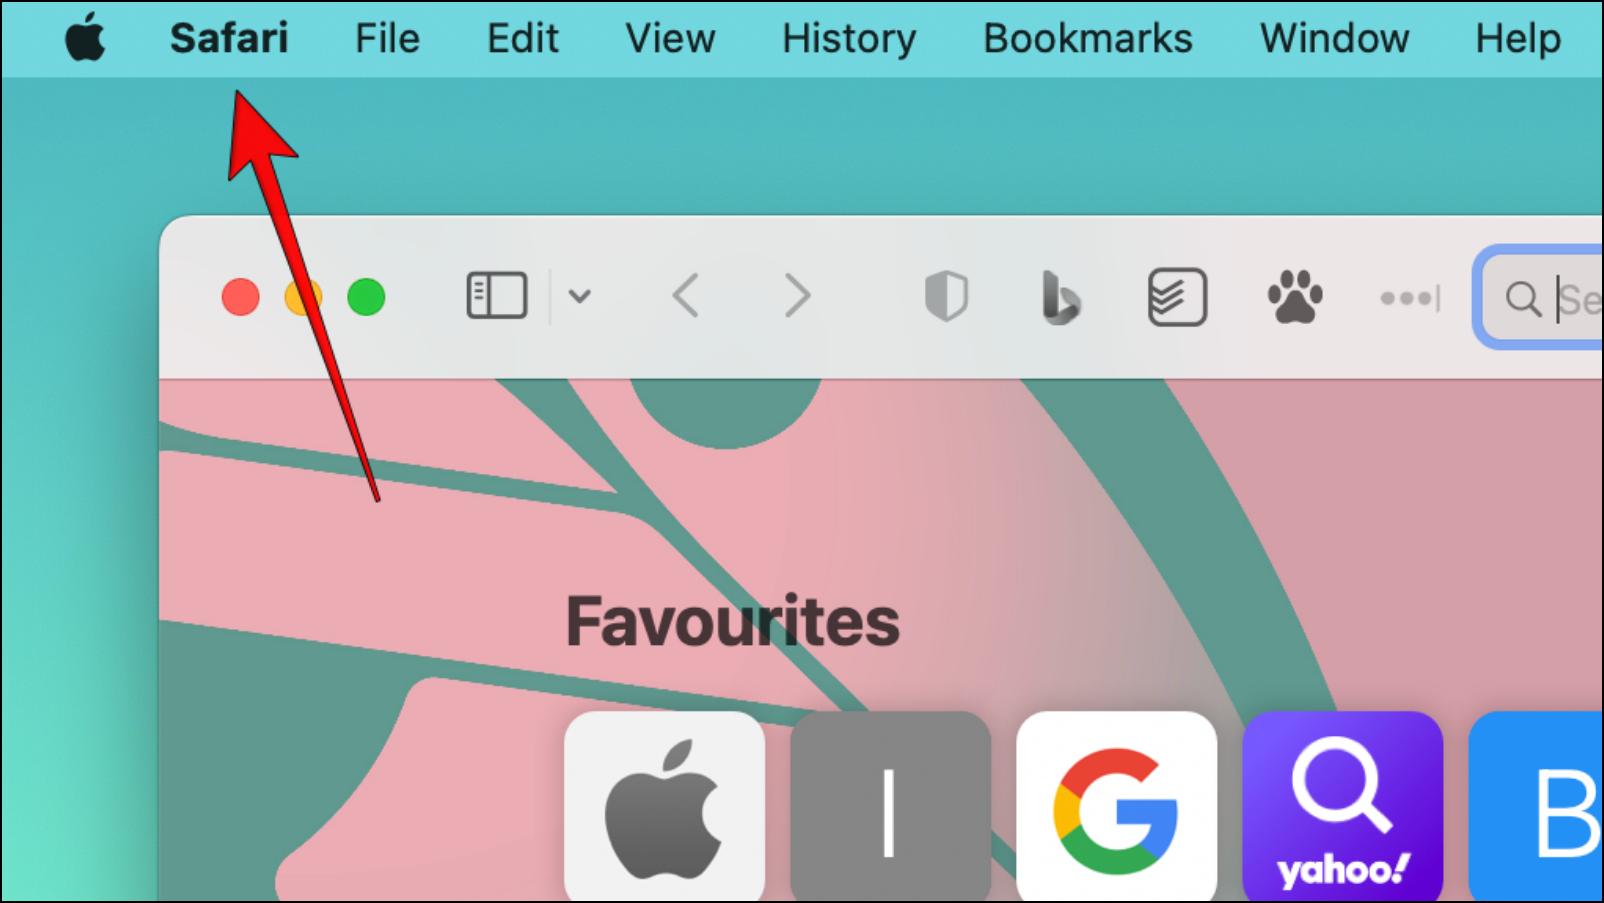
Step 2: Select the option, Clear History…
![]()
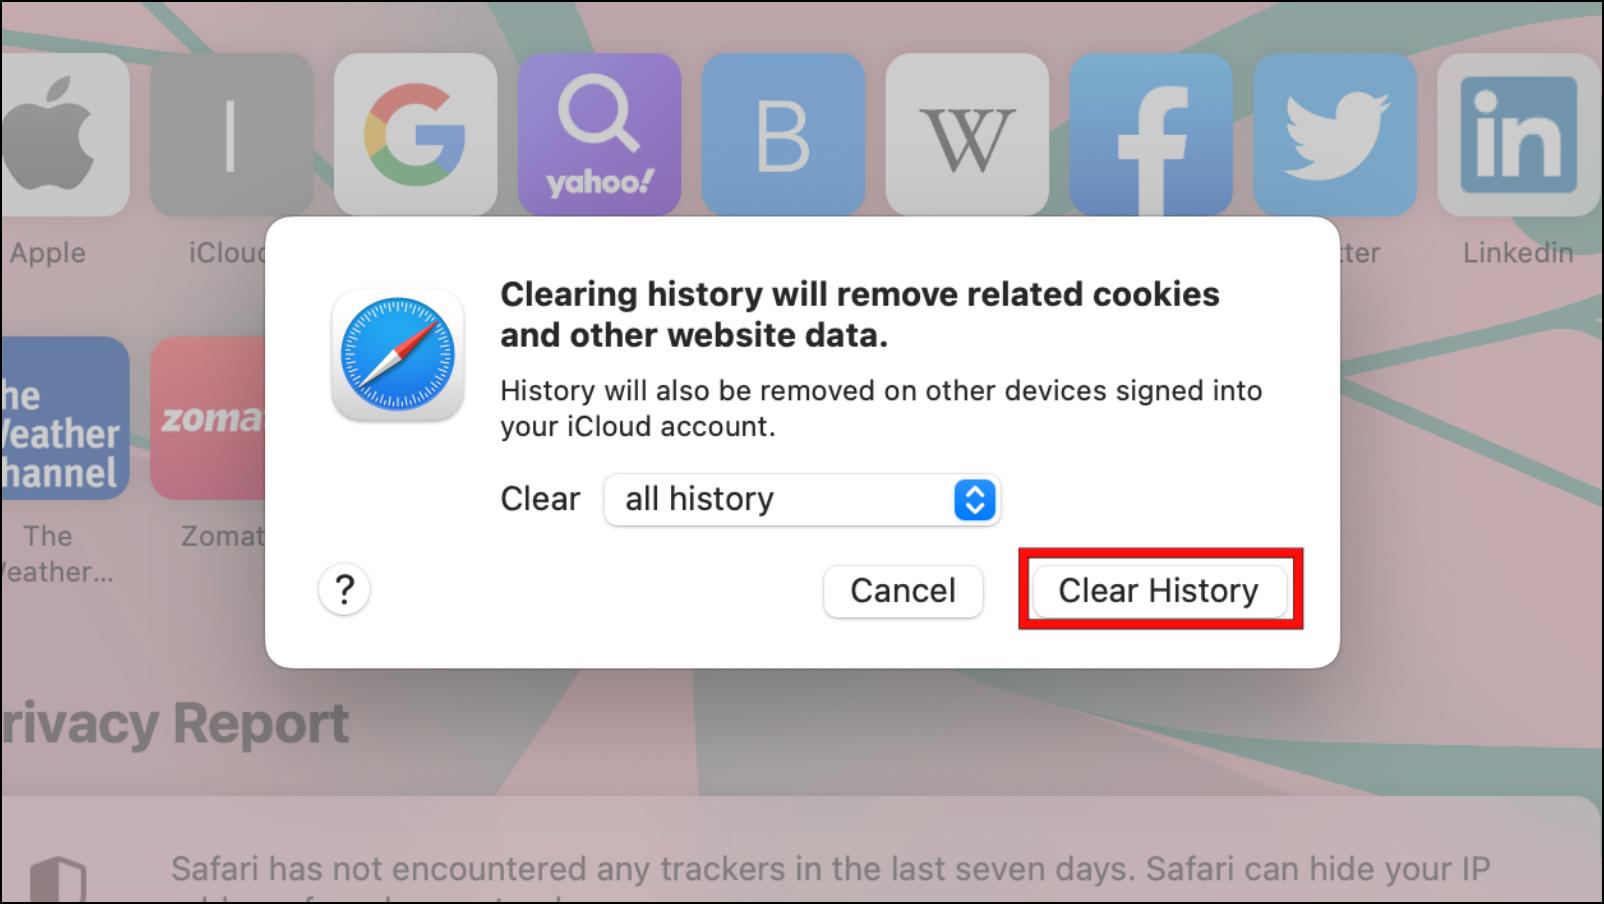
Step 3: Click on the box and choose all history.
![]()
Step 4: Lastly, click on the Clear History button.
Clearing up cache and site data will also free up some space in your system memory.
Method 2- Force Sync Bitwarden Vault
If the Bitwarden extension is unable to load the contents of the vault, then you can try force-syncing it. This may help to load all your data and other items properly.
Step 1: Open your web browser and click on the Bitwarden extension.
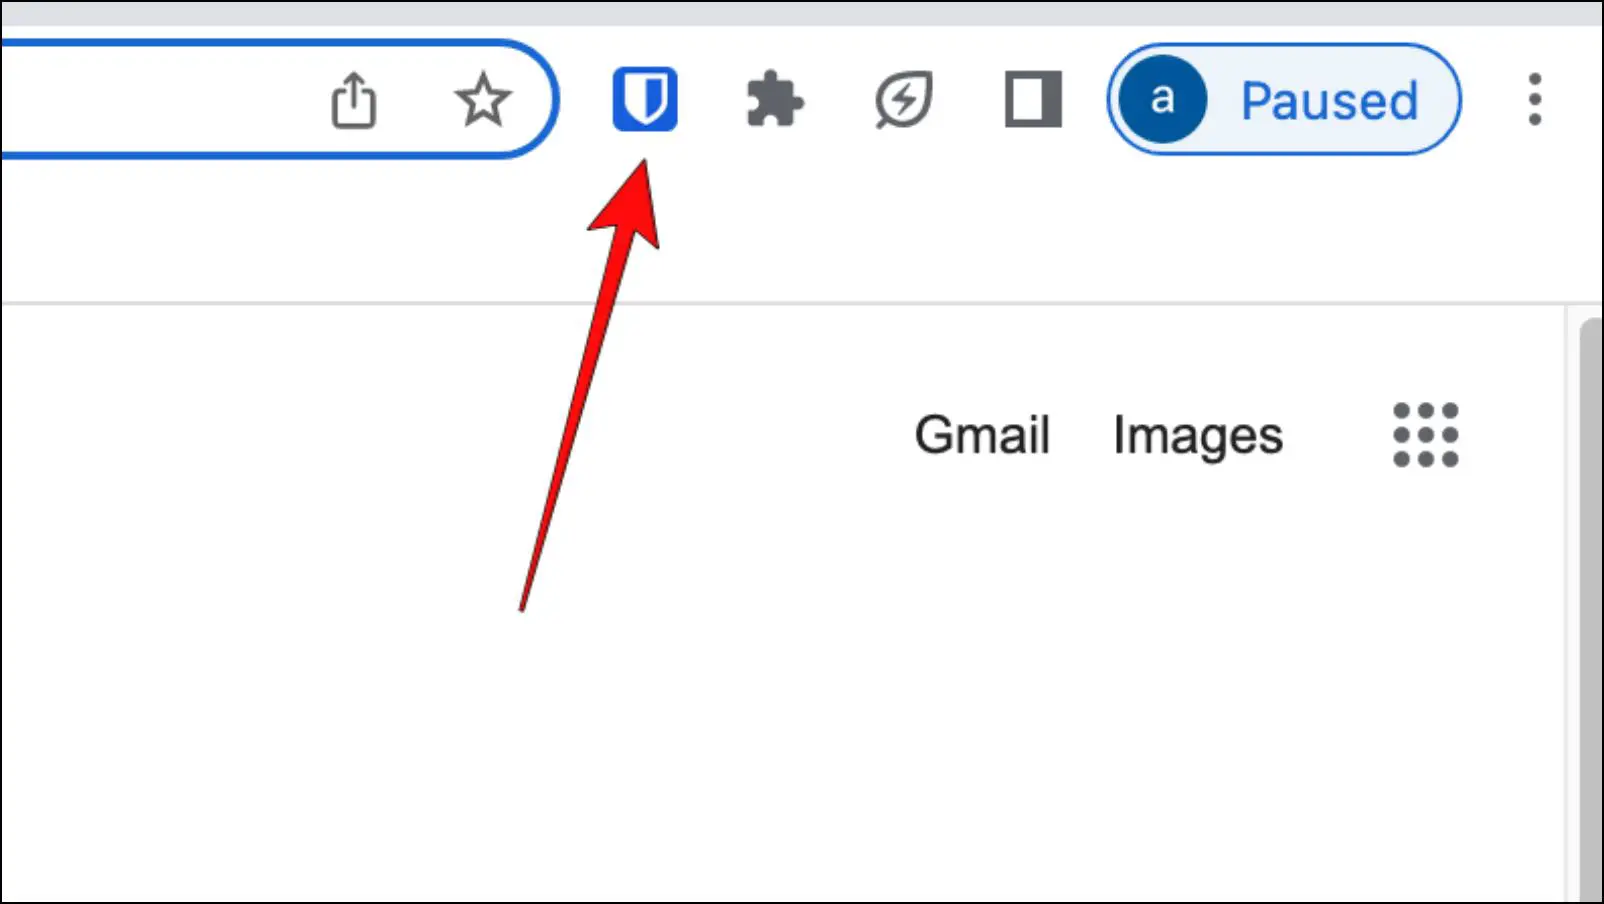
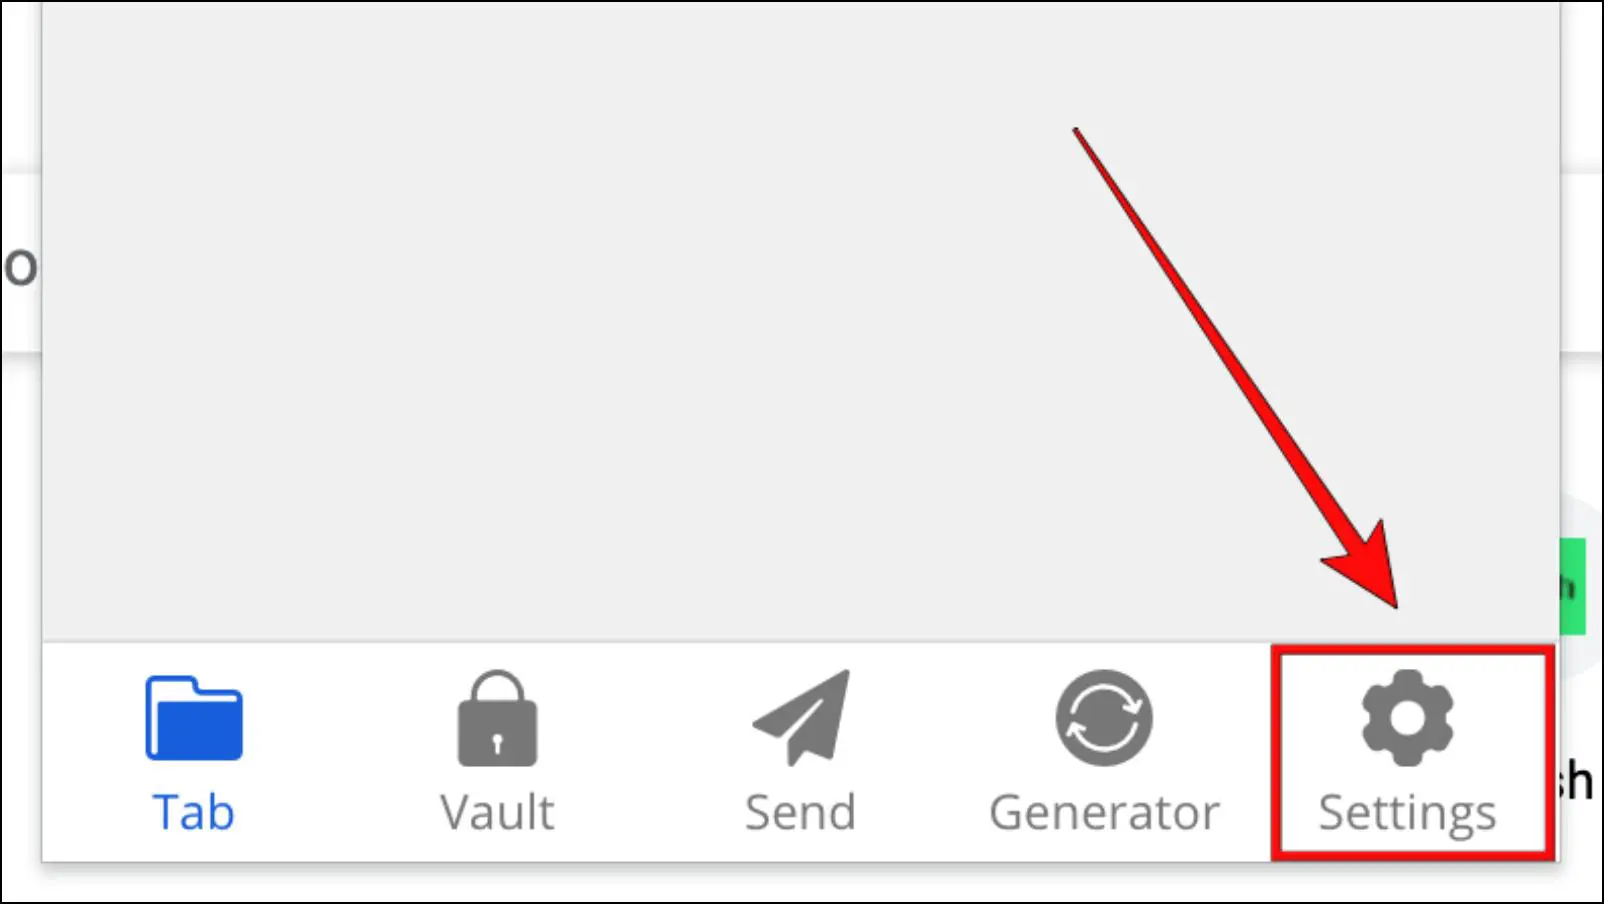
Step 2: In the extension window, click on the gear icon to open Settings.

Step 3: Under the Manage section in Settings, click on Sync.
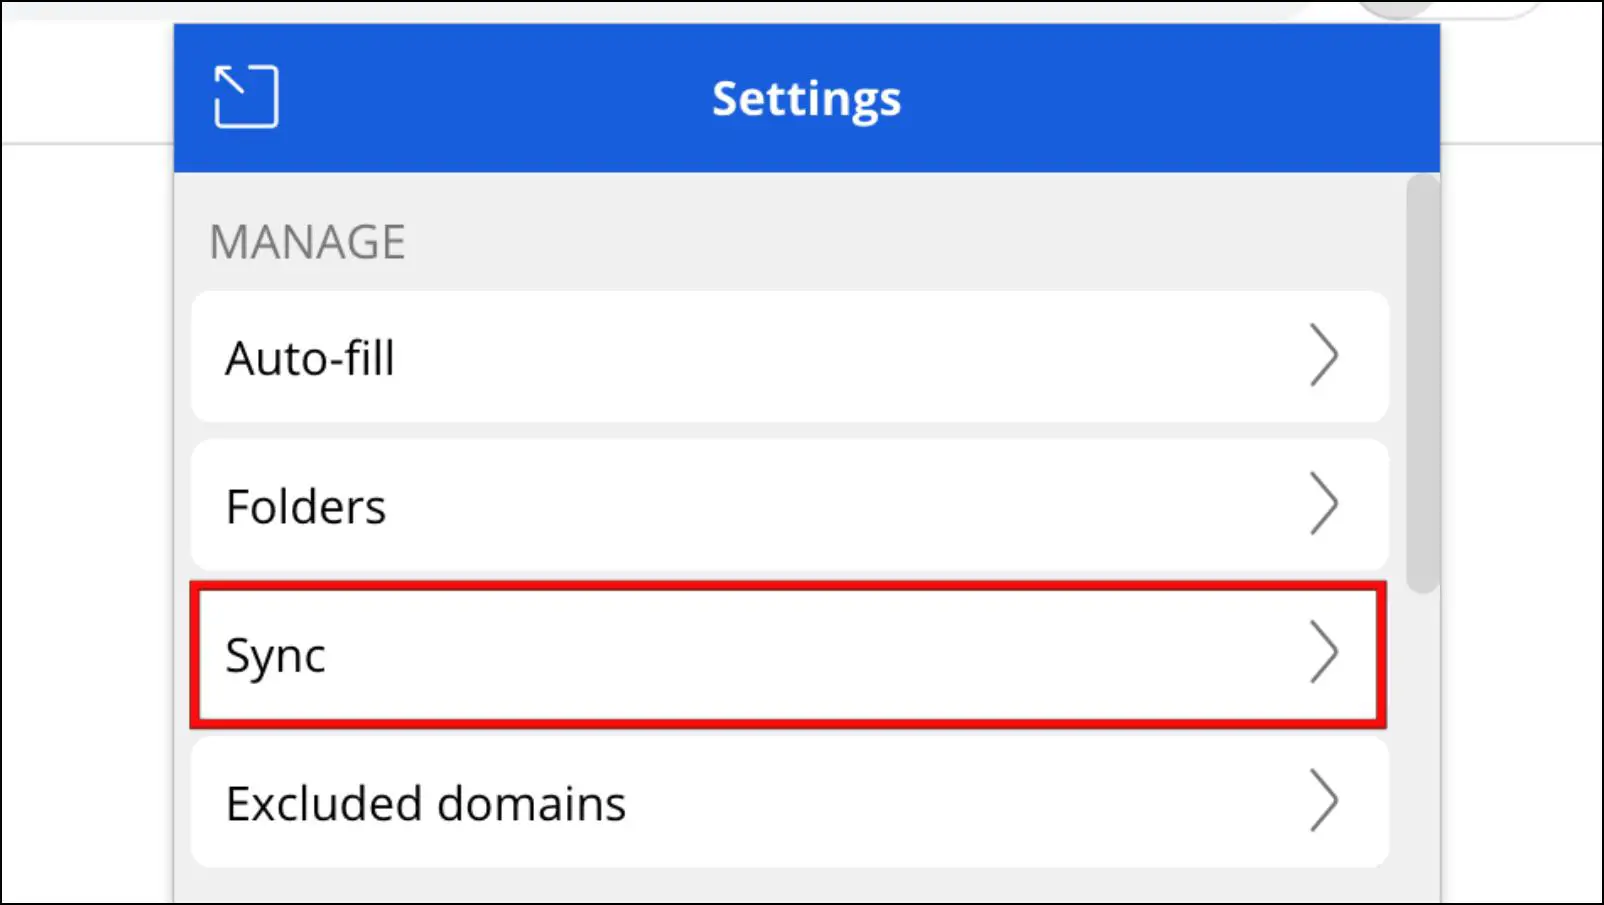
Step 4: Here, click on Sync Vault Now.
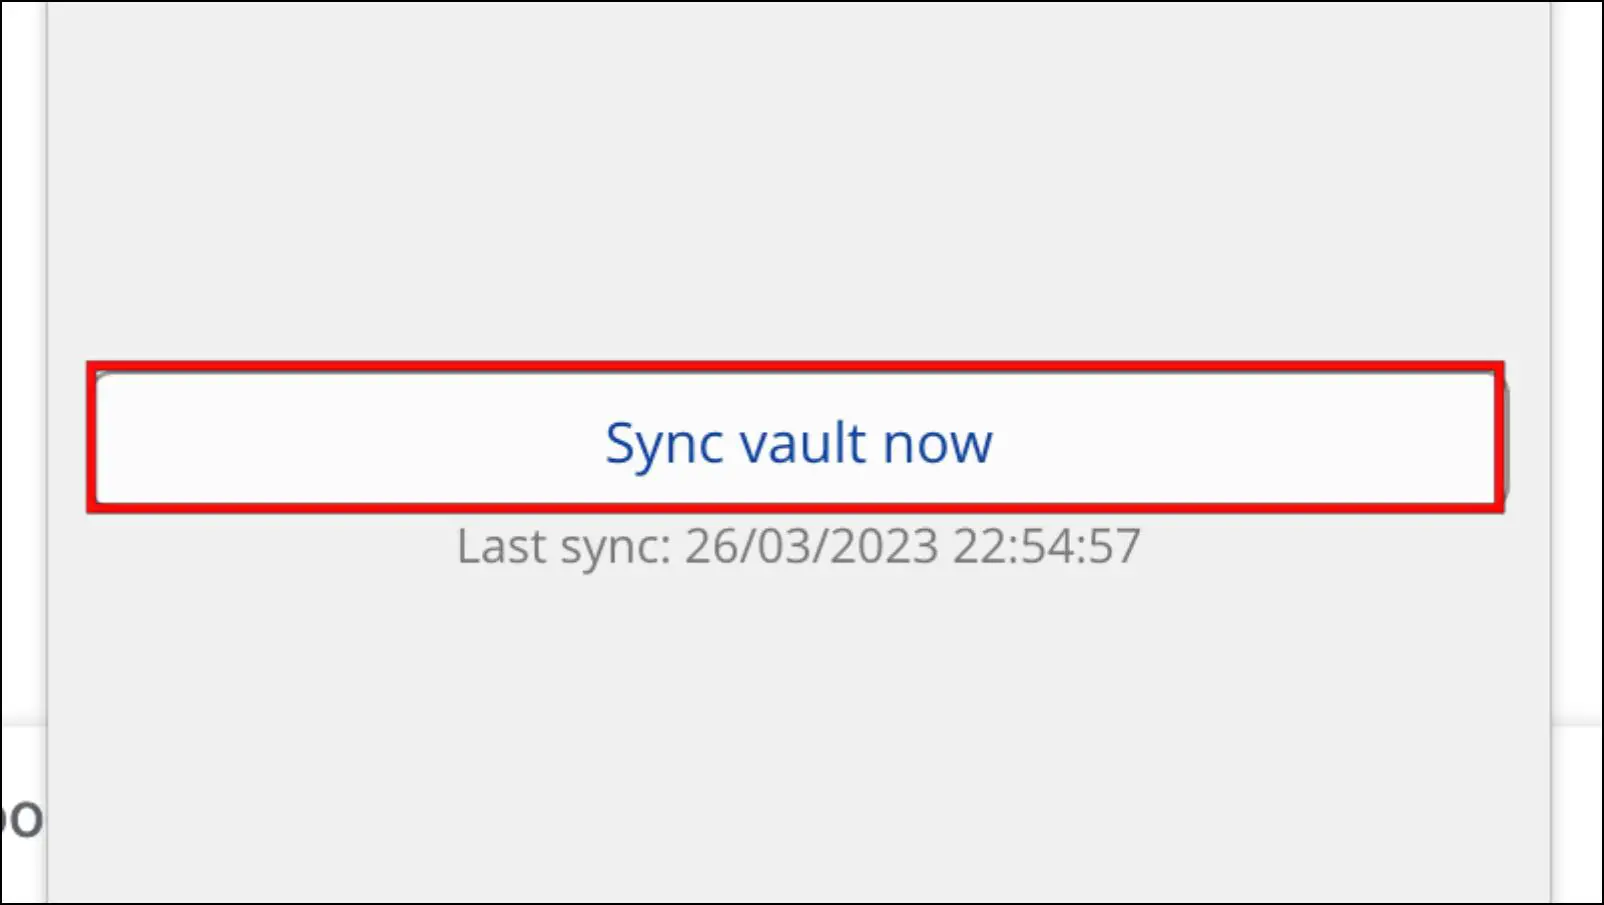
Now go back, and your data should be loaded properly within the extension.
Method 3- Turn Off Page Autofill
Bitwarden can detect a login form when the page loads and will fill in the required information accordingly. This, even though useful, can cause issues with the current build of the extension and also compromise your data on untrusted sites. So it is best to disable the Autofill option.
Step 1: Click on the Bitawarden extension in your web browser.

Step 2: Next, click on the gear icon to open Settings.
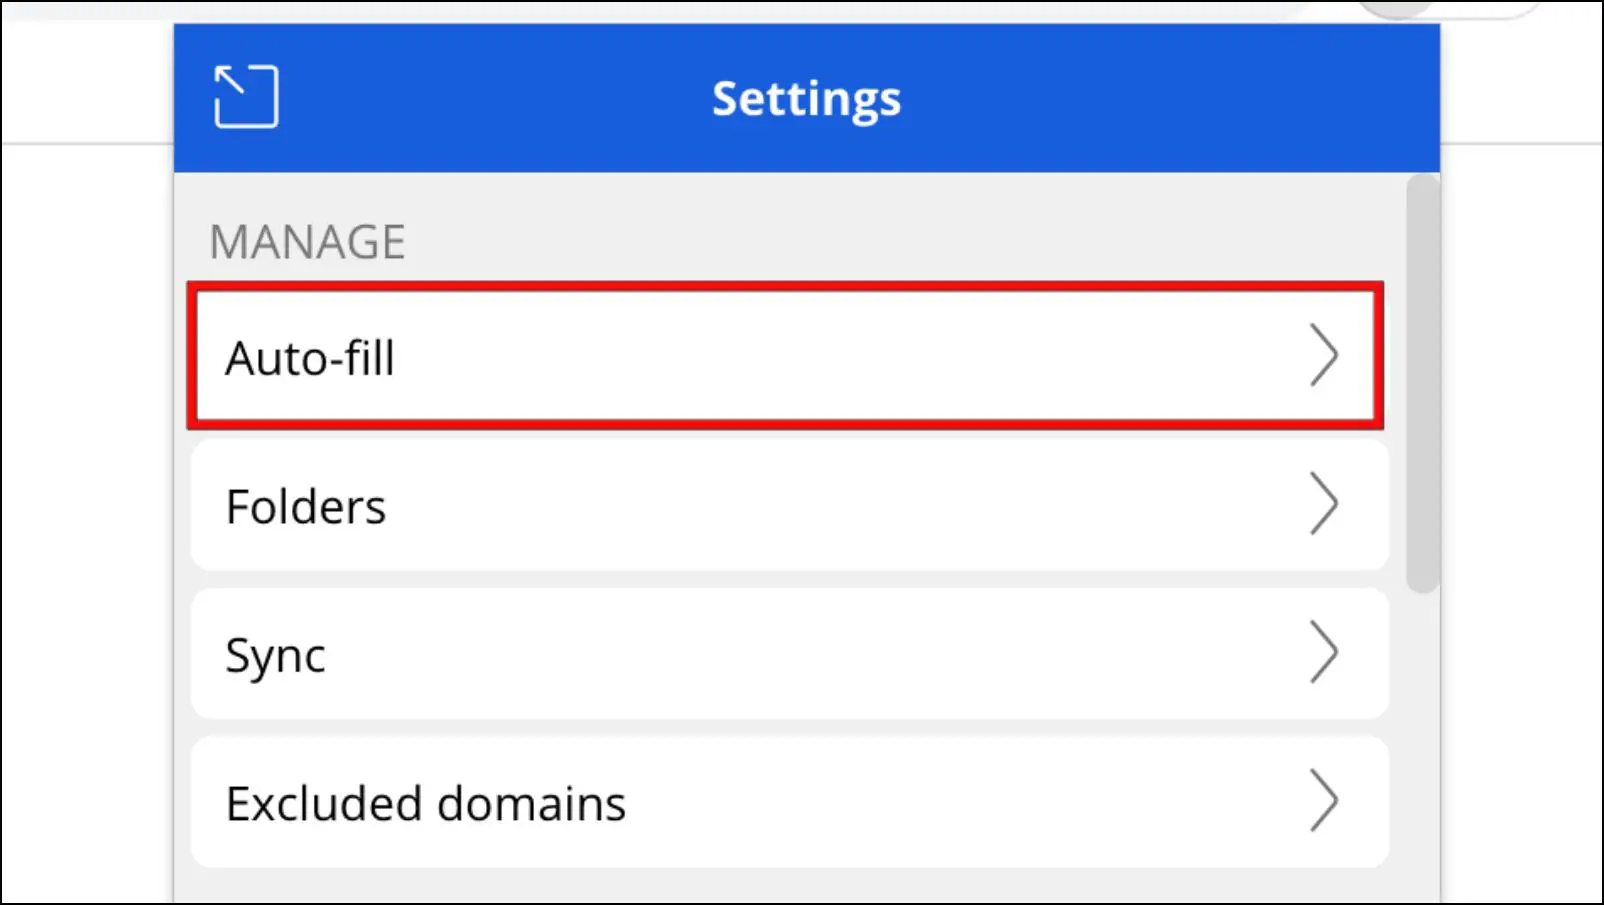
Step 3: Under Settings, select Auto-fill.
Step 4: Untick the box next to the Auto-fill page on load.
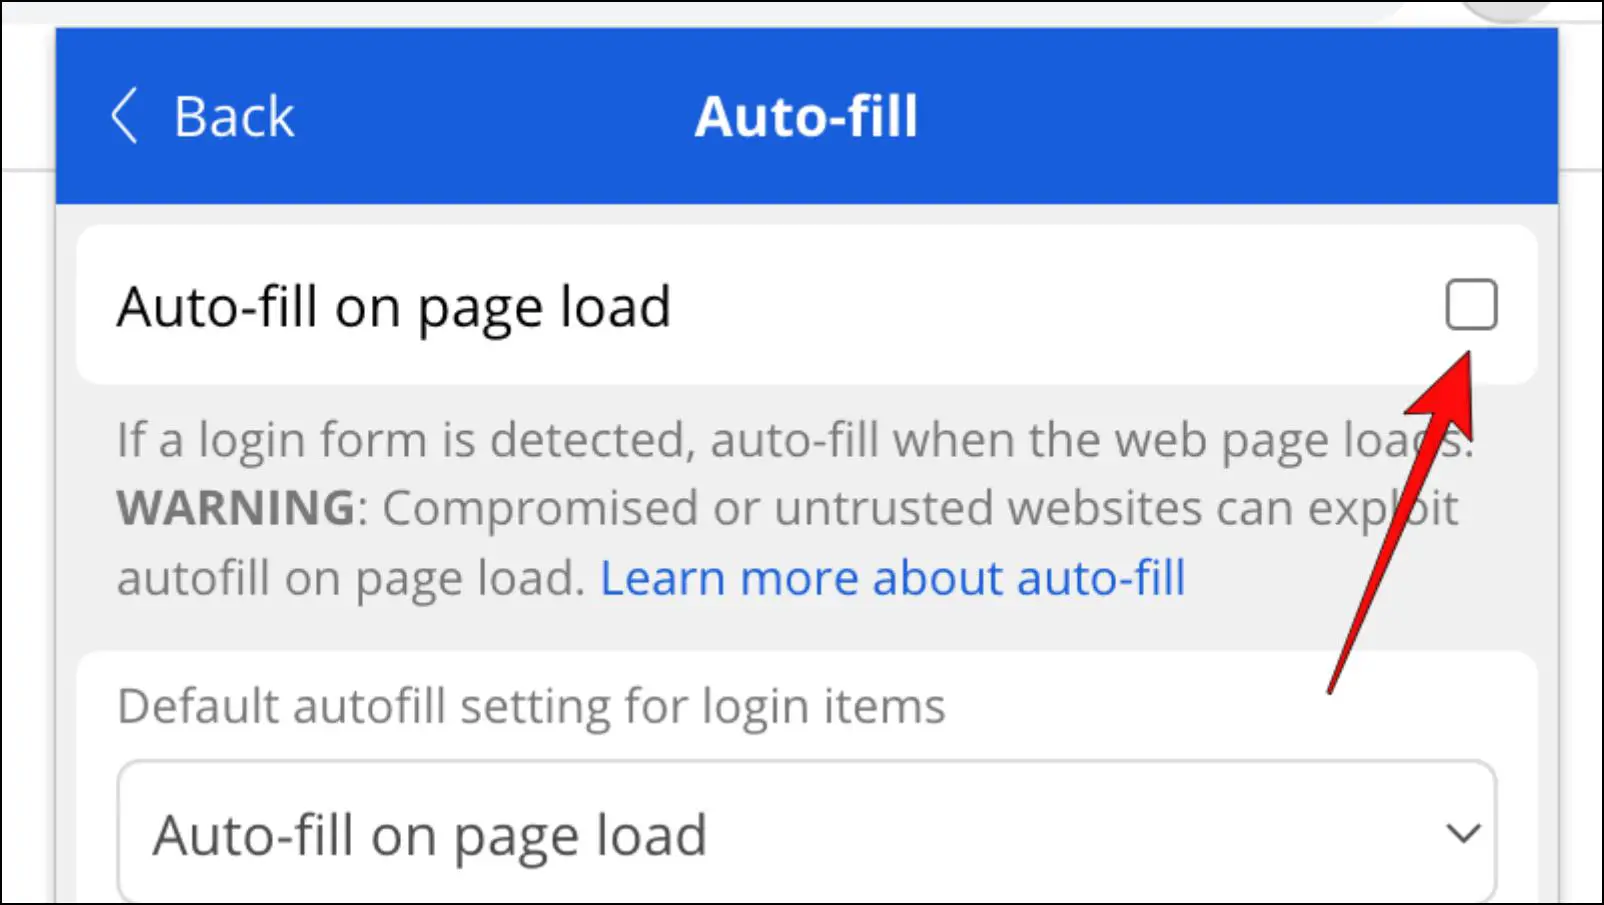
After this, close and restart the browser to check if the issue is resolved.
Method 4- Relogin to Bitwarden Extension
If Bitwarden has trouble loading your details and running into issues constantly, try logging out of the extension. And logging back in again. This should trigger the sync process and help the extension to load all the data properly.
Step 1: To log out of Bitwarden, open the extension in your web browser.

Step 2: Click on the gear icon in the extension window.

Step 3: In Settings, scroll down to Log out under the Account section.
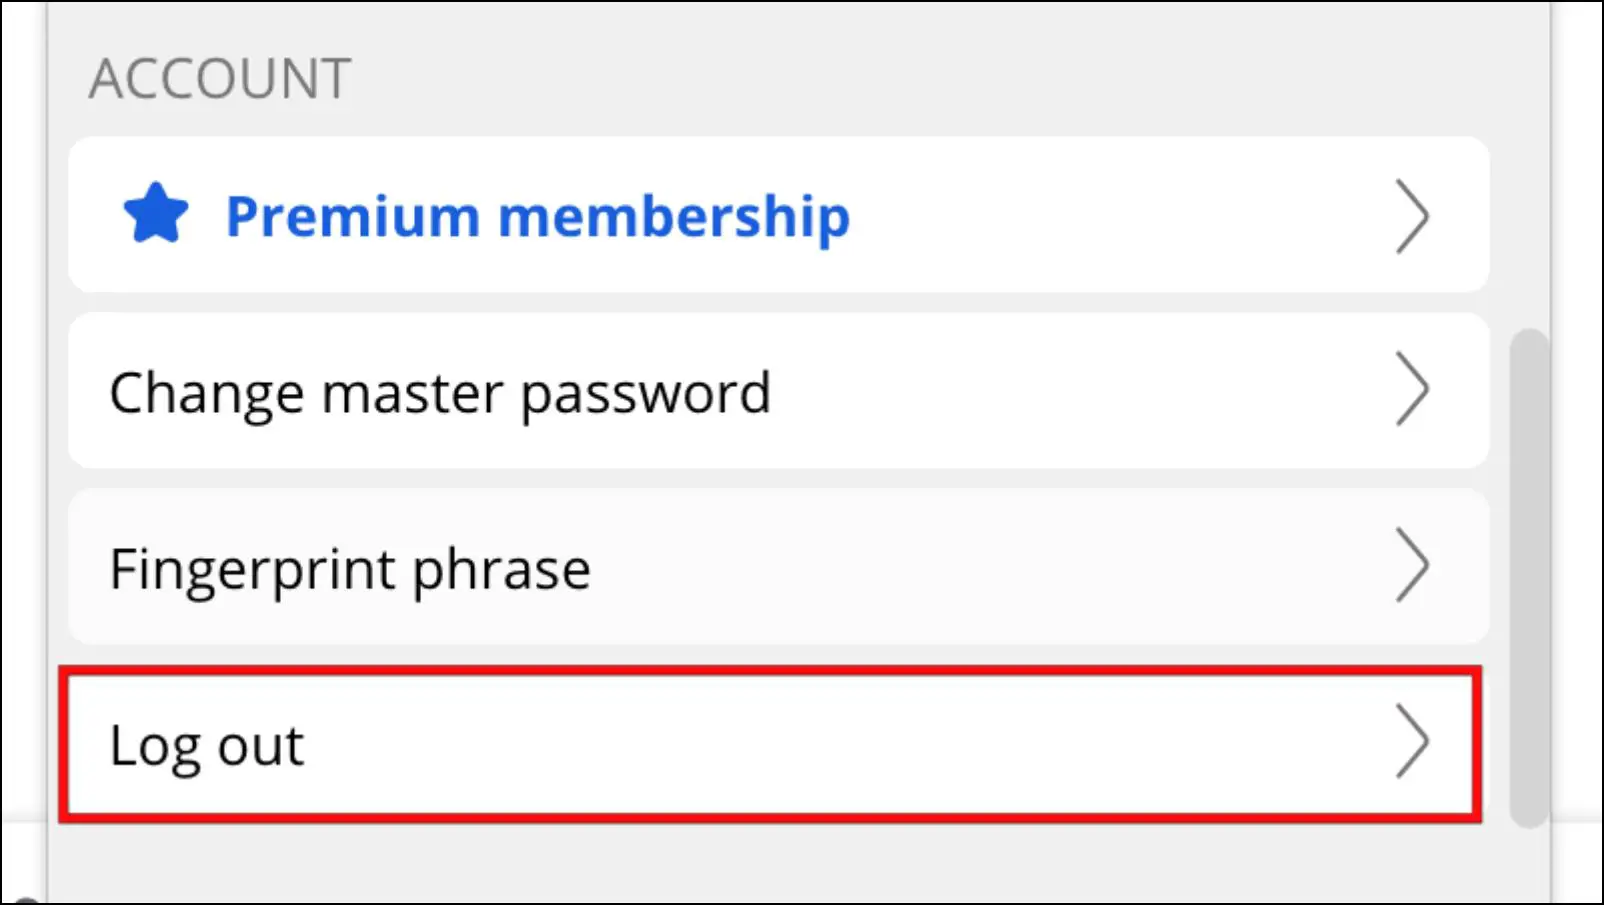
Step 4: In the confirmation prompt, click on Yes to log out of the extension.
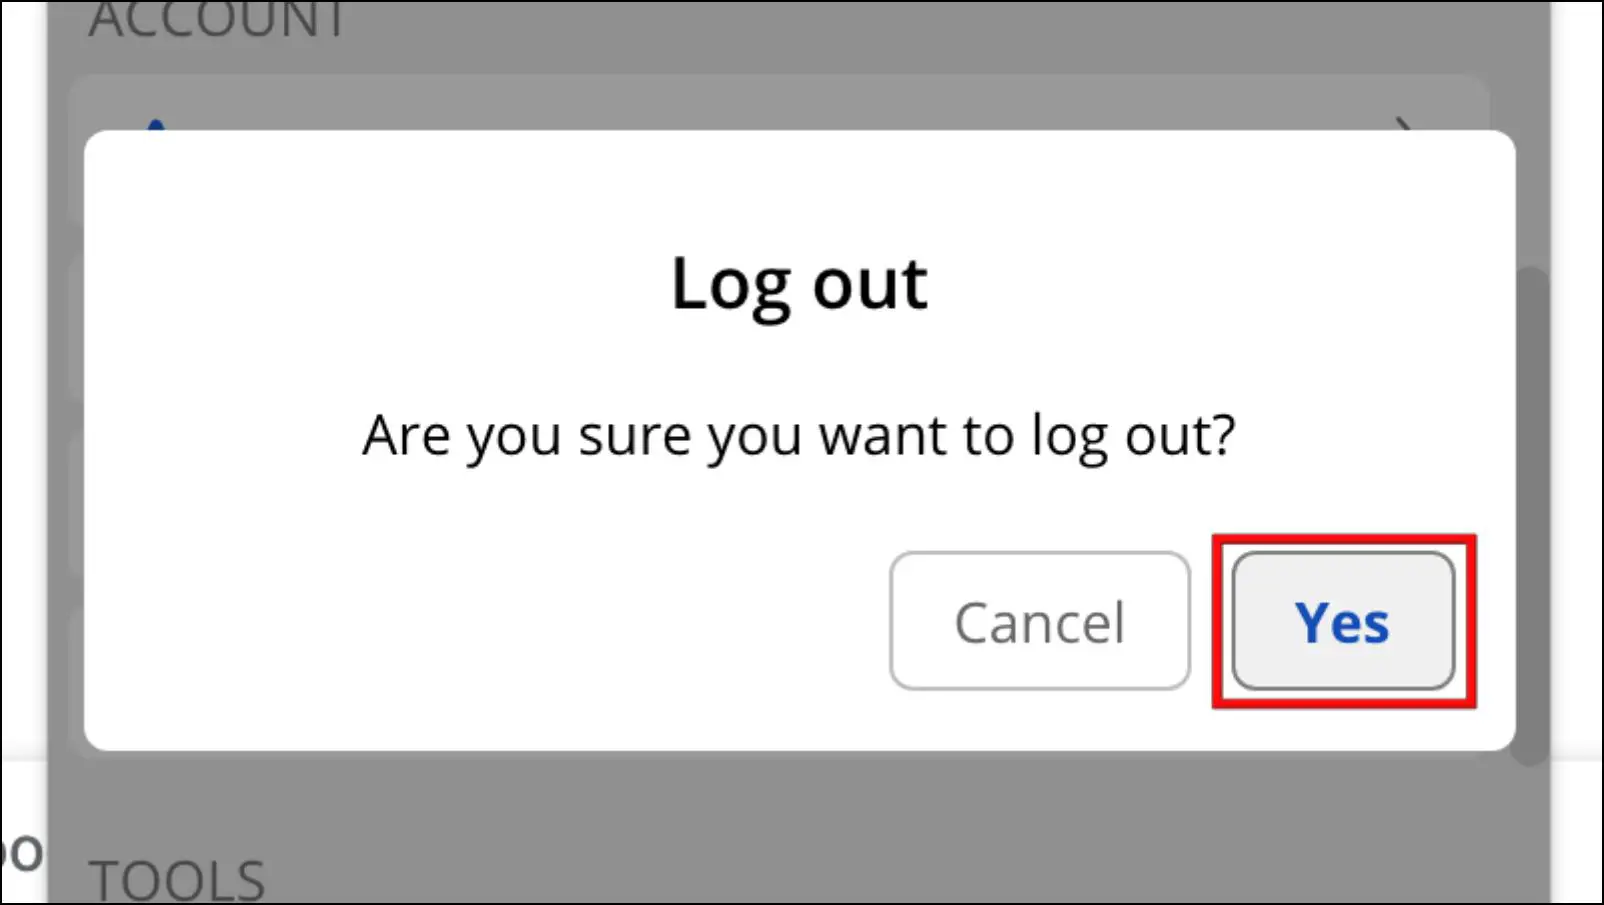
Step 5: Now log in to Bitwarden with the extension and verify if the issue is fixed.
Method 5- Force Close the Web Browser
Your browser could also be at fault for causing issues with the extension. This could be due to several ongoing processes in the browser that are interfering with the Bitwarden extension. You can try force-closing your web browser to help fix the problems with the extension.
Force Close on Mac
This is how you can force close and restart your web browser in macOS.
Step 1: Click on the Apple logo.
Step 2: Select Force Quit…
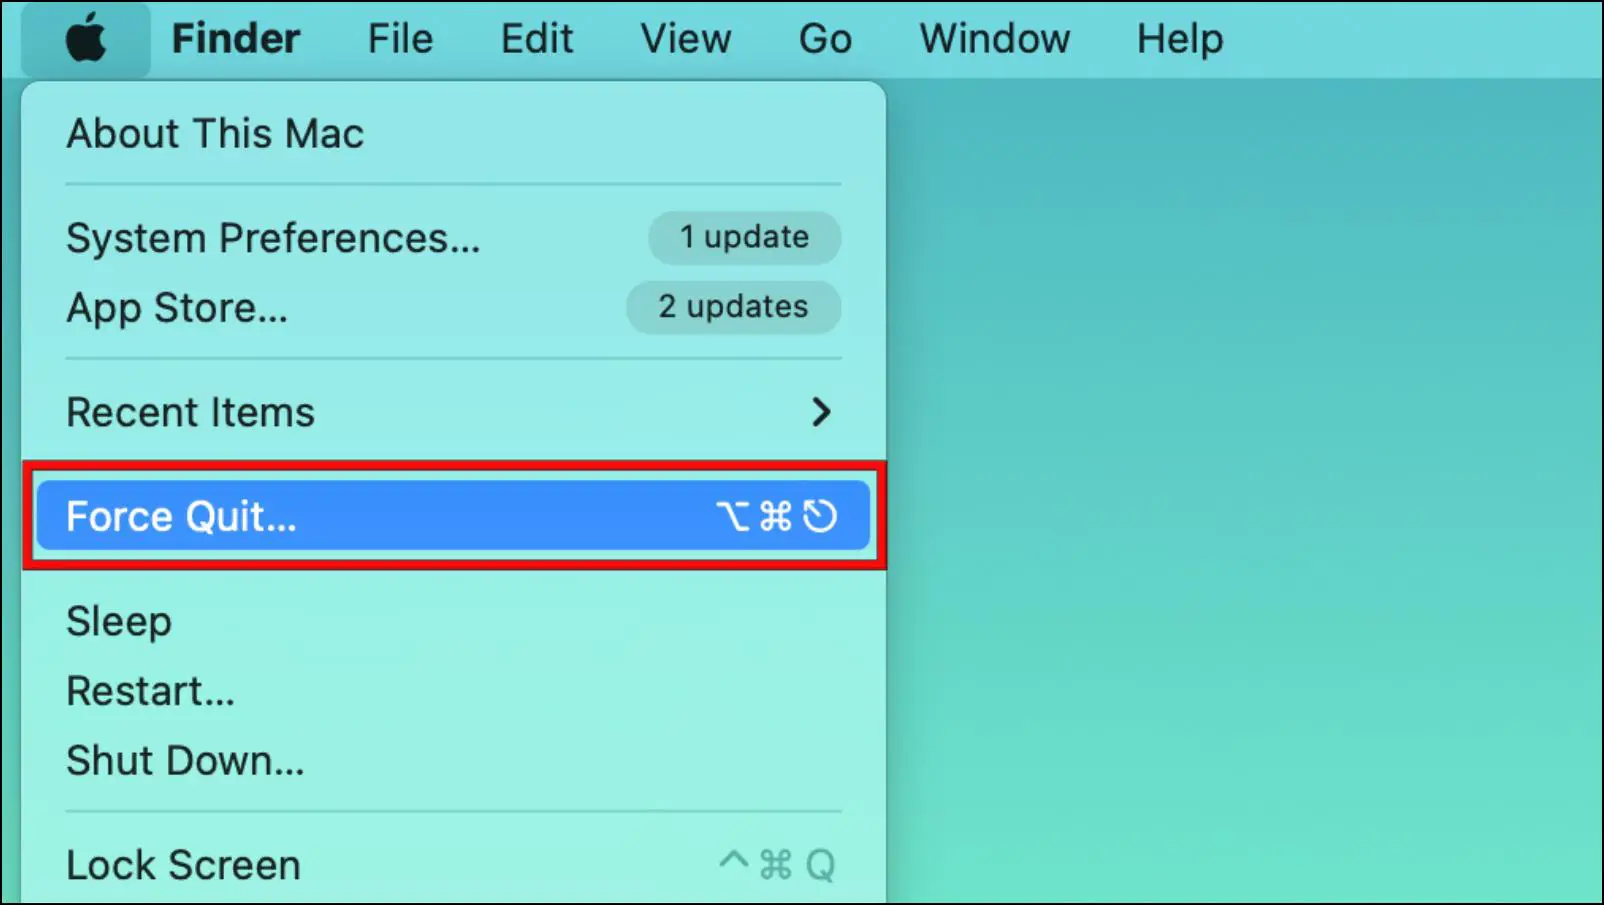
You can also use the Option + Command + Esc keys to bring up the Force Quit menu.
Step 3: Choose the browser from the list of running apps.
Step 4: Click on Force Quit.
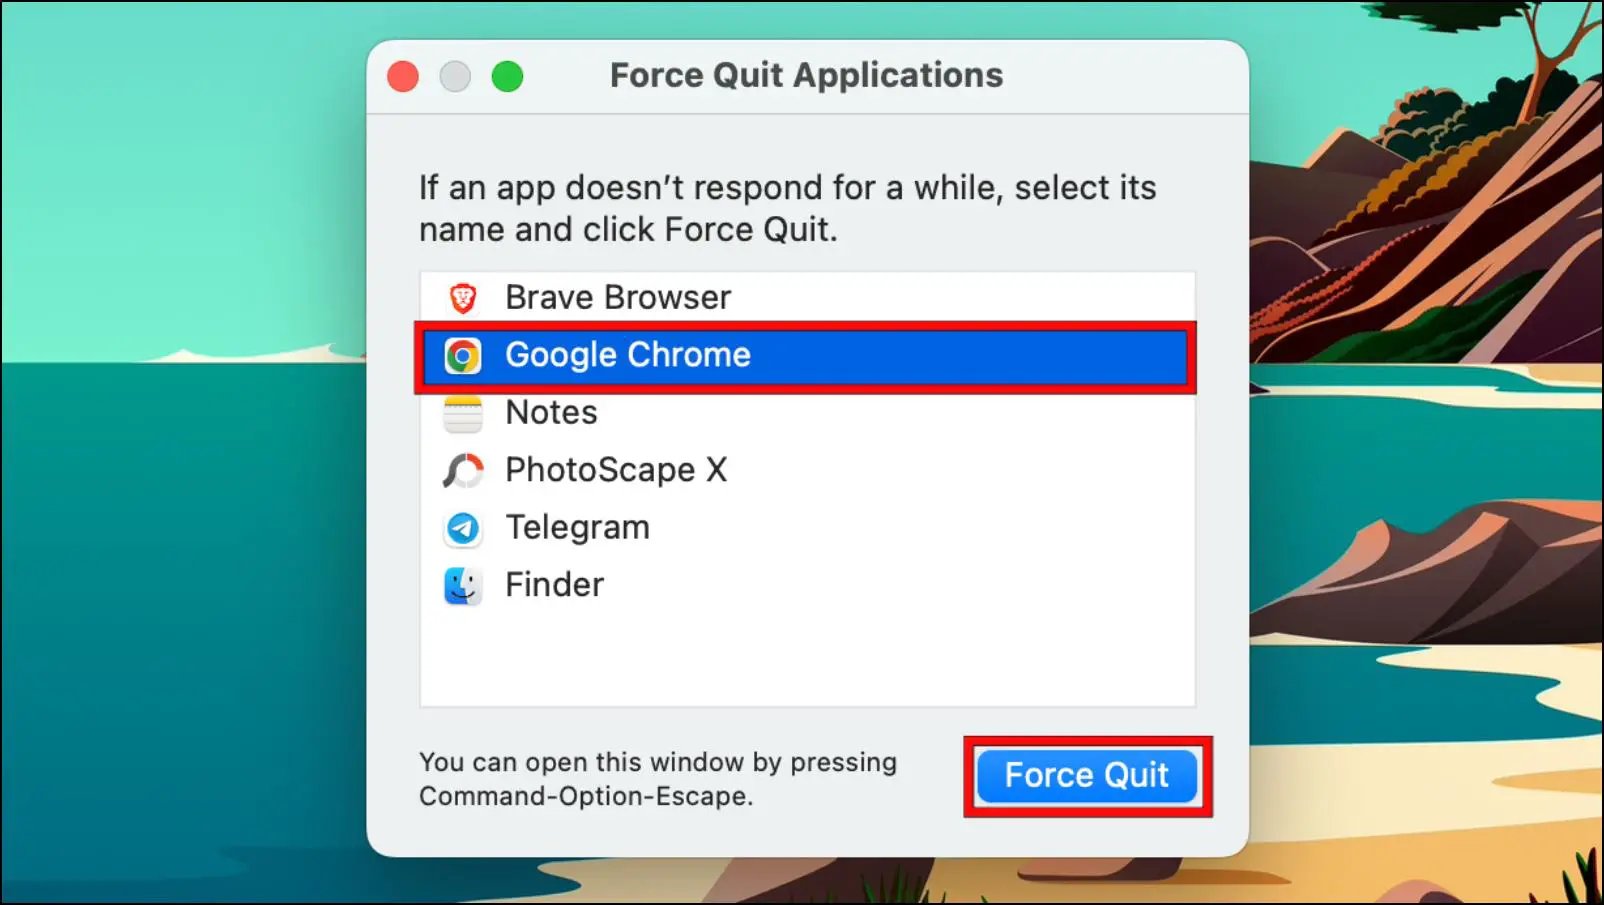
Step 5: Choose Force Quit in the confirmation prompt.
Force Close on Windows
To Force close a program on Windows, you can use the Task Manager. here is how you can do it.
Step 1: Close the browser by clicking on the x button.
Step 2: Press Ctrl + Shift + Esc on your keyboard to launch Task Manager.
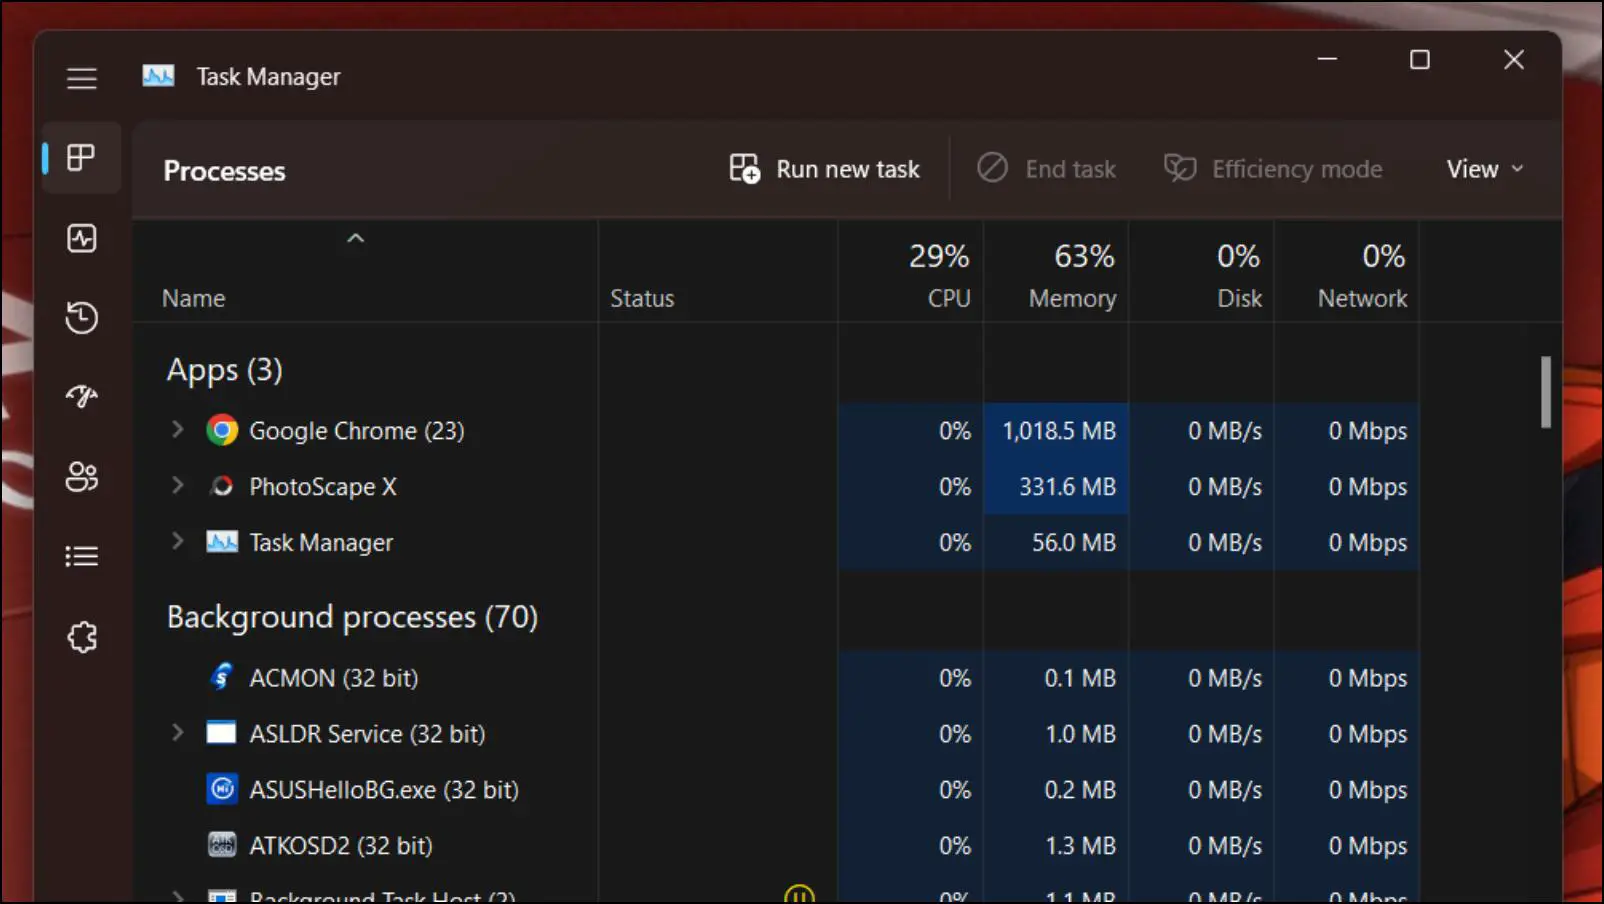
Step 3: In Task Manager, right-click on the browser and then click on End Task.
Once closed, wait for a couple of minutes before relaunching the web browser. Now open Bitwarden and check whether the issue is resolved or not.
Method 6- Add Bitwarden Extension to Login Items
If the Bitwarden extension for Safari is not loading items properly then you may consider adding it to login items. Login items are essentially the Startup apps on Windows. These apps will run in the background when you boot your PC. Here are the steps to add Bitwarden to Login items.
Step 1: Click on the Apple logo in the top left corner.
![]()
Step 2: Go to System Preferences…
Step 3: Select the Users & Groups option.
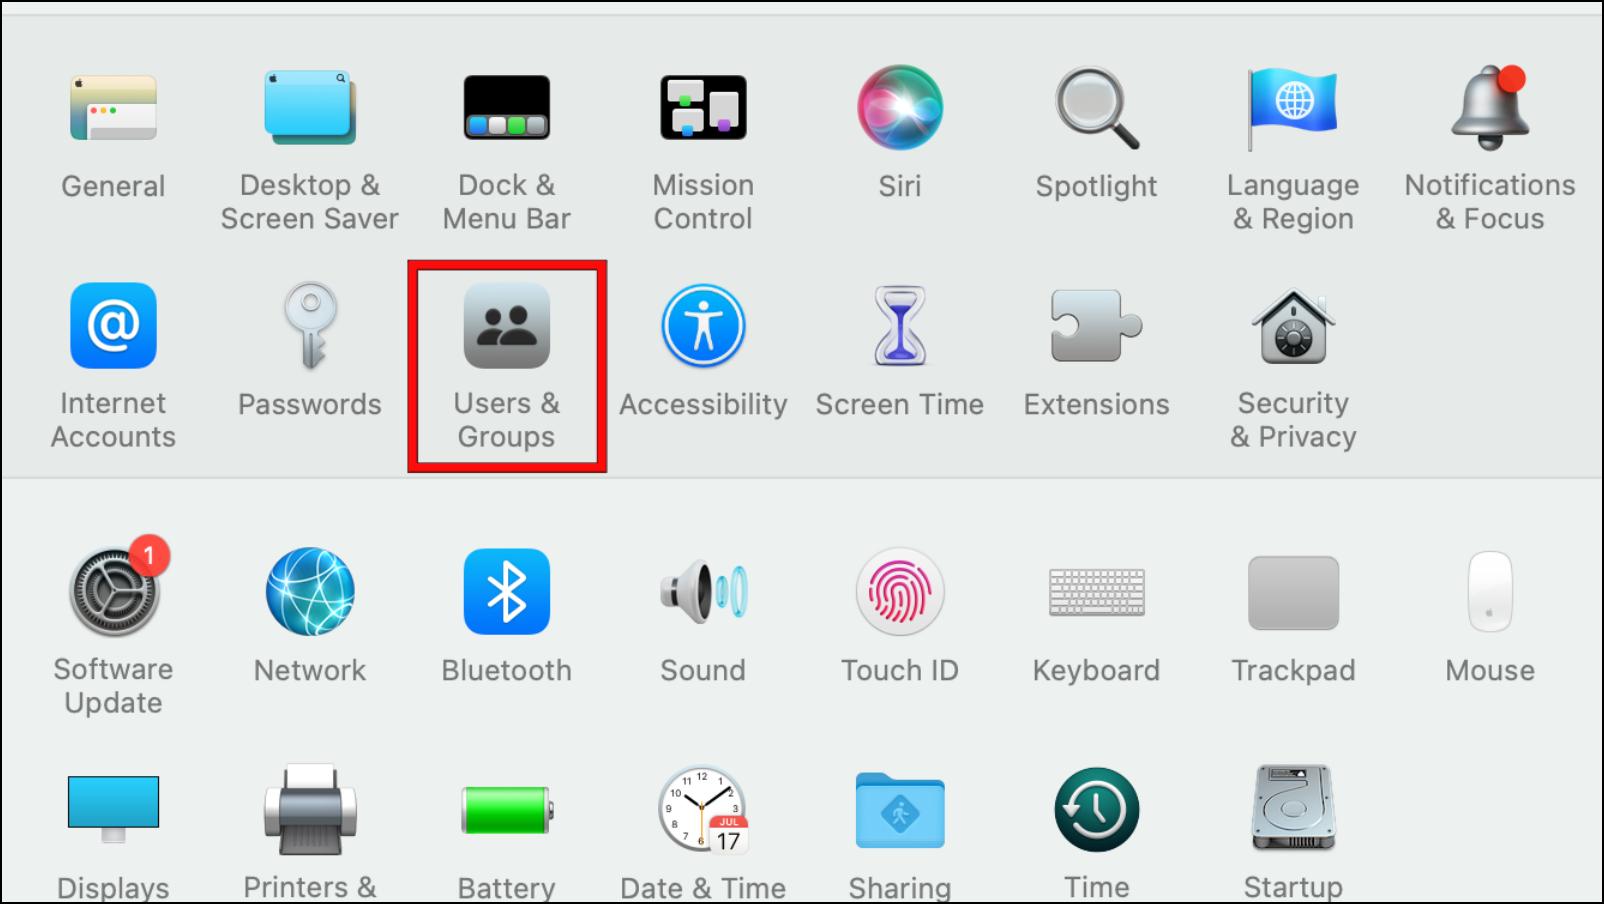
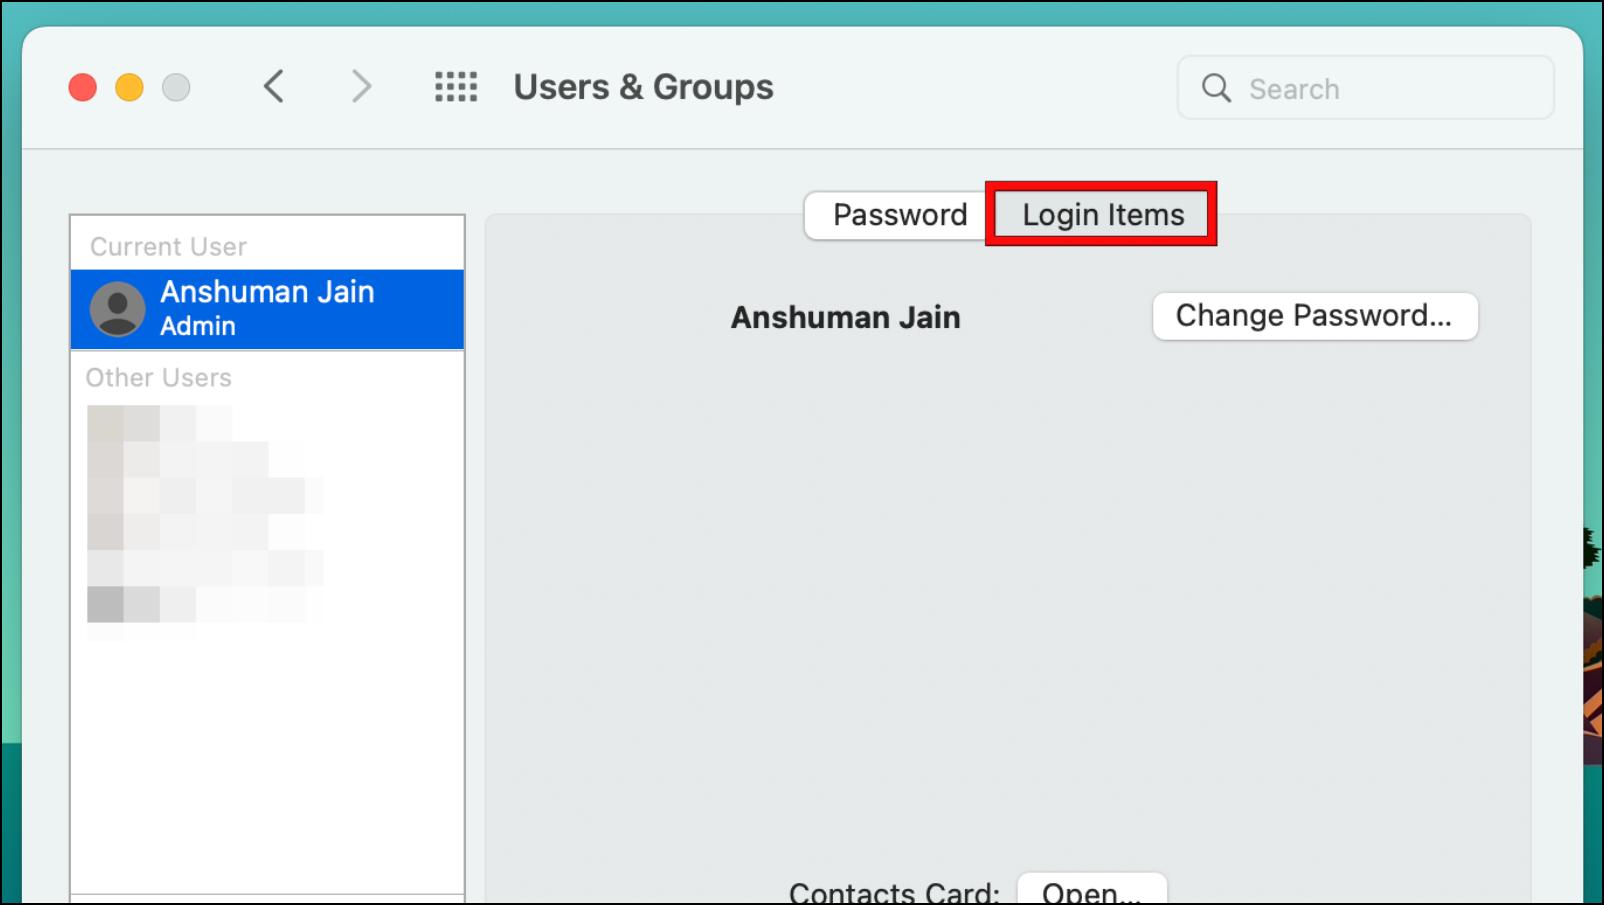
Step 4: Under Users & Groups, switch to Login items.
Step 5: Next, click on the plus “+” icon.
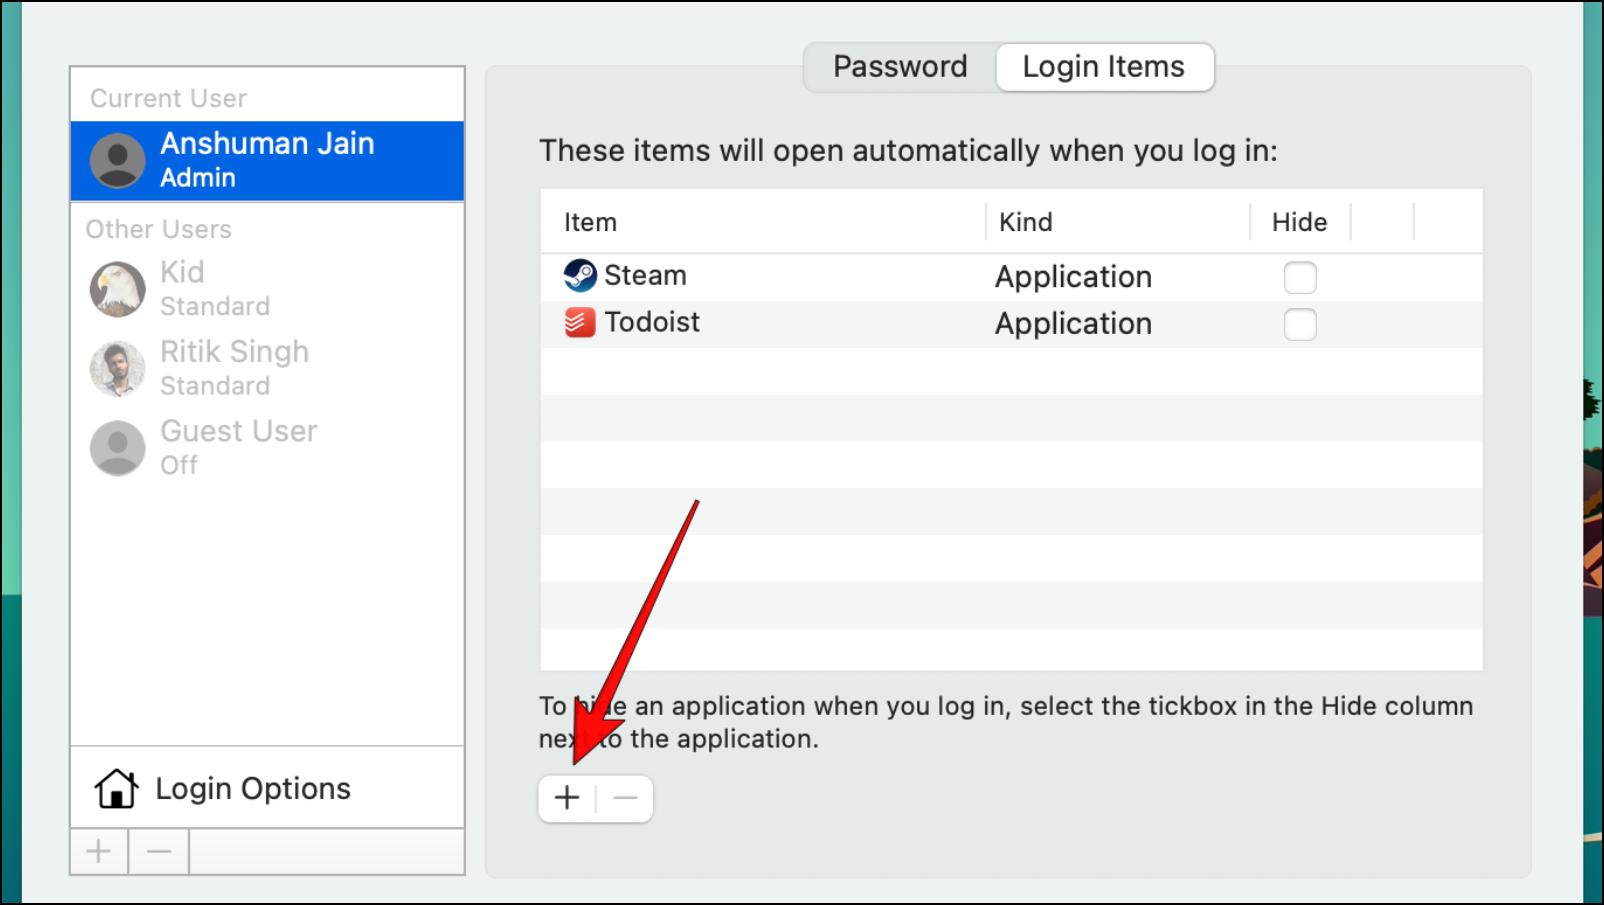
Step 6: Select Bitwarden and click on Add.
This can help overcome any startup issues faced by the Bitwarden extension in macOS.
Method 7- Update Your Web Browser
Another reason why you must be running into issues with the Bitwarden extension is because of an outdated web browser. Running an older version of the browser can run you into errors and numerous problems with extensions, so we recommend that you update your browser to the latest available version. Here is how you can update Chrome, Firefox, and Safari browsers.
Google Chrome
Use the steps below to update Google Chrome to the latest version.
Step 1: On Chrome, click on the three-dot menu at the top right corner.
Step 2: Go to Help and select About Google Chrome.
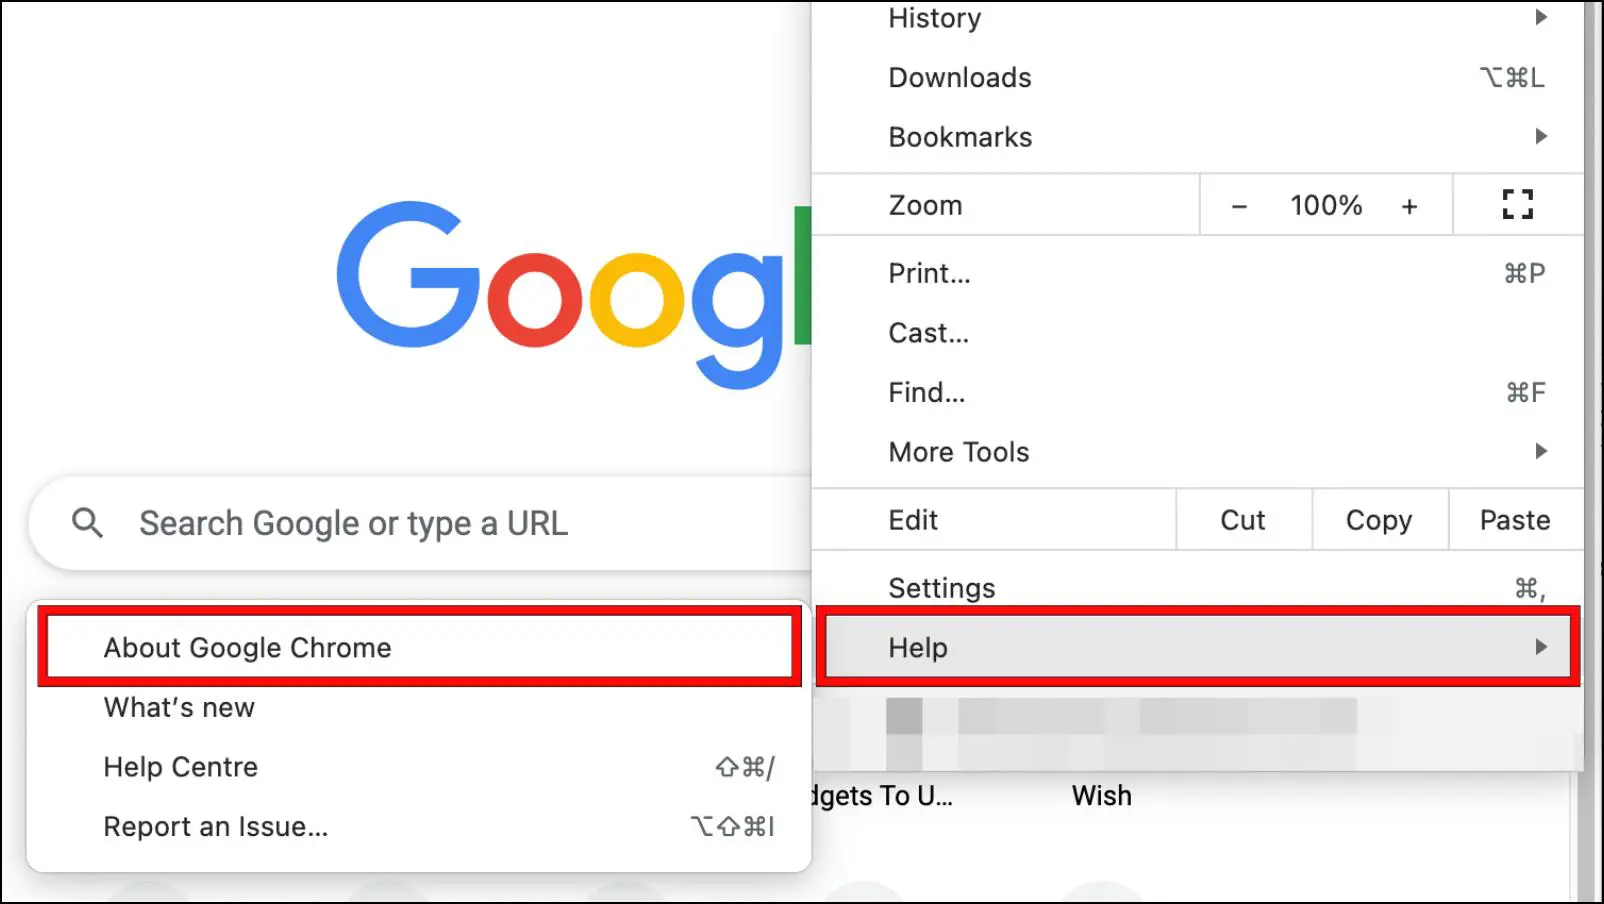
Chrome will look for the latest update and begin downloading it.
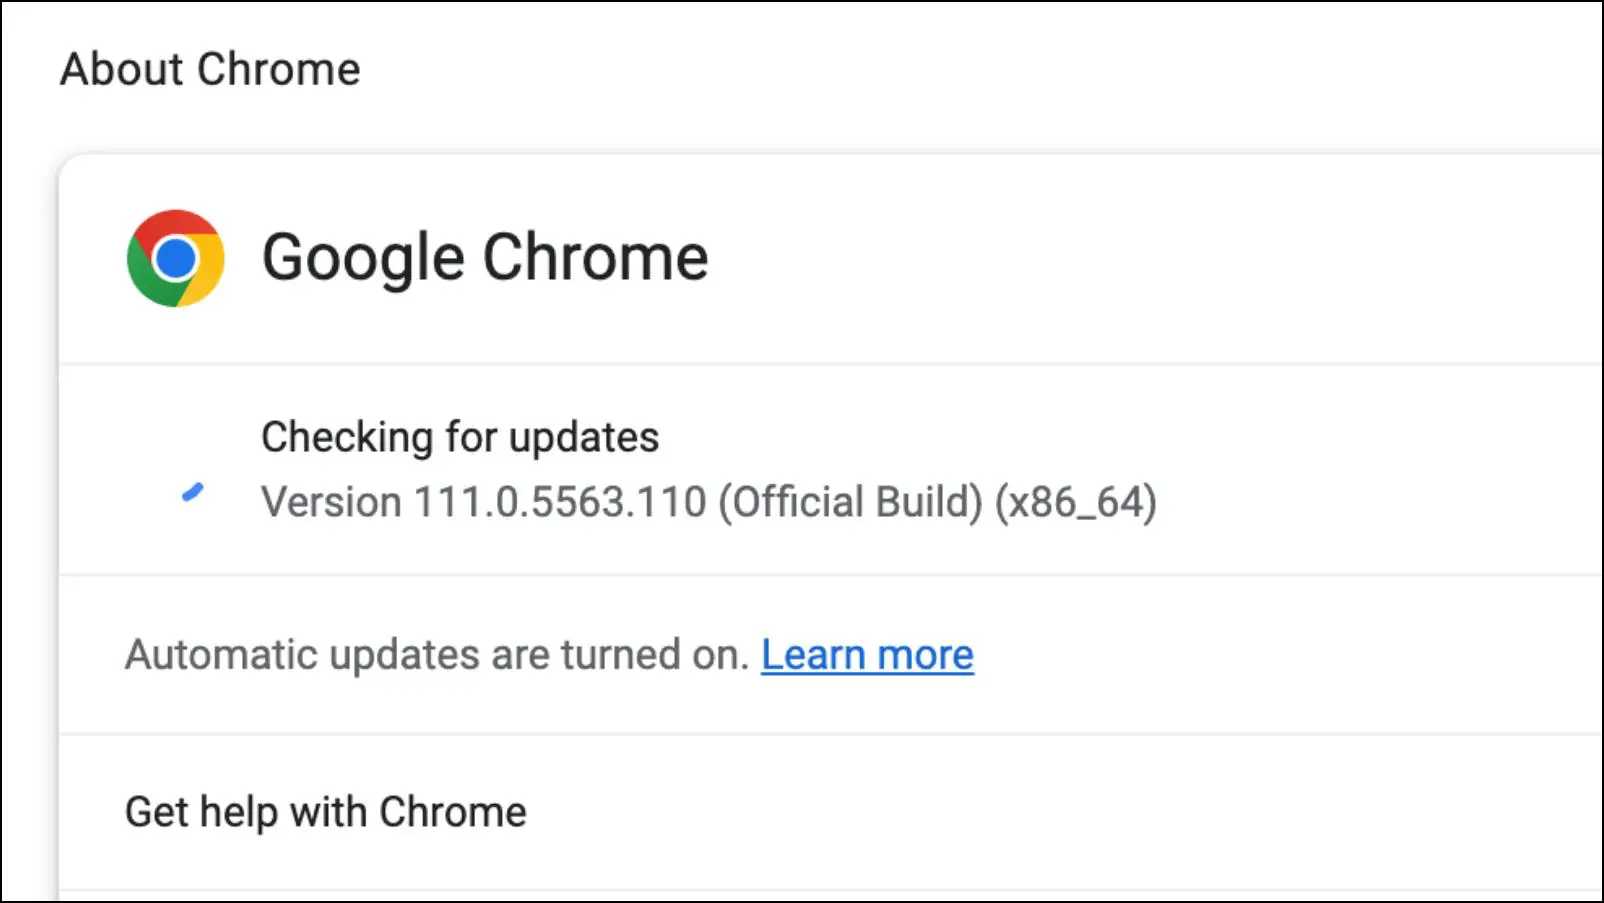
Step 3: Once the update is downloaded, Relaunch the browser to install updates.
Mozilla Firefox
Use the steps below to update Firefox to the latest version.
Step 1: On Firefox, click on the three horizontal lines at the top right corner.
Step 2: Go to Settings.
Step 3: Select General from the left sidebar and scroll down to Firefox updates.
Step 4: Here, Click on Check for updates…
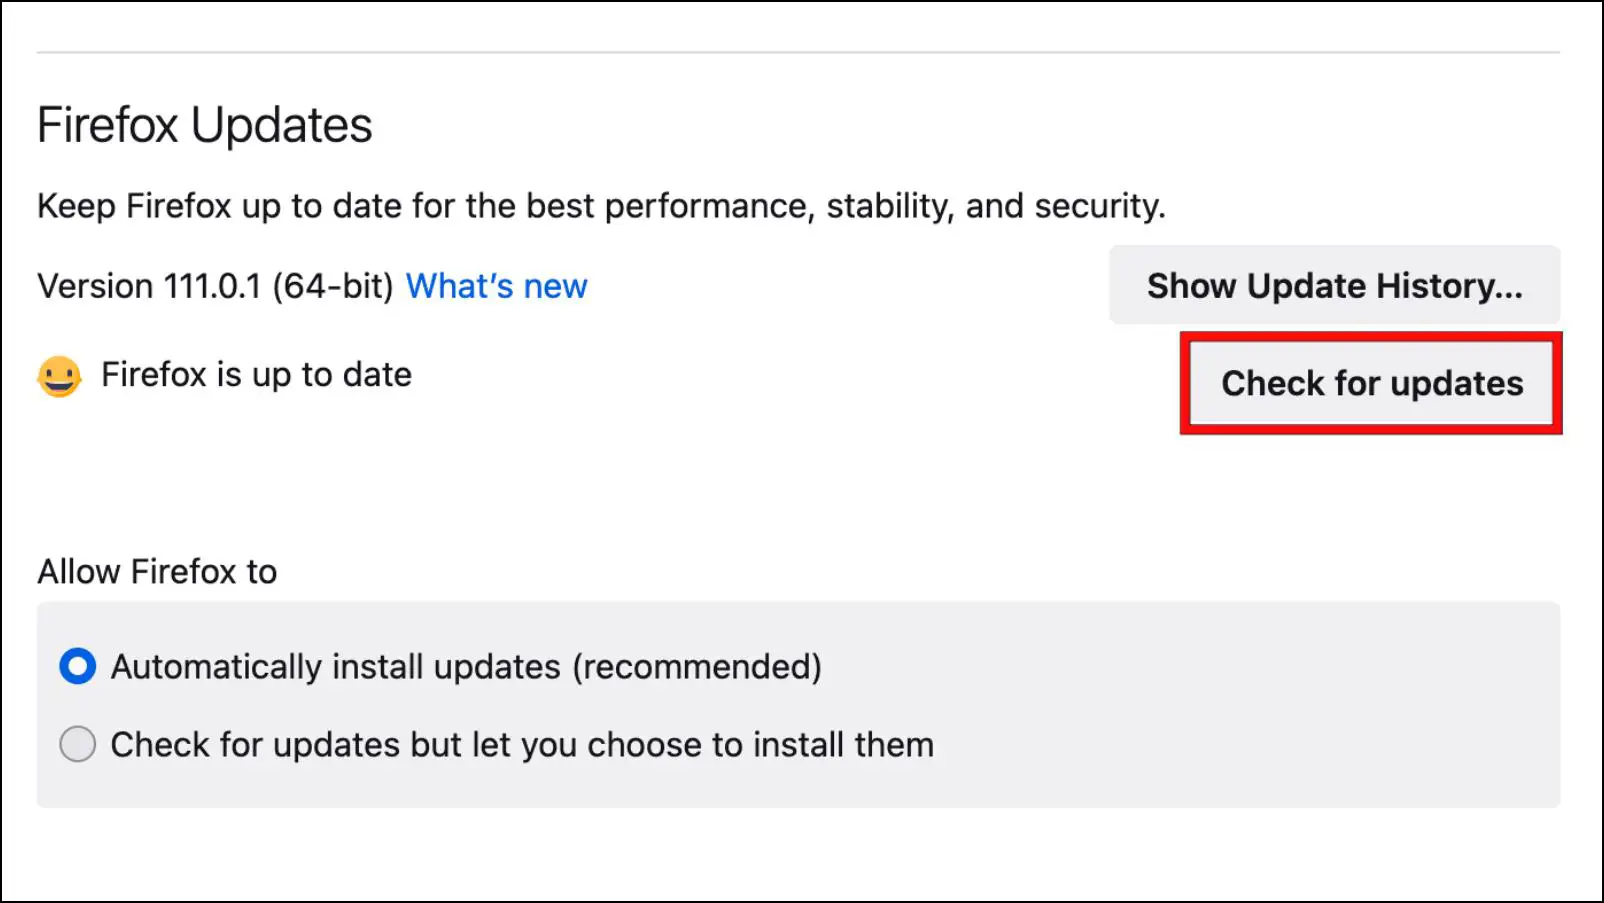
Firefox will search for the latest update and start downloading it.
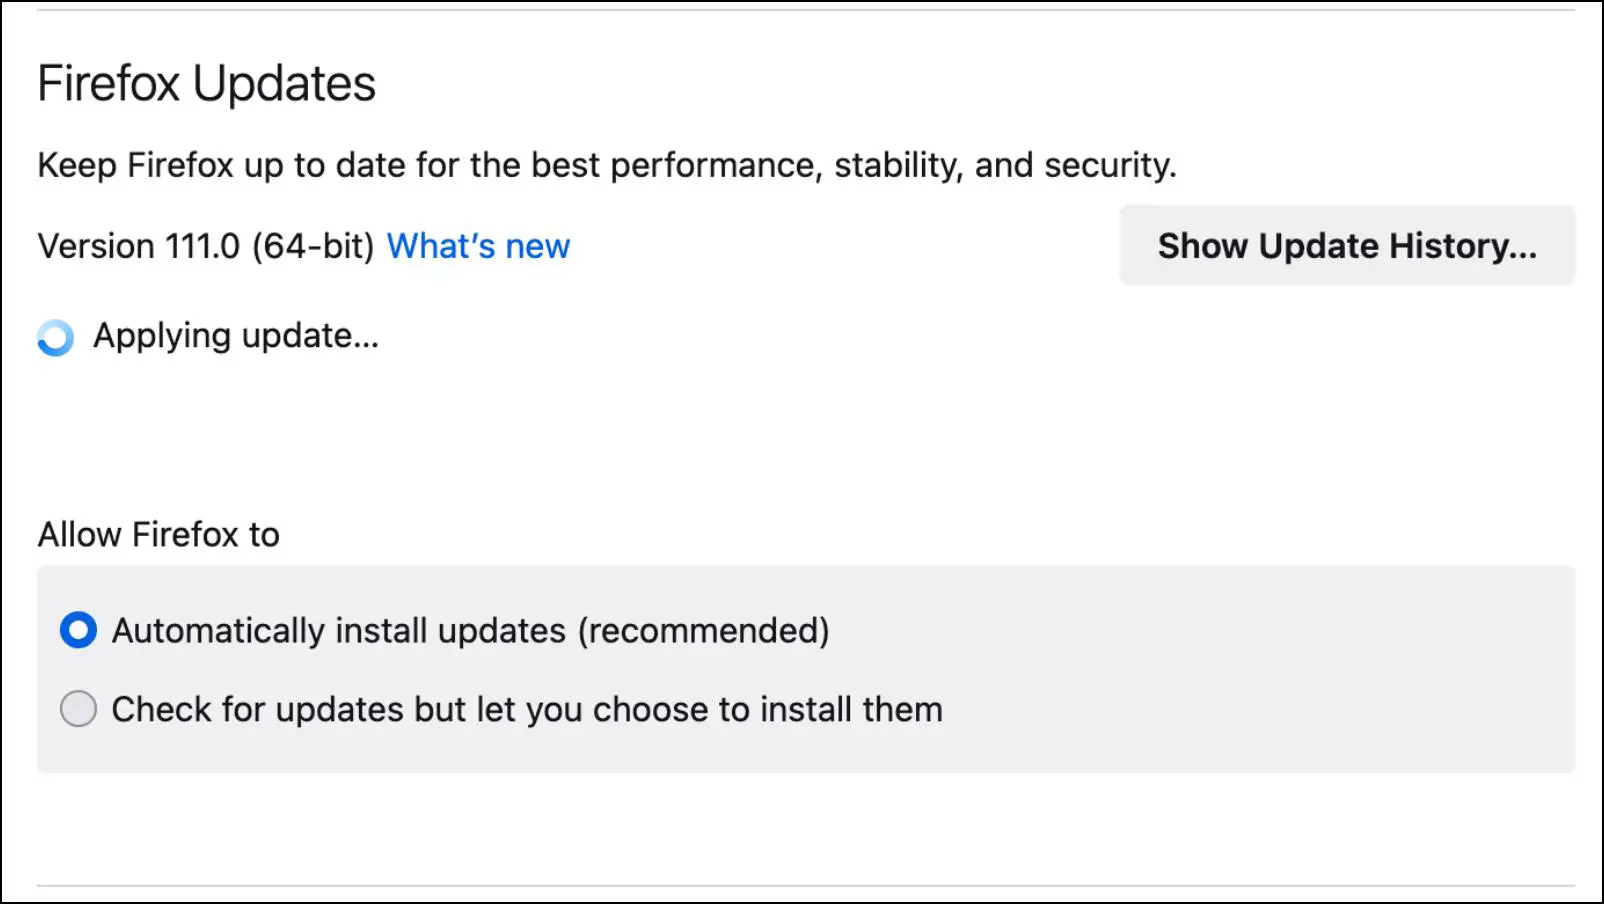
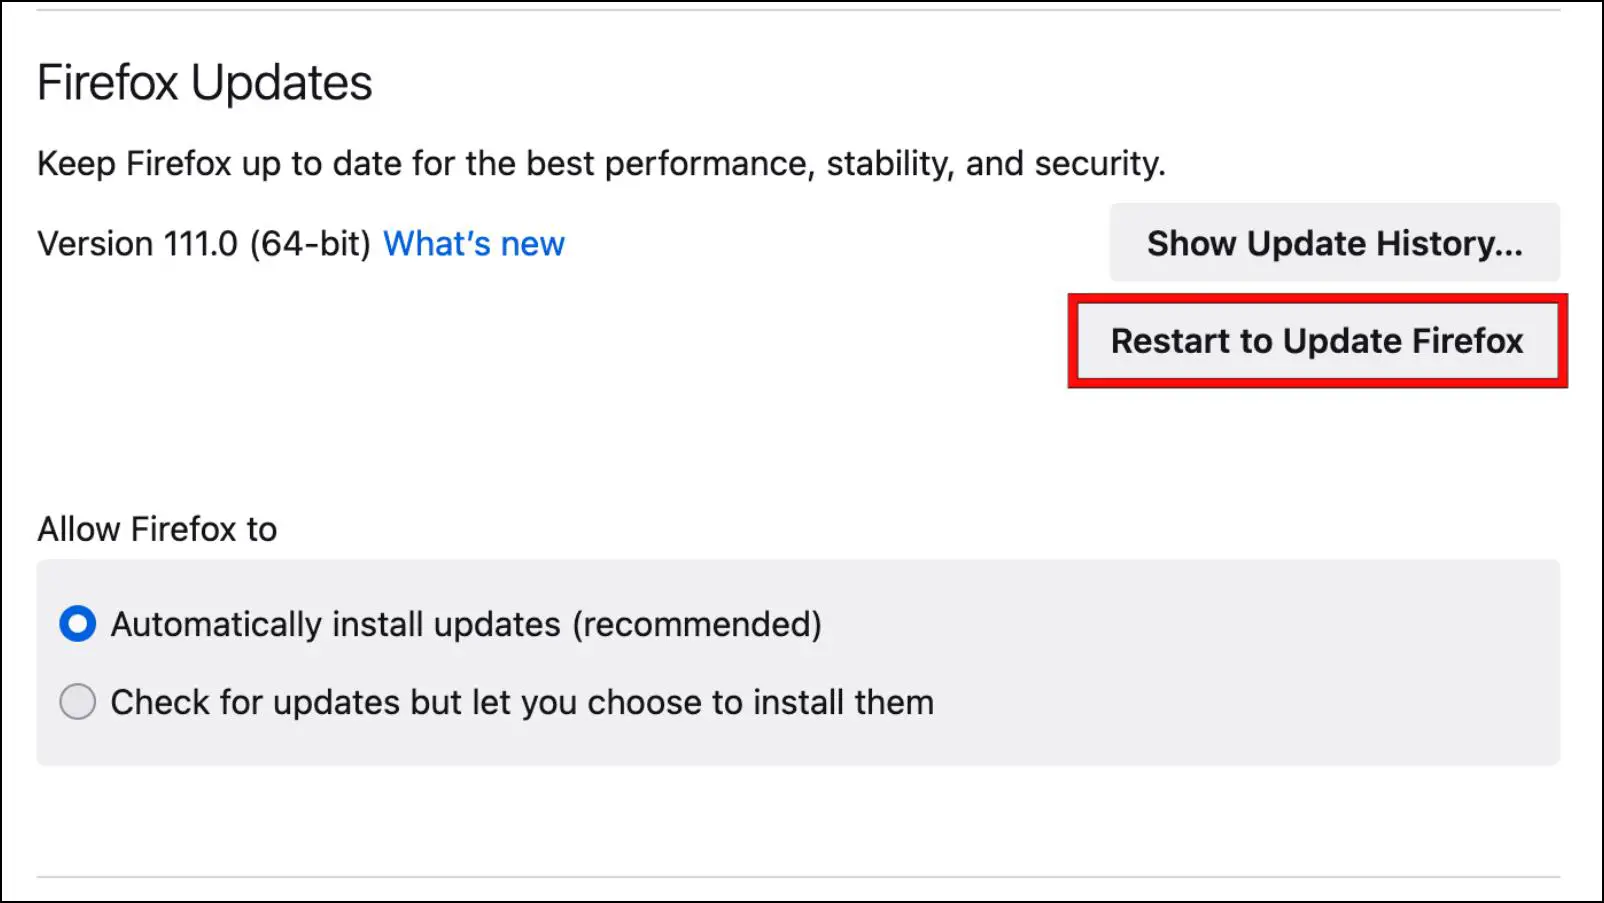
Step 5: Click on Restart to Update Firefox to complete installation.
Safari
Use the steps below to update Safari to the latest version.
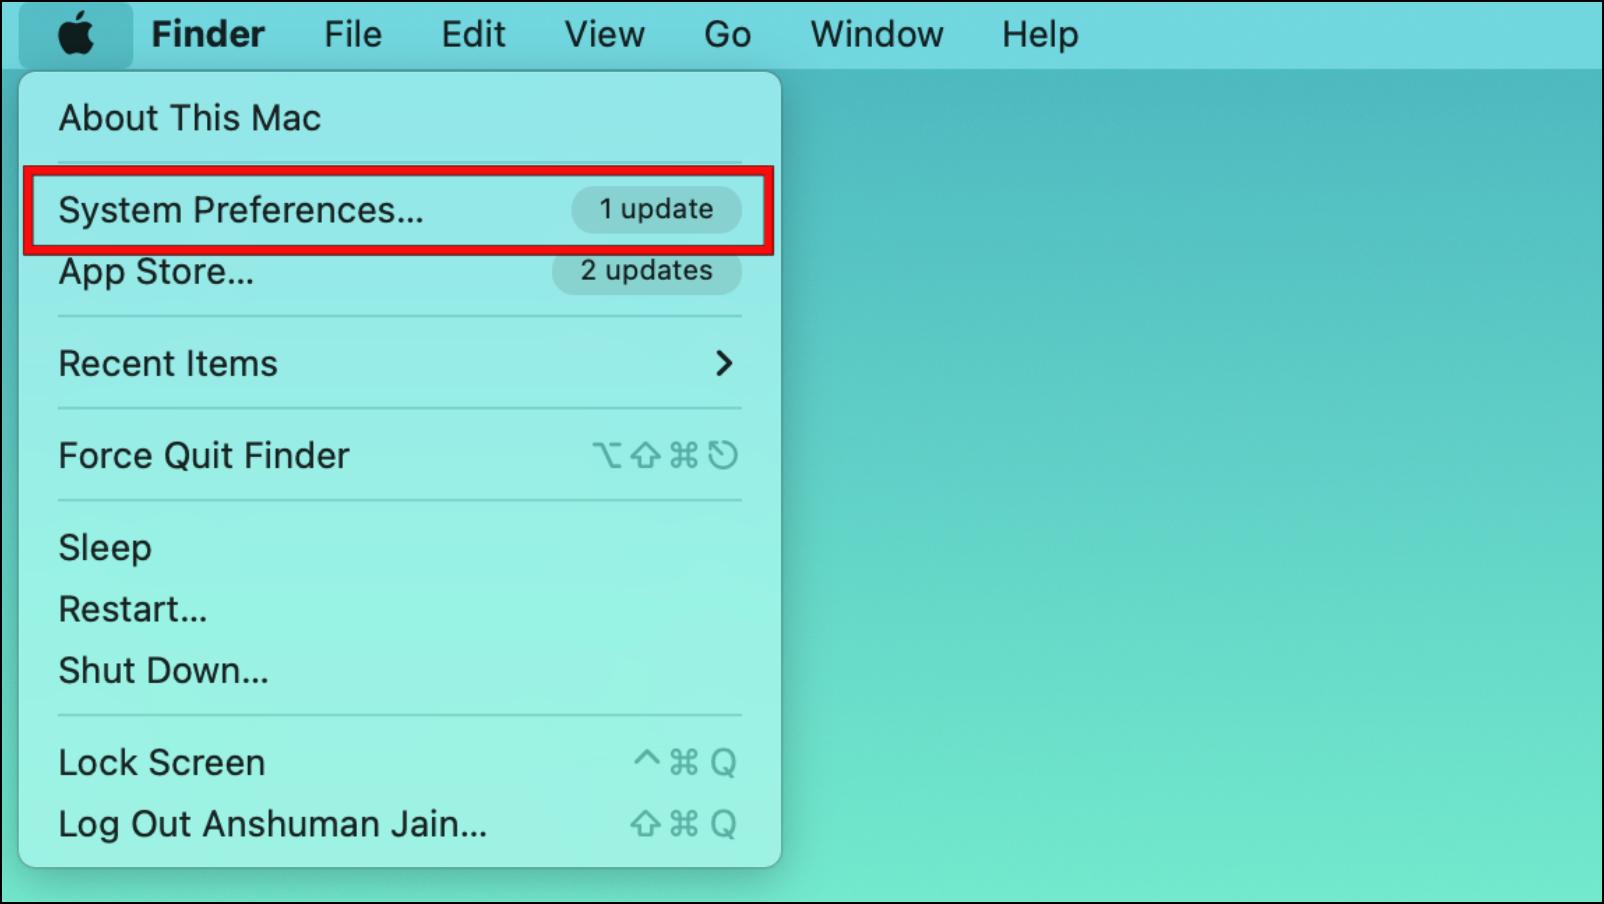
Step 1: Click on the Apple logo.
![]()
Step 2: Go to System Preferences…
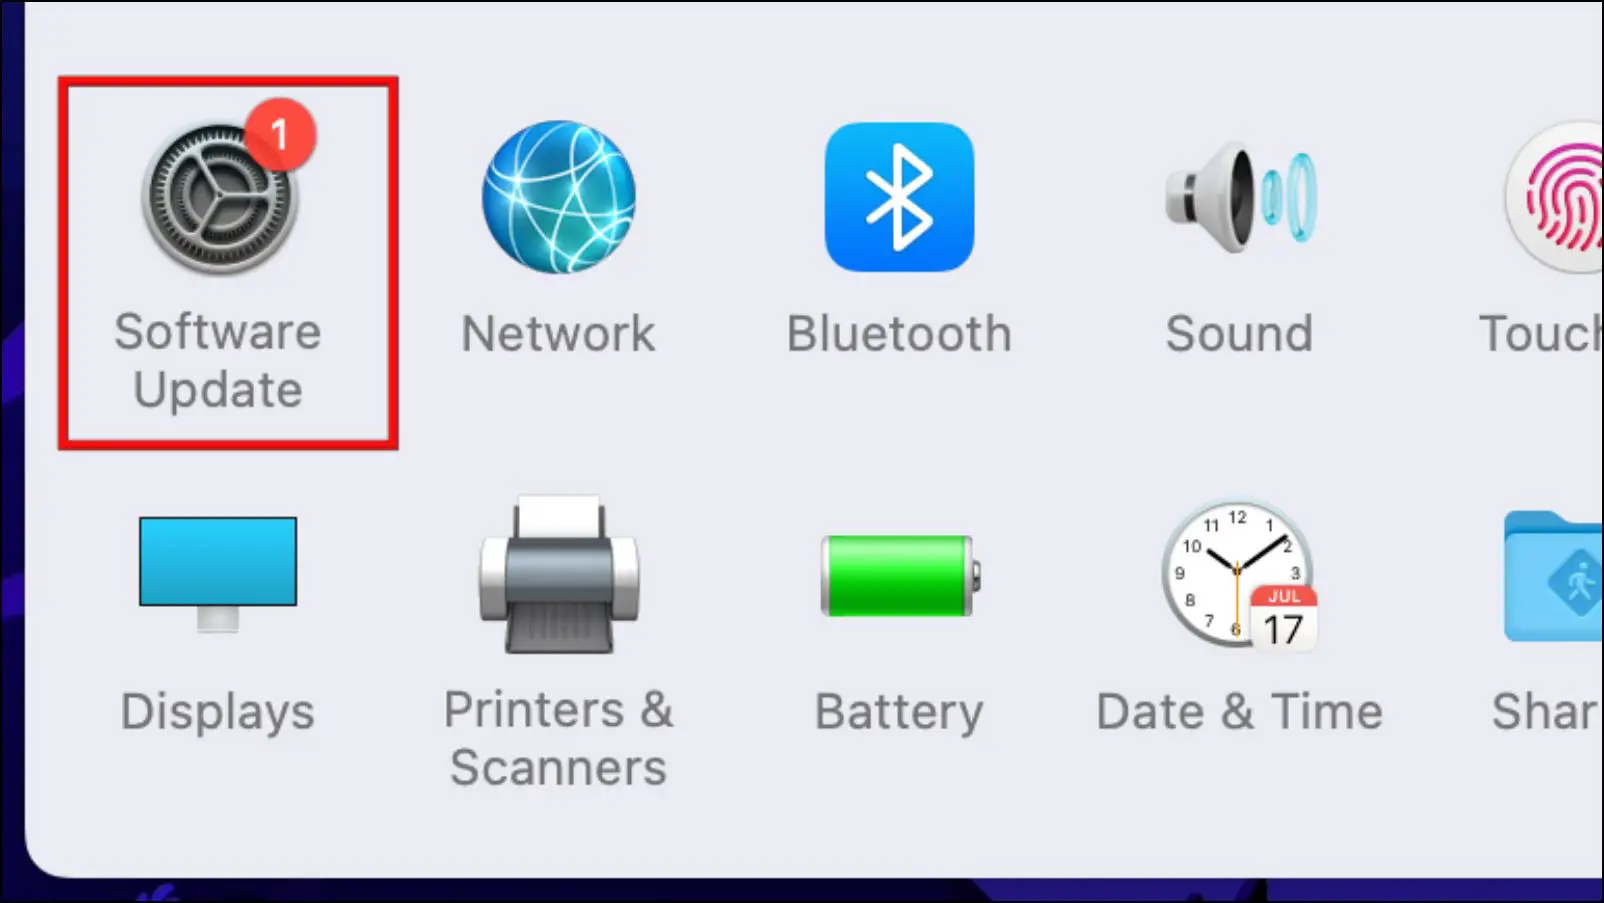
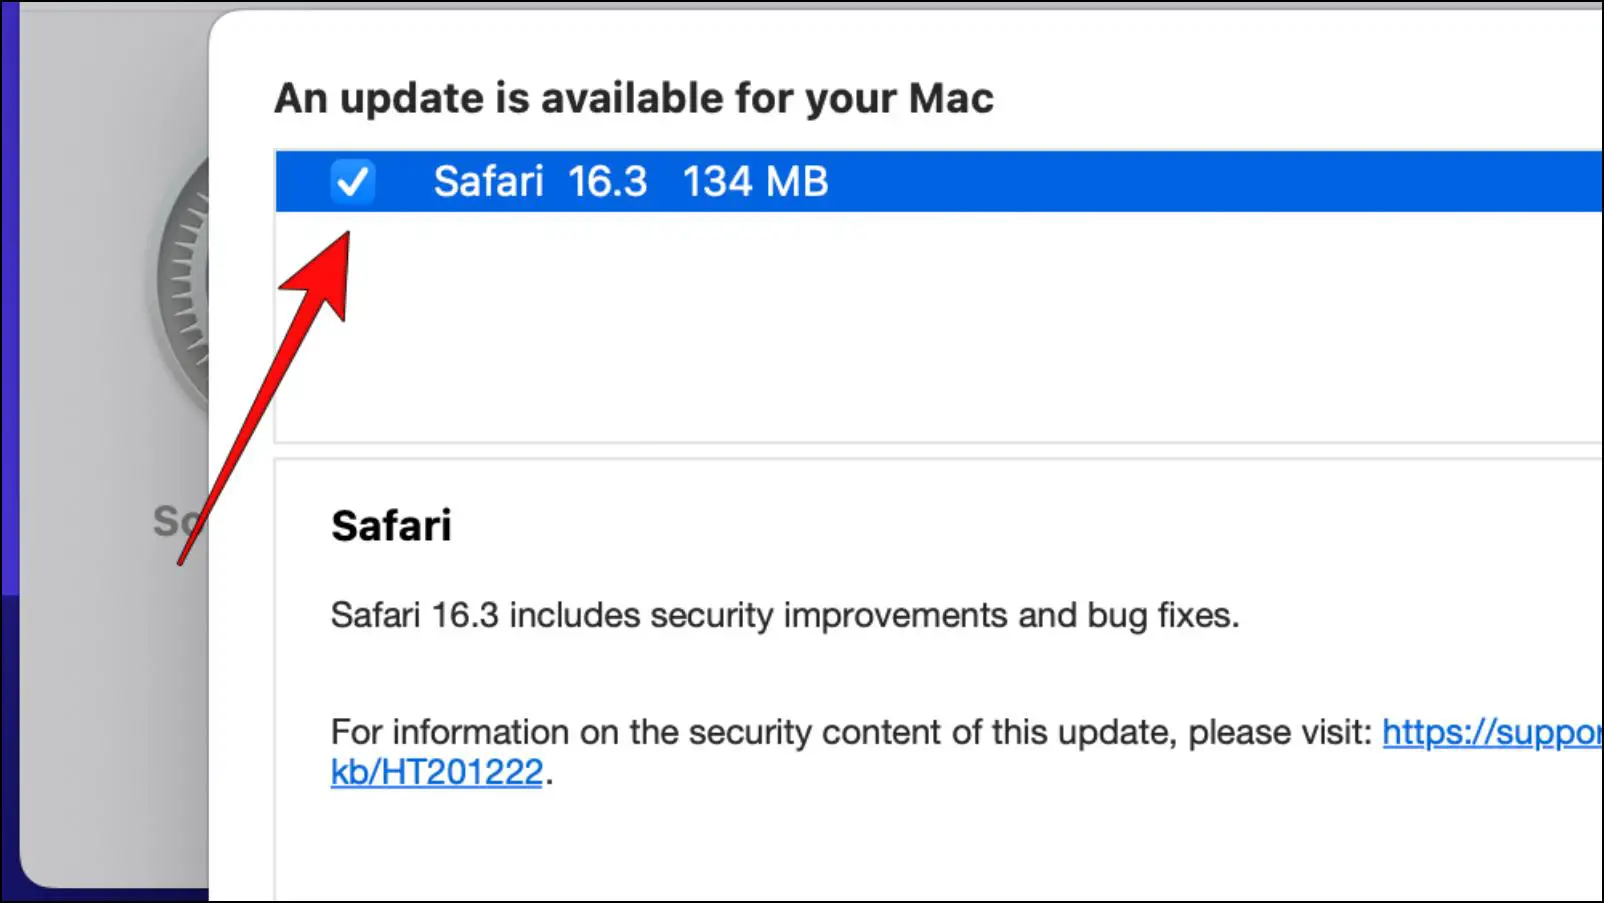
Step 3: Here, Select Software Update.
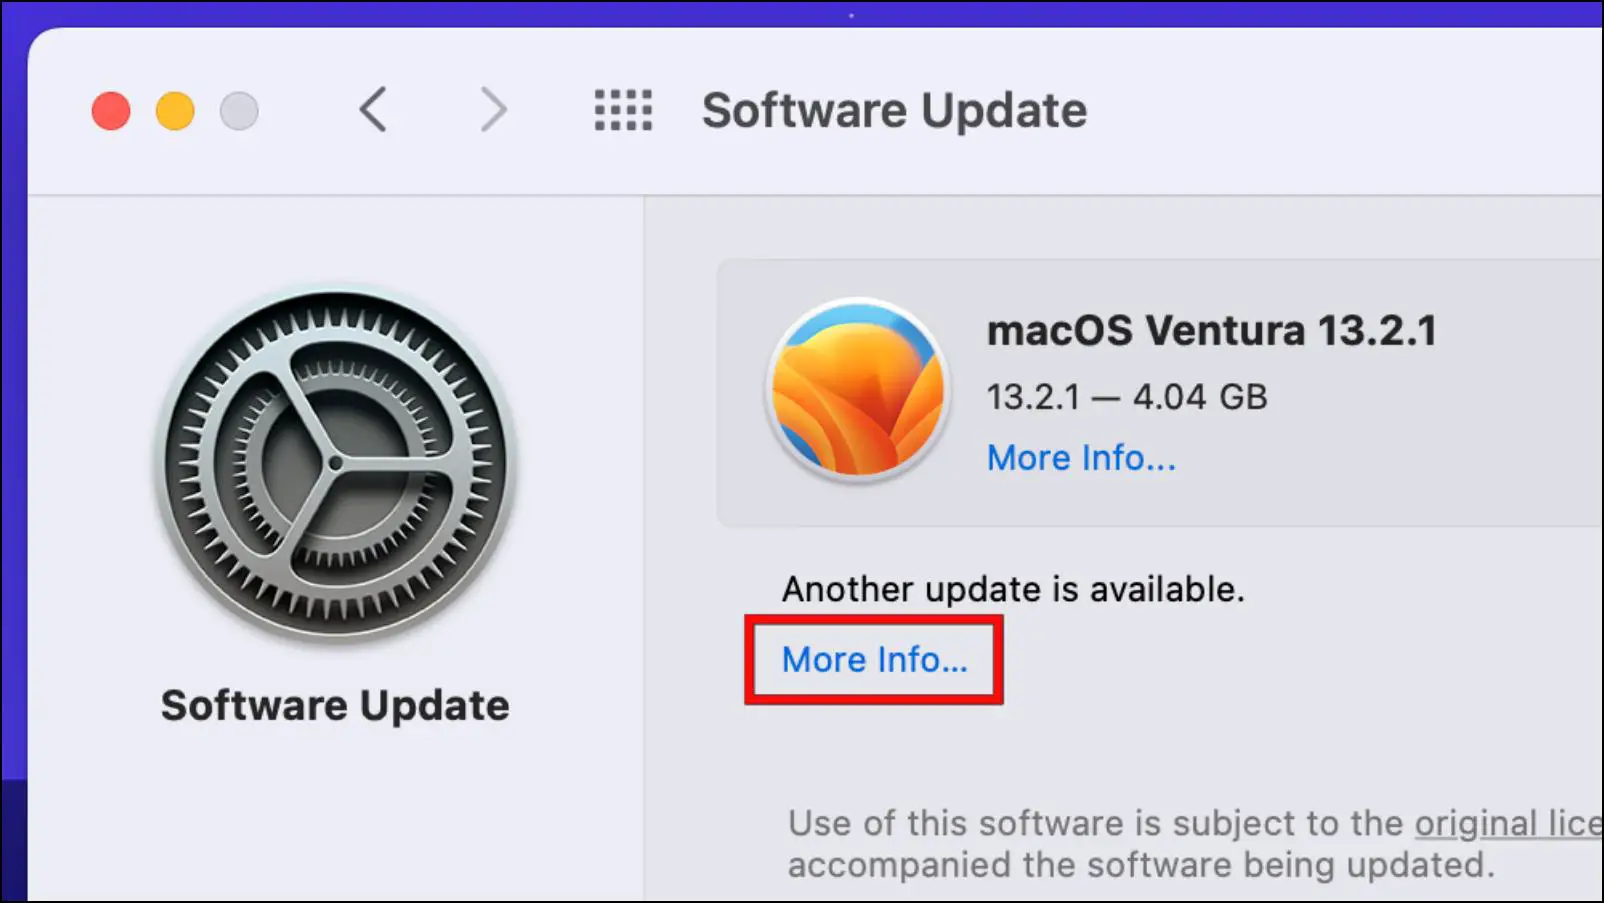
If an update is available, it will show Upgrade Now.
Step 4: Click on More Info…under Other updates are available.
Step 5: Tick the box next to Safari.
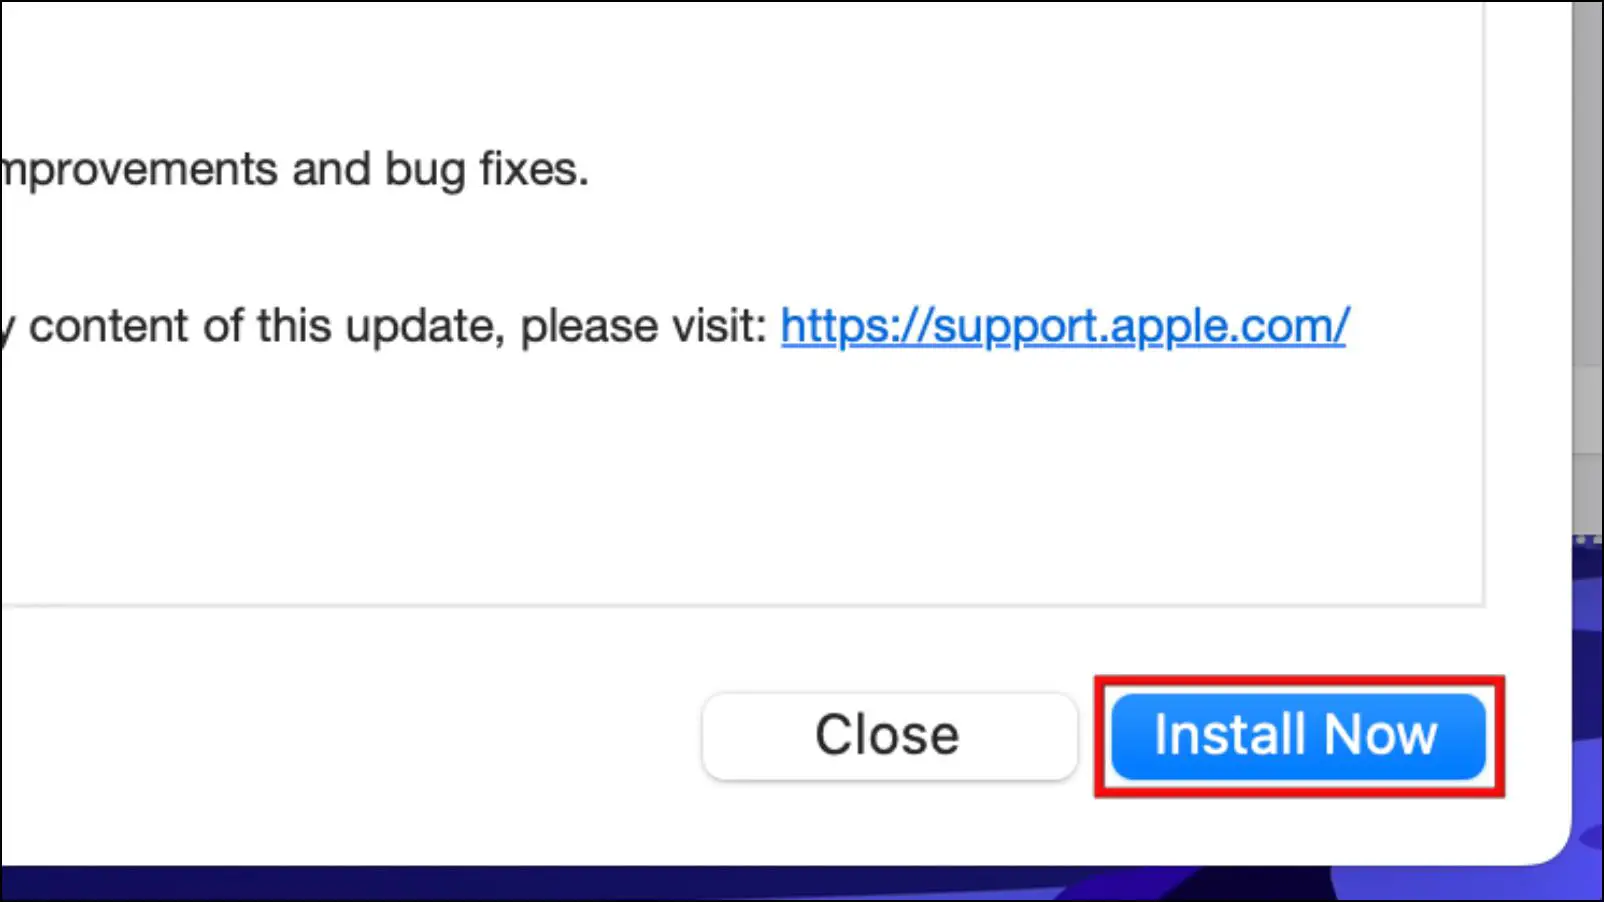
Step 6: Lastly, click on the Install Now button.
After updating your browser, check up on the Bitwarden extension to see if it is running properly.
Is Bitwarden Extension Safe To Use?
Bitwarden protects your data by encrypting it with AES 256-bit encryption, which is considered a military-grade encryption method. The service adopts a zero-knowledge approach which means that even the Bitwarden staff can’t access your information.
Aside from that, user can protect their account with two-factor authentication for better security. It is also compliant with various privacy regulations and security standards. All of this goes to show that Bitwarden is quite a secure service and safe to use.
But we would recommend that you should do your due diligence before handing over or storing your precious data to any service.
(Resolved) Bitwarden Extension Not Working
As the number of services we use grows, the need for a password manager has increased drastically. Bitwarden extension allows you to easily access your passwords right from the browser, but it can be worrying if the extension itself starts to run into problems. Hopefully, this article was able to help solve your issues. Do let us know if you have any more queries related to this article.
Related:


