Have you ever found yourself scrolling through your social media feed, and your browser automatically refreshes the webpage? This has happened to me, and it is quite a nuisance as it also refreshes the content on the page. Thankfully, there are different ways to prevent browsers from auto-refreshing, and in this article, we will look at how to stop auto-refresh in Google Chrome and other browsers.
How to Stop Auto Refresh in Google Chrome and Other Browsers?
Web browsers like Google Chrome often auto-refresh webpages when they are either running low on system memory and there are way too many tabs open, or any changes have been made to the page itself. Whatever the case may be, auto refresh can be frustrating especially when you are trying to read a blog, filling out a form, or completing a transaction.
This is why we have come up with a list of ways to help you prevent auto-refreshing on your web browser. Let us take a look at them.
Method 1 – Close Excessive Tabs
The reason your web browser auto-refreshes web pages is that it takes a lot of system memory to keep all tabs running, especially when you have excessive tabs open and only limited memory. This is also why it also gets tough to manage too many tabs.
Instead of keeping all of them running, Chrome and other browsers redirect their focus to the tabs that are in use. This results in unused tabs being reloaded and refreshed. Therefore, to prevent this, keep only limited tabs open and close the rest.
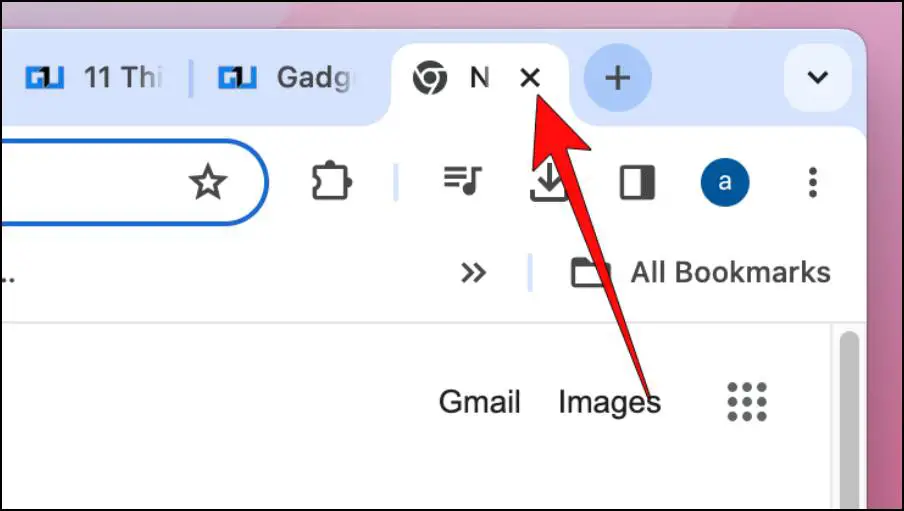
Method 2 – Close and Restart Google Chrome
If Chrome frequently refreshes web pages for you, then it could be an issue with the browser itself. In such situations, you should try to close the browser completely and then relaunch it.

This should fix any glitch with your browser, and stop it from auto-refreshing. We recommend that you close down Google Chrome using Task Manager in Windows or Force Quit the browser if you are on macOS.
Method 3 – Disable Google Chrome’s Memory Saver
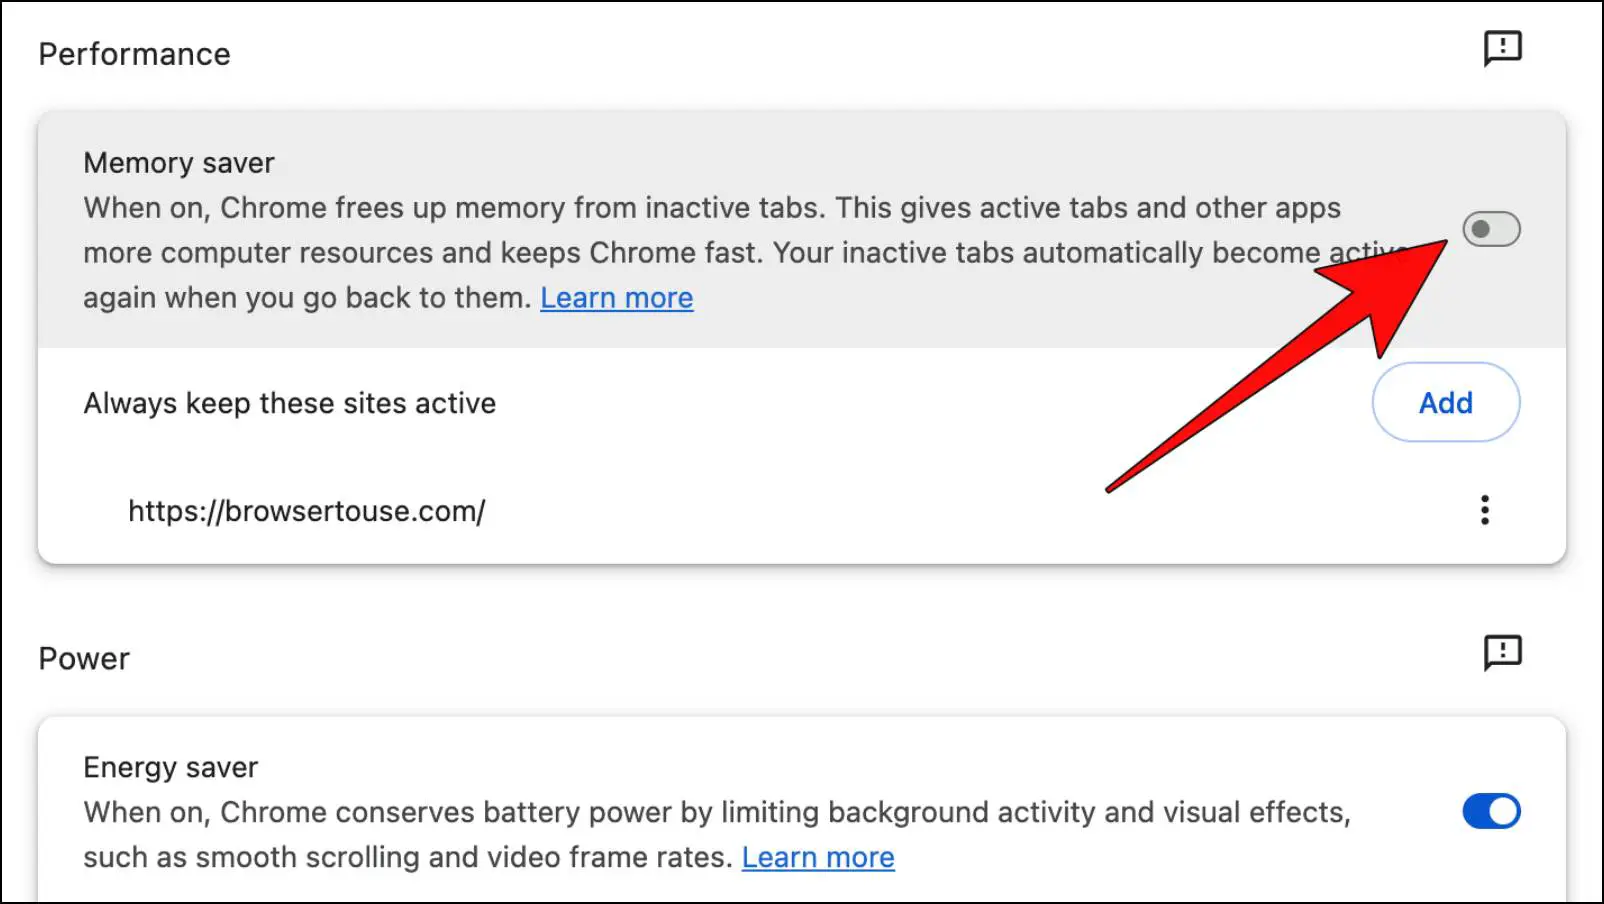
Memory Saver is a feature in Google Chrome that puts inactive tabs you have not used in a while to sleep. This helps to free up system memory that the browser can utilize in active tabs as well as to keep a steady performance.
So when you visit those inactive tabs, the browser reloads and refreshes them. You can stop this auto-refreshing of tabs by disabling this feature.
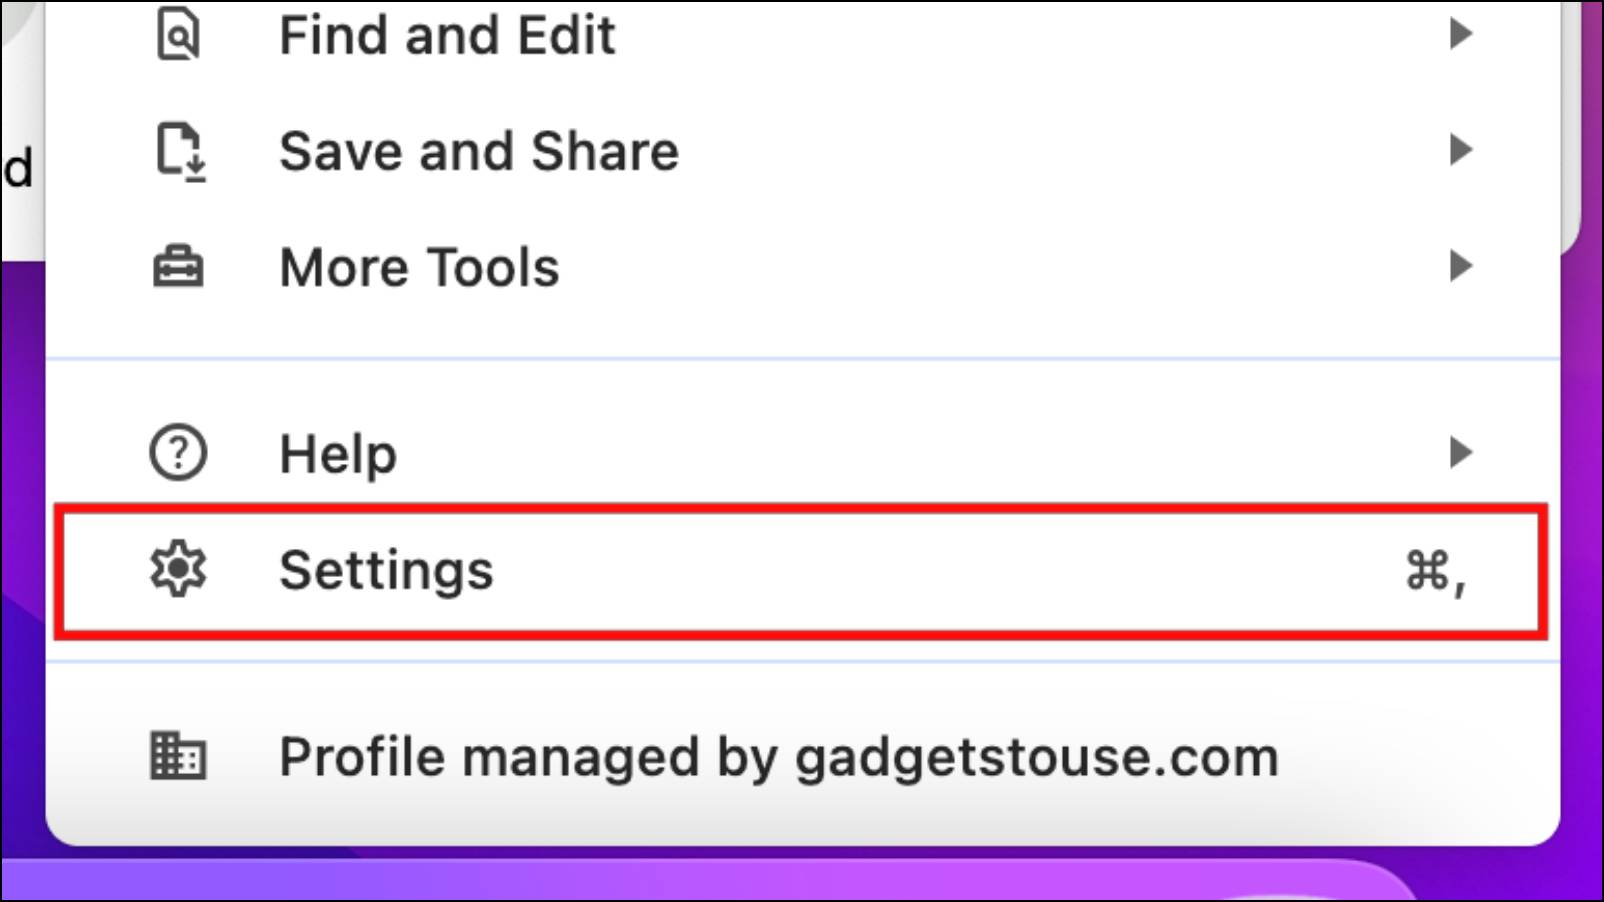
Step 1: To Memory Saver, click on the three-dot menu in the top right corner of Chrome.

Step 2: Go to Settings.
Step 3: Select the Performance menu from the left sidebar.

Here, you will find the Memory Saver option.
Step 4: Turn off the toggle for Memory Saver to disable it.
Method 4 – Turn Off Auto Tab Discardable
If are working on something important and don’t want your tabs to auto-refresh, then you can turn off Auto Discardable. This is a new Chrome flag that lets you disable auto-reload or refresh for tabs.
It is not a permanent solution, as the option resets every time you close the tab or restart Chrome. Still, it can help prevent tabs from auto-refreshing in your current session. Here is how you can do it.
Step 1: On the Chrome address bar, type: Chrome://discards and visit the page.

Here you can view a list of the currently active tabs in Chrome. You can also view the Utility Rank, Site Engagement Score of the current tabs, and Last Active Status.
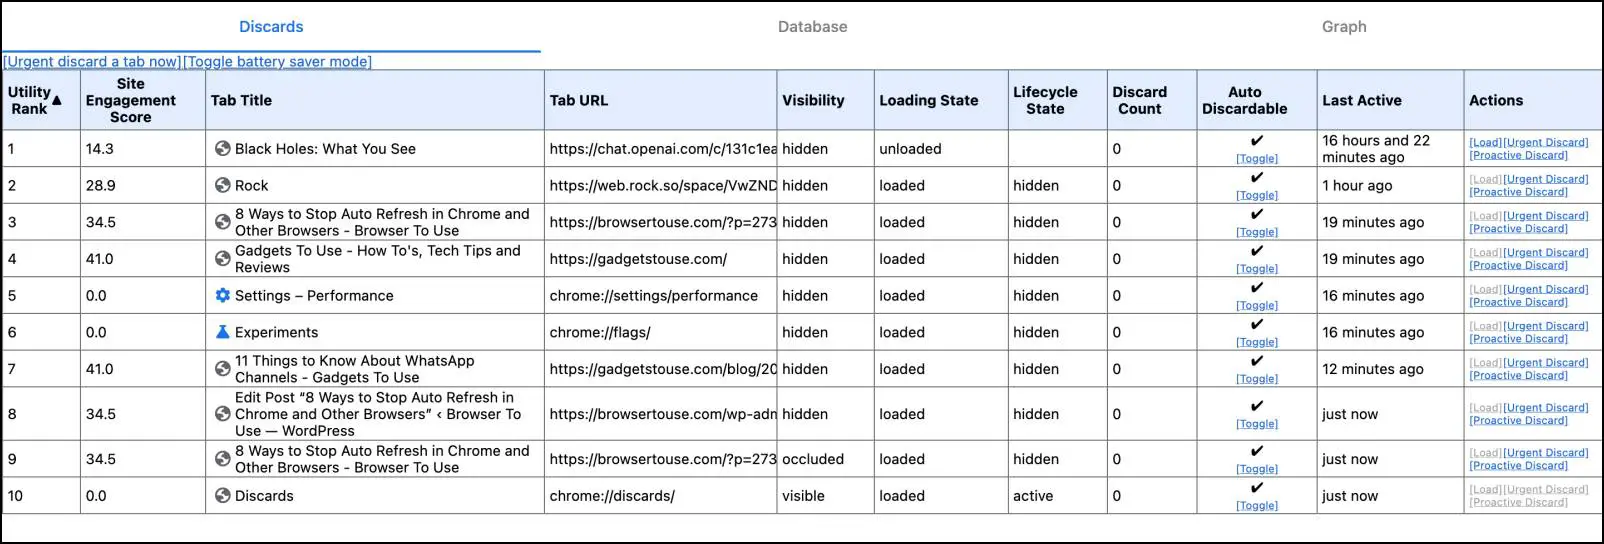
Step 2: Click on the toggle option under Auto Discardable for the tab that you do not wish to auto-refresh.
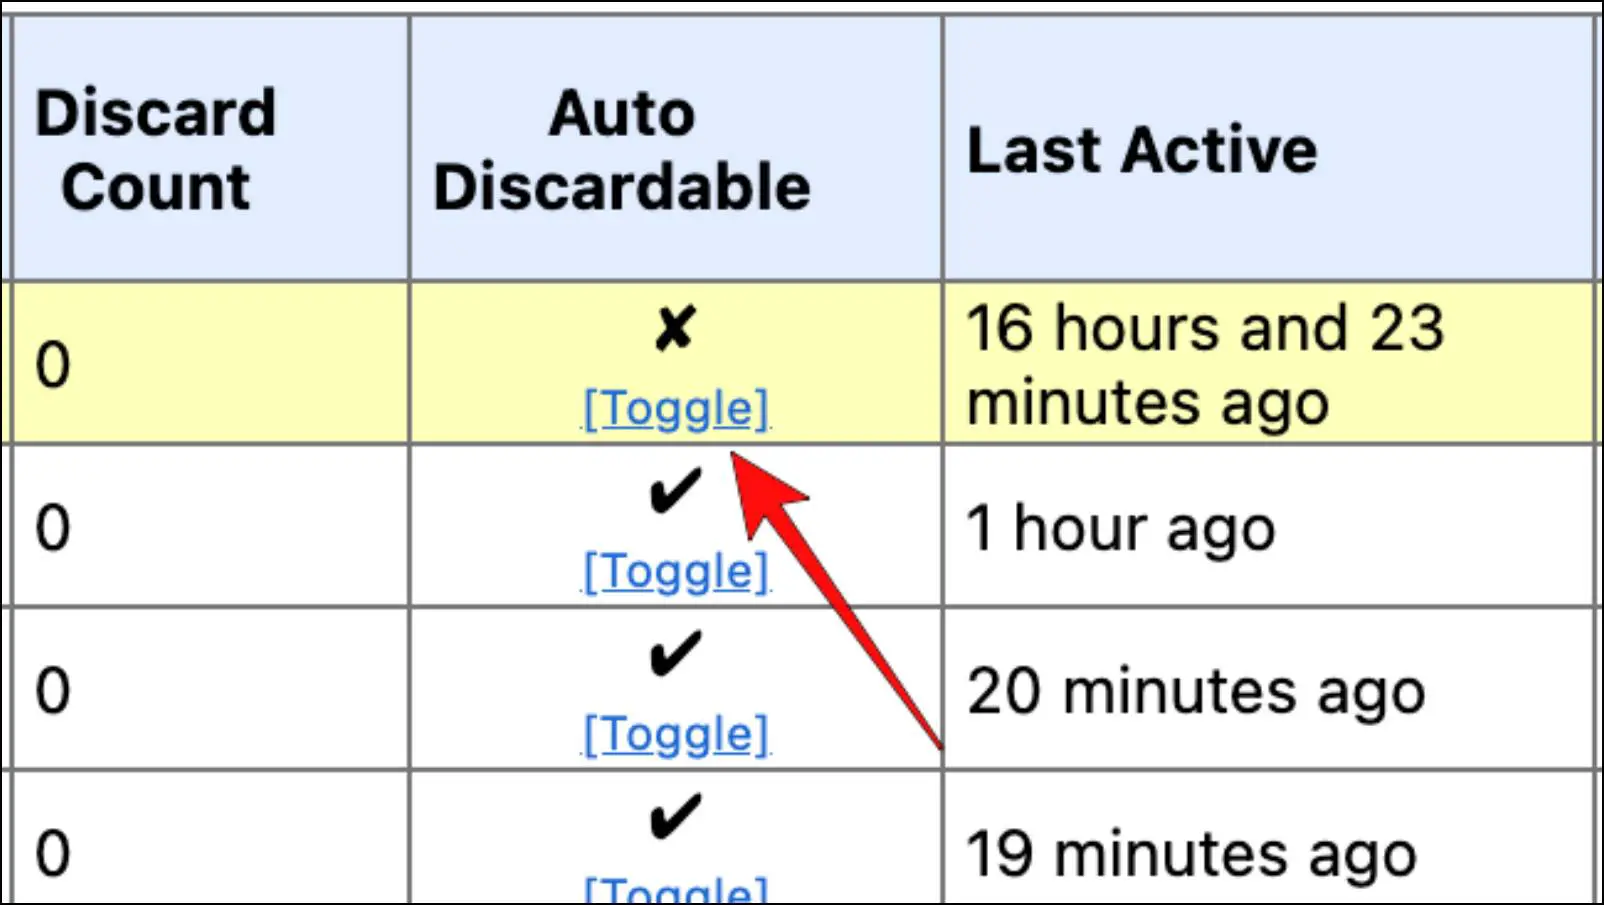
The checkmark above the toggle should turn into a cross, indicating the changes have been applied. The tab will not auto-refresh as long as the current Chrome session is running.
Method 5 – Run SFC Scan on Windows
Windows users who are frequently facing the auto-refreshing issue in Chrome despite having limited tabs open should run an SFC scan. SFC stands for System File Checker. This scan can check all the protected and system files and fix any corrupted data that might be causing such auto-refreshing issues. Use the steps below to run an SFC scan on your Windows PC.
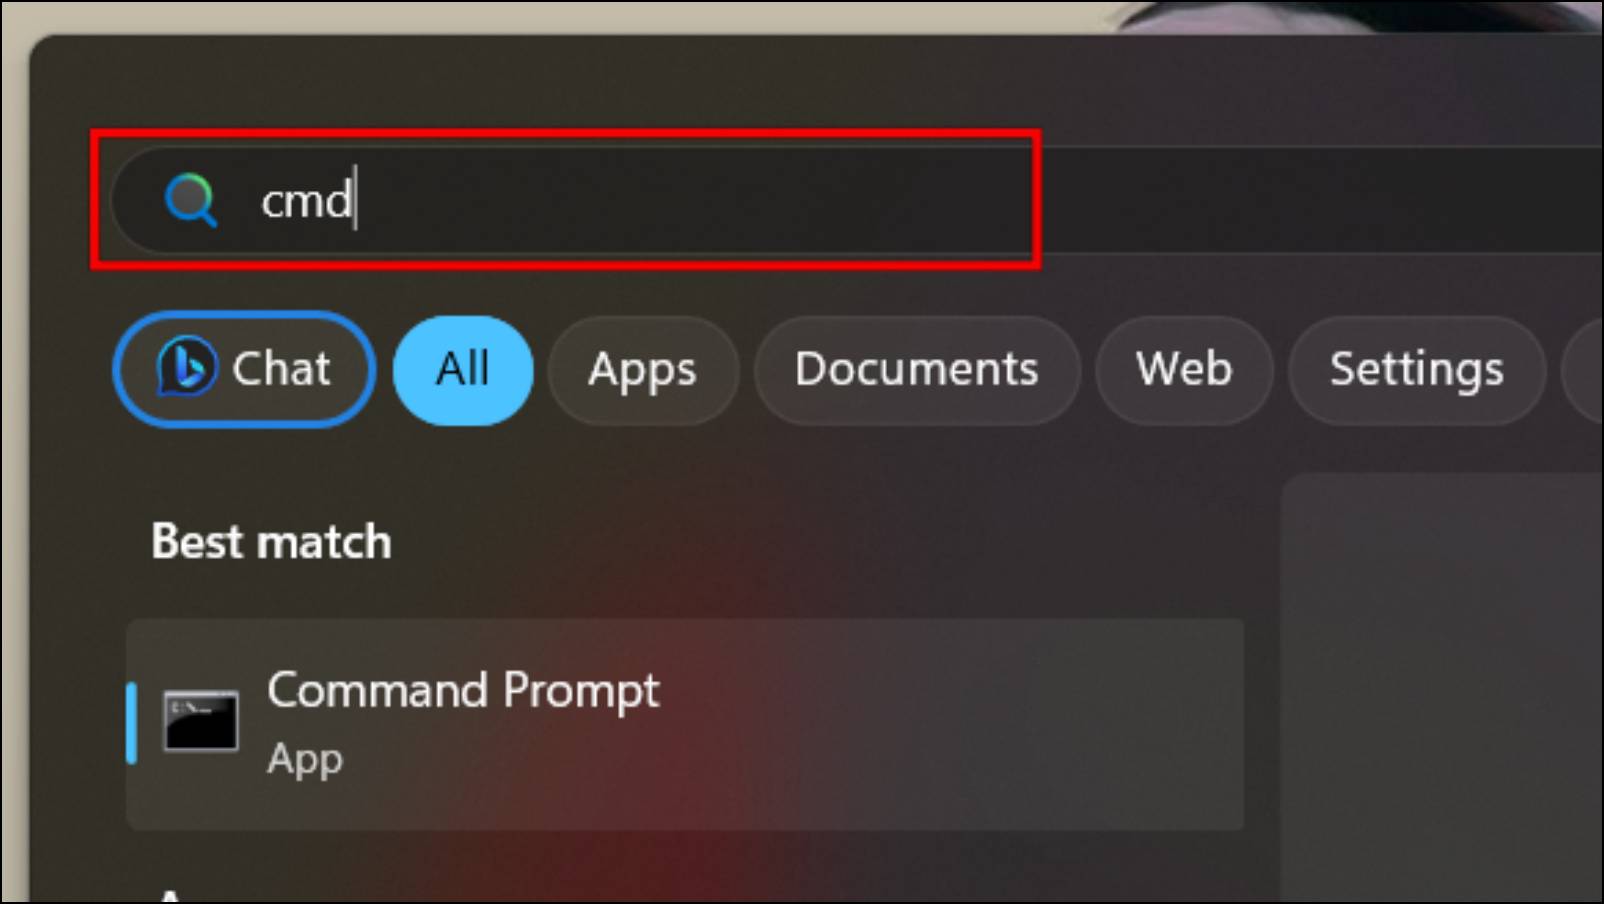
Step 1: Click the Start menu and search cmd in the search bar.
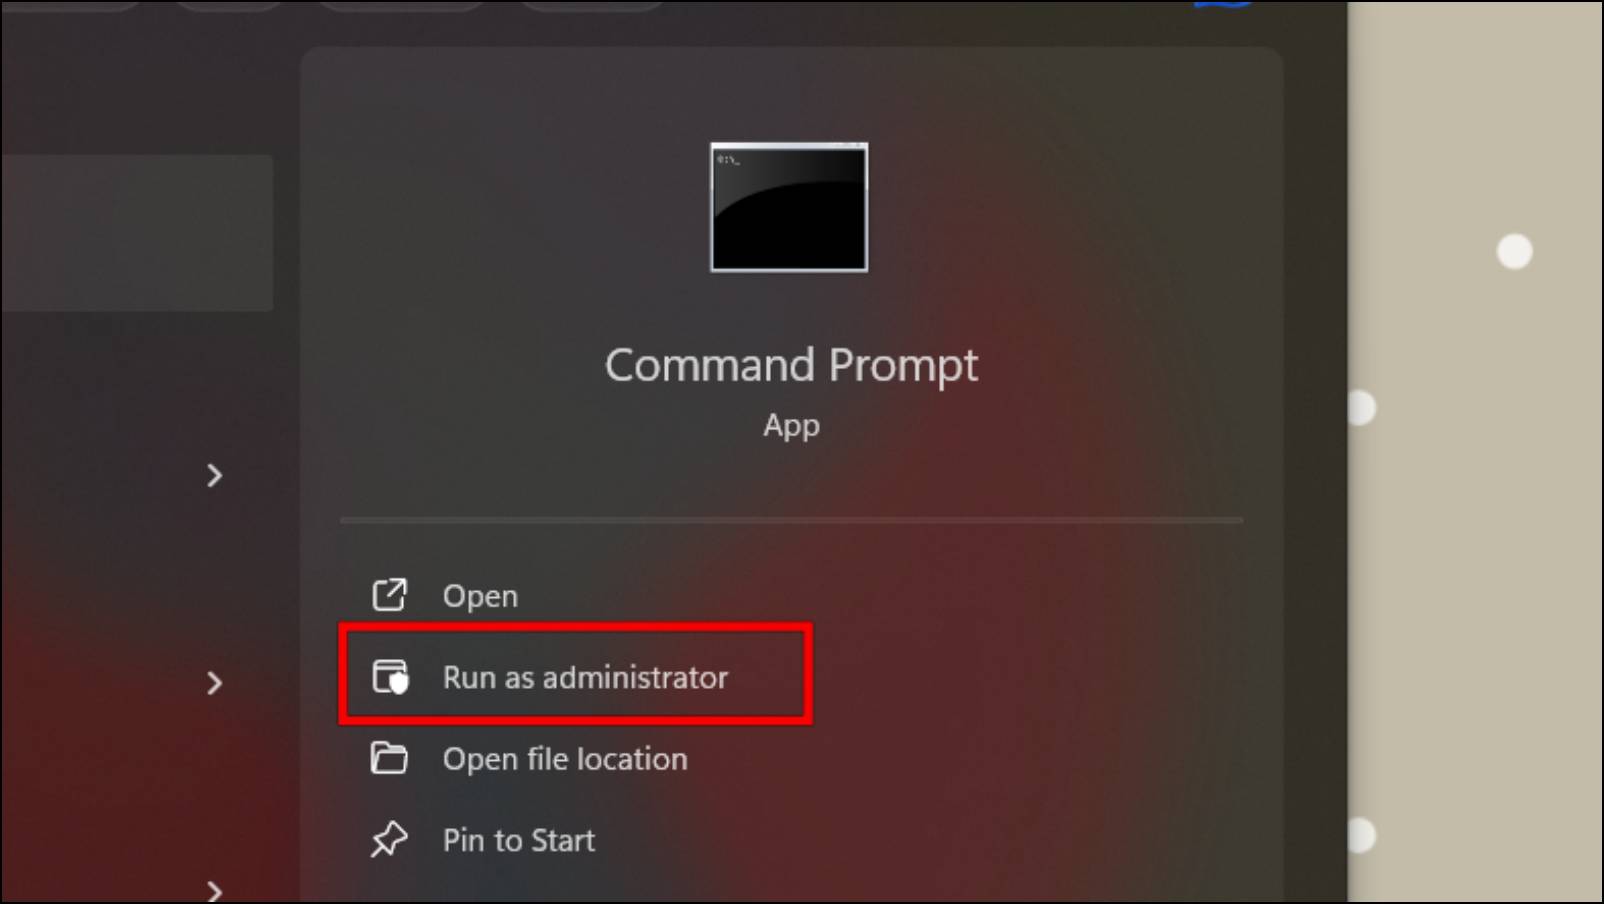
Step 2: Next, click on the Run as Administrator option as shown in the image below.
Step 3: In the command prompt, type: sfc /scannow and press Enter.

The verification and scanning process will take some time to finish.
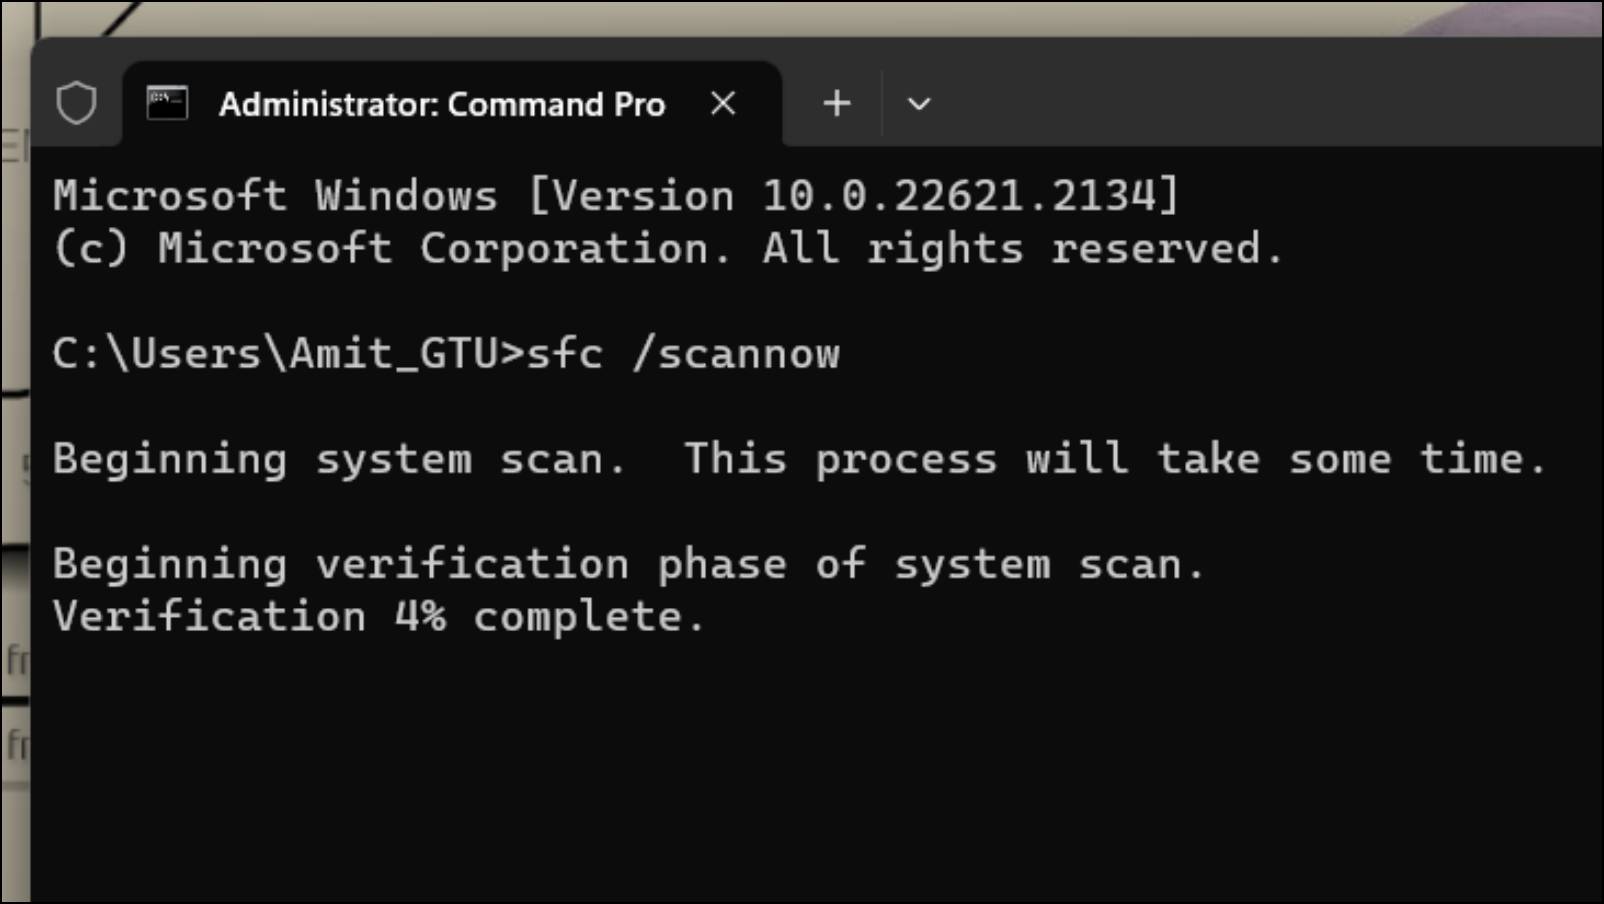
Once it is done, it should show a Successful message. This indicates that all the corrupted data has been fixed.
Method 6 – Install Auto Tab Refresh Extension
Auto Tab Refresh is a Chrome extension that lets you set the time interval after which you want the page to auto-refresh. This can be useful if you want to automatically set the webpage to refresh for new updates. But the extension also has an option to not auto-update the webpage. This can help prevent any random automatic page refresh by the browser.
Step 1: Download the Auto Tab Refresh extension from the Chrome Web Store.

Step 2: Once downloaded, visit the tab that you want to prevent from auto-refreshing.
Step 3: Now click on the extension icon in the Chrome toolbar.
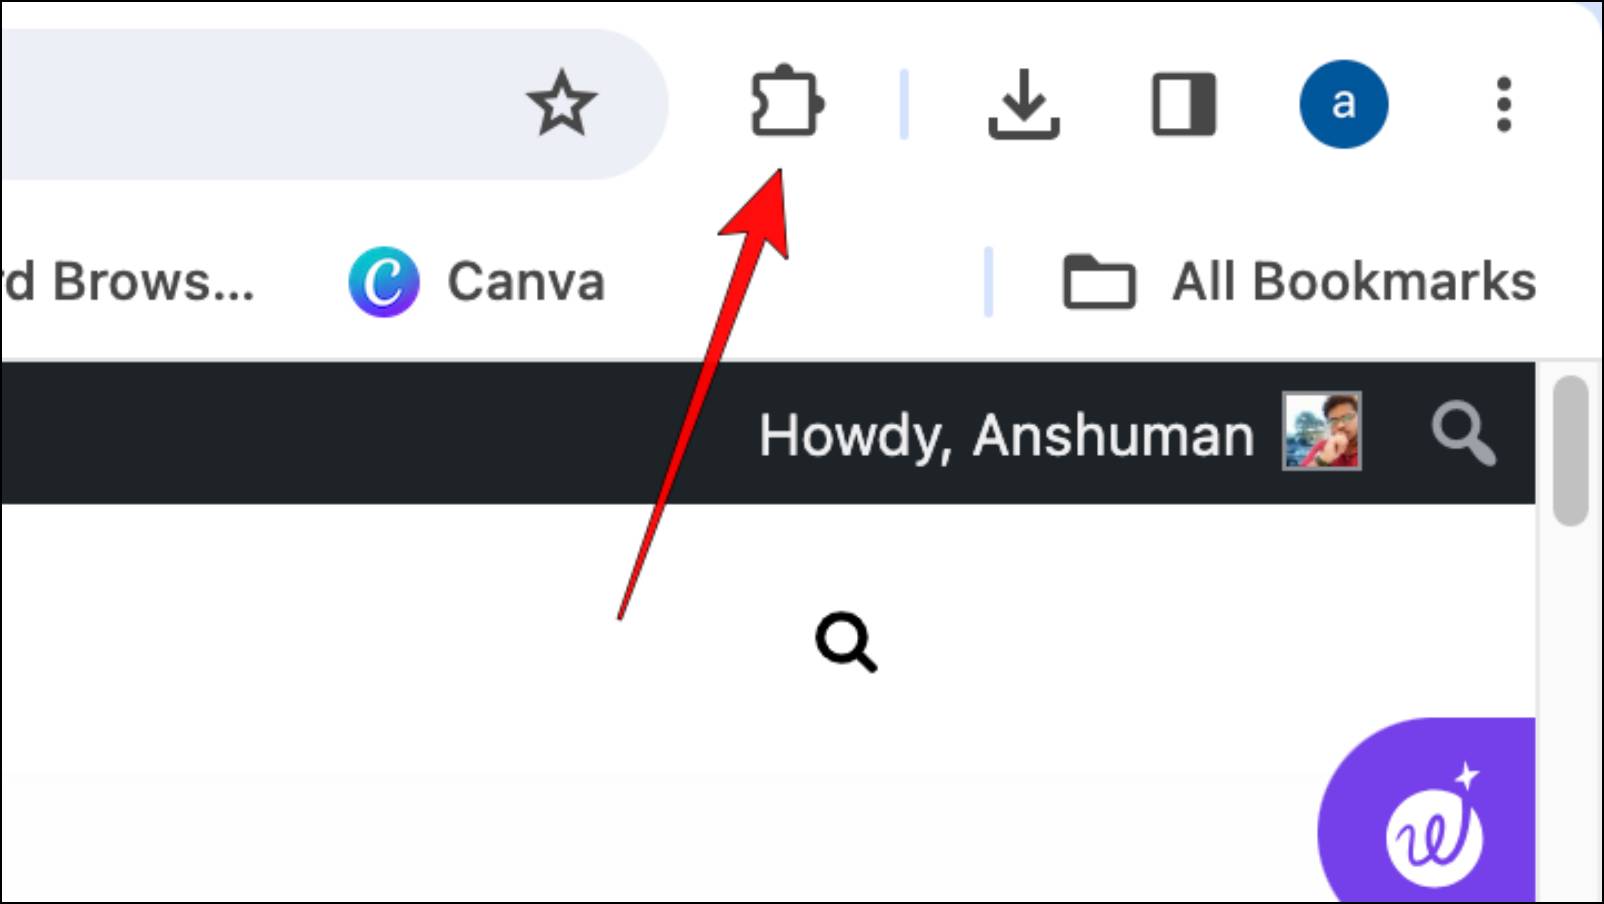
Step 4: Choose the Auto Tab Refresh extension from the list.

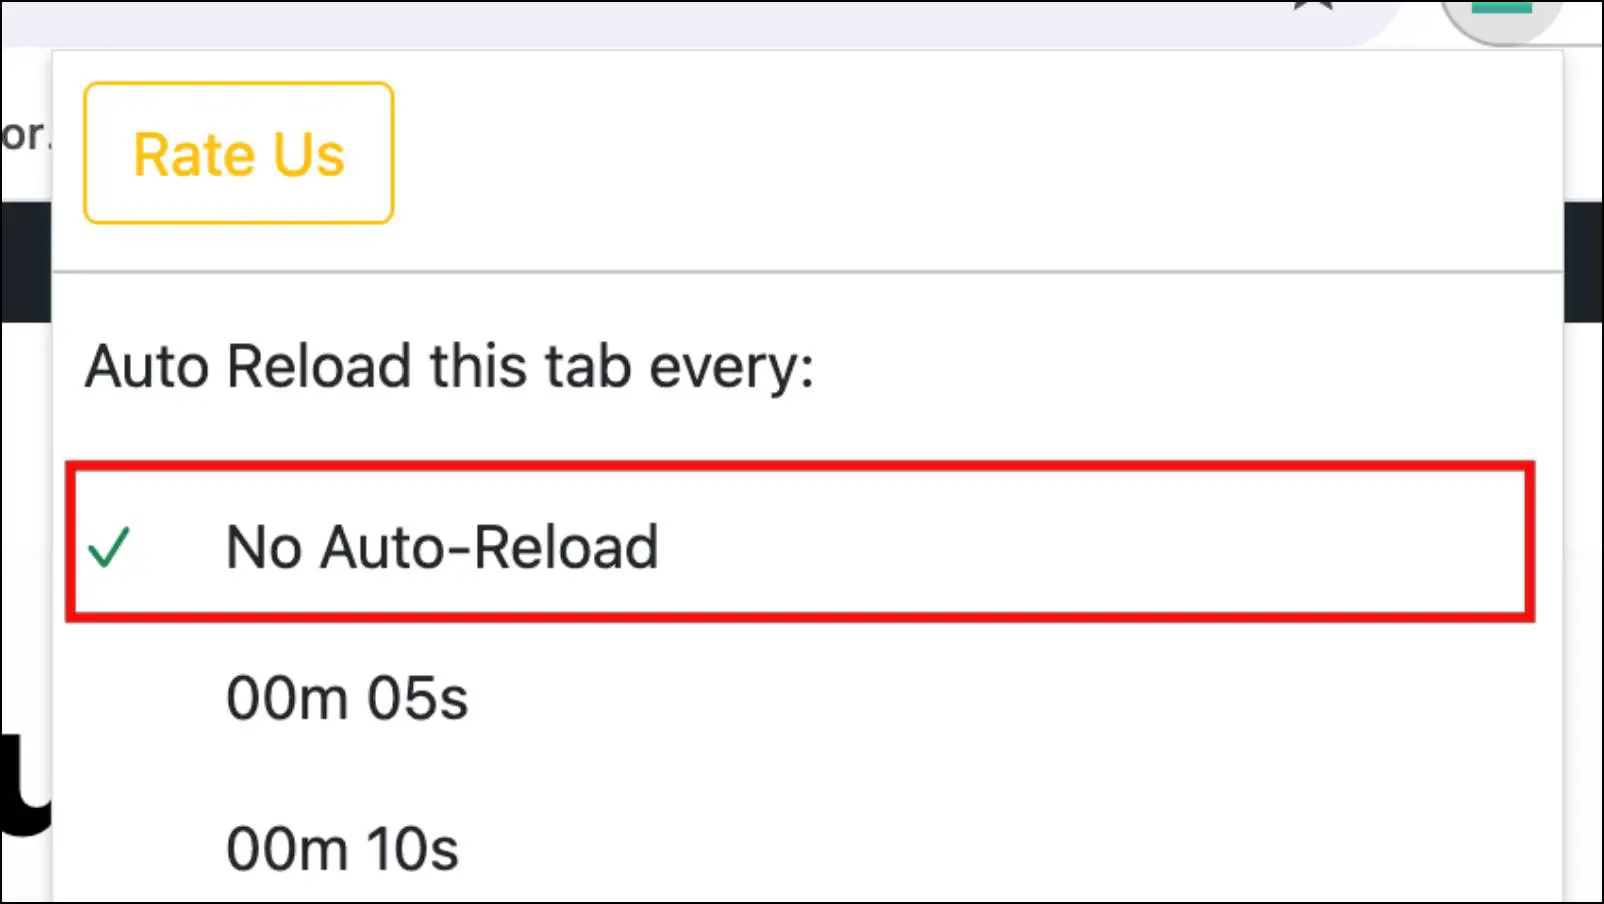
Step 5: In the extension menu, click on No Auto Reload.
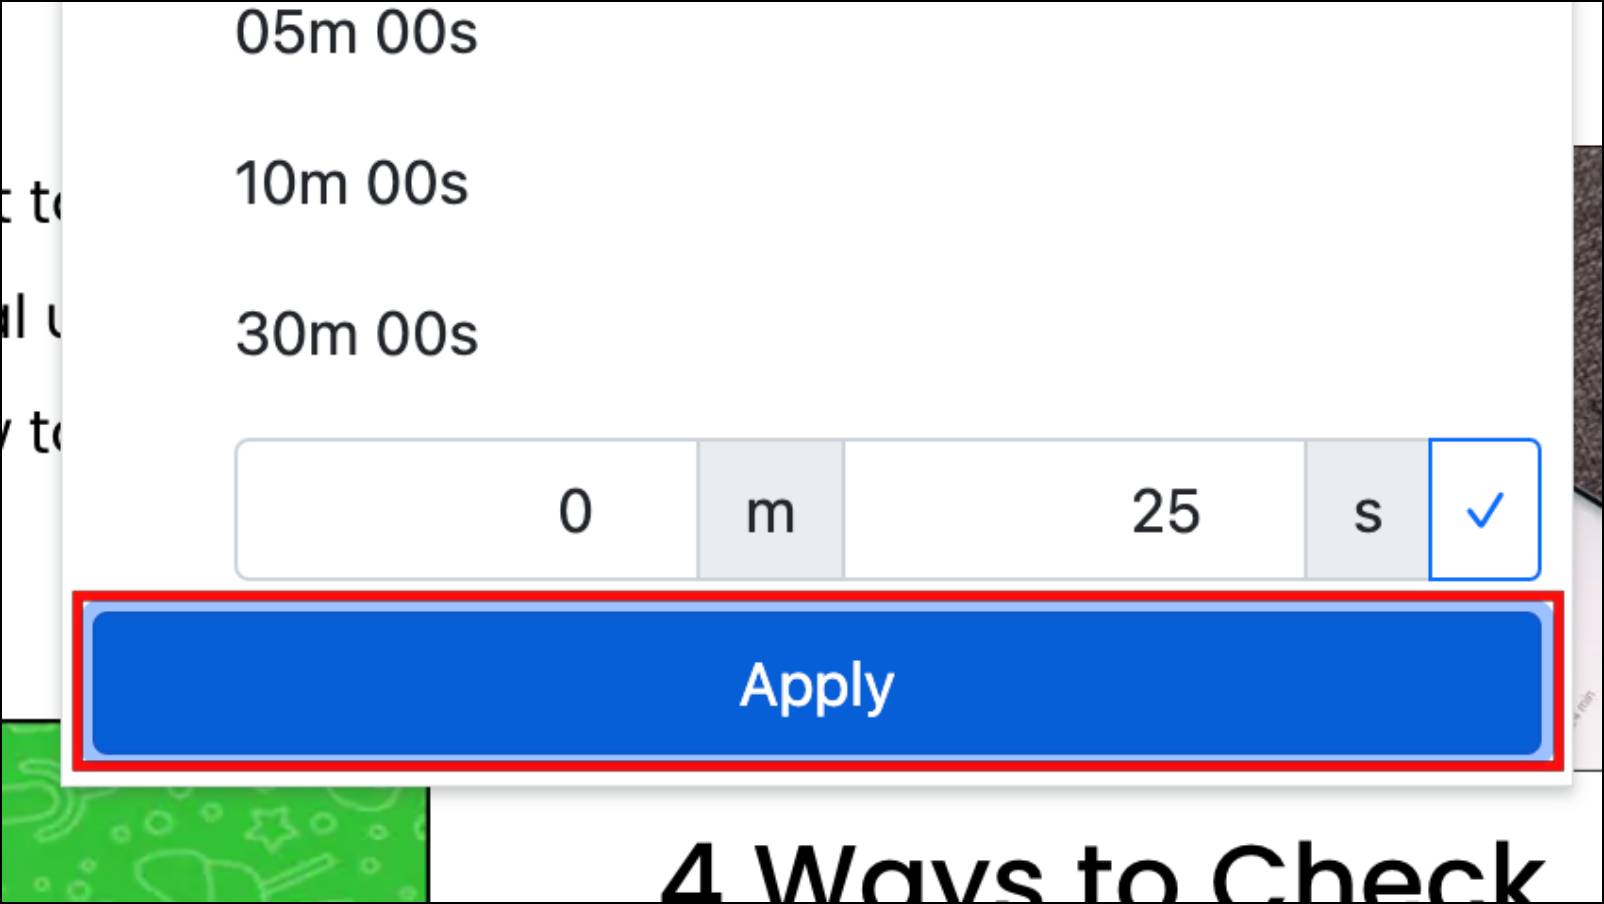
Step 6: Then click on Apply. This should prevent that particular tab from auto-reloading.
Method 7 – Clear Cache and Browsing Data
Corrupted cache and browsing data from websites can even cause your web browser to malfunction. This can result in the browser to refresh the webpage more often. However, you can easily stop this by clearing your cache and browsing data in Chrome. Just follow these steps.
Step 1: On Chrome, click the three-dot menu in the top right corner.
![]()
Step 2: Click on the Settings option.
![]()
Step 3: Go to Privacy and Security.
![]()
Step 4: Click on Clear browsing data.
![]()
Step 5: Here, tick the box for Browsing history, Cookies, and other site data as well as Cached images and files.
![]()
Step 6: Now click on the box next to the Time range.
Step 7: Choose All Time.
![]()
Step 8: Lastly, click on Clear Data.
![]()
This will not clear your bookmarks and saved passwords. After clearing the data, relaunch the browser.
Method 8 – Reset Browser Settings
If any of the above methods have not been much help, and Chrome keeps auto-refreshing, then something could be wrong with the browser itself. In this case, we would recommend that you reset your browser settings. This will switch all the settings and menus to their default state. It will also get rid of extensions, but your bookmarks and passwords will stay intact.
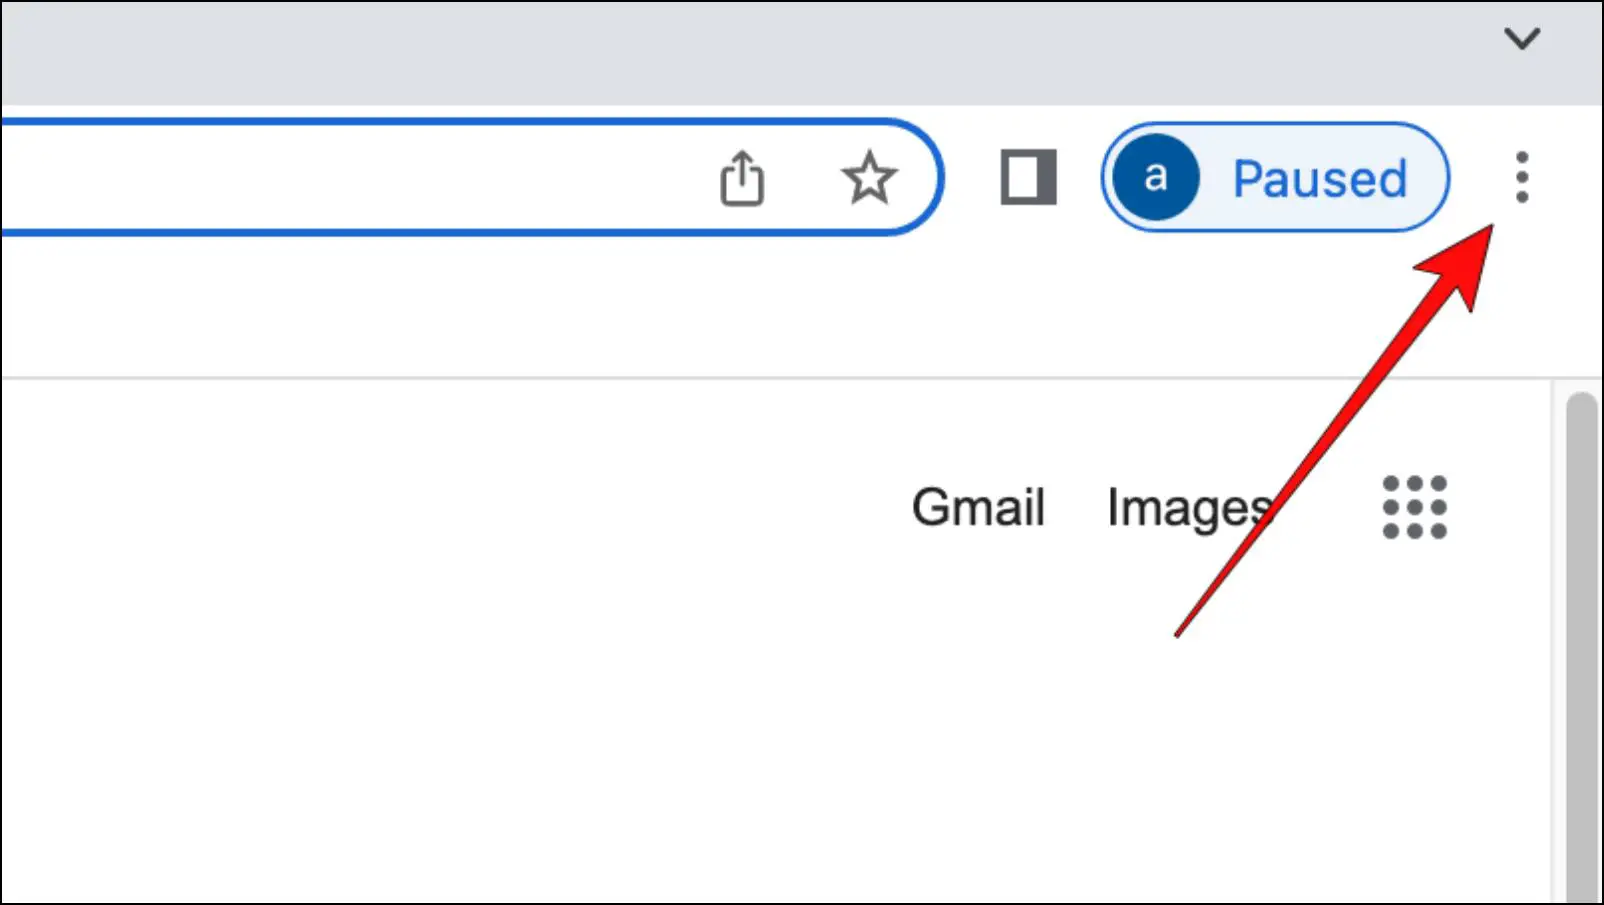
Step 1: To reset Chrome, click on the three-dot menu.
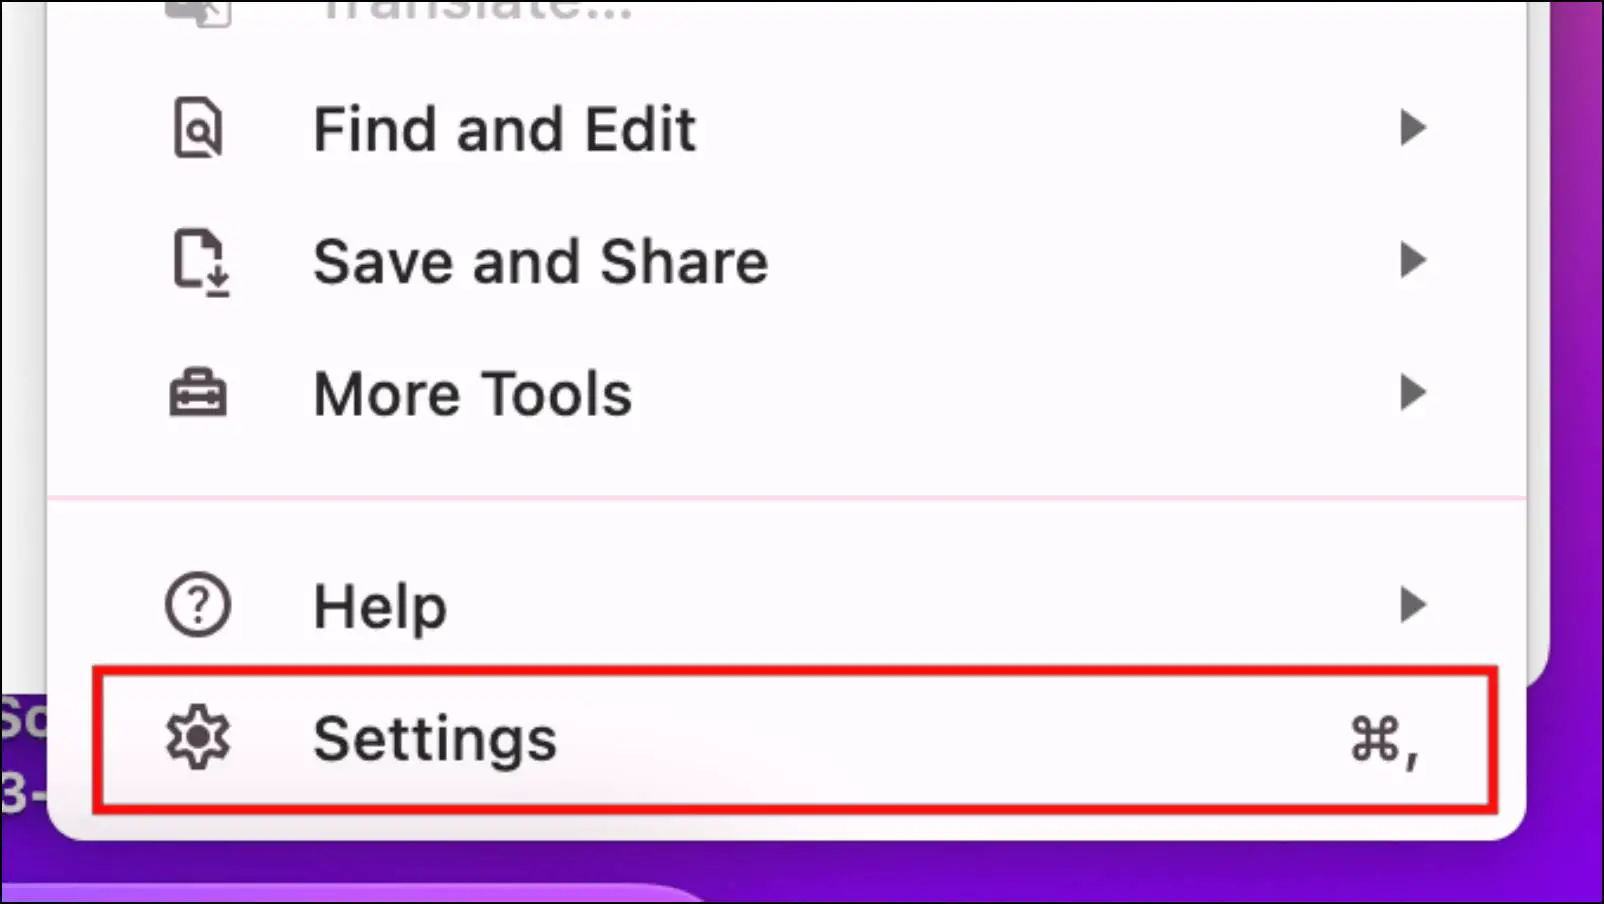
Step 2: Open Settings.
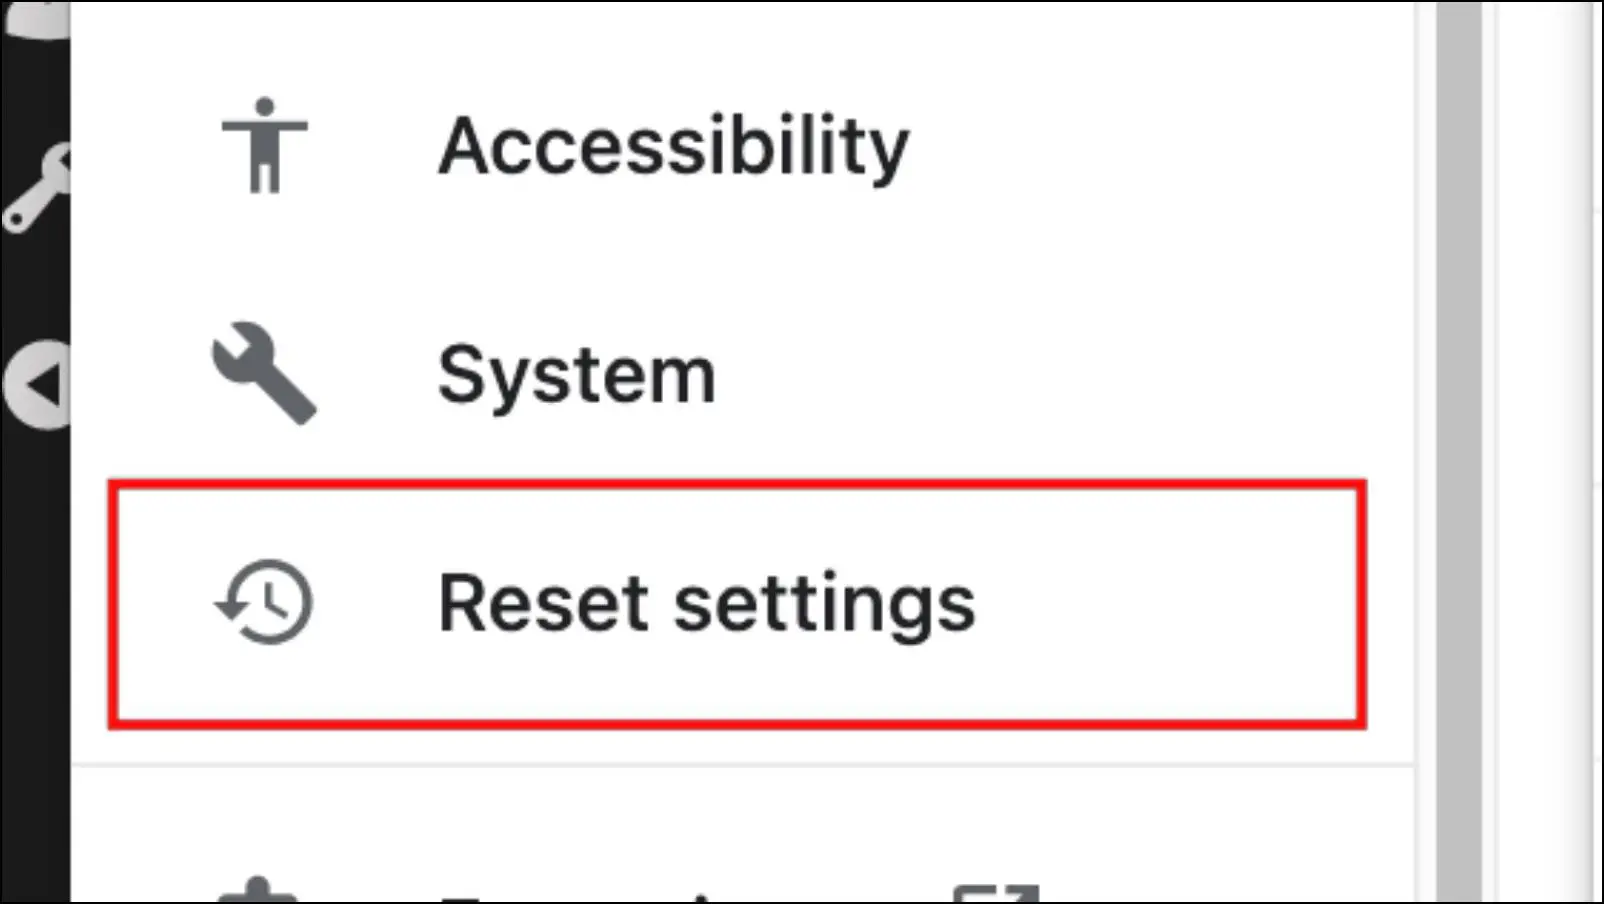
Step 3: Select Reset Settings using the left sidebar.
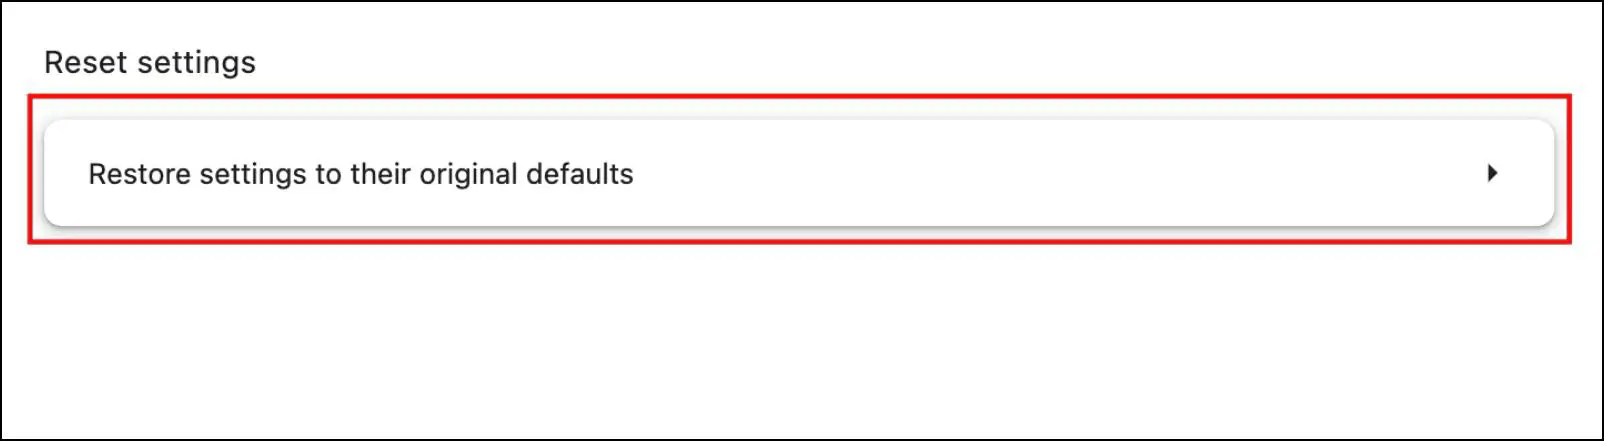
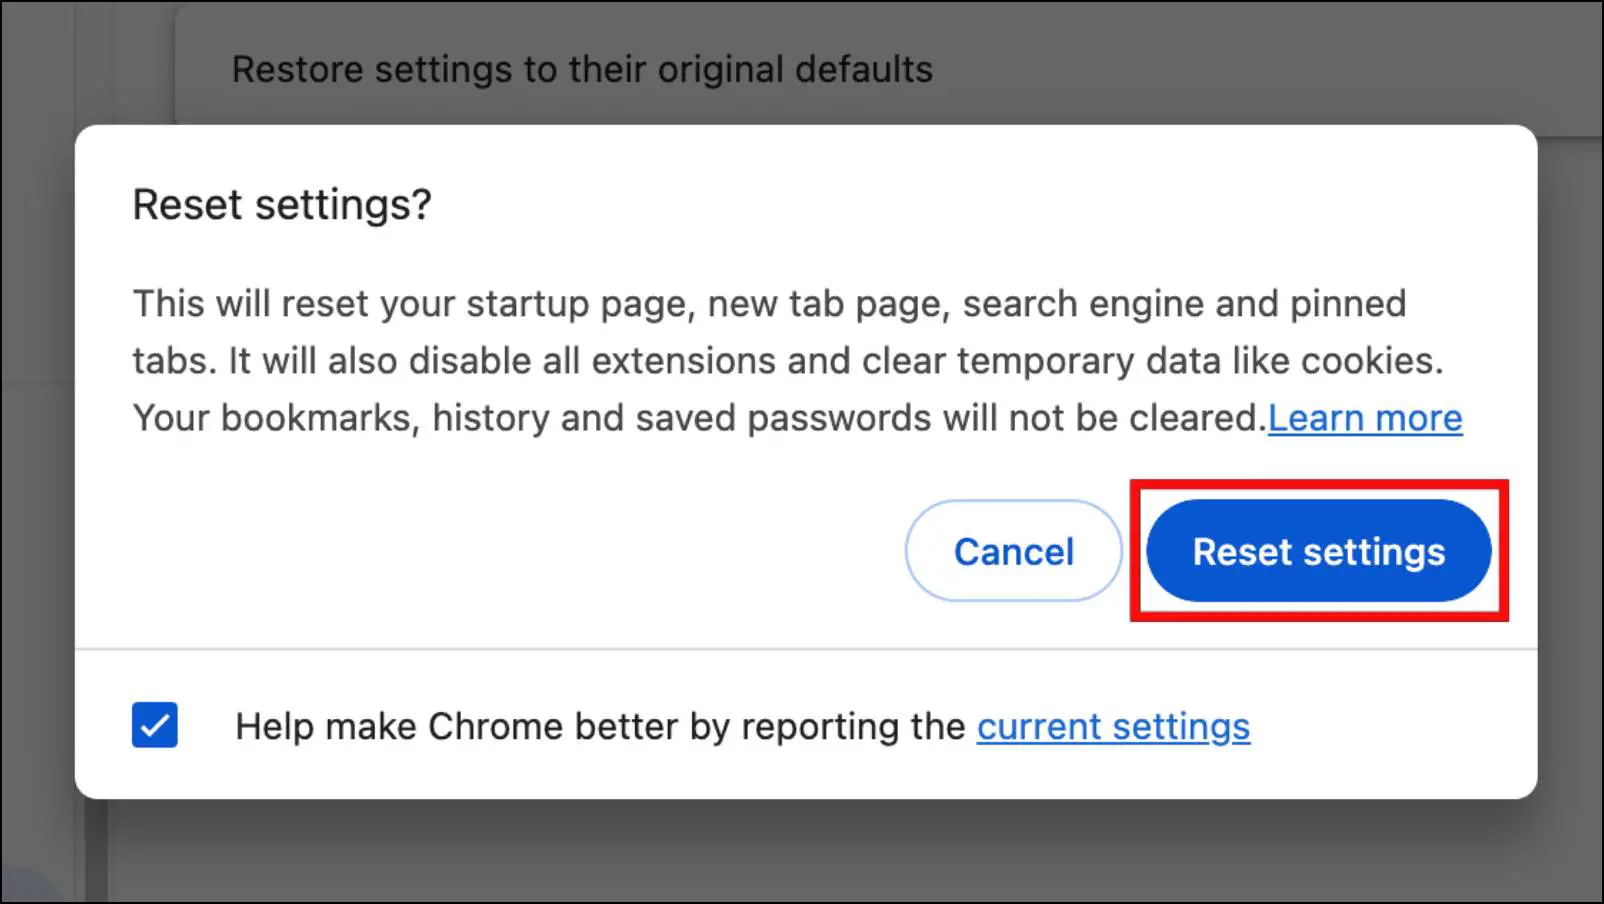
Step 4: Here, click on Restore settings to their original defaults.
Step 5: In the confirmation prompt, select Reset settings.
Wrapping Up
These are the eight ways you can try to stop Google Chrome or other browsers from auto-refreshing the webpage. It is certainly a necessity for your web browser to refresh pages from time to time, to get rid of redundant information, and to load new ones. However, frequent refreshing could hinder your work while also being distracting.
Do reach out to us if you have any queries related to this article. Till then, stay tuned on BrowserToUse for more such articles, reviews, and How-Tos.
Related: