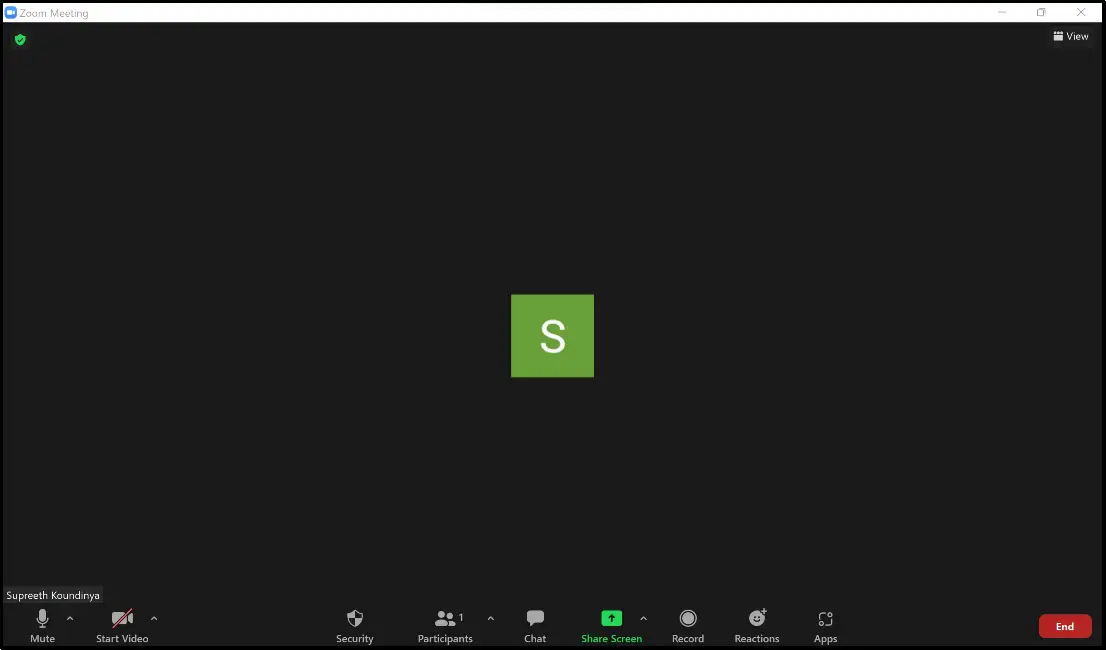
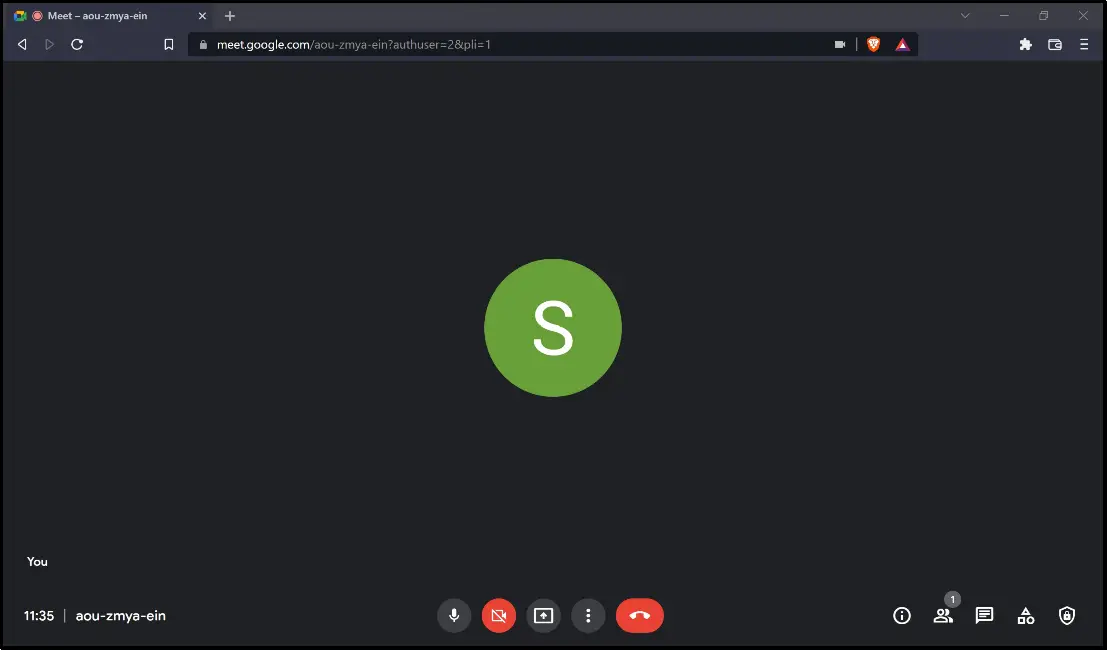
While people appreciate the array of features that popular video calling platforms like Google Meet and Zoom offer, there’s always a concern for an additional layer of privacy and security. Addressing this need, Brave Browser has jumped on the bandwagon of videoconferencing services with Brave Talk. In this article, let us see what Brave Talk is, how it works, and how it compares against the likes of Zoom and Google Meet.
Related: What is Brave Private with Tor? How Does it Work- Is it Safe?
What is Brave Talk? How Does it Work?
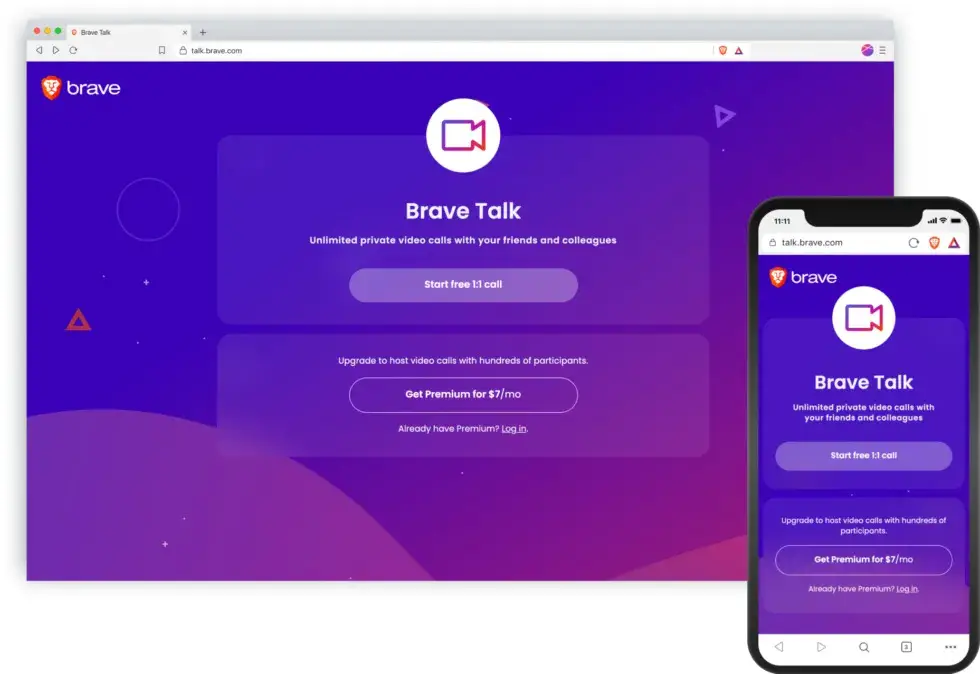
Brave is hailed from all over for offering unique privacy features in its primary product, the Brave Browser. Sticking to its product ethos of prioritizing privacy, Brave has introduced an integrated service called Brave Talk.
Built on Jitsi, Brave Talk is an open-source video conferencing platform. It claims to save no user data, hence adding a good amount of safety and security to the audio-visual elements involved in a video conference.
Brave Talk is built right into the browser, so there’s no need for a browser extension, external app, or software. Calls must be started using the Brave browser, although connections to calls can be made with any browser that supports the required technologies.
It offers encryption for video chats, and the company says it doesn’t store metadata from calls, unlike other video providers.
On the same lines, Brave CEO Brendan Eich stated “Connecting with colleagues and friends through video conferencing channels is now the norm, and as users become increasingly aware of online privacy concerns, there is a growing need for a privacy-first option.”
How to Use Brave Talk to Make Private Video Calls
Let us go about a step-by-step procedure to set up a private video call using Brave Talk.
1- Install Brave Browser
As of yet, Brave Talk works only on the Brave browser. Hence, you need to install Brave Browser if not already, as shown below.
Step 1: Head to the Brave download page.
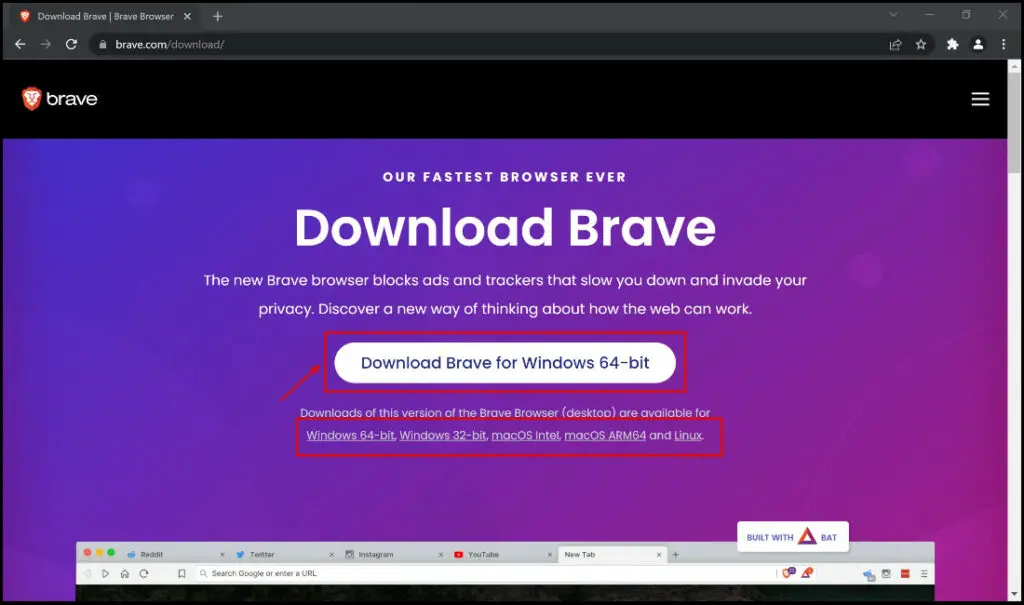
The primary option says “Download Brave for Windows 64 – Bit” and if you are sure your system type is 64 bit, go ahead and click on the option. If not, select the option given for the other alternate versions, depending on your operating system as well.
If you are unsure of what your System Type on Windows is, open Run by pressing Windows key + R. Type and enter msinfo32. Then, make a note of the System Type (as shown in the image below)
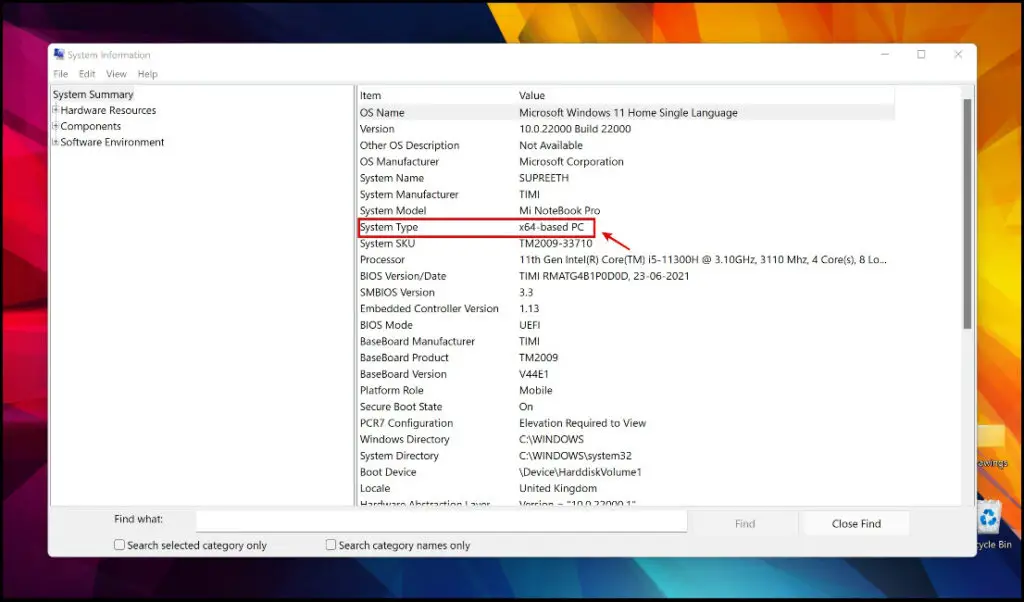
Now that you are aware of your System type, go ahead and download the correct version of Brave Browser.
Step 2: Click the downloaded Brave setup, and tap Yes on the dialog box that pops up.
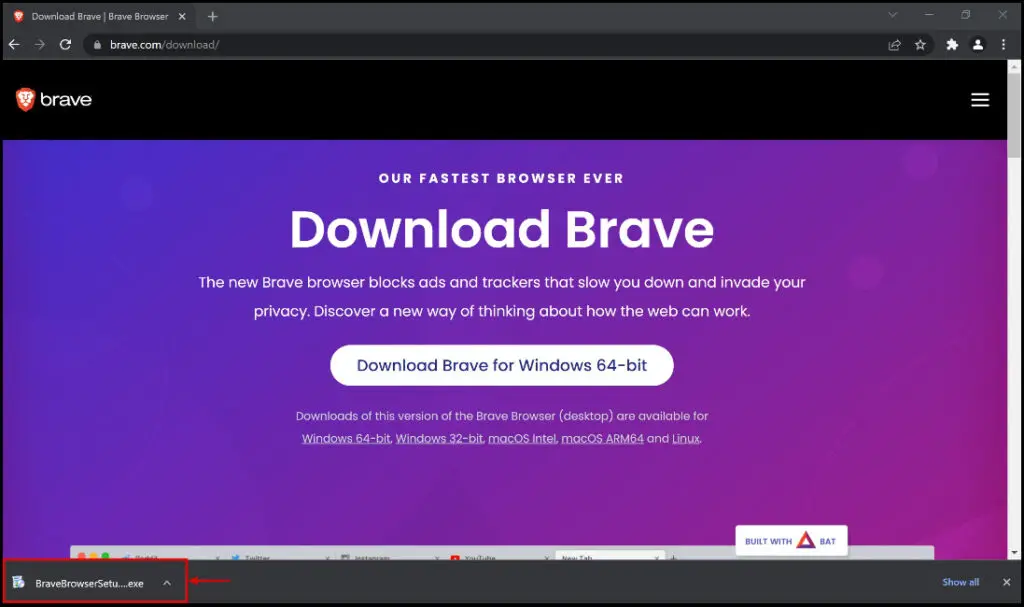
Step 3: Wait for the download & installation process to get completed.
Post that, Brave Browser will open automatically.
2- Start Brave Talk Video Call
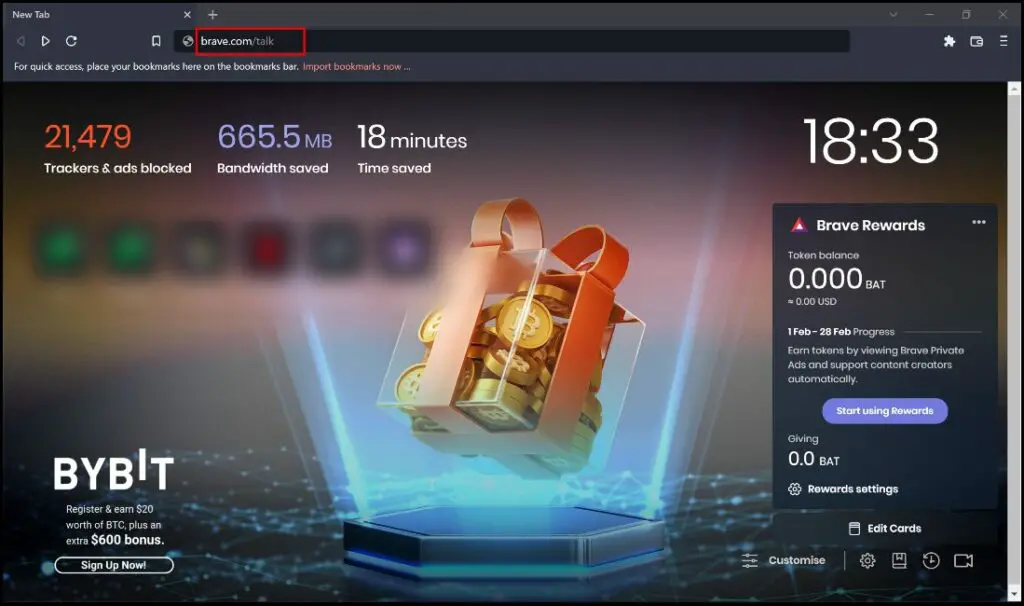
Step 1: Once Brave Browser opens, type brave.com/talk in the address bar and hit the enter. Alternatively, you can visit talk.brave.com.
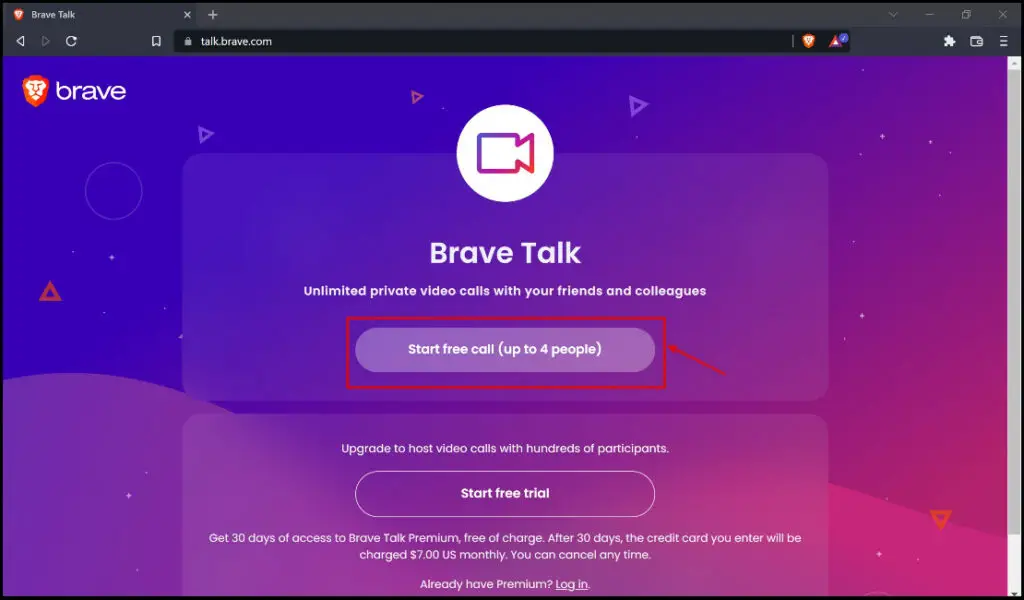
Step 2: Click on Start Free Call.
In the later section of this guide, we shall learn the differences between the free and premium versions of Brave Talk, but for now, let us go ahead with the Free option.
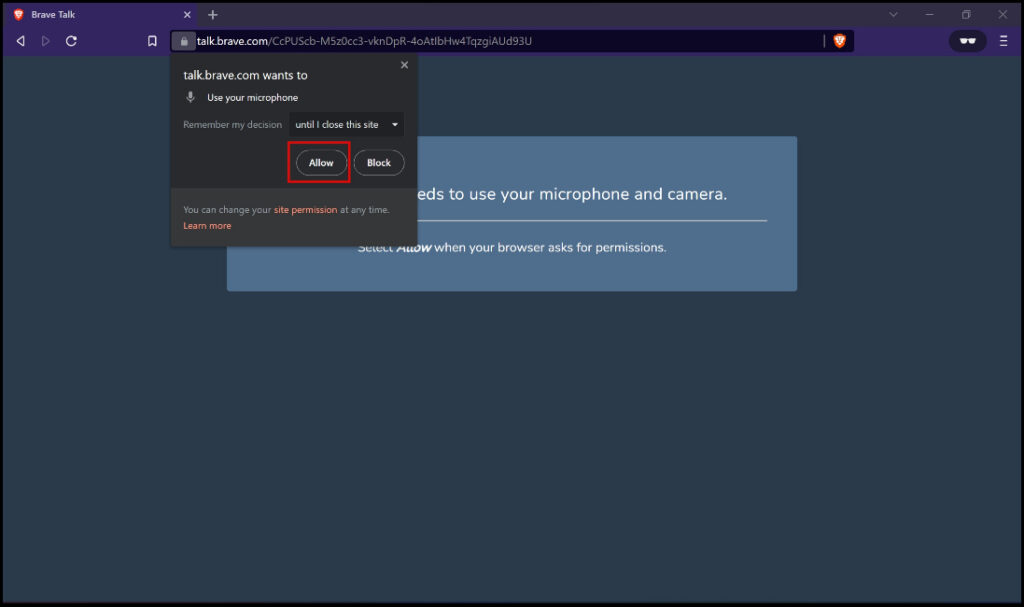
Step 3: Grant permissions for Microphone by clicking Allow. A similar dialog box will pop up once you try to turn on your video later- click Allow at that time as well.
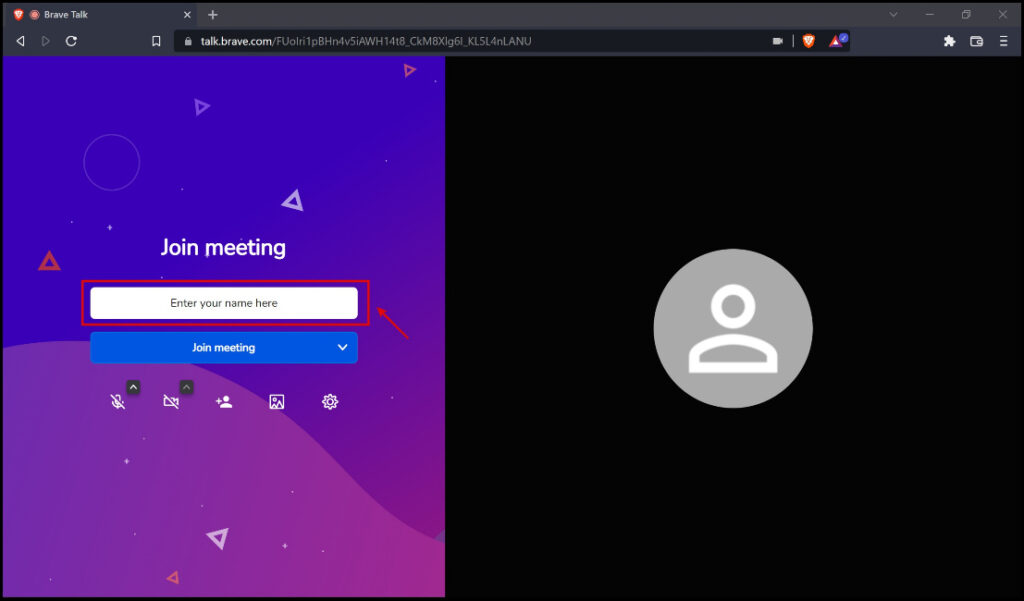
Step 4: Enter your name in the provided box, as shown in the screenshot below.
3- Invite People to Call
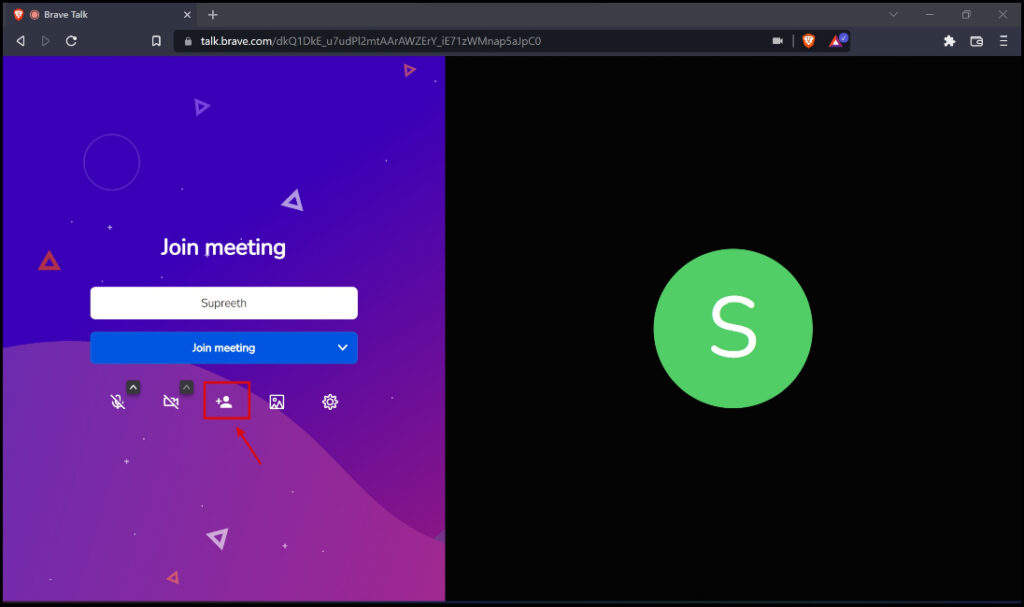
Step 1: Click the Invite people button.
Step 2: Next, click the Copy to clipboard icon. This will copy the link to your clipboard.
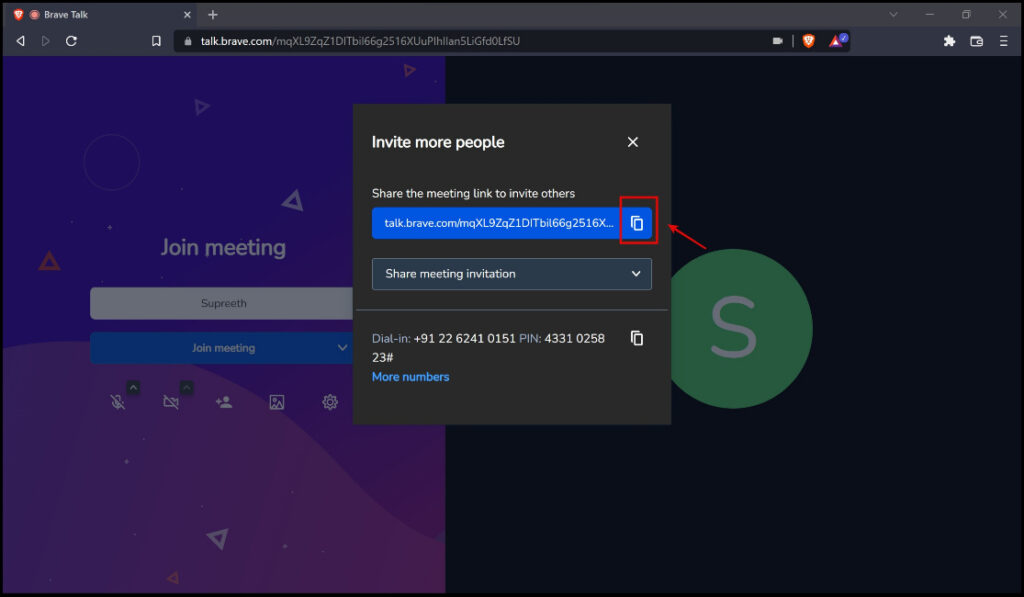
Step 3: Now, paste and share the copied link with the people you want to join the meeting.
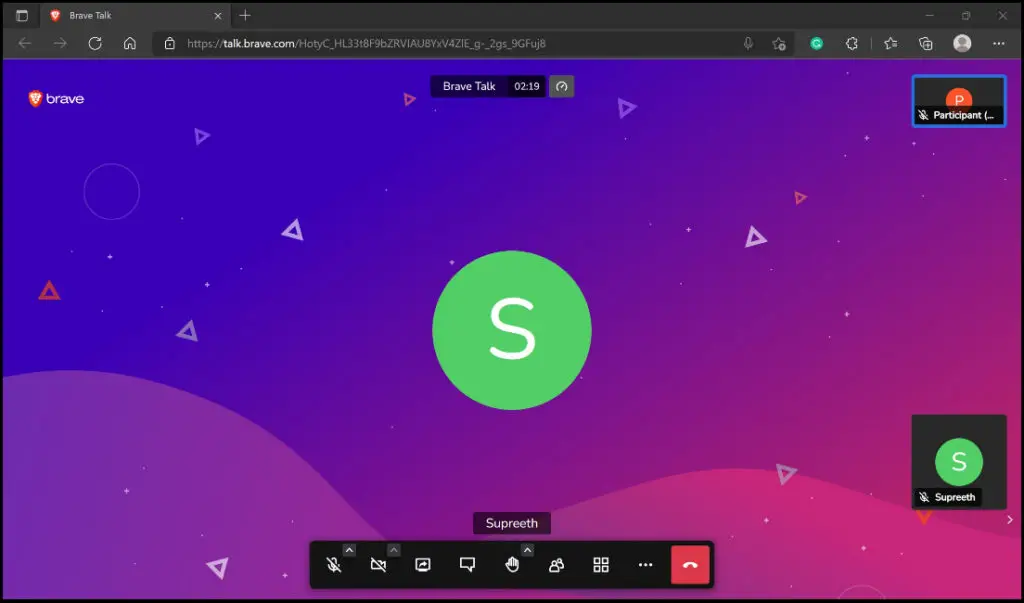
This is what the interface will look like, once participants have joined in.
Brave Talk for Google Calender
Brave recently announced an extension for Google Chrome and Edge, for Brave Talk to integrate with Google Calendar – meaning you could now add set up a Brave Talk session for your meetings/events scheduled on Google Calendar. Here’s a step-by-step procedure to utilize the extension.
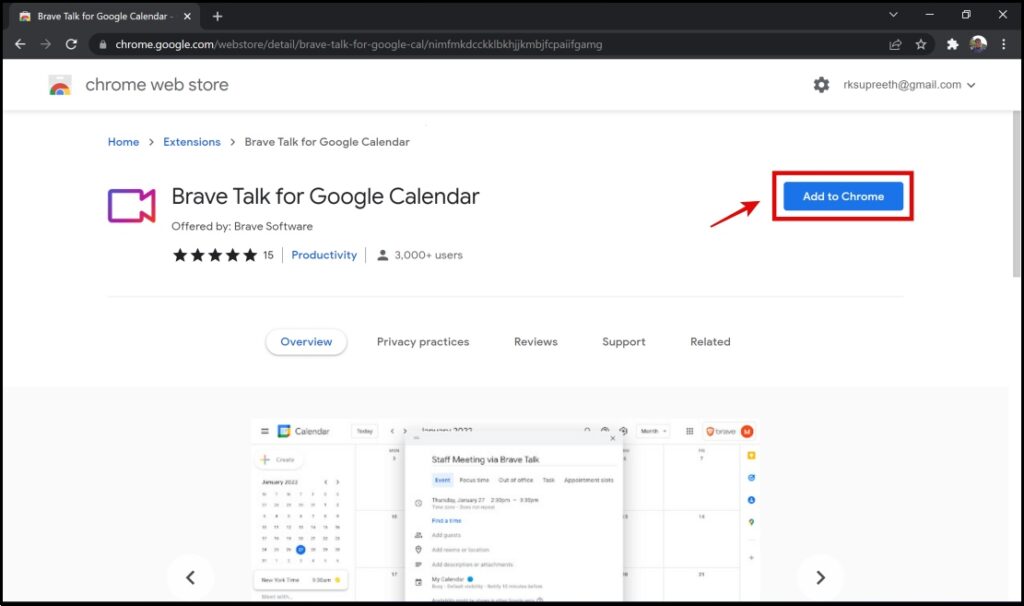
Step 1: Visit the Brave Talk for Google Calendar extension. Click on Add to Chrome -> Add extension.
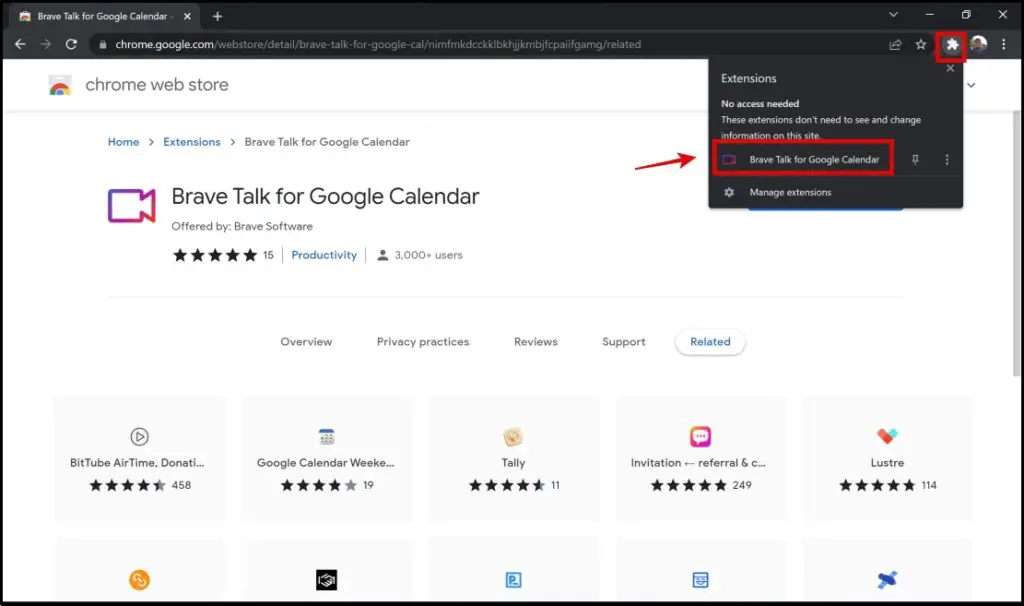
Step 2: Click on the extensions menu on the top right corner of the screen, and select the Brave Talk for Google Calendar extension.
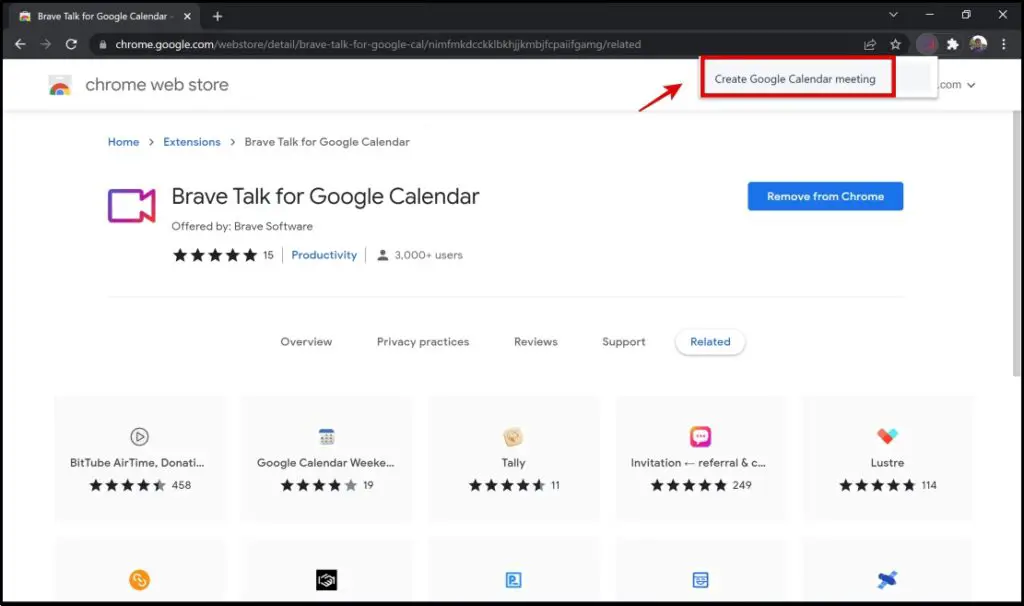
Step 3: Click on Create Google Calendar meeting.
Step 4: Fill in the details in the fields provided.
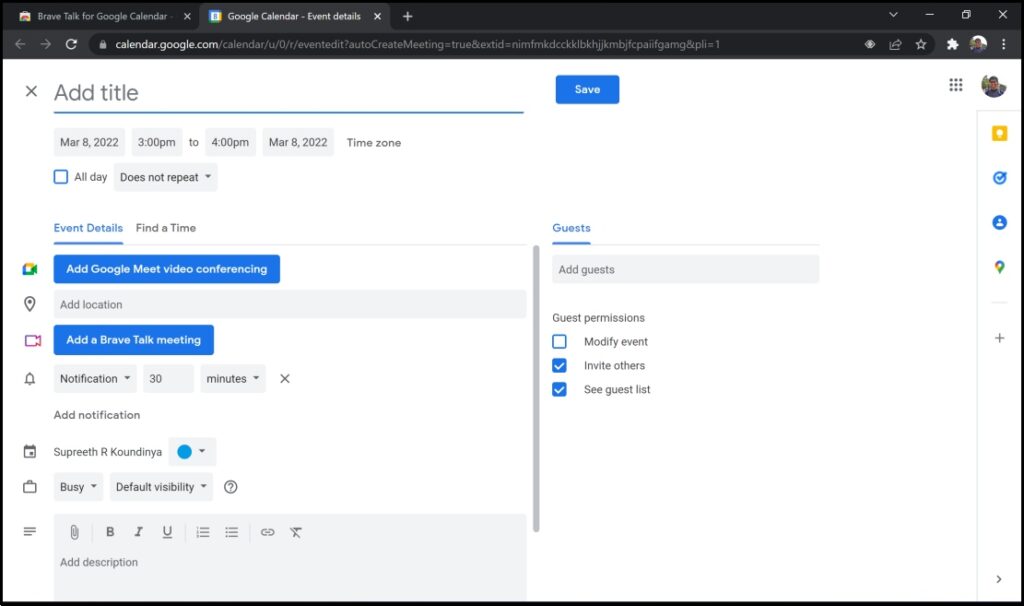
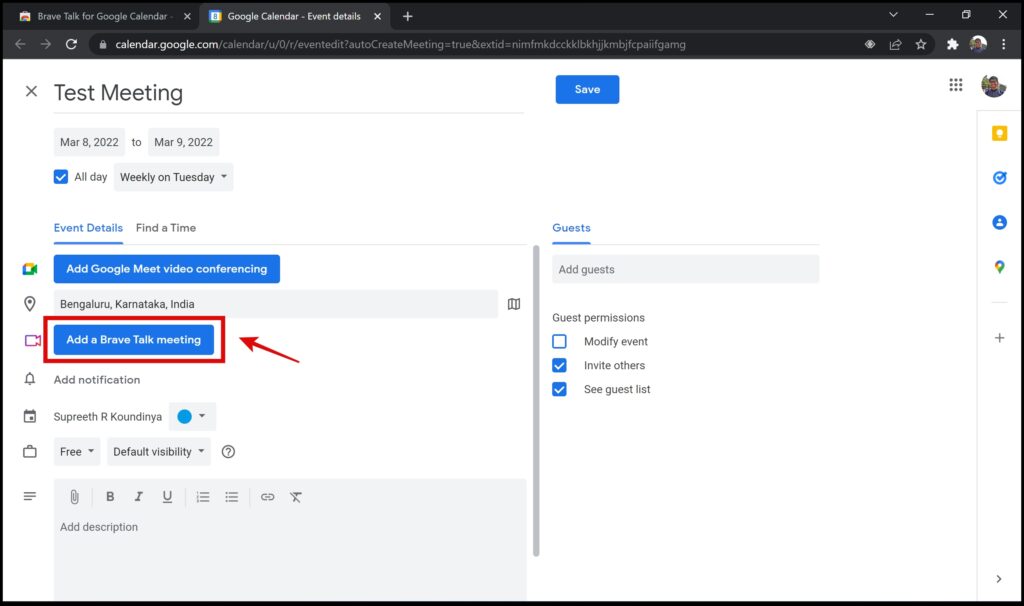
Step 5: Once you enter all the details, click on Add a Brave Talk meeting. This will now create a Brave Talk meeting and link it with your event.
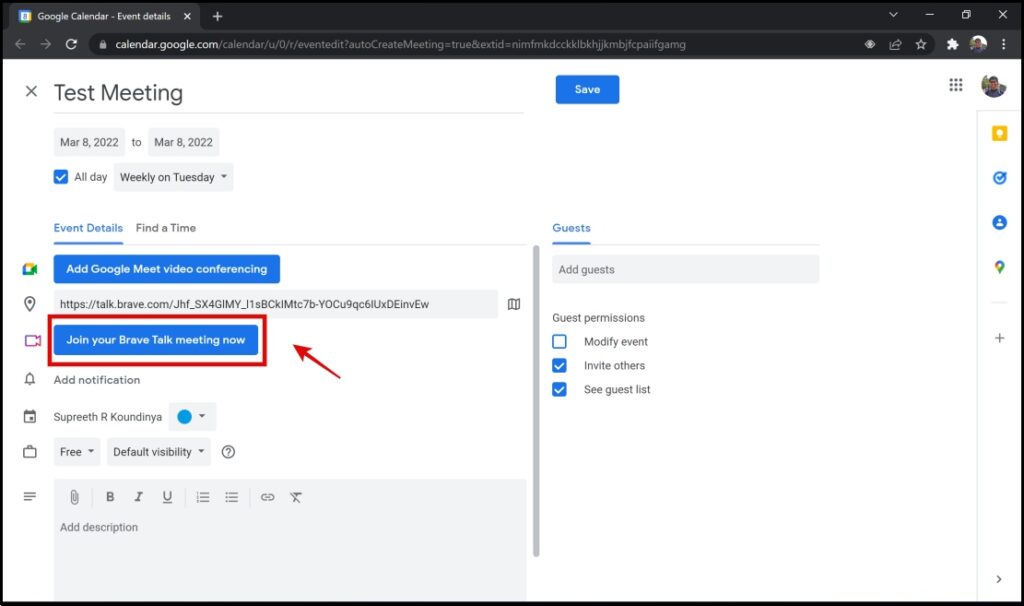
Step 6: Click on Join your Brave Talk meeting now. You will now be automatically redirected to the Brave Talk page, where you can start your meeting and invite other participants.
Brave Talk Features vs. Google Meet and Zoom
Brave Talk comes with all important and commonly used features that an average user needs on a video conferencing platform like:
- Screen Sharing with Audio
- Waiting Room/Control of entry of participants
- Chat/Communication in between participants
- Breakout Rooms
- Conducting Polls through chat
- Live streaming the meeting
Meeting duration and number of participants
Now, let us look at some key aspects that distinguish Brave Talk from Google Meet and Zoom.
For starters, the Brave Talk Free version does not have a time limit, but a participant limit of just four. This can be bypassed by purchasing the premium version, which is priced at $7 per month.
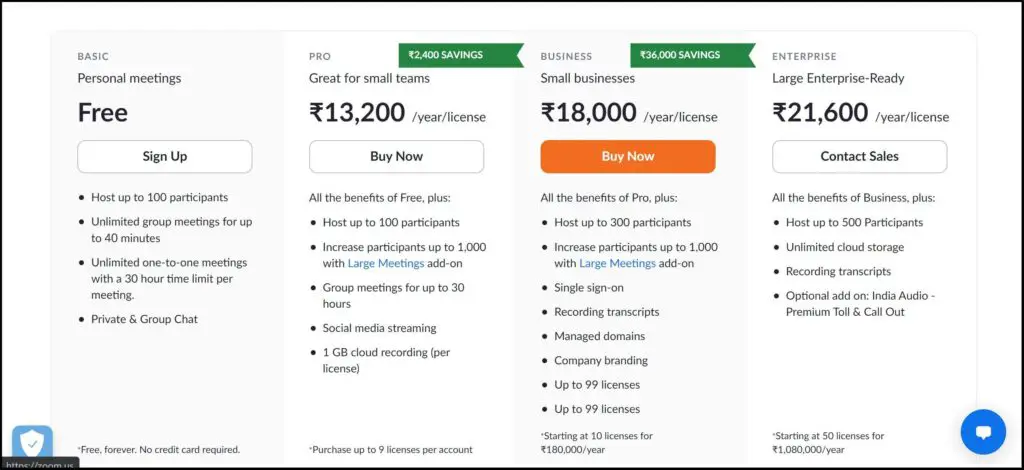
Zoom has a time limit of 30 hours for 1-on-1 meetings. In case the number of participants exceeds two people, the limit is reduced to 40 minutes. This can be bypassed by purchasing the pro or other paid versions.
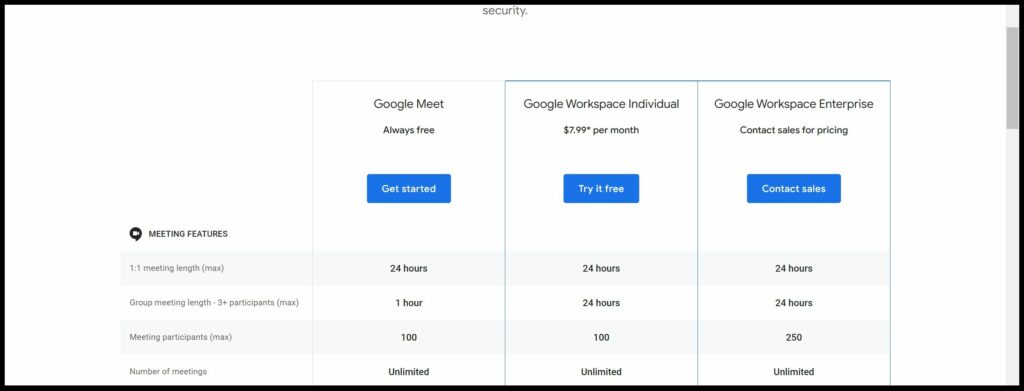
On the other hand, Google Meet allows users to hold one-on-one calls for 24 hours. But the time limit for group calls with 3 or more participants is now reduced to 60 minutes. It supports up to 500 participants.
Ease of Access
Brave Talk, like Google meet and Zoom, can be accessed directly from the web browser without installing any tool/software on your computer. Although a little downside is that as the host of the meeting, you must have Brave browser installed on your PC.
User Interface
Brave opted for a slightly more colorful interface in comparison to Google Meet and Zoom. I personally found the user interface a bit more charming, and a little less boring in comparison to Zoom, and especially Google Meet.
It also felt a bit smoother navigating across different elements of the user interface. Brave Talk also does not skimp on features that help customize the appearance of the interface – be it adding custom images or custom backgrounds.
What I liked most about the user interface on Brave Talk is the easily accessible settings menu. It is available on the meeting screen and is more descriptive.
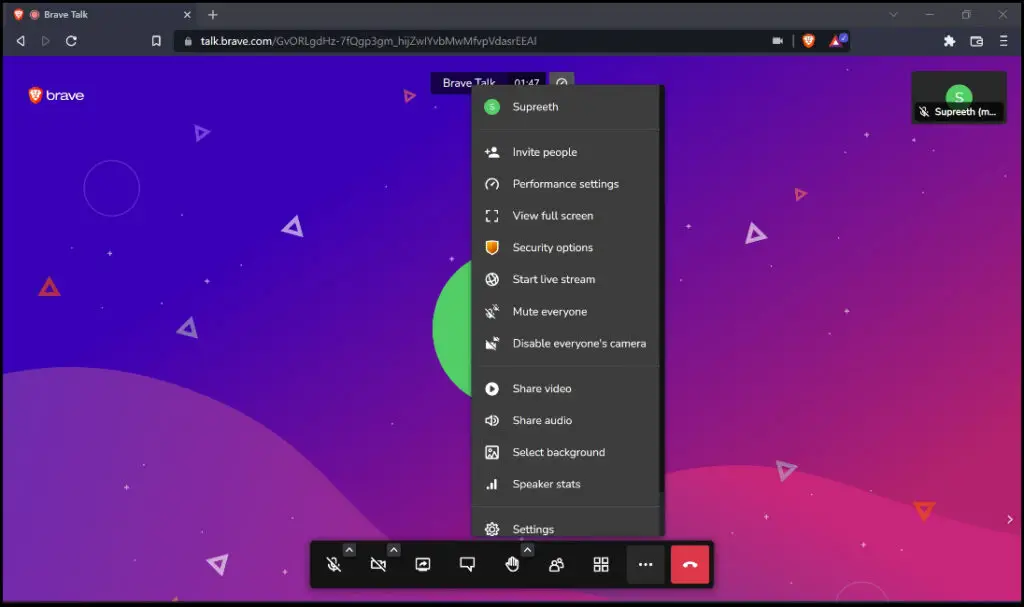
Furthermore, it has more settings that can be quickly modified in comparison to Zoom and Google Meet – without having to jump to a different page.
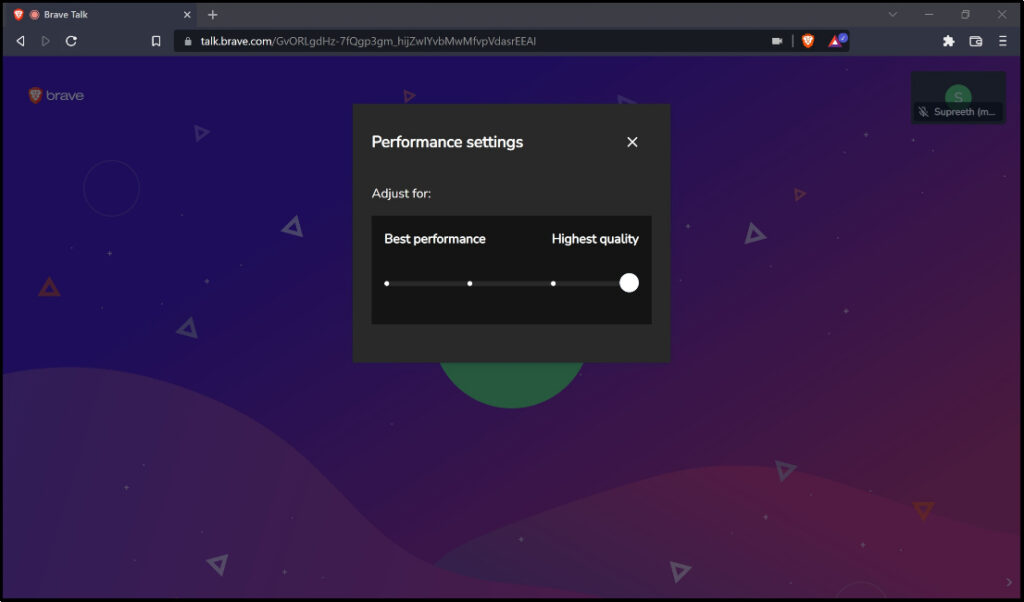
Performance Settings on Brave Talk
Brave Talk comes with an easy-to-use slider to set the performance, depending on what you are using it for. You can adjust it for best performance or best quality using the slider.
Privacy Features on Brave Talk
What sets Brave apart from its counterparts is the much-talked-about, and heavily advertised Privacy features. Brave claims that it does not collect any data from the meetings.
Transport layer encryption is used to encrypt all video and audio data sent through Brave Talk. This is similar to how many websites use HTTPS to ensure that your traffic is not intercepted over public networks (e.g. coffee shop WiFi).
The video/audio from your call is sent to other participants with the help of a Video Bridge server run by Brave’s partner “8×8”. Your browser exchanges keys with other call participants when you enable Video Bridge Encryption in Security Options, and these keys are used to encrypt the video and audio streams.
To Enable Video Bridge Encryption :
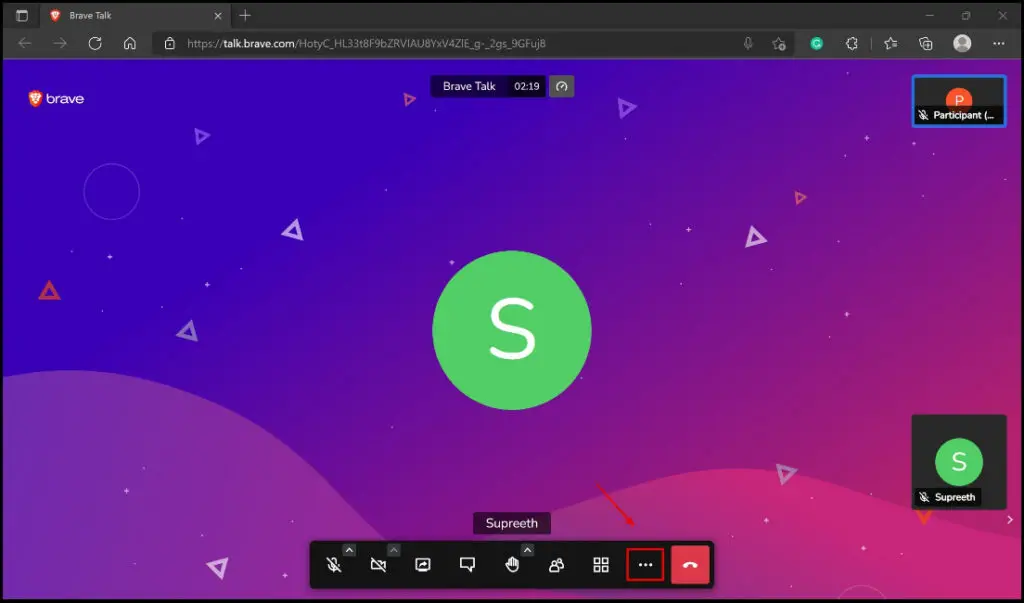
Step 1: Click the More Actions icon on the main screen, as shown below.
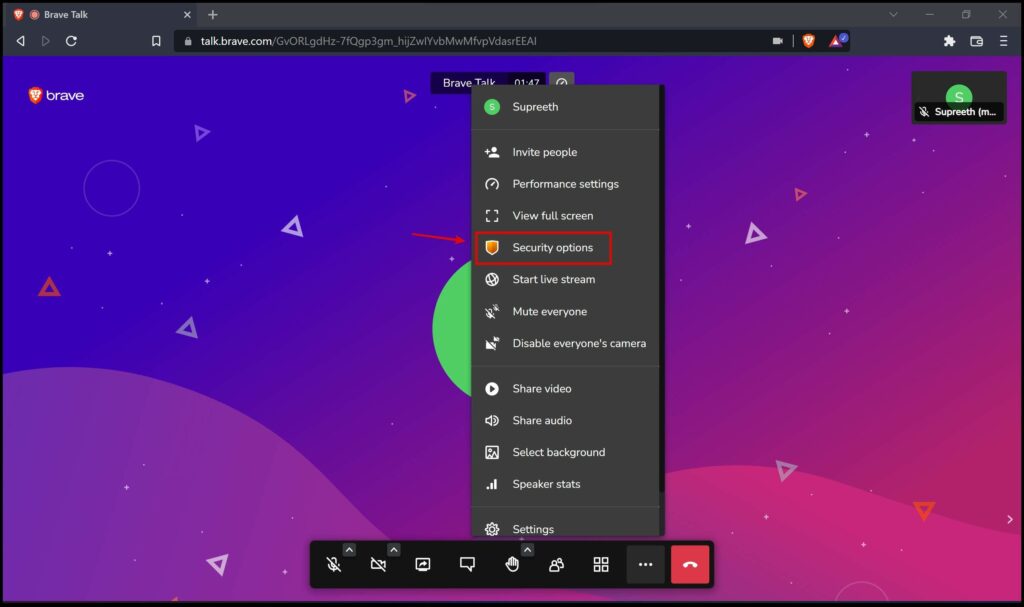
Step 2: Click on Security Options.
Step 3: Scroll down to find the Enable Video Bridge Encryption feature and turn on the toggle for the same.
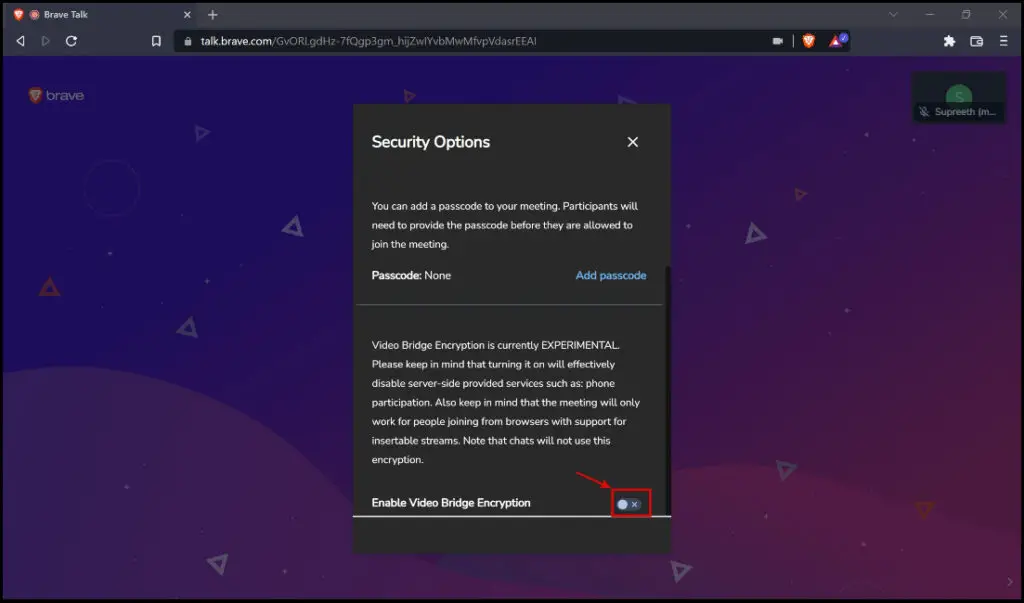
Please note that Video Bridge Encryption will not come into effect if you have more than 20 participants and are using incompatible browsers – unfortunately, Safari is one of them, among most iOS browsers and browsers under the Chromium version 83.
Brave Talk Free vs. Premium
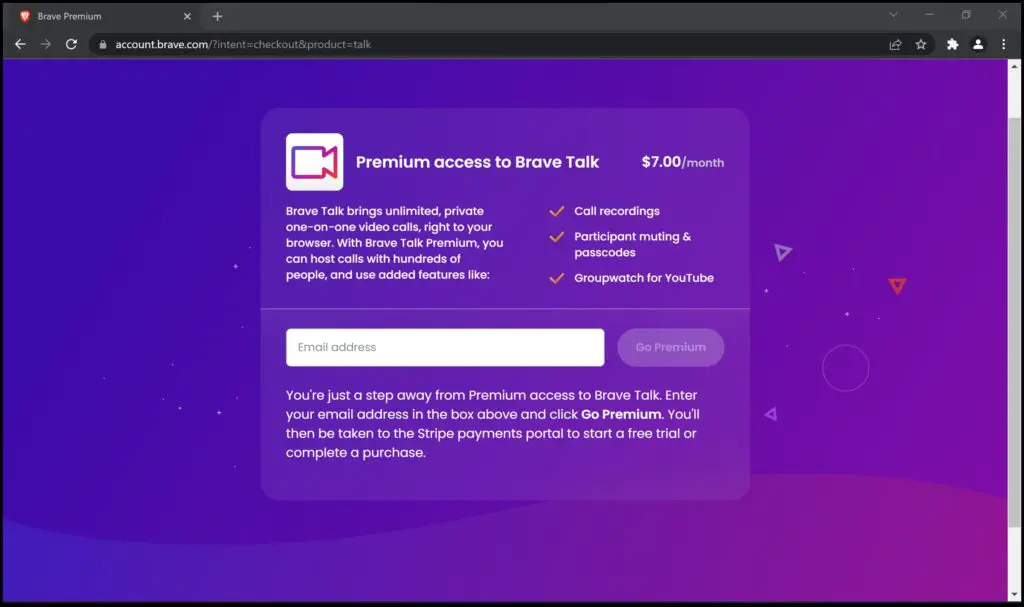
Let us have quickly go through what the Talk Premium version has to offer in comparison to the free version.
Pricing
Brave Talk Premium version is currently priced at $7 per month.
Additional Features That Brave Talk Premium Offers
Brave Talk Premium offers :
- Call Recordings : All of your meetings can be recorded and can be stored on your computer for future usage.
- Mute/Unmute Participants : As the host of the meeting, you can mute/unmute participants using this feature.
- More than four participants: With Talk Premium, you can have more than four participants in your meeting.
- Groupwatch for YouTube : With this feature, YouTube videos shared on the meeting can be viewed by all participants simultanoeulsy.
- Meeting Passcodes : With Premium, you can add passcodes for your meetign to ensure nobody unauthorized tries to enter your meeting.
Wrapping up
While it is a commendable initiative that Brave Talk has focused more on privacy features, it might only appeal to a few people and organizations as most people by now have their own favorite video conferencing service and are well used to it.
I hope this guide helps you understand what Brave Talk has to offer and helps you choose if you do want to use it daily. Stay tuned for more such articles regarding the latest development on such video conferencing services.

