Google is rolling out its new AI assistant called Search Generative Experience (SGE) which will offer concise results with visual content to help you with your queries. This should make the search experience more informative and engaging, but many are unsatisfied with its responses and want to disable it. So if you want to revert to the good old Google search, here’s how you can disable Google Generative Search in Chrome.

How to Disable Search Generative Experience in Google Chrome?
Search Generative Experience is Google’s attempt to add the AI flair to their search engine. This is similar to what Microsoft achieved earlier this year with their Bing AI search. Generative search on Google works similarly as it shows you a summary of the queries you searched for using multiple sources.
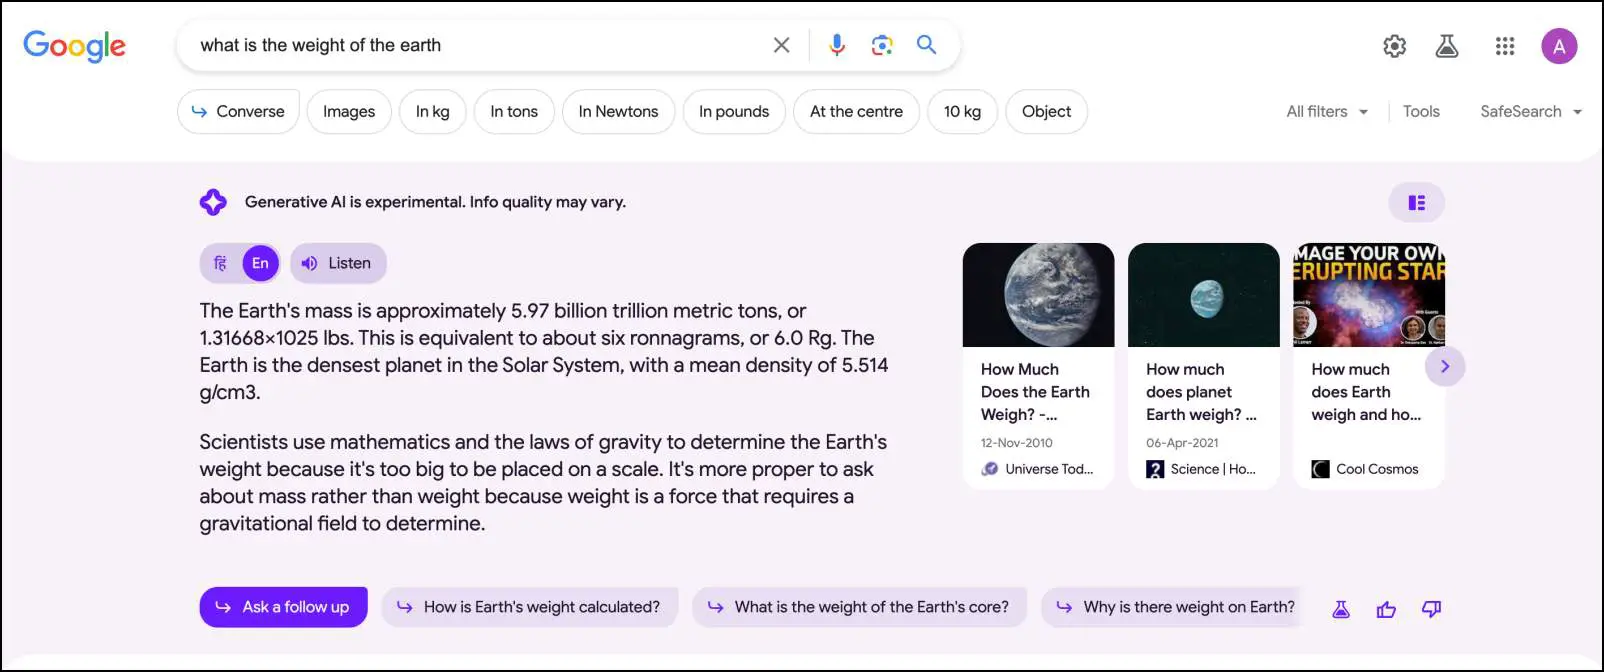
This does save you a bit of time, and you can ask follow-up questions to get more insight on the same. It is currently rolling out to limited users in certain regions. However, the issue is the answers provided by the AI are not always satisfactory.
This is why some users are looking for ways to disable this feature and move back to the regular old Google search. We have compiled a list of ways that you can try out to disable Google’s generative search on your Chrome browser. Let us have a look at them.
Method 1 – Disable Generative Search in Google Labs
If you are seeing the AI-powered generative search in the Google search results, then you must have enabled it through Google Labs. The good news is that you can go back and disable it from the same place. In case you need a refresher, here is how you can turn off Search Generative Experience (SGE) in Chrome.
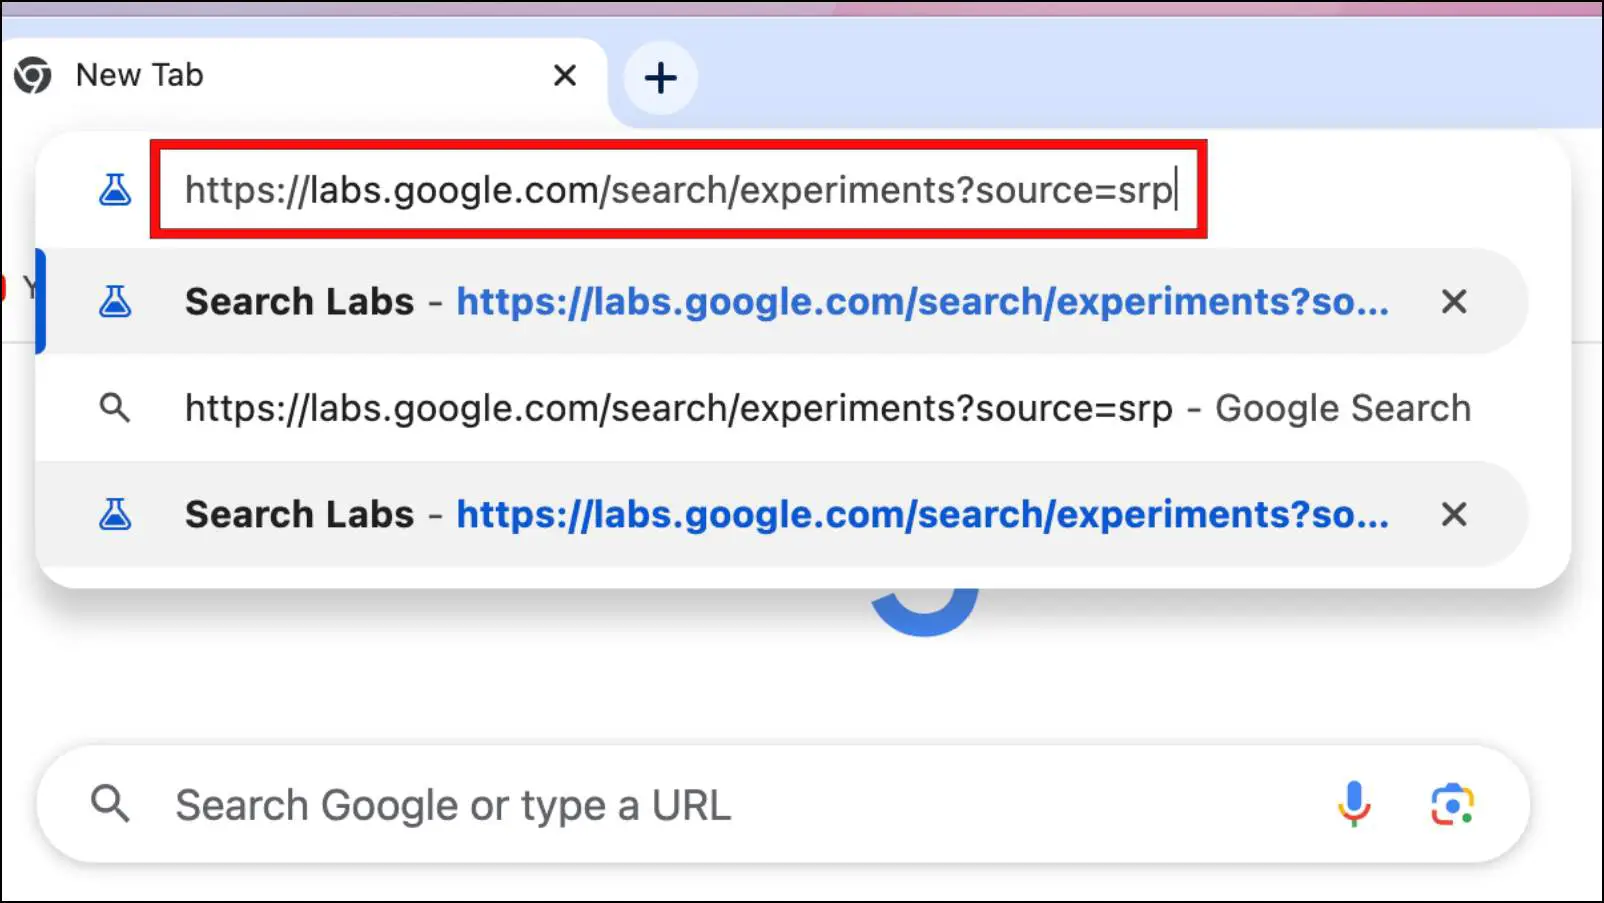
Step 1: Visit this link: https://labs.google.com/search/experiments?source=srp
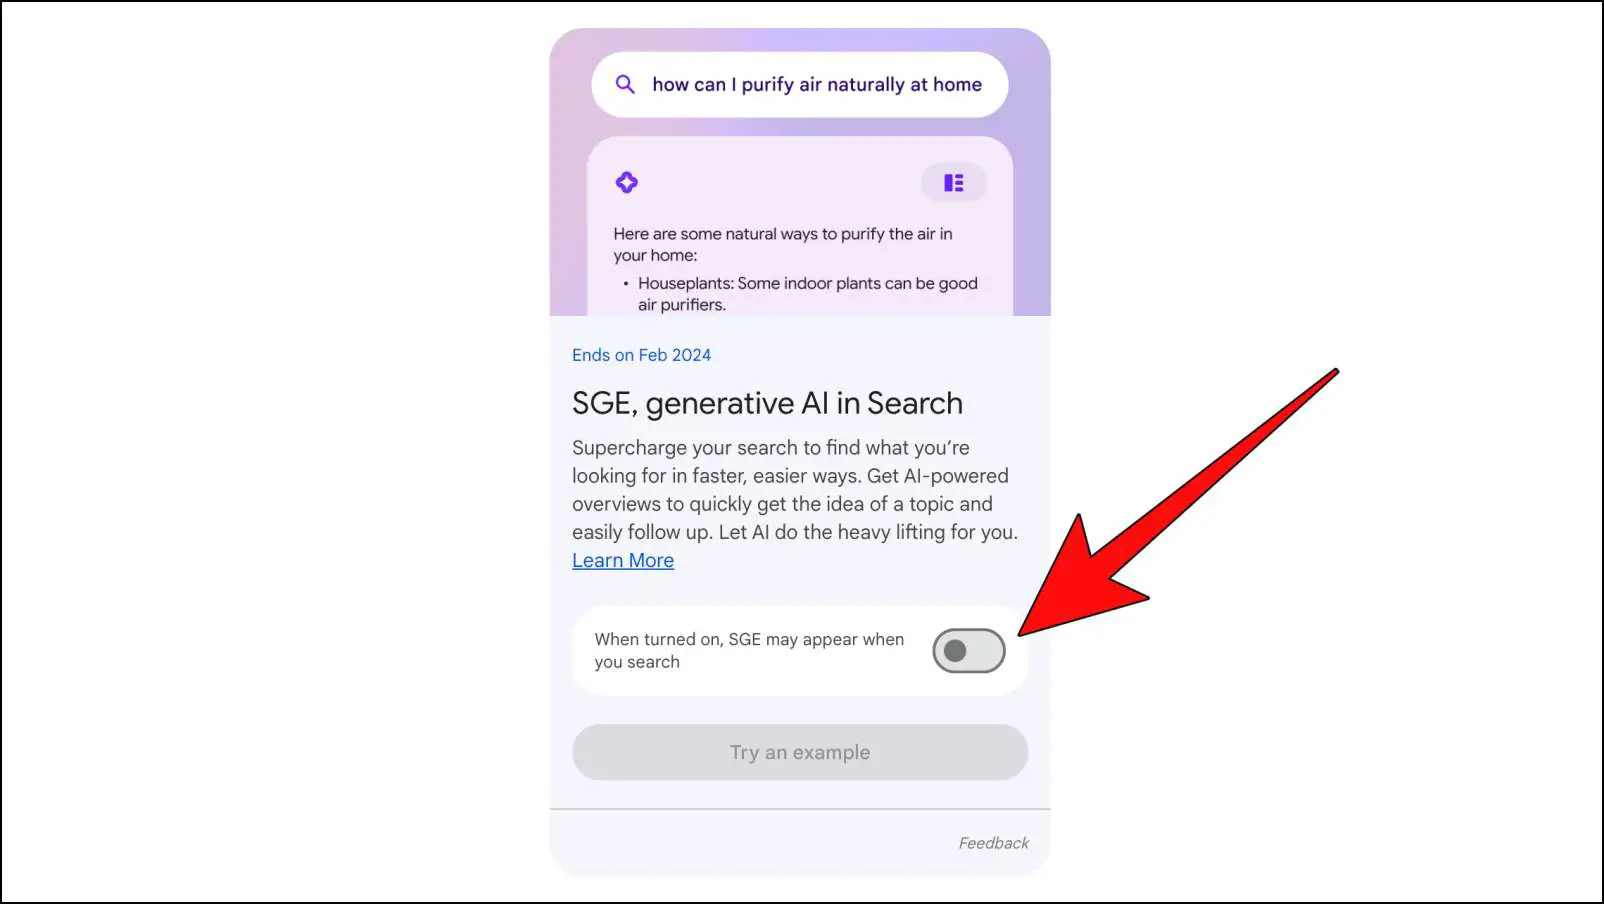
Step 2: Here, turn off the toggle for SGE, Generative AI in Search.
Once disabled, close and relaunch Google Chrome. Now your search results in Google should be back to their usual old style.
Method 2 – Sign Out of Chrome Browser to Turn Off SGE
Google requires you to stay signed into your Chrome browser to use the generative AI in search. This is because, in its current state, SGE is only available for users who have enabled it for their Google account. So, signing out of your account or switching to another will disable the AI-powered search experience. Here are the steps to sign out of Google Chrome.
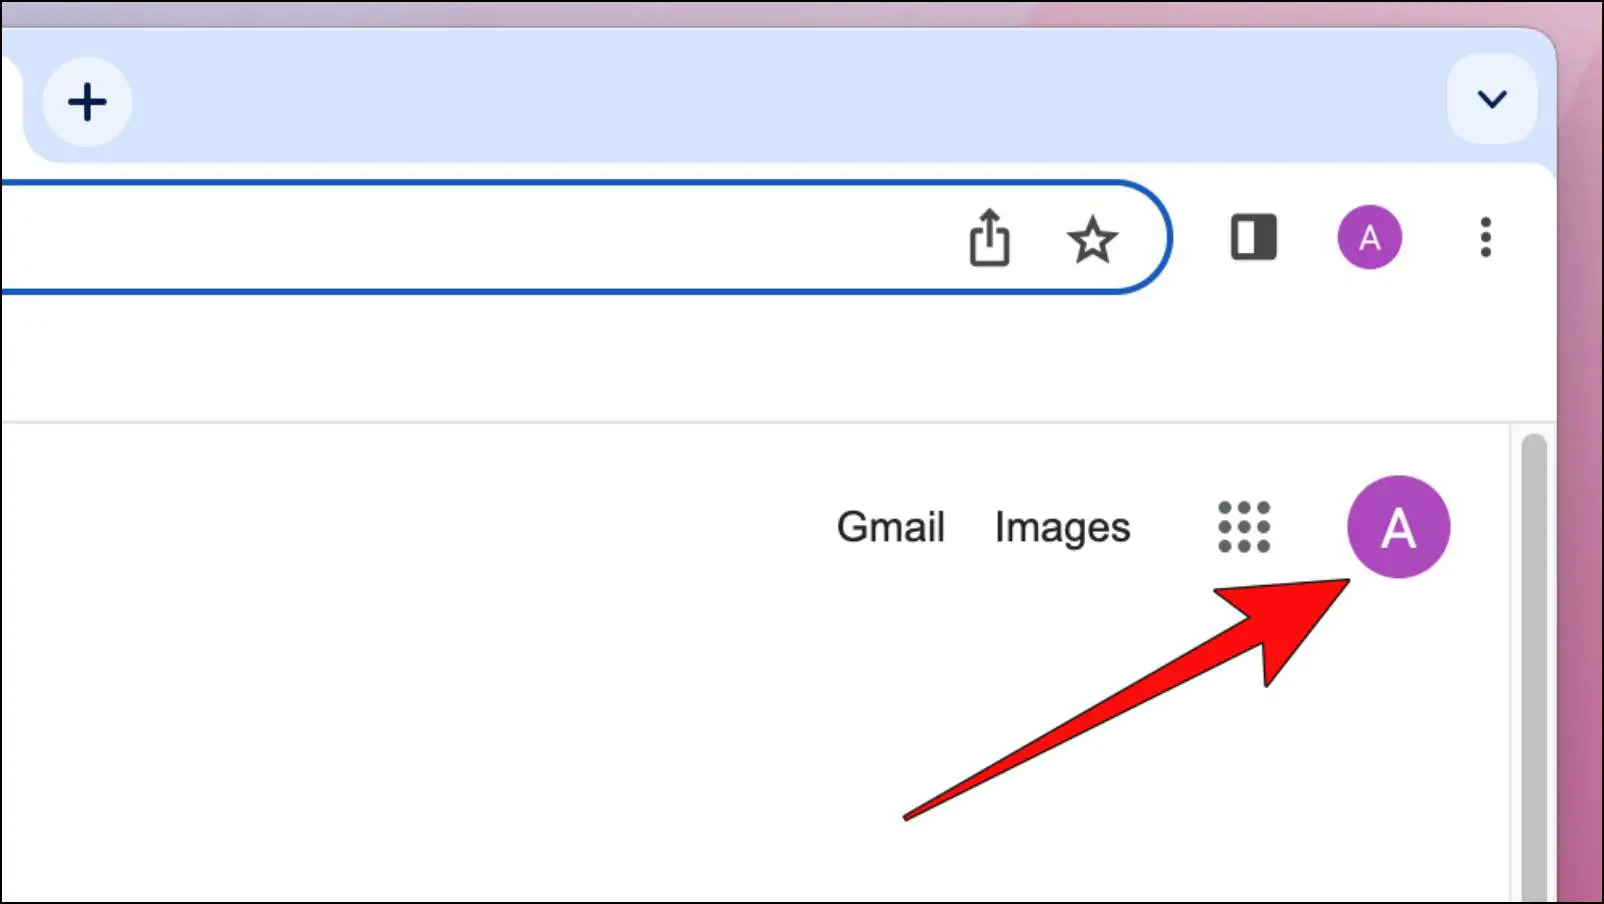
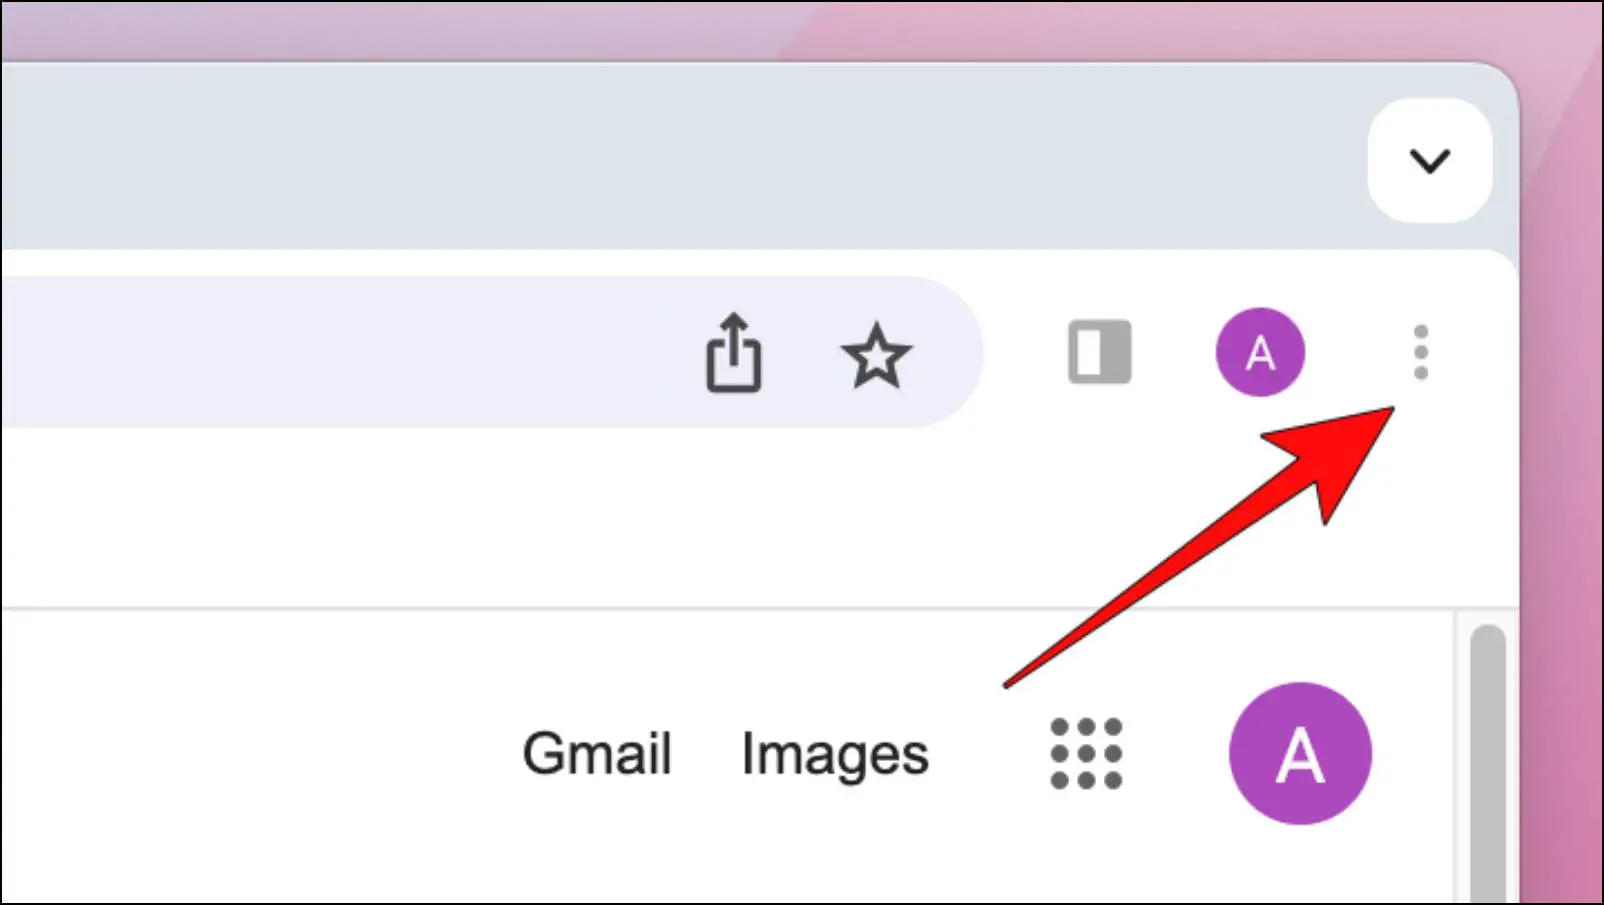
Step 1: On the Chrome homepage, click on your profile icon in the right corner.
Step 2: Here, select the Sign-out option.
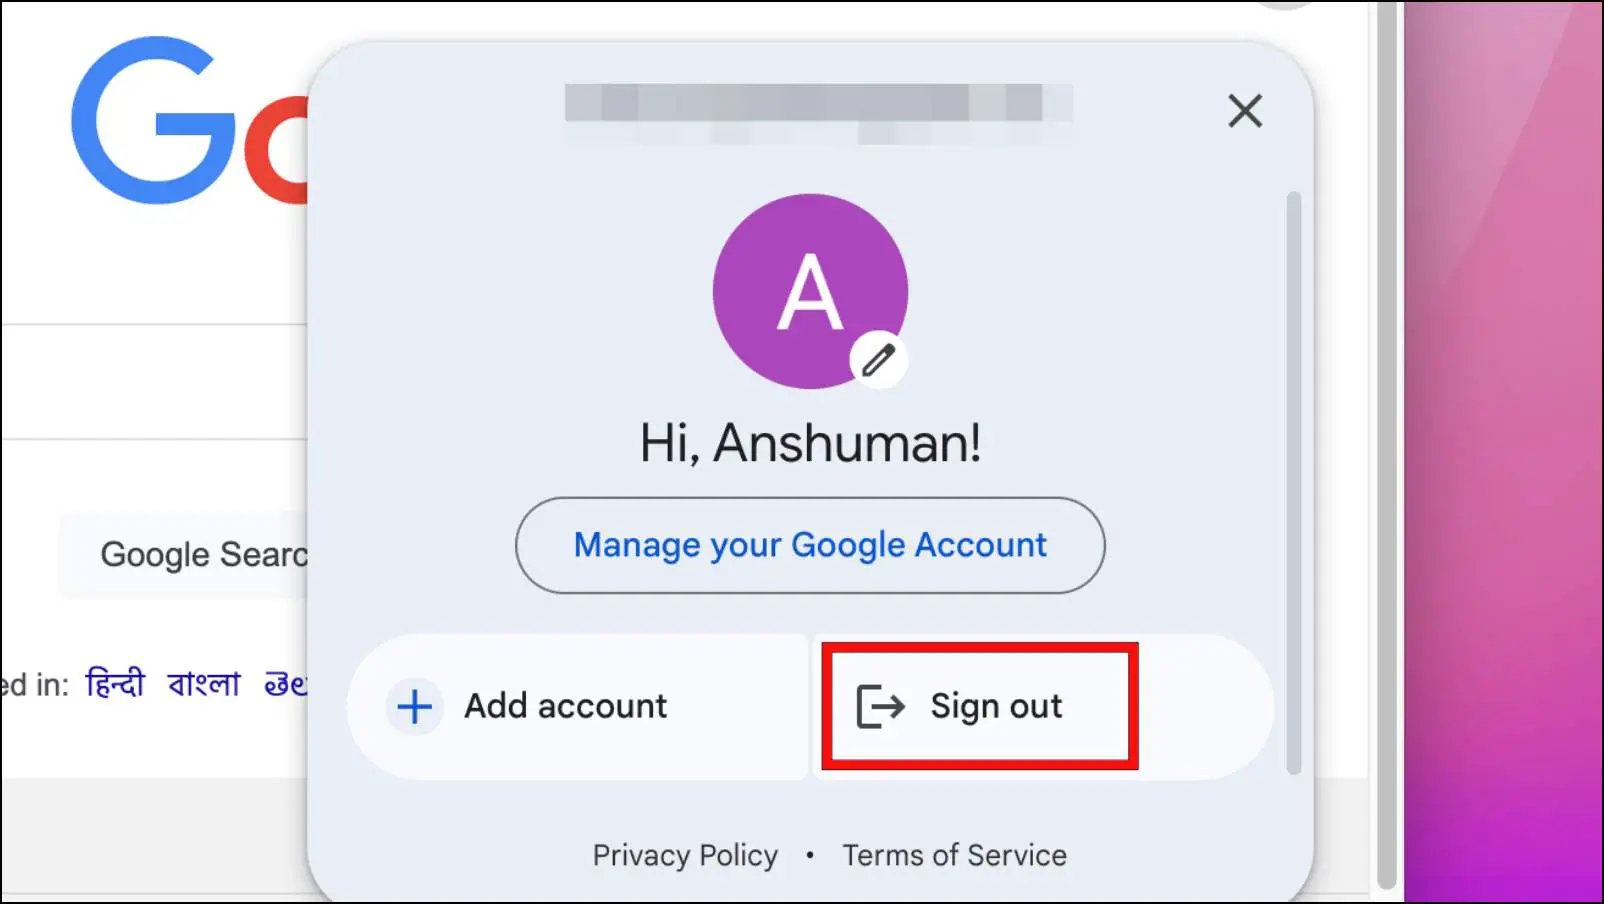
You will be asked to confirm sign out as it pauses your bookmarks, history, and password sync.
Step 3: Click on Continue to sign out.

Now when you go to Google search, it won’t show you the generative AI results.
Method 3 – Manually Change Your Search Engine
Another way to get rid of the generative AI search results in Google is to switch to another search engine. Google is surely the best search engine there is, but there are other search engines out there that do a commendable job. You can try out Bing or DuckDuckGo if privacy is your priority. Let’s go through the steps to change the default search engine in Google Chrome.
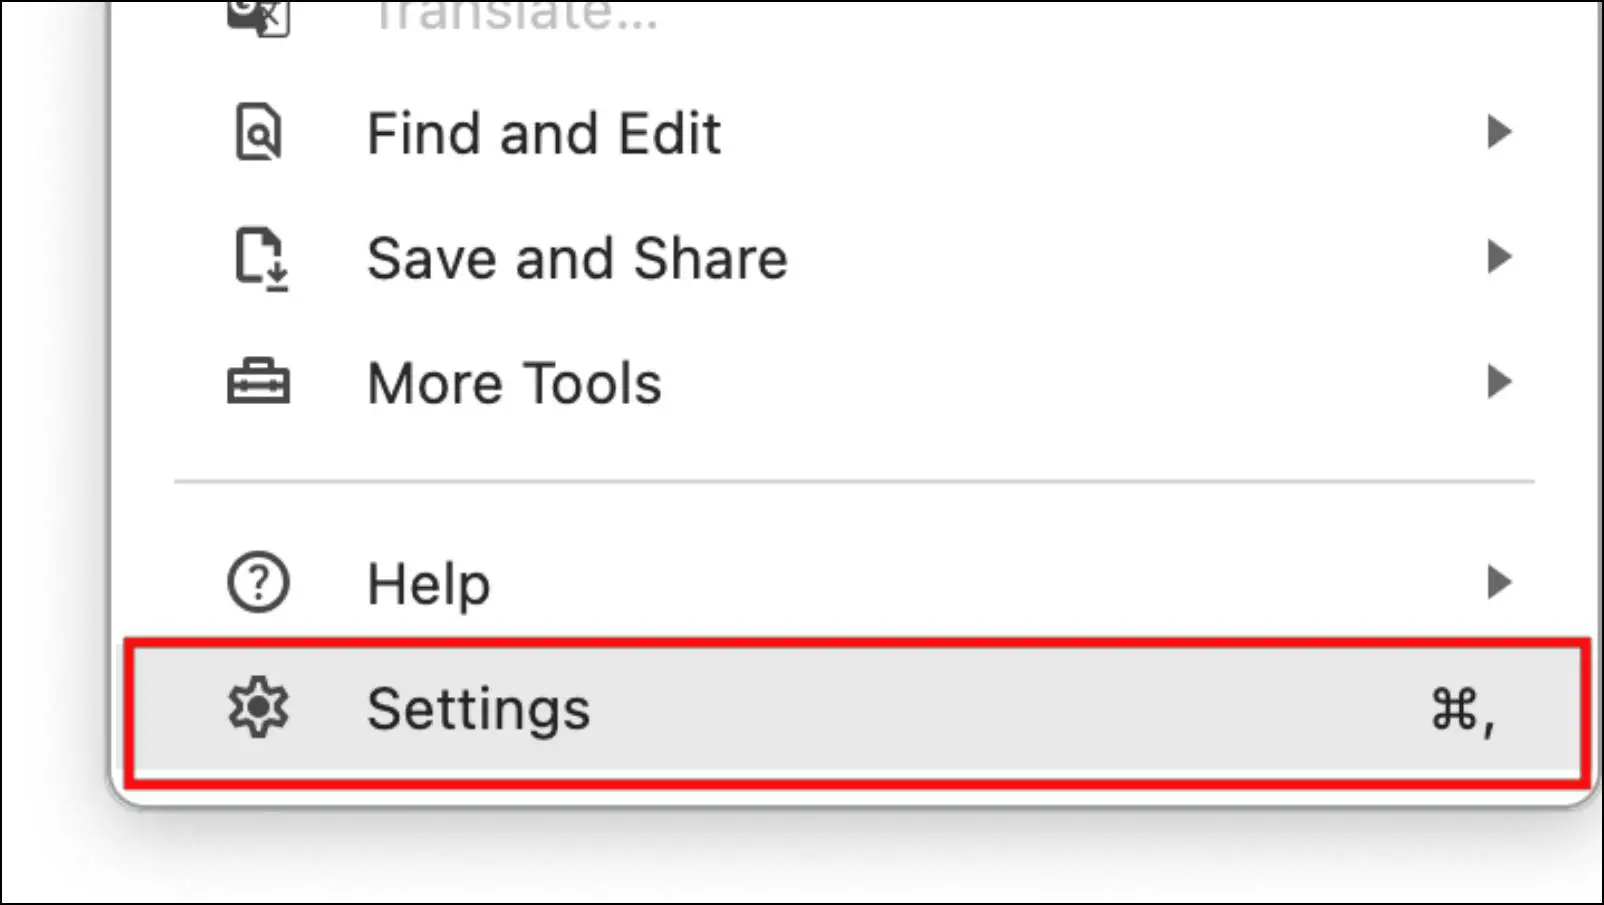
Step 1: In an open Chrome window, click on the three-dot menu in the top right corner.
Step 2: Head over to Settings.
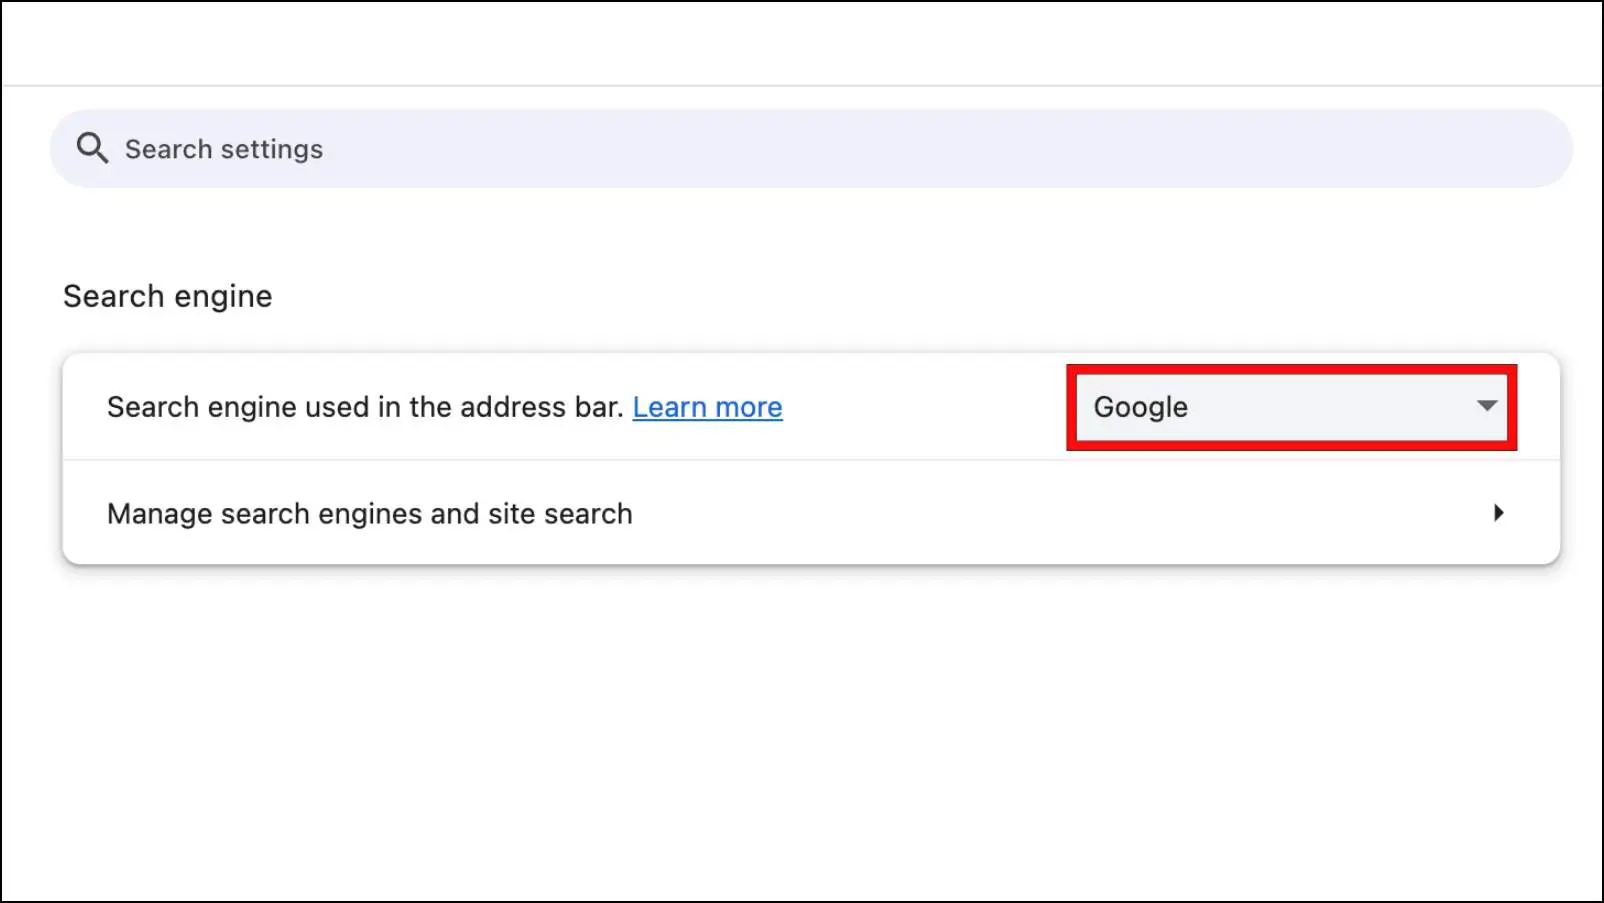
Step 3: Here, click on Search engine.
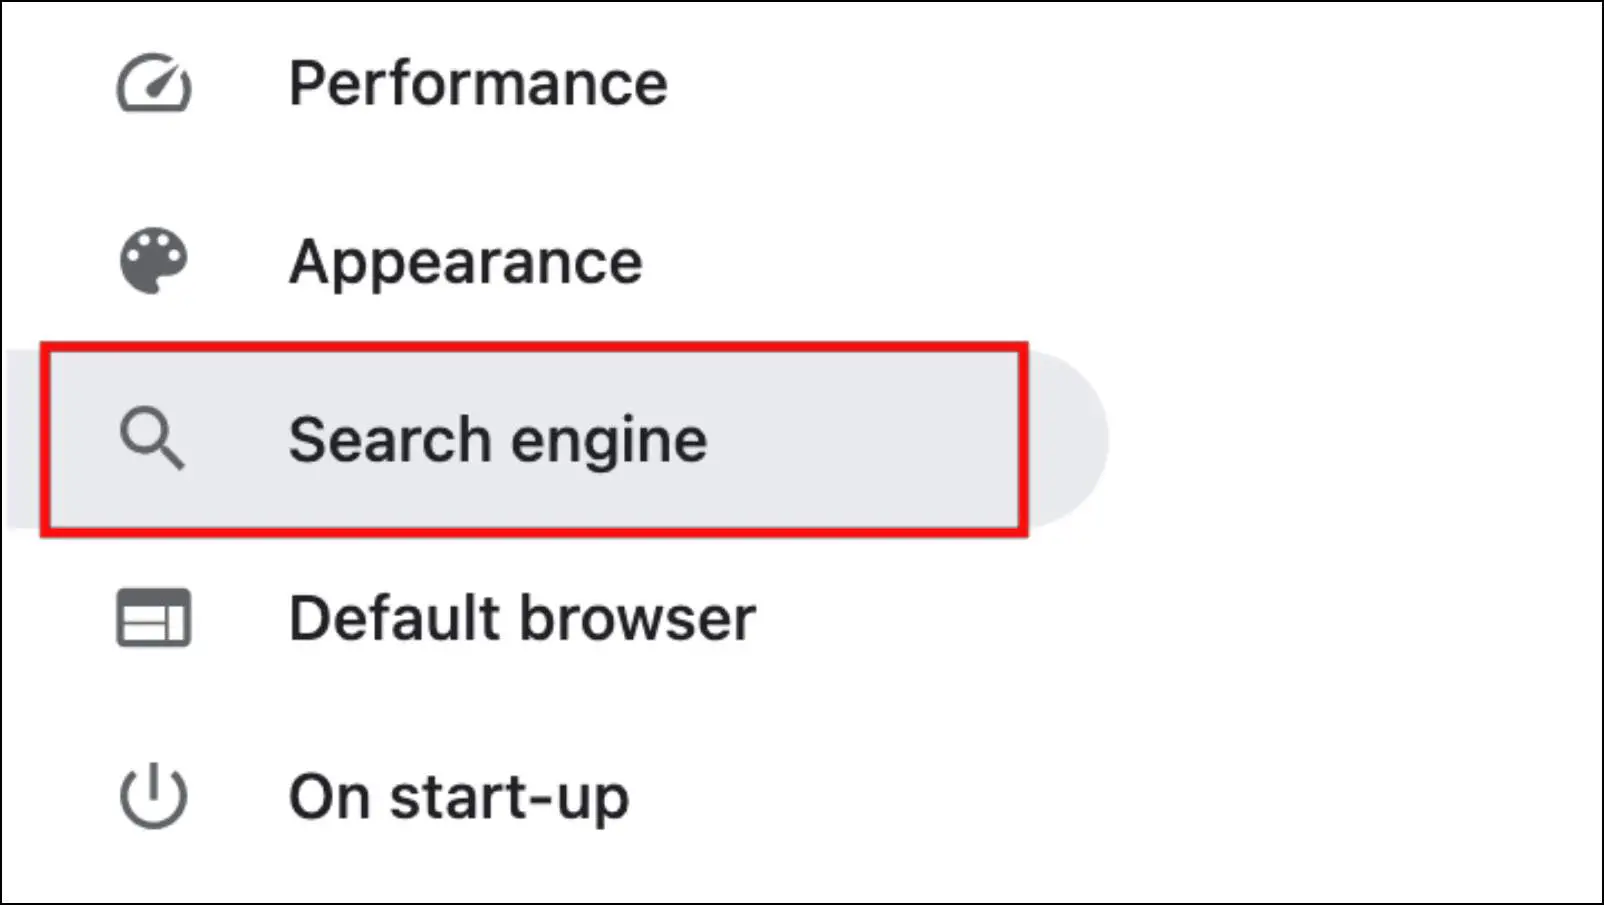
Step 4: Click on the box next to the Search engine used in the address bar.
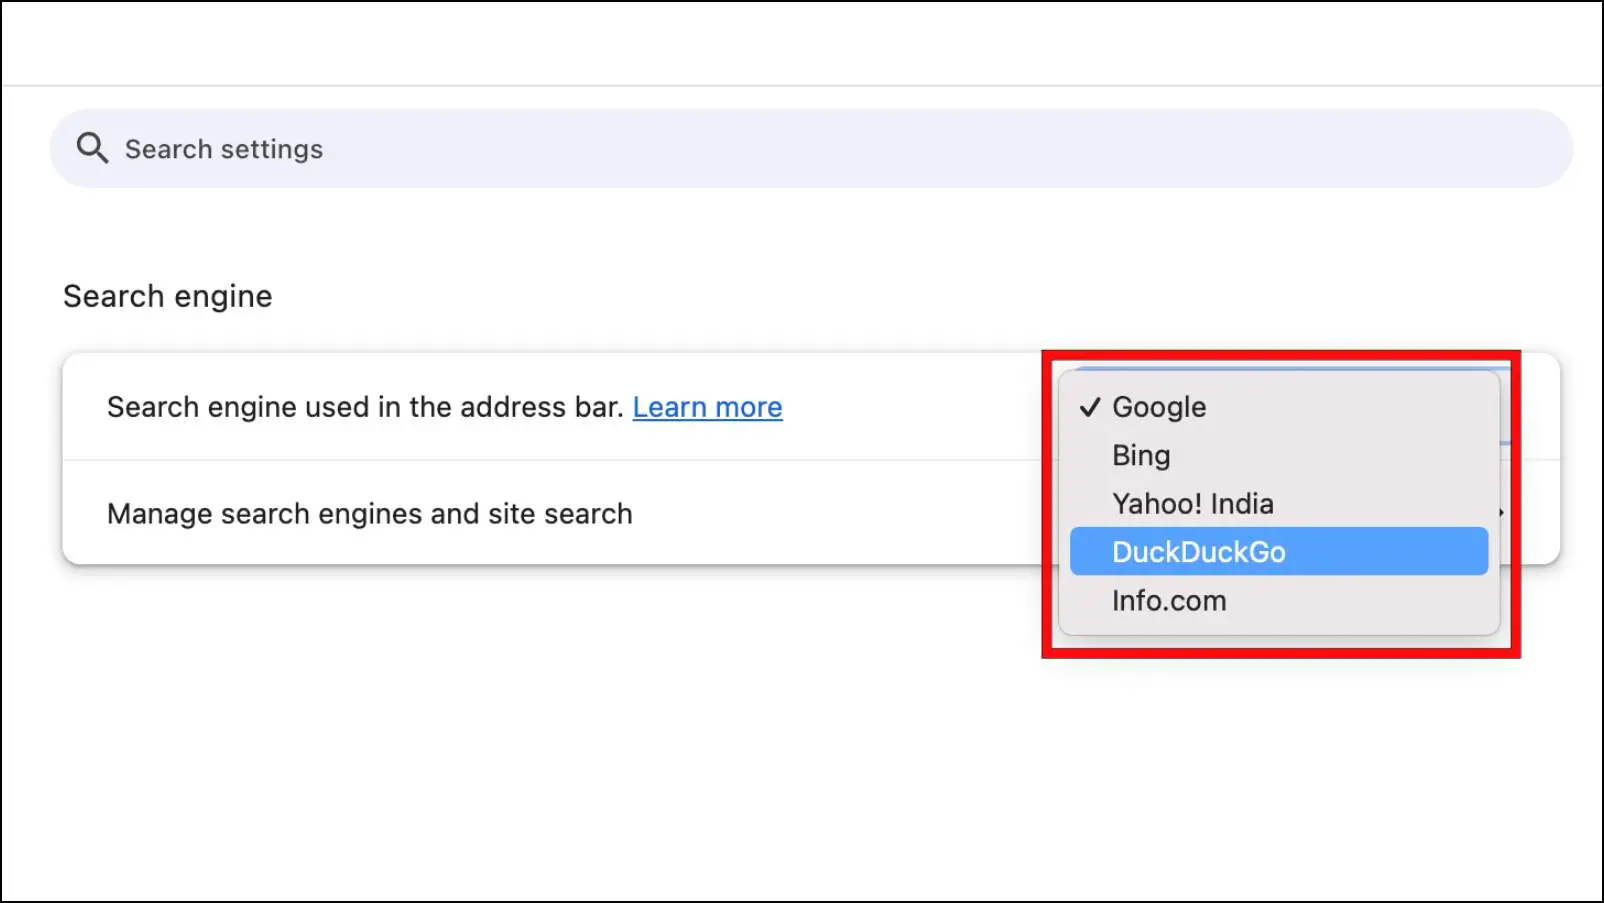
It will show you the list of available search engines that you can choose from.
Step 5: Next, click on your preferred search engine to set it as your default option.
Wrapping Up
This is how you can disable Google generative AI search. There are surely a lot of use cases for AI when it comes to search results, but not in its current state. Maybe after some polish and better implementation, it can turn out to be a good way to quickly find the answers that you are looking for. Till then, stay tuned on BrowserToUse for more such articles, guides, and How-To’s.
Related: