
A few years back, smartphones had limited memory, so having several tabs open on Chrome, or running multiple processes can result in your device displaying an error message alerting the user that the device does not have enough memory to continue with the new task. So, in case you have encountered this error warning on your device, keep reading as we discuss fixing “Unable to complete the previous operation due to low memory” in Chrome.
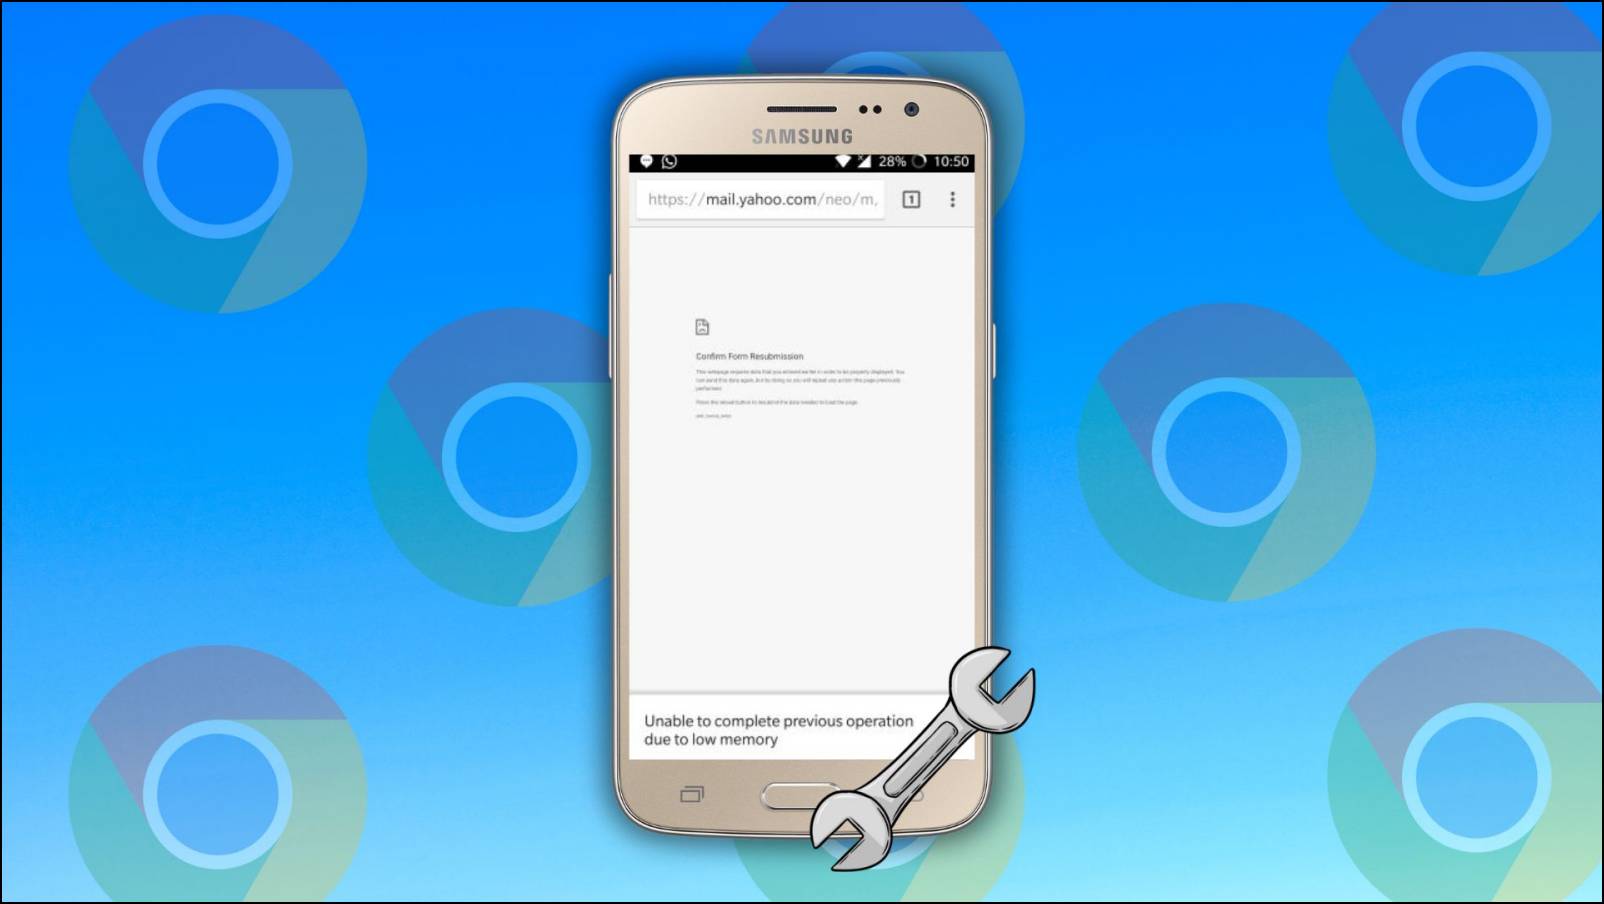
How to Fix “Unable to Complete Previous Operations Due to Low Memory” in Chrome?
The “Unable to complete previous operations due to low memory” Chrome error is not as common of an issue as it used to be, thanks to the improved memory management of Android. Modern phones ship with a sizeable 6GB RAM as the bare minimum.
But if you have an older phone with limited memory and see the error message pop-up in your Chrome browser, refer to these troubleshooting methods discussed below.
Close Unnecessary Tabs in Chrome
Running multiple tabs simultaneously in the Google Chrome app can affect your smartphone’s performance. Each tab occupies some space in virtual memory, depending on its running process. This can cause the browser to show the “Low Memory” message. Therefore, you close any tabs that are not necessary at the moment to make room in the memory for other tasks.
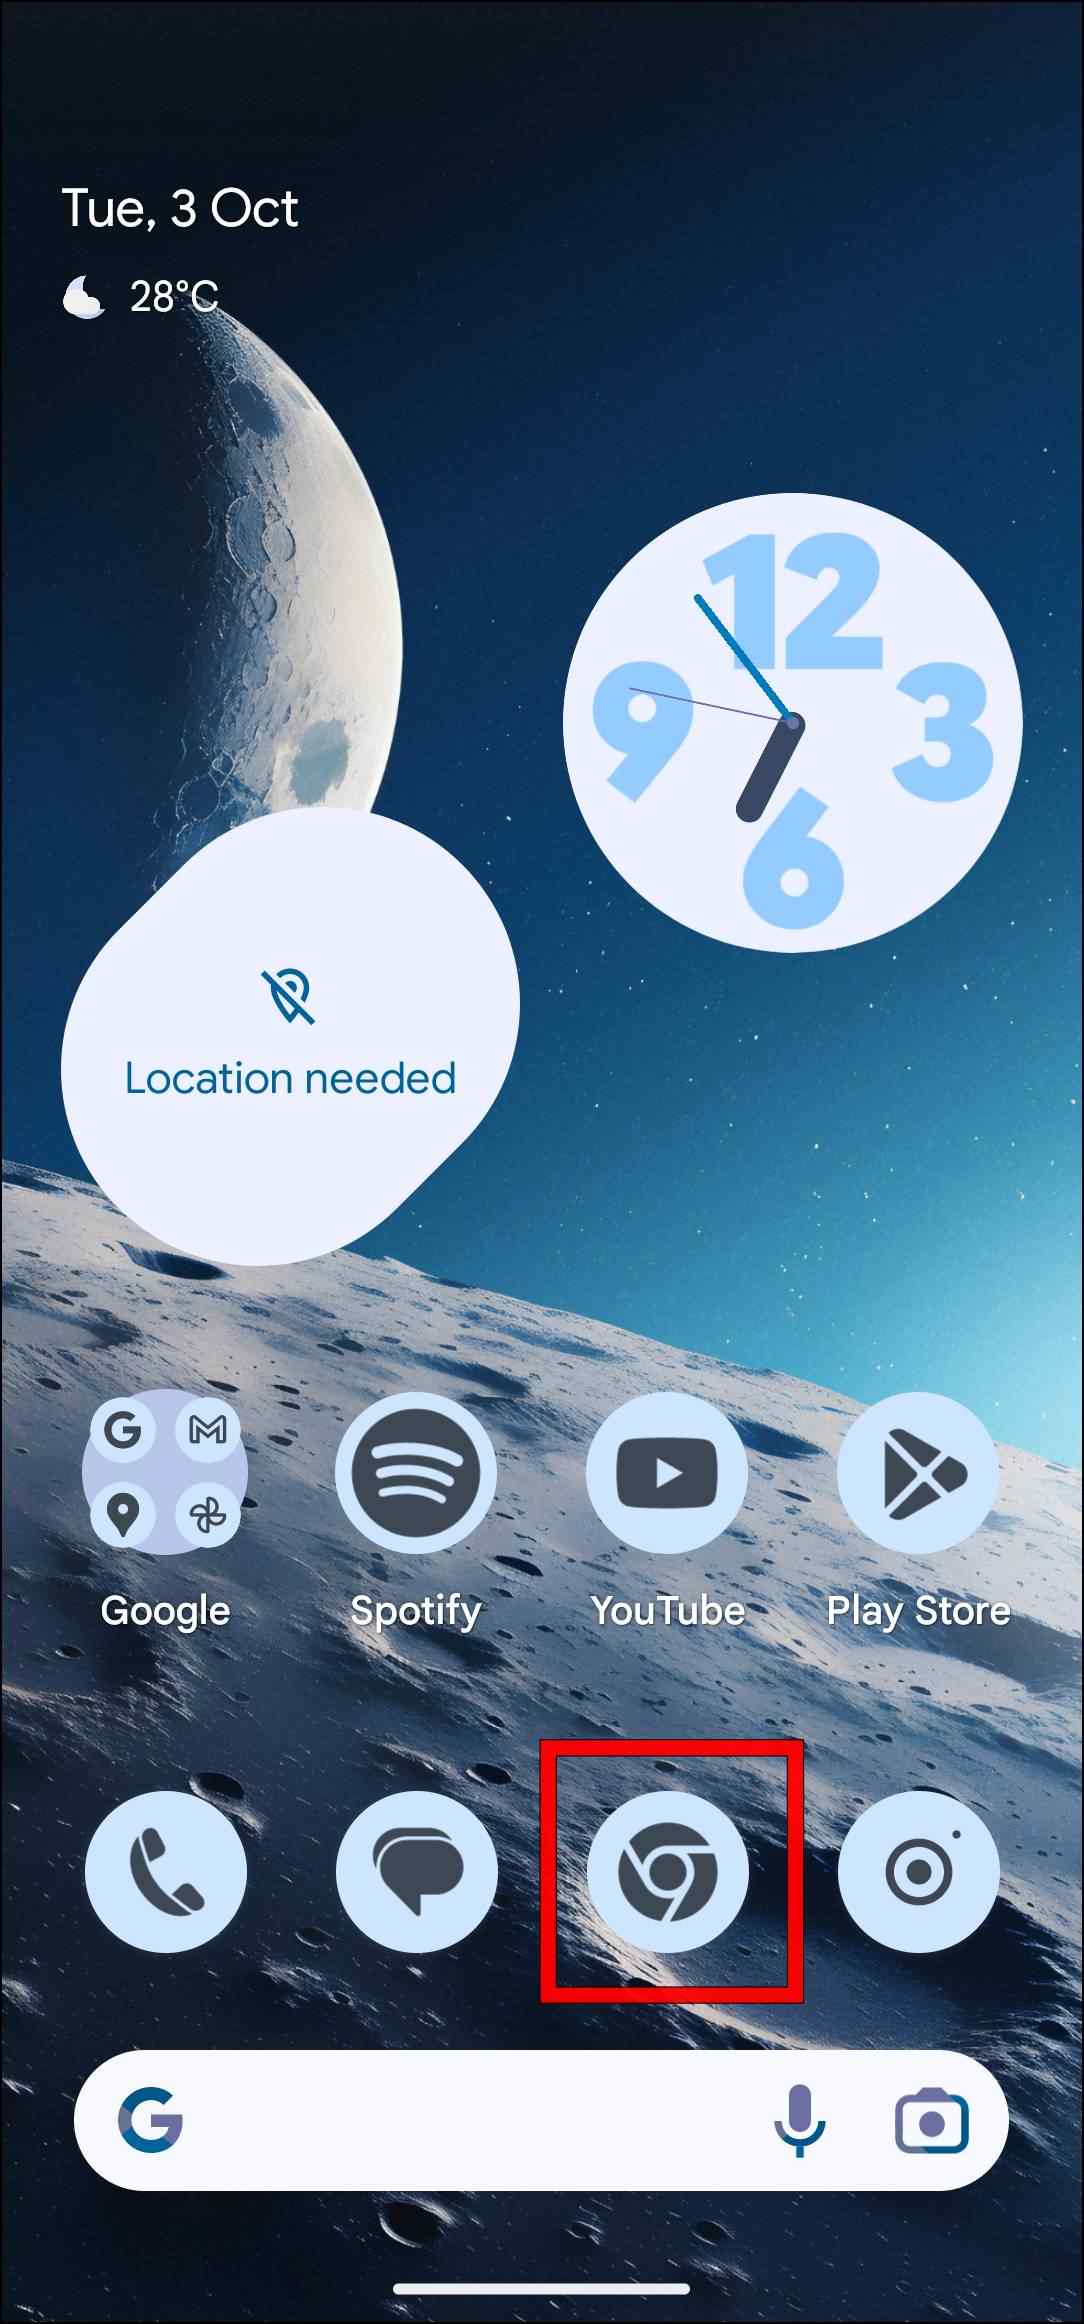
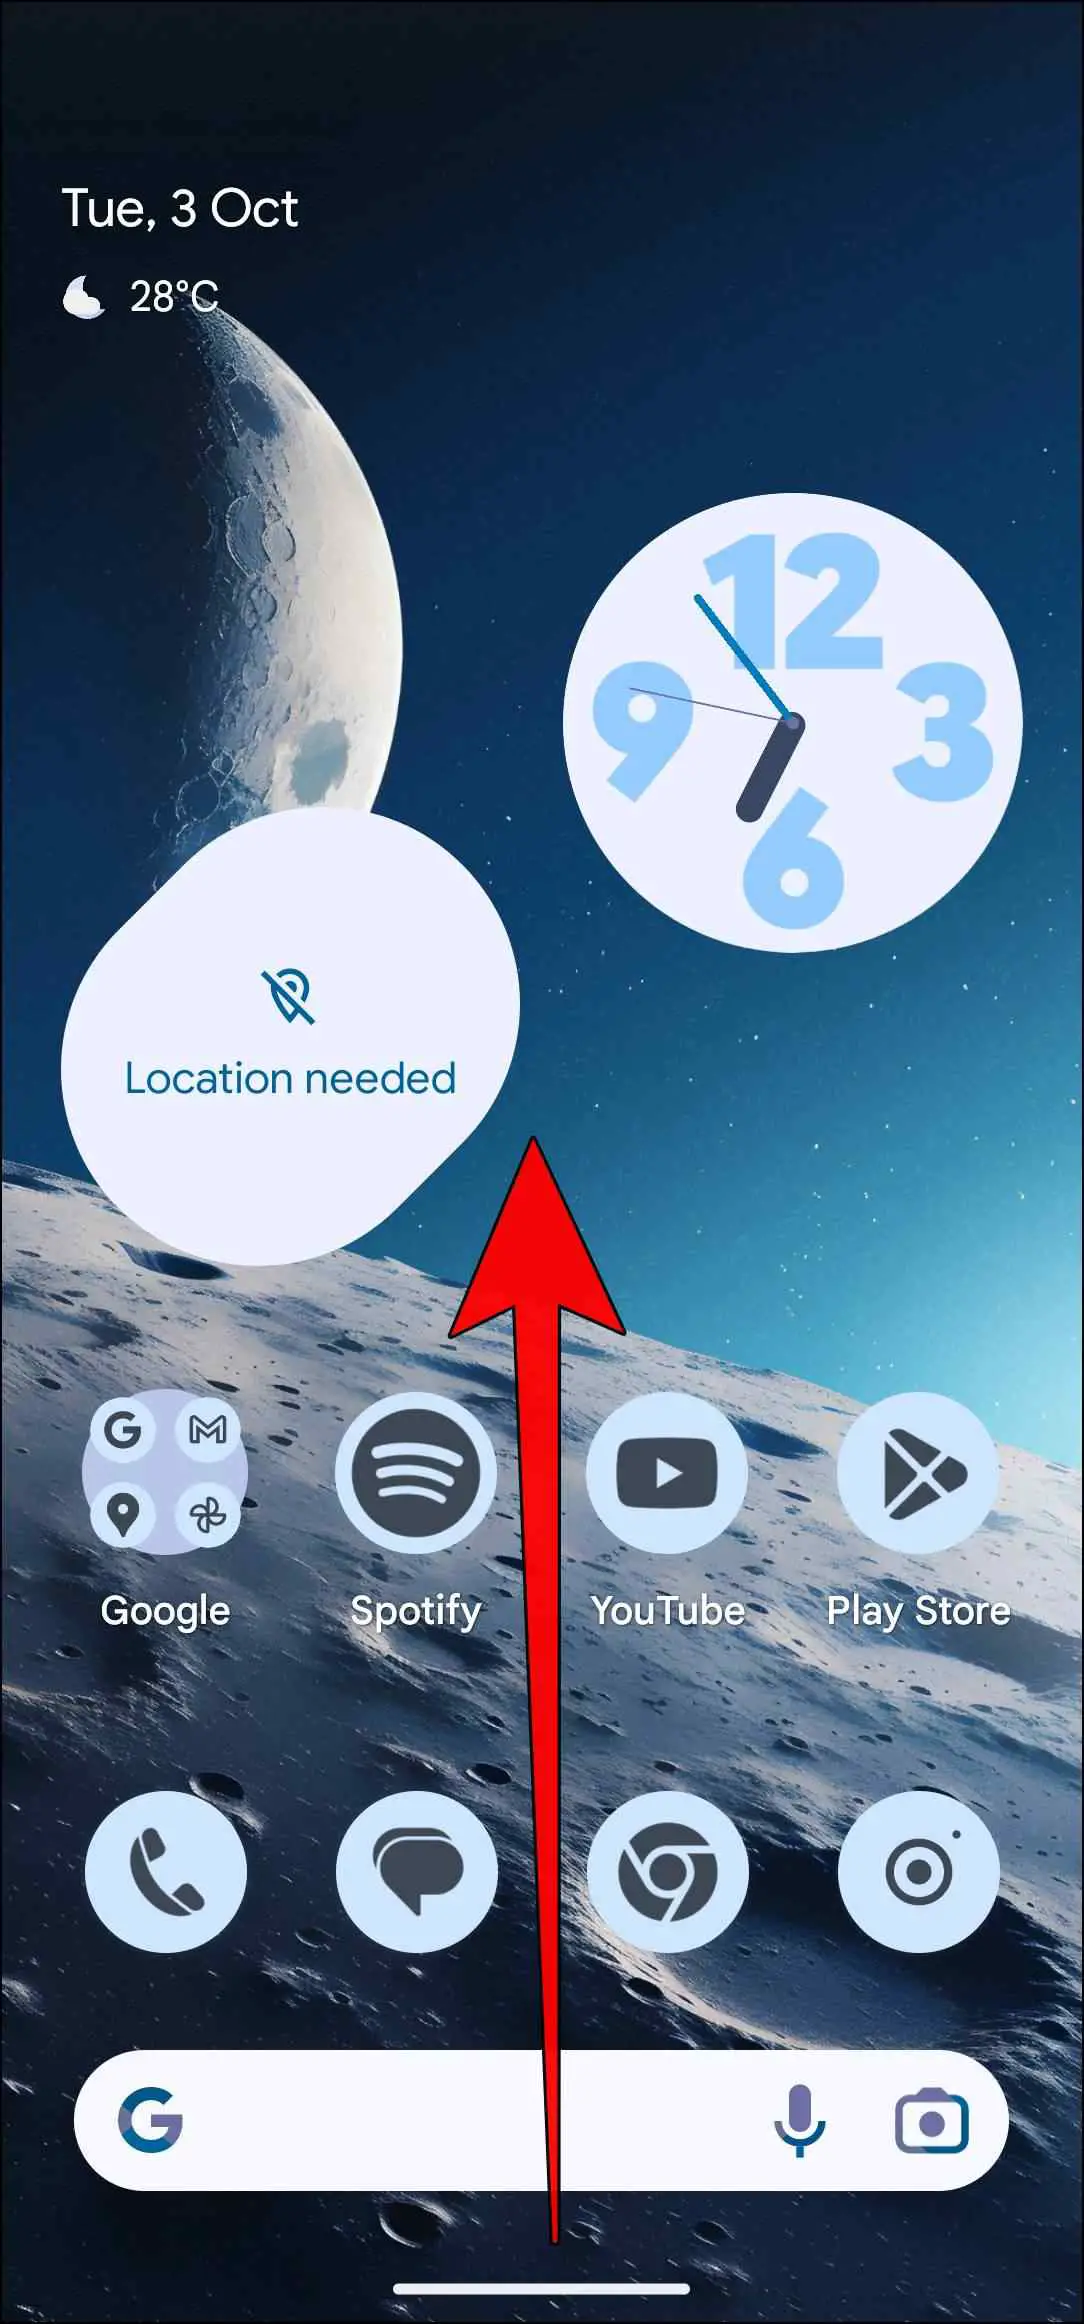
Step 1: Open Chrome and tap on the tabs icon at the top.

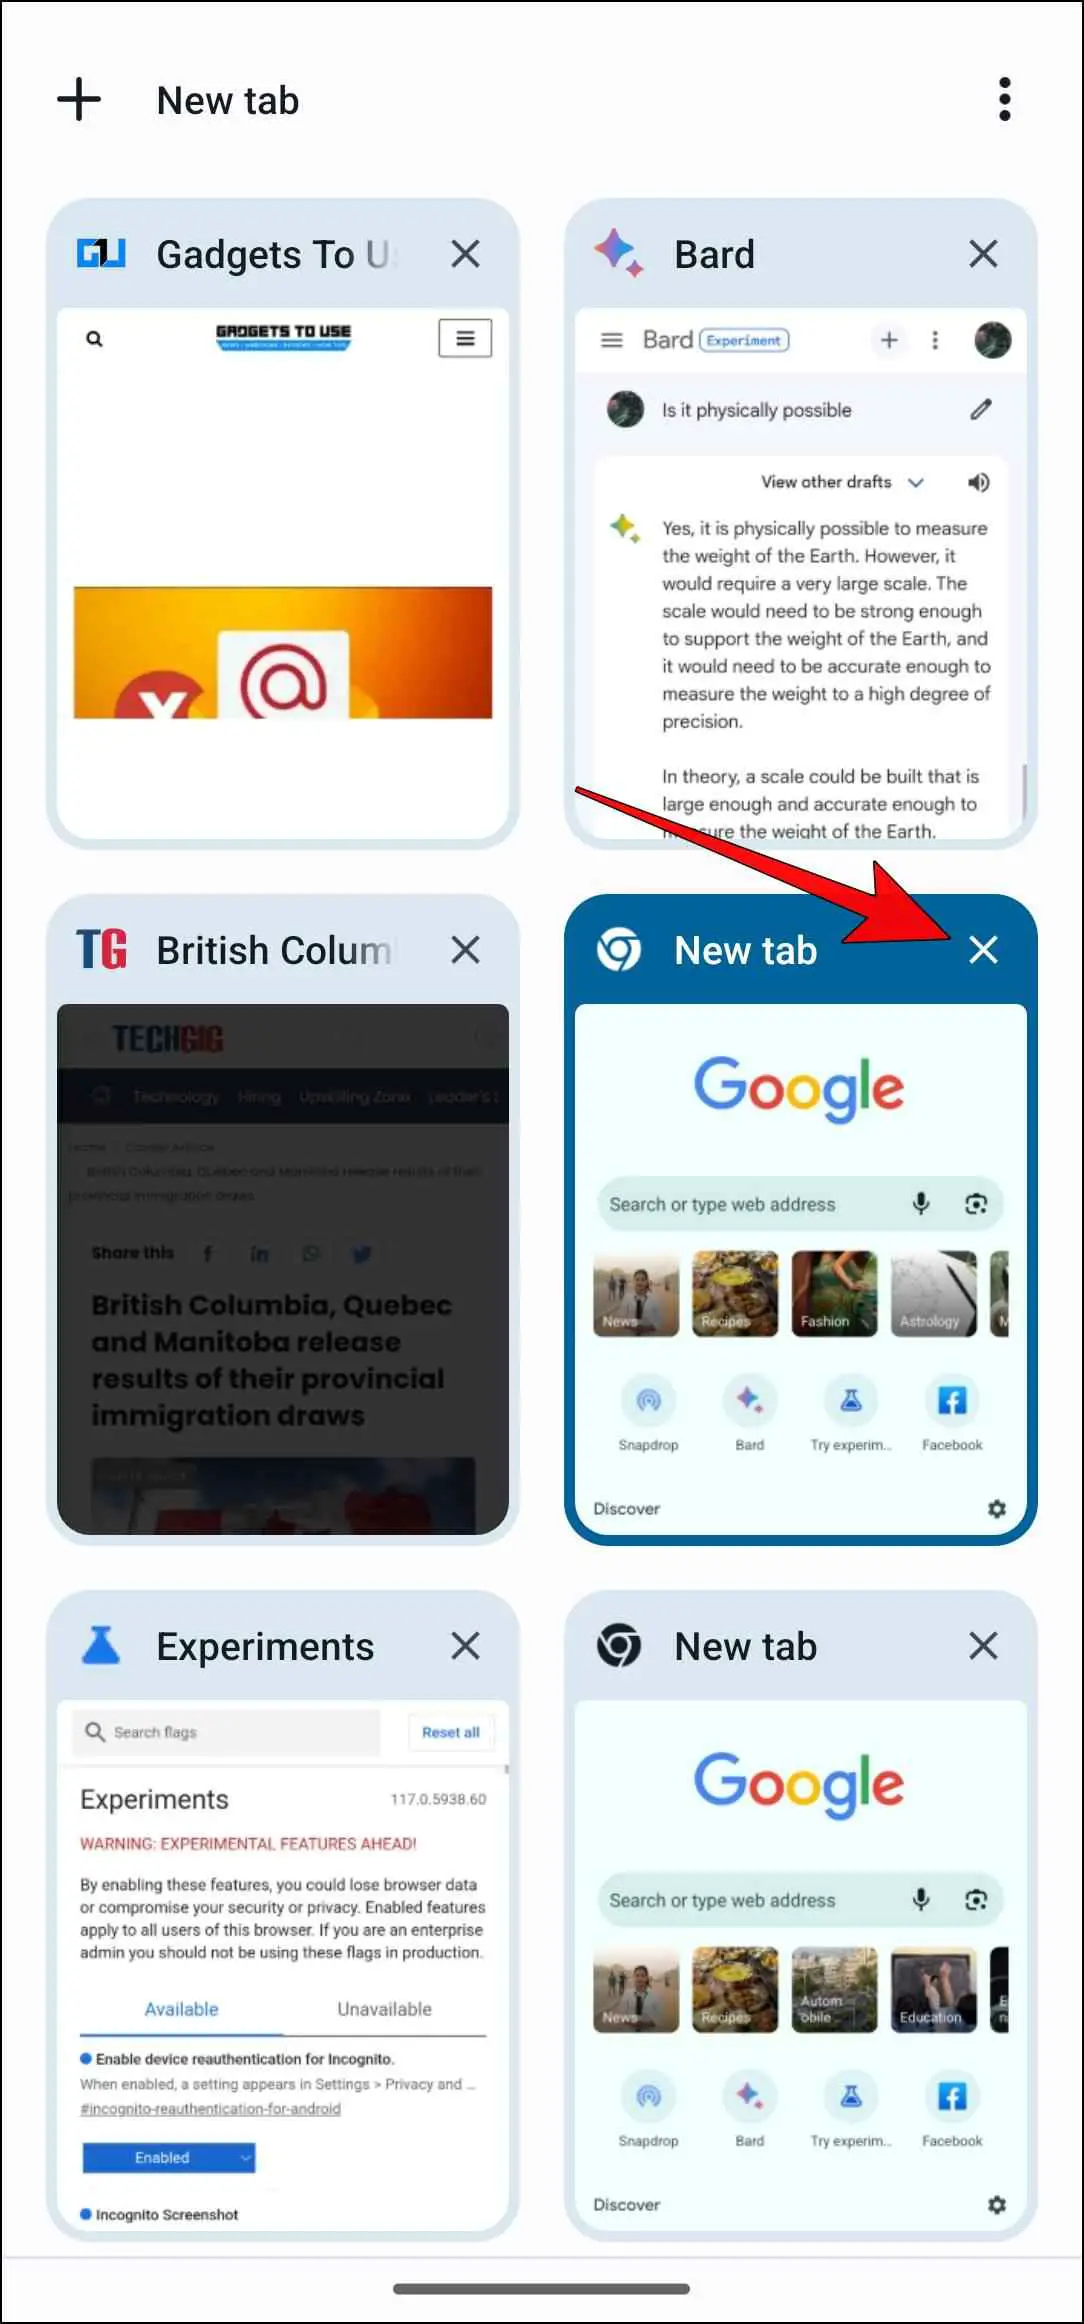
This will preview a grid of currently open tabs in the browser.
Step 2: Tap the “x” icon for each tab you wish to close.
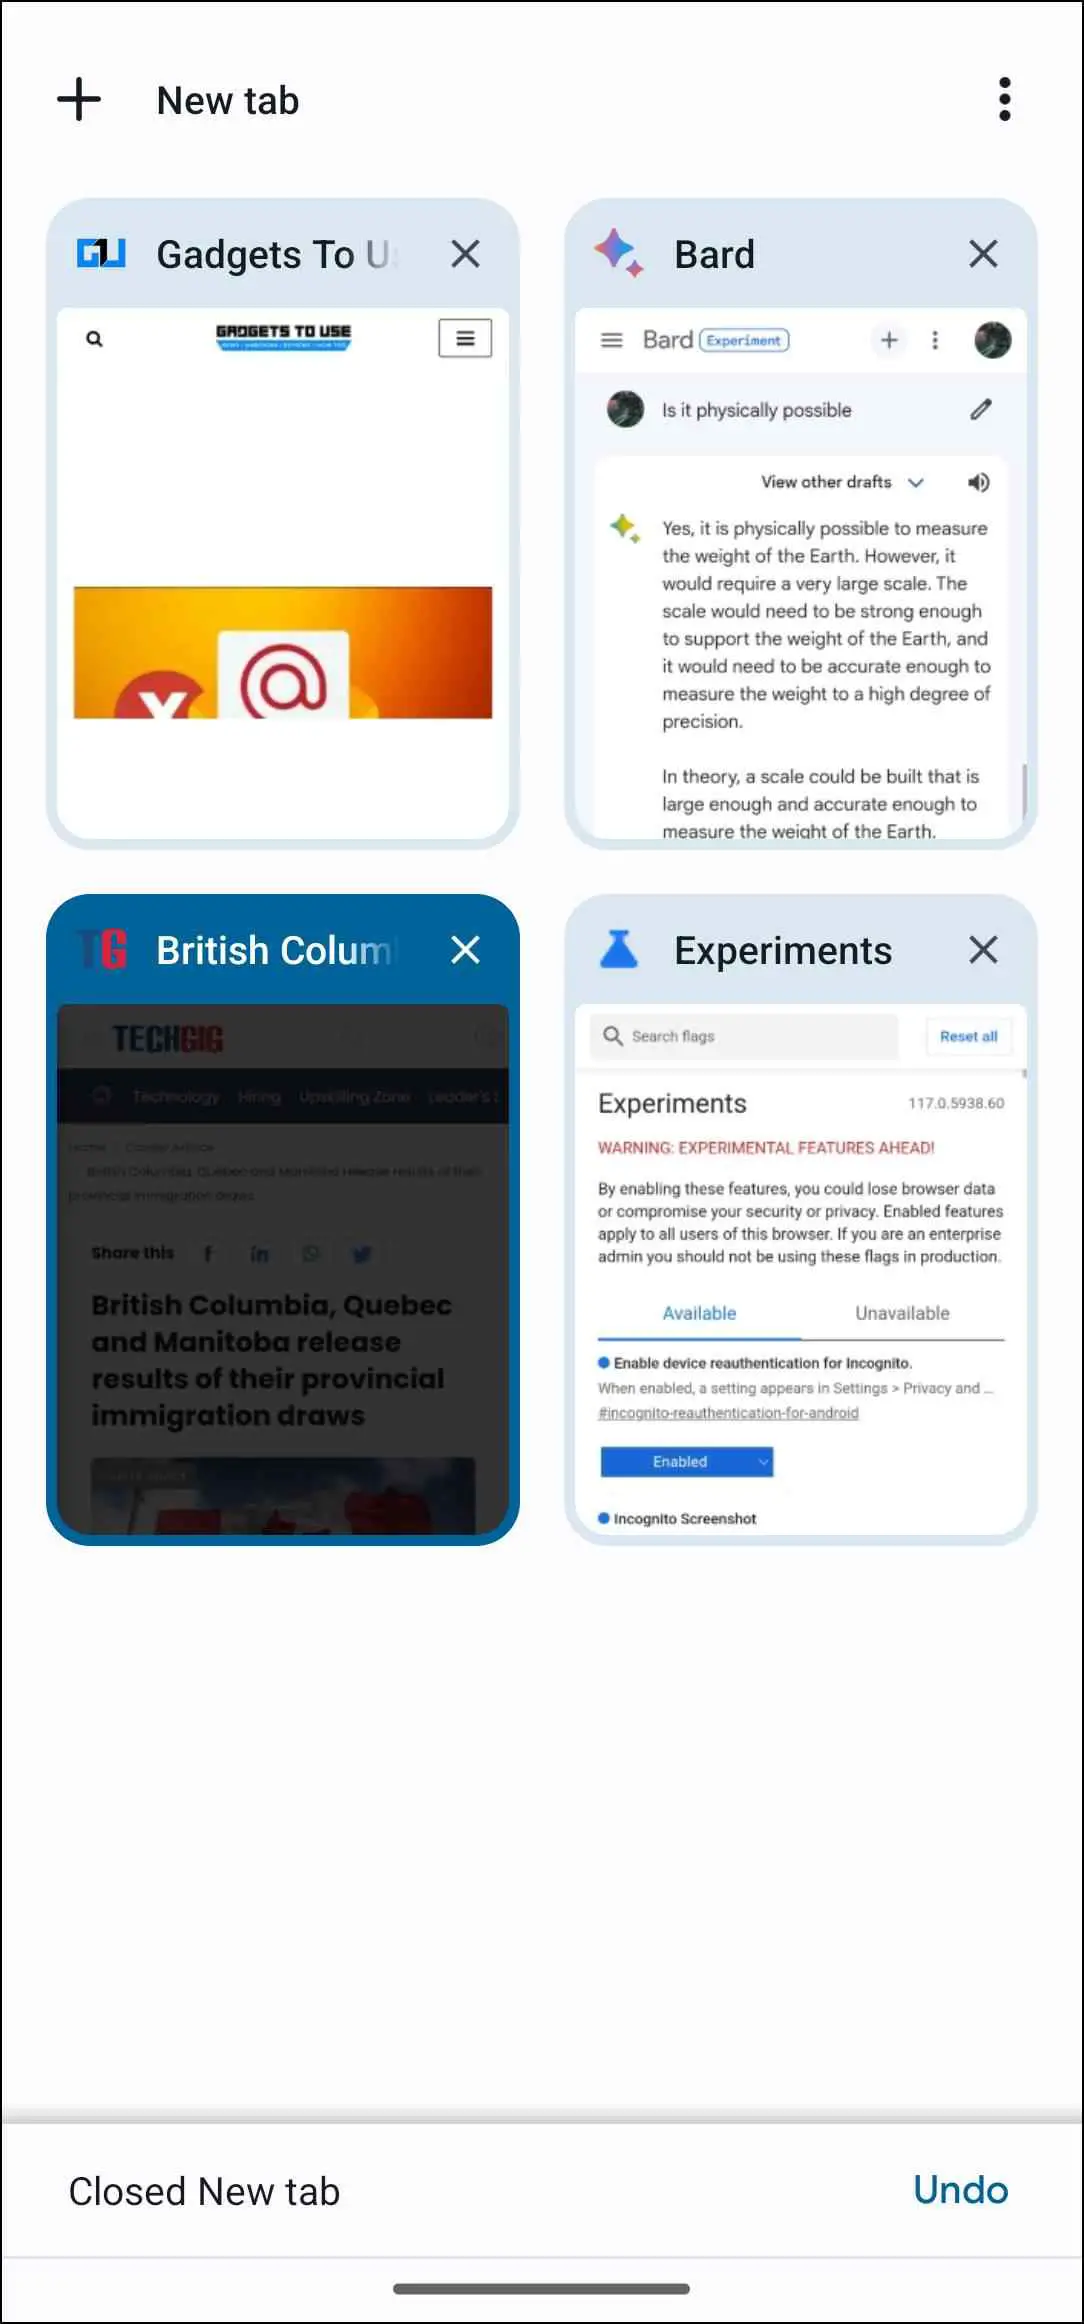
Remember that closing any tab means that your current progress or any other critical data will be lost. So make sure to save the page first or create a bookmark to read later.
Remove Additional Apps
Each app on your phone also takes up a significant amount of memory. This can be an issue if you are using an old Android device with limited memory of only about 1-2 GB RAM. That is why you should close any apps running on your phone to clean up storage.
Step 1: Go to the app overview screen using the swipe up and hold gesture from the home screen or pressing the overview button.
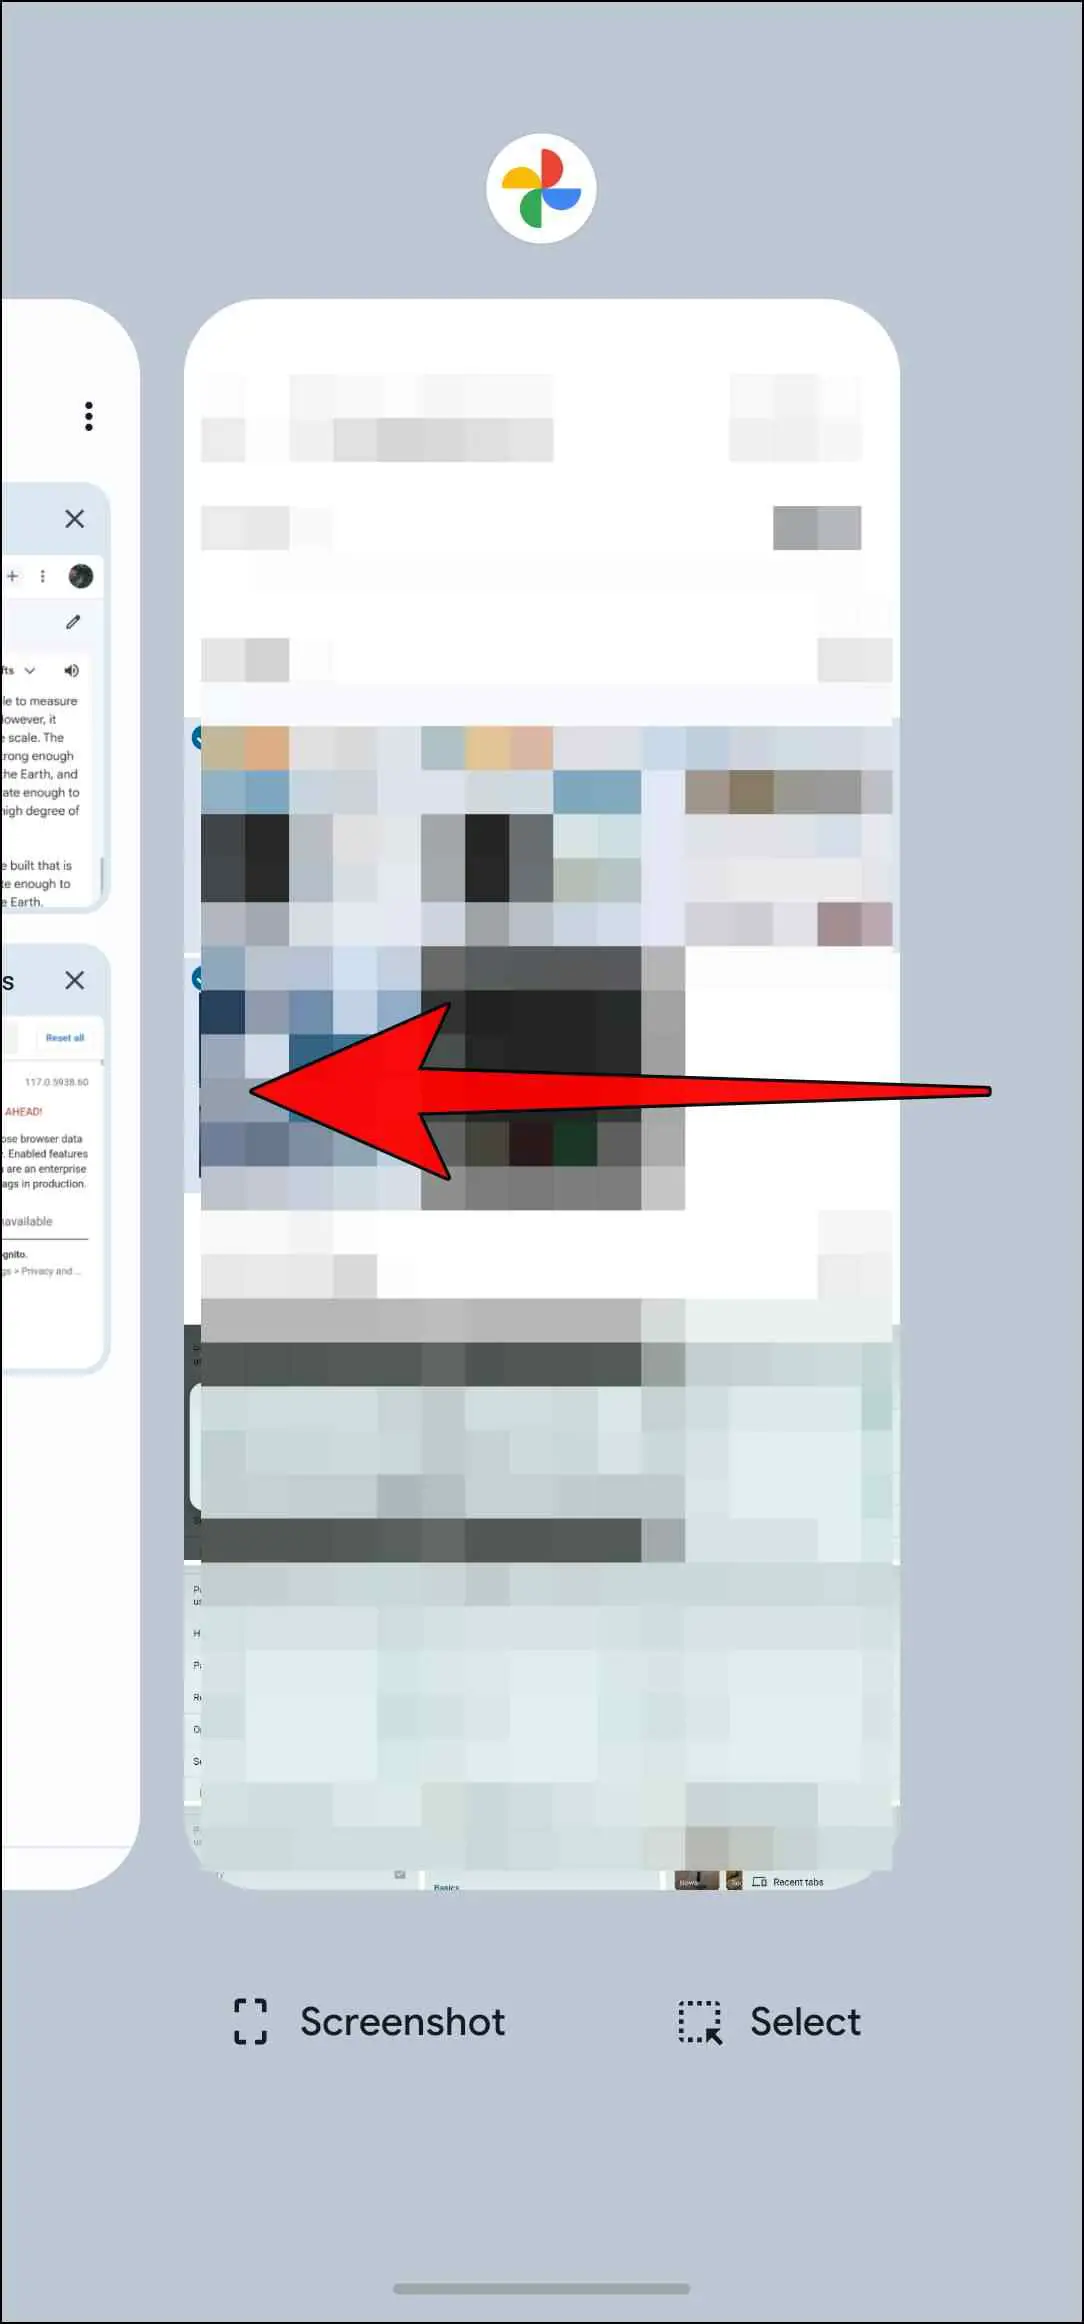
Step 2: To clear an app from the memory, just swipe up on the app.
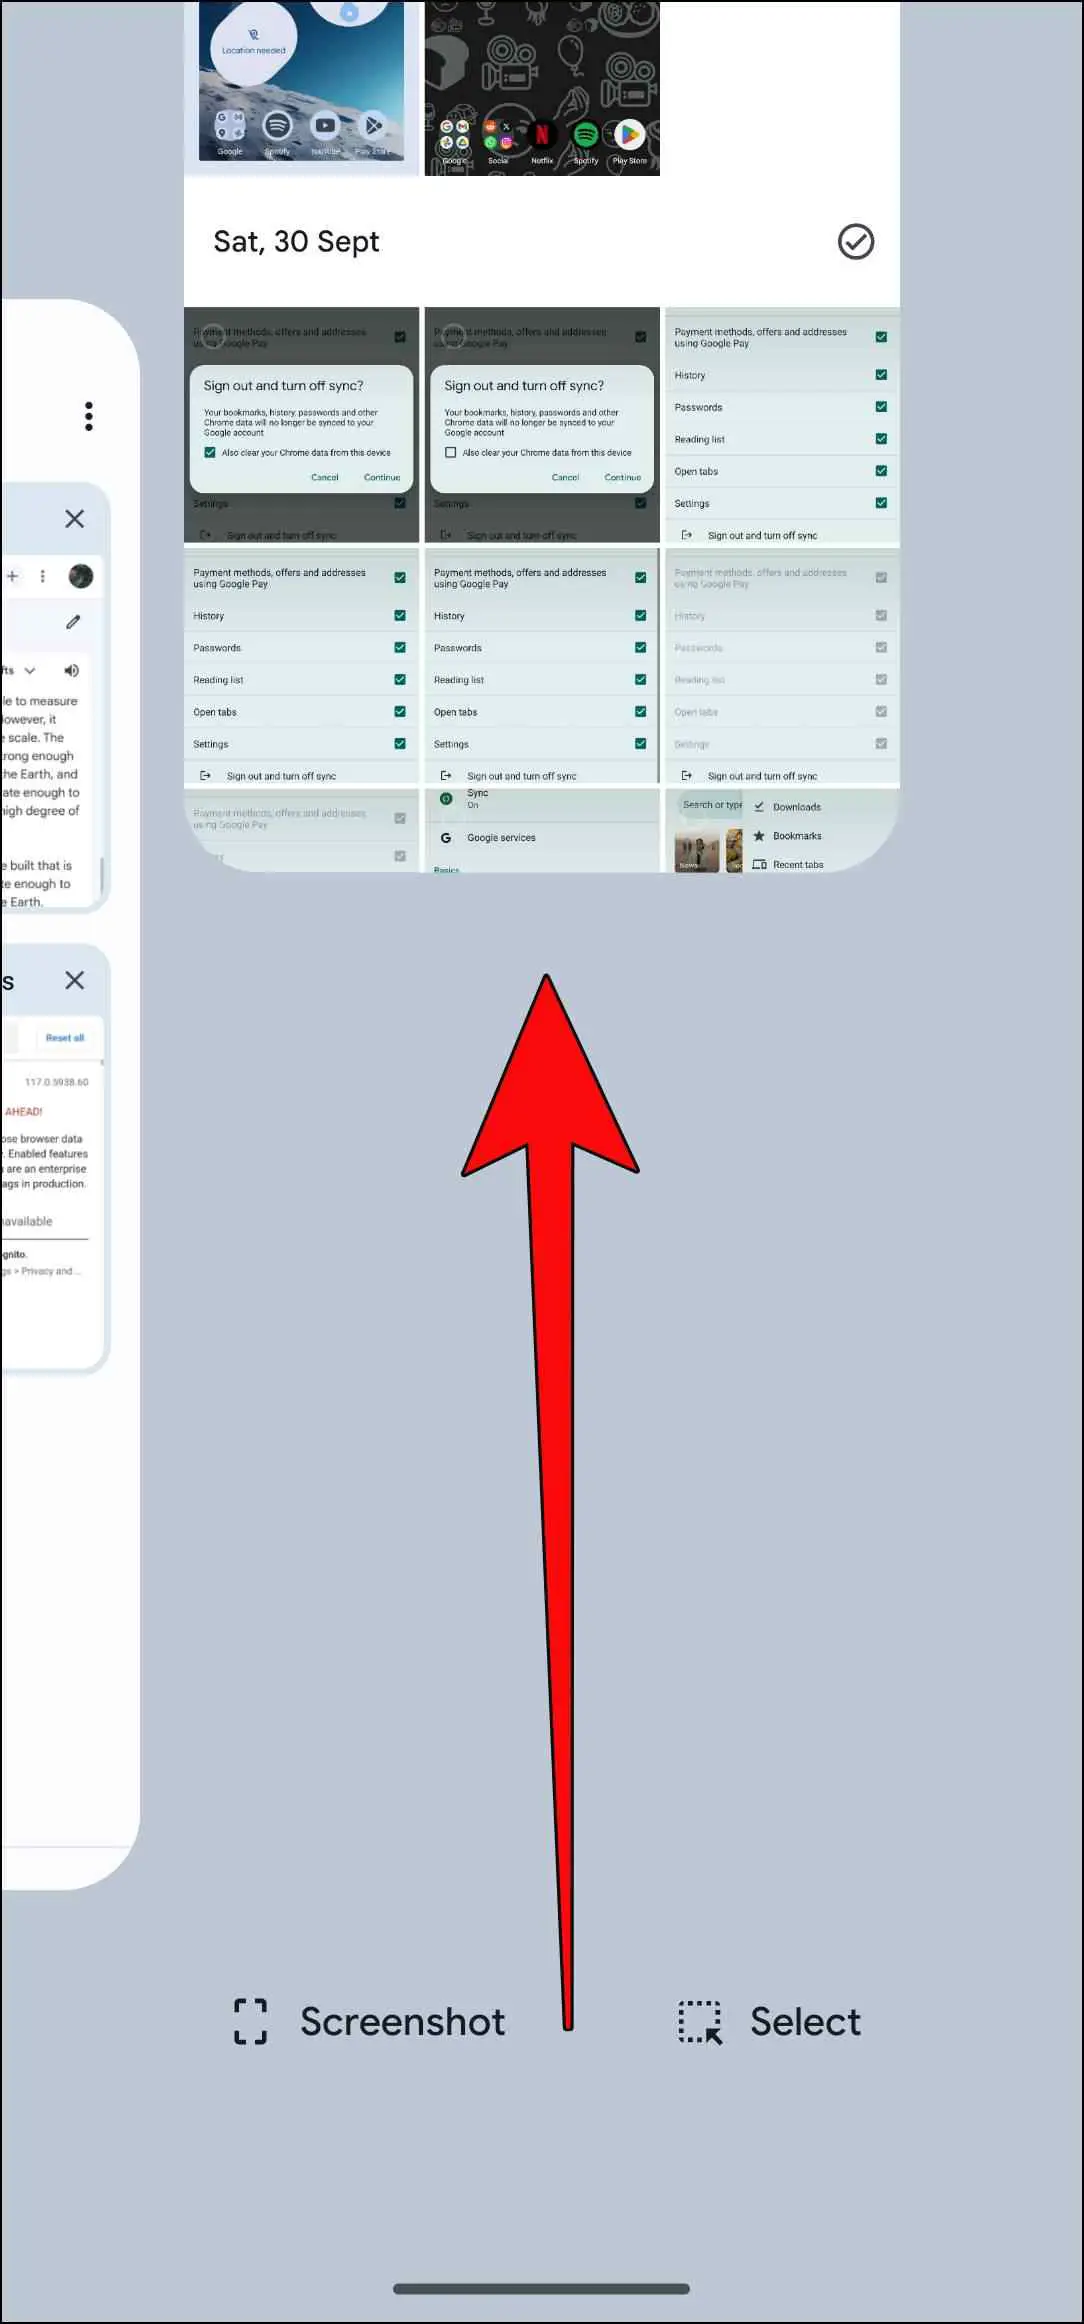
Step 3: If you want to close multiple apps, swipe to the left and tap on Clear All.

The position of the Clear All button might be different for your device.
Clear Chrome Cached Data
Another reason you are getting the “Unable to complete the previous operation due to low memory” error in Chrome is because of a minor bug. This could be caused by corrupted cached data in the browser. This can be fixed by clearing cached data for the browser. Here are the steps to do so.
Step 1: Long press the Google Chrome app icon on your smartphone.
Step 2: Tap on the i icon available in the quick shortcuts.
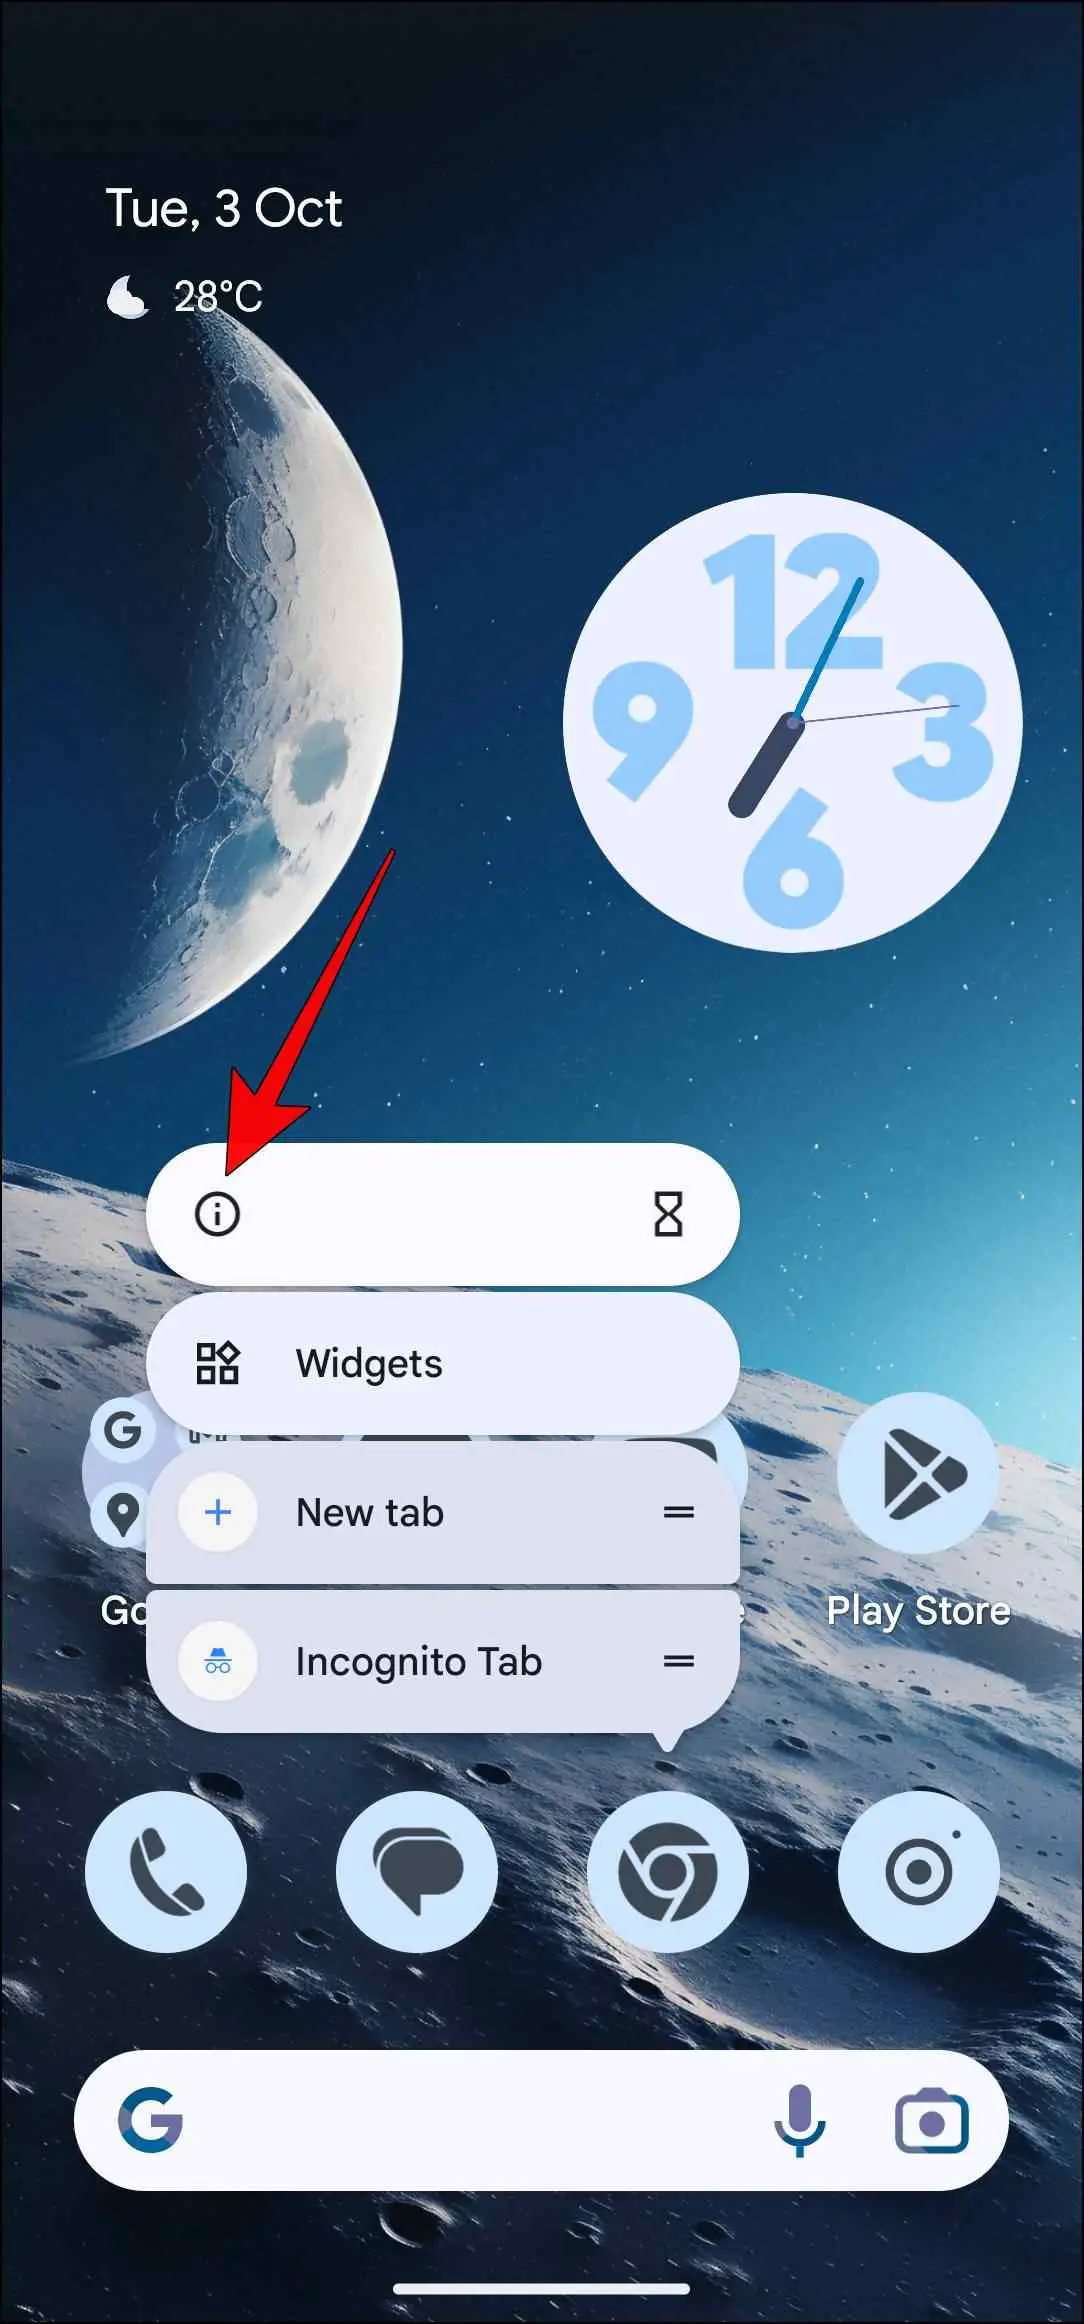
This will take you to the App Info page for Google Chrome.
Step 3: Here, go to Storage and Cache.
Step 4: Now choose Clear cache.
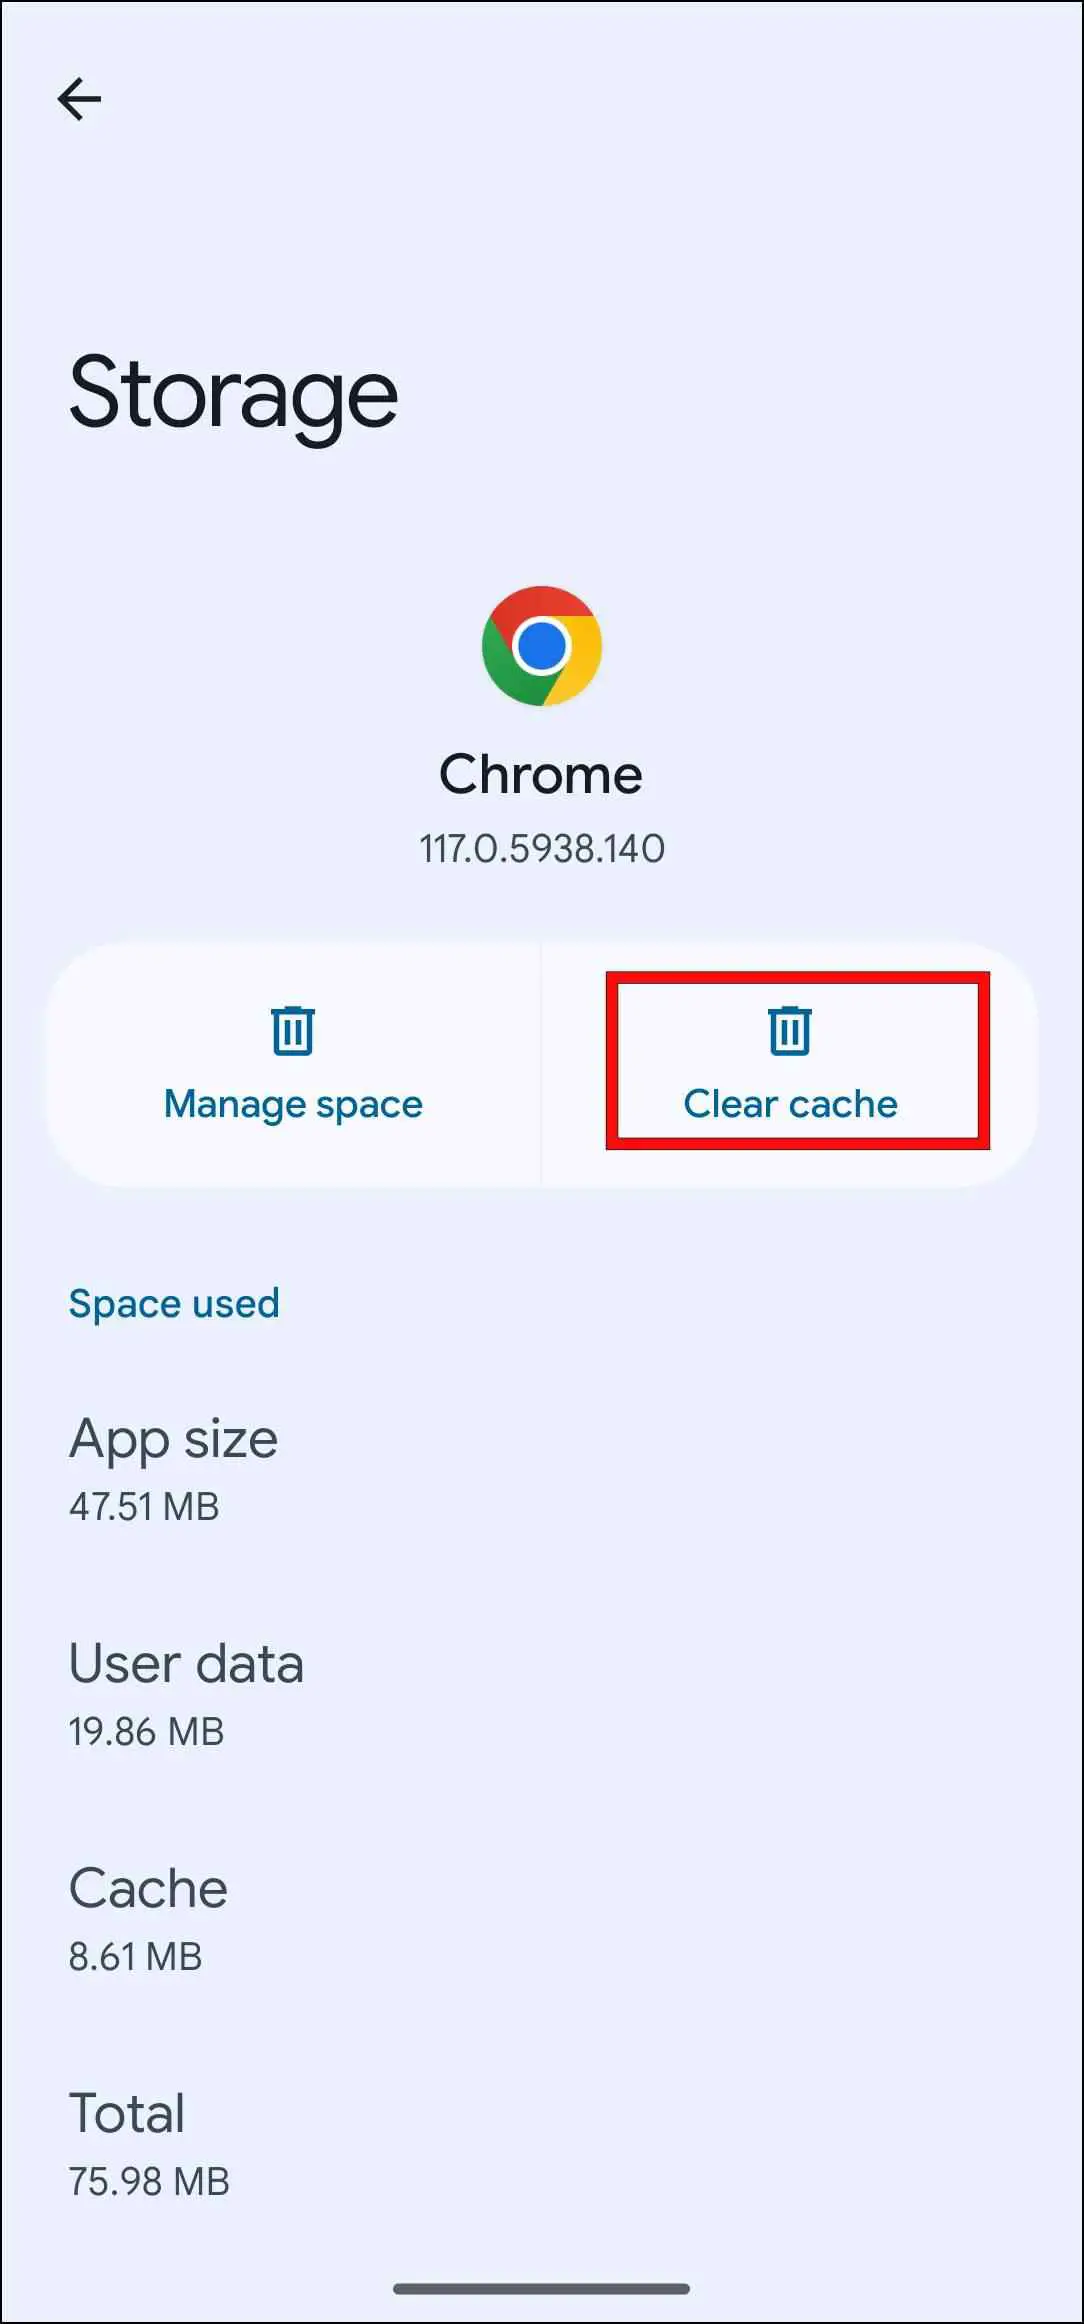
That’s it! The browser cache has been cleared. Now, remove the browser from the phone memory using the above method.
Check for App Updates
It might also be possible that the current version of Chrome installed on your phone may have some sort of bugs or glitches causing it to show the error. So, we recommend that you check for the latest updates for the browser from the Play Store. This is how you can do that.
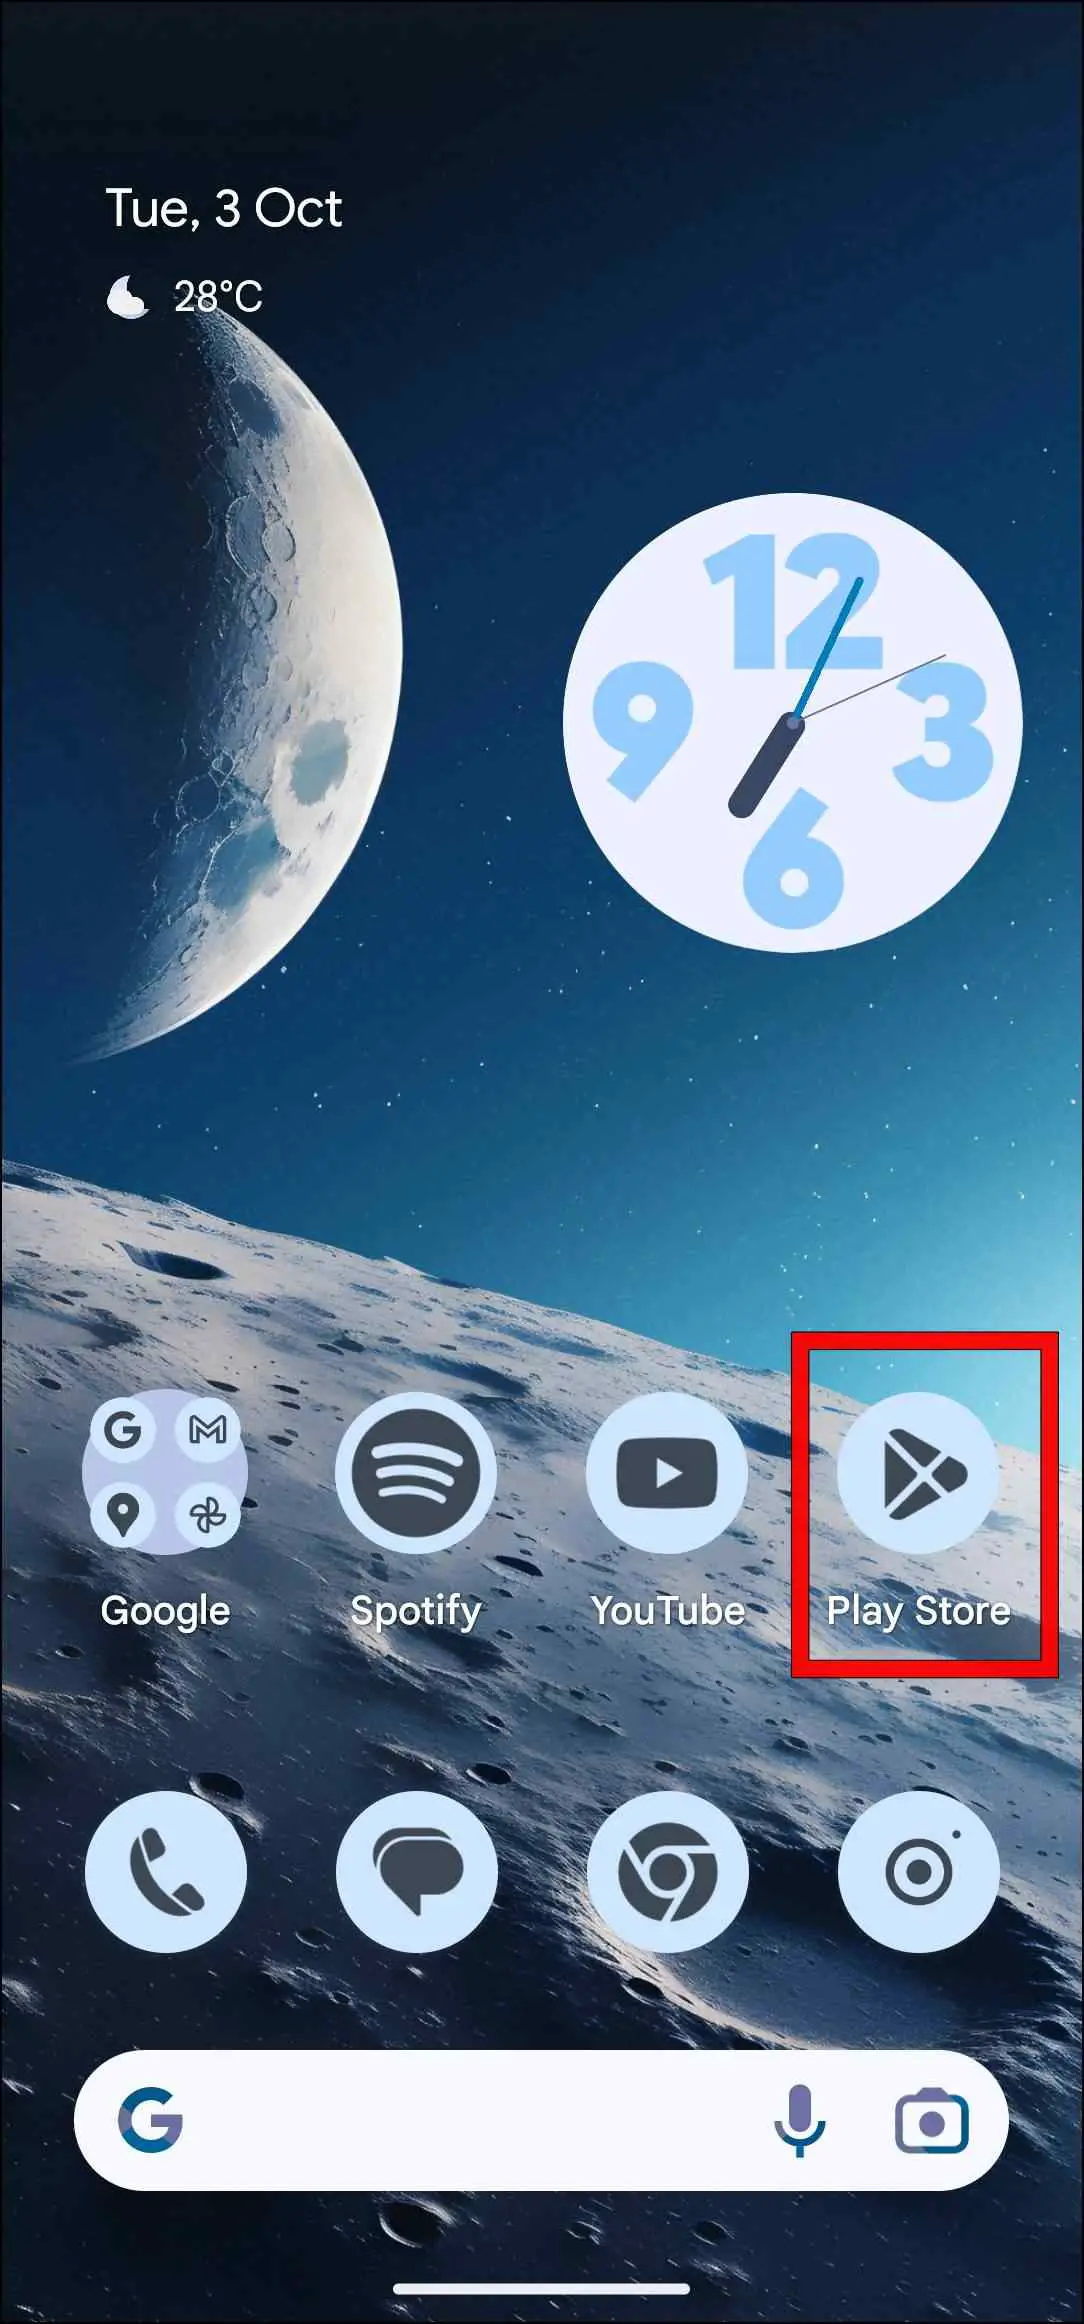
Step 1: Open the Google Play Store on your Android phone.
Step 2: Here, tap on your profile icon in the top right corner.
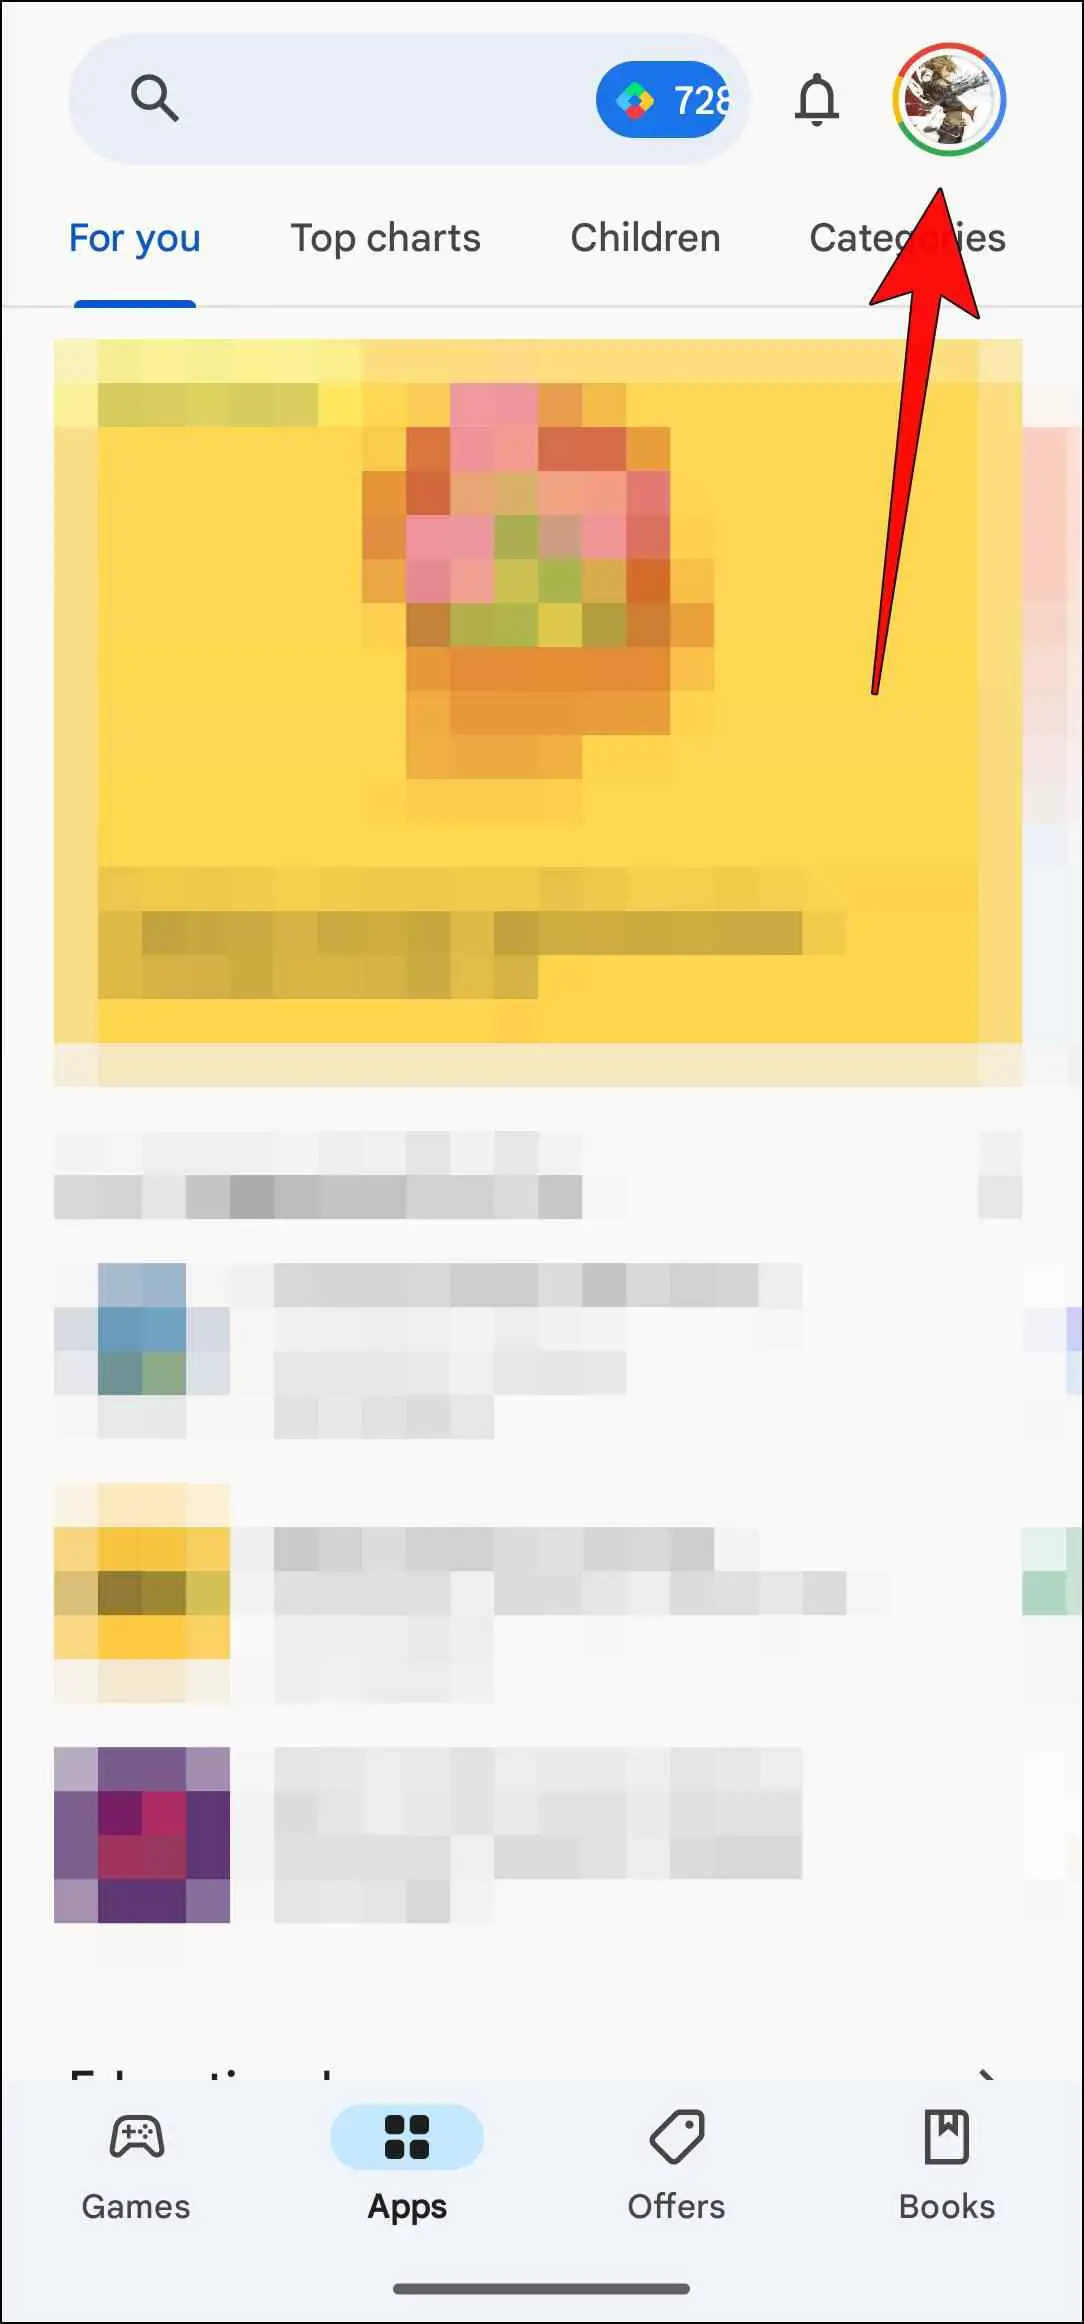
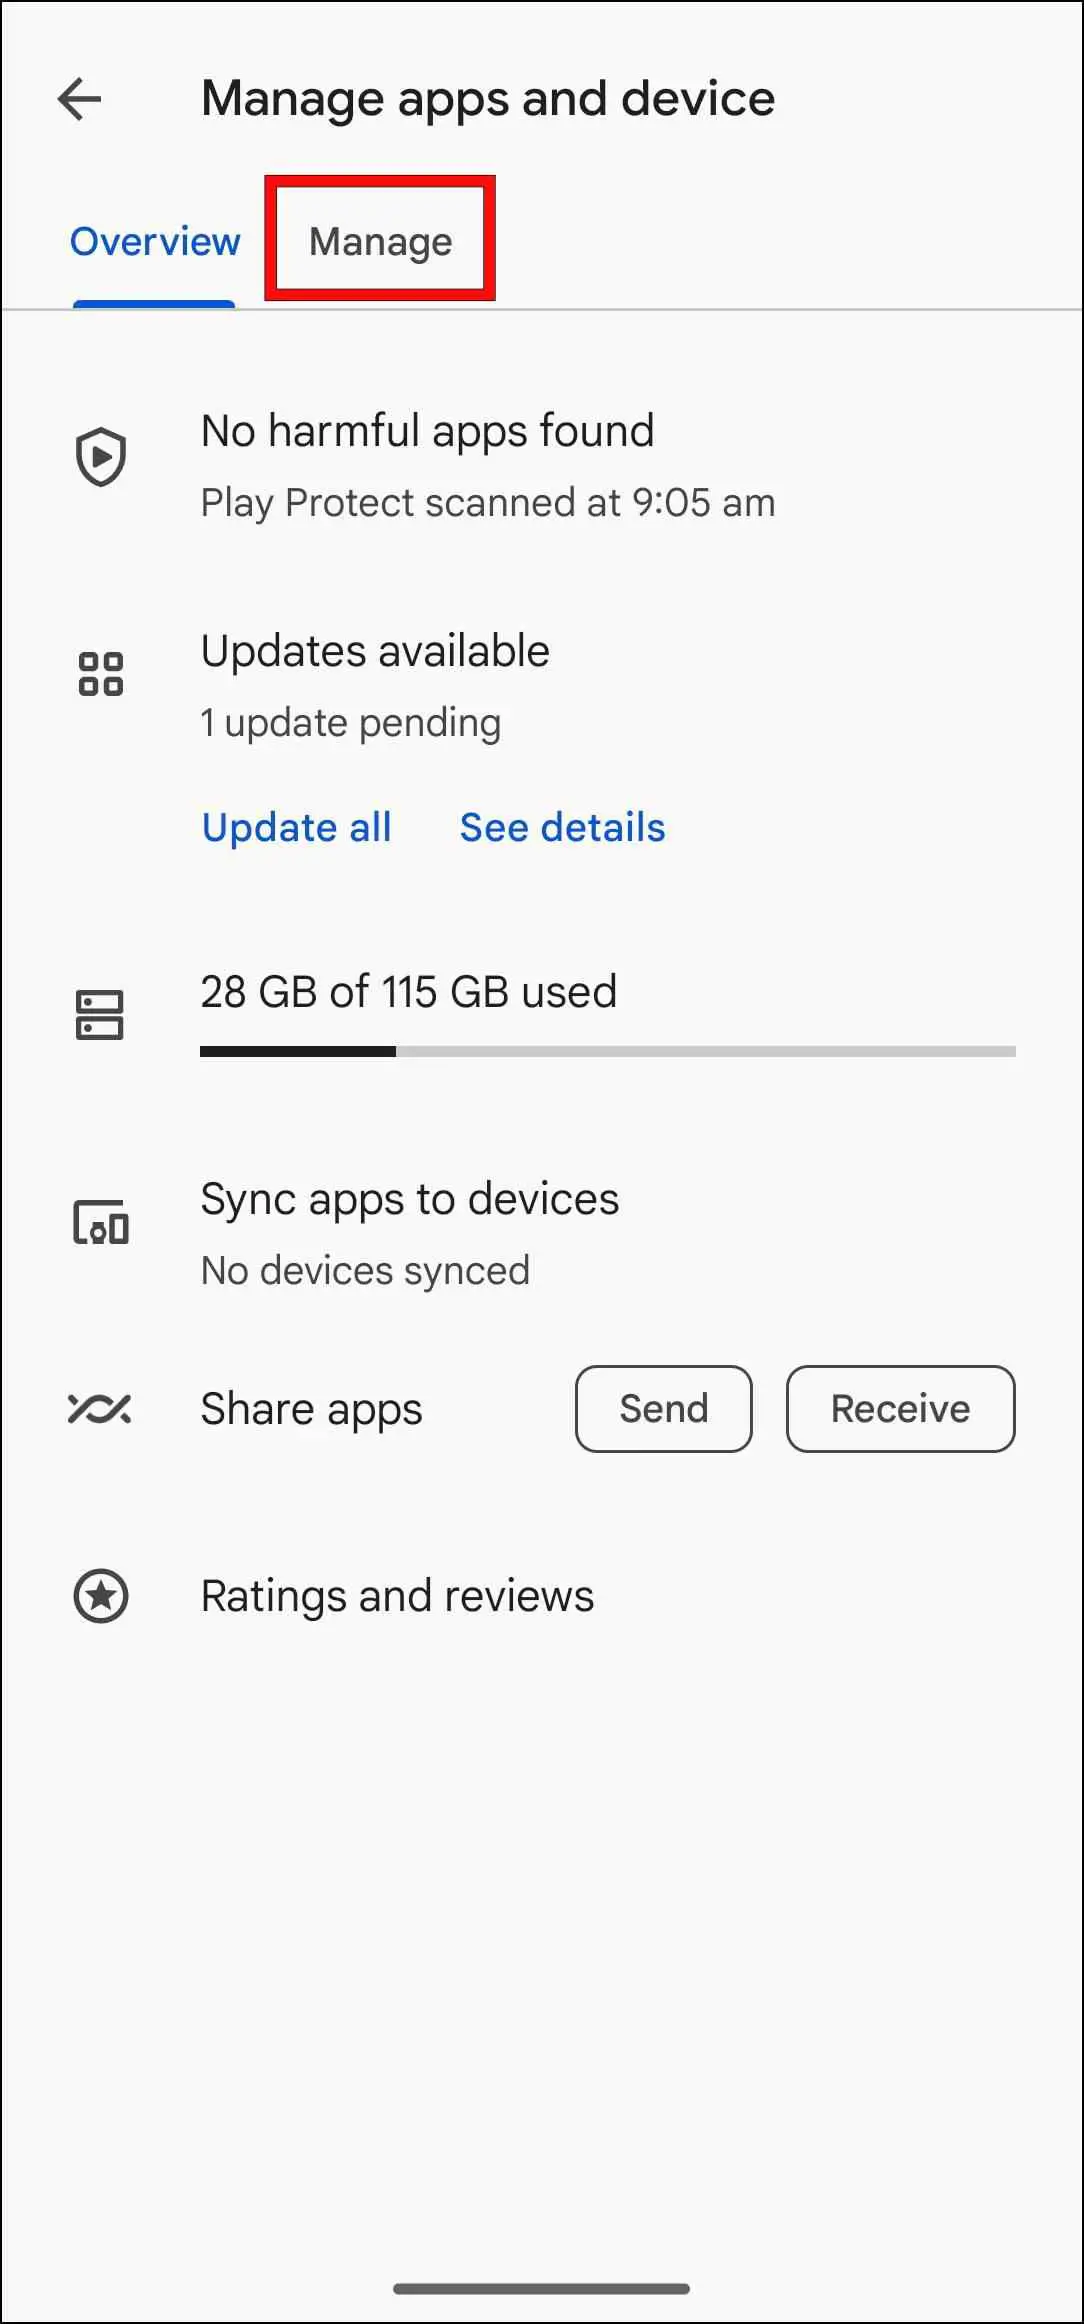
Step 3: Select Manage apps and devices.
Step 4: Go to the Manage tab.
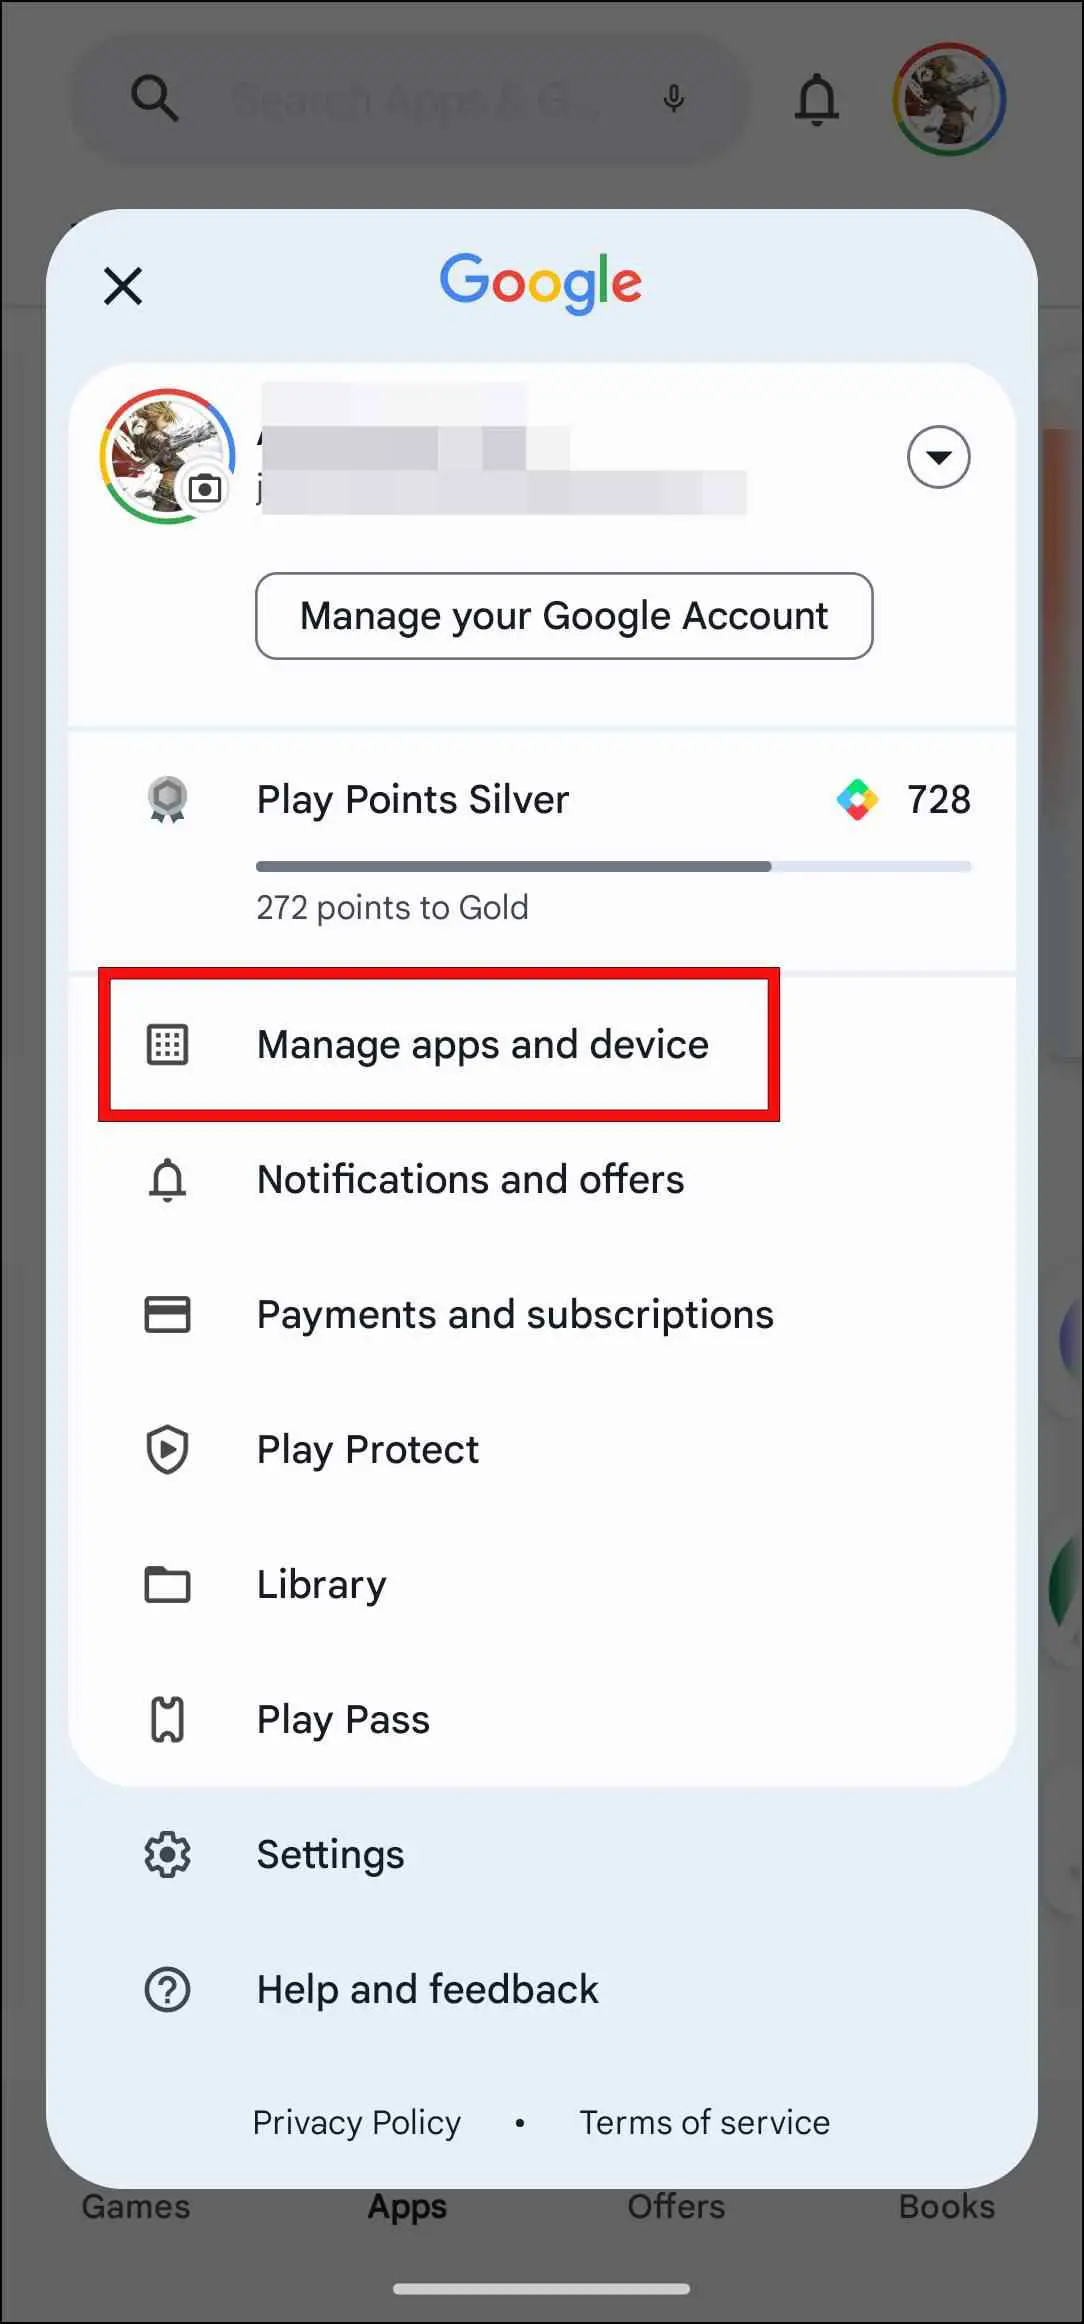
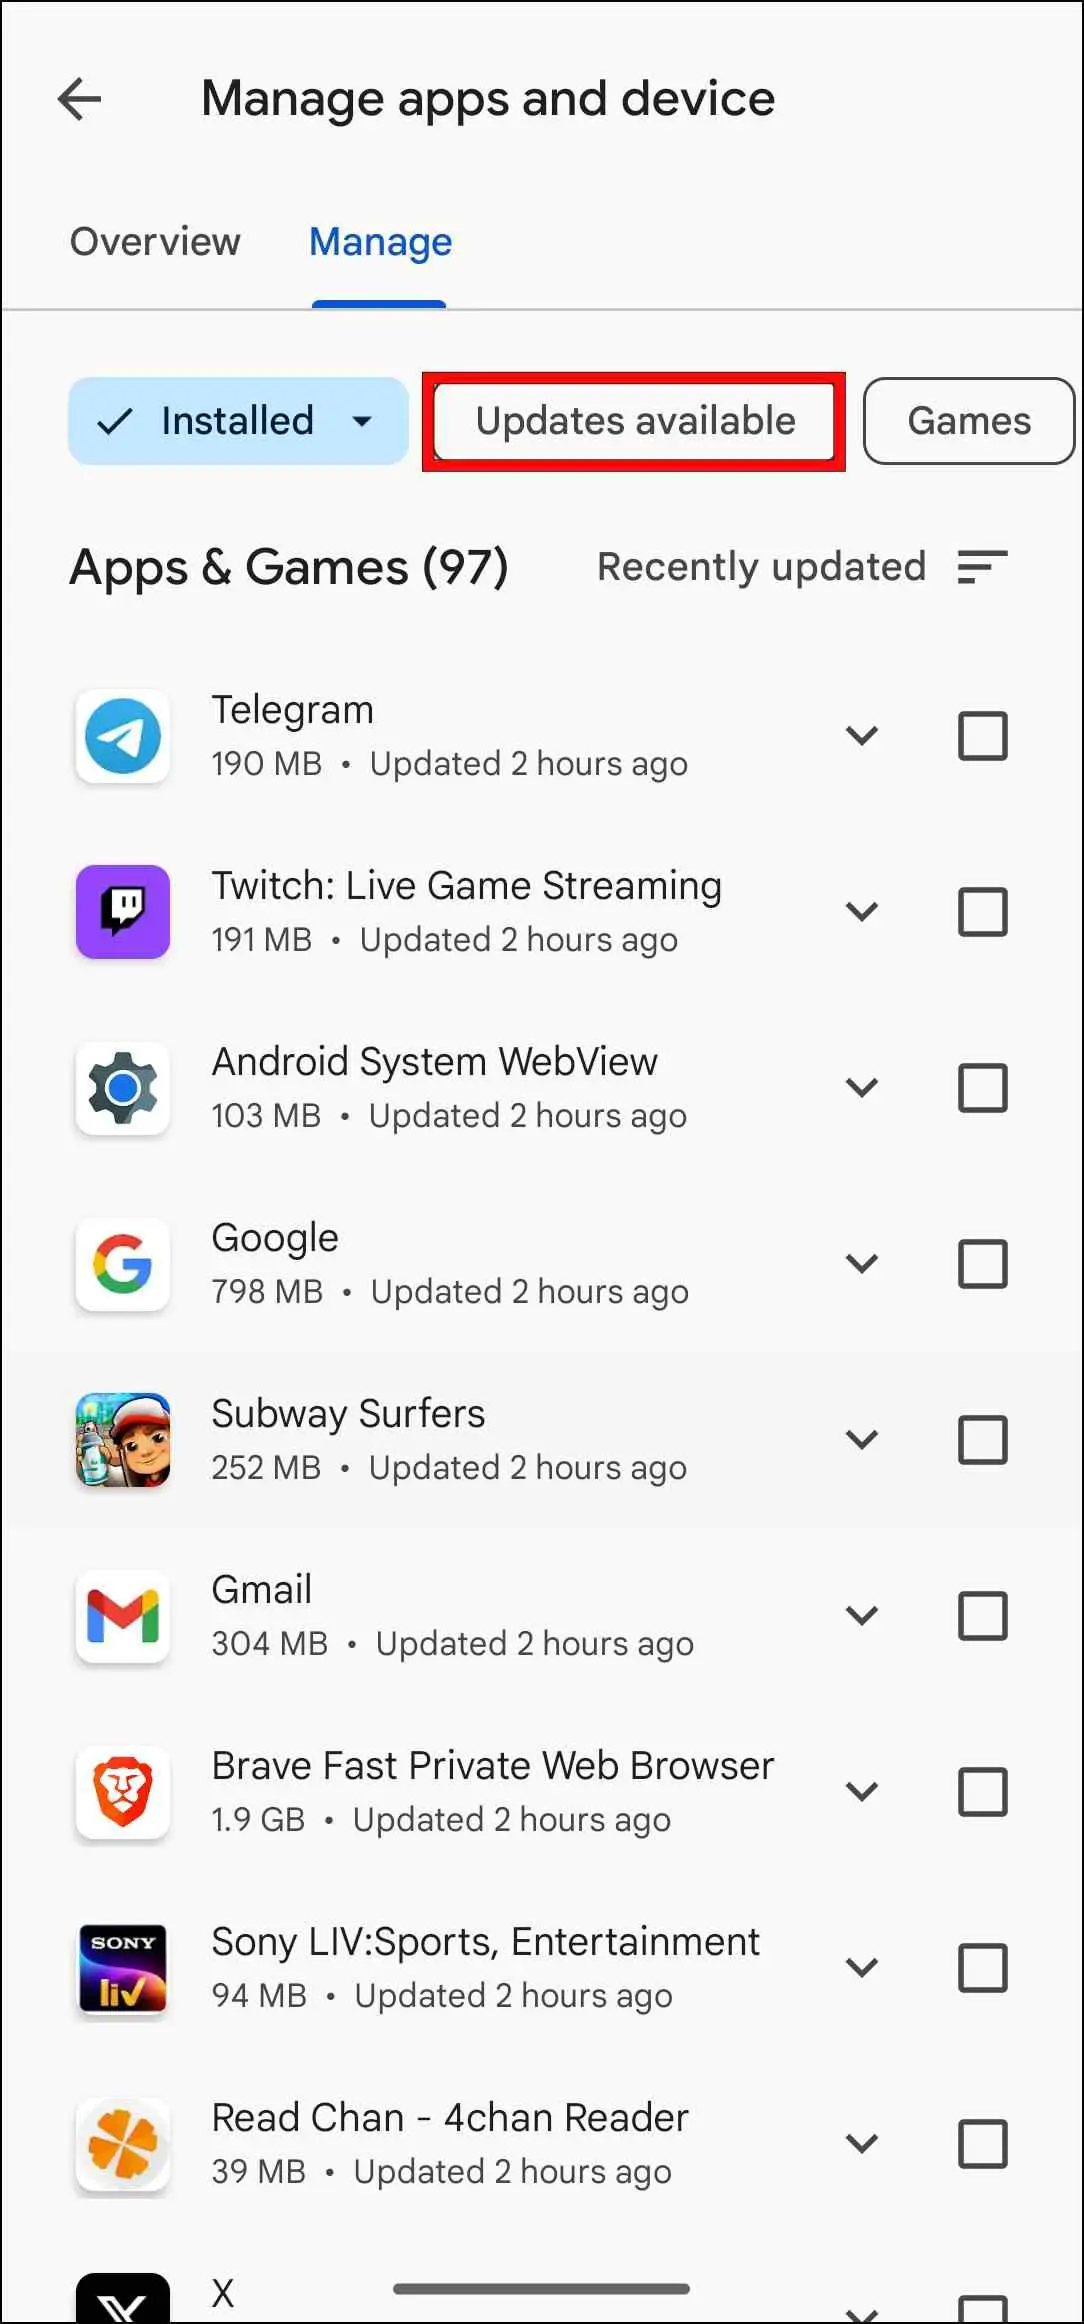
Step 5: Next, tap on the Updates available option below.
If there is an update available for the browser, it should appear here.
Step 6: Tick the box next to Google Chrome to select the app.
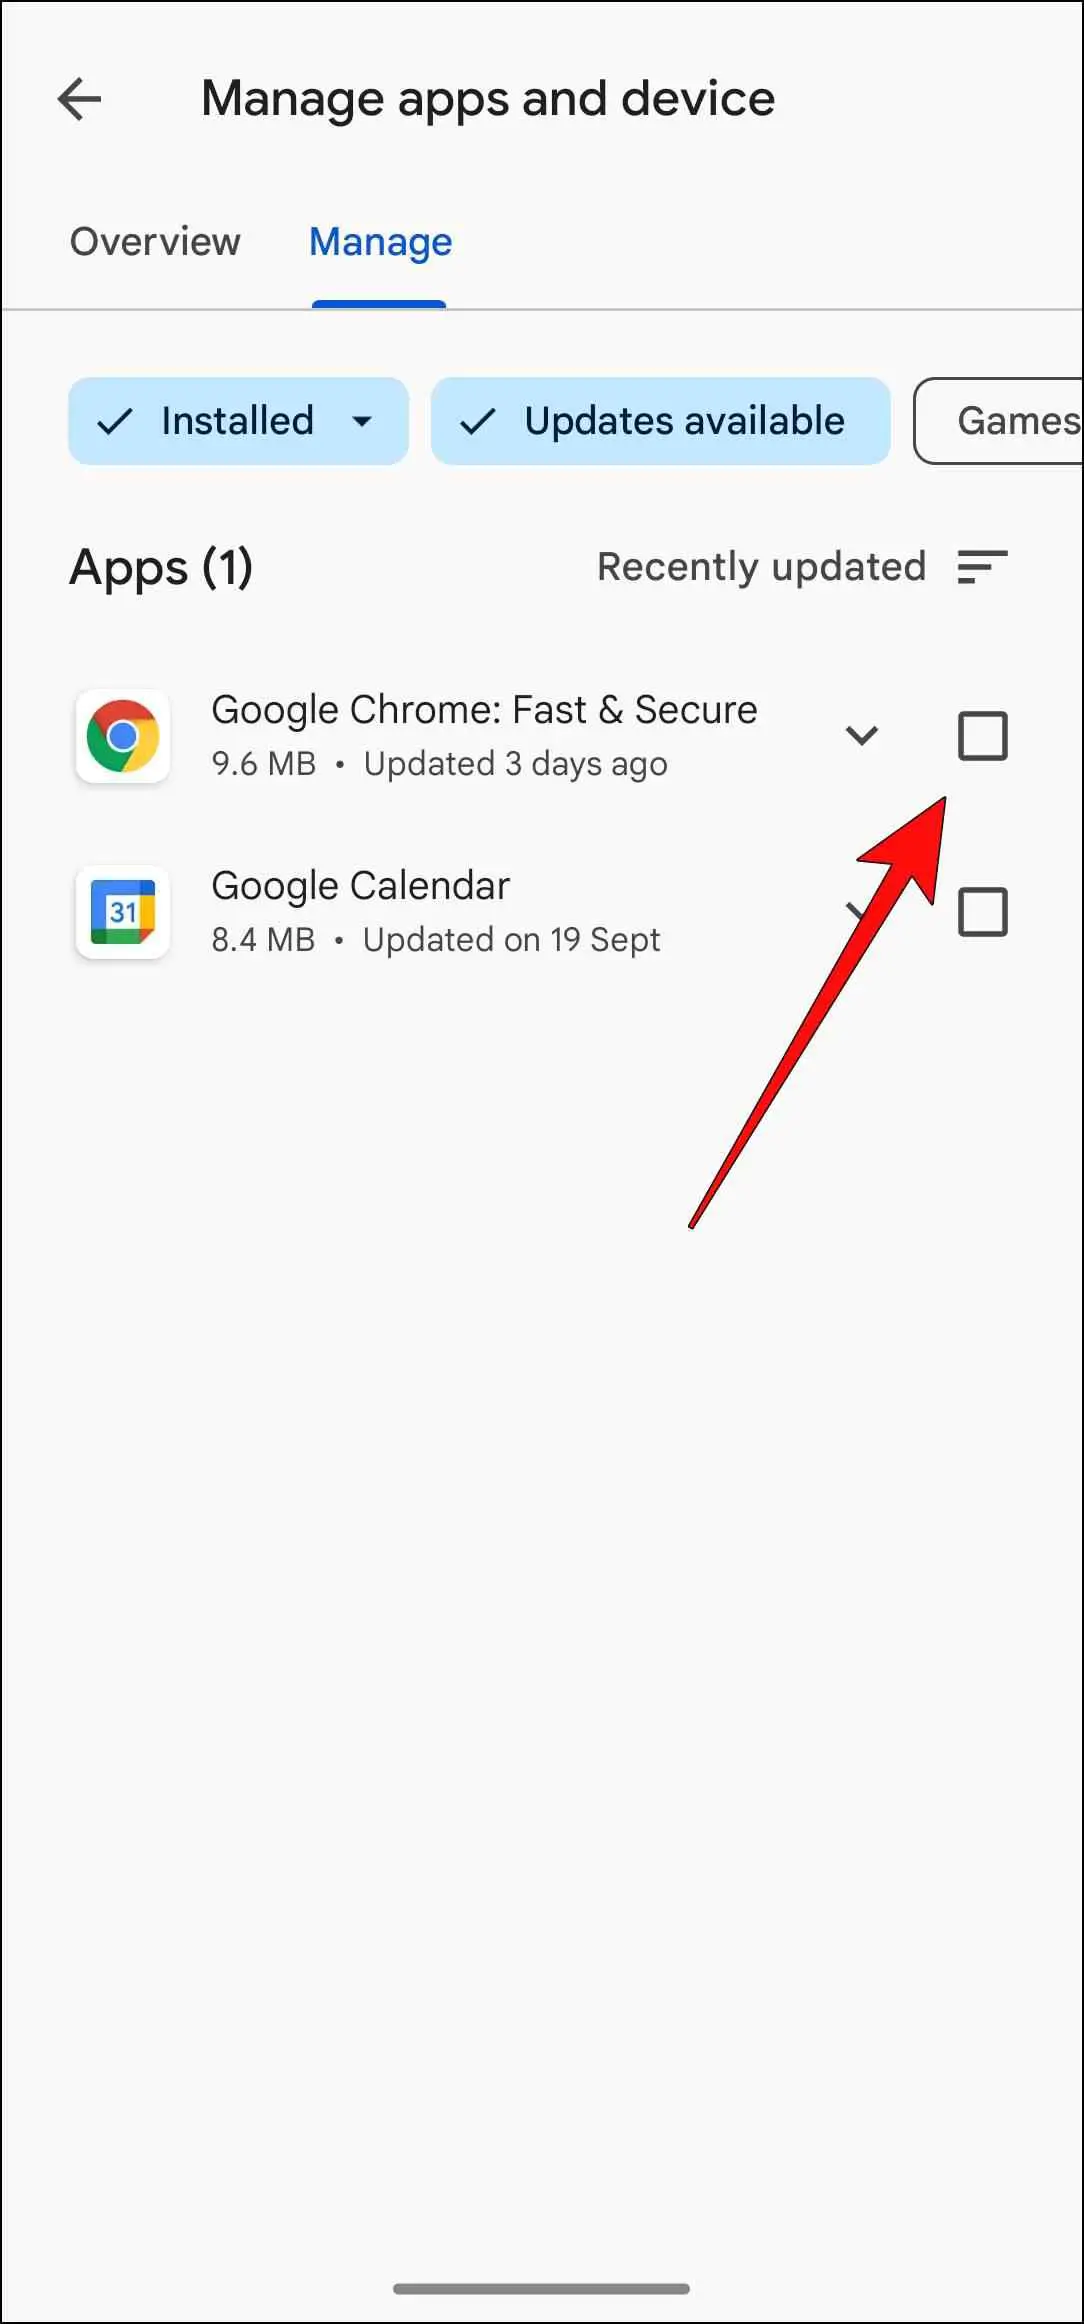
Step 7: Once Chrome is selected, tap the update icon to download and install the latest update.
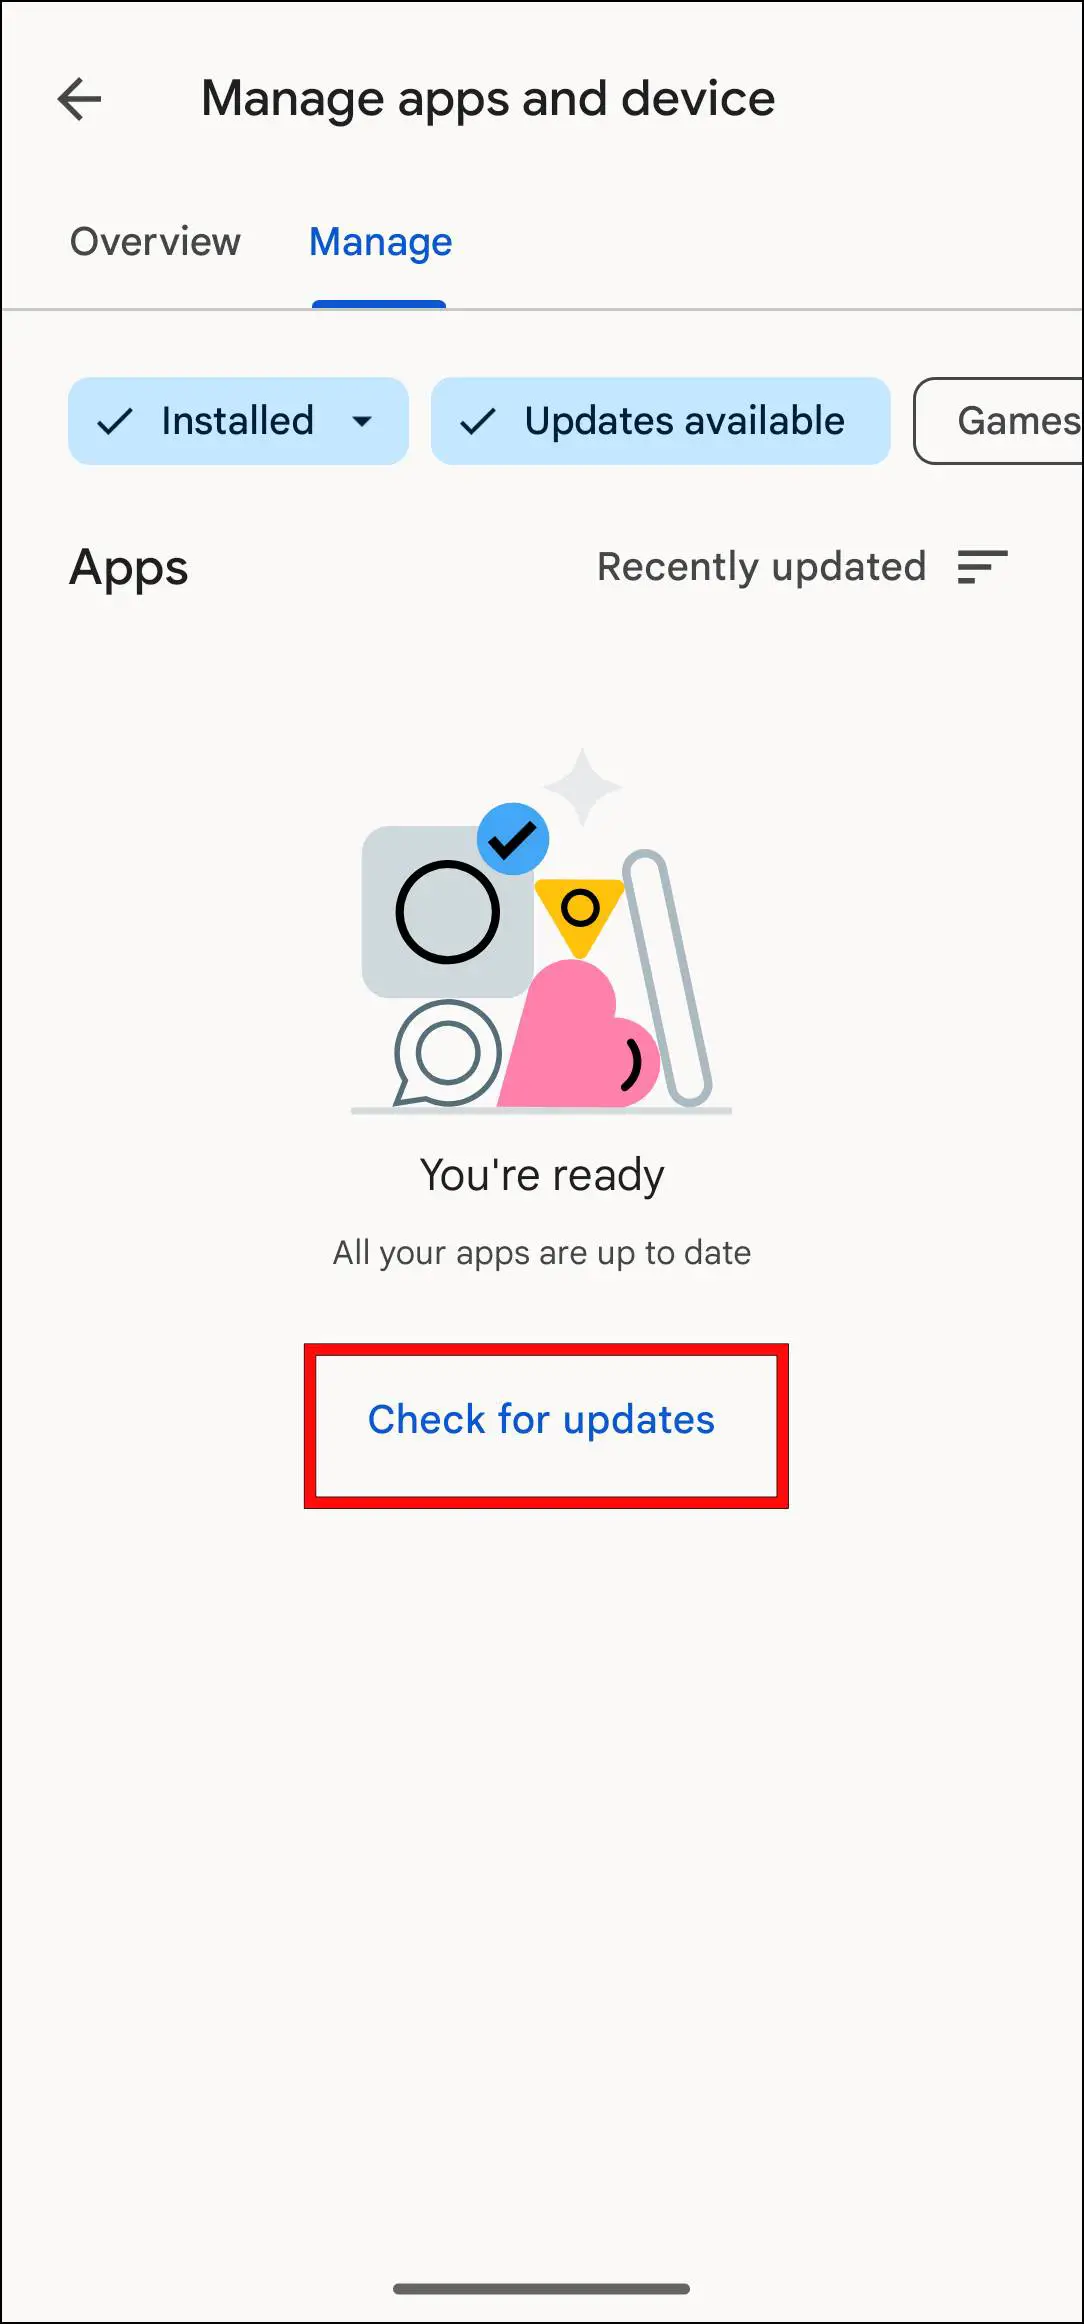
Step 8: In case you are not able to see updates for any apps, tap on Check for Updates.

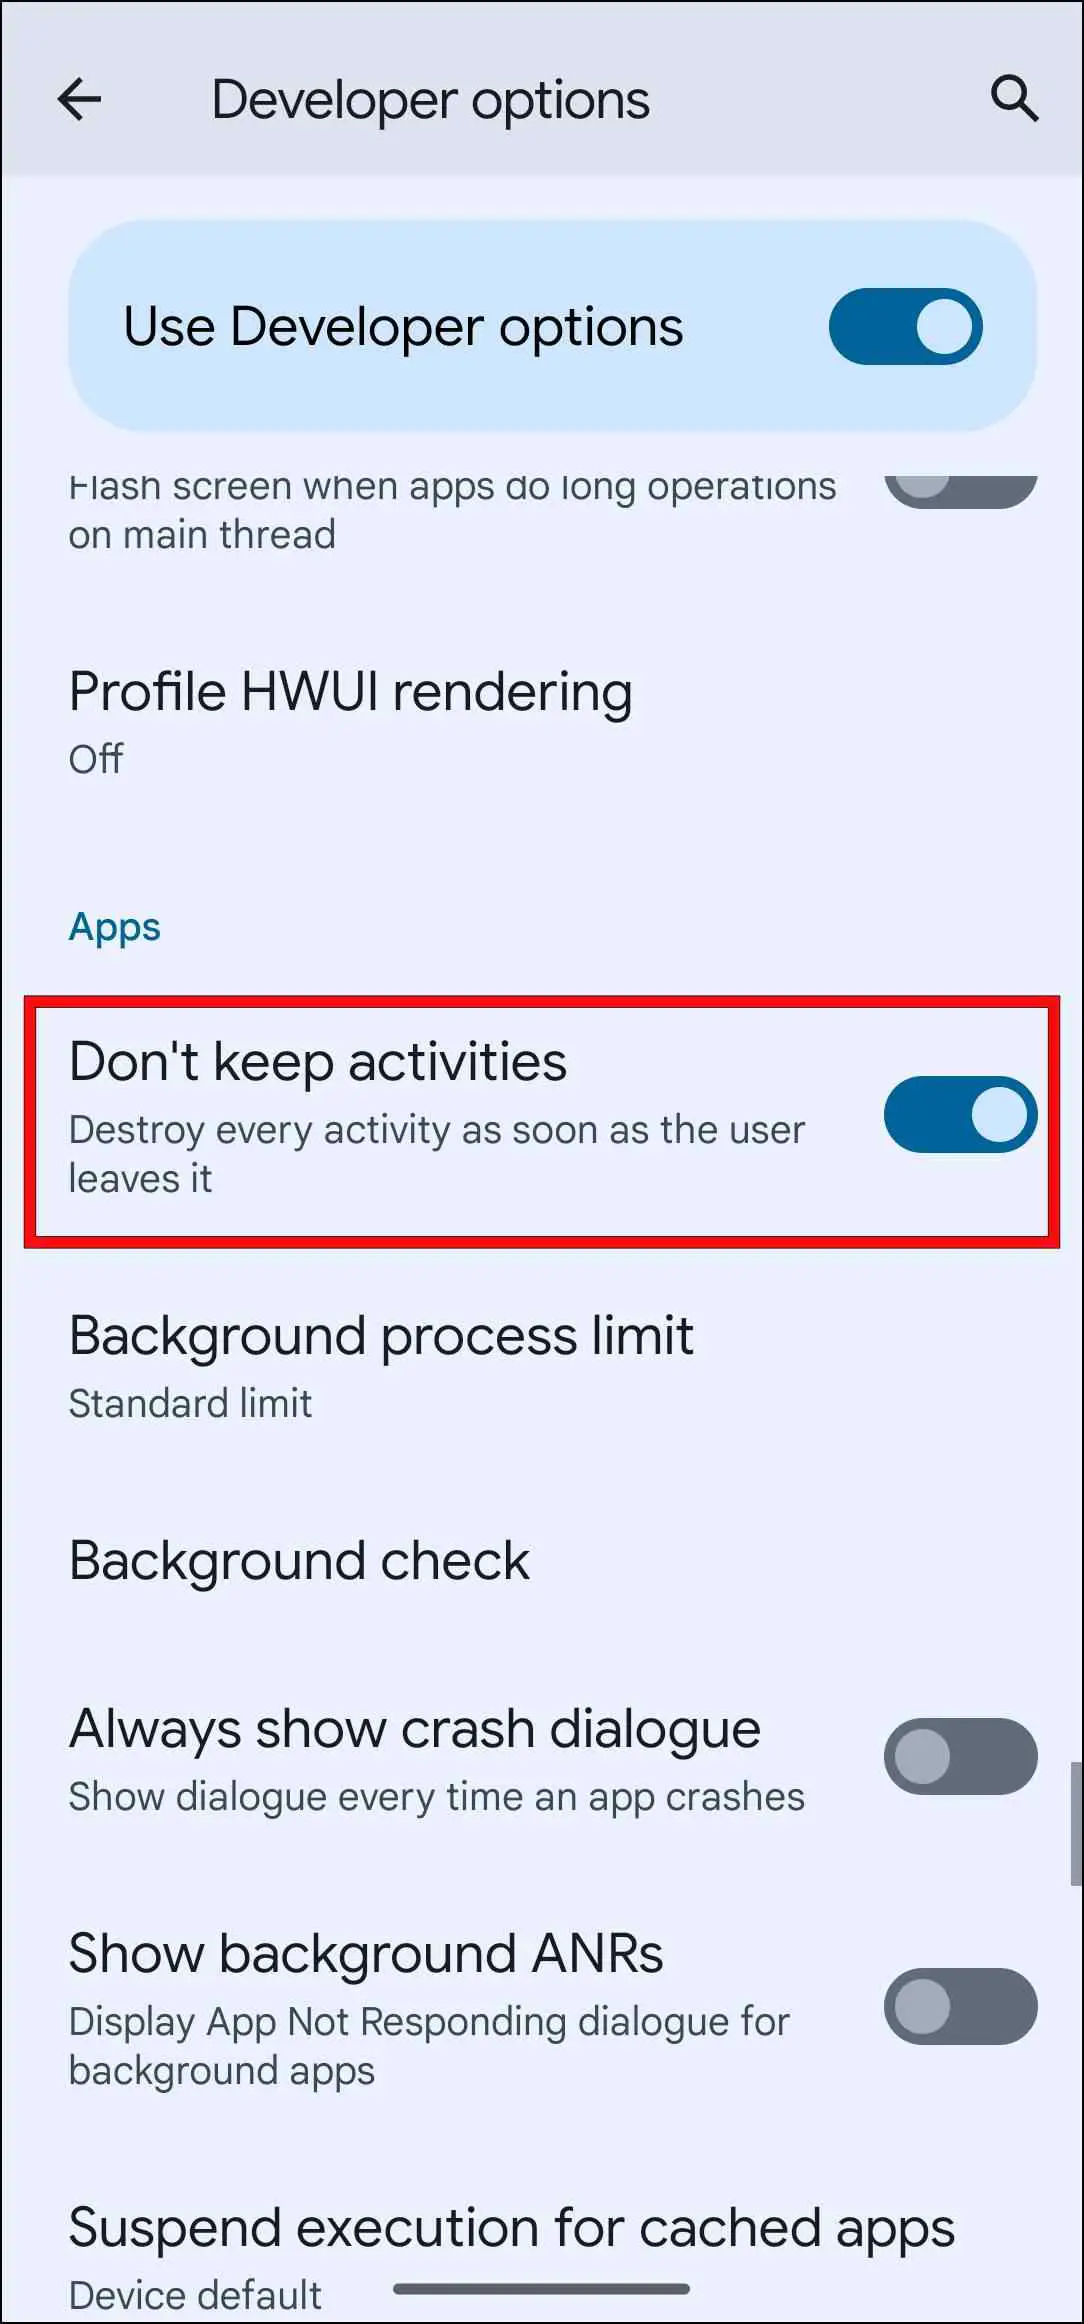
Turn Off “Don’t Keep Activities”
Don’t Keep Activities is a setting within the Developer Options of Android. Turning it on will close any apps running in the background, which can be helpful, but it can also have negative effects, especially on devices with limited RAM. That is why you should disable this setting if you are facing the “Unable to complete the previous operation due to low memory” error message. Use the steps below to turn it off.
Step 1: Open the Settings app.
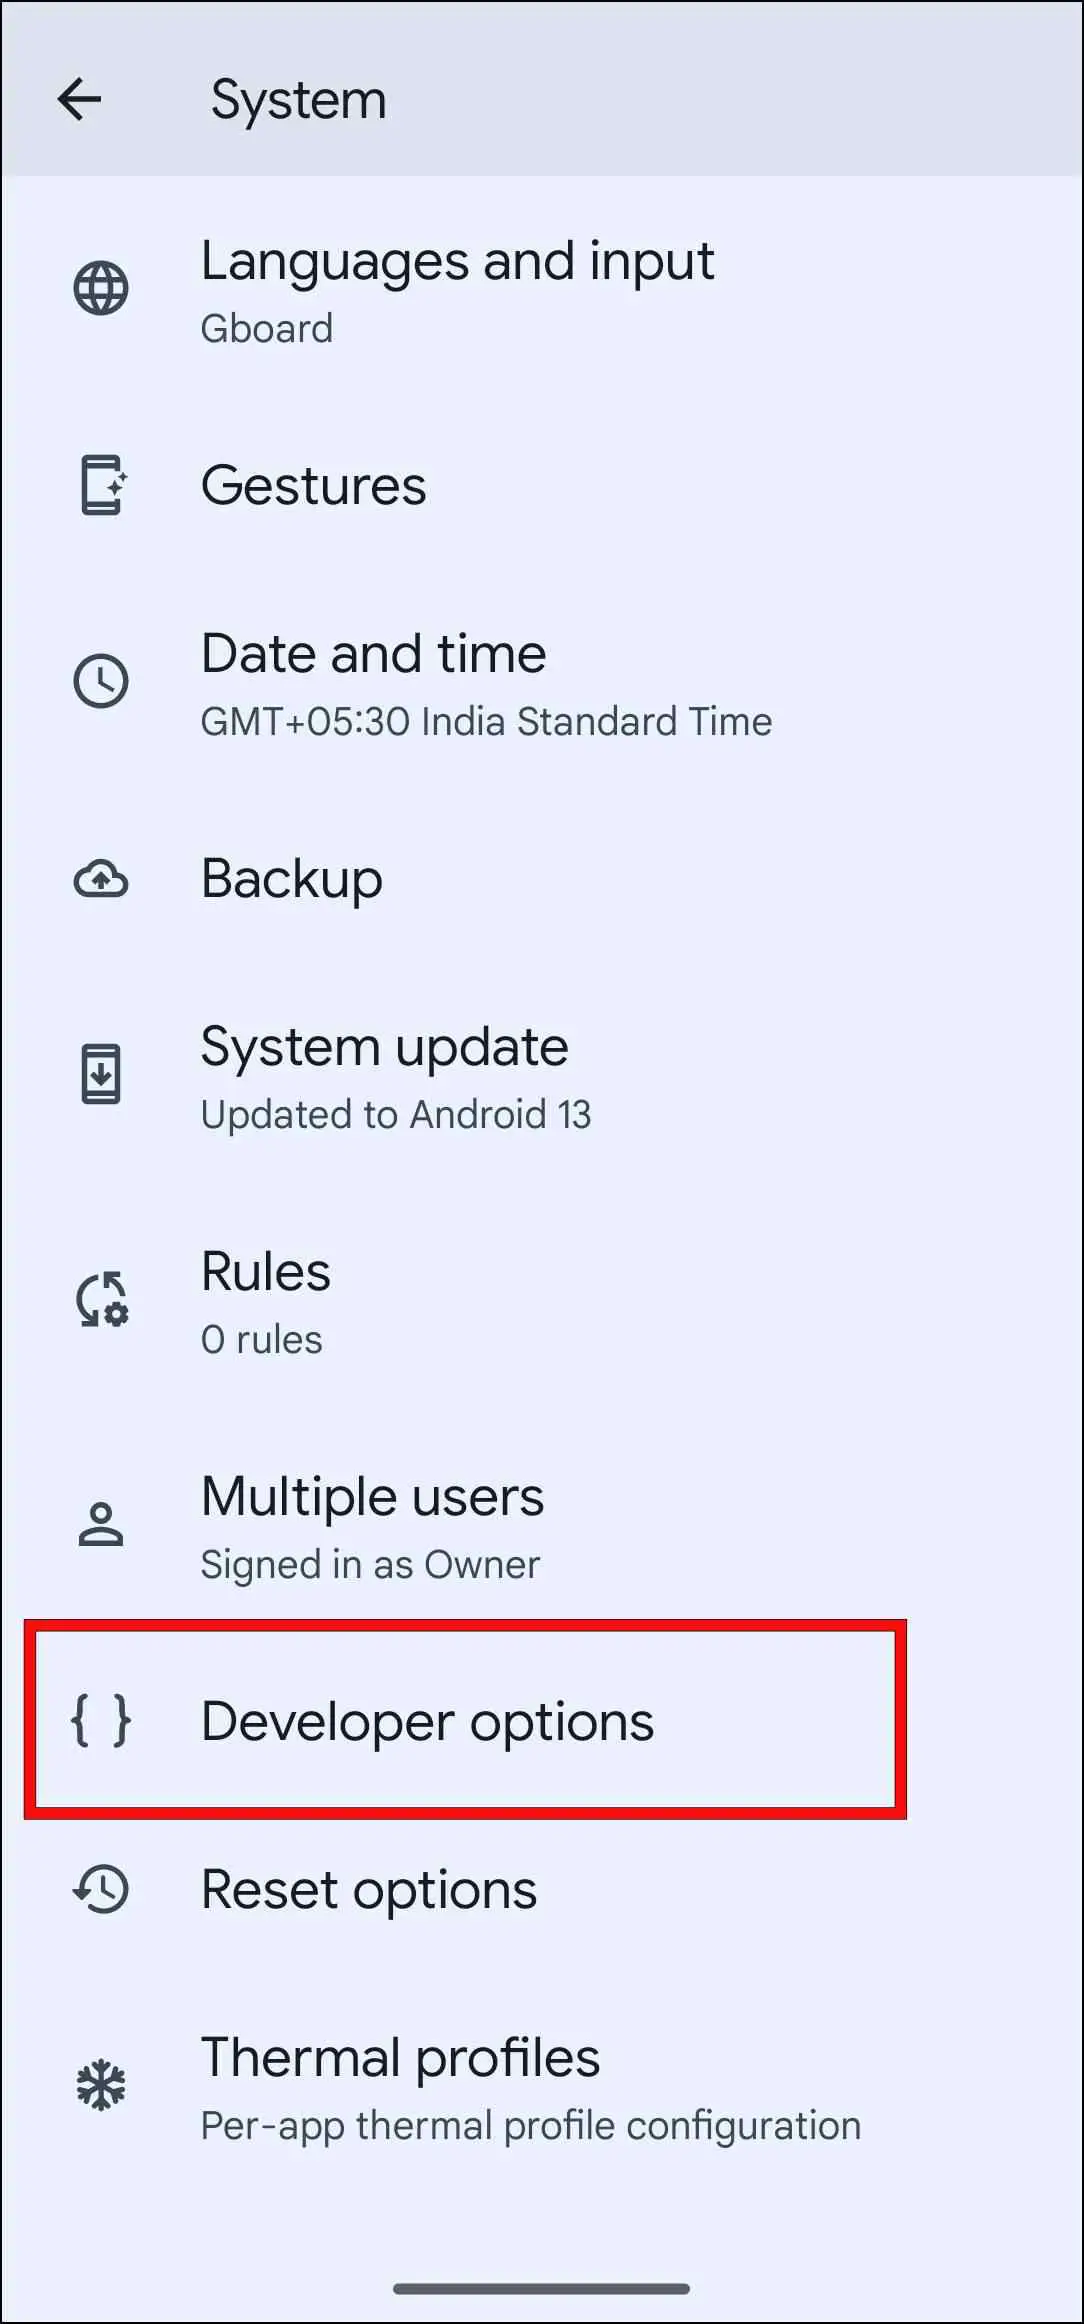
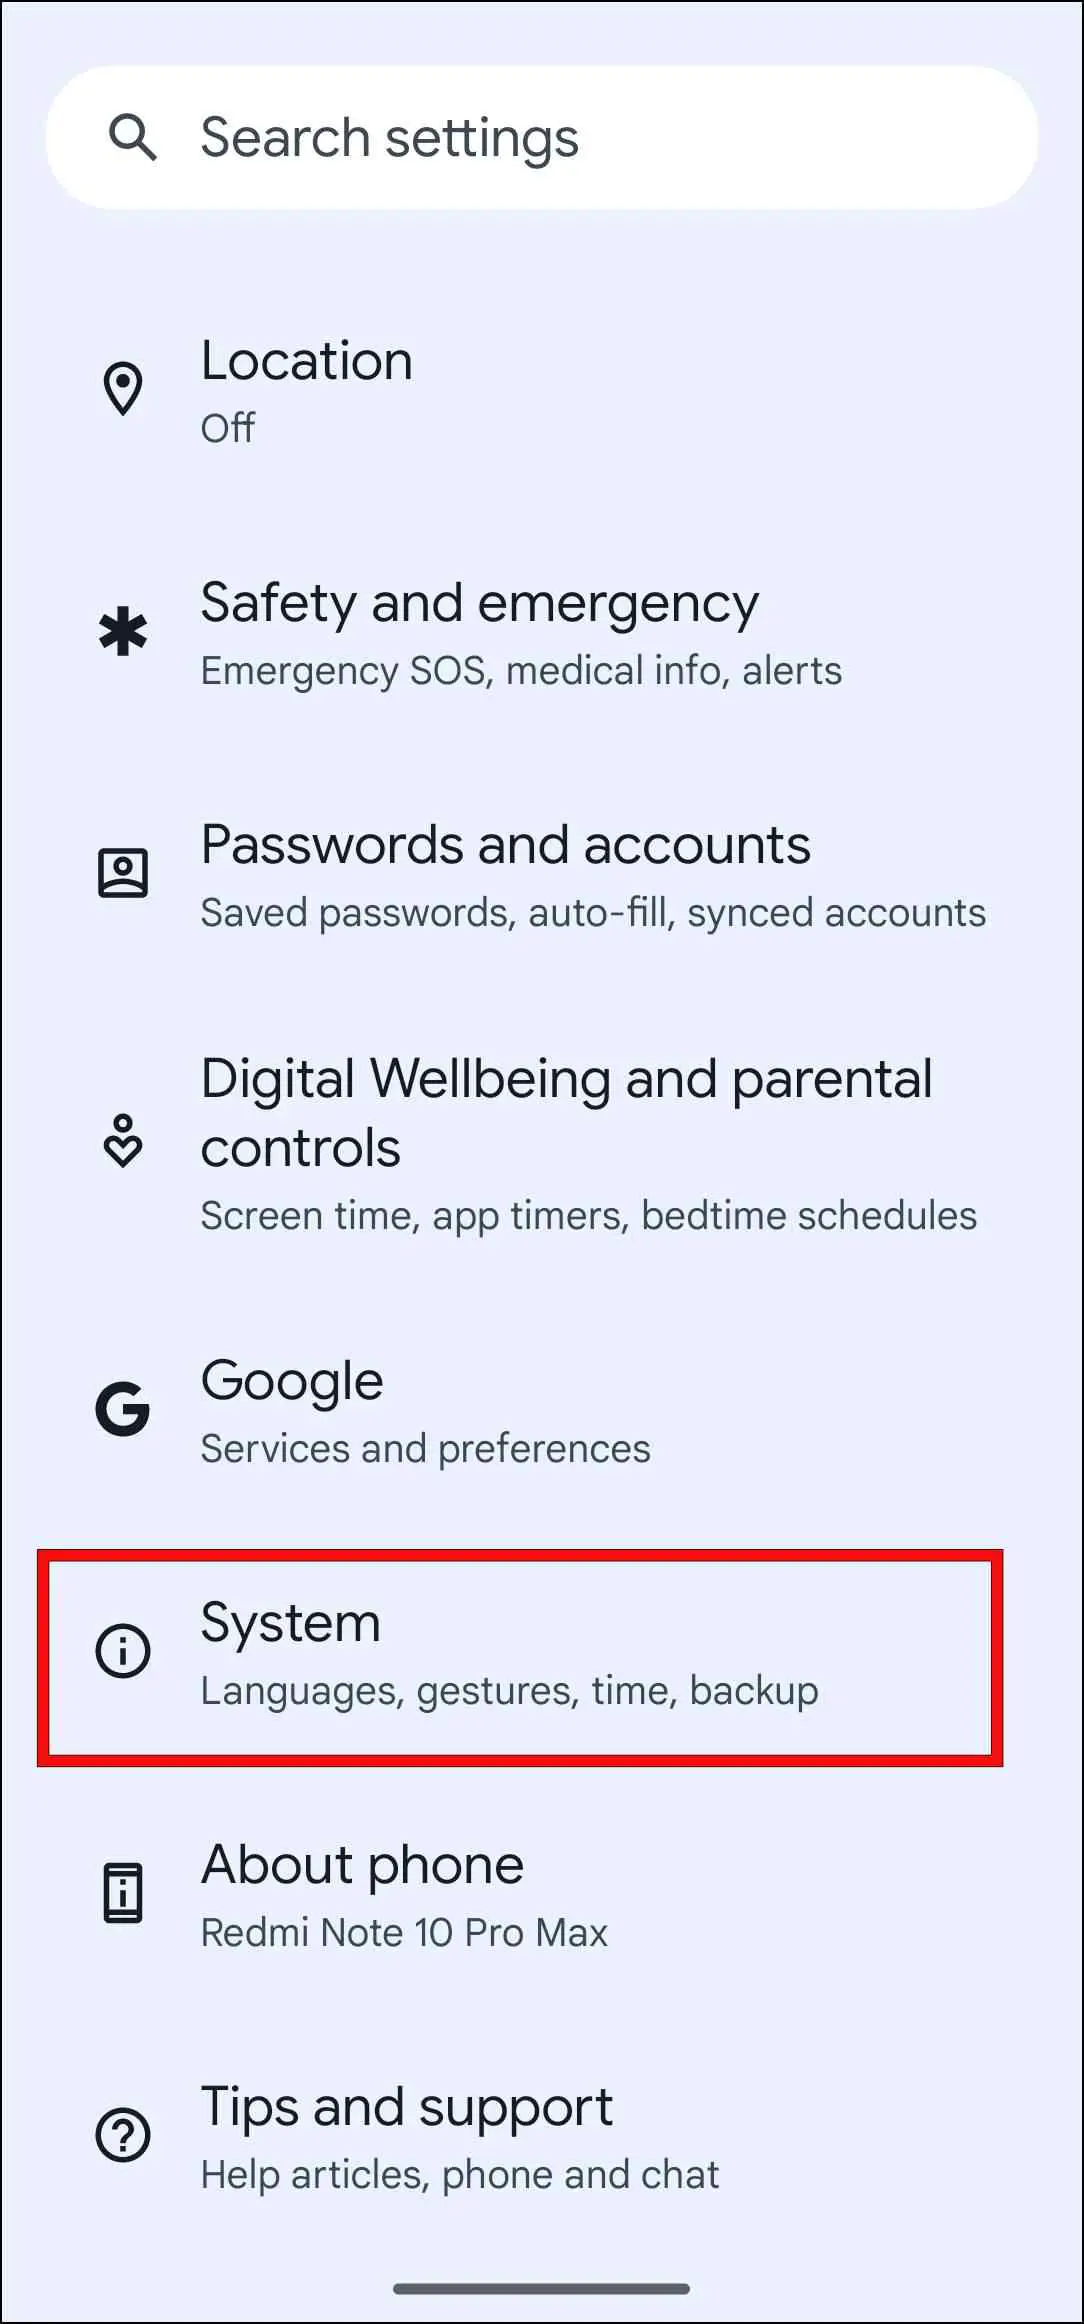
Step 2: Scroll down to System and tap on it.
Step 3: Go to Developer Options.

Note: To enable Developer Options, go to About Phone > Tap on the Build number 7 times.
Step 4: Scroll down to the Apps section.
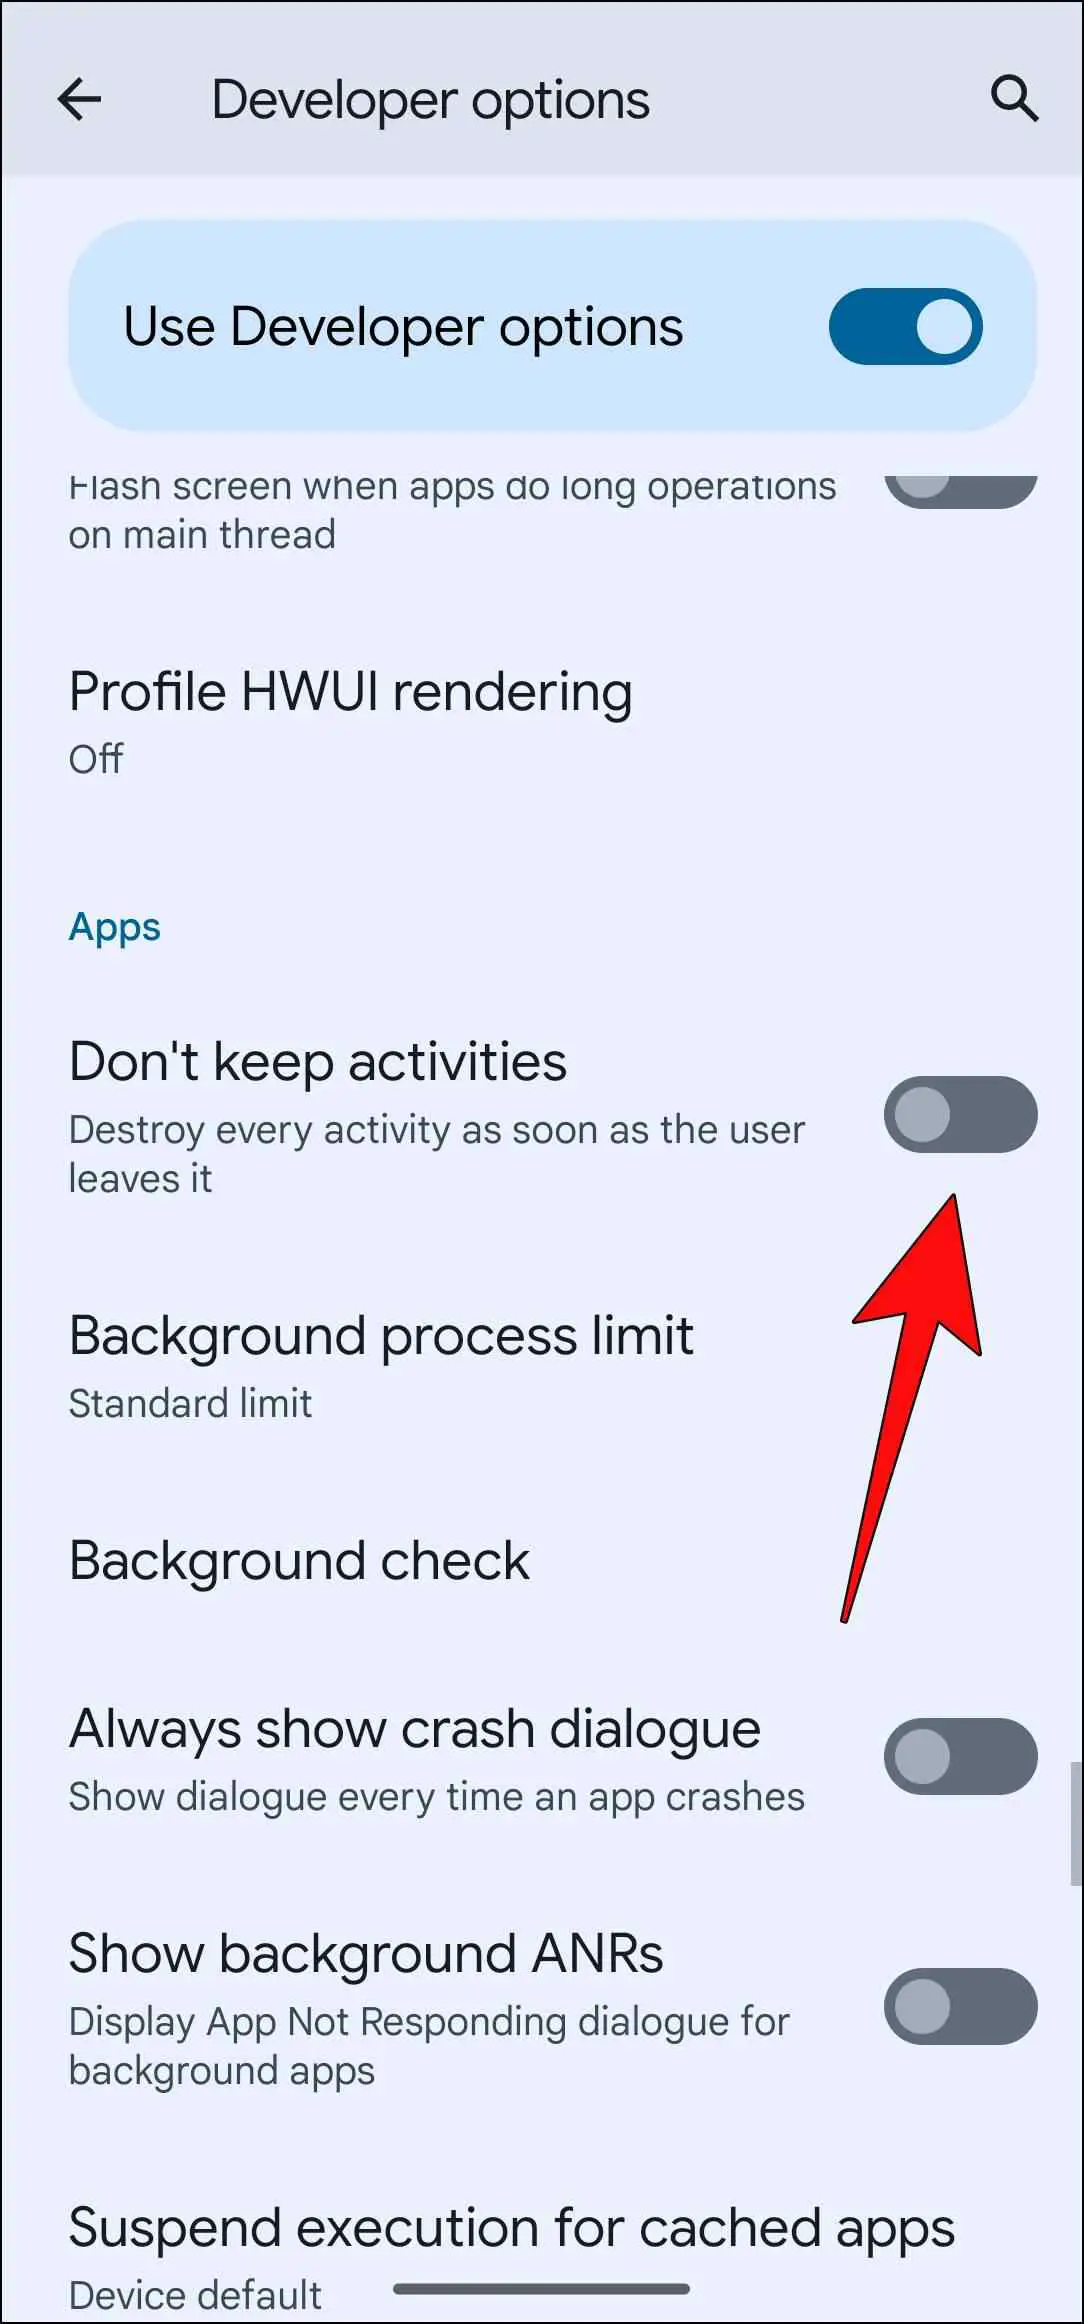
Step 5: Here, turn off the toggle for Don’t Keep activities.
Step 6: At last, restart your phone.
Disable “Strict Mode” from Developer Options
Some users have mentioned that disabling Strict Mode has also proven to fix the issue. You can find the Strict Mode setting within Developer Options. This setting flashes the screen when apps are running for a while on the main thread. You can try turning it off to check if it resolves the “Low memory” issue.
Step 1: Head over to Settings and go to System.
Step 2: Here, tap on Developer Options.

Step 3: Next, scroll down to Monitoring, then turn off the toggle for Strict mode enabled.
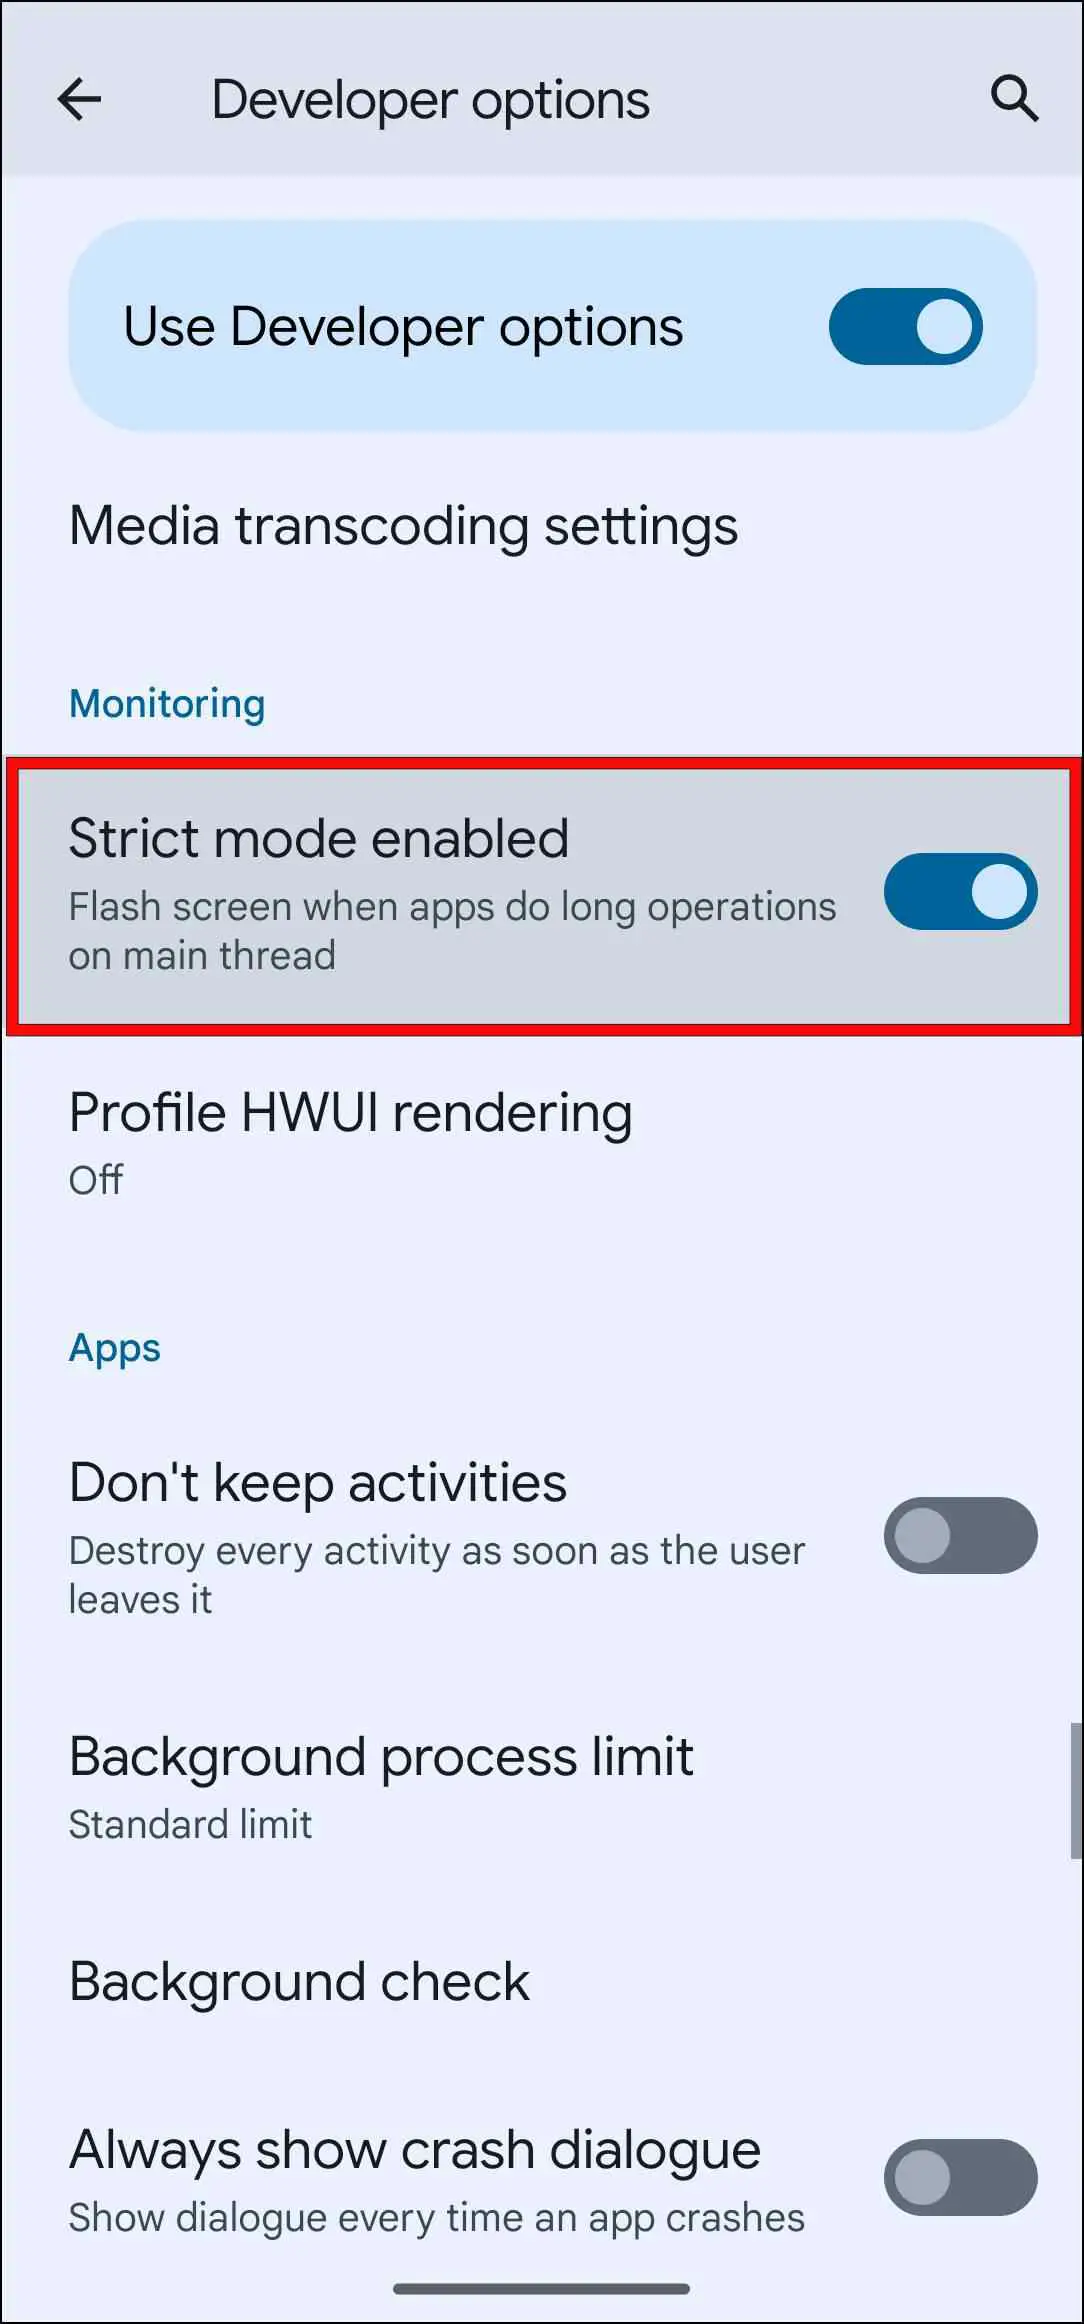
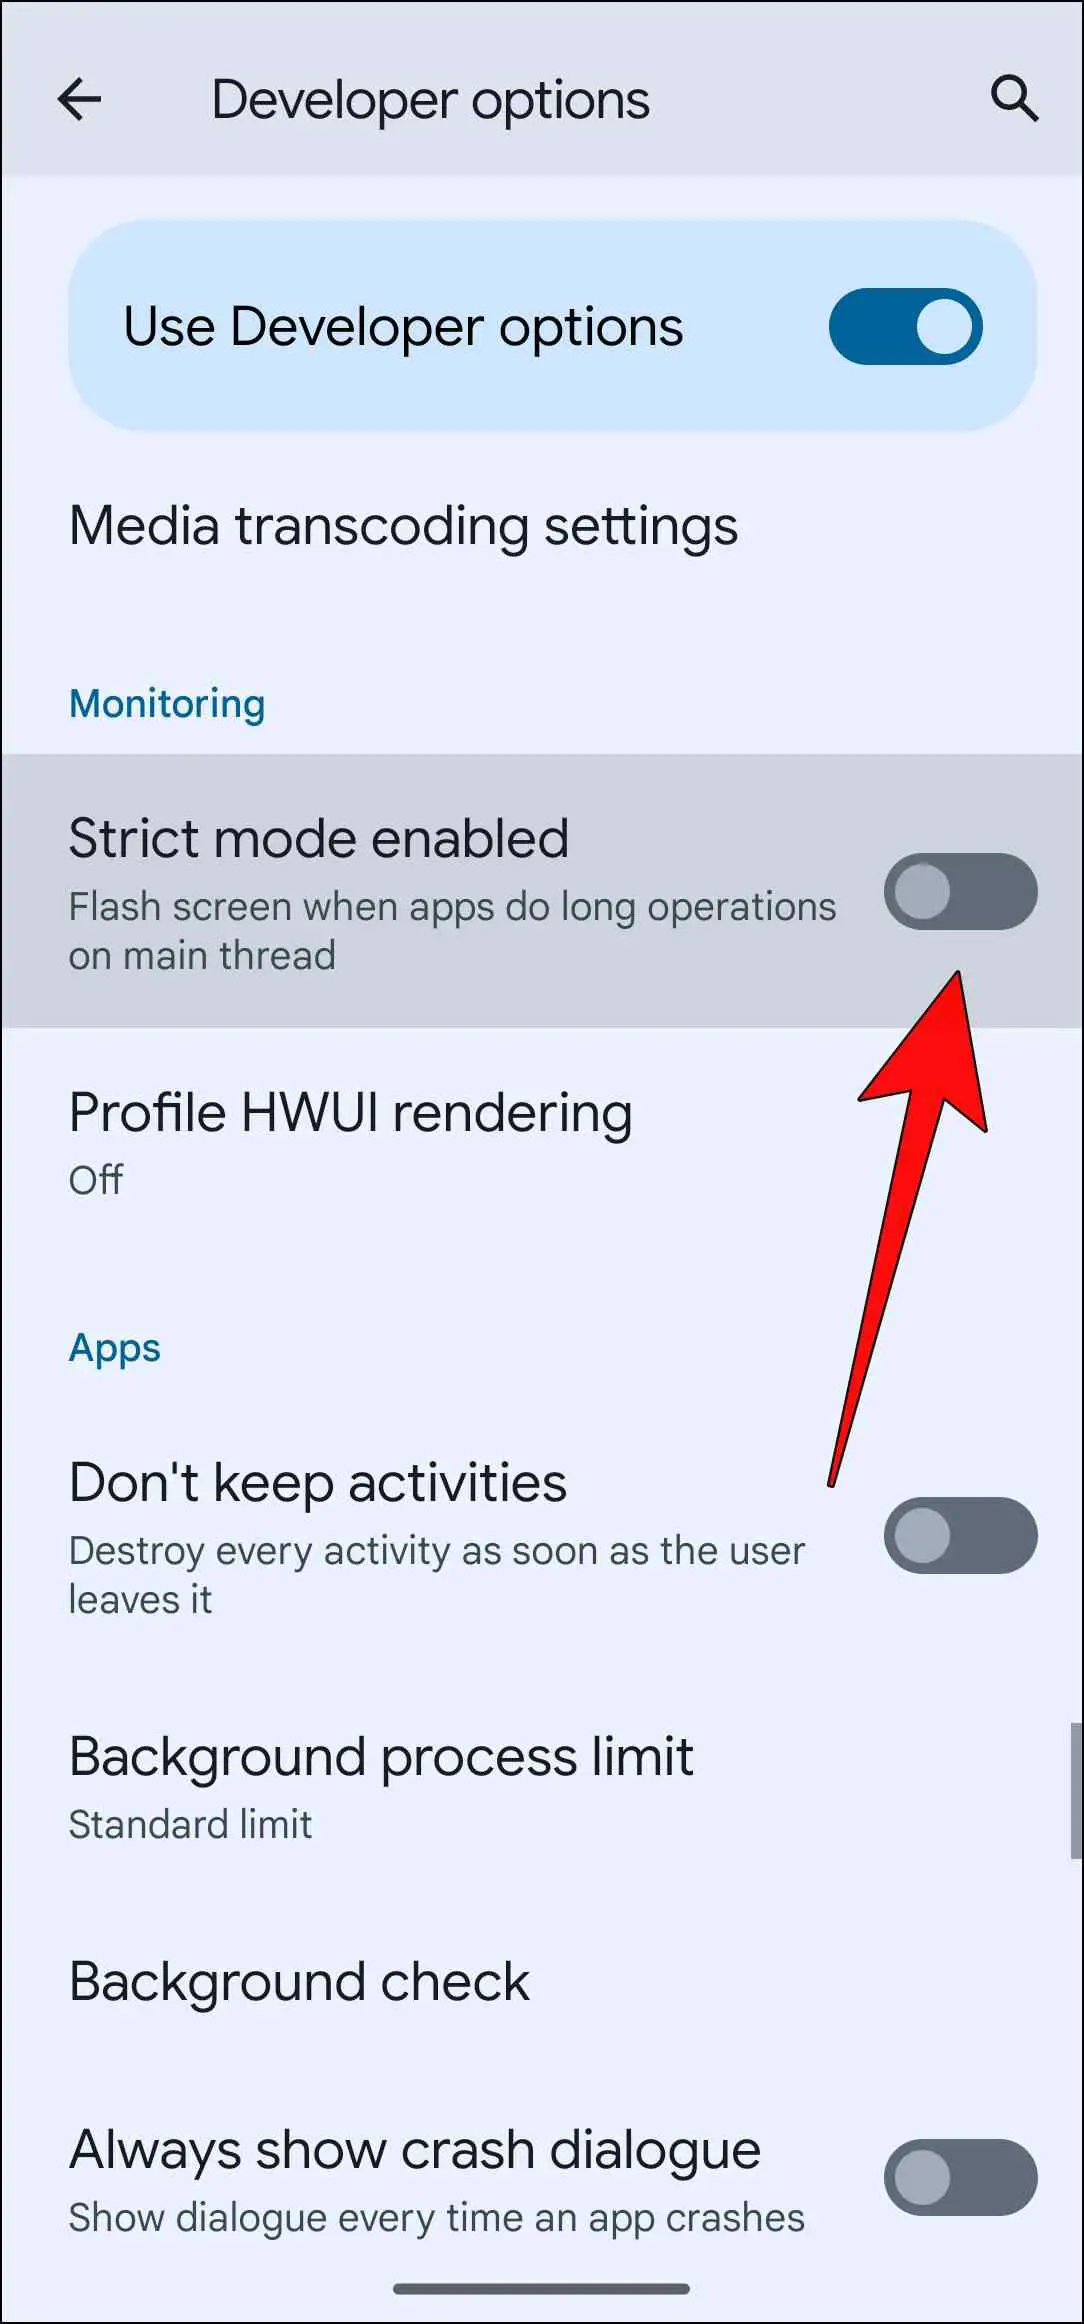
Step 4: Once disabled, reboot your device to apply changes.
Now go ahead and check whether Chrome still shows the error message.
Switch to a Lightweight Browser
If none of the above methods worked for you, and you still see the error message in Chrome, we recommend switching to another browser. You can try out other browsers developed to run on devices with limited memory and storage.
Some options you can try are Via browser, Aloha Lite, DuckDuckGo privacy browser, and Pure browser. Here are other Android browsers using less RAM and storage.
(Resolved) Unable to Complete Operation Due to Low Memory in Chrome
These are some ways that you can try out for yourself to overcome the “Unable to Complete Previous Operation due to low memory” message in Chrome on Android. If you have any further queries related to this article or the methods discussed above, then do reach out to us. Till then, stay tuned on BrowserToUse for more such articles, guides, and How-To’s on web browsers.
Related:


