
Many users have reported ads being removed in Chrome and other browsers with an error stating, “Ad Removed, This Ad Used Too Many Resources.” Here, we will explain the cause of the ad using too many resources error and answer what exactly are these resource-consuming heavy ads, followed by Google’s criteria to flag heavy and their disadvantages. We’ll also discuss how to disable resource-heavy ad warnings in Google Chrome.
Related | 3 Ways to Print Articles Without Ads in Edge, Firefox, Opera, Chrome
Why Do You see “Ad Removed, This Ad Used Too Many Resources” in Chrome?

With the release of the Chrome 85 update, Google released a heavy ad intervention tool, which targets and removes any ads consuming too many system resources and data, affecting your device performance and browsing experience.
The feature detects such heavy ads and unloads the ad’s contents, replacing them with a custom error message like “This ad used too many resources from your device so, Chrome removed it” or “Ad Removed, This Ad Used Too Many Resources.”
This is primarily done so that these ads don’t tax your system resources, which will make the browser and computer feel slow. To get an idea of the same, you can use extensions to monitor CPU and RAM usage in Chrome.
What Are Heavy Ads?

Any ad that uses more than the required amount of system resources within a given time frame can be classified as a heavy ad. These can include ads that contain high-resolution images, video ads, and interactive ads that lock or capture users’ mouse and controls.
Engineers at Chrome and Google have set official criteria. According to them, an ad is considered heavy if it meets any of these criteria:
- The user has not interacted with it (for example, has not tapped or clicked it)
- CPU usage for more than 60 seconds in total
- CPU usage for more than 15 seconds in any 30 second period
- Consumes more than 4MB of network bandwidth
If any of these conditions are met or crossed, then the ad will be flagged as a heavy ad, and Chrome will detect and unload the ad contents.
Disadvantages of Heavy Ads

Certain disadvantages come with Heavy ads. To help you understand better, we have discussed how different components of your device are affected.
CPU: They can consume excessive CPU resources causing random spikes in CPU usage, slower loading speeds, stuttering, and lag while trying to browse a website and increased battery consumption on laptops or mobile devices.
RAM: Heavy ads can end up taking up plenty of resources on your RAM, which results in long loading times, background tabs being closed forcefully, and the page or the browser becoming unresponsive and crashing.
Network Bandwidth: These resource-heavy ads may also hog your data, leading to slow loading speeds of other contents of the site and depleting your data limit if you have a data plan.
Using the Heavy Ad Intervention feature helps save 16% of CPU resources and 12.8% of network usage. Here’s our detailed guide to making Chrome use less RAM and CPU.
How to Enable or Disable Heavy Ad Intervention tool in Chrome
You cannot access these settings as they have been removed from the recent versions of Chrome. But if you are running an earlier build like Chrome 85 or older, you can enable or disable the intervention tool using the steps below.
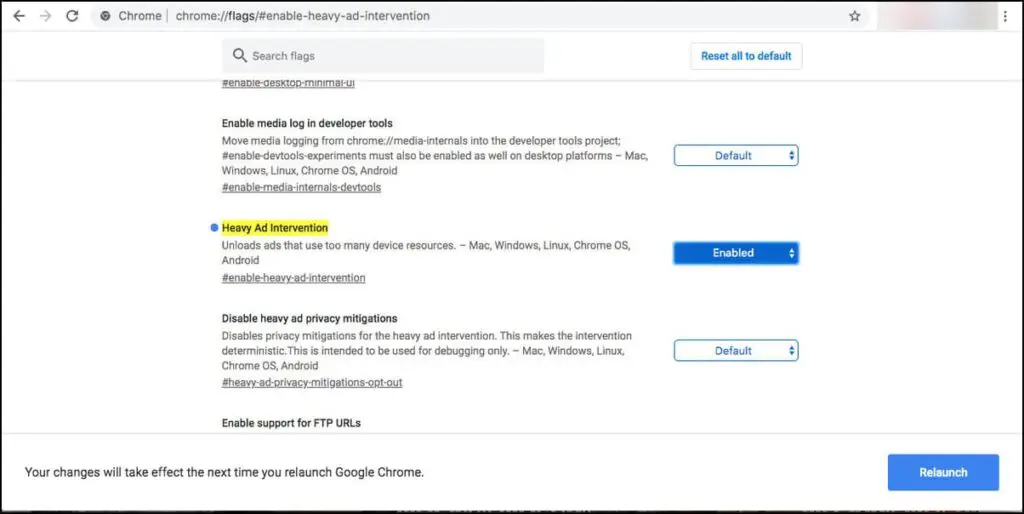
Step 1: Open Chrome. Type and enter chrome://flags in the address bar.
Step 2: Search for “heavy ads intervention” or directly go to this Chrome flag: chrome://flags/#heavy-ad-privacy-mitigations.
Step 3: Set it to Disabled to remove Heavy ad protection or Enabled to turn on the intervention tool.
Finally, restart your Chrome browser using the given button.
How Does the Ad Removed Message Affect You?
As a user, the heavy ad intervention tool does not affect you. If you come across an Ad removed message on a website, then you can rest assured that the tool did its job and unloaded the annoying ad before it could hog your system resources and ruin your browsing experience.
Bonus- Block Only Bad Ads Using Chrome Extension
Ads play an essential role in keeping your favorite content or website free on the internet. Ads are one of the primary sources of websites, and other content creators earn revenue online. We recommend you to use Fair Adblocker, which helps you block certain types of ads while allowing you to whitelist your favorite website and creators to support them. Let us take a look at how to set it up:
Step 1: Download the Fair Adblocker extension from the Chrome Web Store.
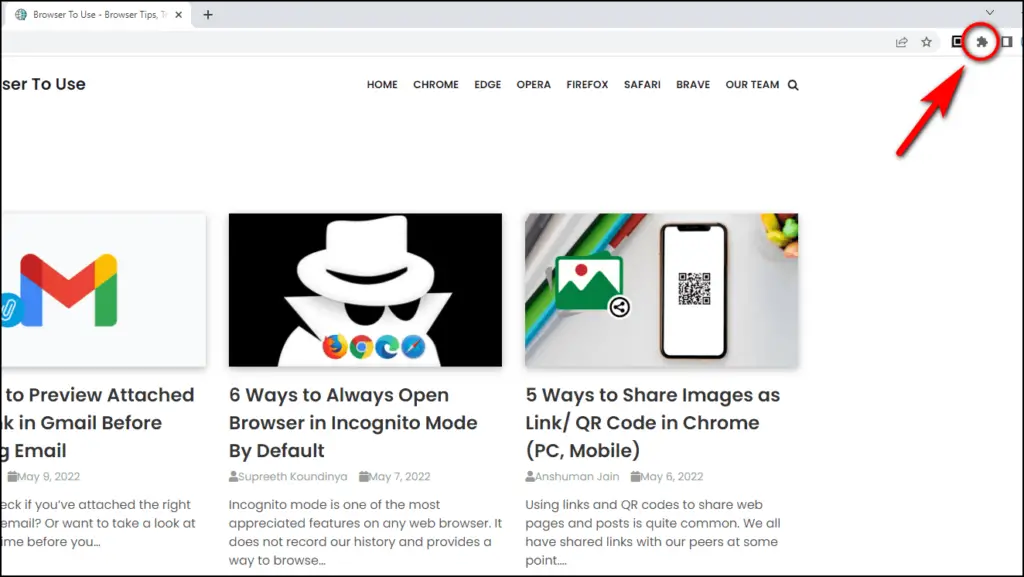
Step 2: Click on the extension icon at the top right corner of the address bar.
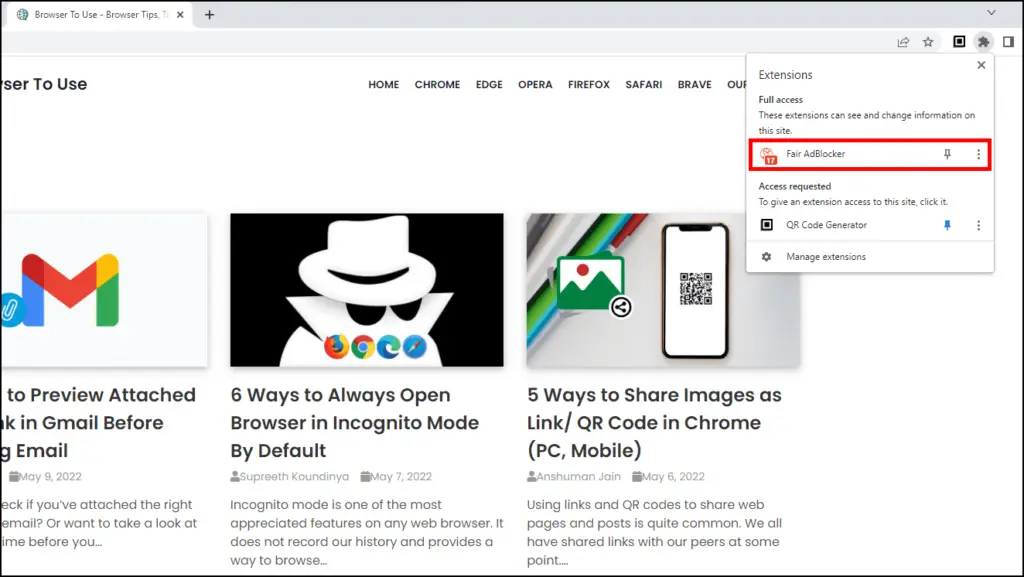
Step 3: Now, again, click on the Fair Adblocker extension to launch it.
Step 4: Go to Adblocker settings as shown below.

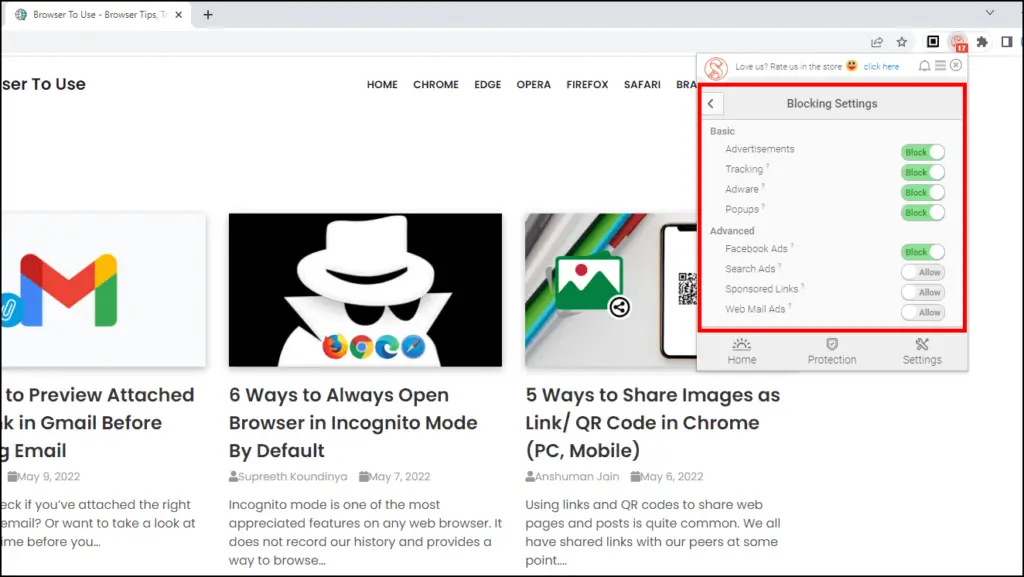
Step 5: Here, select Block settings.

Step 6: Toggle Block and Allow the type of ads you want to see.
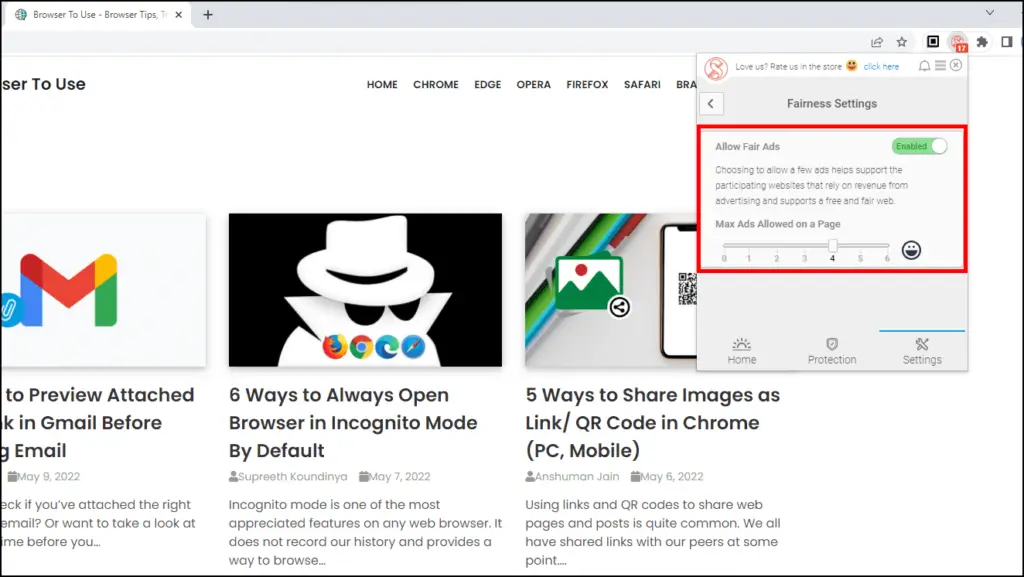
Step 6: Go back and select Fairness settings. Here you can adjust the max number of ads you want to allow per page.
Step 7: Go to Whitelisted Sites and enter the URL of the website you want to whitelist, and click on Add Site to allow ads on the site to support it.

Once you are satisfied with your selections, you can browse the web as usual, and you will not see any unwanted types of ads while still supporting your preferred sites.
Wrapping Up
The team at Chrome is constantly working on creating more such tools and features to ensure that we do not come across such ads and other annoyances. They have already rolled out a feature that blocks third-party cookies, with more to come soon. Blocking heavy ads also helps advertisers improve their products to attract user attention without consuming a lot of resources. We hope you enjoyed this guide, and stay tuned to Browsers Tp Use for more such amazing guides and How to’s.


