
Google Chrome is one of the most widely used web browsers across the globe. It offers breezy performance in comparison to other web browsers. On the contrary, it does eat a lot of resources, and at times, it gets quite laggy, especially while scrolling pages on websites. This, of course, defeats the entire purpose of using Chrome, as most of us opt for it for performance. Thankfully, there are a few methods to enable smooth scrolling in Google Chrome.
Related | 7 Instant Ways to Load Pages Faster in Chrome
What is Smooth Scrolling?

Smooth scrolling is a feature that enables you to scroll and vertically navigate smoothly on a website. Scrolling sometimes might get sluggish and slow for various reasons, and having a smooth scrolling option enabled ensures it does not happen.
Smooth scrolling not only works with your mouse but even on your keyboard – as you use the Page Down button to scroll down, it does not jump directly down one page, and you will experience a much smoother scrolling performance.
Enable Smooth Scrolling in Chrome
While there are a lot of methods and extensions that claim to enable smooth scrolling on Google Chrome, here are three of our tried and tested methods that actually work and solve the problem of sluggish and jerky scrolling.
Method 1- Enable Smooth Scrolling Via Flags
If you didn’t know, Chrome flags are an array of experimental features, and most of these help you enhance your browsing experience. Smooth Scrolling is one such toggle, and here’s how to enable it :
Step 1: Type in chrome://flags in the address bar.
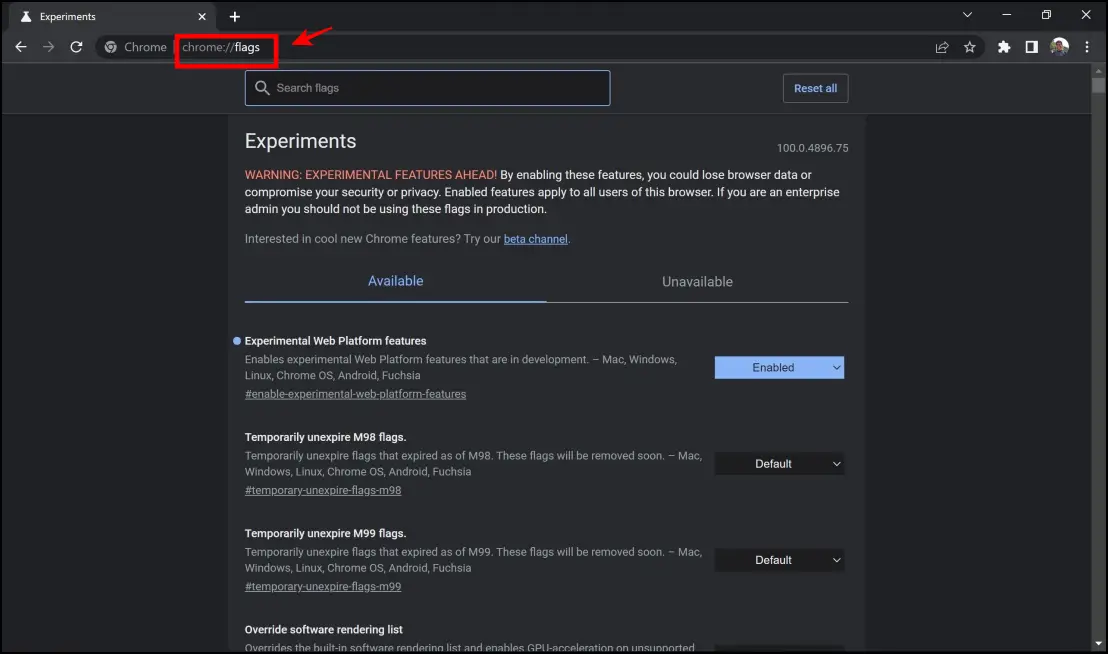
Step 2: You will now land on the flags page. In the search box, type in and search “smooth scrolling.”

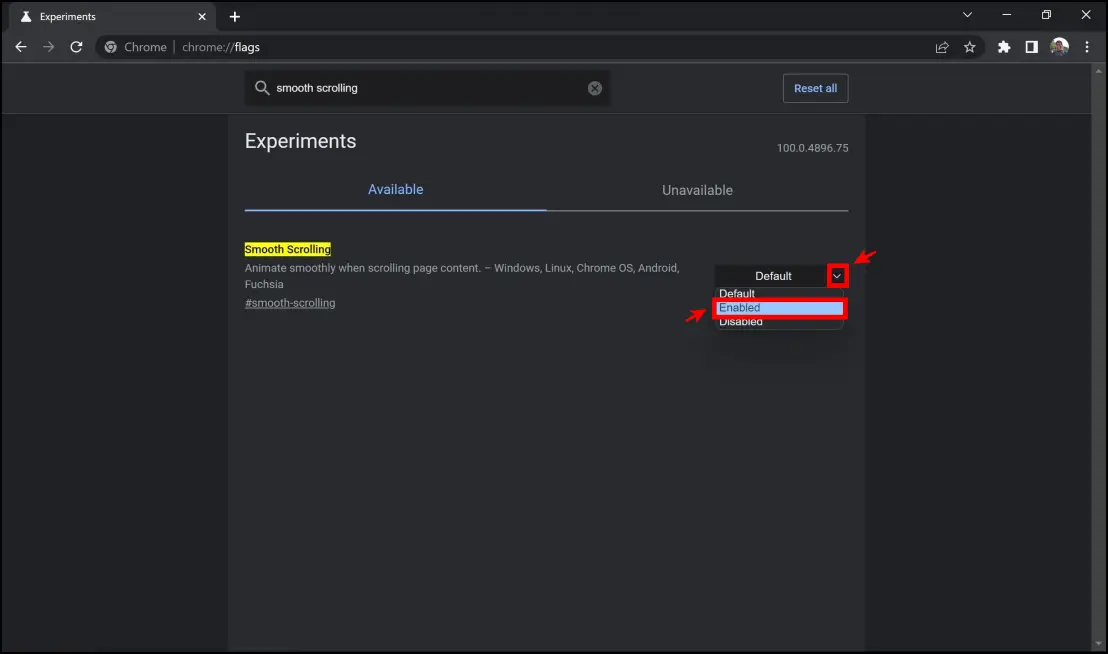
Step 3: The smooth scrolling option will now appear. Click on the drop-down menu, and click on Enabled.
Step 4: You will be now asked to relaunch Google Chrome. Click on Relaunch.
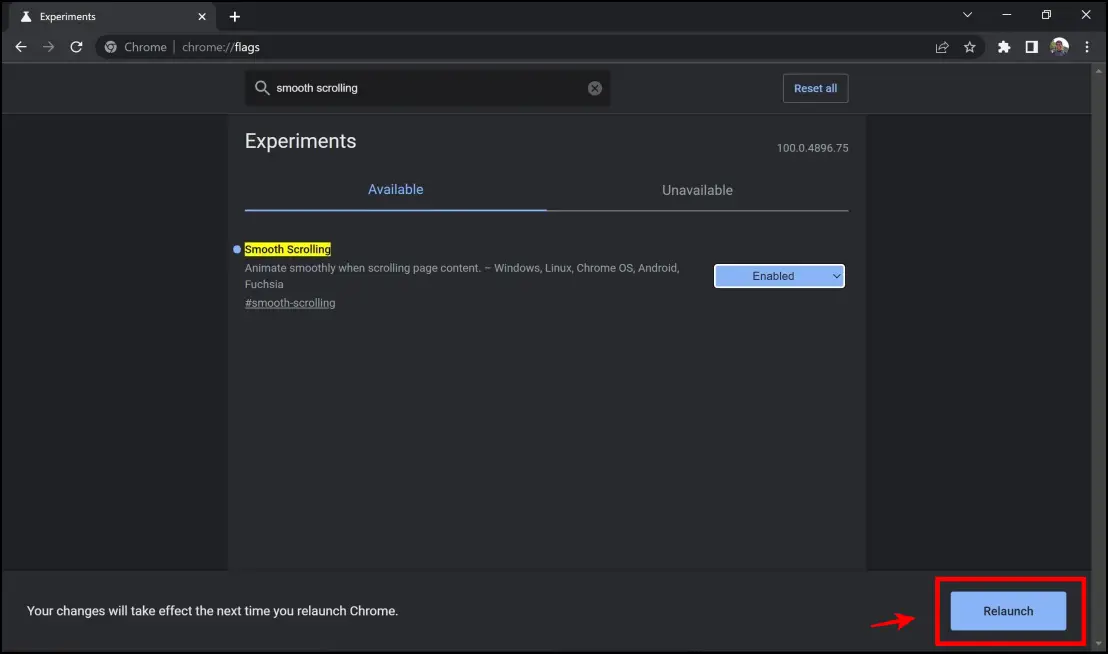
The feature will now take effect, and smooth scrolling will be enabled on Google Chrome.
Method 2- Smooth Scroll Extension
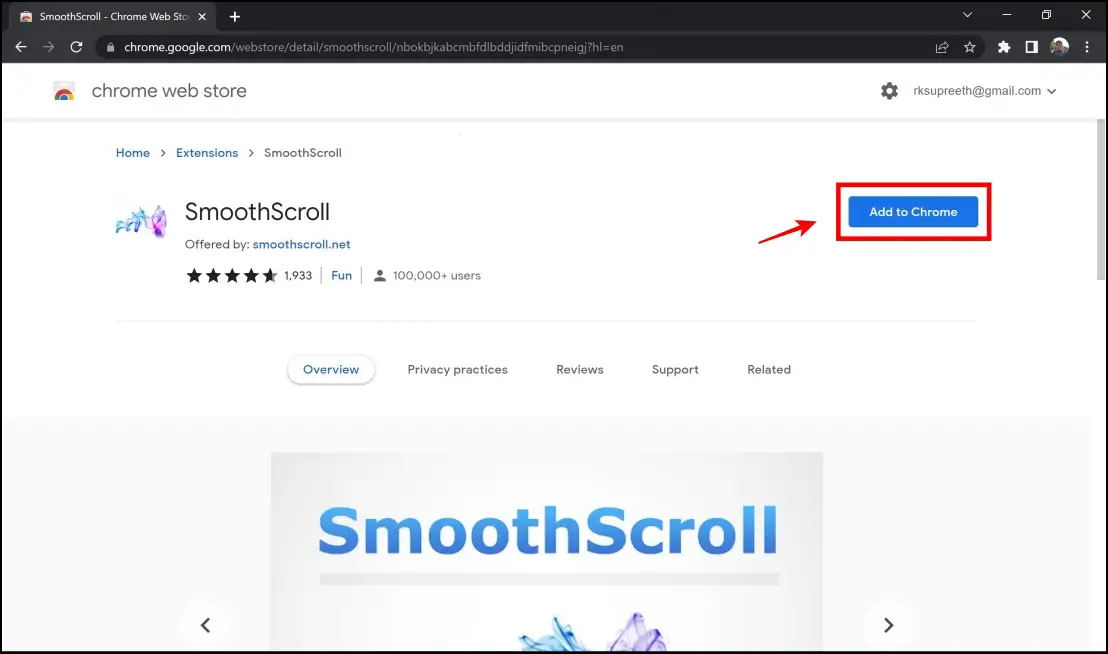
If the flag option in the previous method does not work, we have got you covered with an extension that lets you enable smooth scrolling on Google Chrome. The SmoothScroll extension has over 100,000+ users and gets the job done. Here’s a step-by-step procedure to install and configure the extension.
Step 1: Visit the SmoothScroll extension page. Click on Add to Chrome > Add Extension.
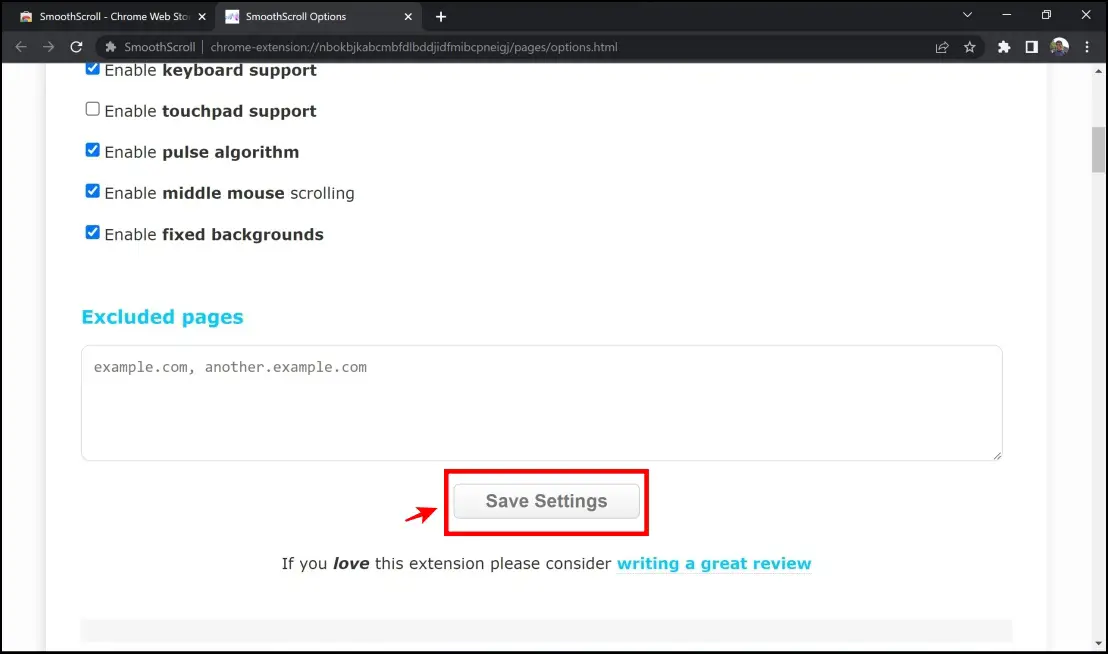
Step 2: Once you install the extension, you will be automatically redirected to the options page. Scroll down to find the Save Settings button. Clicking it will activate the extension to enable smooth scrolling on Google Chrome.
Step 3: The extension provides you with many options to tweak the scrolling parameters. For the same, click the extension’s menu on the top right corner of the toolbar.
Step 4: Tap the three dots icon next to SmoothScroll.
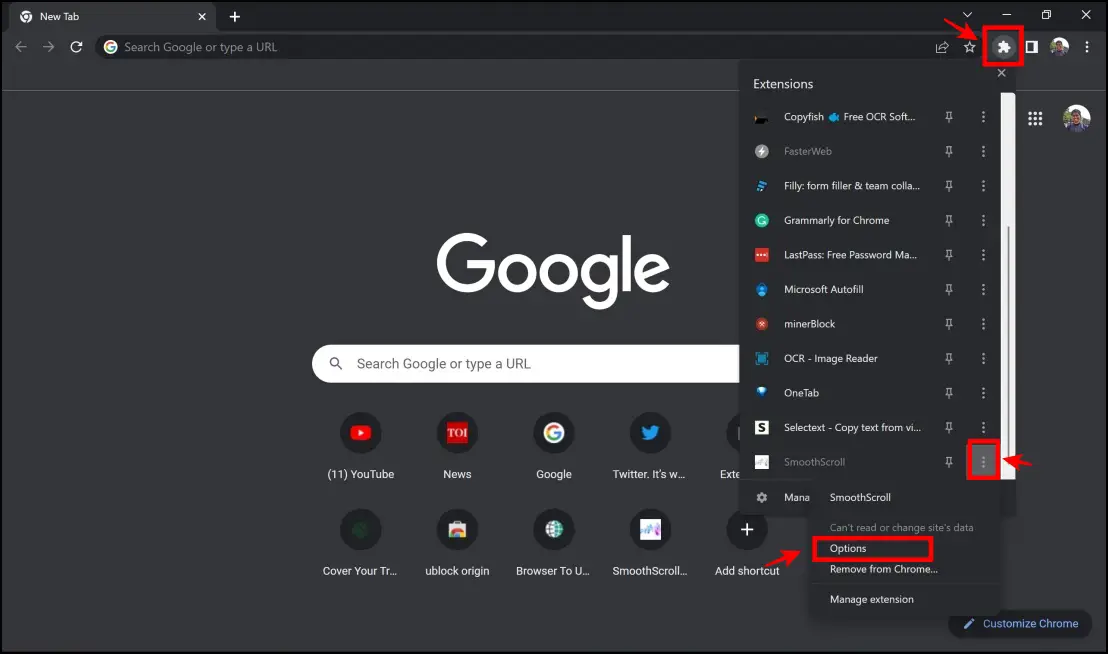
Step 5: Click on Options.
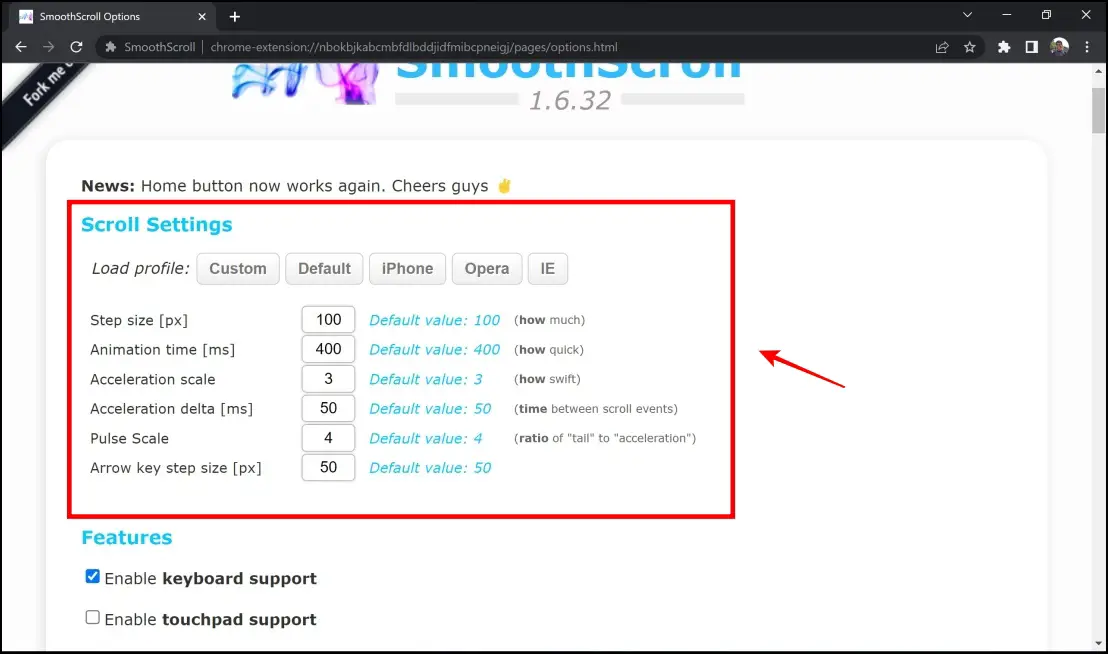
Once you land on the options page, you see different options to play around with. You can change the default values in the fields provided against what it does. We really appreciate this feature and the short description next to each feature, making it even more user-friendly.
Method 3- Smooth Scrolling with 60fps
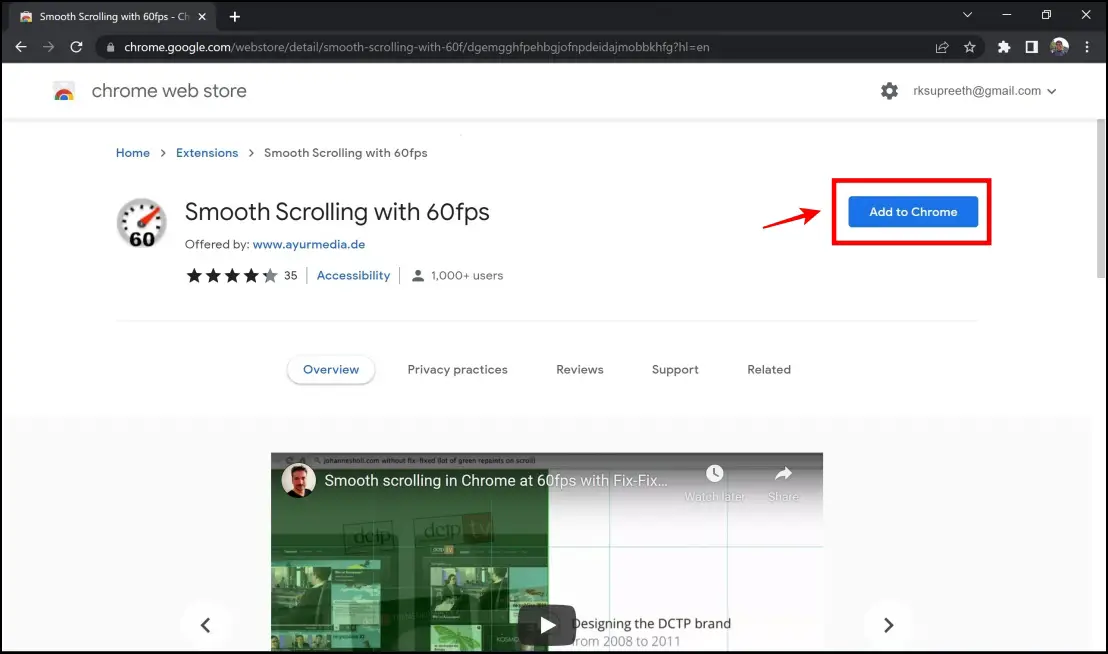
Another extension that lets you enable smooth scrolling on Google Chrome is the Smooth Scrolling with 60fps. It is quite a simple and one-click extension, and here’s how to use it.
Step 1: Visit the Smooth Scrolling with 60fps extension page. Click on Add to Chrome > Add Extension.
Step 2: Once you install the extension, it is automatically activated. Here’s how to check – click on the extension icon on the top right corner of the toolbar.
Step 3: If it says “off” on Smooth Scrolling with 60fps extension, it is not activated.
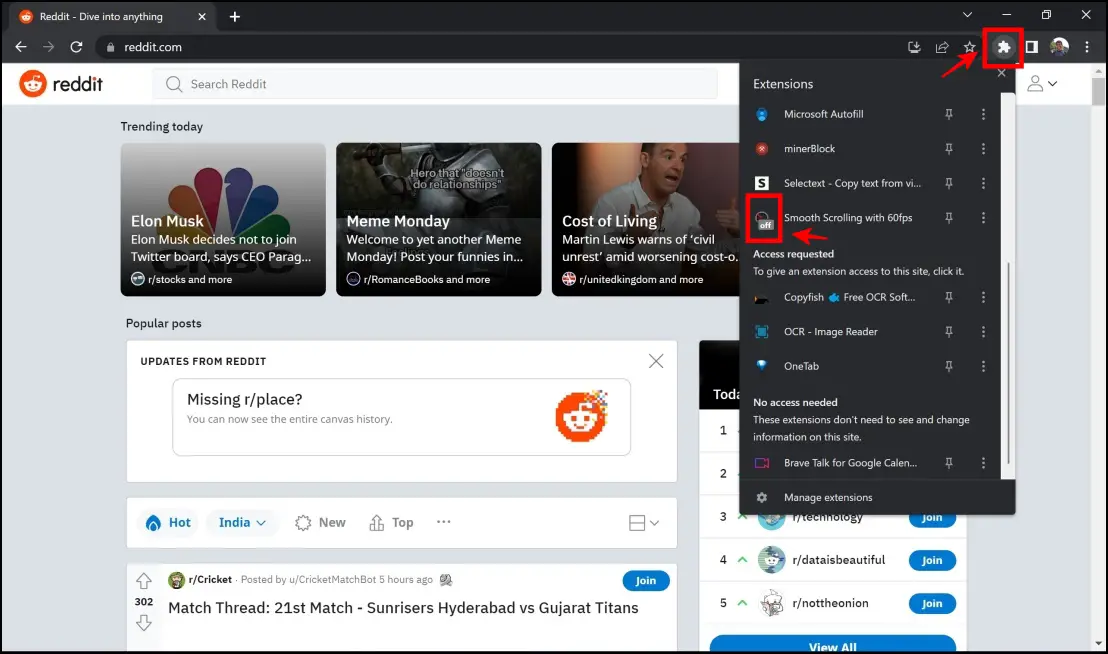
Step 4: In order to activate this, you have to click on the extension. It will now be enabled, and the “off” sign will disappear.

Method 4- Smooth Scrolling for Logitech Mouse Users
A mouse lets you scroll pages, and if your’s is made by Logitech, you get additional exclusive tools to enable smooth scrolling Google Chrome and everywhere across your computer.
Logitech Options Tool
The Logitech options tool offers you a set of options using which you can enhance your experience with your optical mouse. Here’s how to install and customize smooth scrolling.
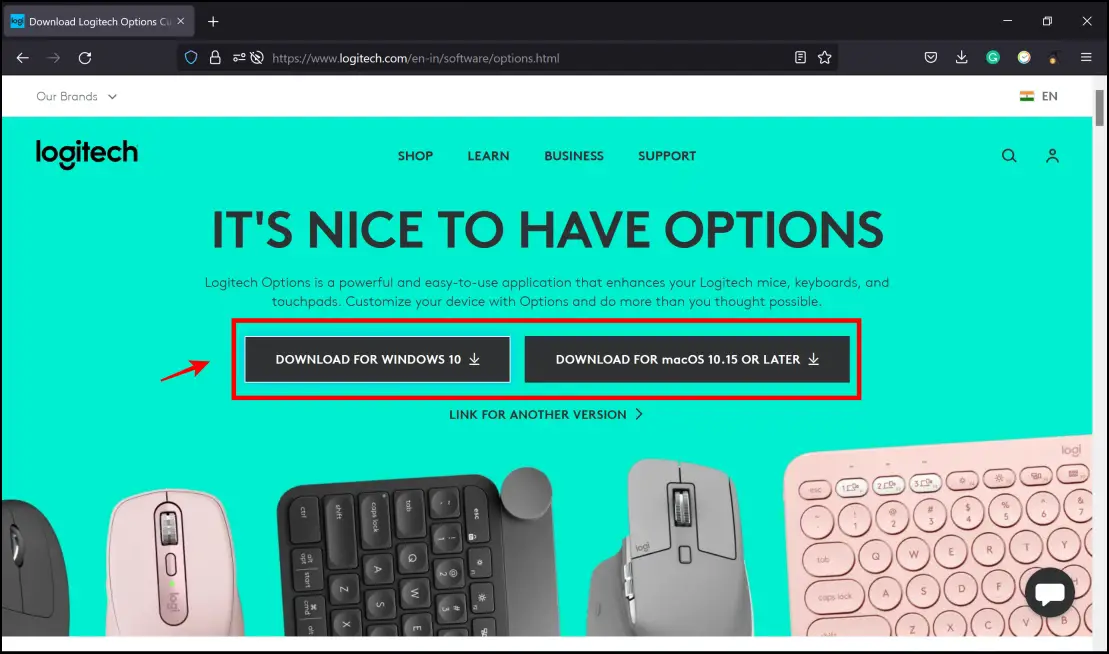
Step 1: Visit the Logitech Options Installation Page.
Step 2: Download and install the version compatible with your operating system.
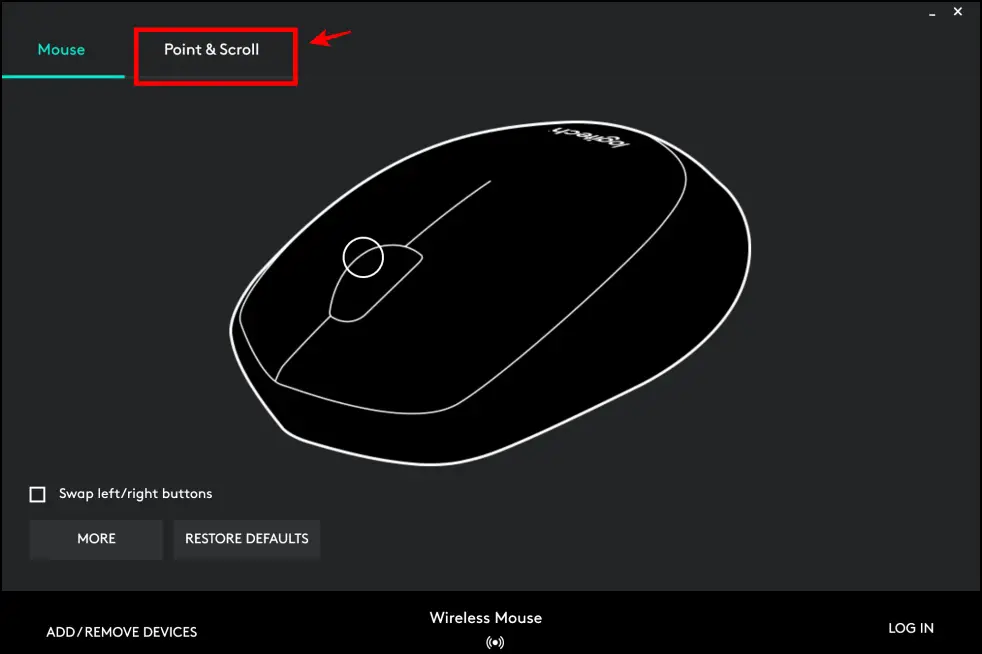
Step 3: After you complete the installation, click on the Point & Scroll section on the main screen.
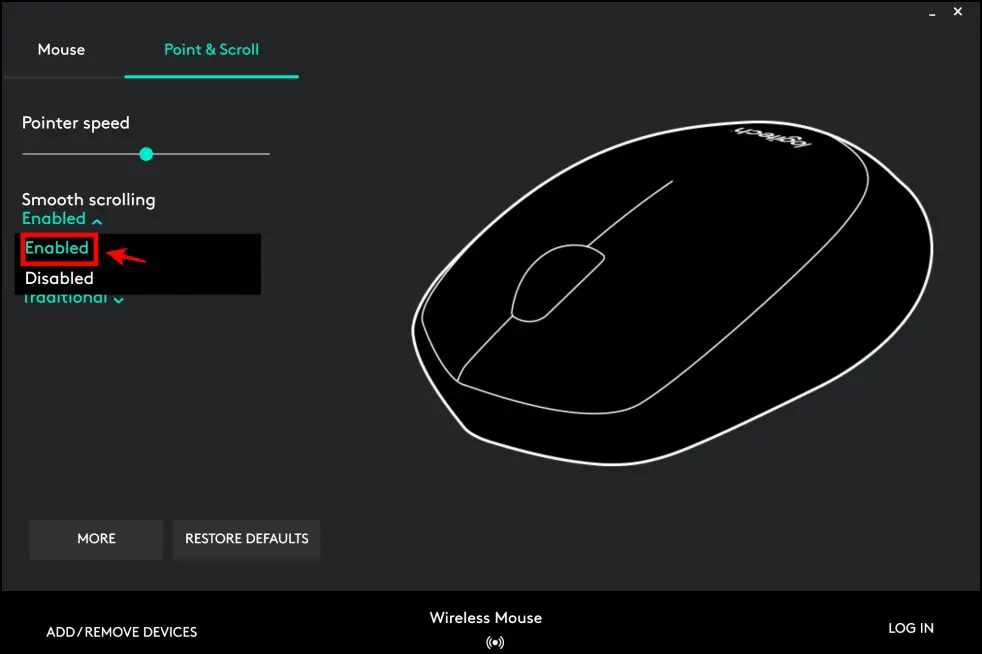
Step 4: Click on the drop-down menu and click on Enabled. This will enable systemwide smooth scrolling as long as you use the same Logitech mouse.
Logitech Smooth Scrolling Extension on Chrome
If you specifically want to enable smooth scrolling on Google Chrome with a Logitech mouse, there is an extension that allows you to do the same.
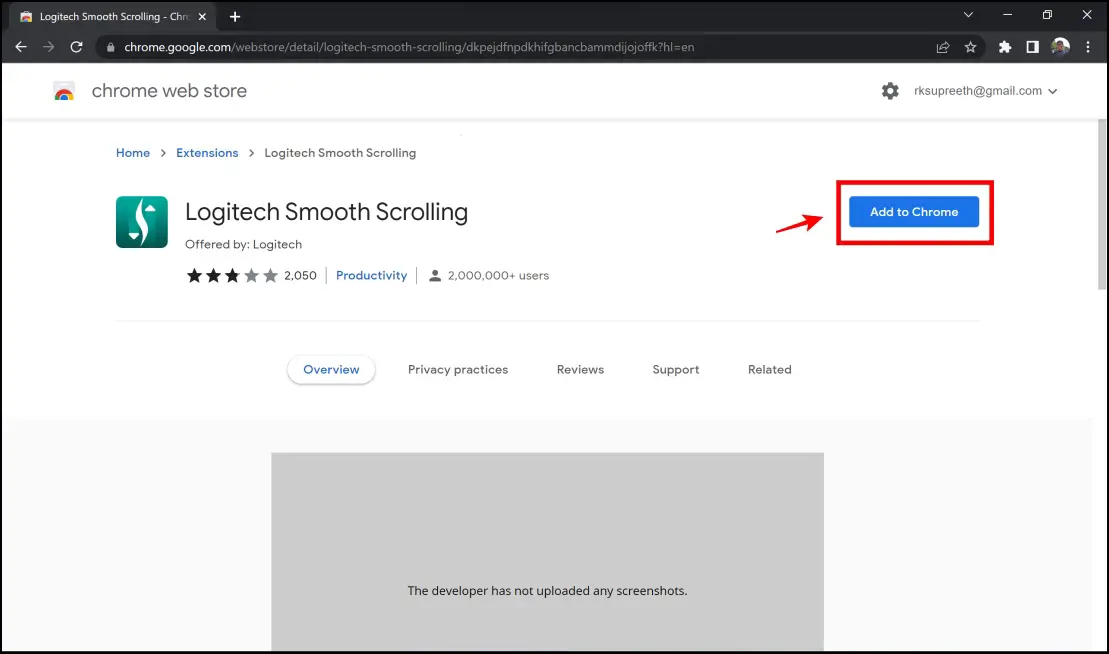
Step 1: Visit the Logitech Smooth Scrolling extension page.
Step 2: Click on Add to Chrome > Add Extension.
That’s all you need to do to activate the extension and the smooth scrolling feature that comes with it.
Also, read | 3 Ways to Capture Full Page Scrolling Screenshots in Google Chrome
Other Ways to Improve Scrolling Performance on Google Chrome
If you ended up using the methods mentioned above and are still experiencing sluggish scrolling, maybe it’s time to look into a few general methods to improve performance on Chrome. Here are some of the methods worth exploring to try and enable smooth scrolling on Google Chrome.
Clear Data
Chrome collects and locally stores a lot of data related to your browsing activity. This accumulation can increase memory usage, and clearing data is an effective method to improve the overall performance of Google Chrome.
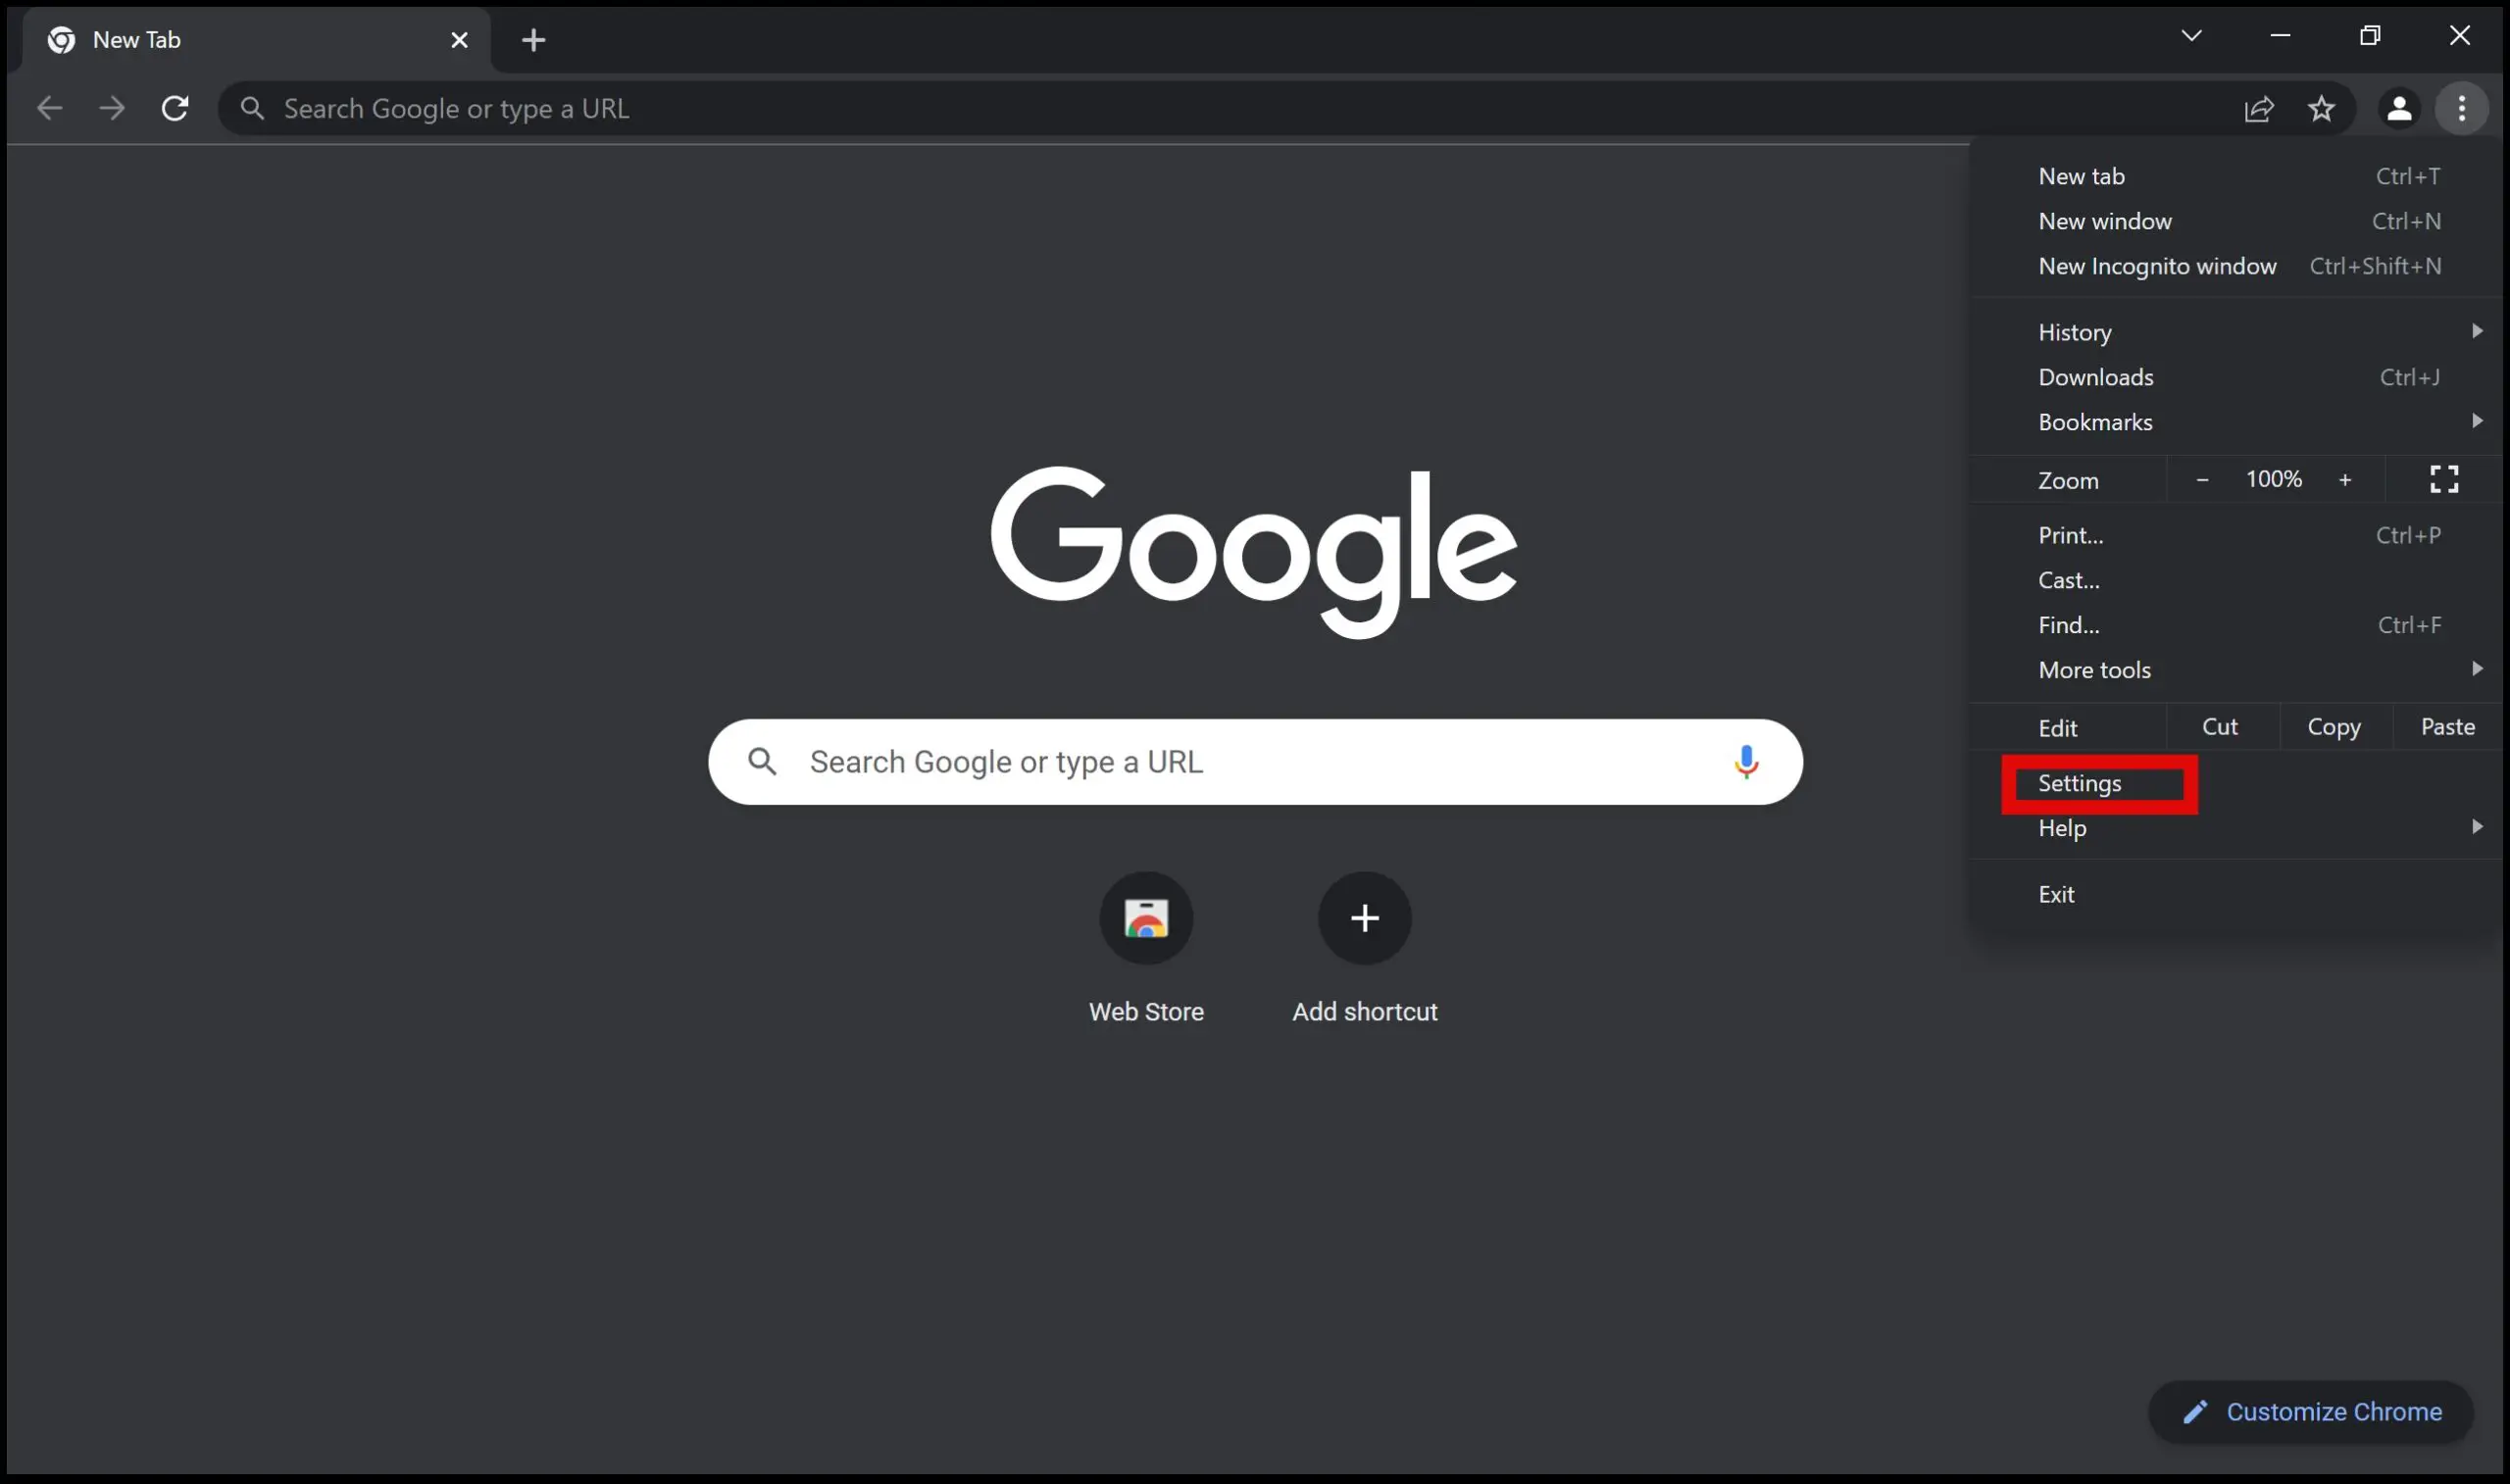
Step 1: Click the three-dot menu icon at the top right > Click on Settings.
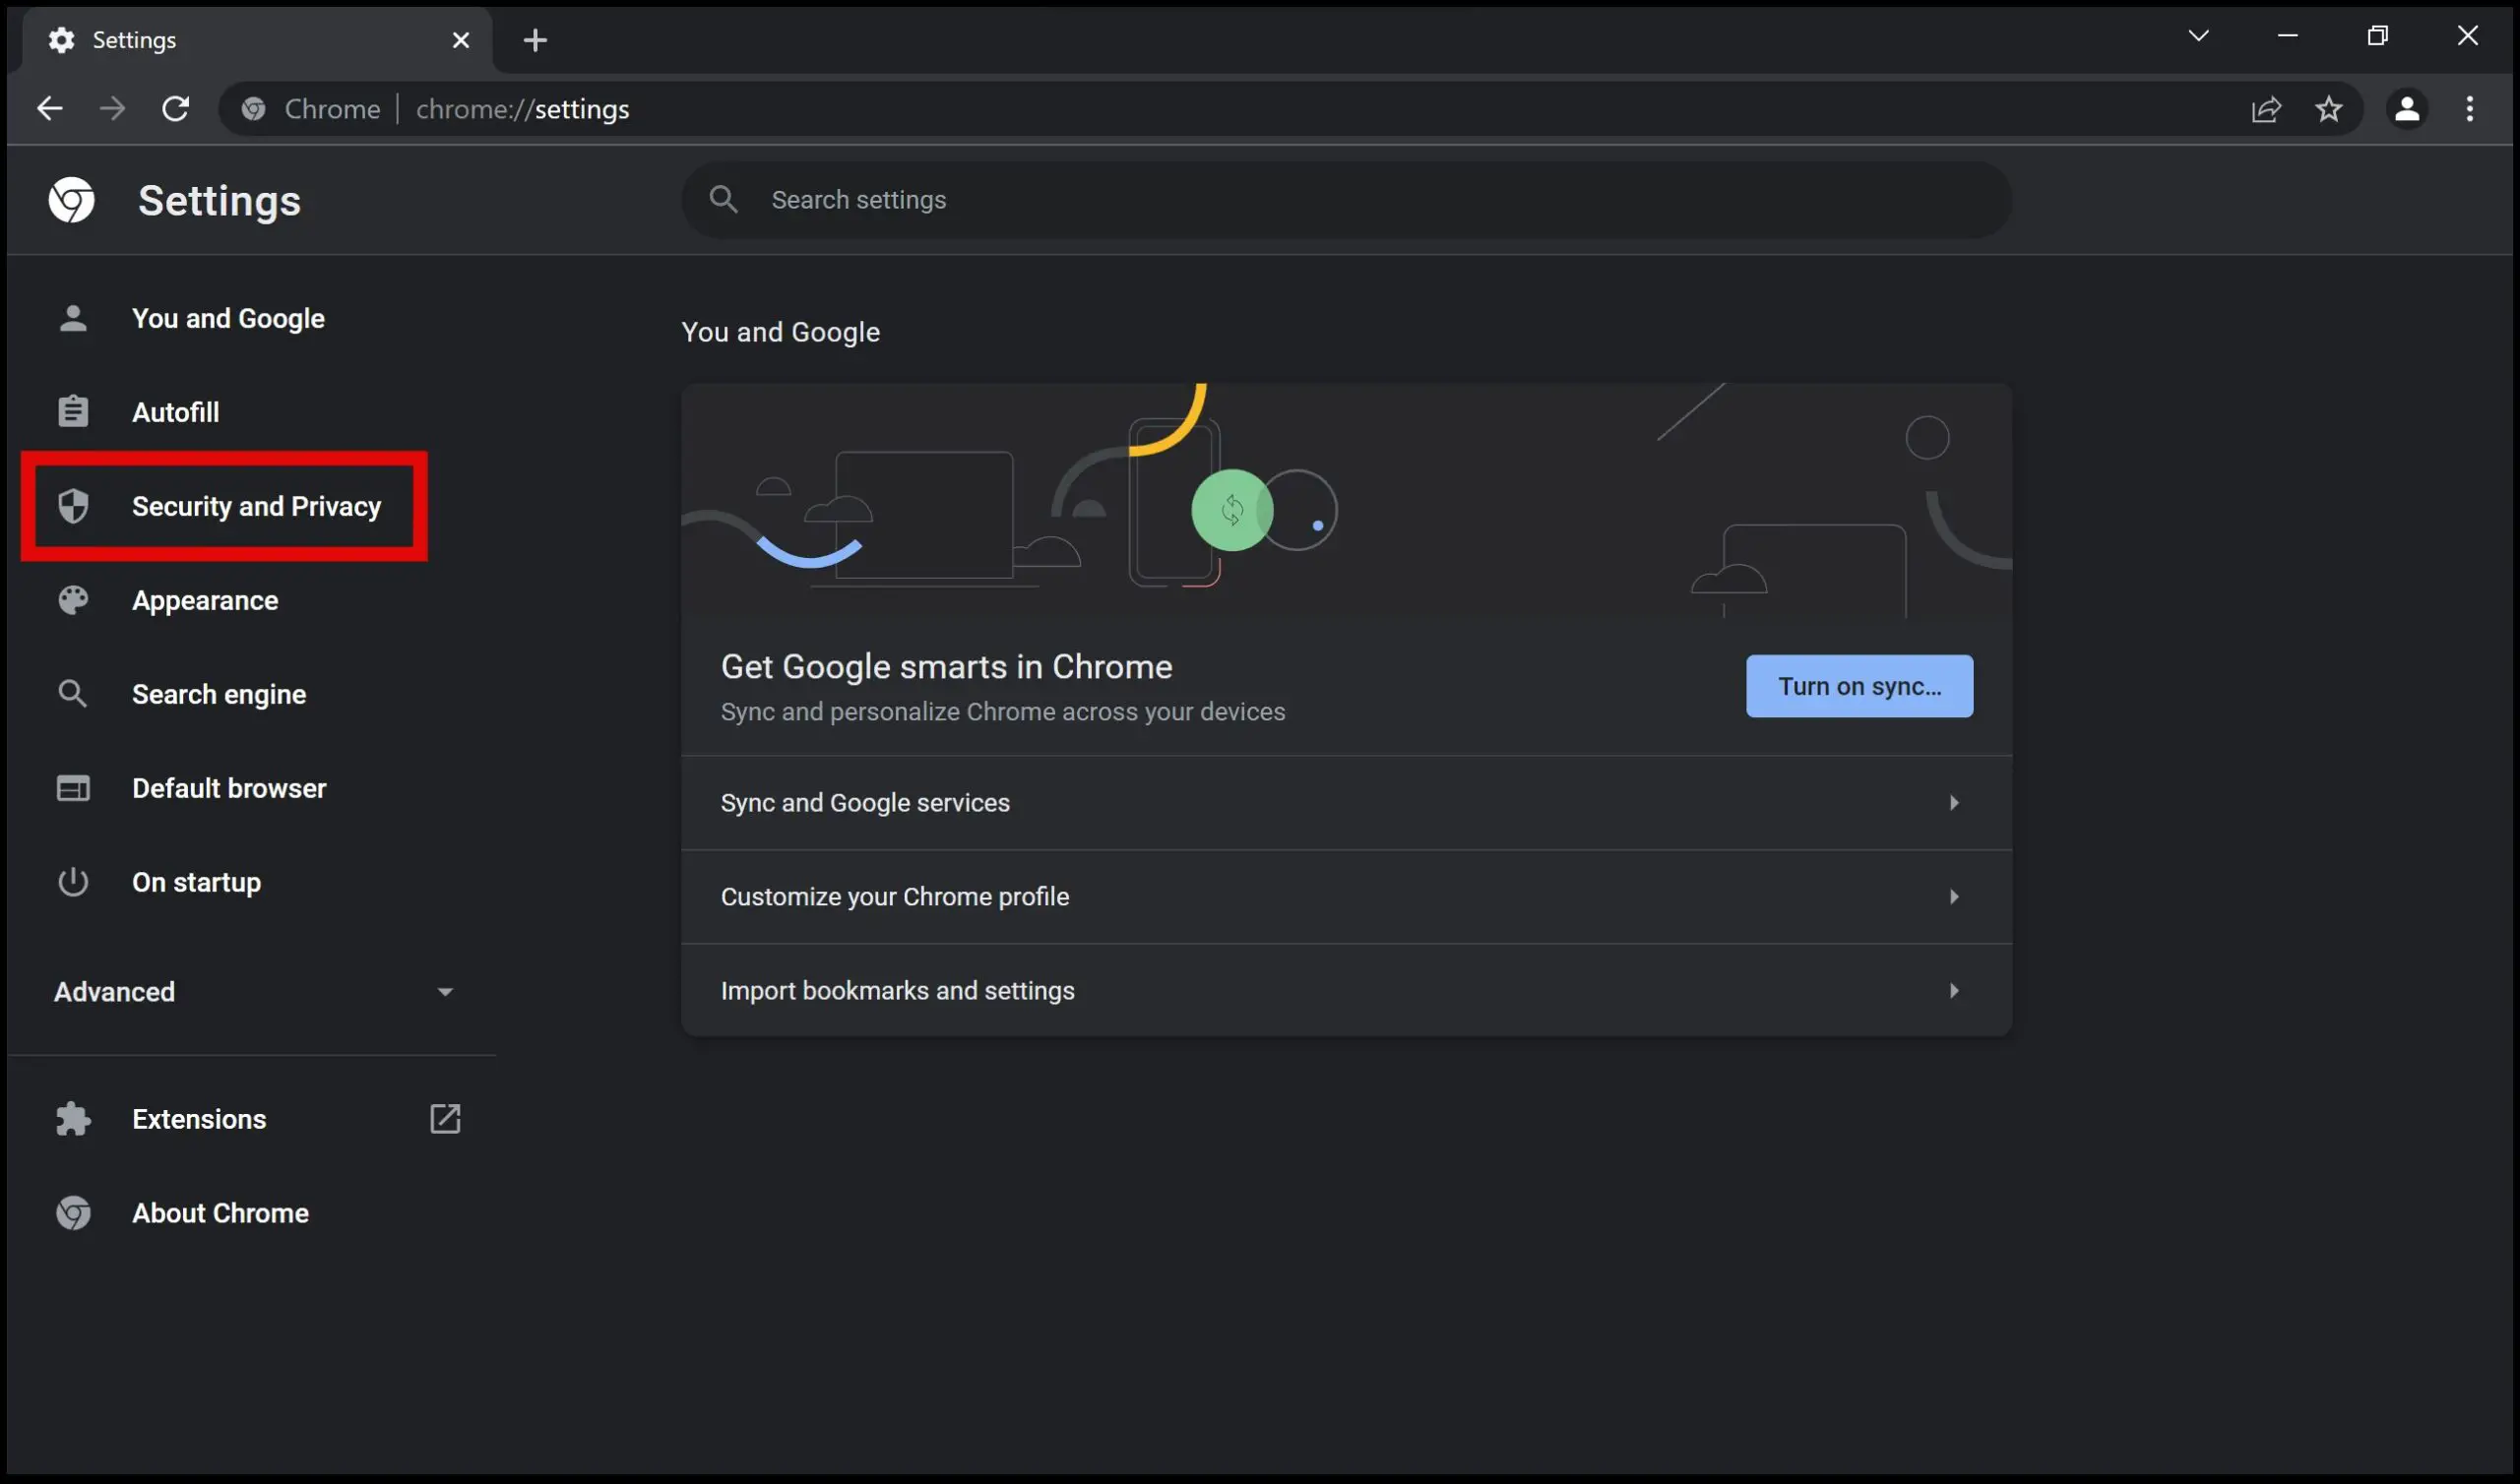
Step 2: Click on Security and Privacy.
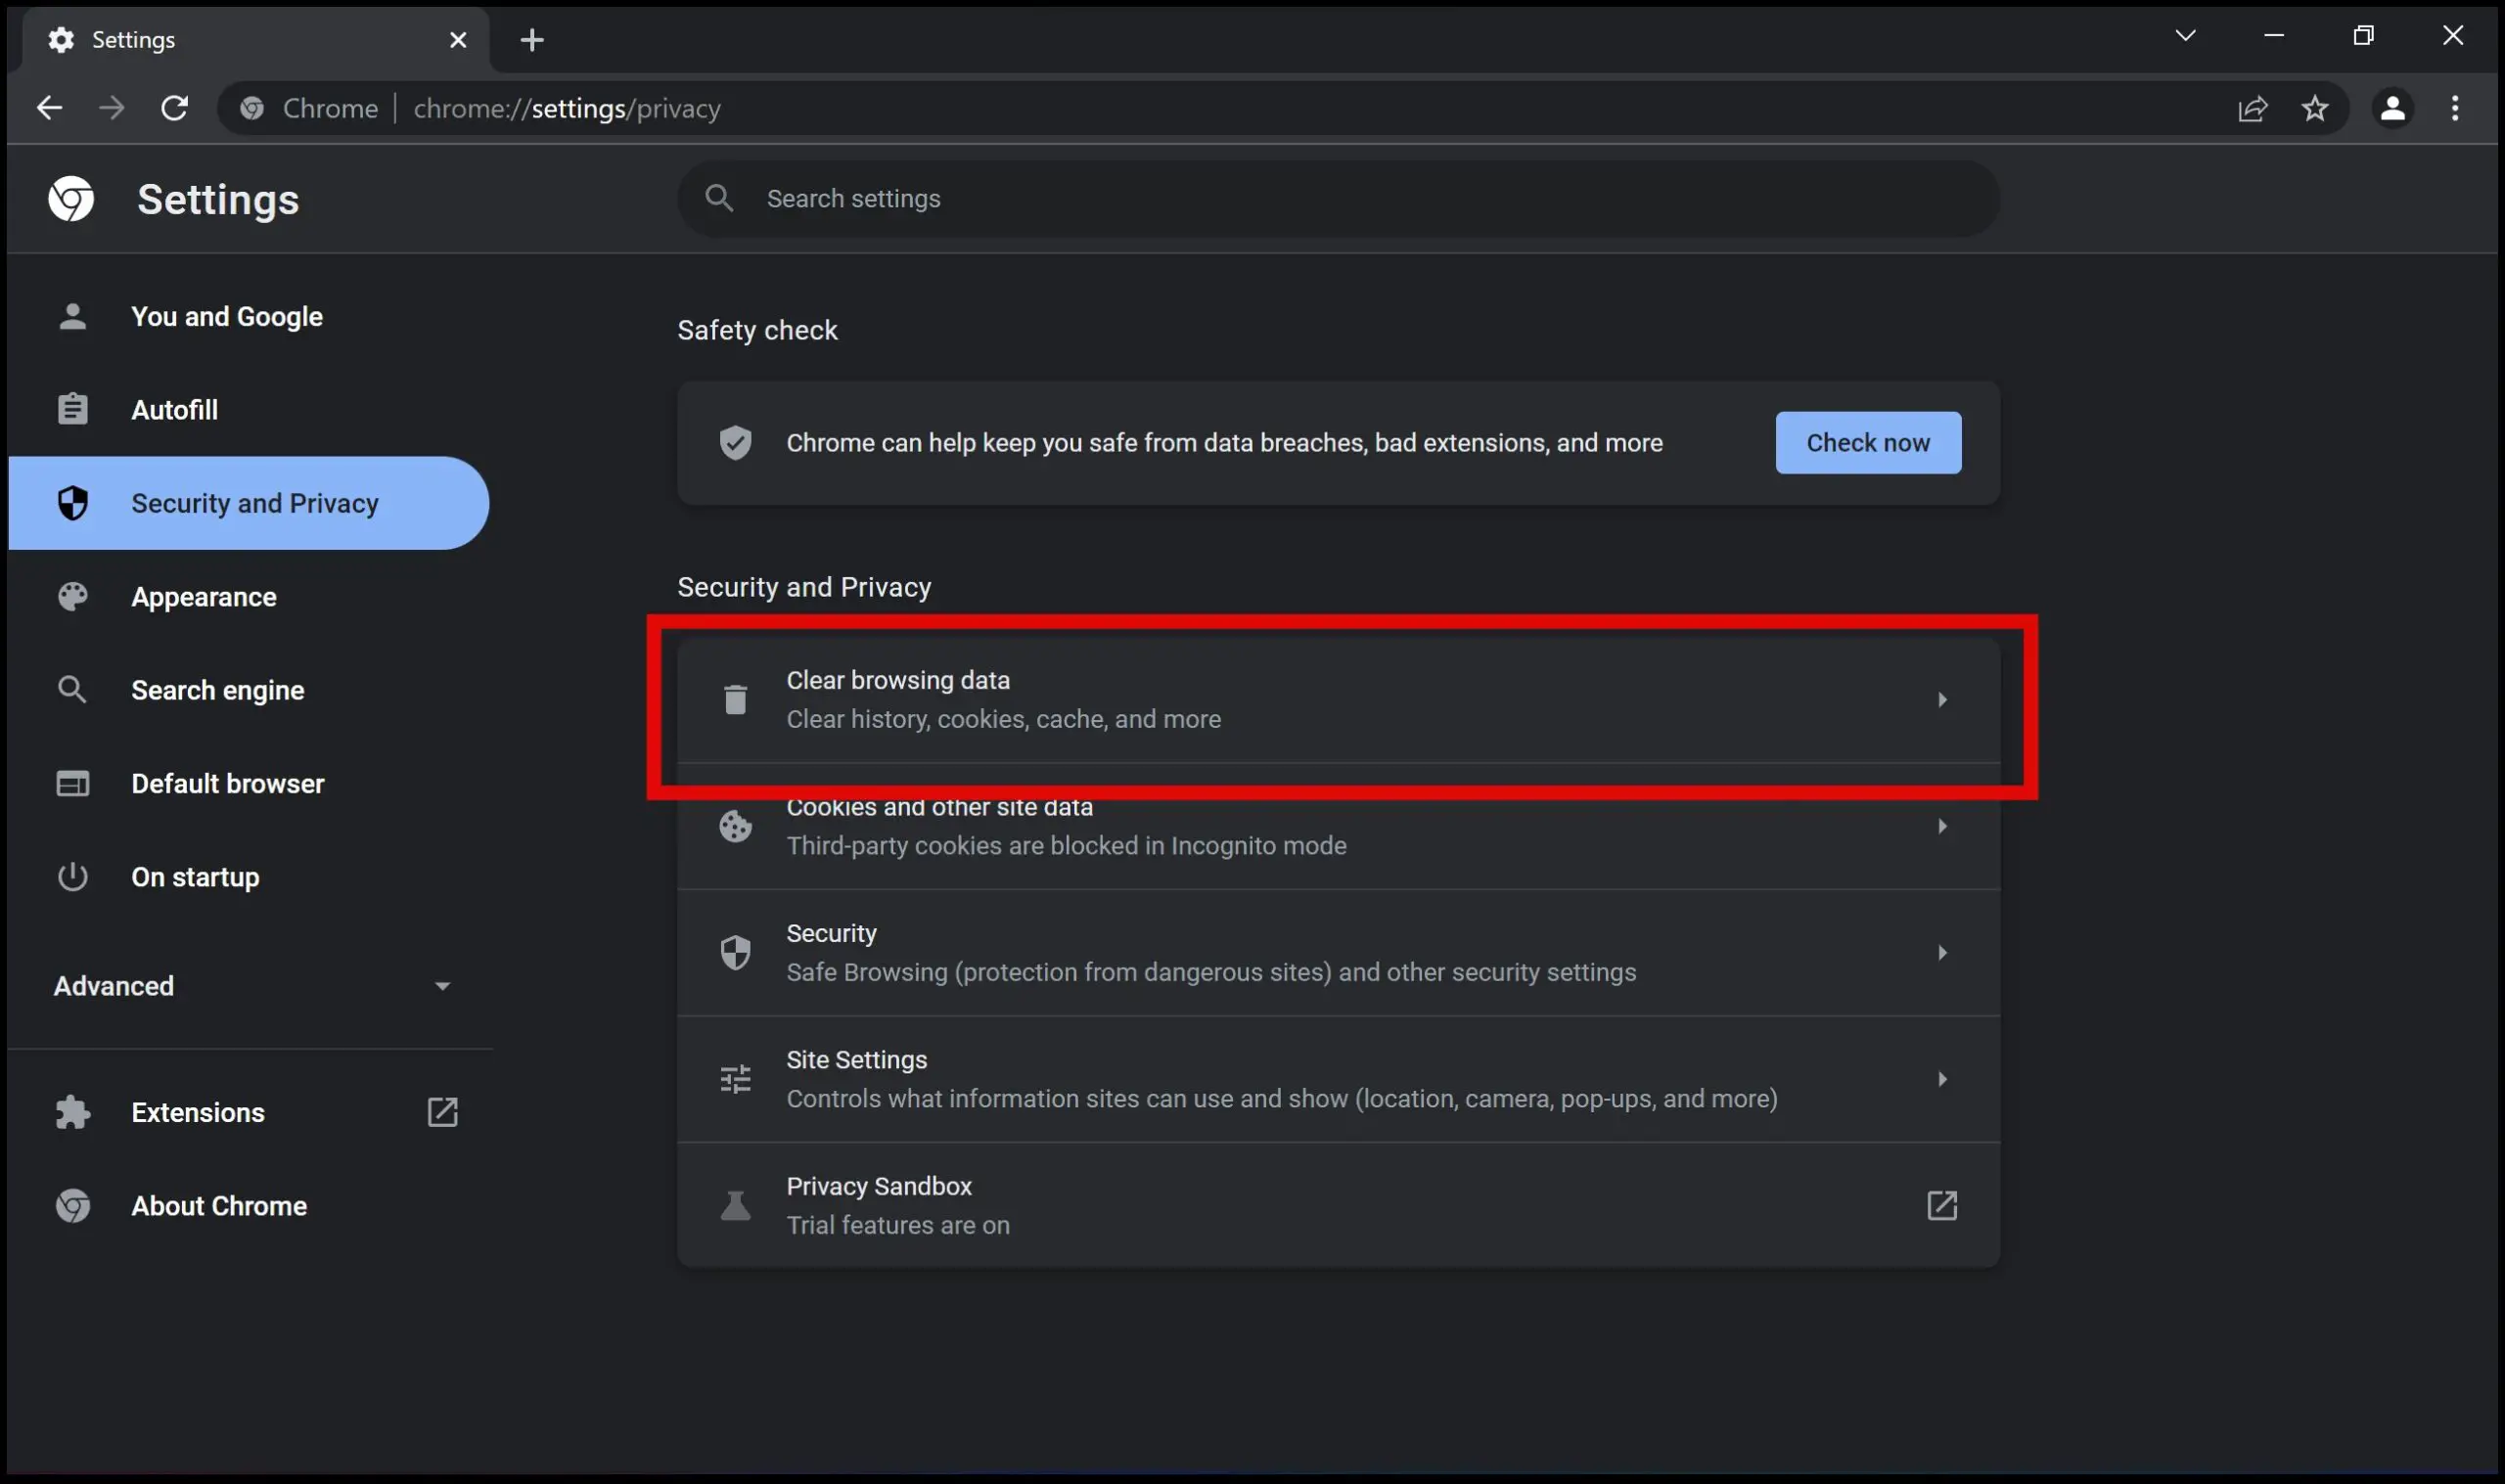
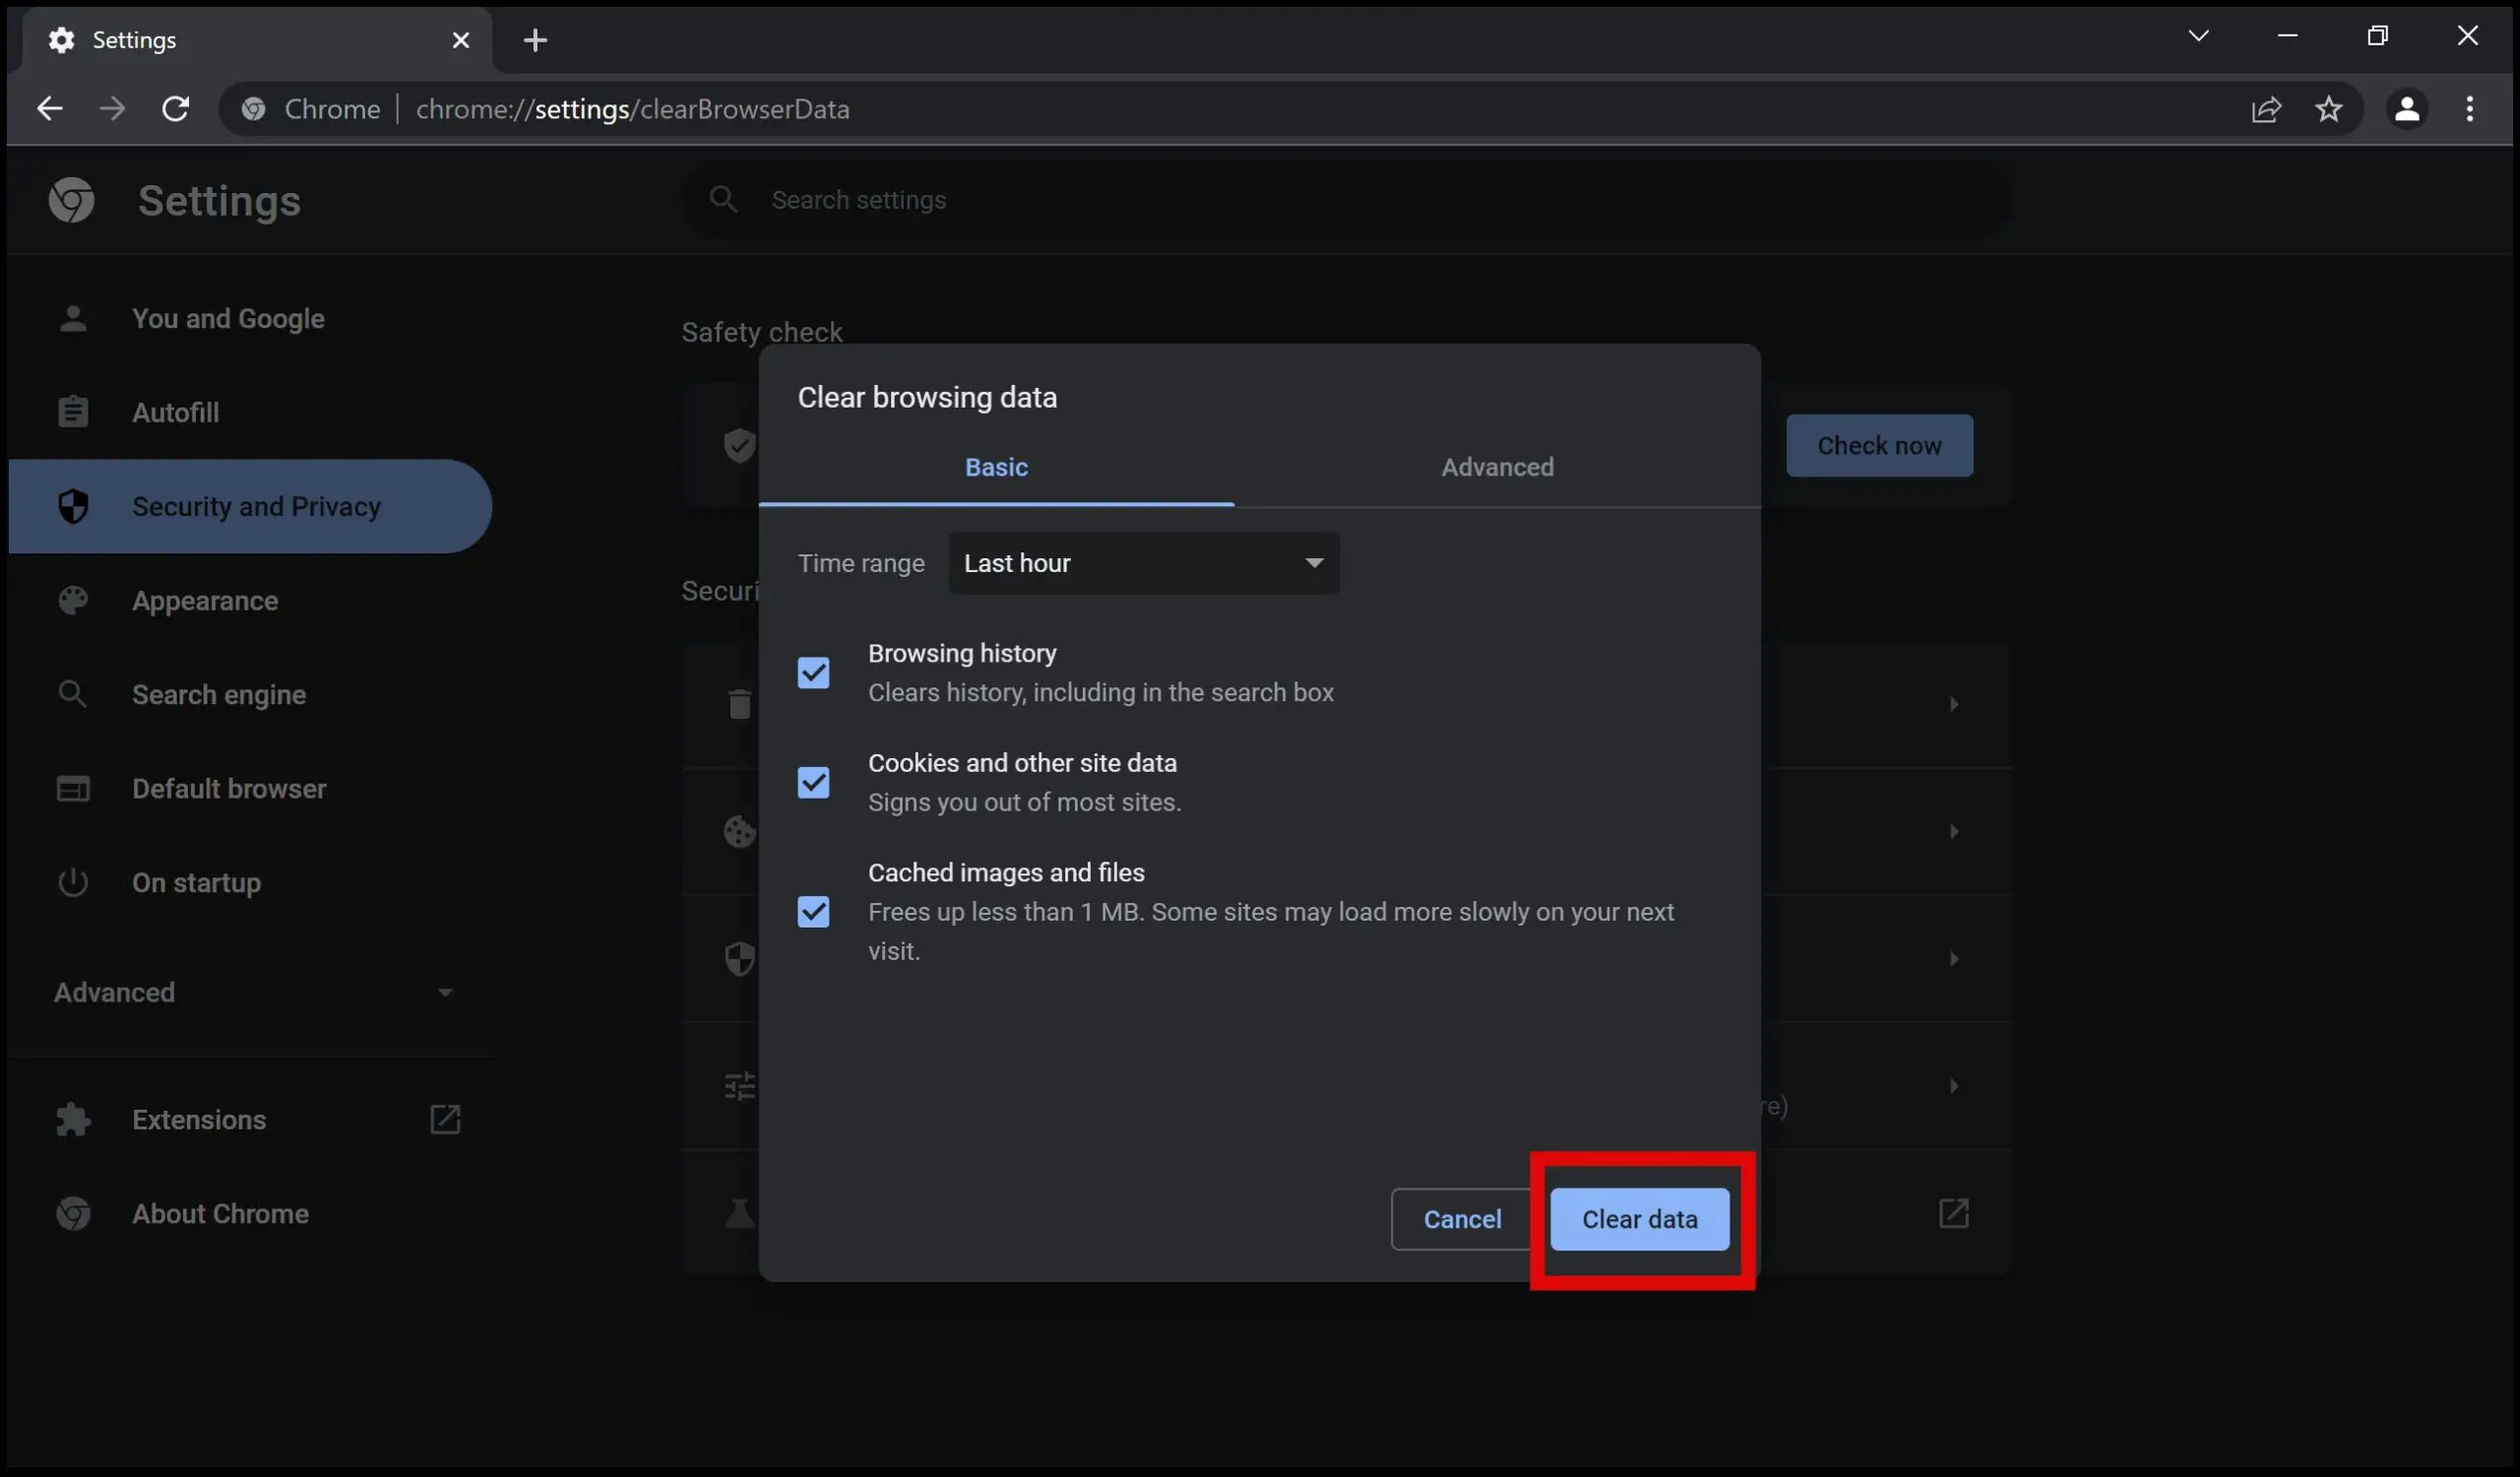
Step 3: Here, tap Clear browsing data.
Step 4: Click on Clear data. While the default option remains “Last hour,” you can click on the drop-down menu to select your “all time.”
The above steps will ensure all of your browsing data is cleared on Google Chrome and can increase the performance. If using Advanced cleanup, make sure to backup or sync any essential data, including saved bookmarks and passwords.
Update Google Chrome
Google regularly pushes updates to increase the optimization and fix the bugs present in the browser. To ensure the best performance and experience while using Google Chrome, it is essential to stay updated on the latest version.
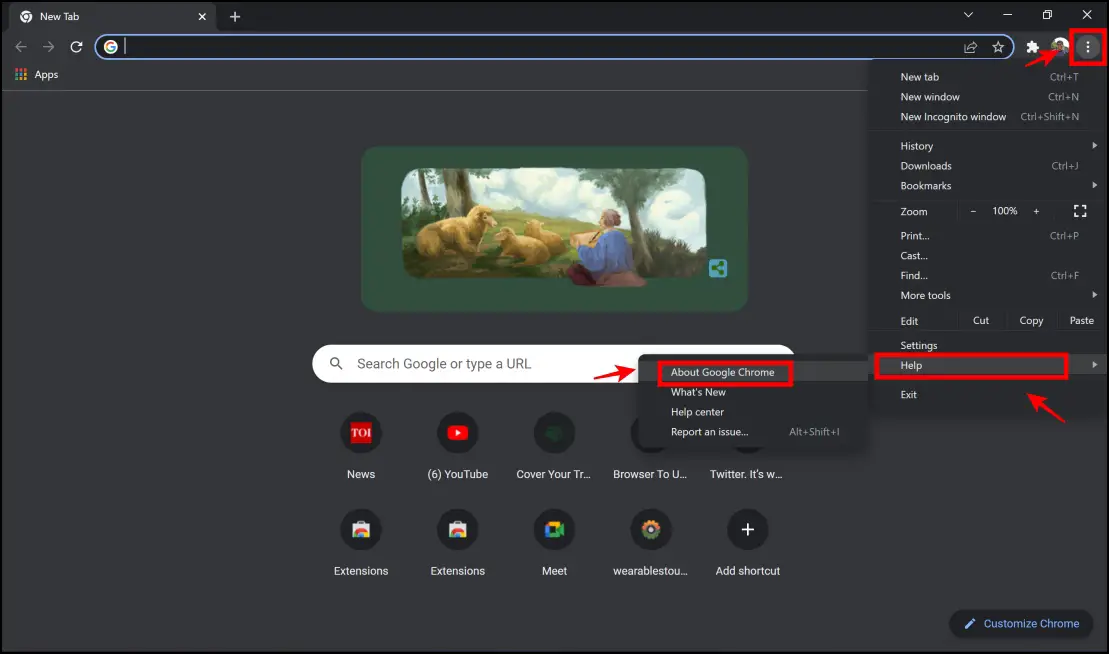
Step 1: Click on the three-dot menu in the top right corner of the screen.
Step 2: Click on Help > About Google Chrome.
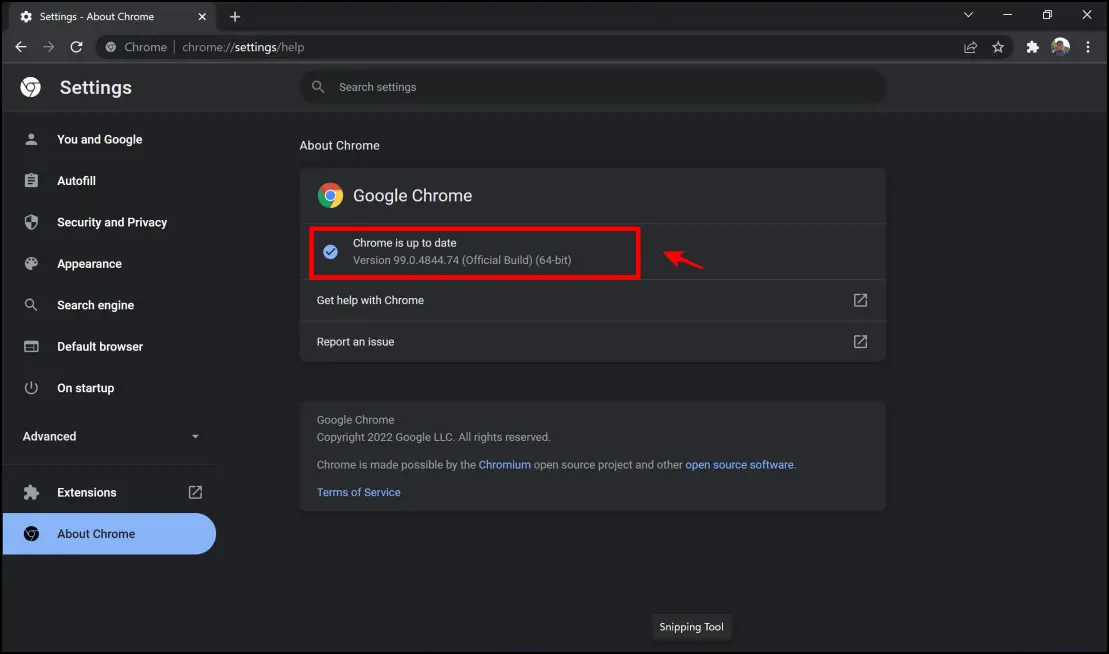
Step 3: Ensure that the message says, “Chrome is up to date.”
If not, update Google Chrome to the latest version available.
Disable Unwanted Extensions
While extensions are super helpful to enhance the user experience on Google Chrome, they can be major culprits for hogging up RAM and other resources. Disabling unwanted extensions is an excellent way to improve performance on Google Chrome.
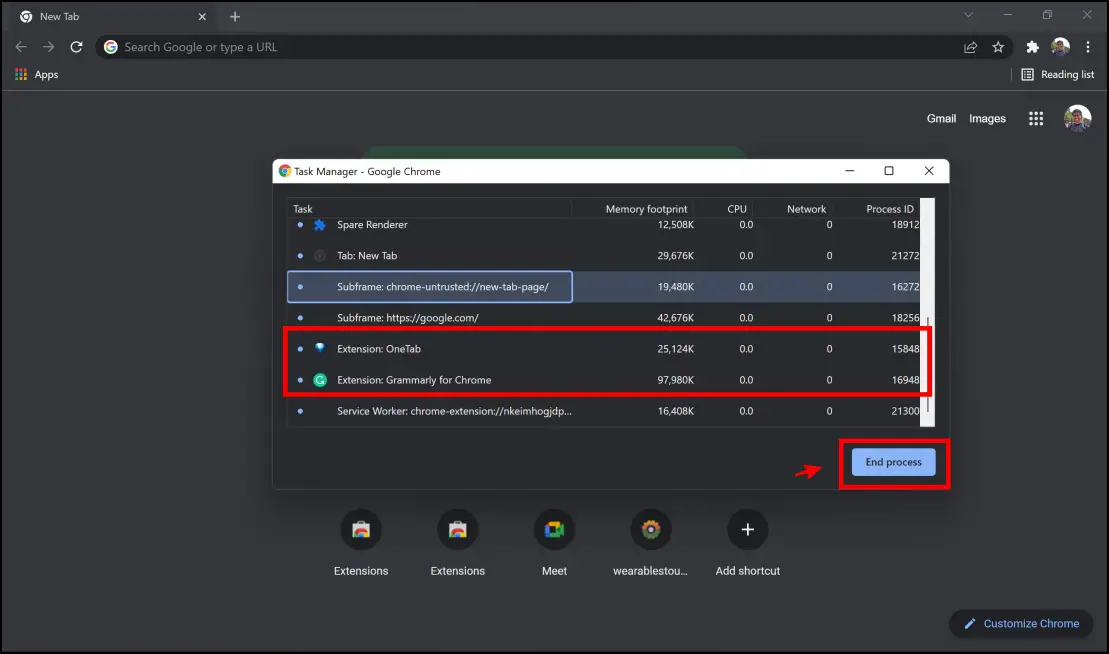
Step 1: Press Shift + Esc when inside Chrome to open task manager to understand how elements of the browser are eating up RAM.
Step 2: Click on whichever extension you feel is unnecessary as you want to increase available memory, and tap End Process.
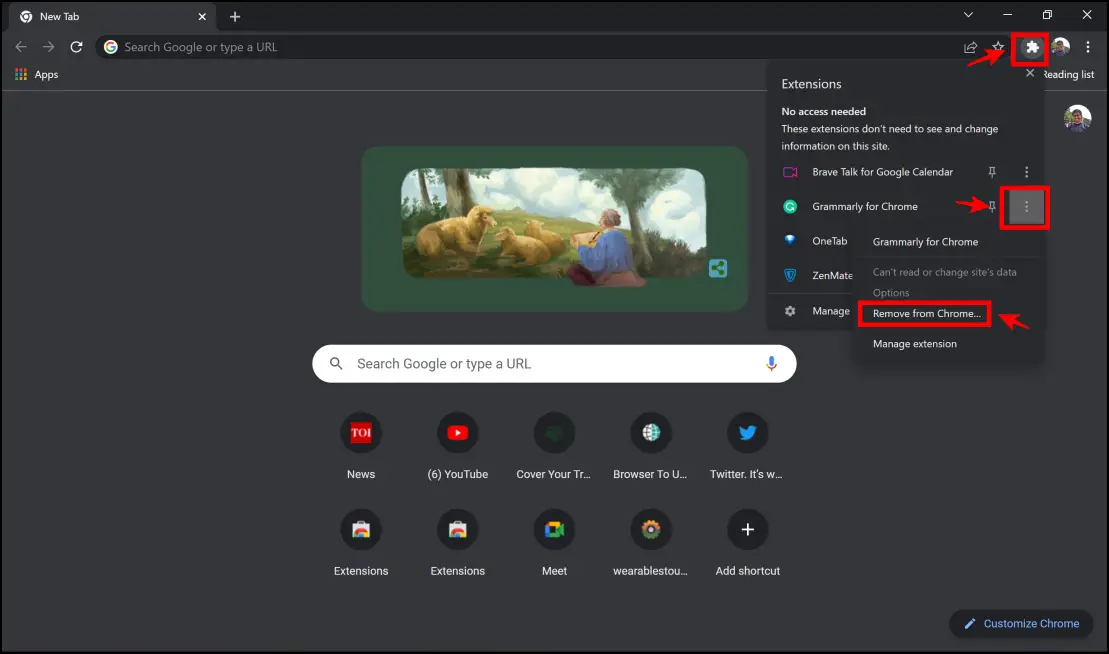
Step 3: In case you decide to remove the extension altogether from Chrome –
- Click on the extensions menu in the top right corner.
- Click on the three dots option next to the extension which you want to remove.
- Click on Remove From Chrome.
Wrapping Up
These are some of the methods to enable smooth scrolling on Google Chrome. We hope this helped you improve scrolling down websites on Google Chrome. Stay tuned for more such articles to enhance performance and browsing experience on Google Chrome.


