Have you experienced issues while uploading files in Chrome? These issues can range from unresponsive behavior, slower than usual upload speed, or delay in the upload starts. We have also come across this problem, and it can be confusing to fix it. That is why we have curated working ways to fix can’t upload files issue in Google Chrome on Mac and Windows PC.

How to Fix Unable to Upload Files in Chrome?
Having upload issues can affect your workflow or other online activity, especially when trying to upload important documents, videos, images, or other files. Such issues are quite random and might not be the same for everyone. But there are a few workarounds that can come in handy to troubleshoot the upload issues. Read on.
Method 1 – Check Your Internet Connection
First and foremost, you should check your internet connection to make sure that is not the issue. Oftentimes, poor internet connection or hindrance within it can result in slower uploads than usual.
We recommend that you try other websites or even contact your service provider to ensure your internet speed is not an issue. Also, disable any VPN services if you are using one.
Method 2 – Remove Unnecessary Extensions
Extensions can increase the functionality of the browser, given that Chrome is quite barebones in nature. However, certain extensions, or an abundance of them, can conflict with websites or pages where you are trying to upload files.
Some sites may not allow adblockers, so having an adblocker extension can create issues preventing the site from operating properly, while some may have problems with ChatGPT or AI extensions. That is why you should disable and remove unnecessary extensions. Here is how you can do that.
Step 1: Click on the extensions icon in the Chrome toolbar.
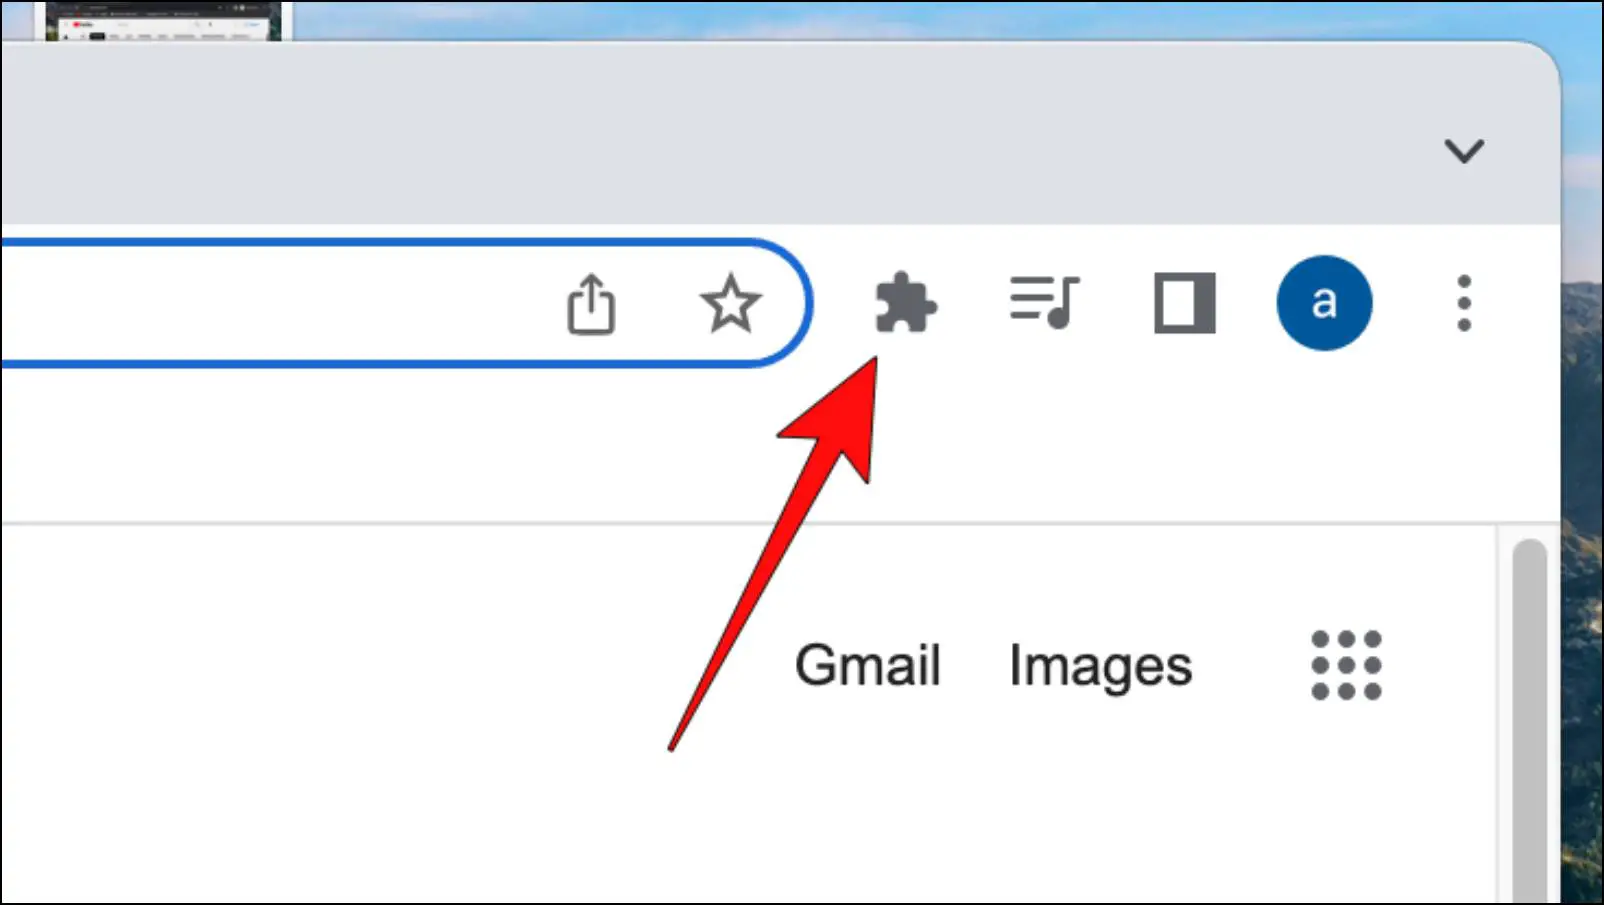
Step 2: Next, click on Manage Extensions.
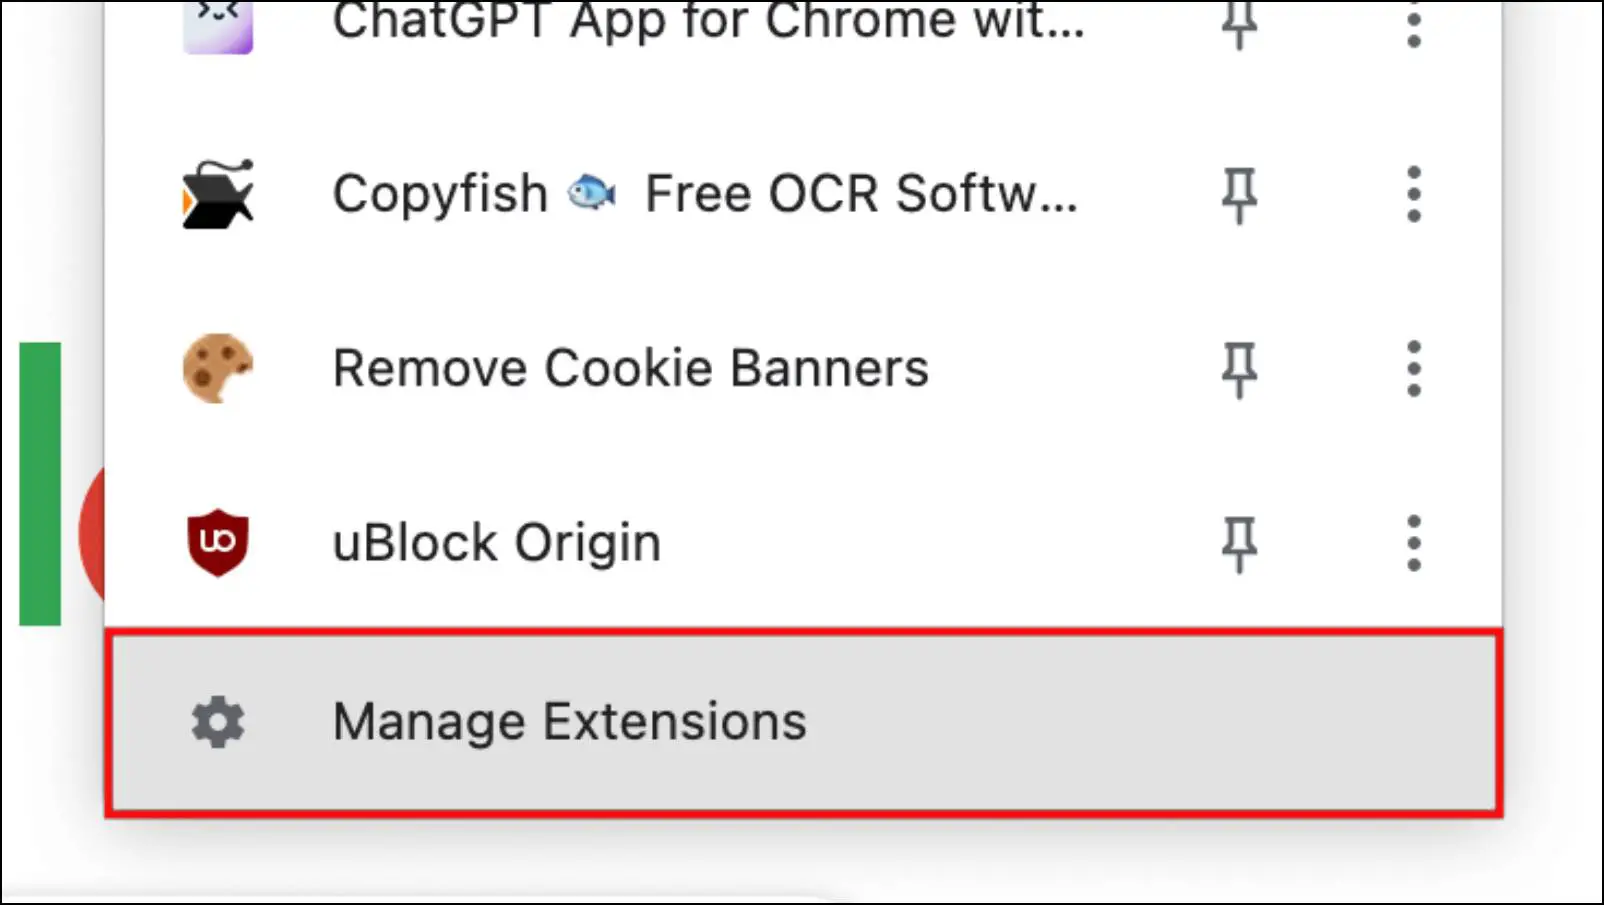
Step 3: Here, turn off the toggle for the extensions that you do not use often.
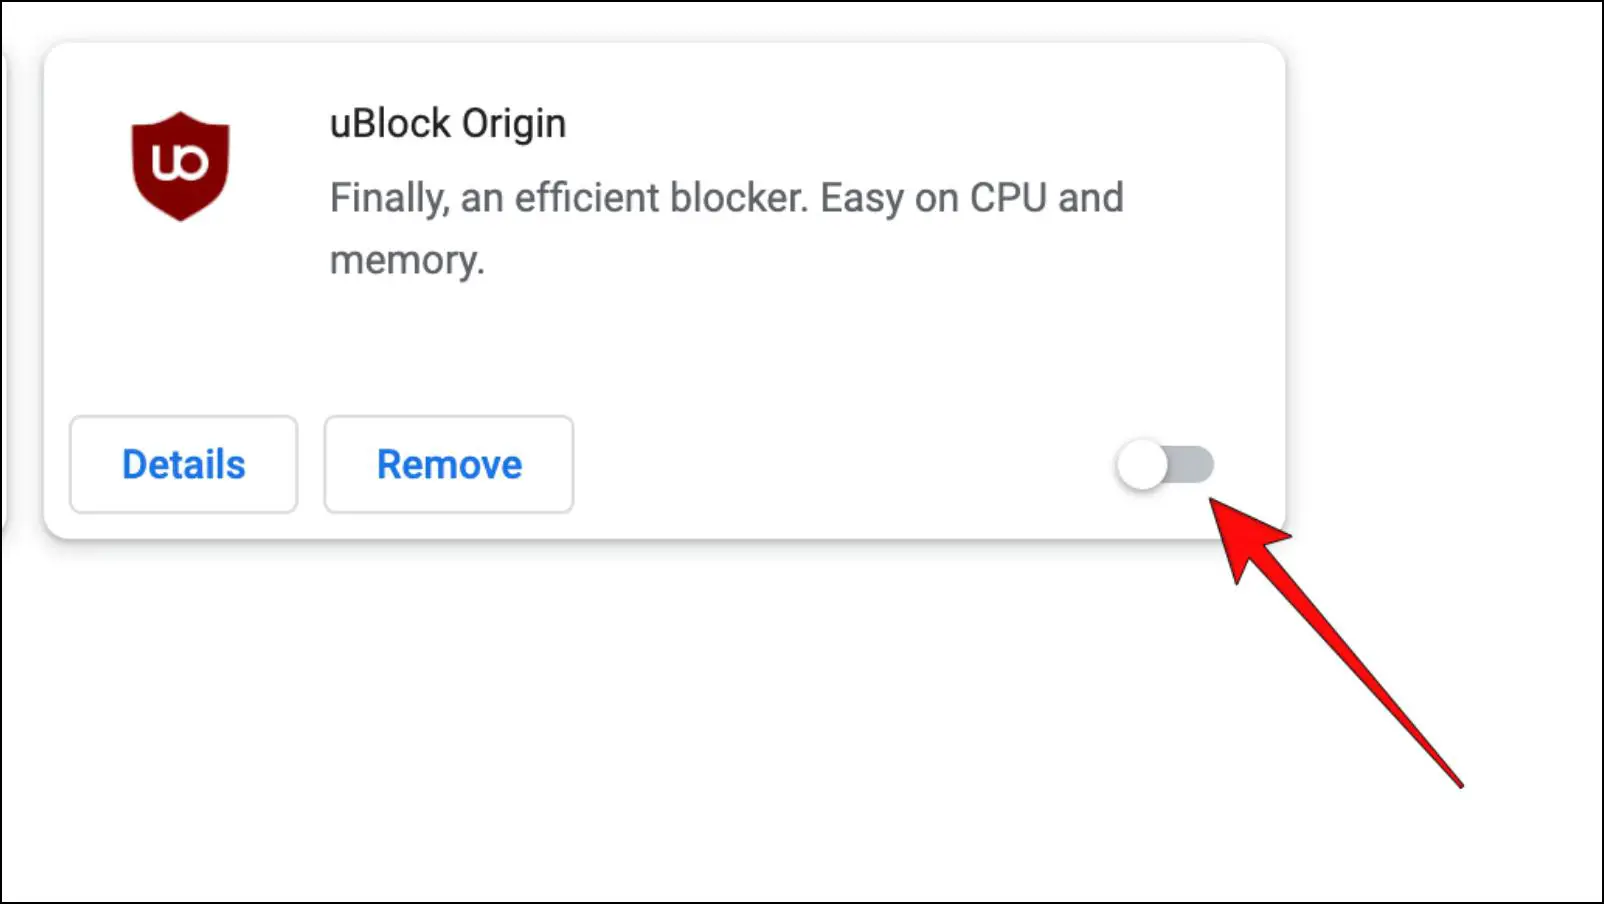
Step 4: Now go back to check whether you can upload files or not.
In case you can upload files as usual, then proceed with the steps further.
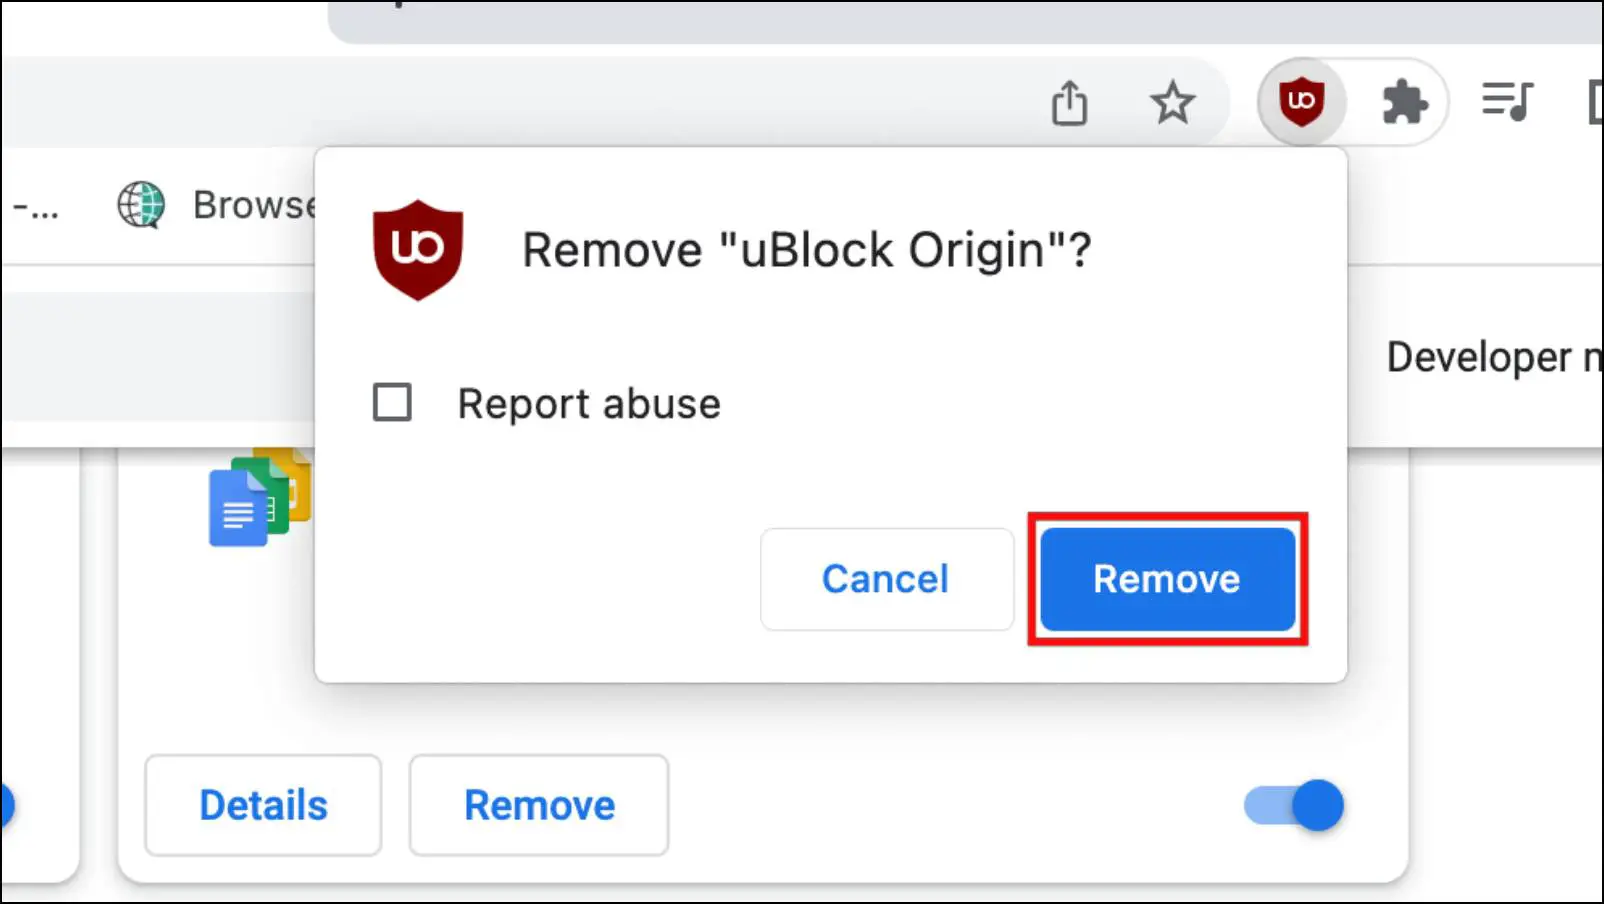
Step 5: Click on Remove for the unwanted extensions that you want to delete.
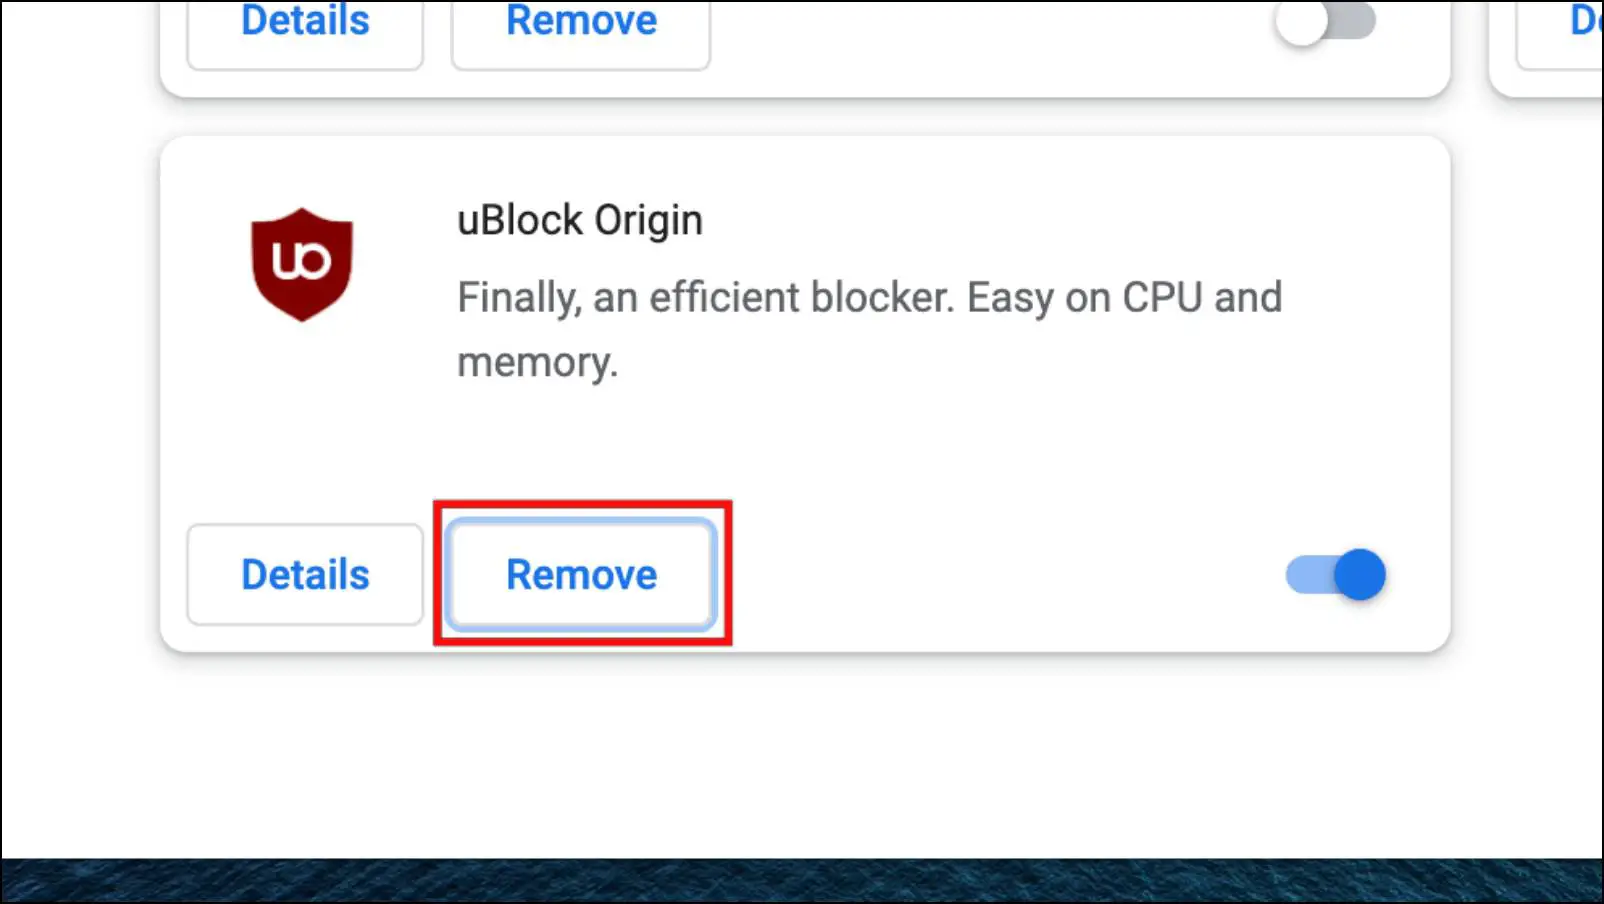
Step 6: In the confirmation prompt, click on Remove.
This method worked for us as the issue we were facing when trying to upload files on Google Drive was resolved after removing extensions.
Method 3 – Drag and Drop Files to Upload
Another issue we encountered while trying to upload large files to Google Drive was that the file manager would not open. This meant that the File Manager window, or the Finder in macOS, did not come up when prompted to open in Google Drive.
If you are having the same issue, then a simple solution for this would be to drag and drop files from the file manager to the Chrome window. Here is how it works.
Step 1: Open a File Manager and a Chrome window.
Step 2: On Chrome, head to Google Drive and visit the folder where you wish to upload files.
Step 3: On the File Manager, select the files that you want to upload.
Step 4: Now, without lifting the mouse cursor, drag the selected files to the Chrome window.

This will initiate the upload process, and your files will be saved on Google Drive. In this case, the problem was caused by one of the recently installed extensions.
Method 4 – Remove Corrupted Cache and Browsing Data
Your browser saves certain elements of all the websites you visited to make it easier to load them the next time. But often, this stored data gets bloated and corrupted, causing all sorts of issues with the browser.
This can include the upload issues that you are having. So, we recommend you clear the cache and browsing data to check if that helps with the upload issue.
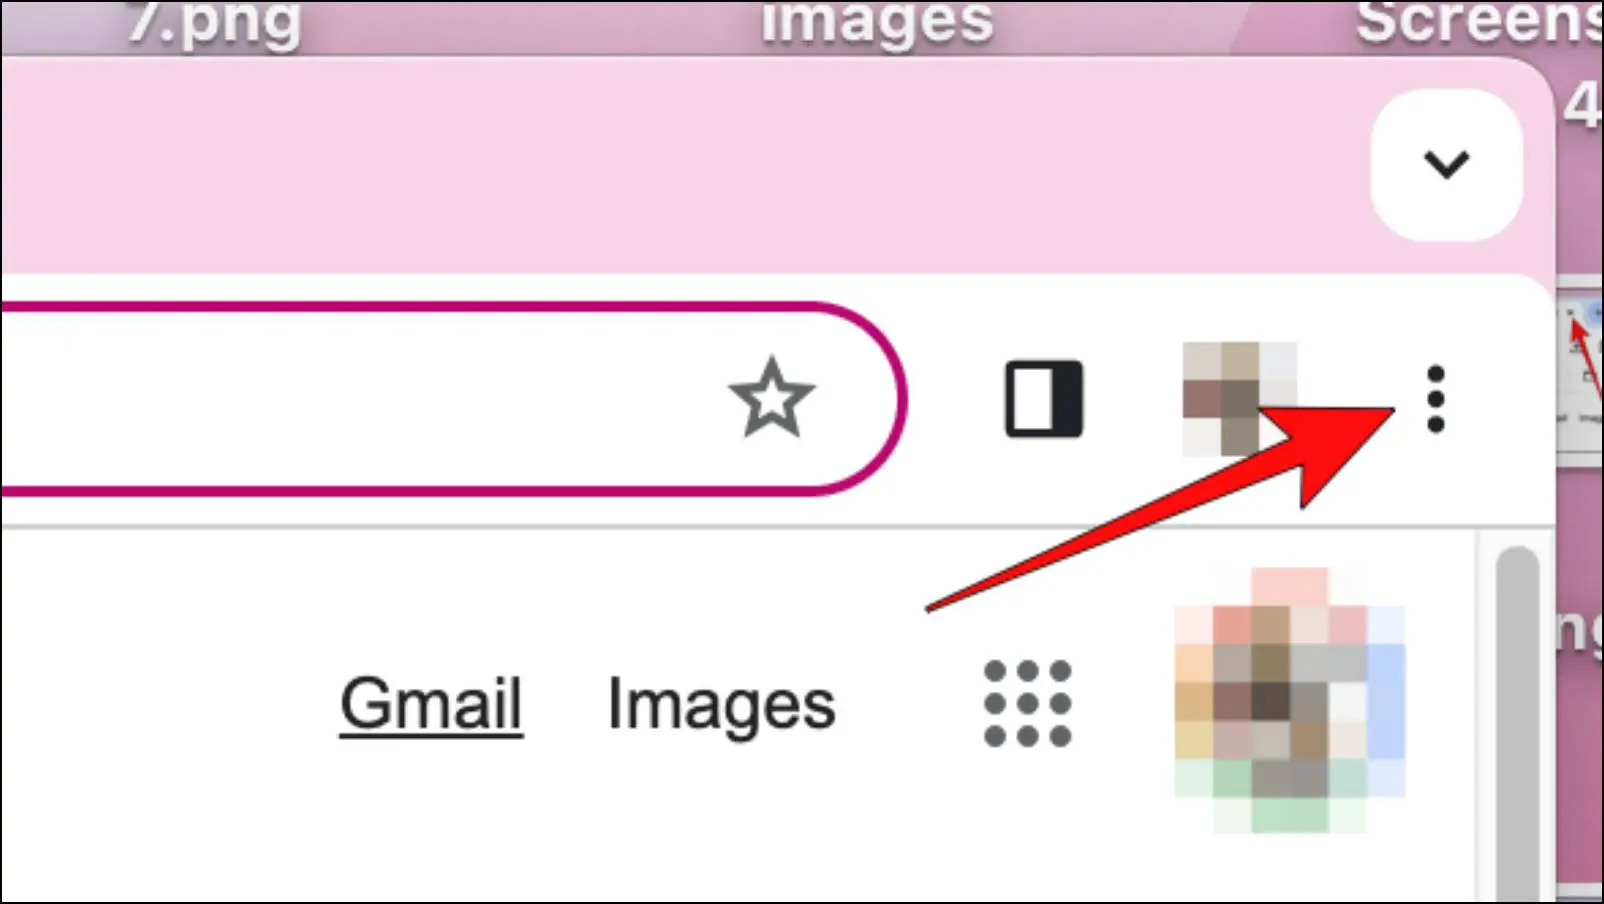
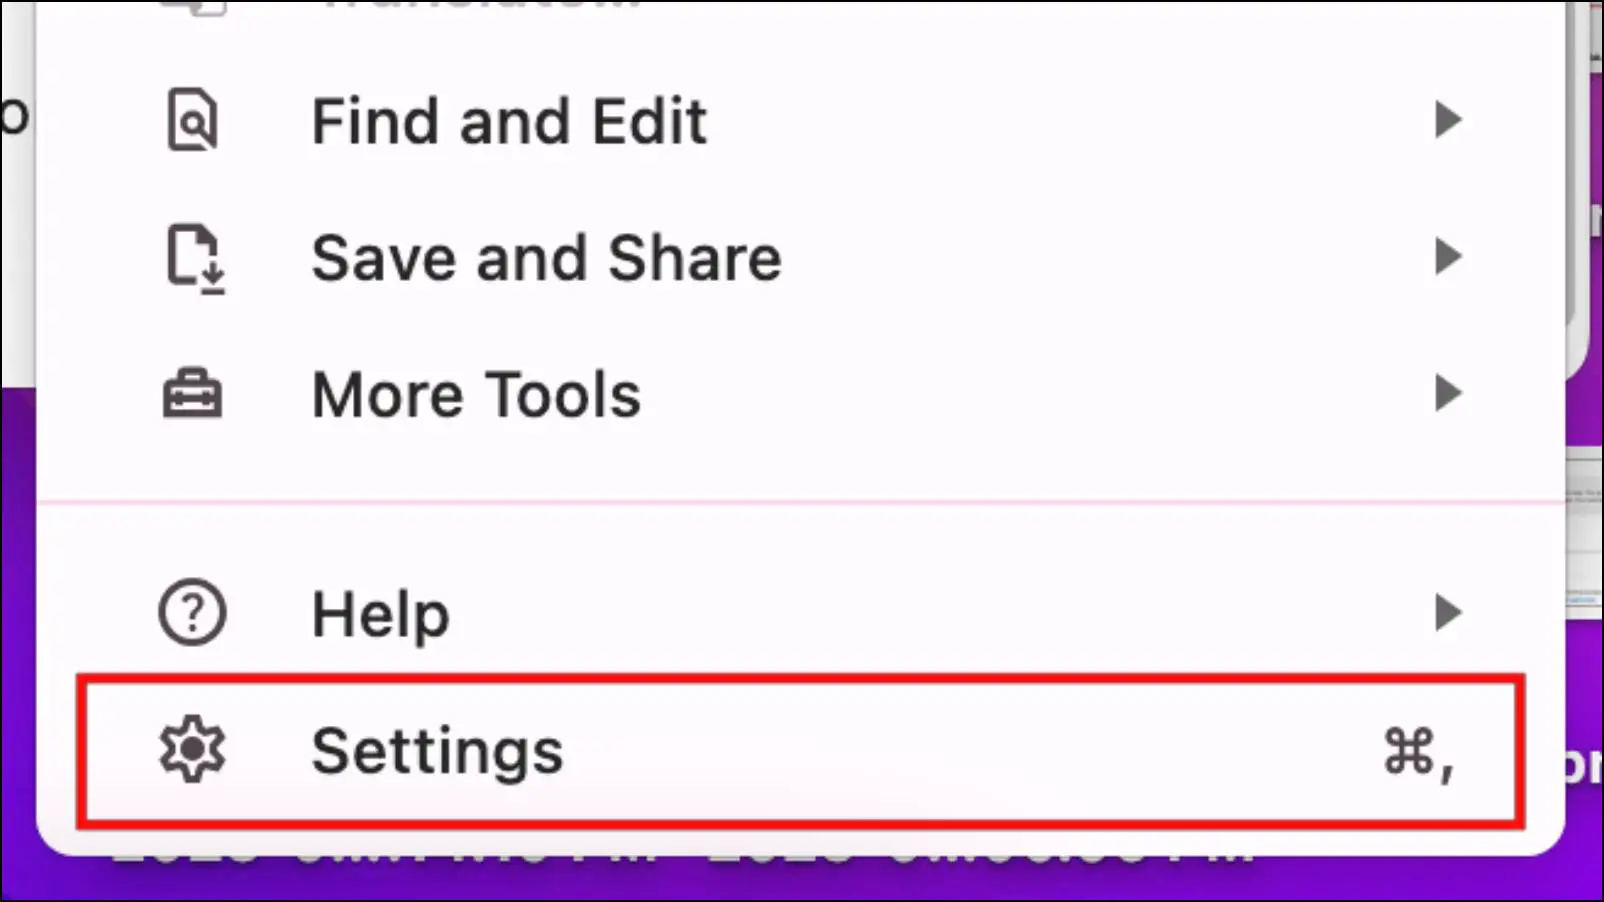
Step 1: To clear the cache in Chrome, click on the three-dot menu.
Step 2: Go to Settings.
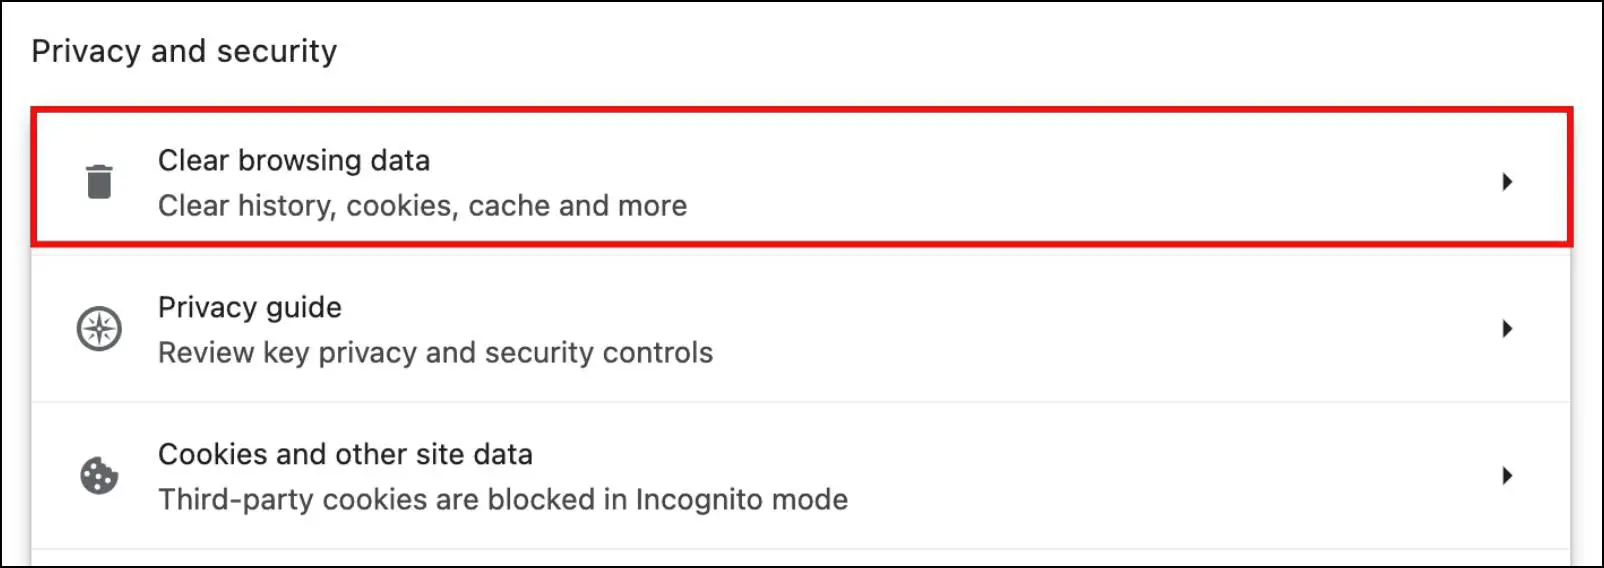
Step 3: Select Privacy and Security from the sidebar menu.

Step 4: Here click on Clear browsing data.
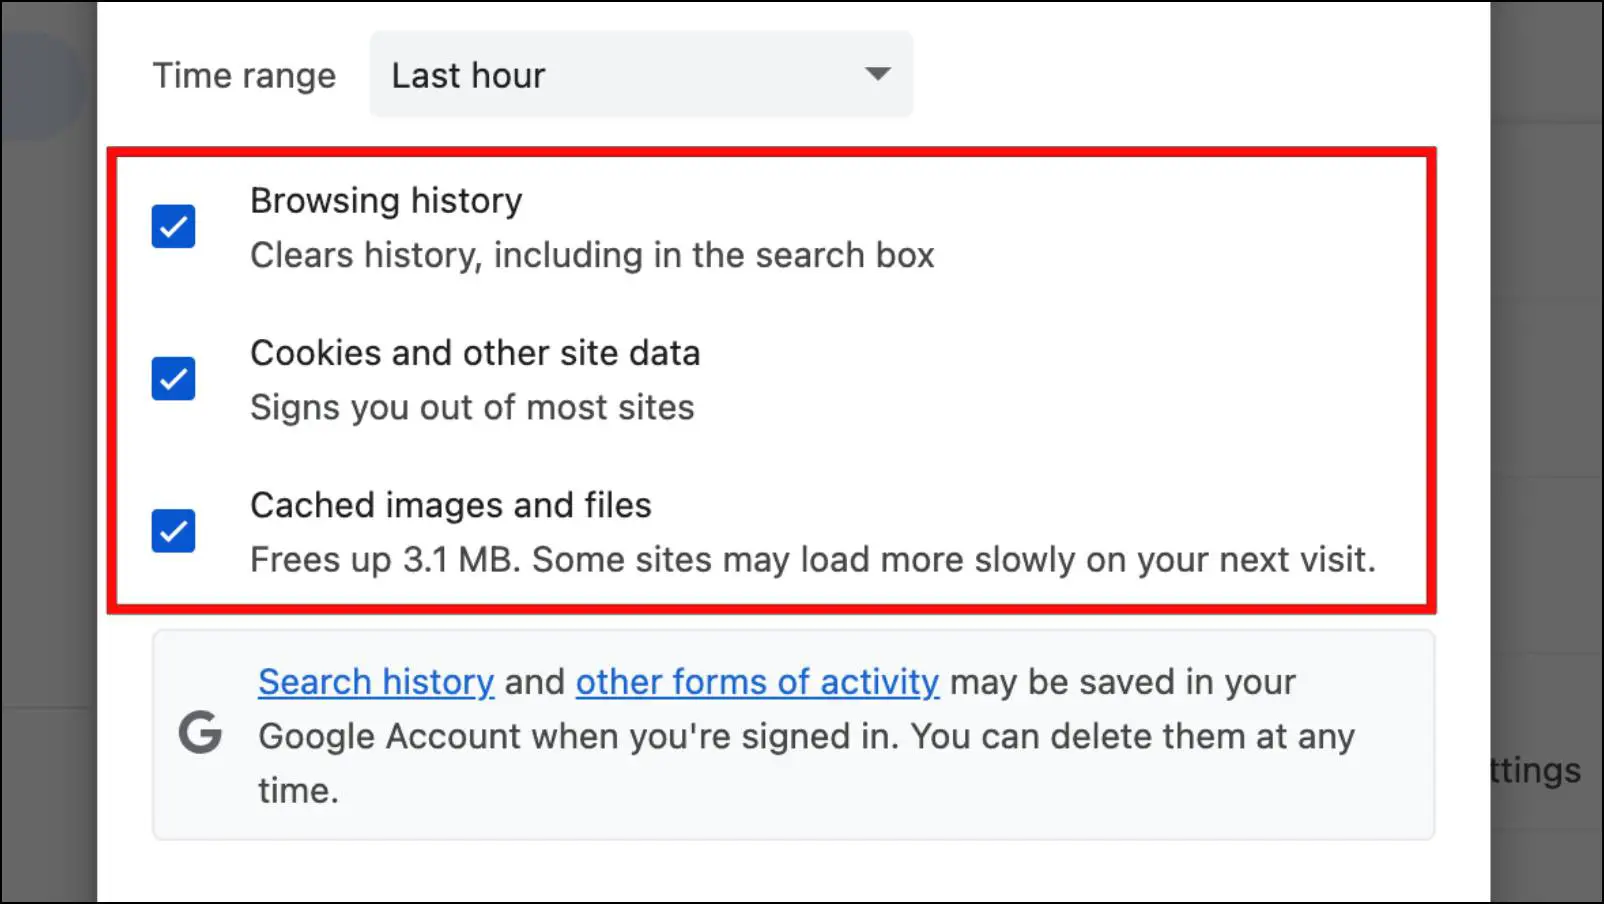
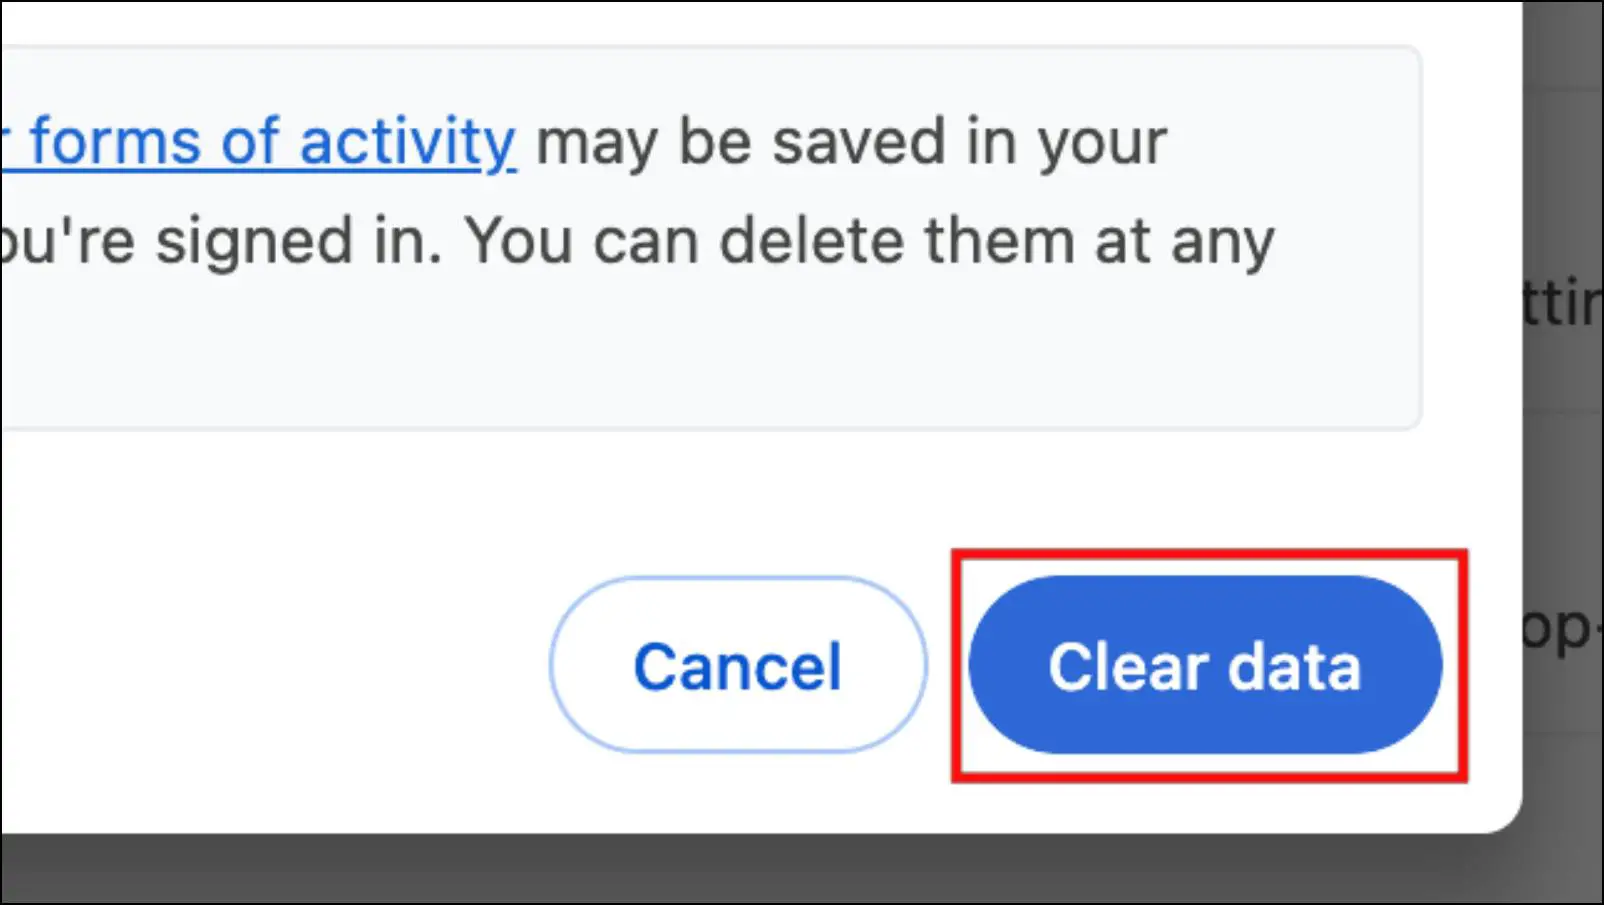
Step 5: Next, tick the box for all three items, that is Browsing history, Cookies and other site data, Cached images, and files.
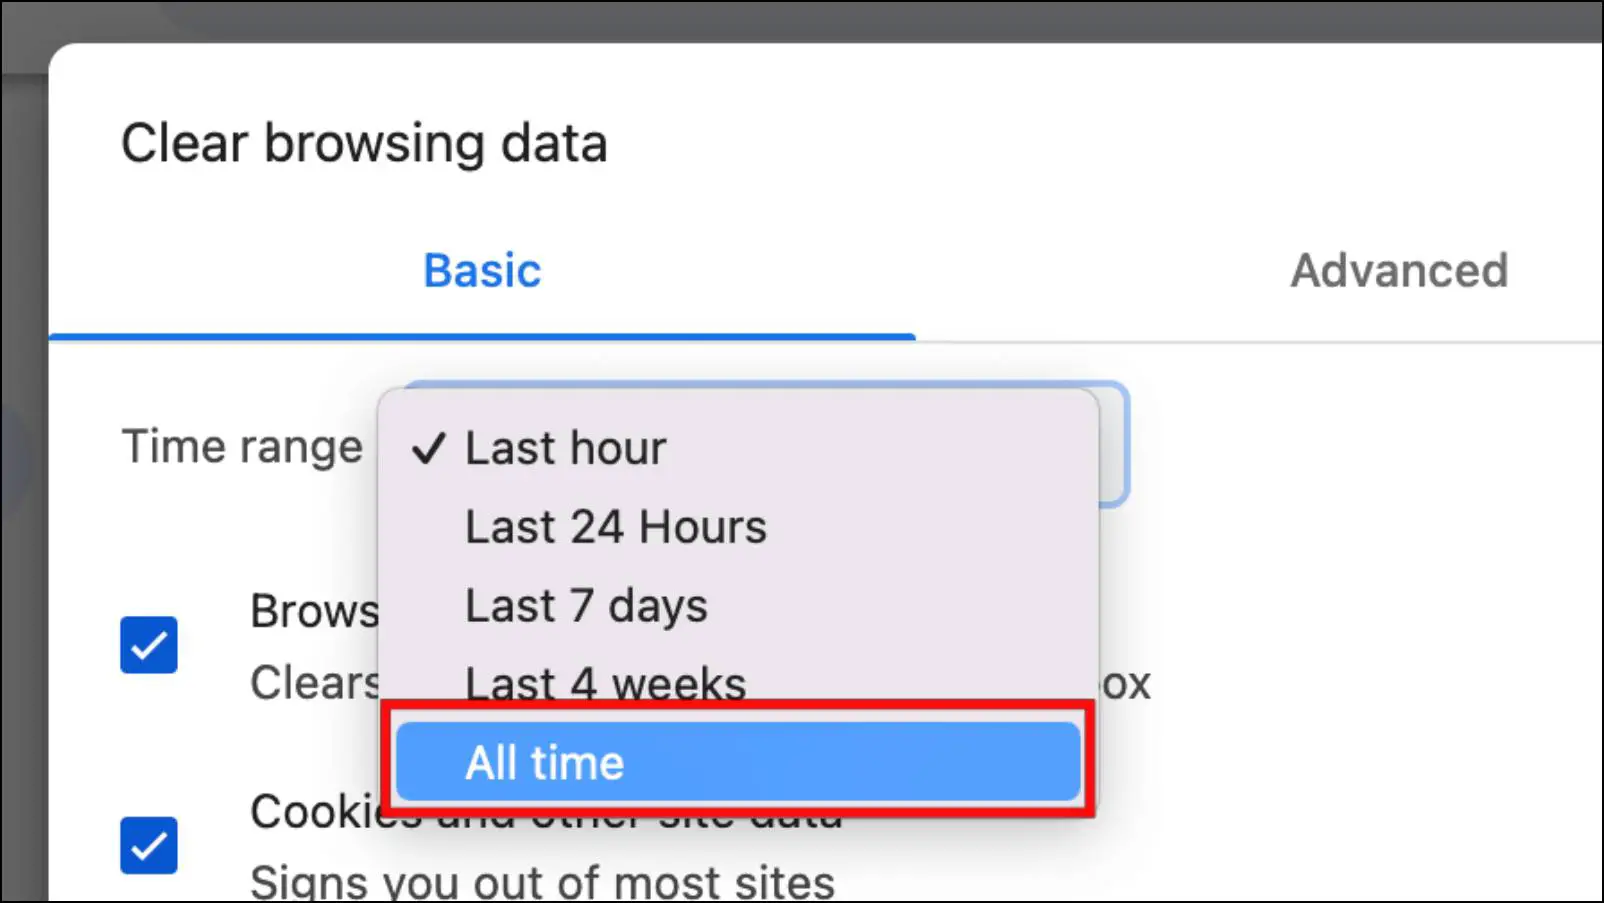
Step 6: Now click 0n the box above next to the Time range.
Step 7: Choose All Time.
Step 8: Finally, click the Clear Data button to finish the process.
Method 5 – Upload Files Individually
Sometimes, website servers may be unable to handle multiple requests or face maintenance problems. This could be one reason you cannot upload files, especially if you are trying to upload them all at once. So we recommend that instead of bulk uploading files, try to upload one file at a time to see if that works.
Method 6 – Update Google Chrome Browser
Besides the above-mentioned methods, you should also check for updates for your browser. New updates bring support for major online policy changes and compatibility with new standards.
Older versions may not have the same compatibility, resulting in website issues. That is why you should check for the latest update and download it using these steps.
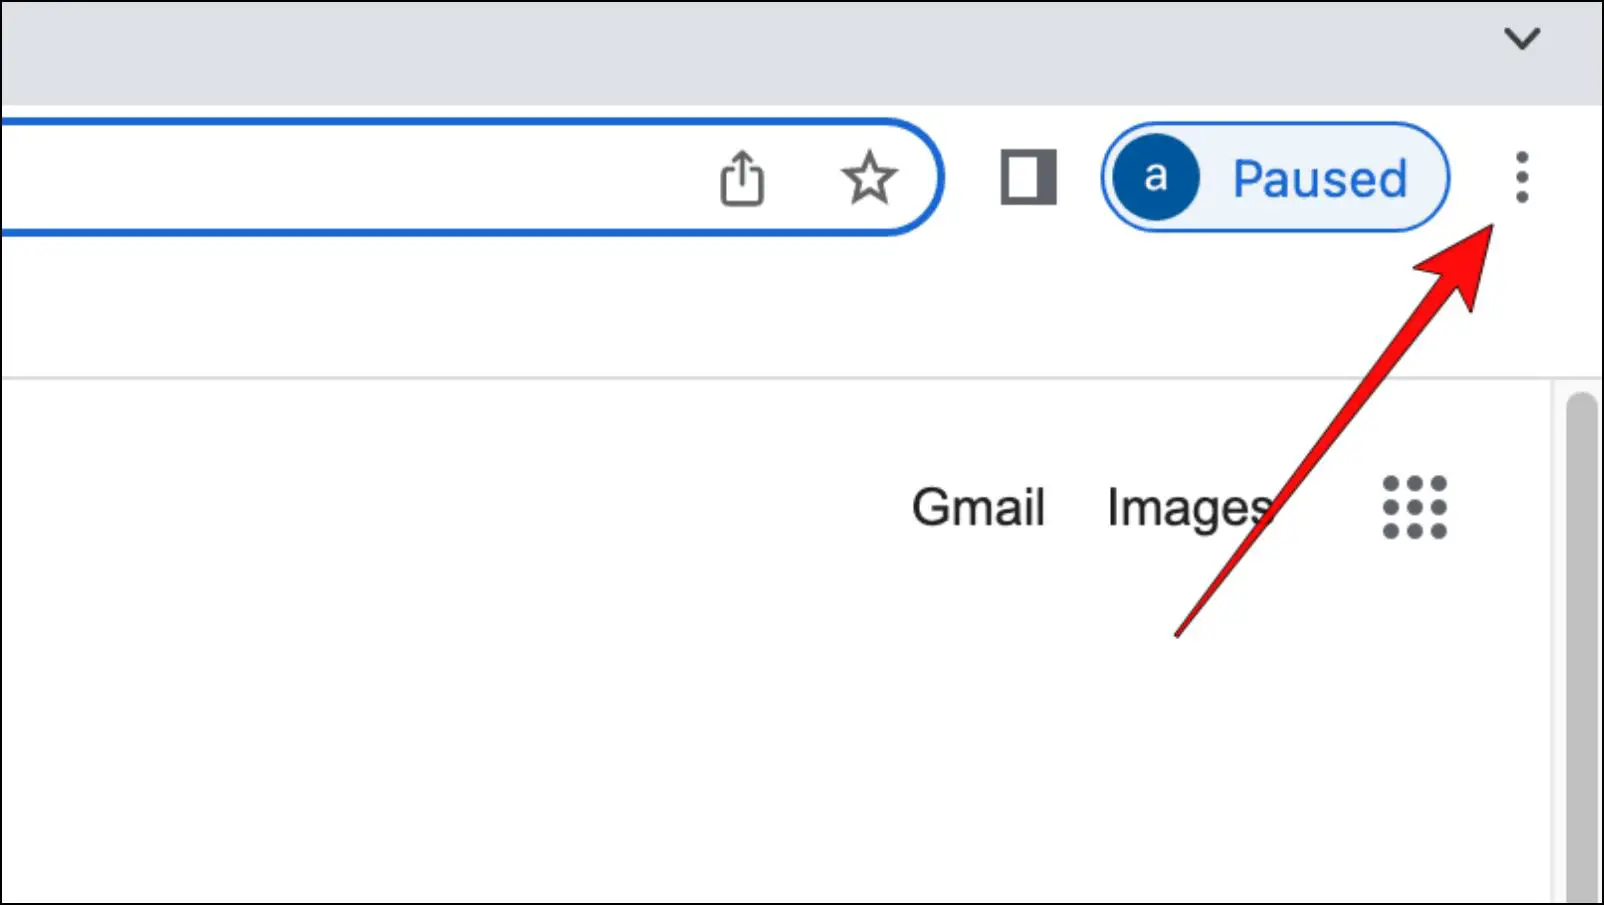
Step 1: Click on the three-dot menu in the top right corner.
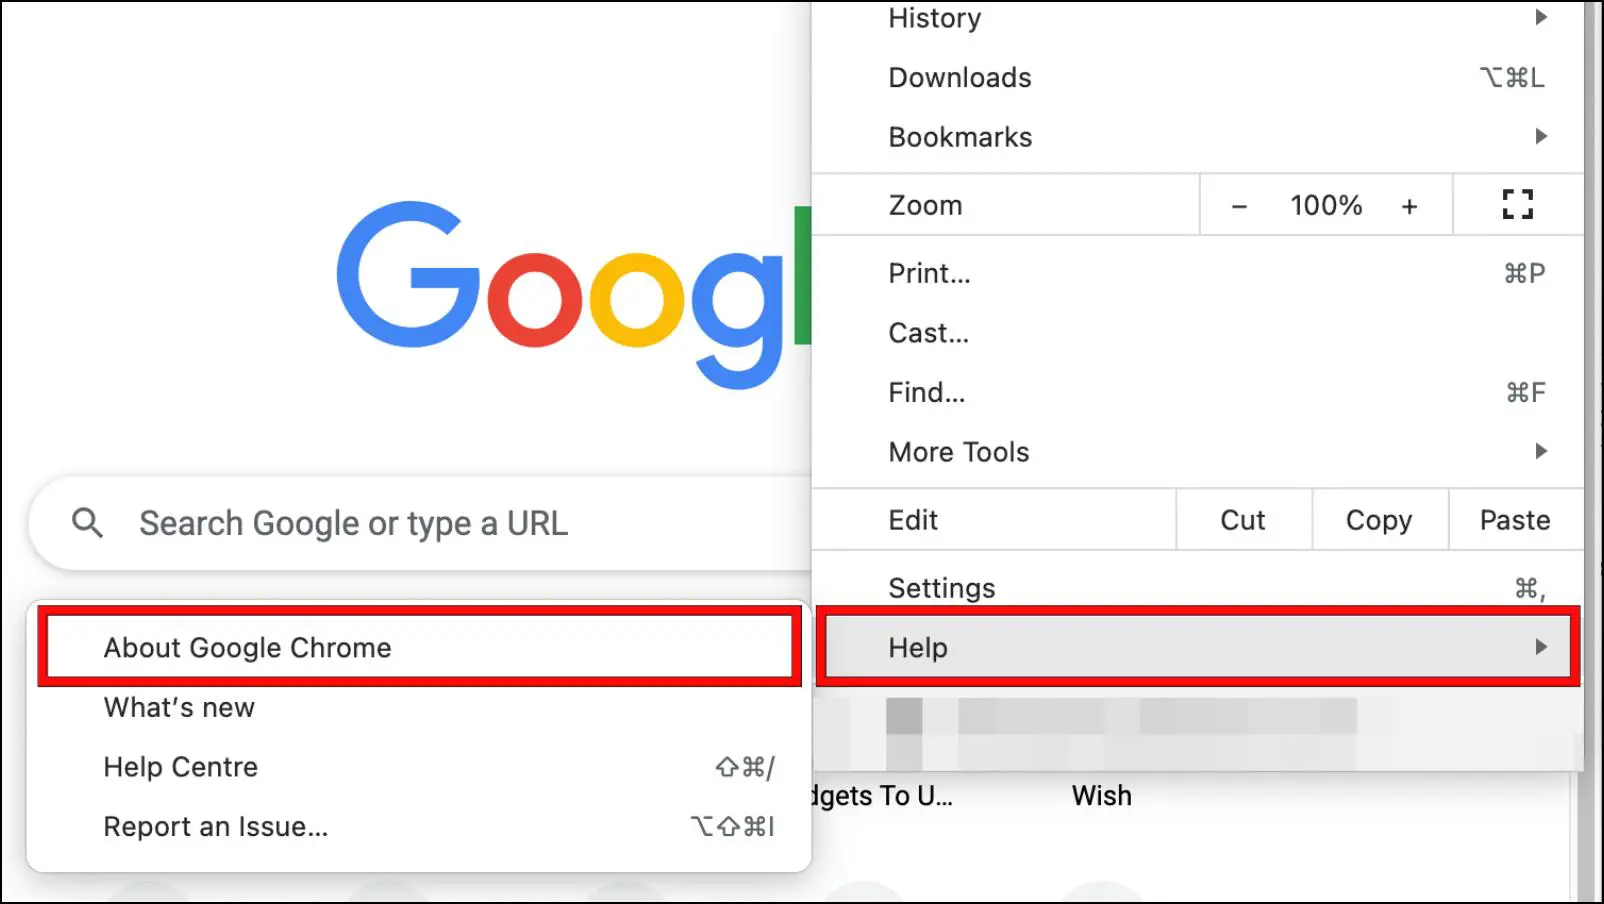
Step 2: From the list, click on the Help option, then select About Chrome.
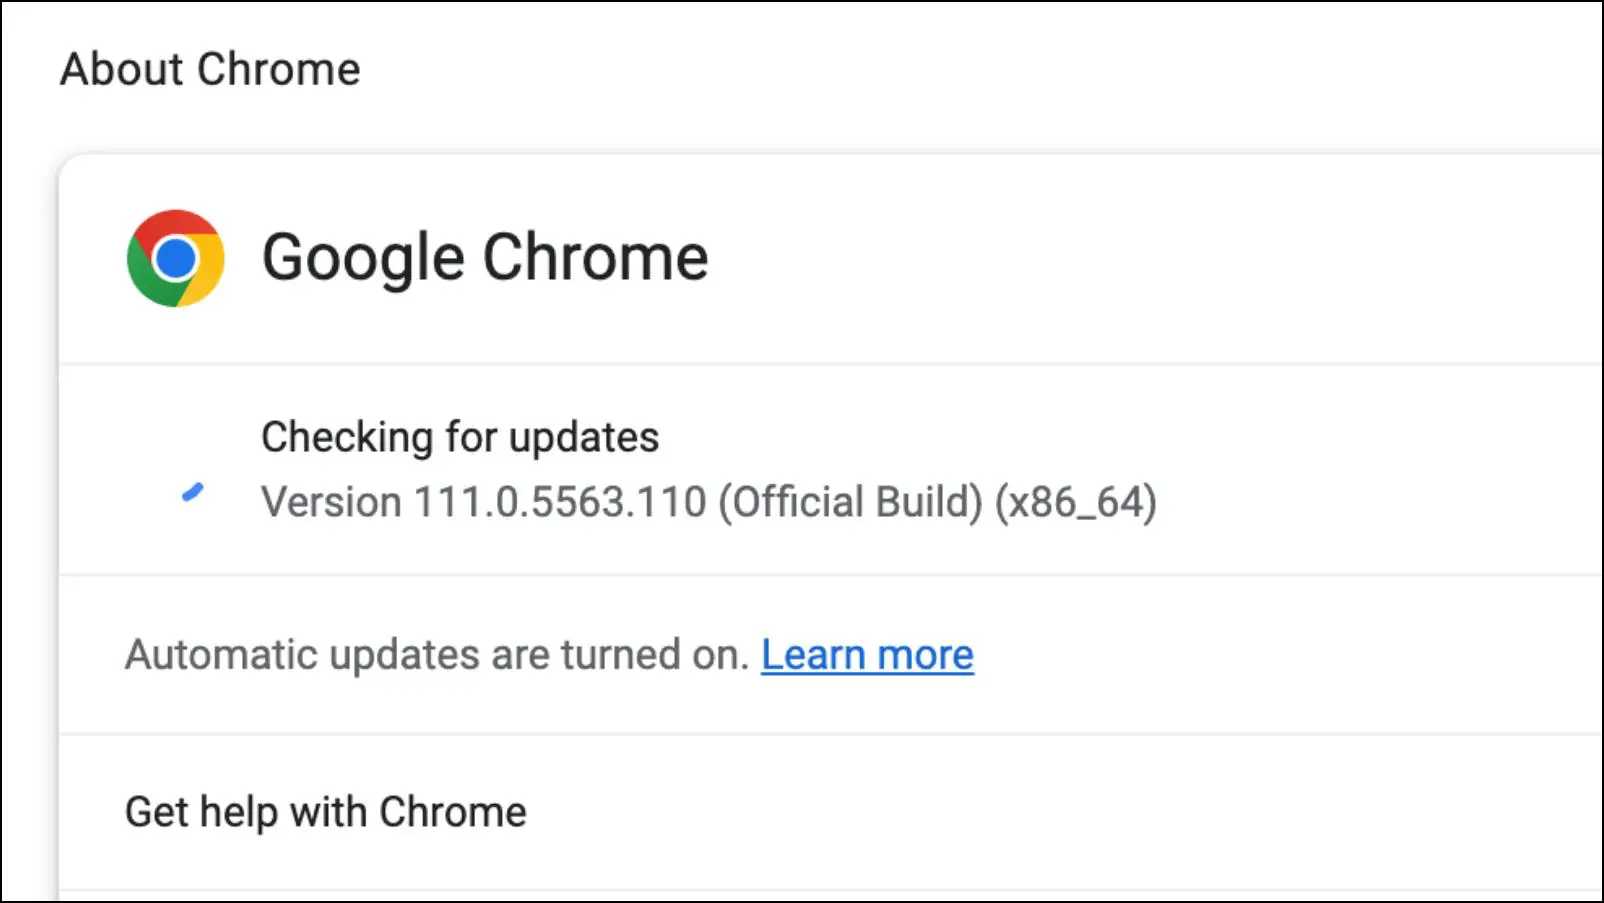
In the About Chrome section, the browser will check for the latest available updates. If an update is available it will automatically download it.
Step 3: Once the update is downloaded, tap on Relaunch to apply changes.
After the update, open Chrome to verify whether the upload issue is fixed.
Method 7 – Restart Your Computer
Oftentimes, the most simple fixes are the most effective ones. One such is restarting your computer. Restarting your system does help to fix common bugs and glitches with applications as it empties all data from memory and reloads them again. Here are the steps to correctly restart your system.
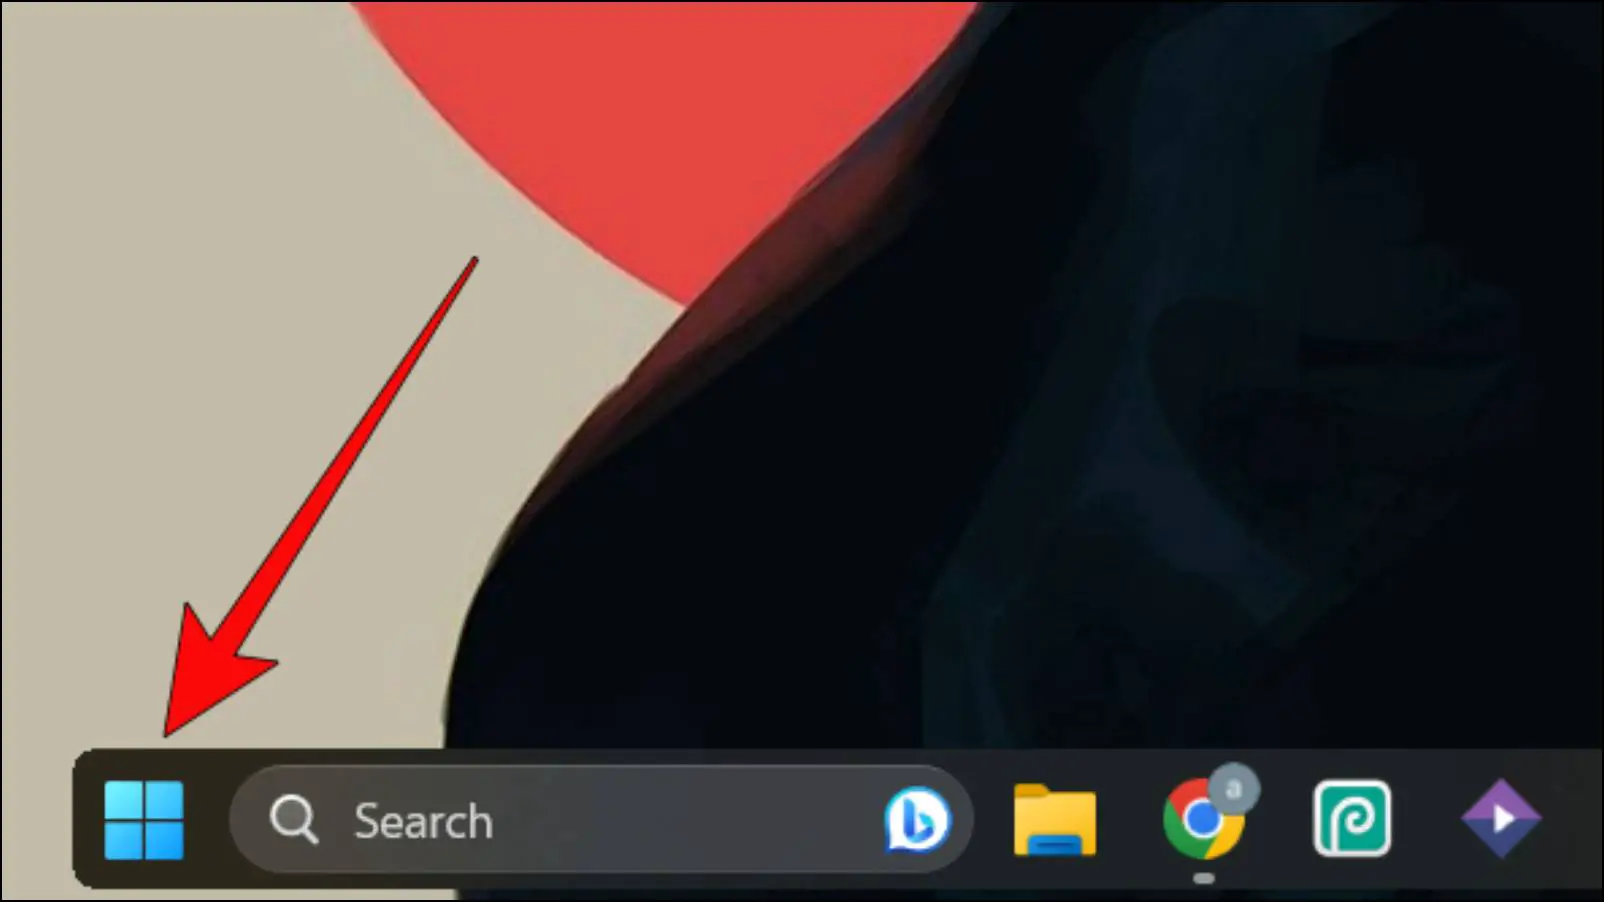
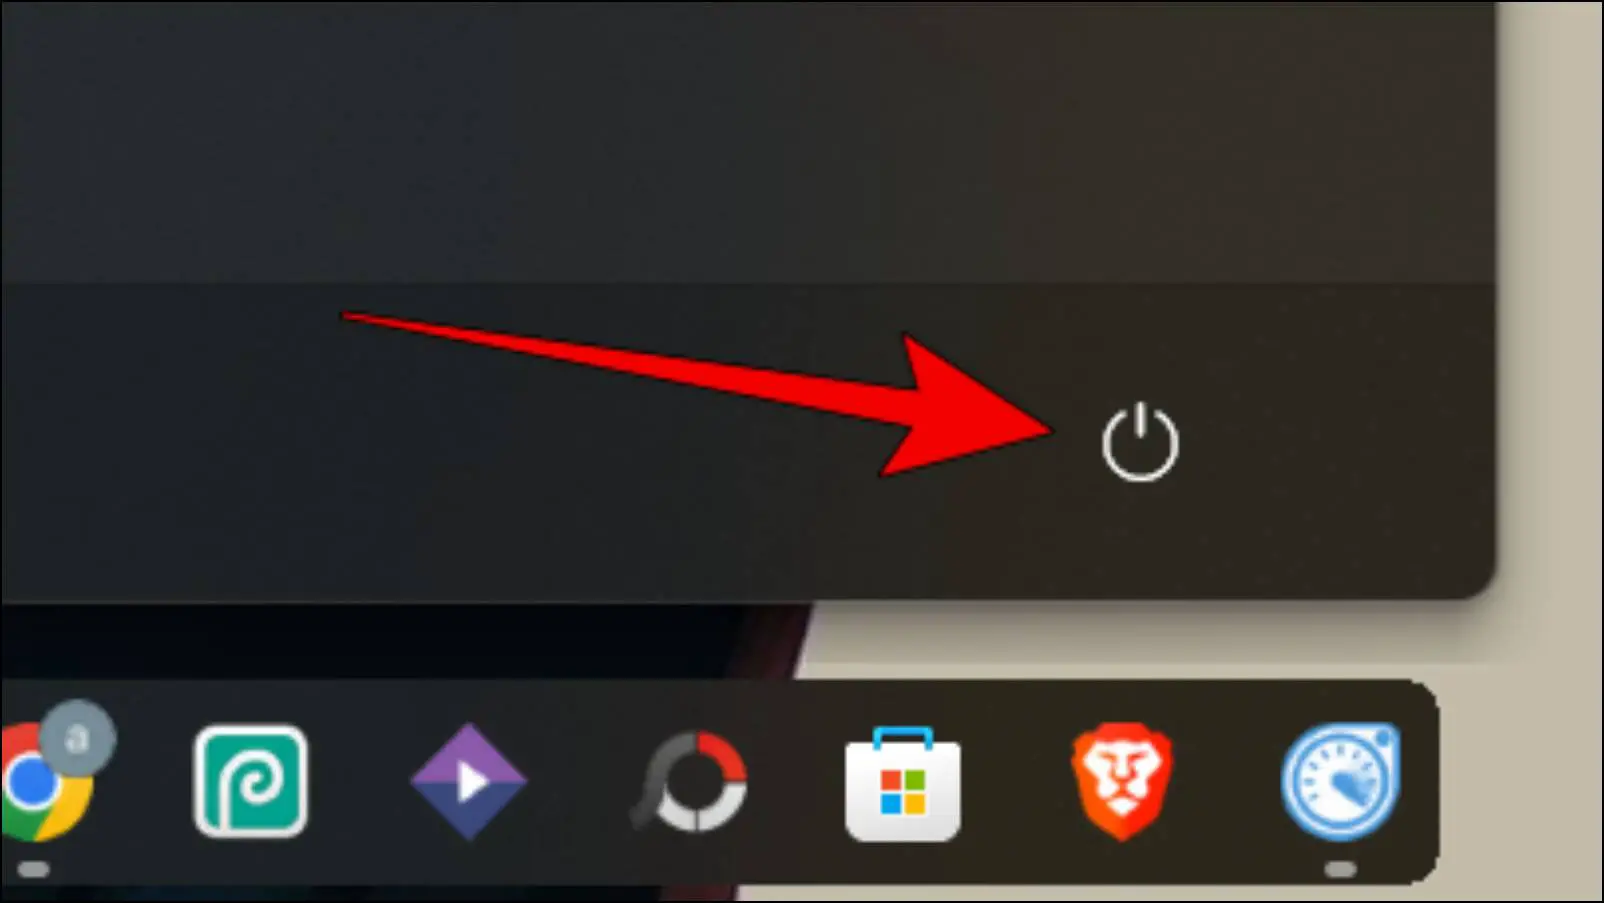
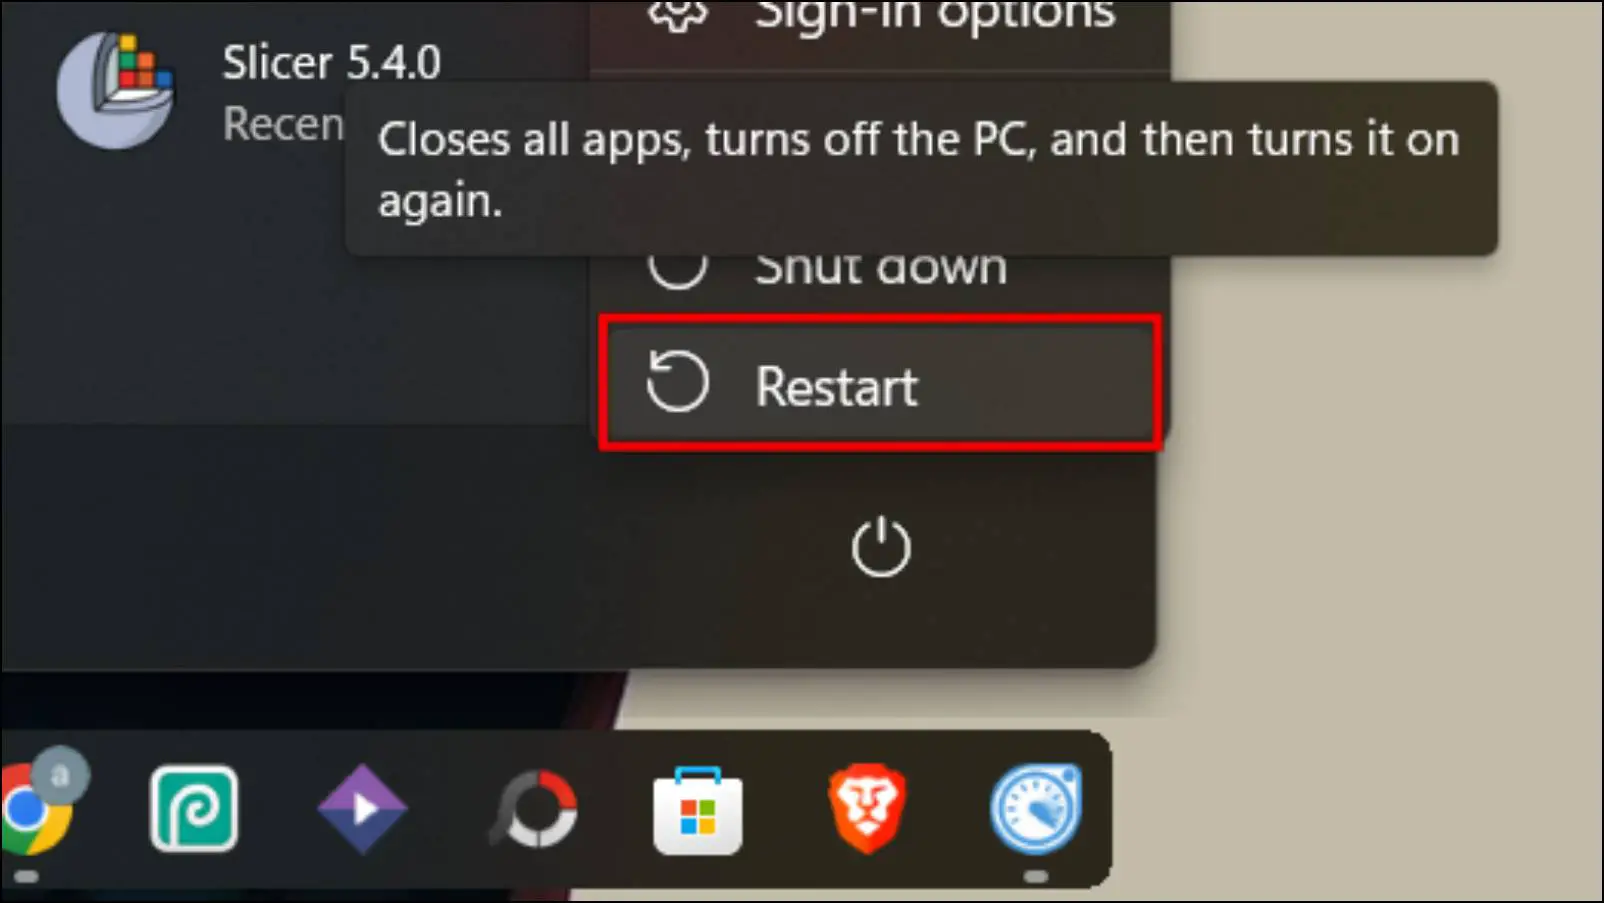
Restarting a Windows PC
Use the steps provided below to restart your Windows computer.
Step 1: Click on the Start menu.
Step 2: Next, click on the power icon.
Step 3: Now choose the Restart option.
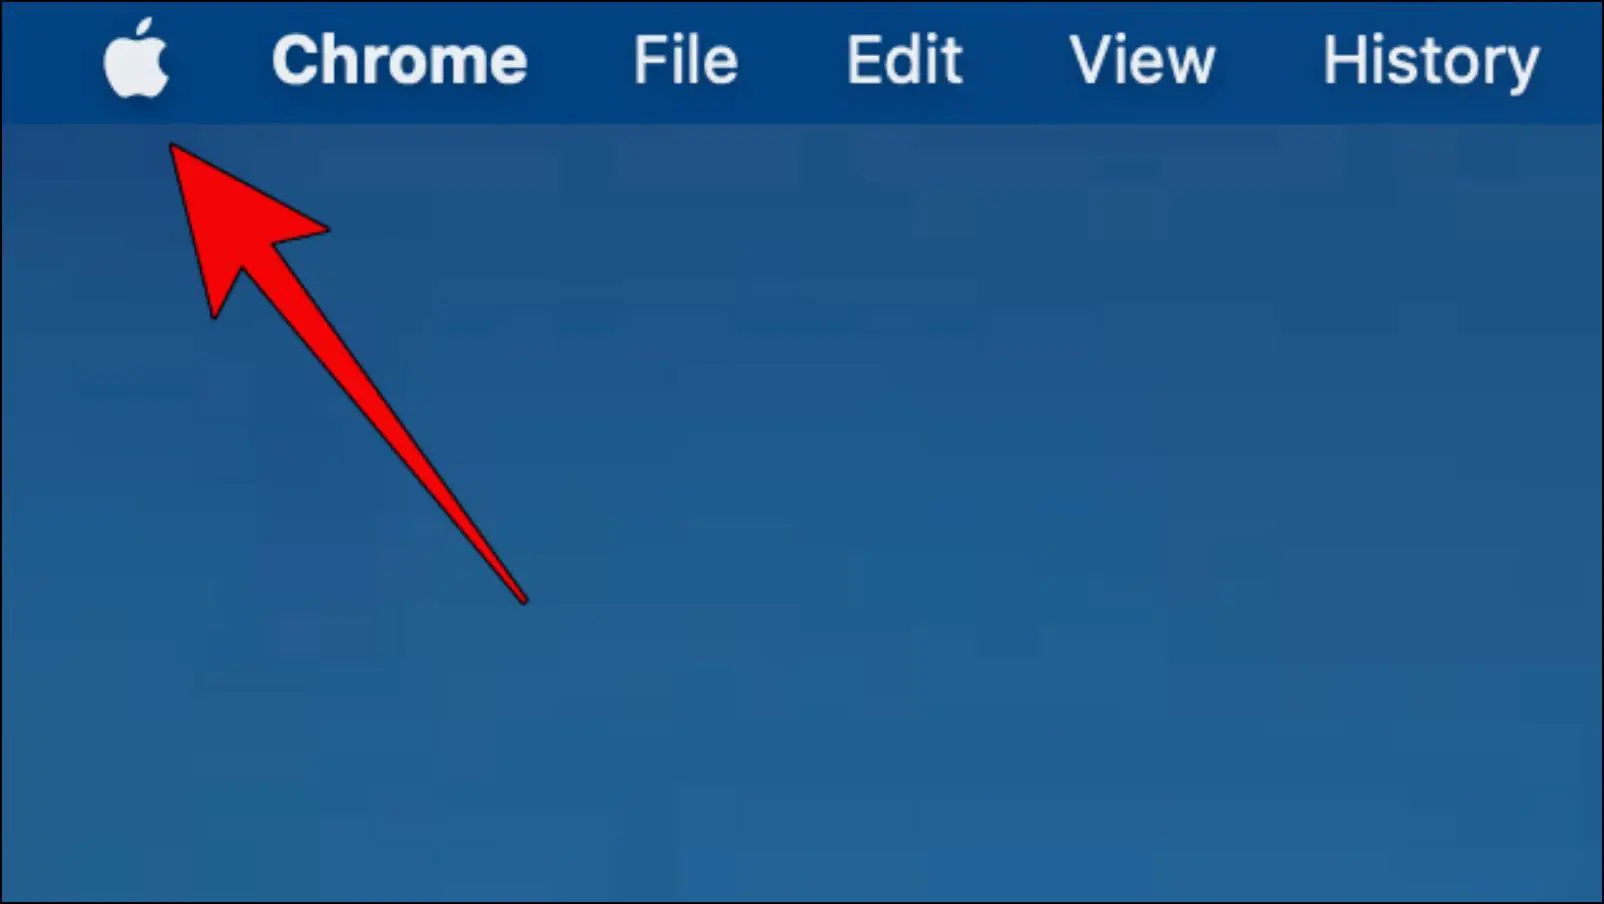
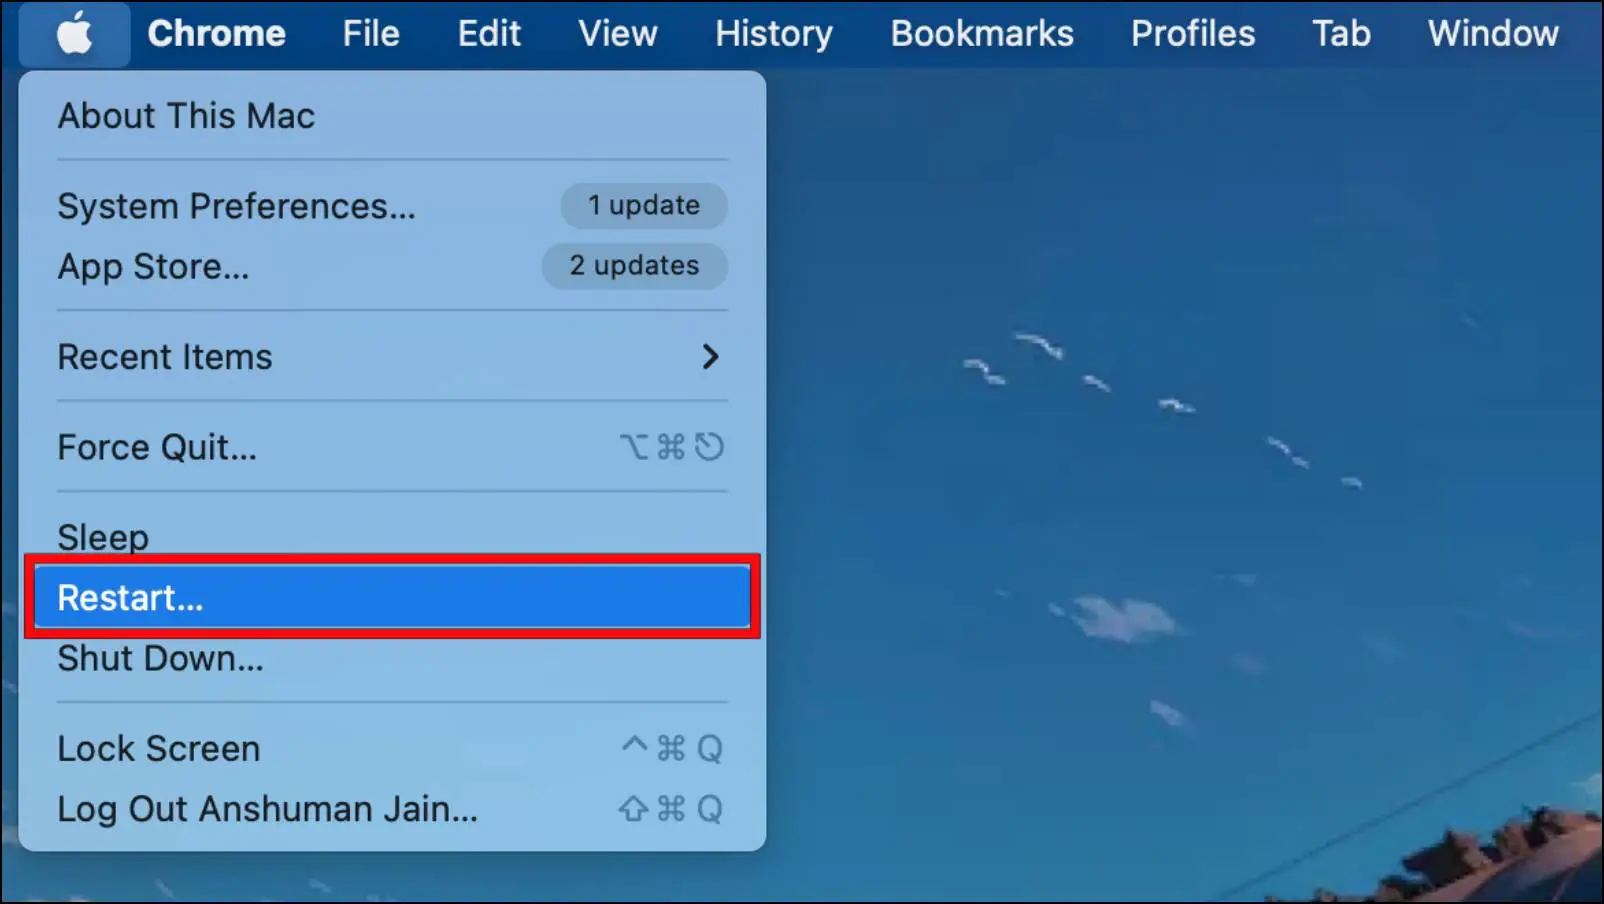
Restarting a Mac computer
These are the steps to restart your Mac.
Step 1: Click the Apple icon in the top right corner.
Step 2: Select Restart…
Wrapping Up
These are some of the ways that you can use to fix the upload issues on Google Chrome. We recommend going through each of them, as any one of them might be able to help resolve your issue. In case of any queries with the article, do reach out to us. Till then, stay tuned on BrowserToUse for more such articles, guides, and How-Tos.
Related: