Lately, several users have reported that they’re witnessing a blank screen when opening Chrome on their PC. Chrome doesn’t respond and the screen is completely black, leaving them helpless. Do not worry, we’ve got your back. Here are working methods to fix the blank black screen issue when opening Google Chrome on Windows 7, 10, or 11 computers.
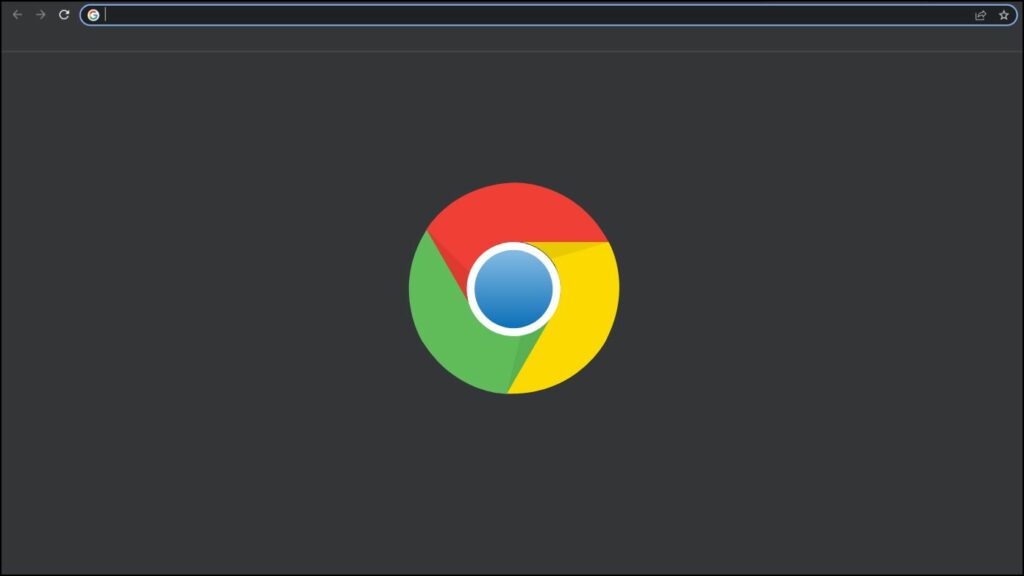
How to Fix Blank Black Screen in Chrome (Windows 7/10/11)
There can be various reasons for Google Chrome’s black screen issues on a Windows PC. It could be either due to incorrect browser settings, rogue extensions or experimental features, or improper graphics driver settings. Read on to see as we troubleshoot and fix the issue in detail.
Restart the Browser
You can try closing and restarting the browser as there might be some bug or glitch in the browser. Follow the below steps to do so.
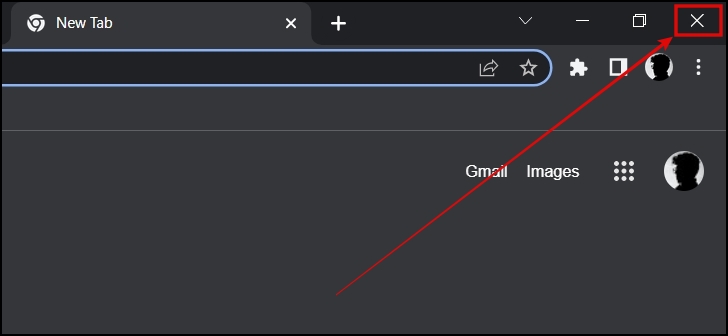
Step 1: Tap on the cross icon at the top or press the Alt+F4 key to close the browser.
Step 2: Once closed, wait for a few seconds then re-open it.
Restart Your PC
If restarting the browser does not fix the problem of a black screen on Chrome then you need to restart your Windows computer. Here’s how you can do it.
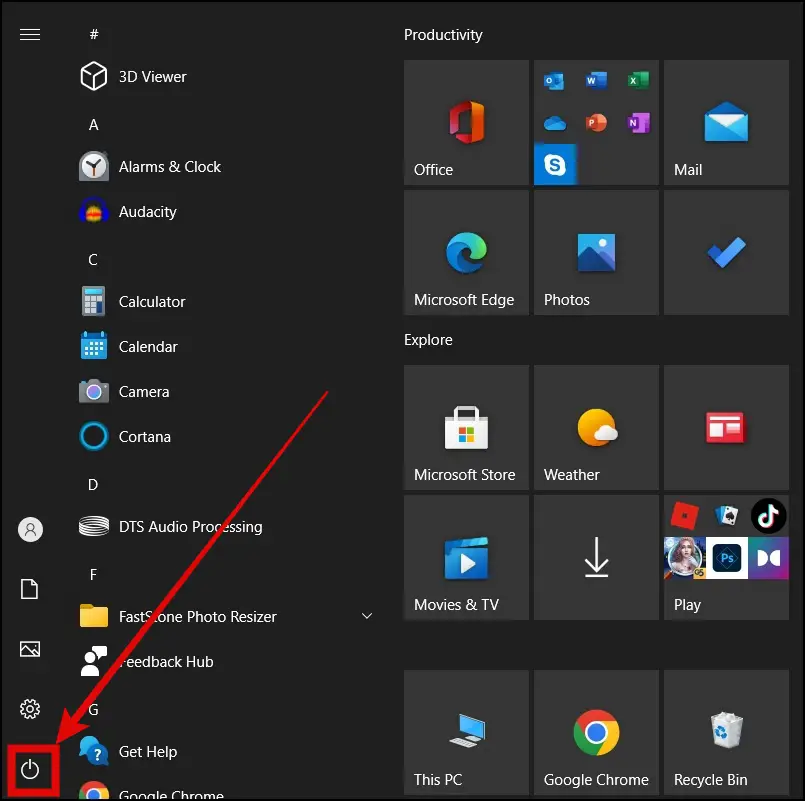 Step 1: Press the Windows Key on your keyboard.
Step 2: Tap on the Power button.
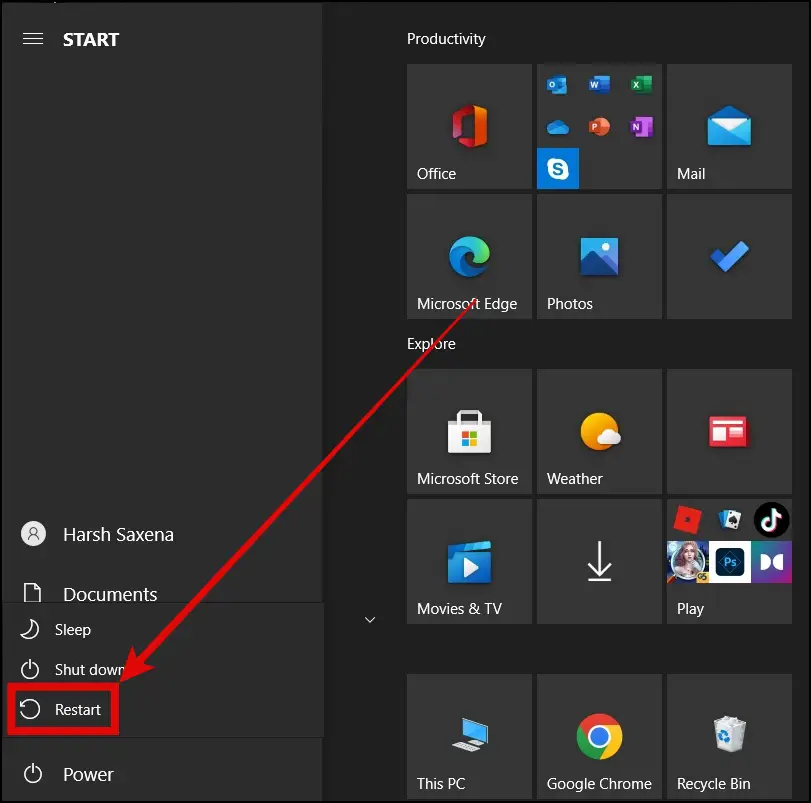
Step 3: Select Restart from the given options to restart your system.
Clear the Chrome GPUCache Folder
Step 1: Open This PC or My Computer Folder on your System.
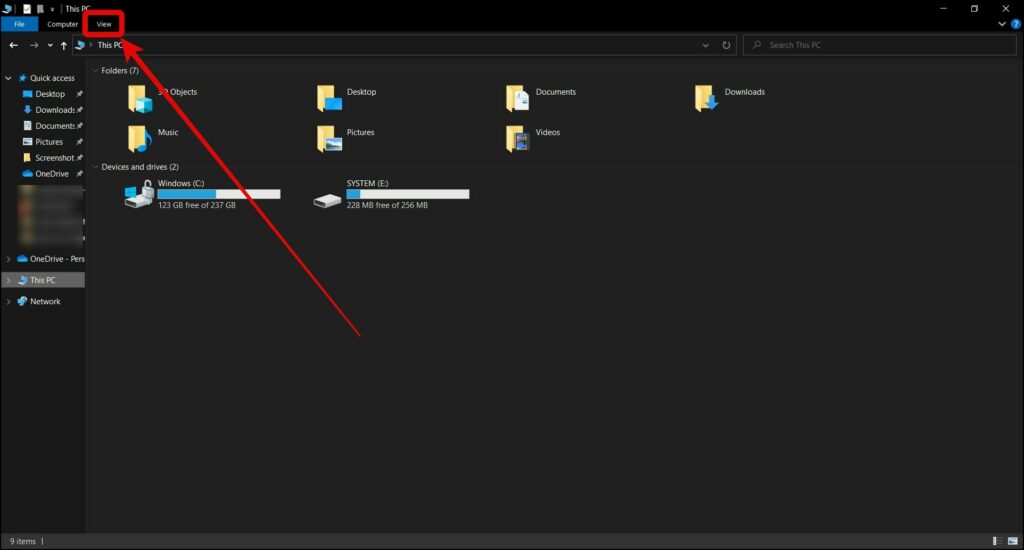
Step 2: Tap on View at the top menu.
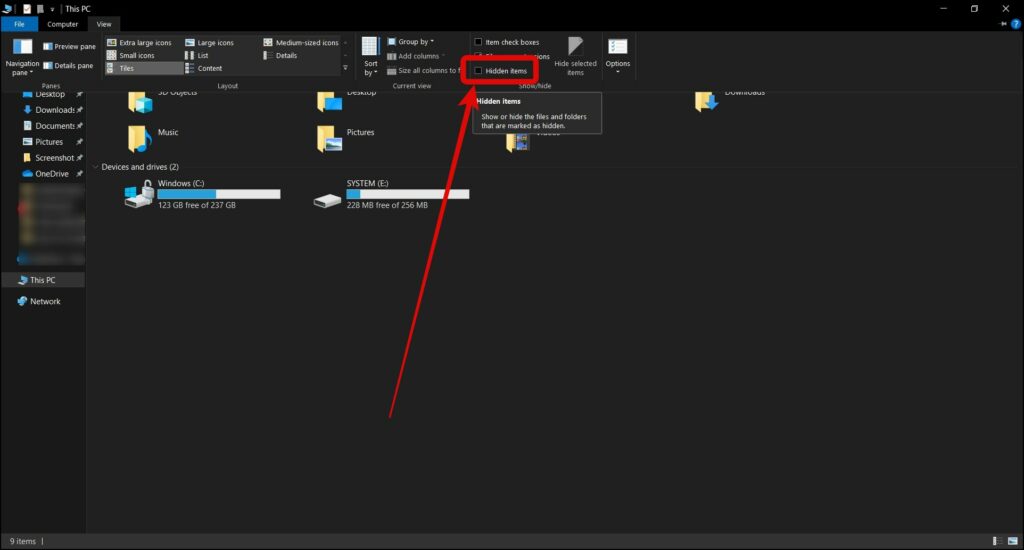
Step 3: Select the checkbox for Hidden Items.
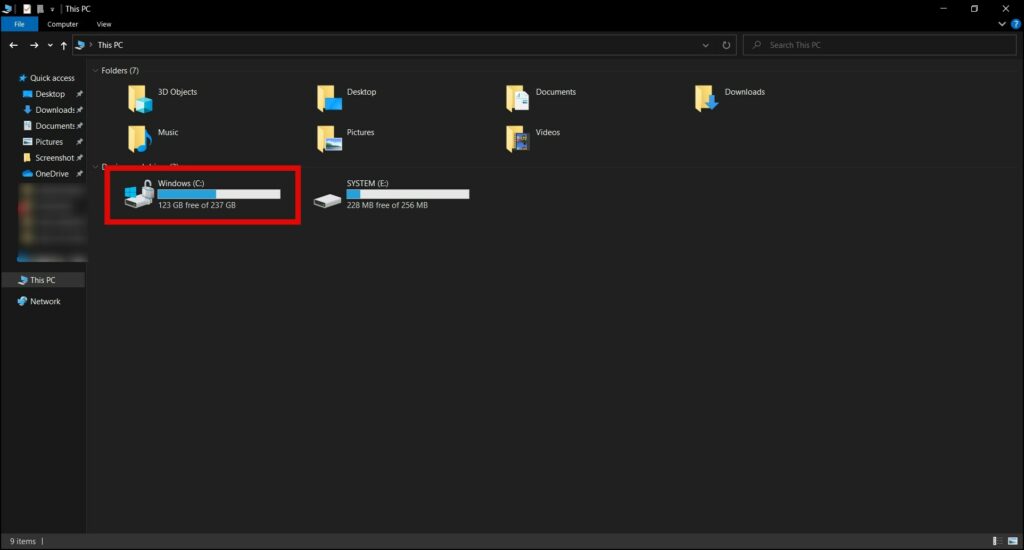
Step 4: Now, open Windows (C:) Drive where the operating system is installed.
Step 5: Go to Users, select the current user, and then tap AppData.
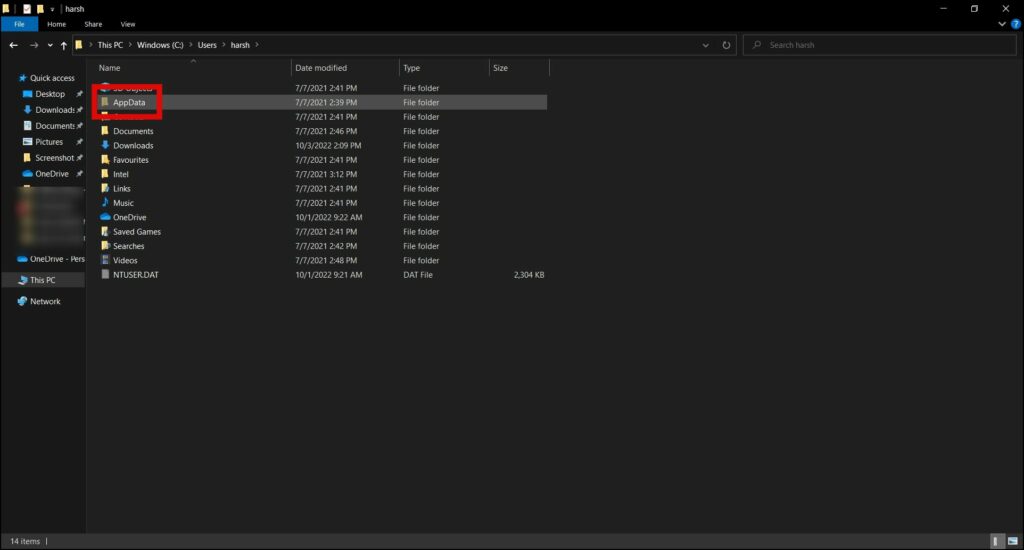
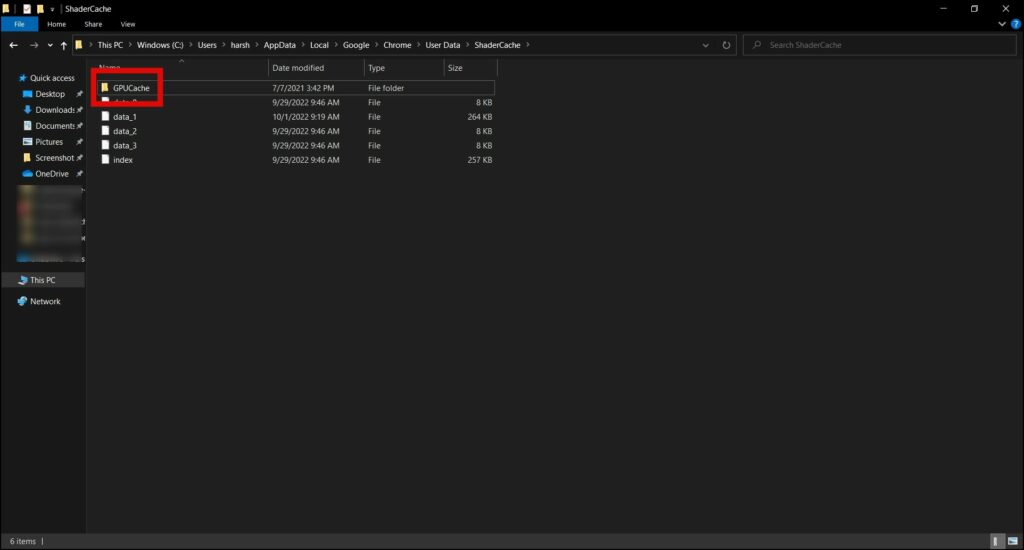
Step 6: Navigate to Local > Google > Chrome > User Data > ShaderCache and you will see GPUCache folder.
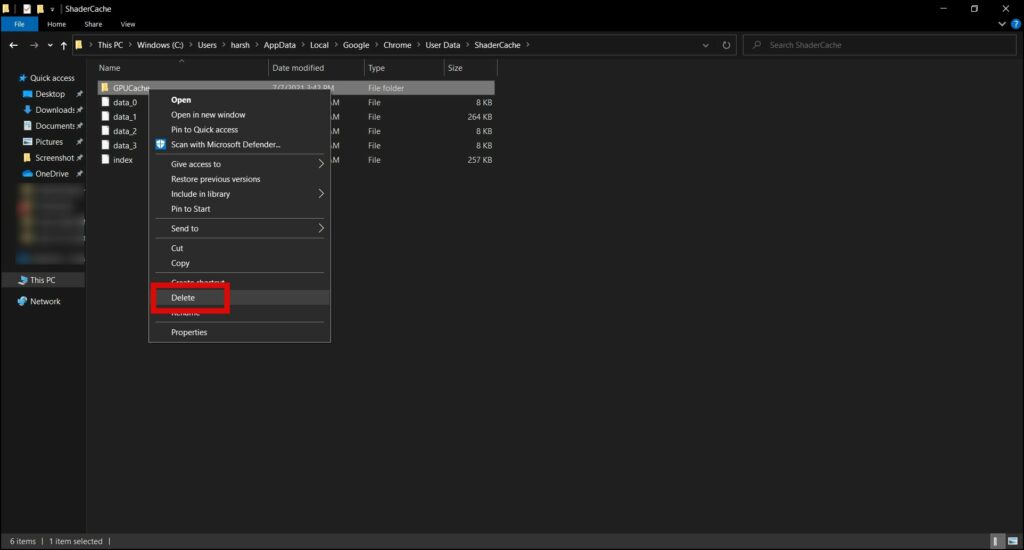
Step 7: Right-click on the GPUCache and select Delete to remove the folder.
Step 8: Once deleted, restart your system.
Disable Browser Extensions
There are chances that the extensions in the browser are causing problems and that’s why you are seeing a black screen display on Chrome. So if you have recently installed any extensions on your browser, try disabling them to see if it solves the problem, as shown below:
Step 1: Open the Google Chrome browser on your PC.
Step 2: Tap on the three-dots icon at the top and select Settings.
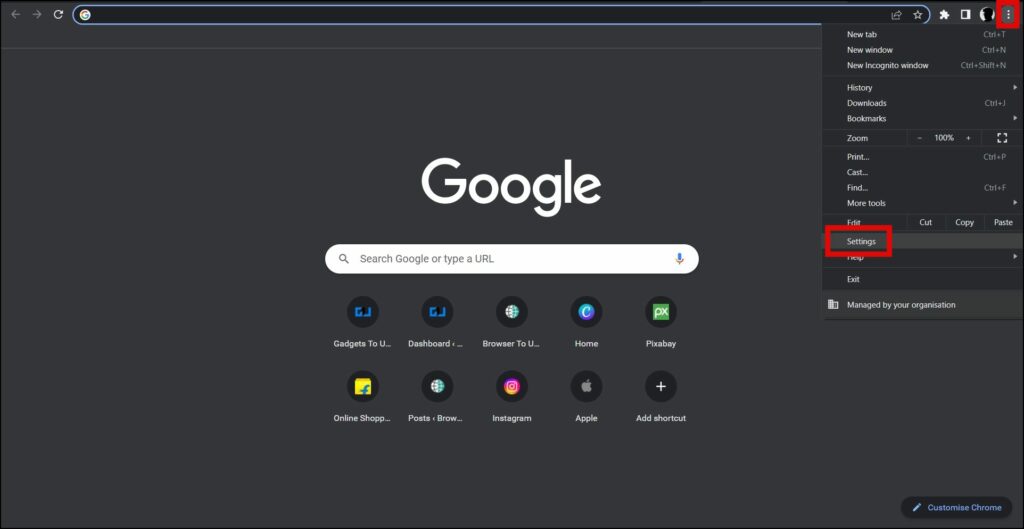
Step 3: Click on Extensions from the left sidebar.
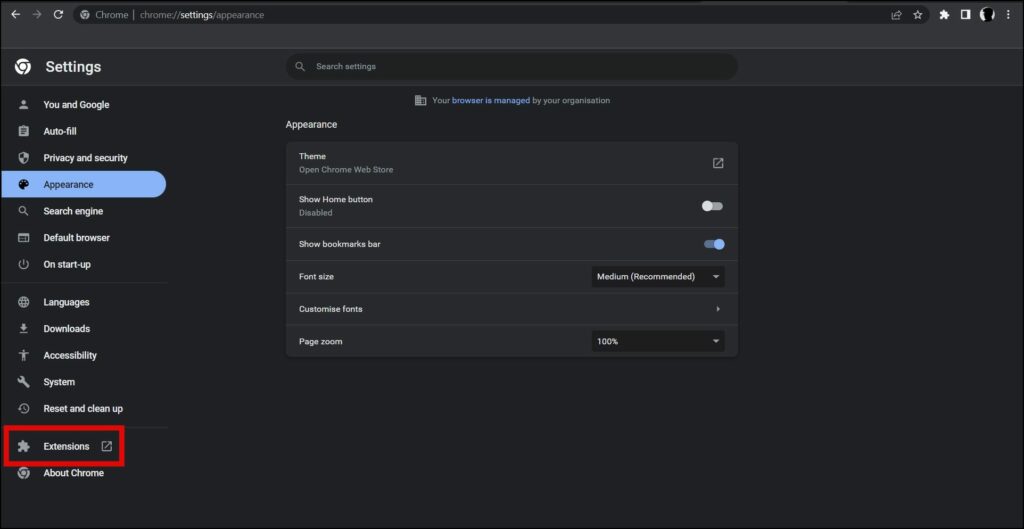
Step 4: Alternatively, type Chrome://extensions in the search box and hit enter to open the extensions page.
Step 5: Turn off the toggle next to each extension to disable them.
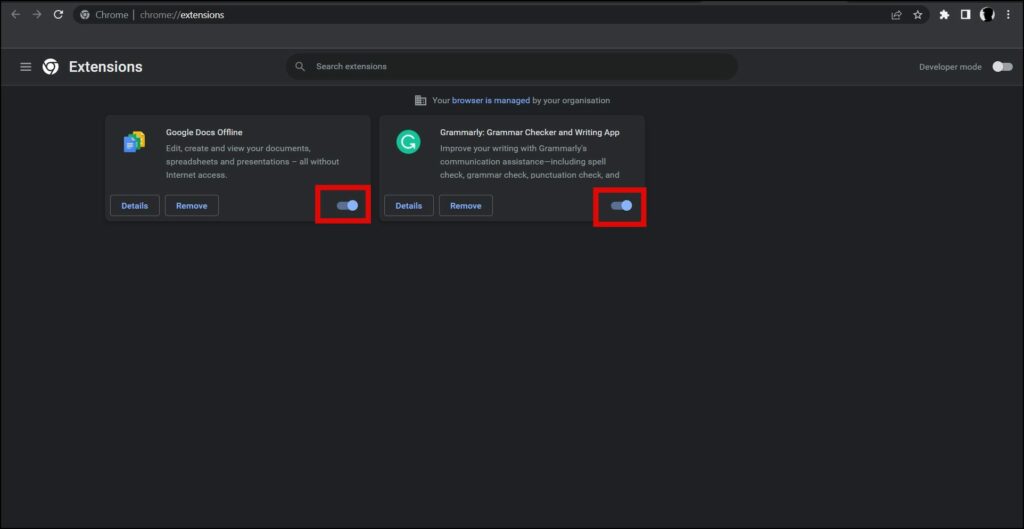
Check whether your issue is solved or not. If disabling extensions solves your problem, you need to enable the installed extensions one by one to find out the one which is causing the issue. After finding it out, you can either reinstall it or remove it permanently.
Disable Chrome Flags or Experiments
At some point in time, you may have enabled or disabled some or the other feature in Google Chrome’s experimental flags. In order to resolve the problem, you need to disable all the flags. Here’s how you can do it.
Step 1: Open the Google Chrome browser on your PC.
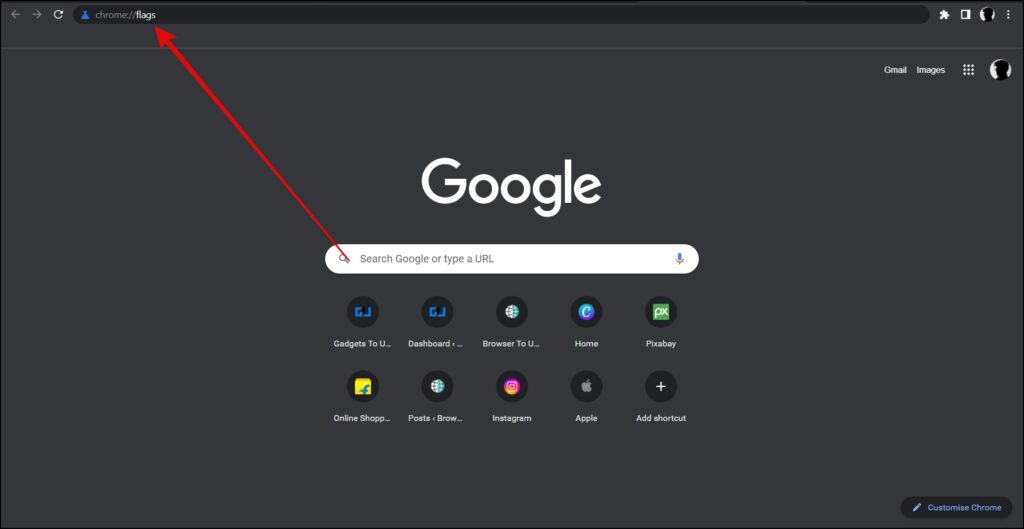
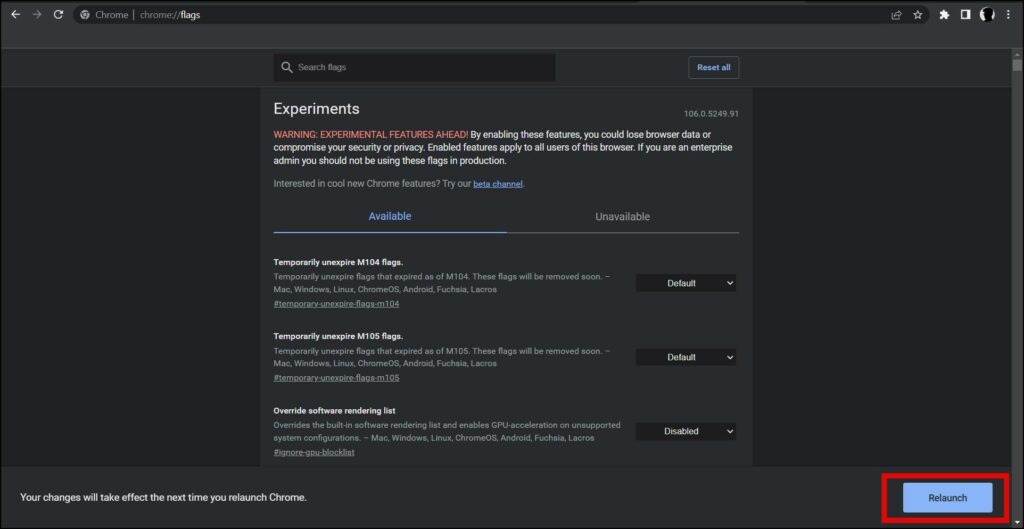
Step 2: Type chrome://flags in the search box and hit enter.
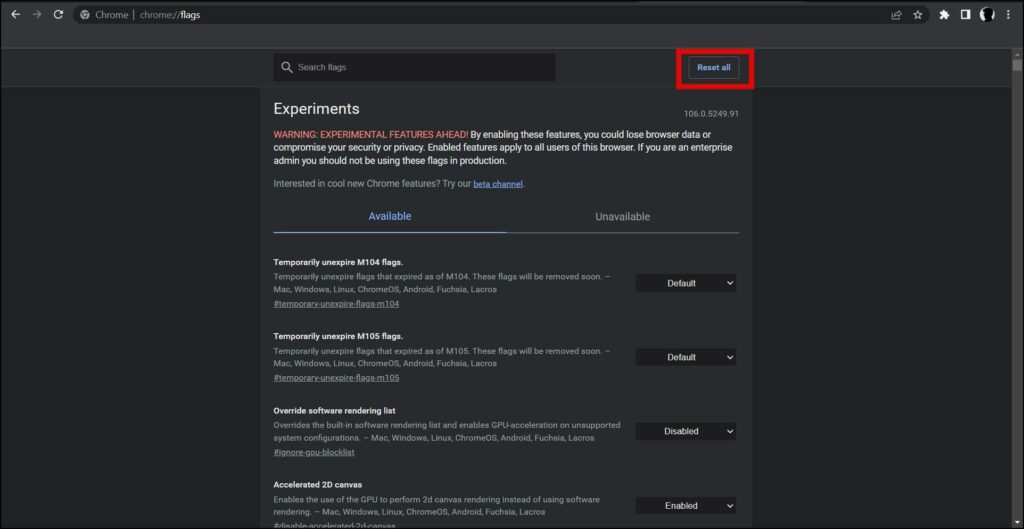
Step 3: Tap on the Reset all button at the top to reset all the experimental settings to normal.
Step 4: Click on the Relaunch button to reopen the browser.
Disable GPU and Hardware Acceleration in Chrome
Google Chrome uses Hardware Acceleration to give users better performance. However, sometimes, your hardware may not meet the requirements and as a result, you will see a black screen in the Chrome window. Follow the below steps to disable it.
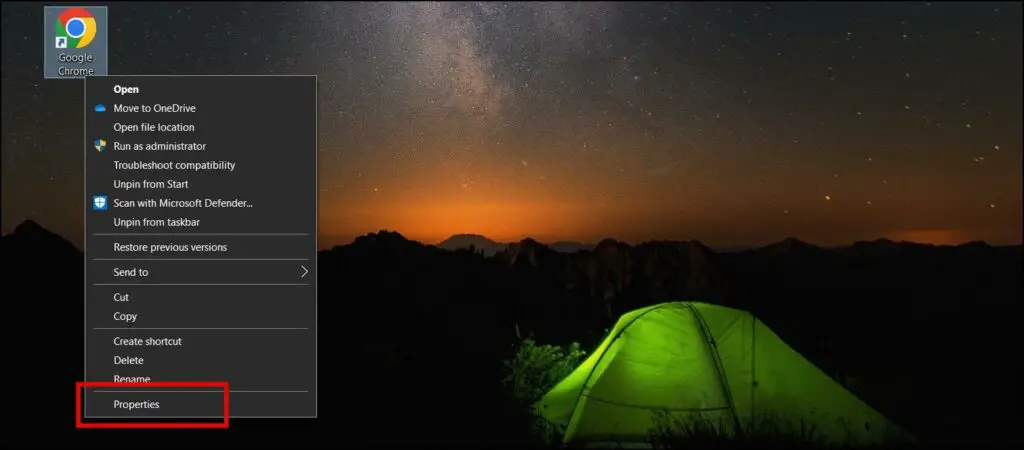
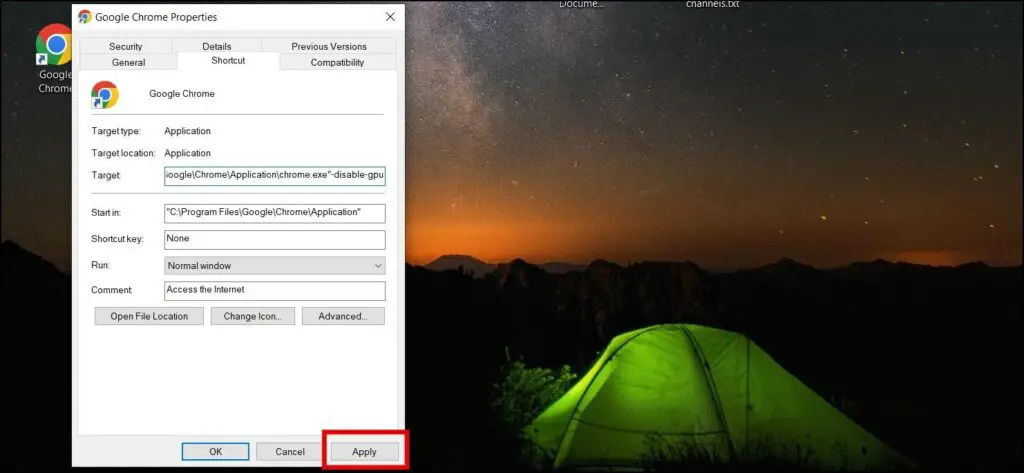
Step 1: Right-click on the Chrome shortcut on your desktop and tap Properties.
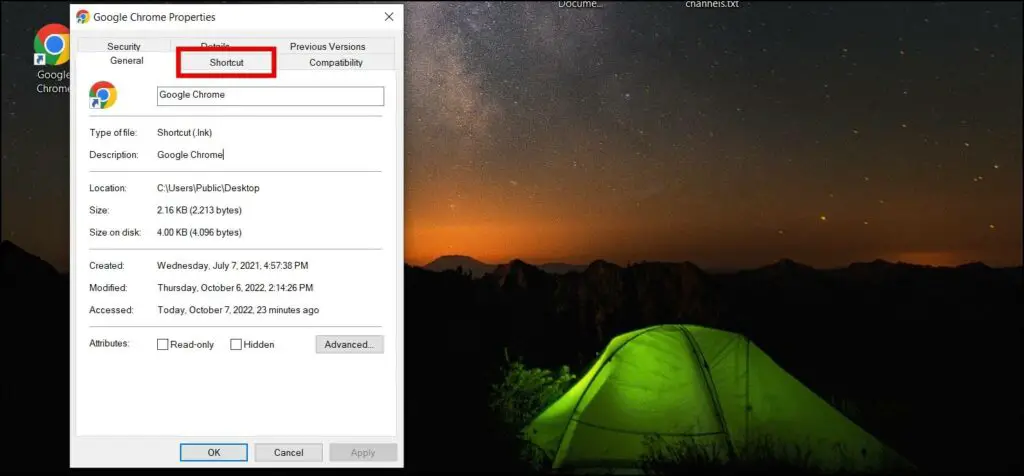
Step 2: On the next screen, tap on Shortcut.
Step 3: Add -disable-gpu just after the path on the target field.
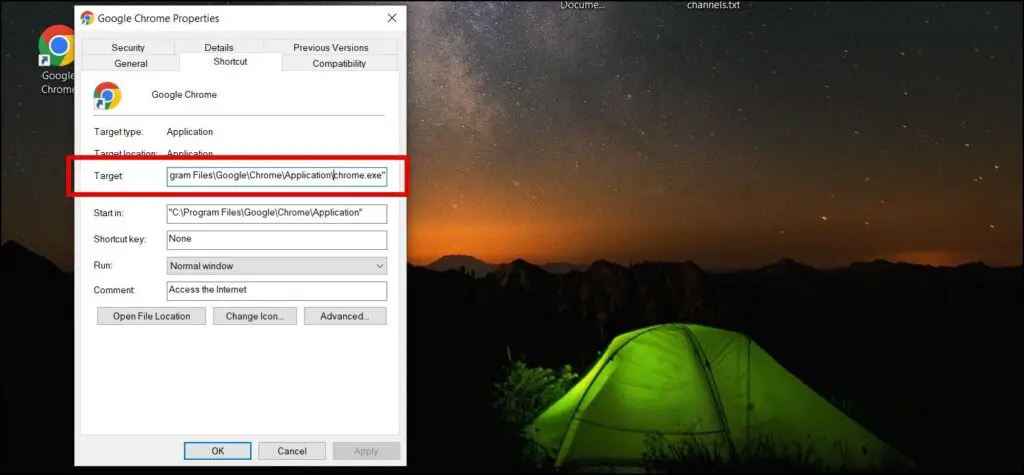
Step 4: Tap on Apply then choose OK.
Step 5: Restart the Browser.
Step 6: Re-open the Chrome Browser on your PC.
Step 7: Tap on three dots at the top and select Settings.
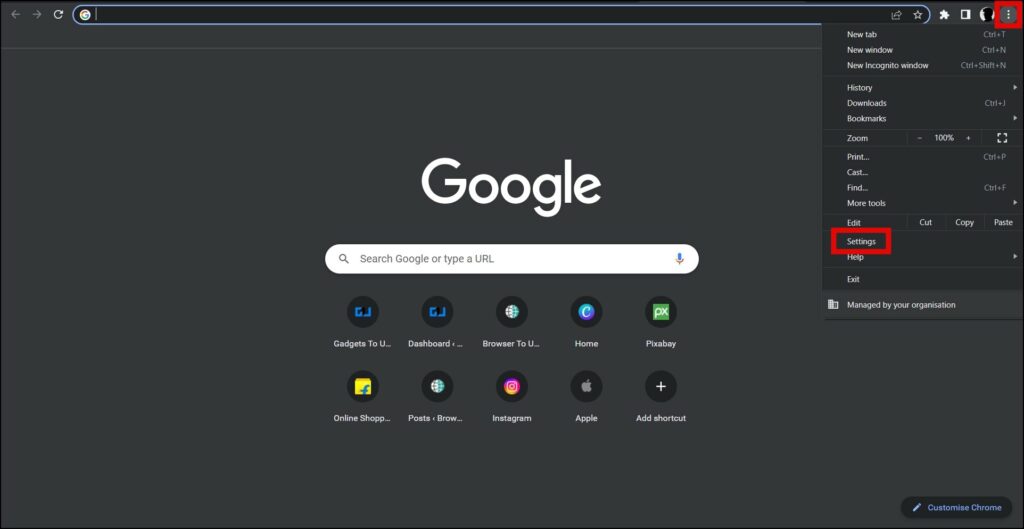
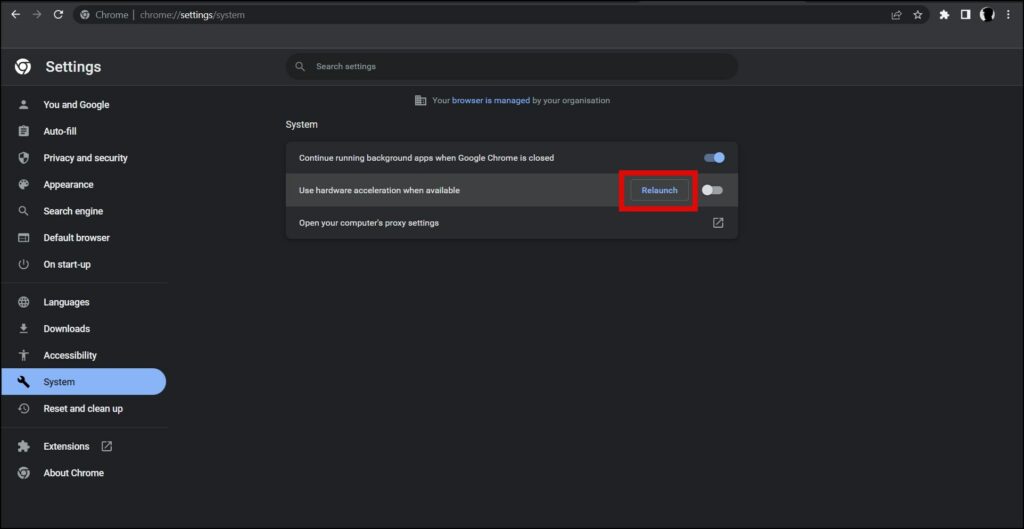
Step 8: Click on System from the left sidebar.
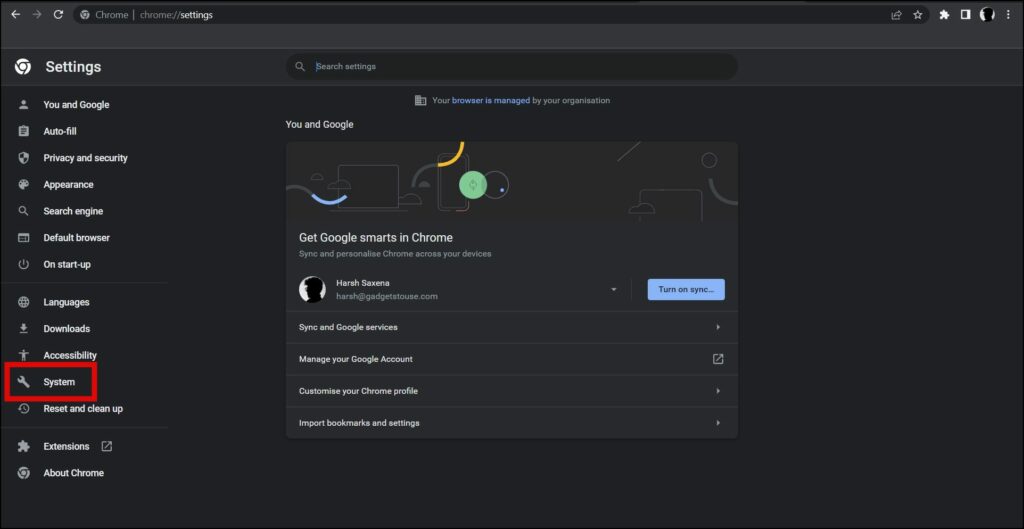
Step 9: Turn off the toggle next to Use hardware acceleration when available.
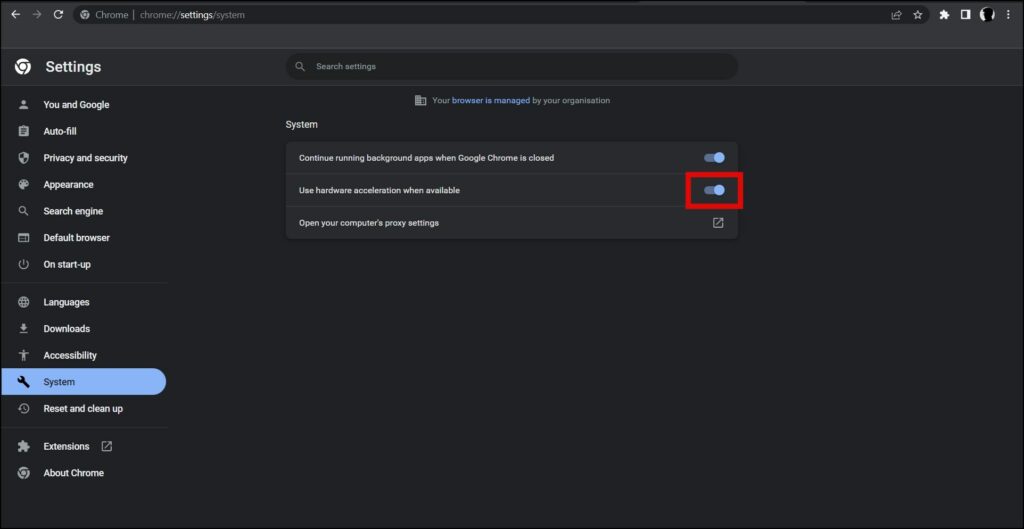
Step 10: Now, tap on the relaunch button to re-open the browser.
Run Chrome in Compatibility Mode
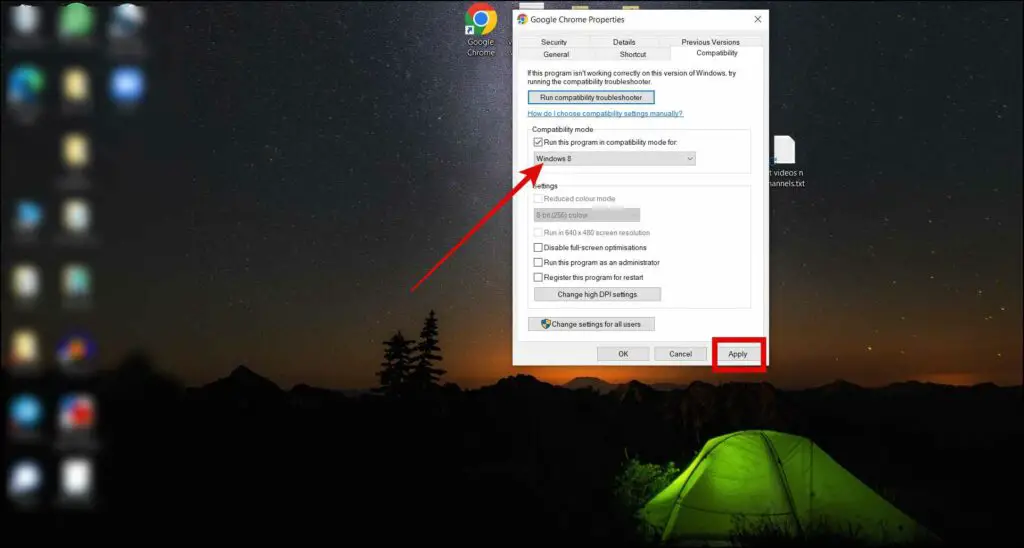
If you are still facing the same problem then you need to run chrome in compatibility mode. Follow the below steps to run it.
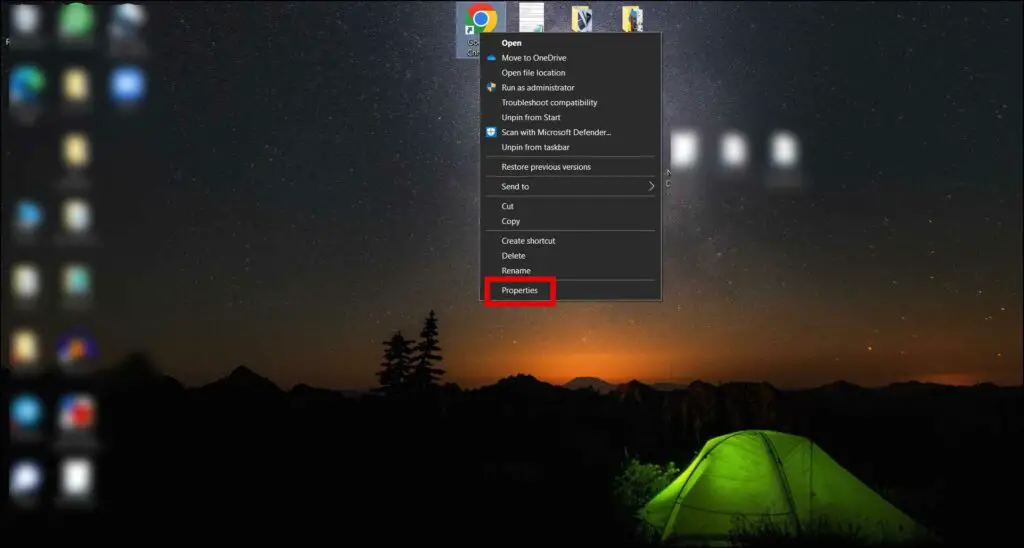
Step 1: Right-click on the Chrome shortcut on your desktop and tap on Properties.
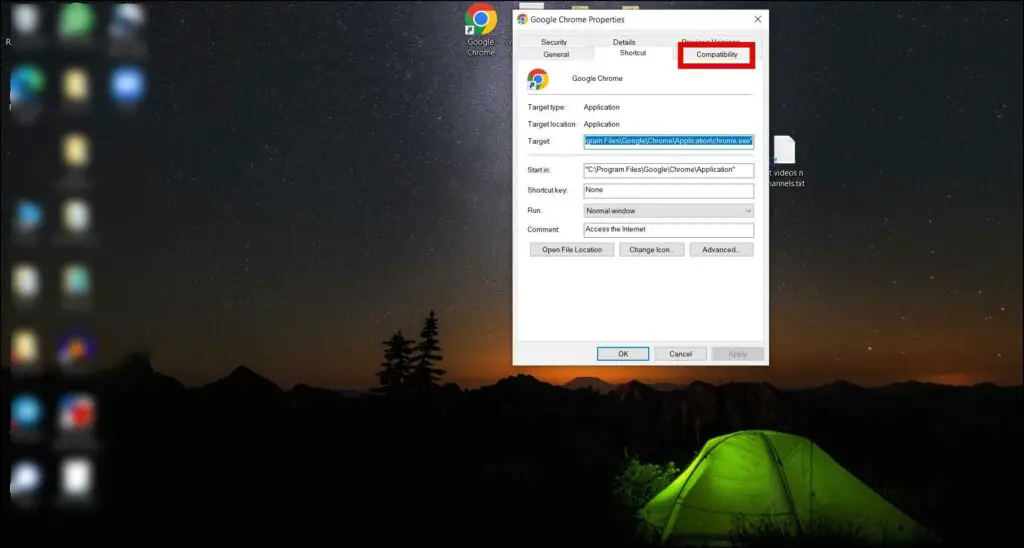
Step 2: Tap on the Compatibility tab.
Step 3: Select the checkbox for Run this program in Compatibility mode.
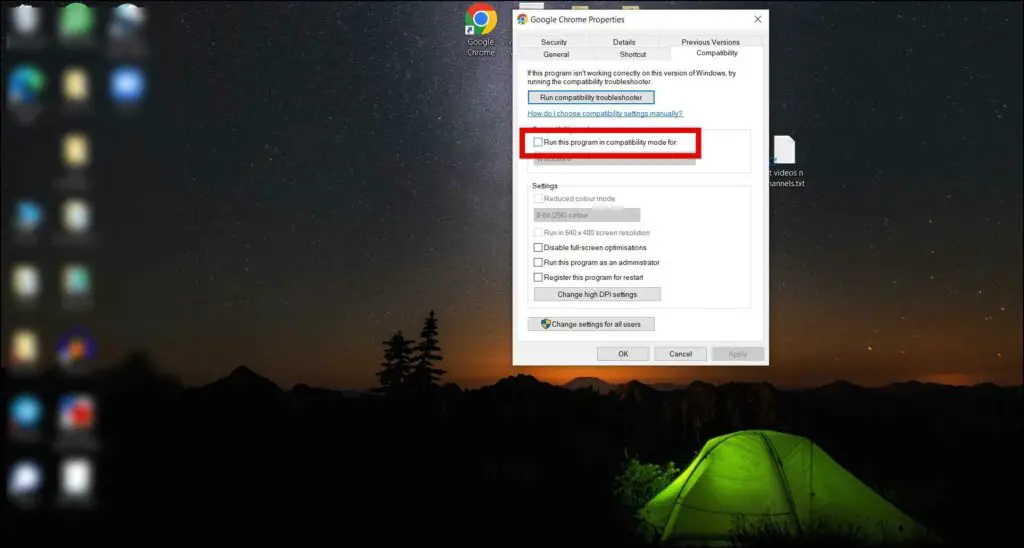
Step 4: Tap on the drop-down and choose the version as either Windows 7 or Windows 8.
Step 5: Finally, tap on Apply then tap OK.
Reset Google Chrome Settings
You can also try resetting the Google Chrome browser to its default settings. Follow the below steps to reset Chrome.
Step 1: Open the Chrome browser on your PC.
Step 2: Tap on three dots and choose Settings.
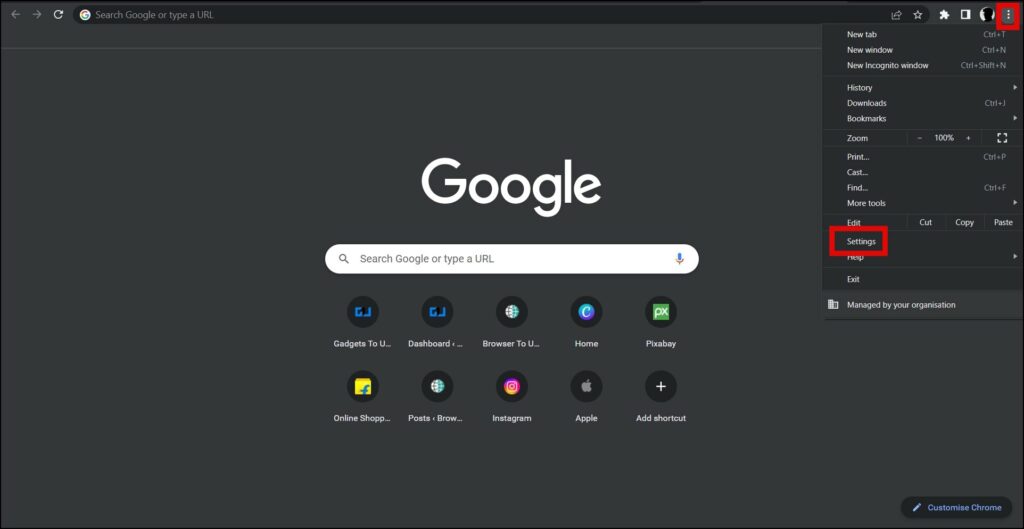
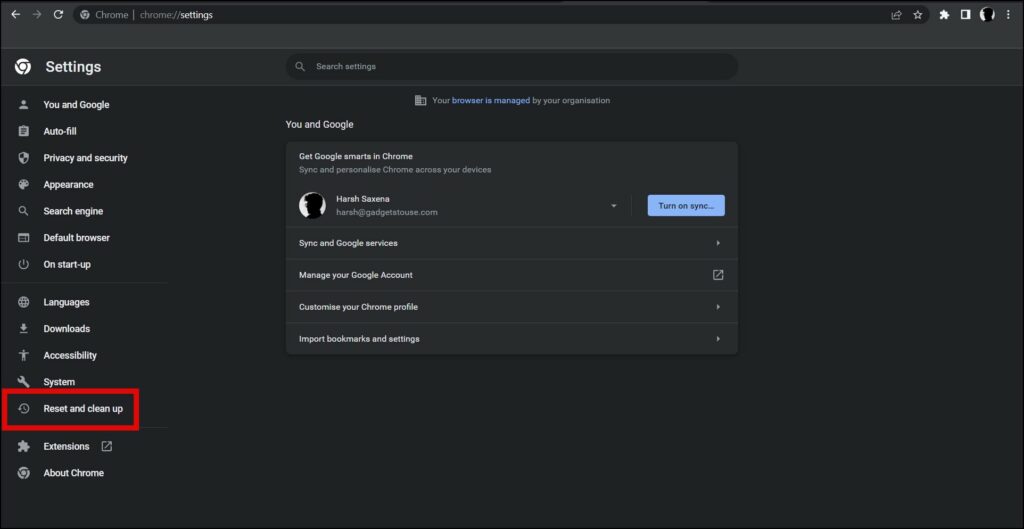
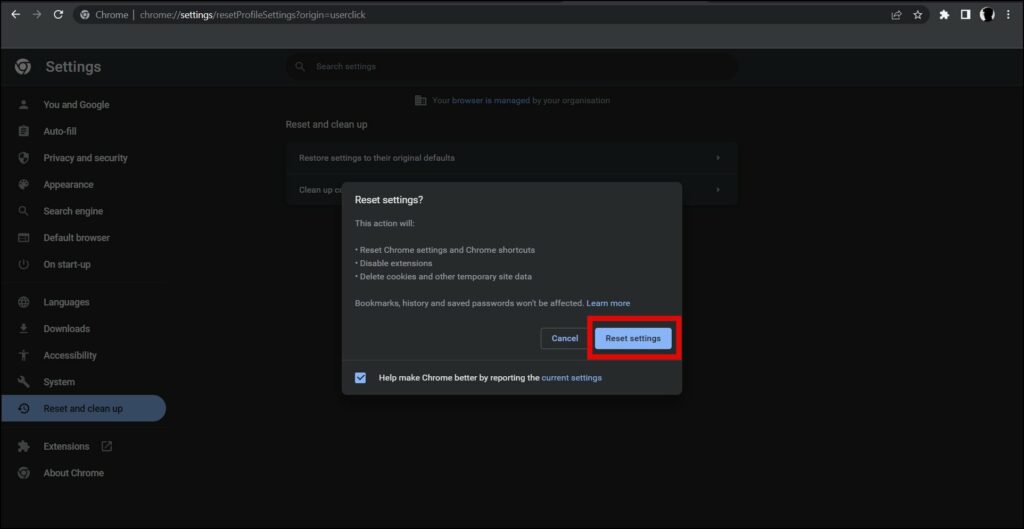
Step 3: Click on Reset and Clean Up from the left sidebar or type chrome://settings/reset in the address bar to visit the same page.
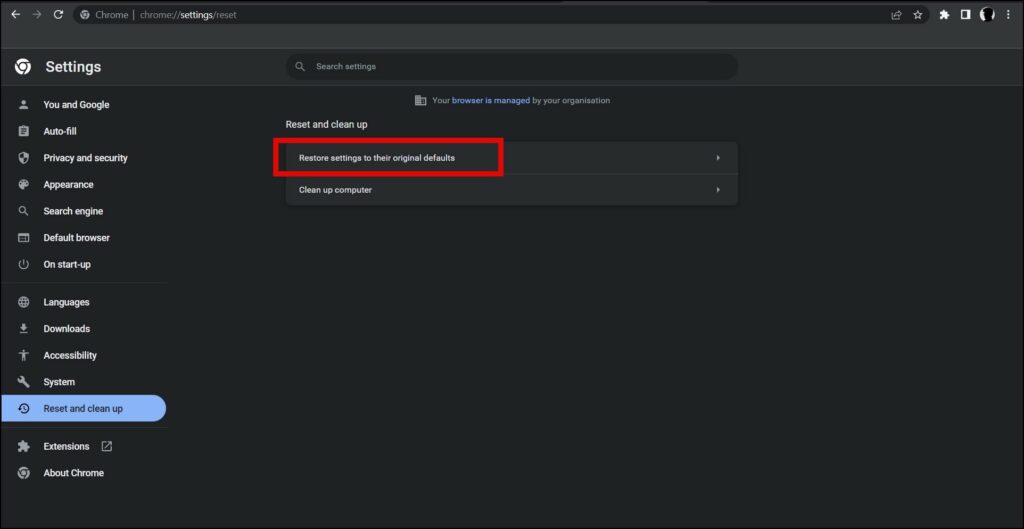
Step 4: Here, tap on Restore settings to their original defaults.
Step 5: Tap on Reset Settings to confirm the action.
Reinstall Google Chrome
If none of the methods work then you need to re-install the Chrome browser on your PC. Follow the below steps to do so.
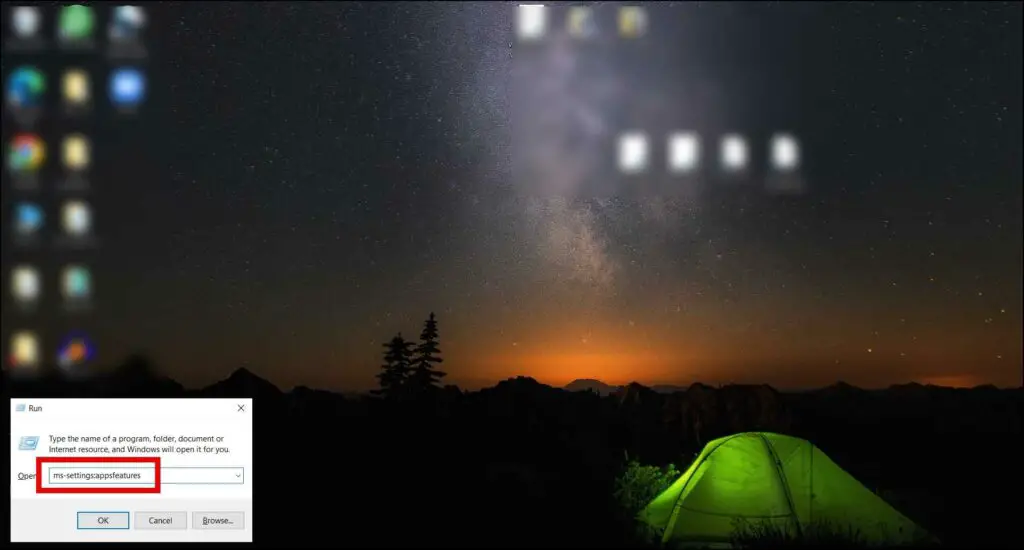
Step 1: Press the Windows + R simultaneously to open Run.
Step 2: Type ms-settings:appsfeatures and hit enter to open the Apps & features Settings page.
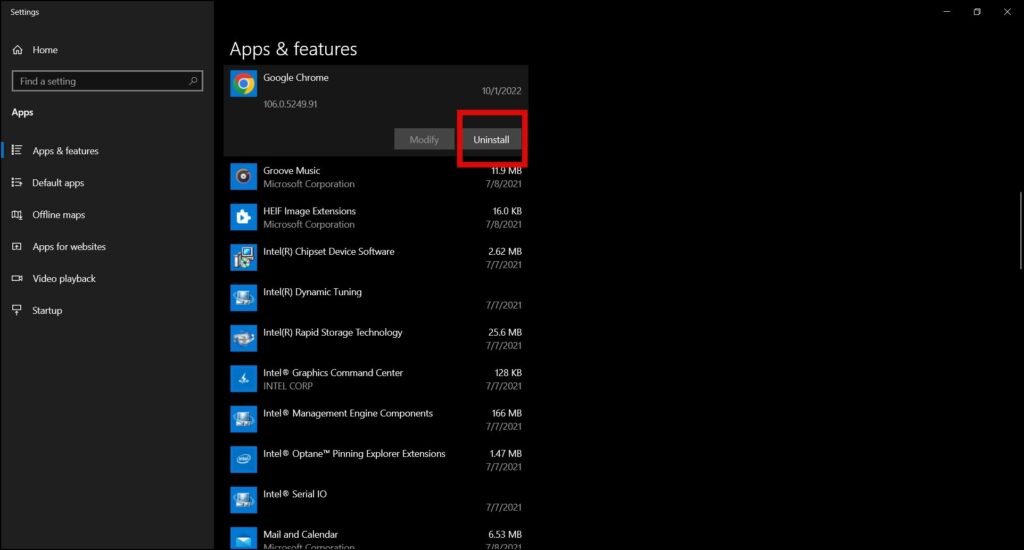
Step 3: Tap on Google Chrome app from the list.
Step 4: Click on Uninstall under the menu and confirm it.
Step 5: Once uninstall, open Google’s official website on another browser.
Step 6: Download Chrome and install it on your PC.
Wrapping Up
This was how you can fix the blank black screen issue in Chrome on Windows 7/10/11. I hope the above article helped you in fixing the black screen issue on the Google Chrome Browser. Stay tuned for more such tips, tricks, and how-tos.
Related:
