Are you experiencing problems with website accessibility, sluggish loading times, or errors while using Google Chrome? Clearing the DNS cache is one potential solution to such issues. A DNS cache is a temporary database that holds website domain names and IP addresses. Clearing this cache may help you resolve different surfing issues and provide a more seamless web experience. Here’s how you can clear the DNS cache in the Chrome browser on other devices.

Why Should You Clear Chrome’s DNS Cache?
Clearing the DNS cache can be useful in several ways. When you visit a website, Chrome normally saves its IP address in the DNS cache so that the site can be loaded quickly in the future. However, this cache can become outdated or corrupted over time, resulting in website loading issues or difficulties accessing specific web pages.
By clearing the DNS cache, Chrome can find the most recent IP addresses for websites, resolving these difficulties and improving your surfing experience.
How to Clear DNS Cache in Chrome PC?
There are two methods for clearing the DNS cache. One approach is to enter a command, and the other is to use the Chrome browser. The process to clear your computer’s saved DNS cache is shown below.
From Chrome Settings
Step 1: Open the Chrome browser on your system.
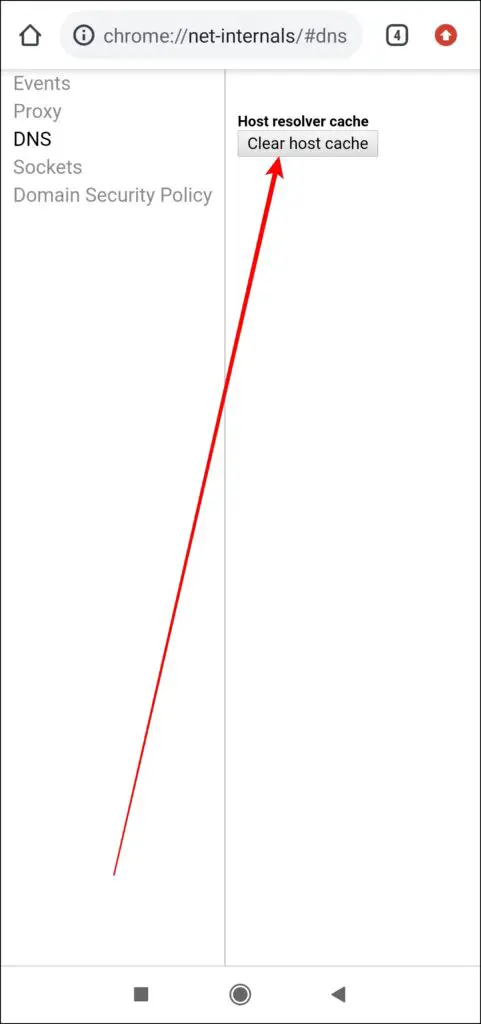
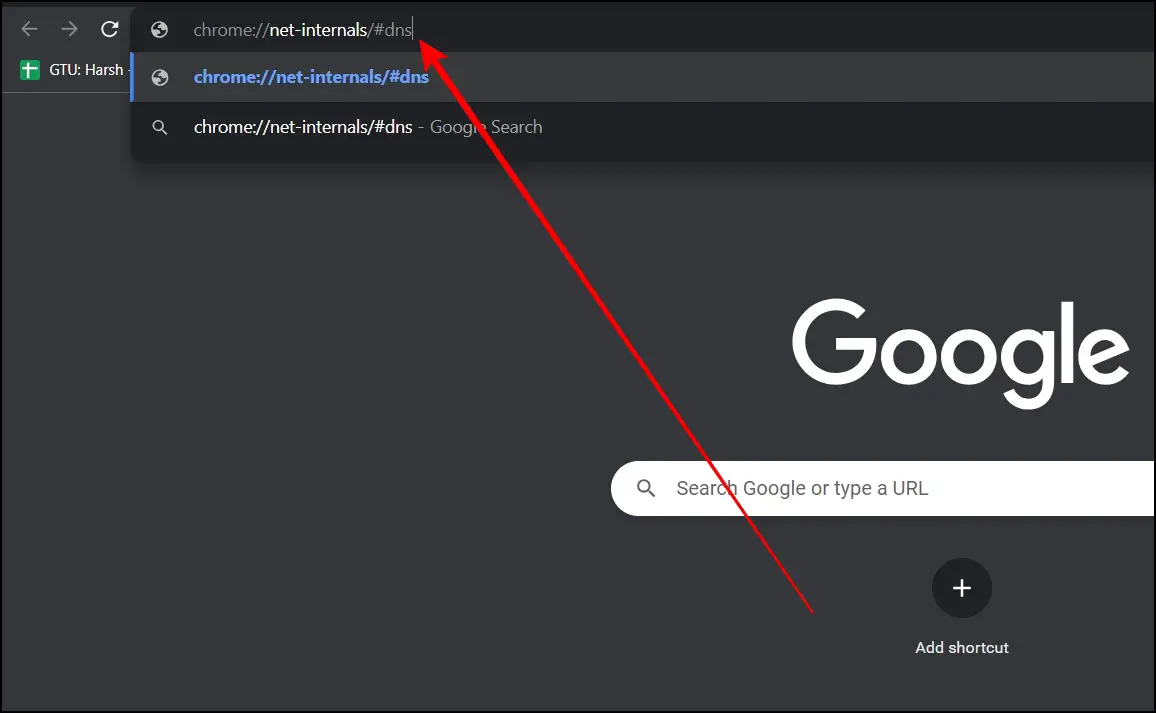
Step 2: Type chrome://net-internals/#dns in the address bar and hit enter.
Step 3: Click on Clear host cache next to Host resolver cache.
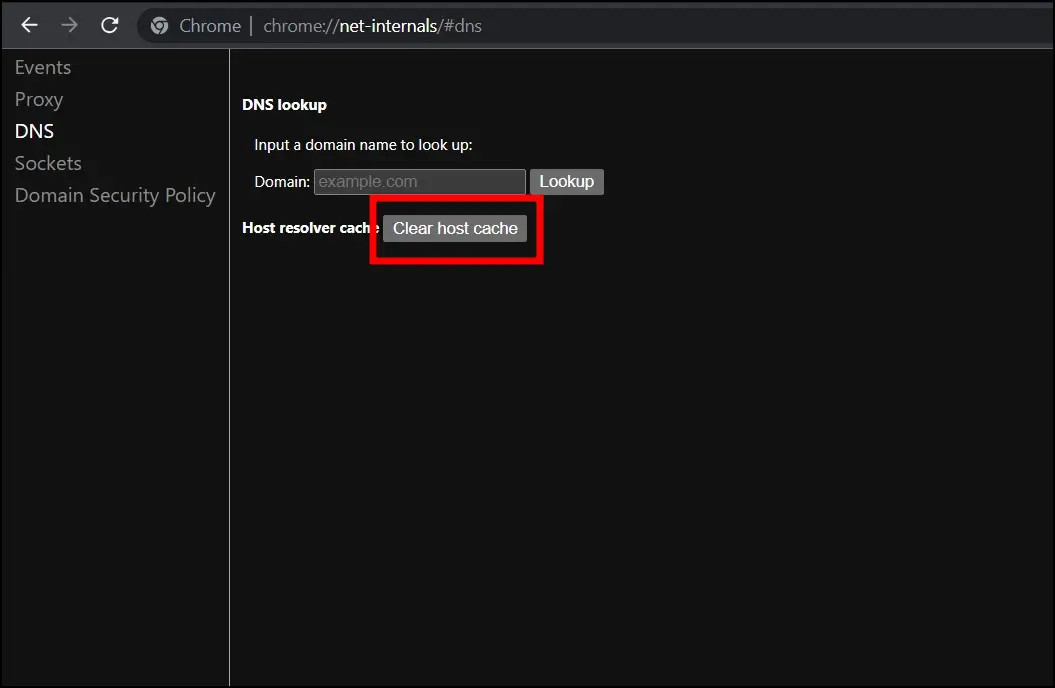
Once you do, the DNS cache will be cleared successfully.
Using Terminal or Command Prompt
On Mac
Step 1: Open Finder and tap on Applications.
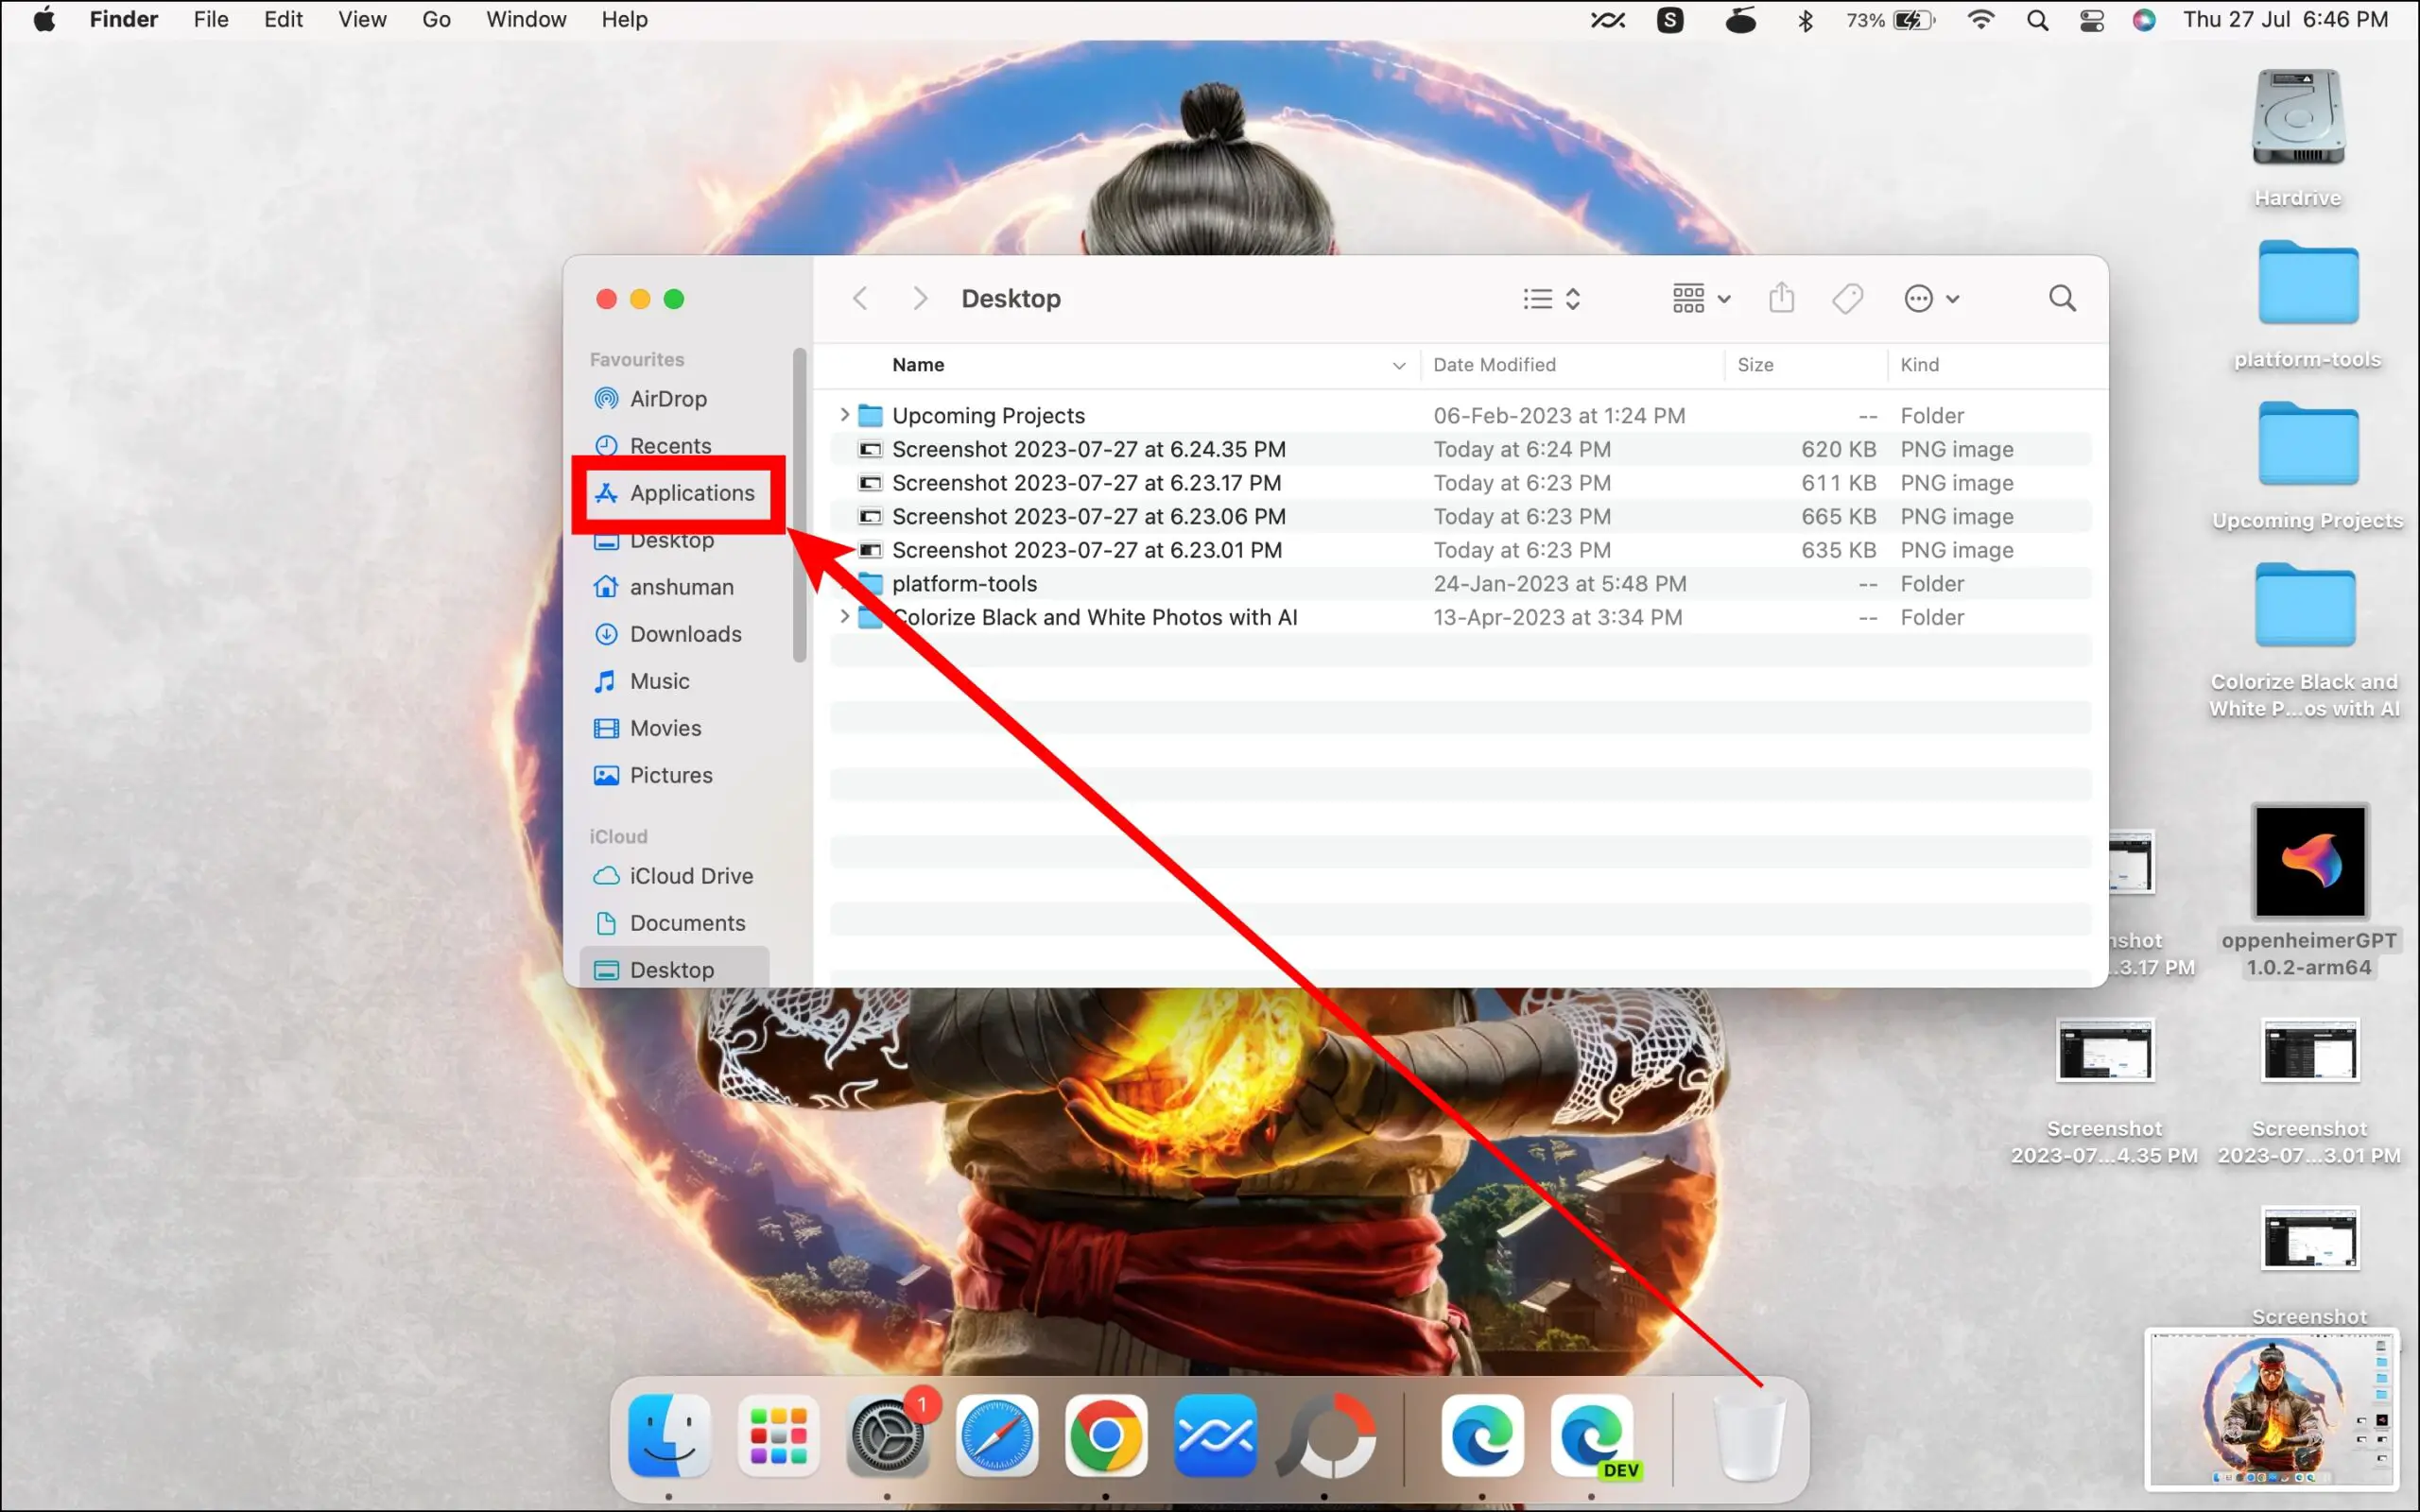
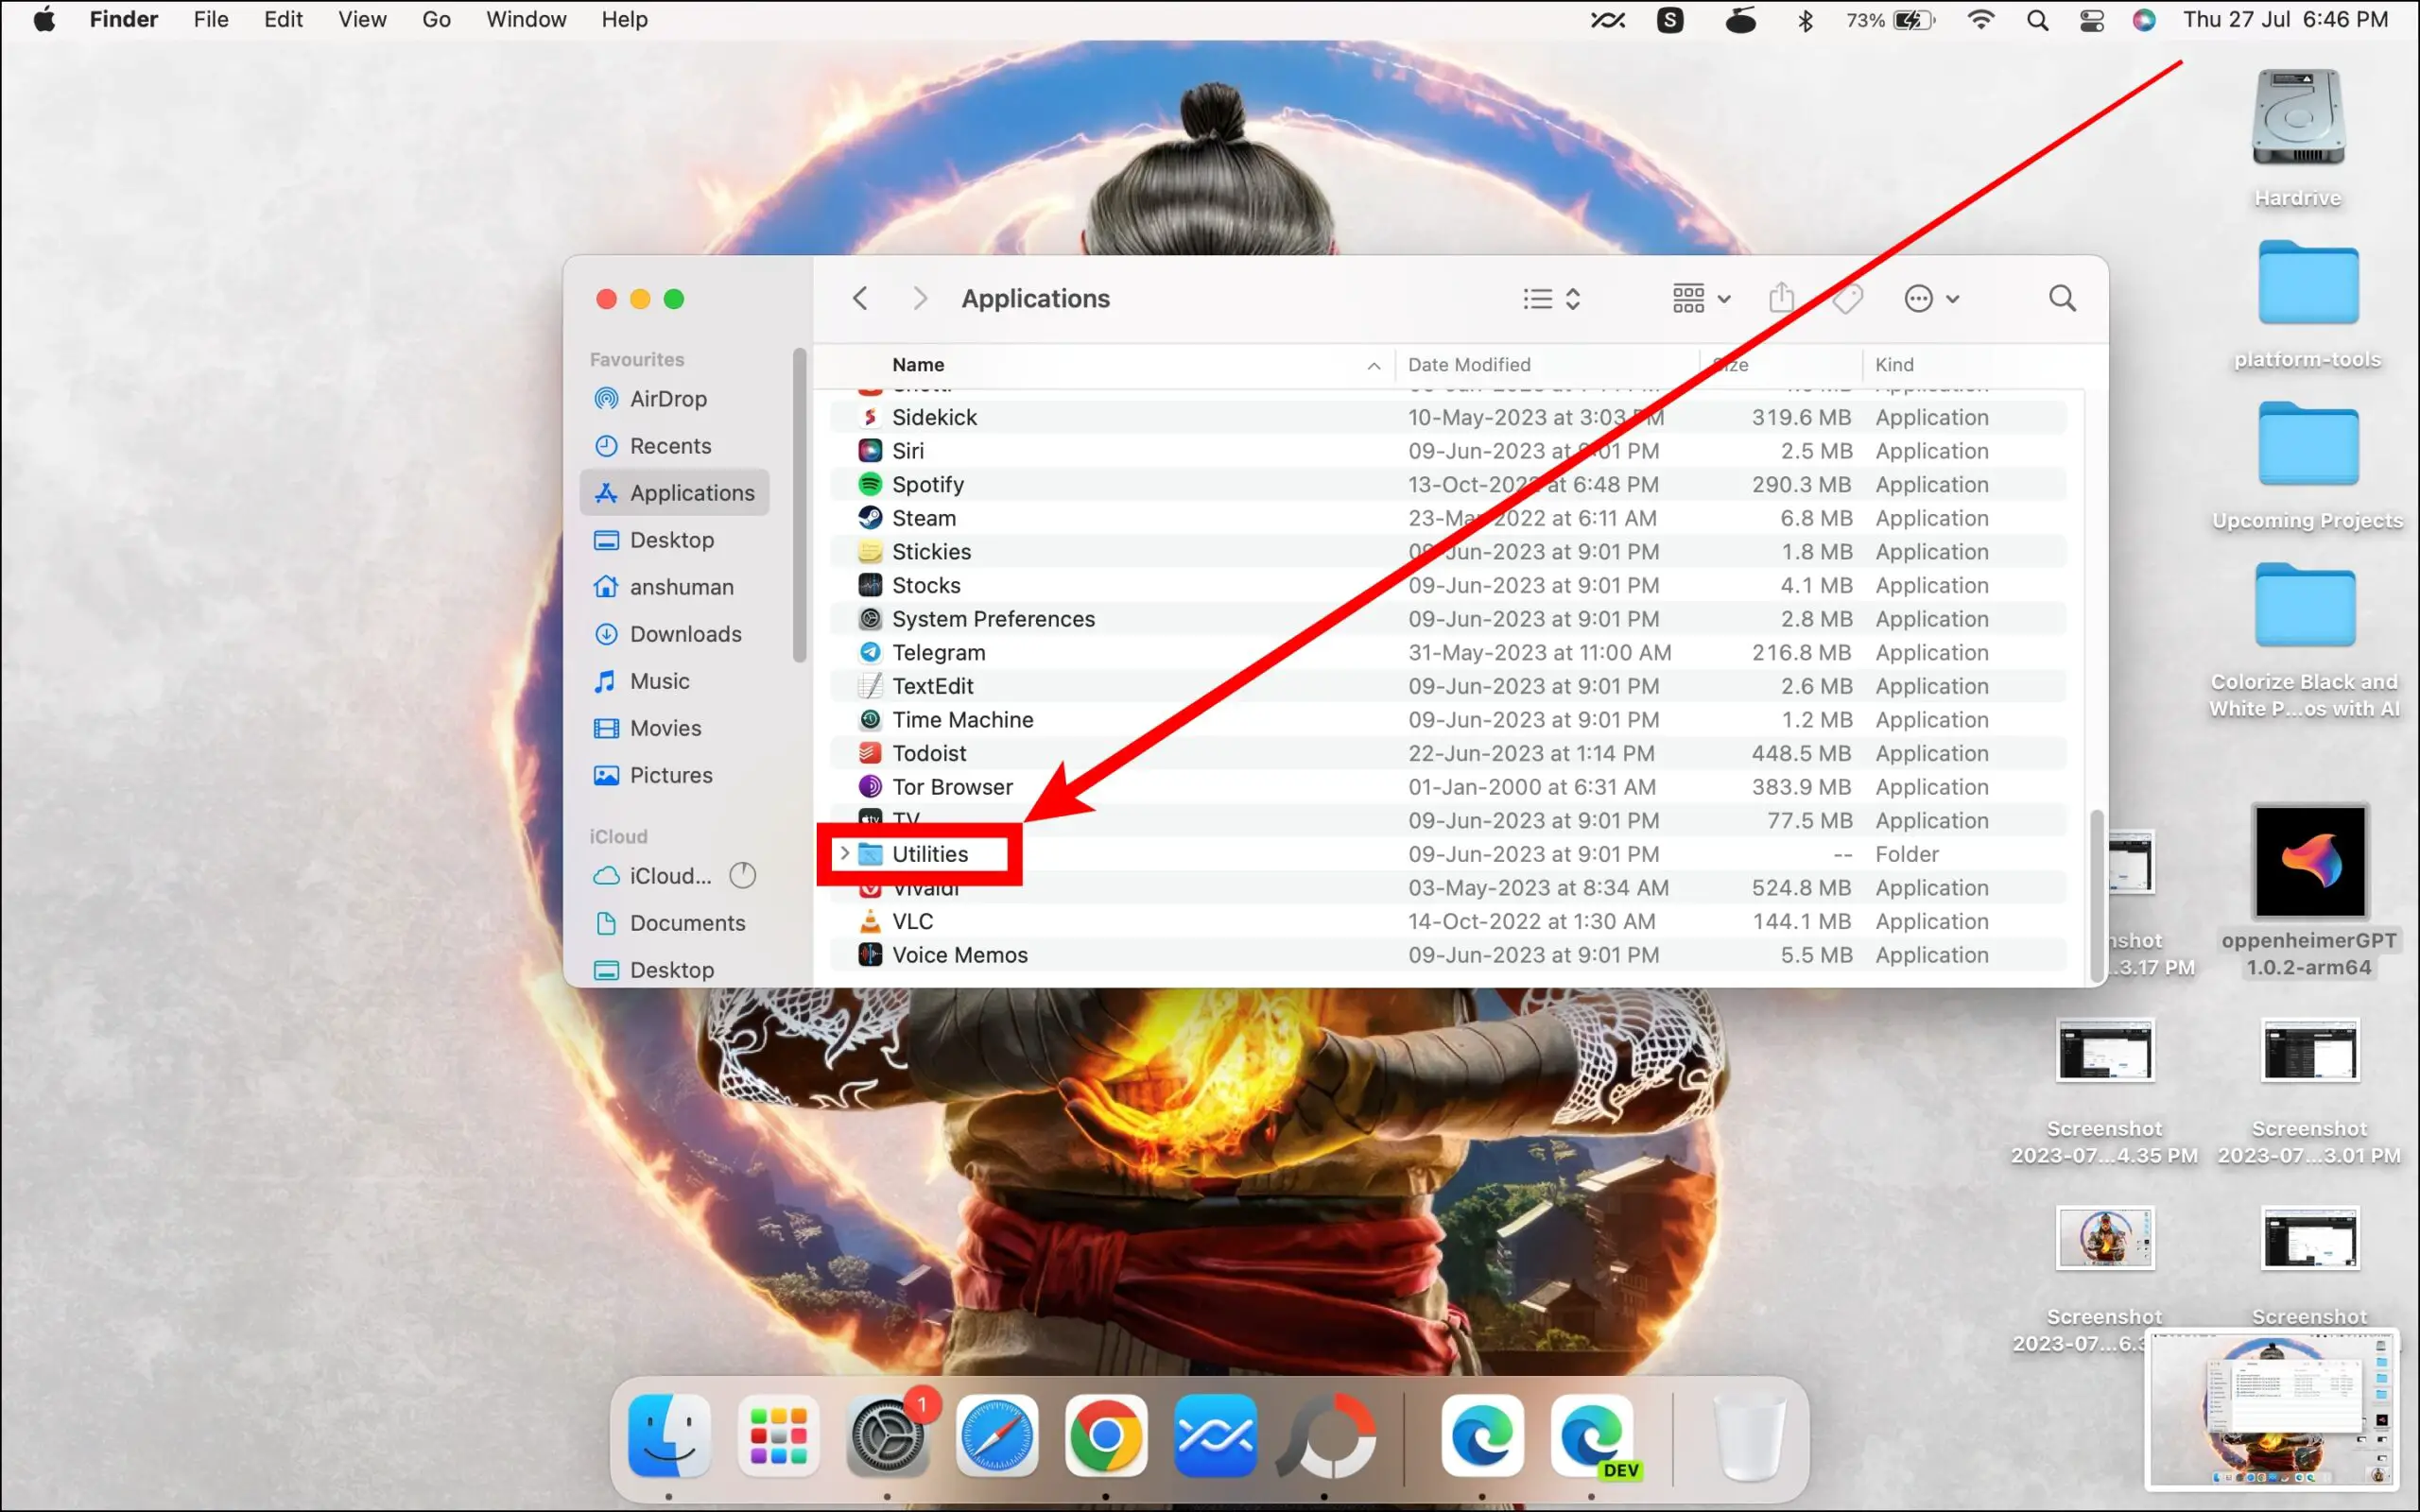
Step 2: Scroll down and look for the Utilities folder; tap to open it.
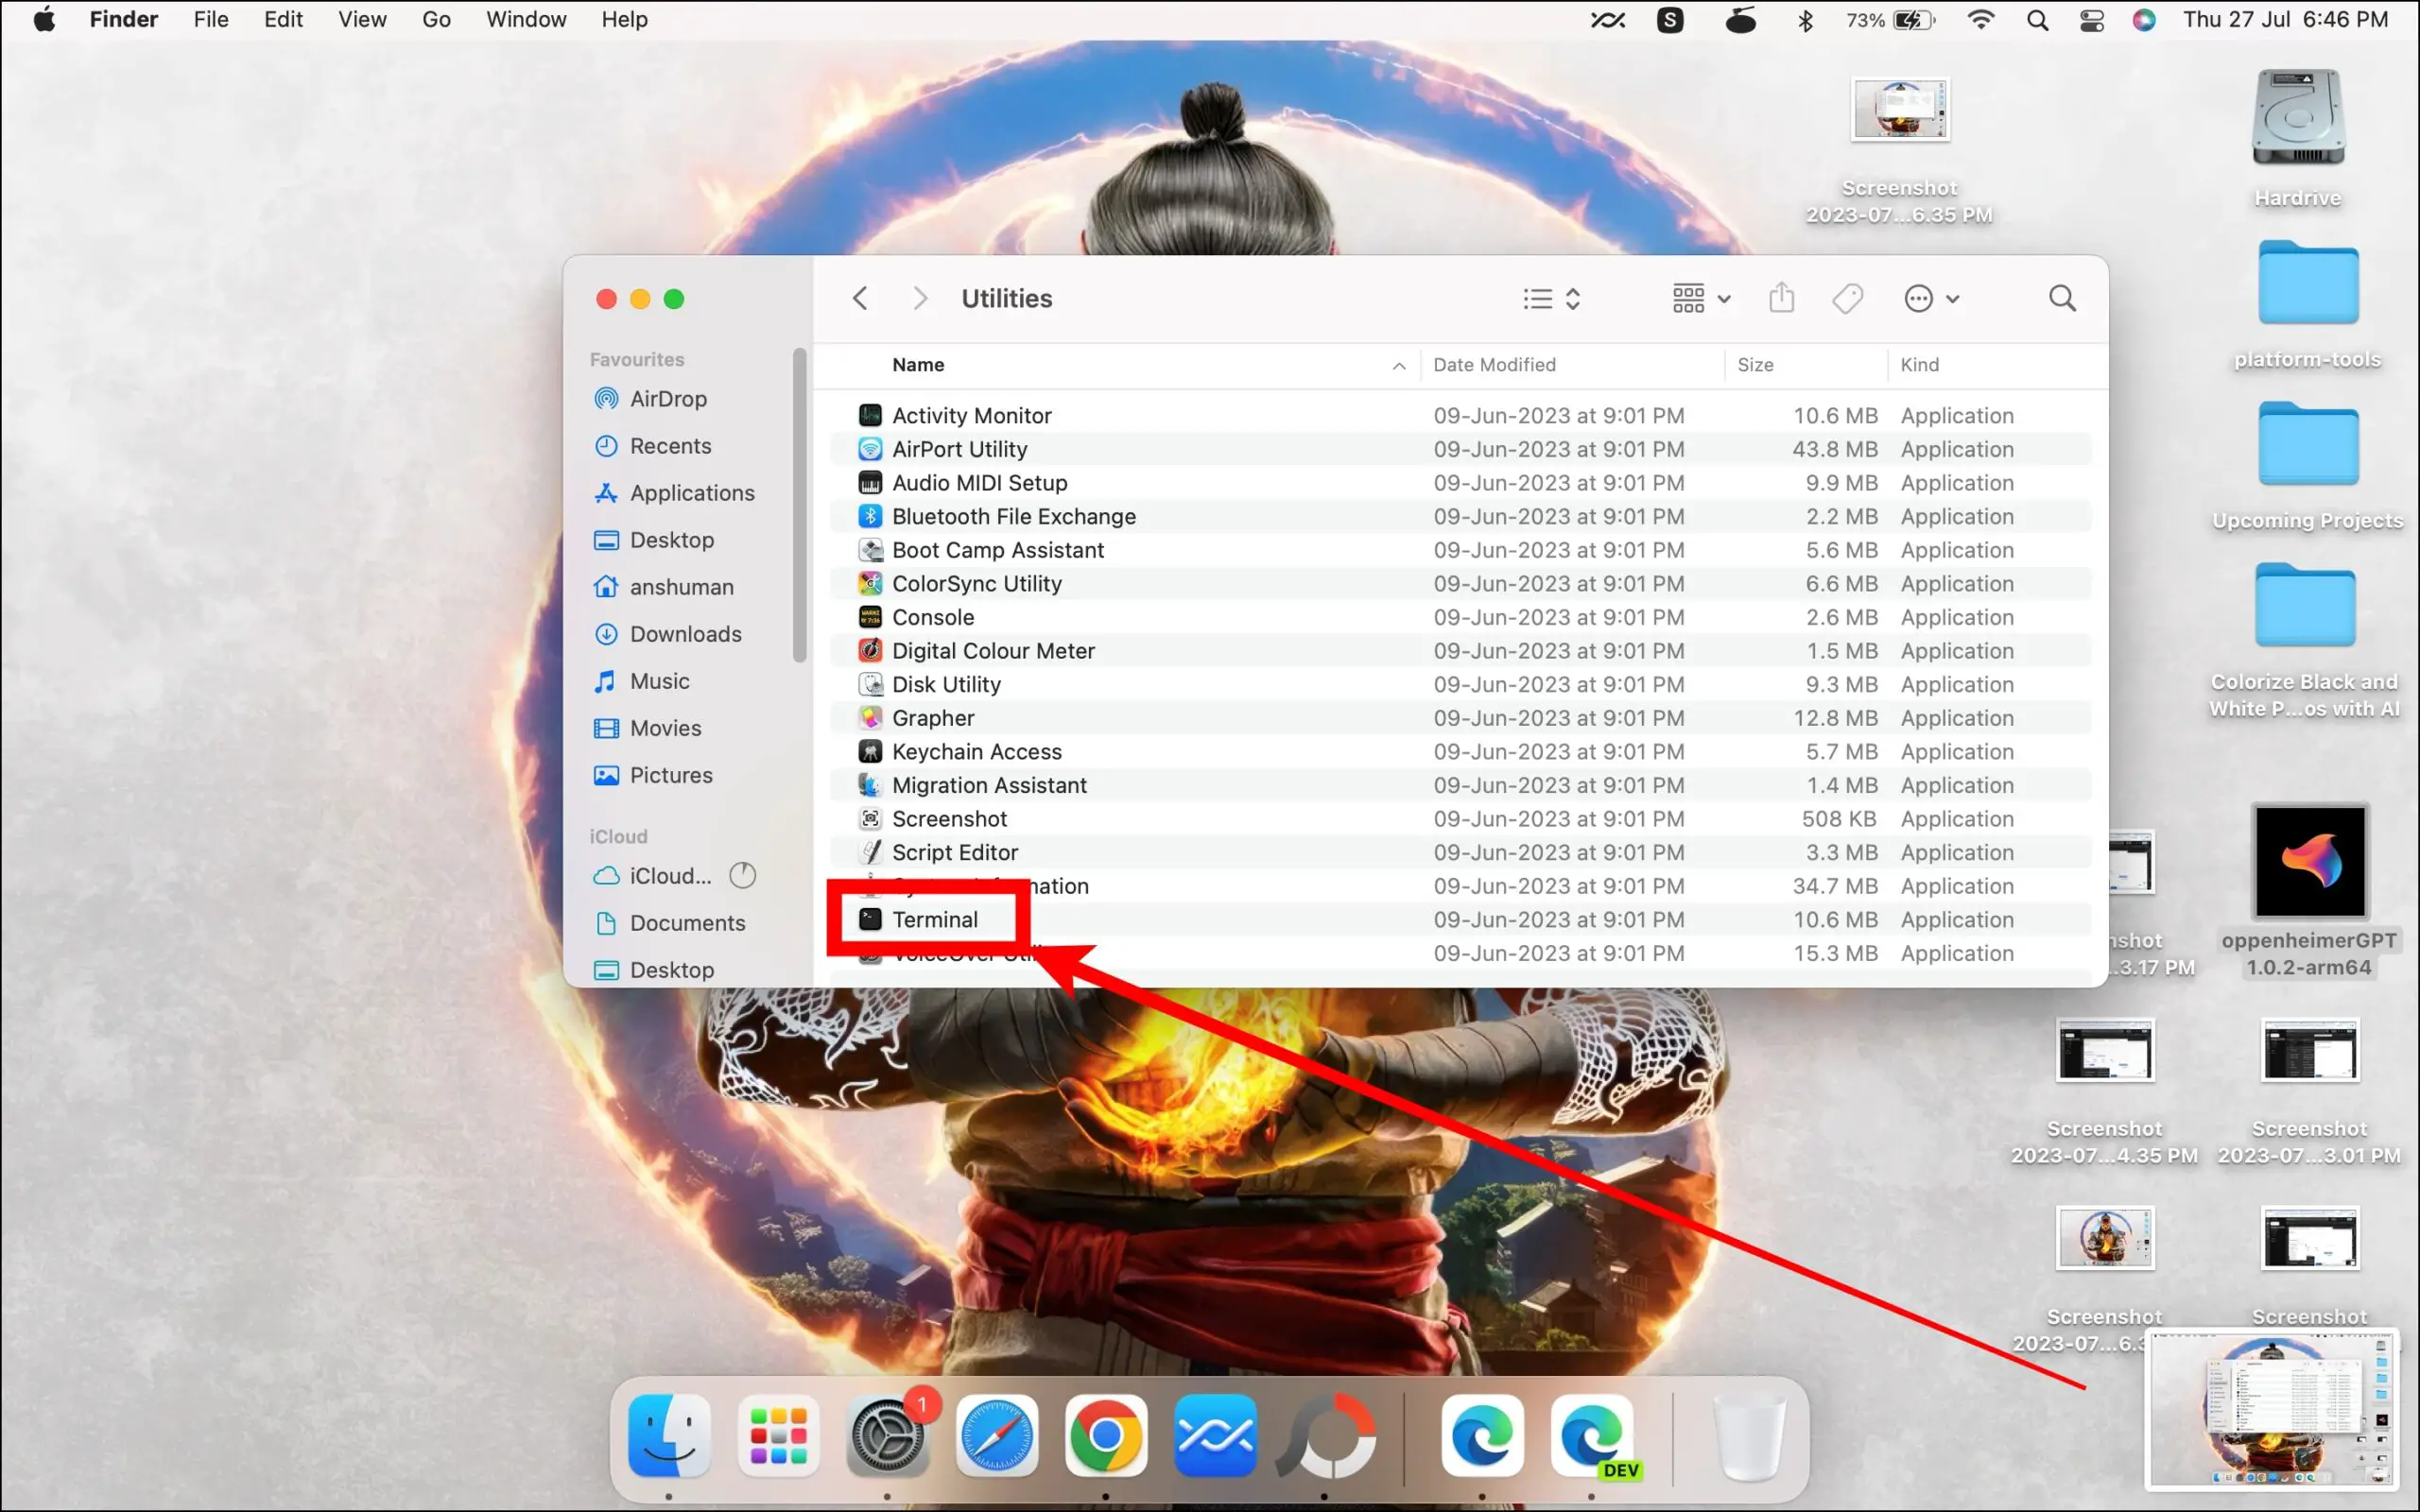
Step 3: Double-click on Terminal to launch the application.
Step 4: Enter the following command and hit enter: sudo dscacheutil -flushcache; sudo killall -HUP mDNSResponder
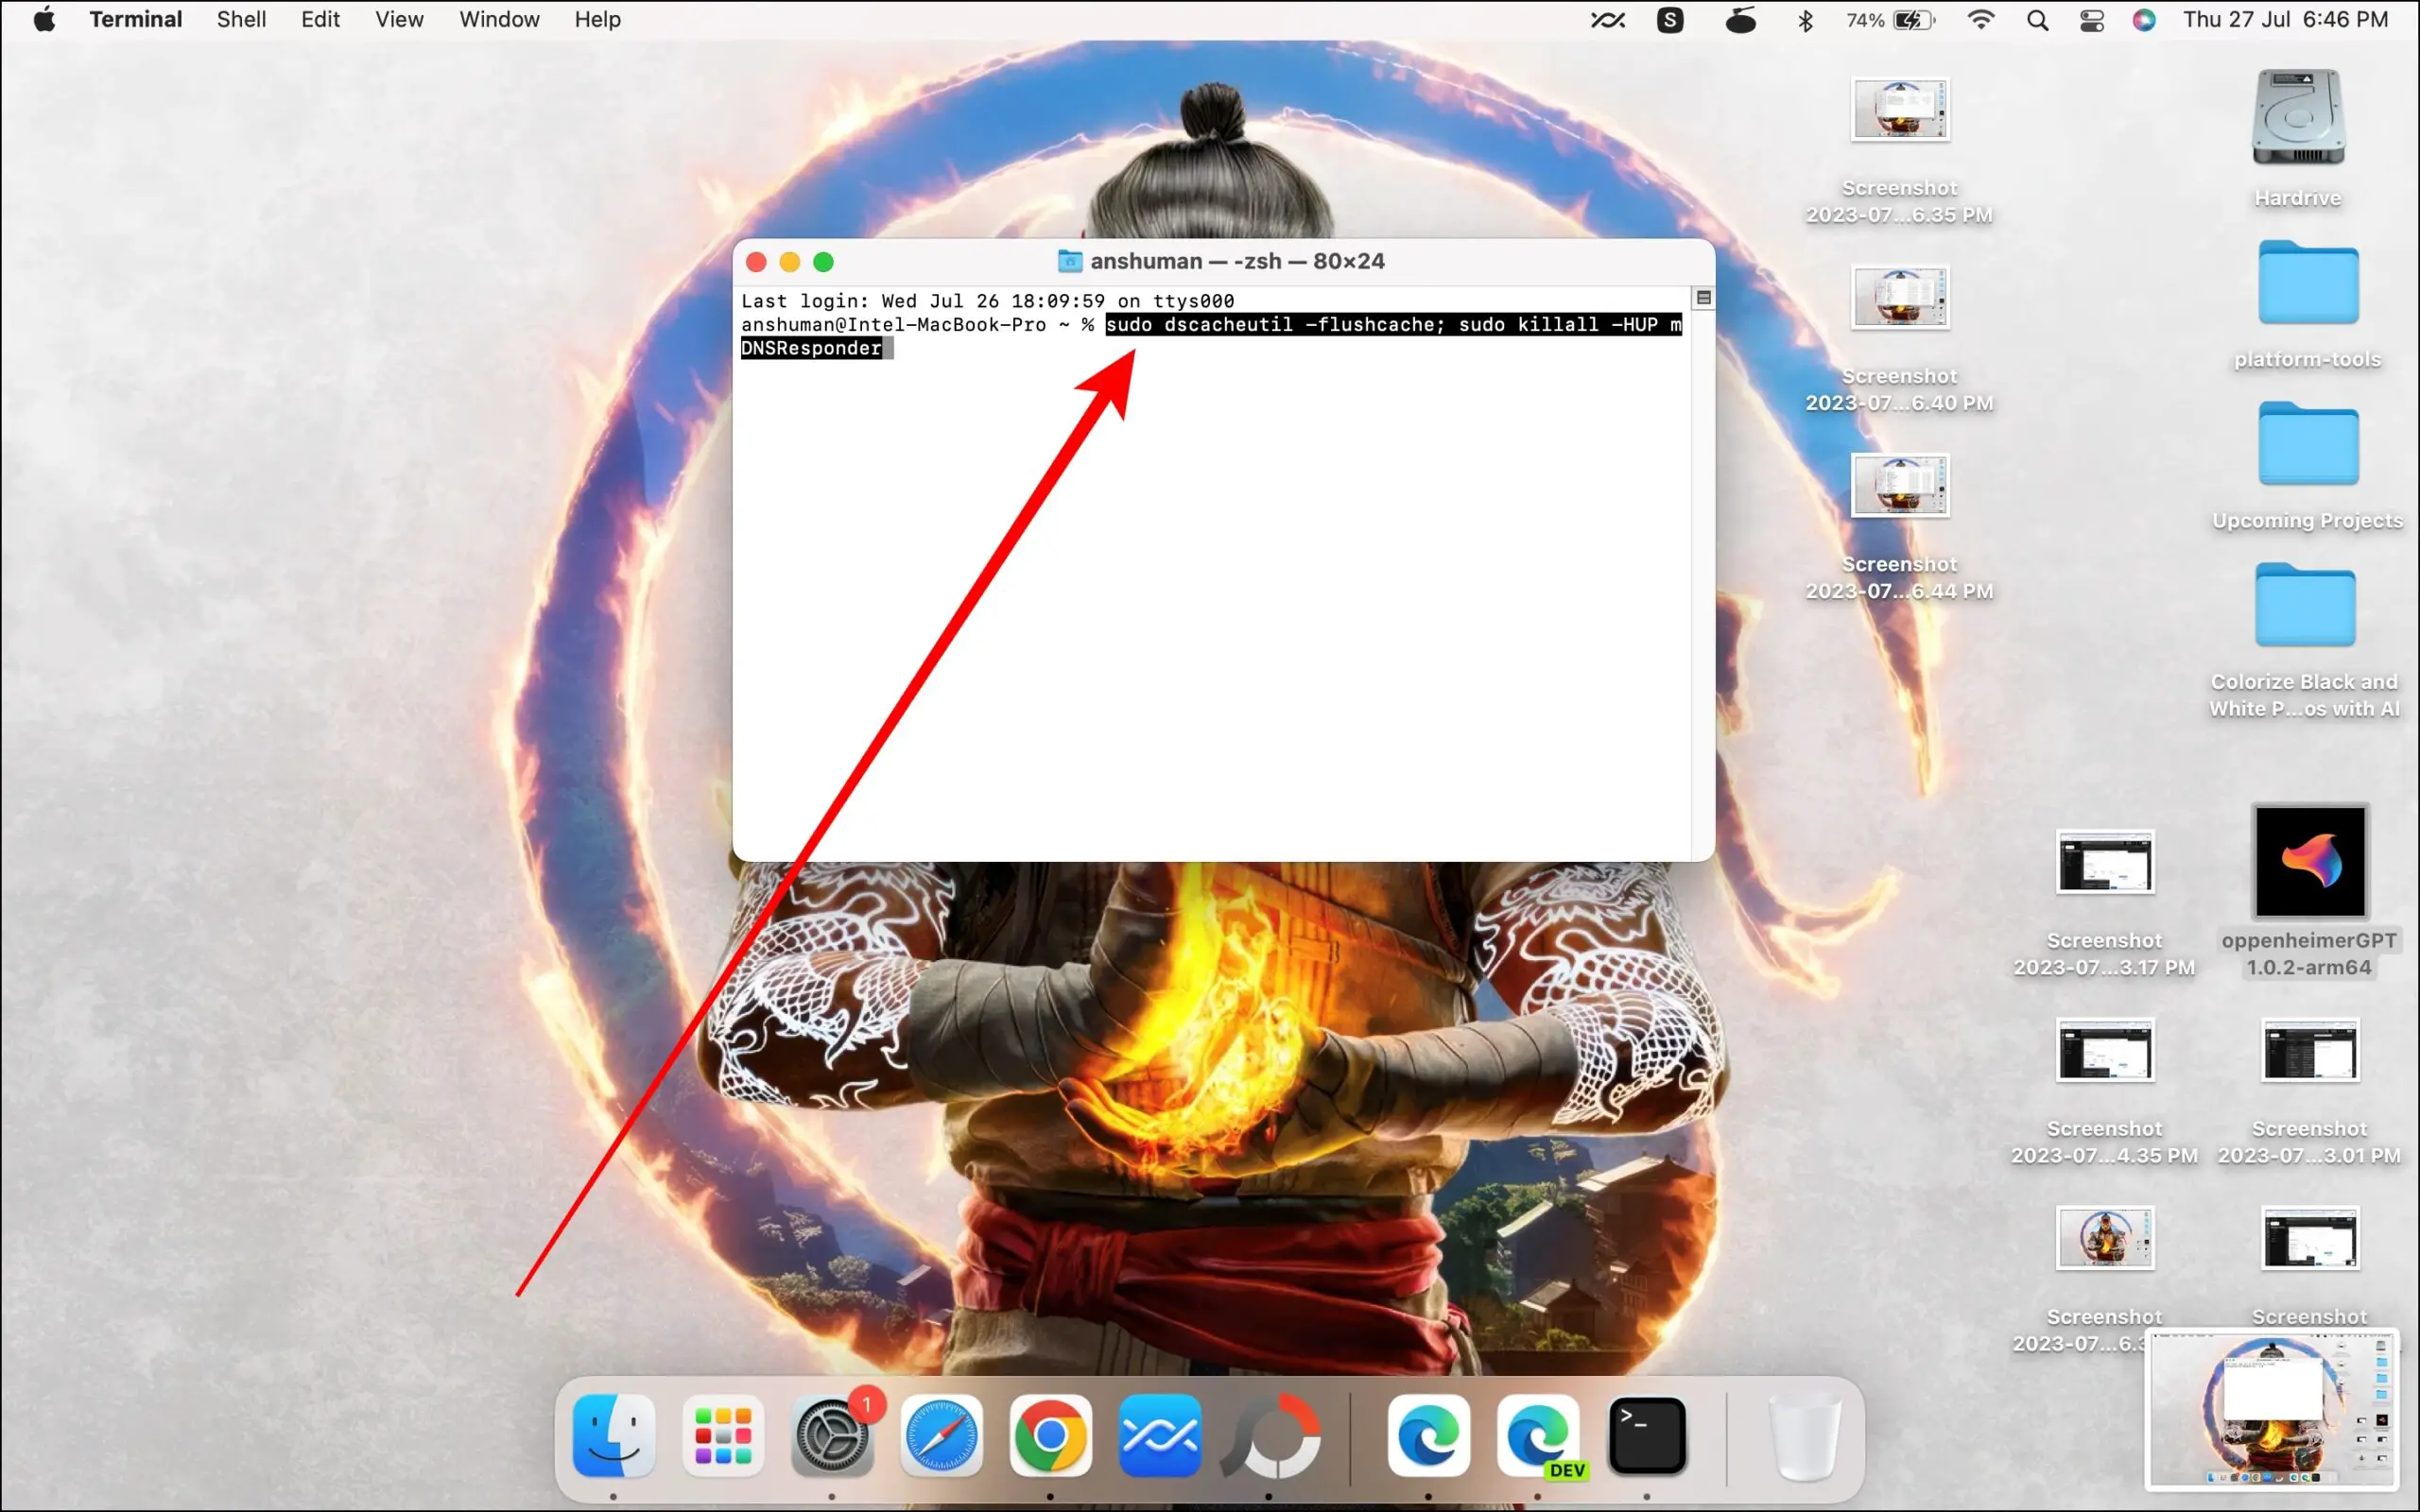
Step 5: If prompted, enter your password.
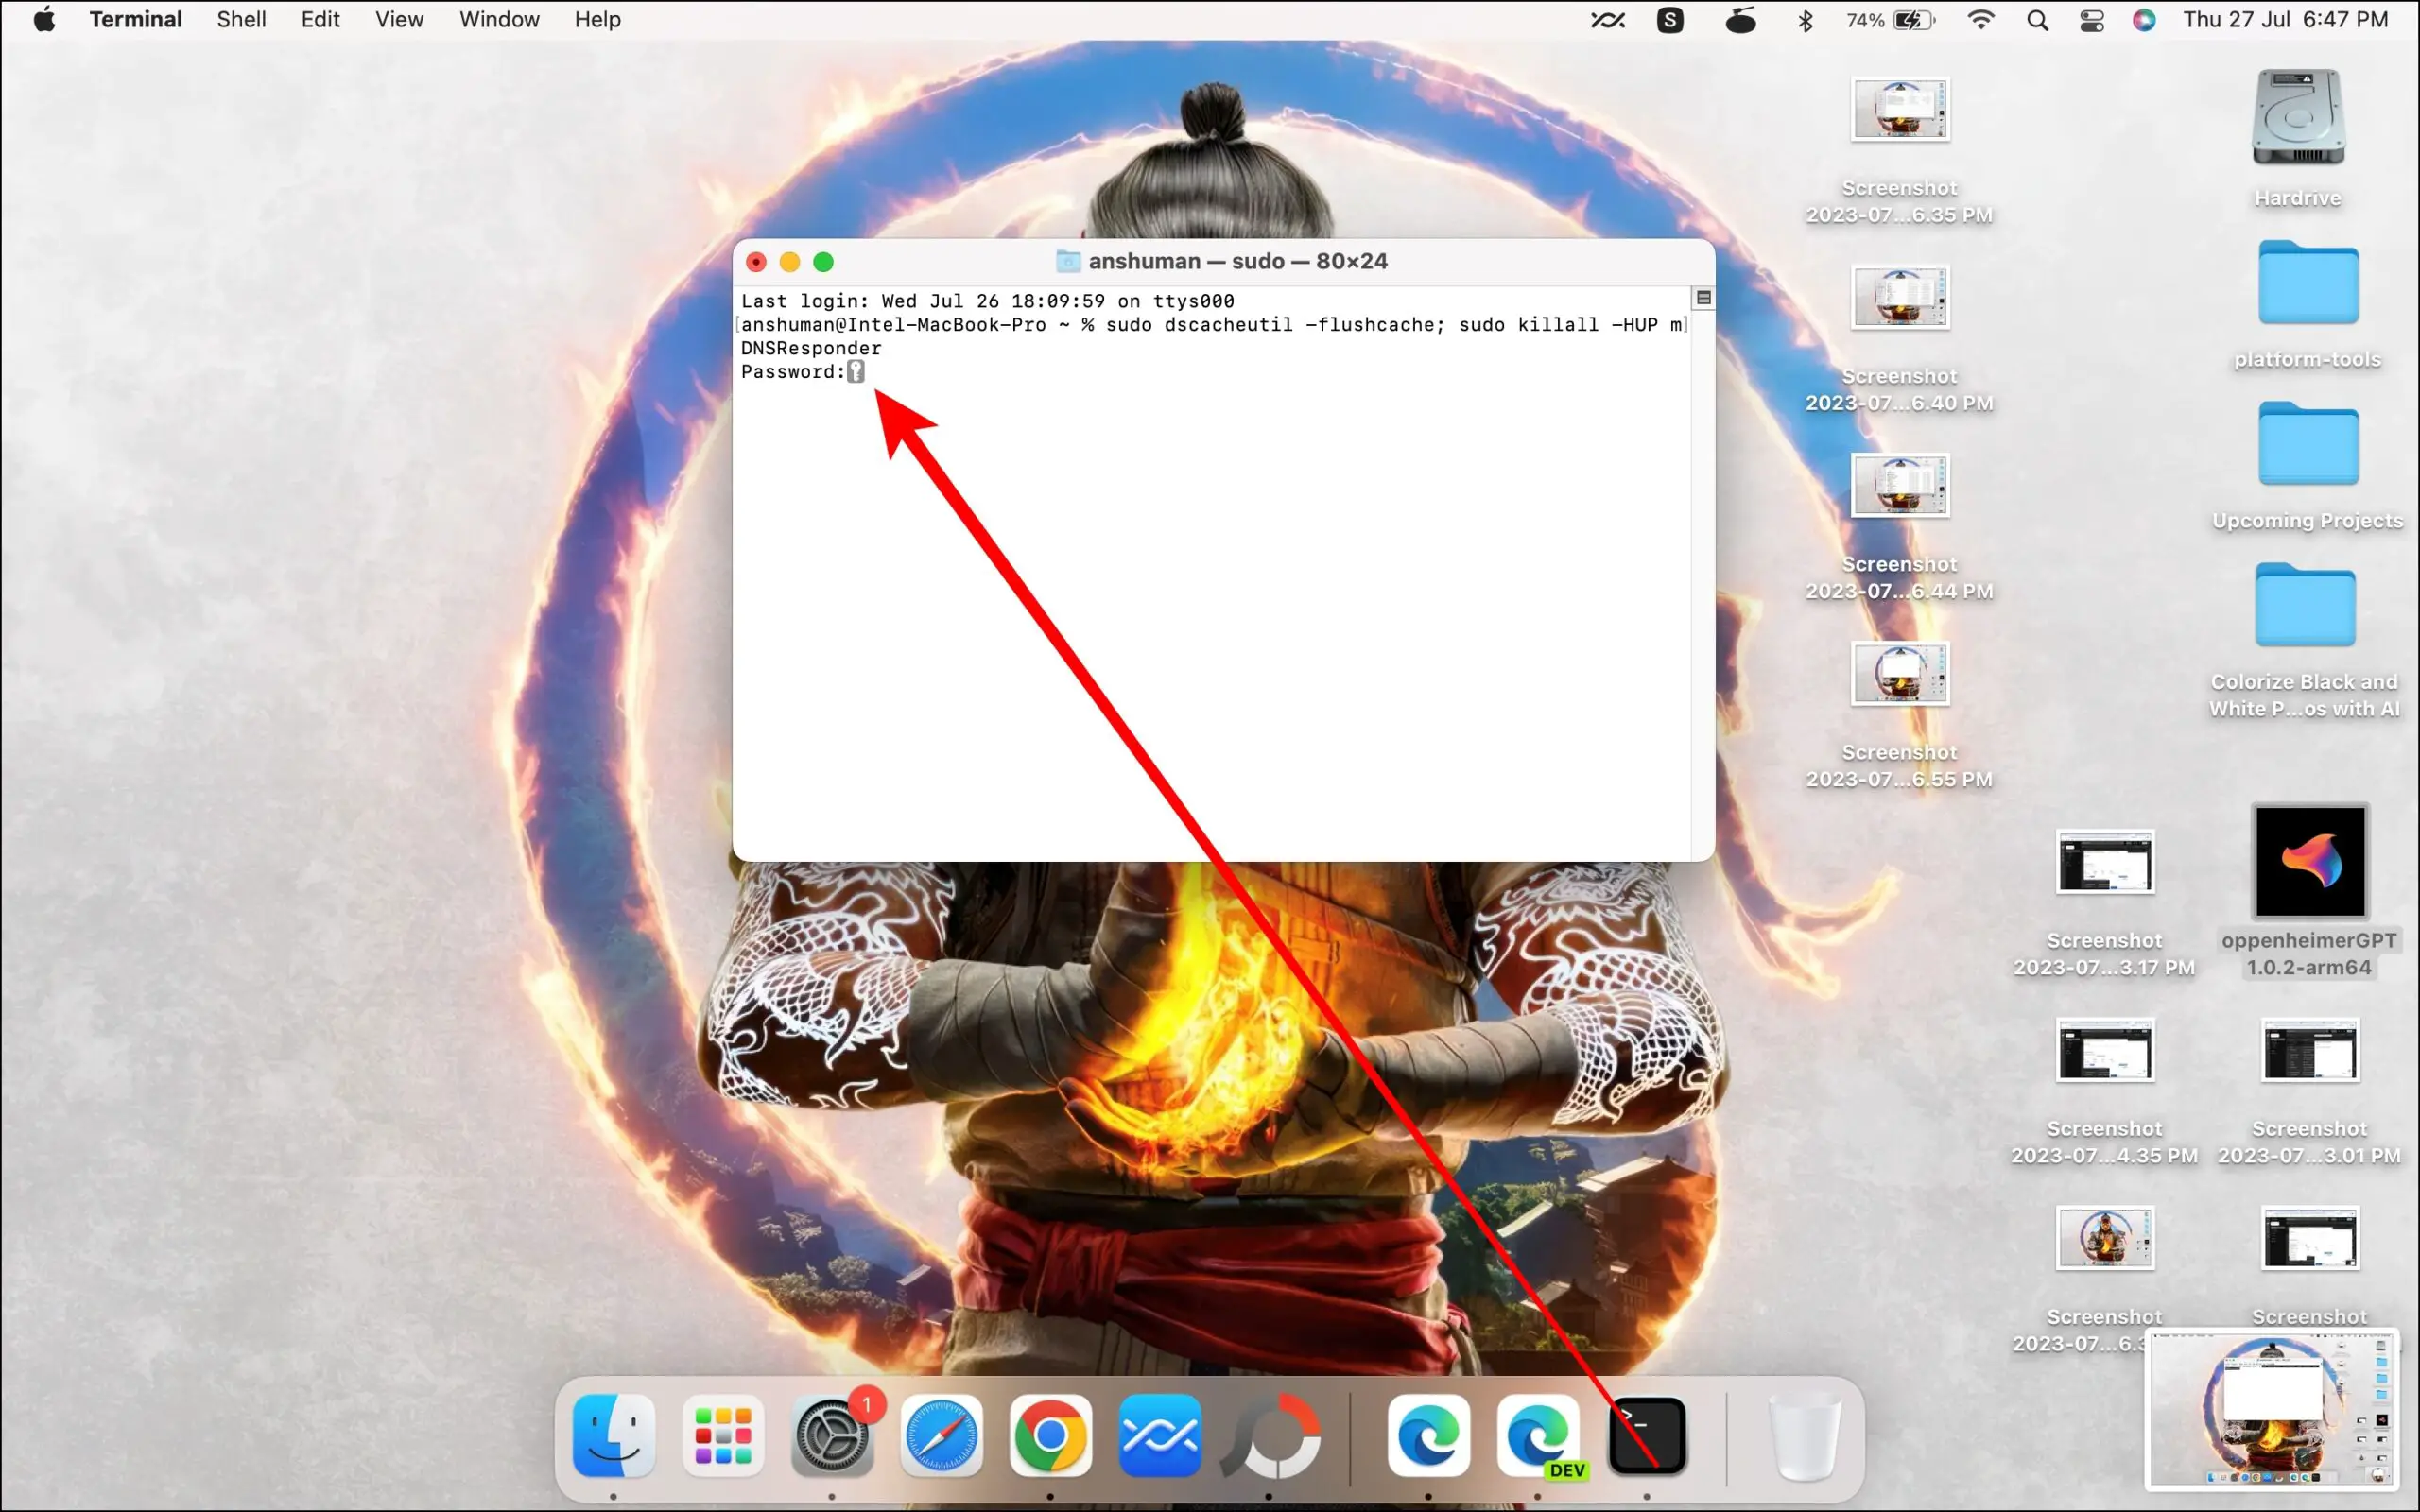
Once done, a notification should appear confirming that the DNS cache has been reset.
On Windows
Step 1: Press the Windows and R keys to open the Run window.
Step 2: Type cmd and hit enter to open the command prompt.
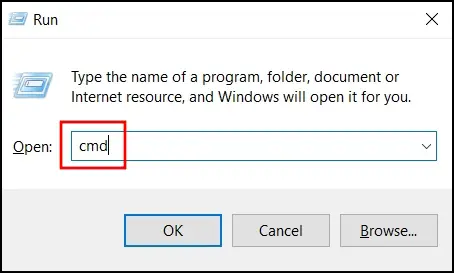
Step 3: In the command prompt, type ipconfig /flushdns and hit enter.

A message should appear confirming that the DNS Resolver Cache was successfully flushed.
How to Clear DNS Cache in Chrome Mobile?
On Android
Just like a computer, Chrome for Android uses built-in DNS rather than the system’s own DNS. As a result, deleting the Android DNS cache has no impact on Chrome for Android. To resolve the issues, you need to delete the Chrome DNS host cache, and below are the steps to do so.
Step 1: Open the Chrome browser on your Android phone.
Step 2: Type chrome://net-internals/#dns in the address bar and hit enter.
Step 3: Tap on Clear host cache.
Once you do, the DNS cache will be removed for the Chrome browser.
On iPhone
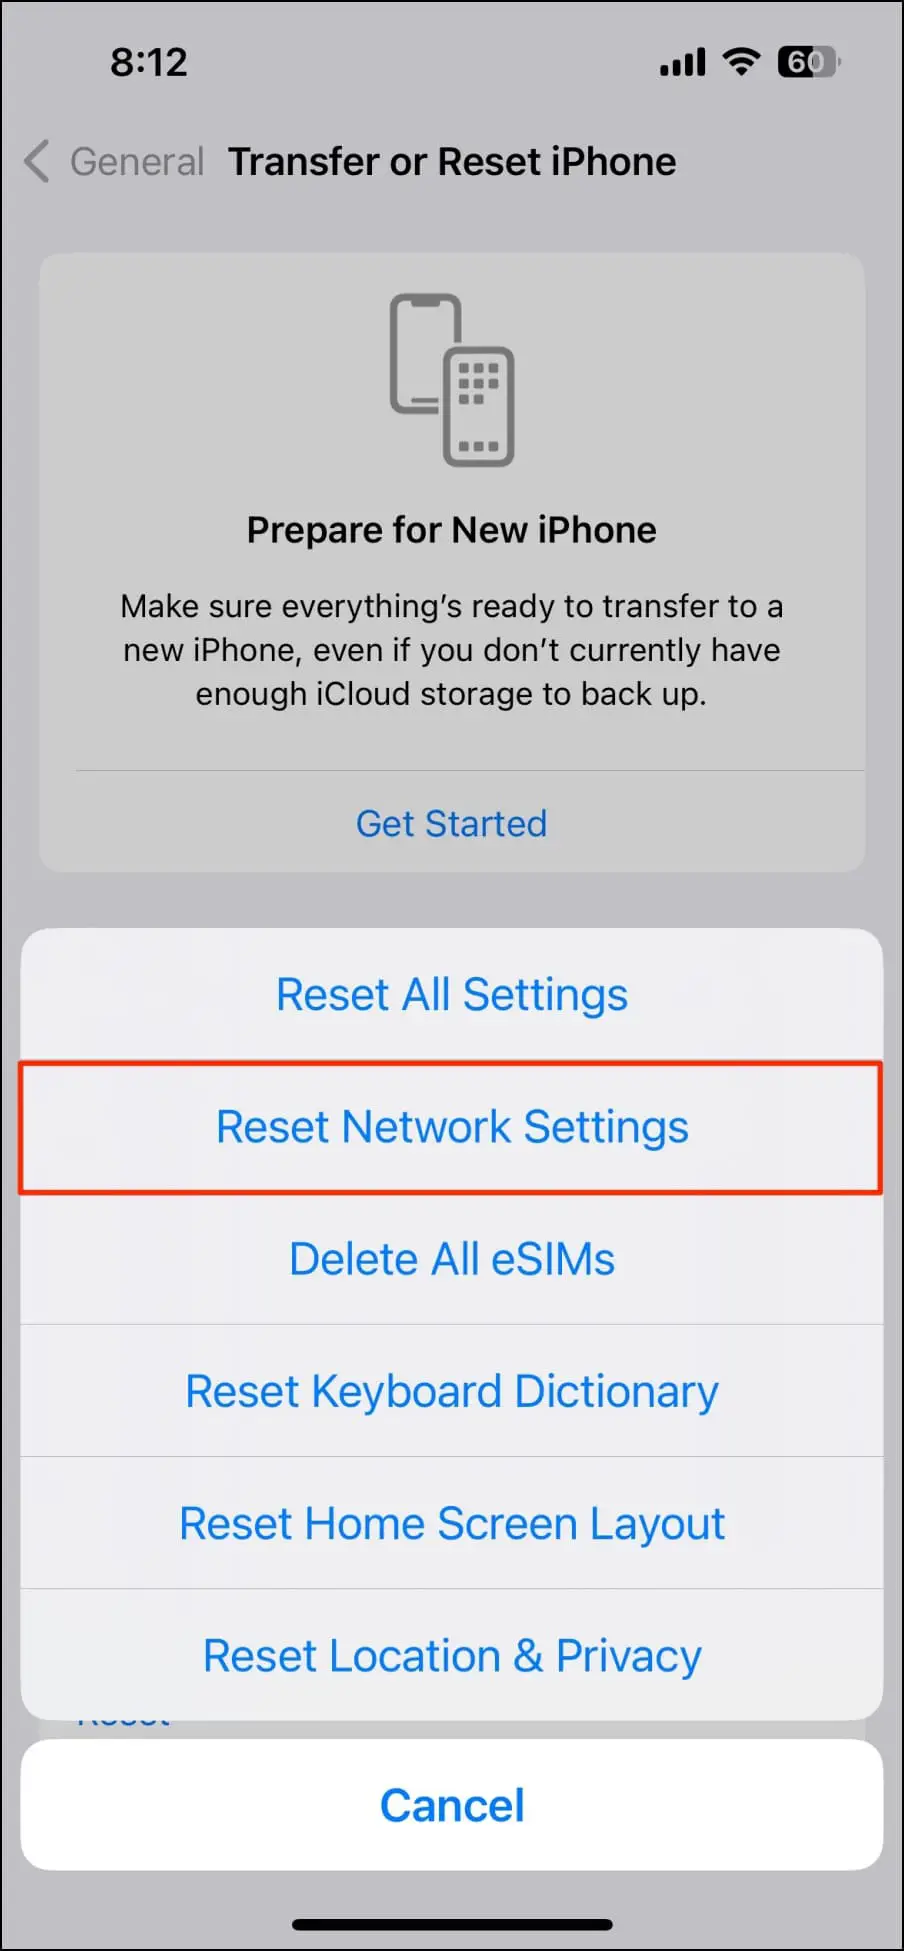
Unfortunately, Chrome for iPhone or iPad does not have DNS cache storage. To clear the cache on your iPhone or iPad, you need to reset the network settings, and we have added the steps to do so.
Reset Network Settings Using Aeroplane Mode
When you enable Aeroplane mode, iOS or iPadOS automatically resets the network settings and removes the DNS cache from the device. Here’s how you can do it:
Step 1: On the home screen, swipe from the top right corner to open the Control Center.
Step 2: Click on the Flight mode icon to enable it.
Step 3: Wait for a few seconds and tap the Flight mode icon again.
Reset Network Settings from the Settings App
Apple also allows users to reset their iPhone or iPad’s network settings from the Settings app. Below are the steps to do so.
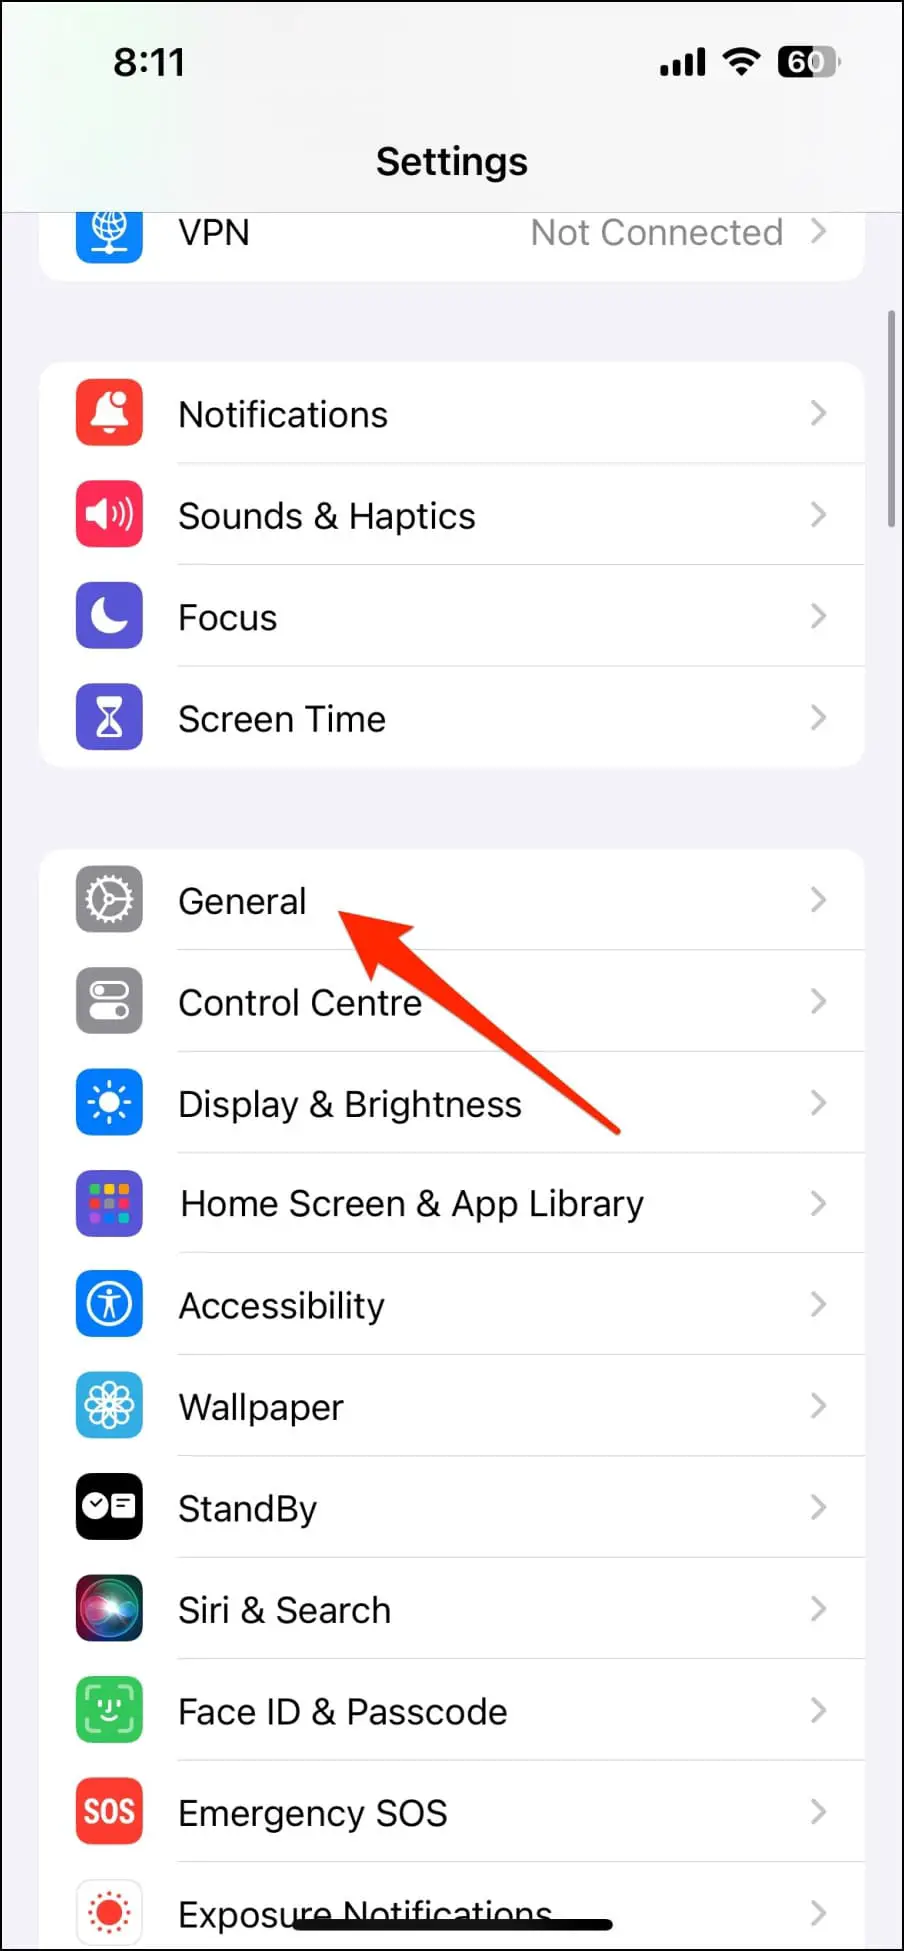
Step 1: Open the Settings app on your device.
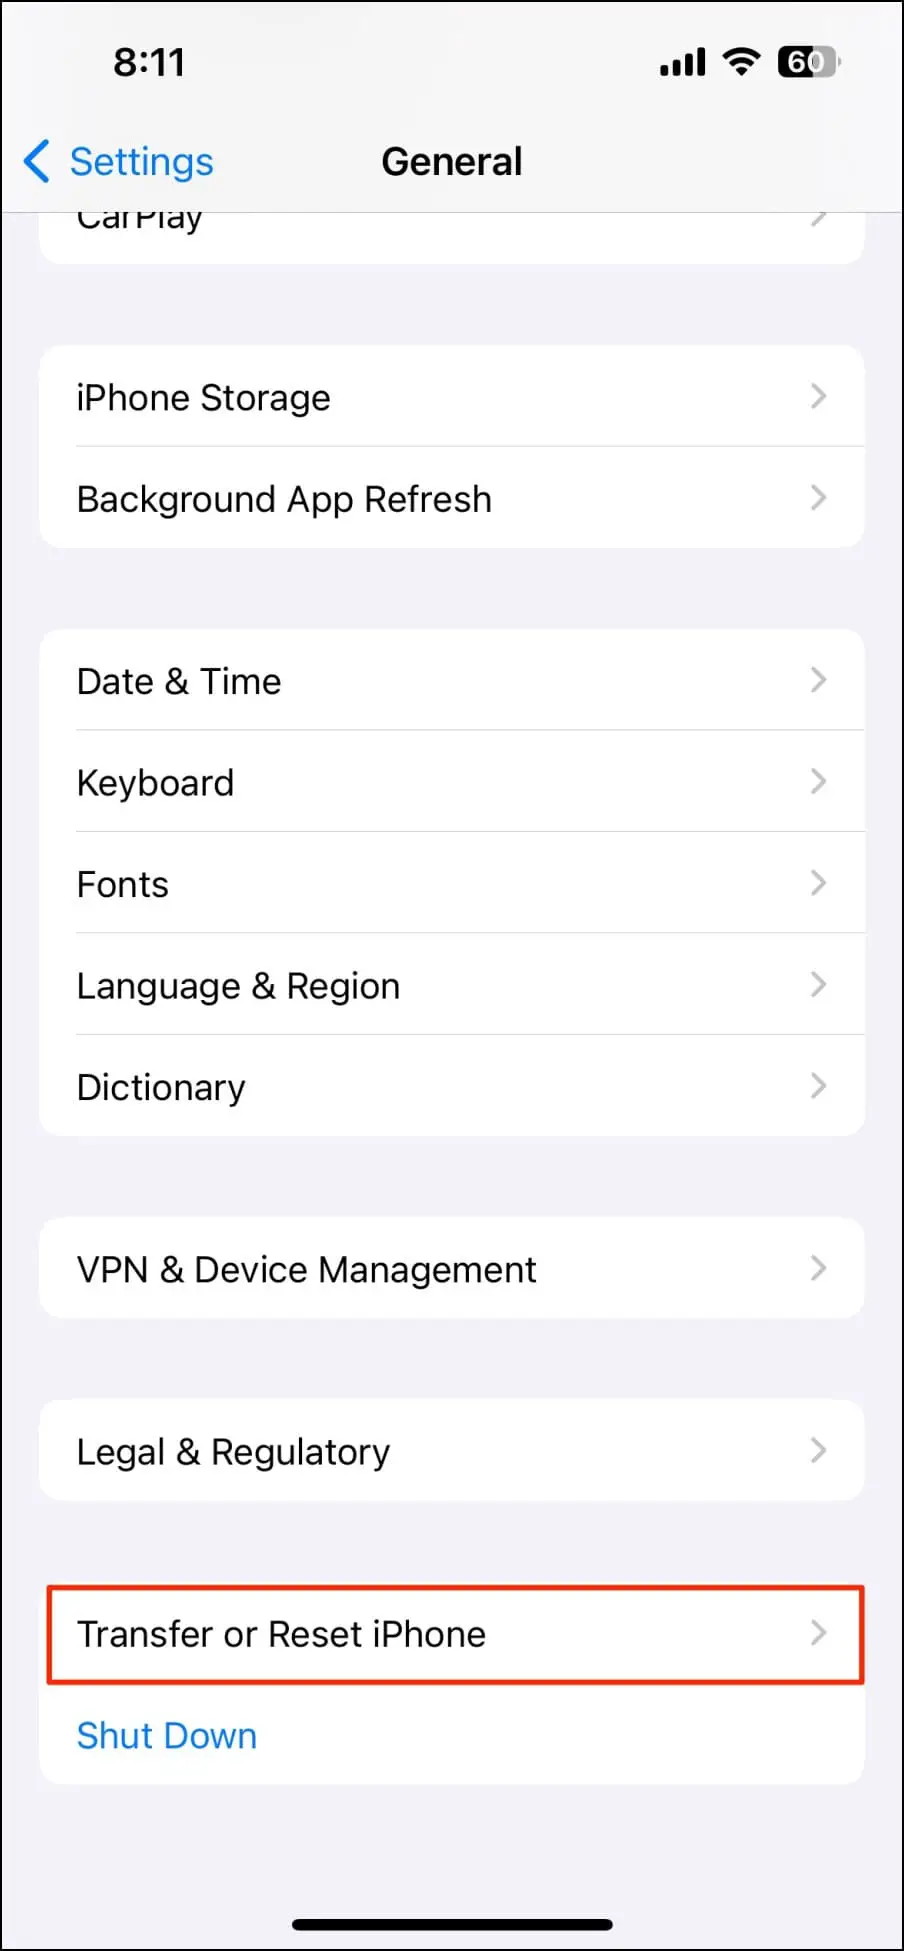
Step 2: Navigate to General, then tap on Transfer or Reset iPhone.
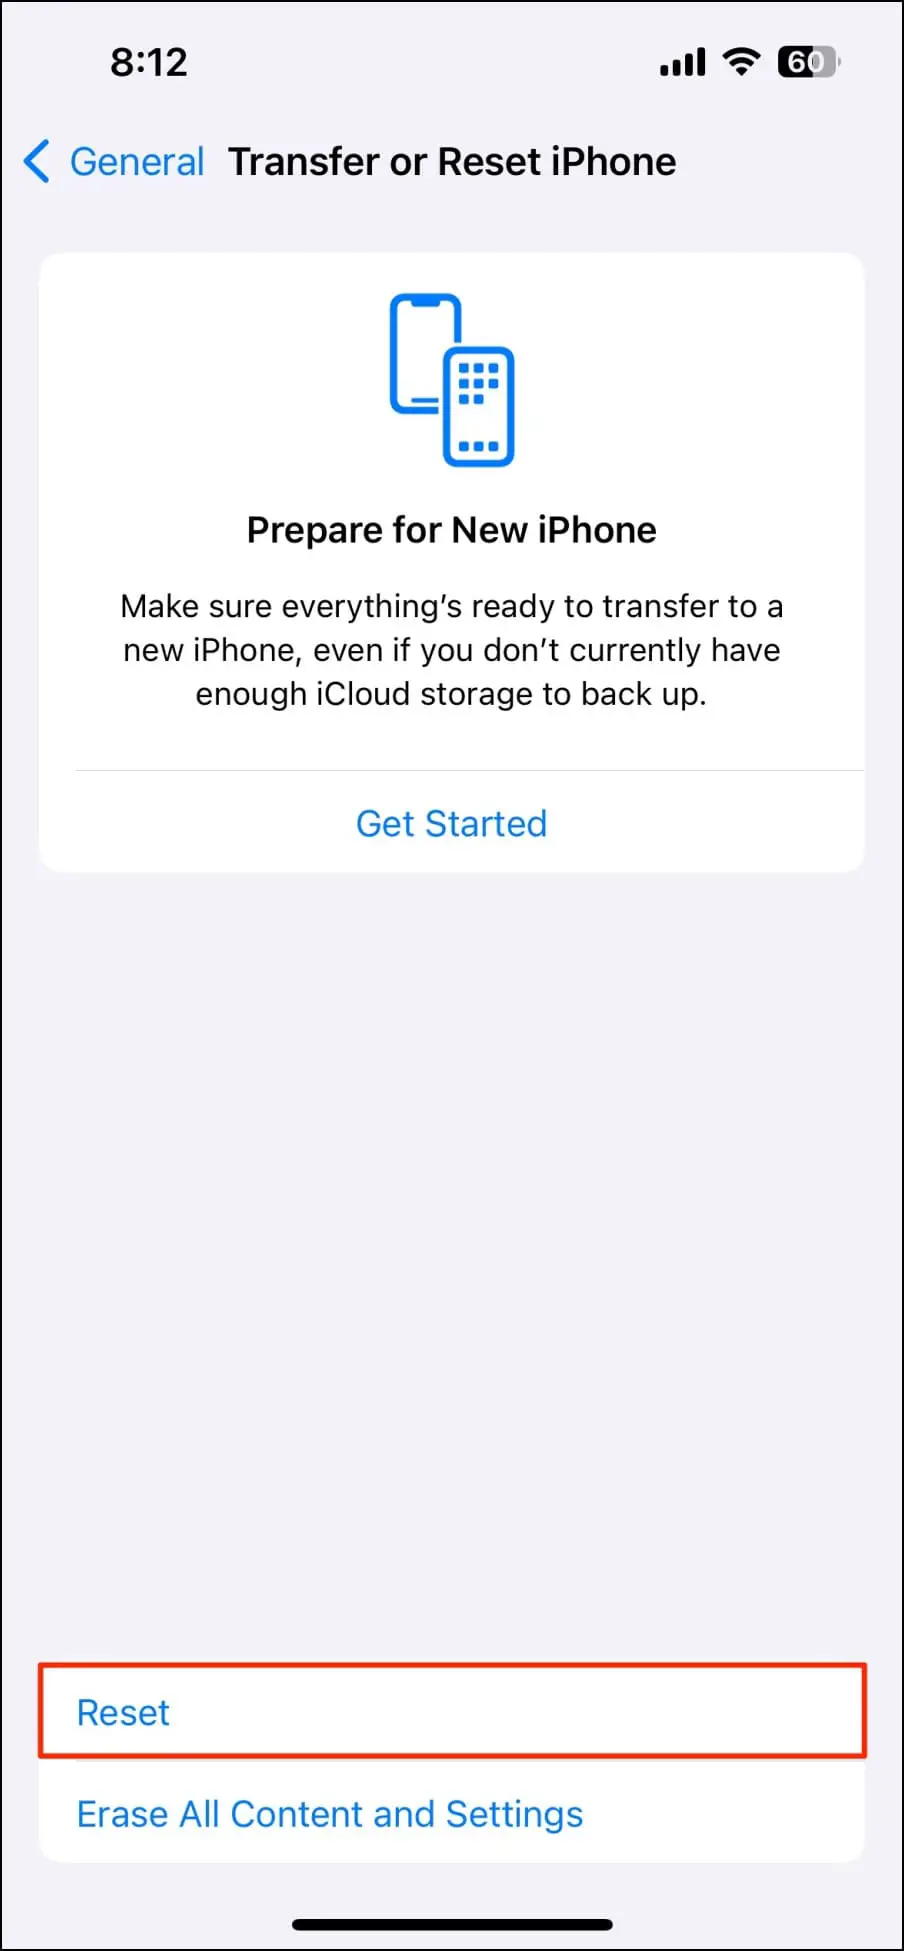
Step 3: Tap on Reset.
Step 4: Finally, click on Reset Network Settings.
Enter your iPhone passcode to proceed.
FAQs
Q. What is DNS Cache in Google Chrome?
The DNS cache in Chrome is a temporary storage space that keeps website domain names and their corresponding IP addresses, providing faster access to already visited websites.
Q. Is Clearing the DNS Cache Reversible?
No, the temporary records are completely removed once you clear the DNS cache. However, Chrome immediately starts generating a new cache as you browse websites, ensuring efficient future browsing.
Wrapping Up
This is how you can clear the DNS cache in the Google Chrome browser. I hope the above article helps you remove the DNS cache in Chrome on different devices. If you have any queries related to the article, let us know, and stay tuned to BrowserToUse for more such articles and how-tos.
Related:
