
Filling details like passwords, addresses, emails, payment information, and more can be very time-consuming when browsing the web. This is where auto-fill comes to the rescue. All your details can be saved and pasted in one click when required. Chrome comes with a built-in autofill feature alongside other options like extensions. Let us look at different methods to enable and use autofill in Google Chrome.
Related: How to Create Custom Primary Password in Microsoft Edge- What is it?
Enable & Use Autofill in Chrome
In Google Chrome, you can use the built-in autofill feature, which works on both phone and PC. Besides, you can also use Microsoft’s Autofill, password managers, and dedicated autofill extensions. Read on.
Method 1- Built-in Autofill Option
Google Chrome integrates a way to enable auto-fill within the native settings. Using these settings, you can store passwords, addresses, and payment methods. Here’s a step-by-step procedure to configure and enable autofill on Google Chrome.
On Chrome Desktop (Mac, Windows)
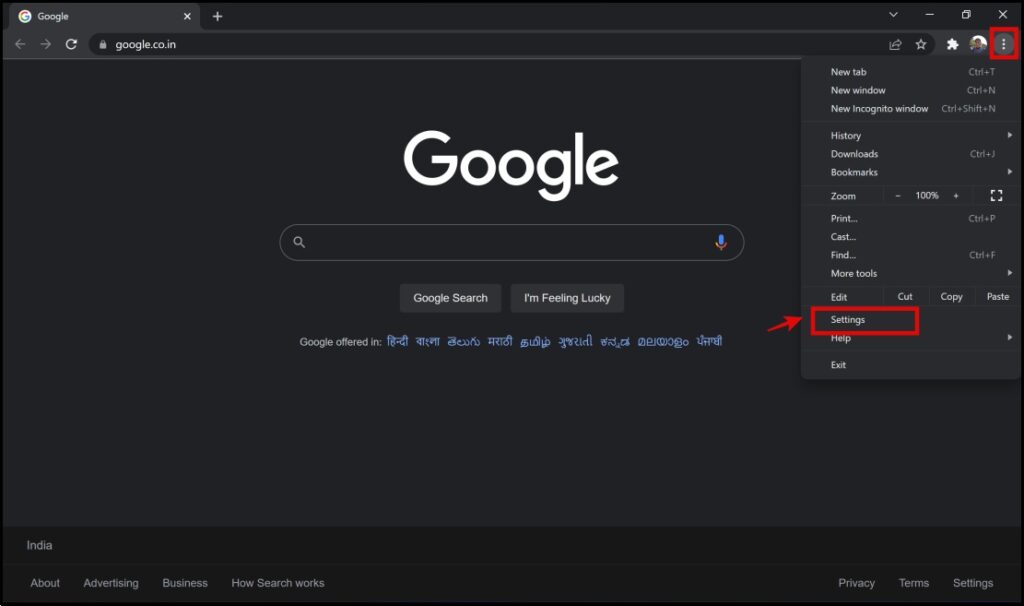
Step 1: Click on the three dots menu icon on the top right corner of the screen. Click on Settings.
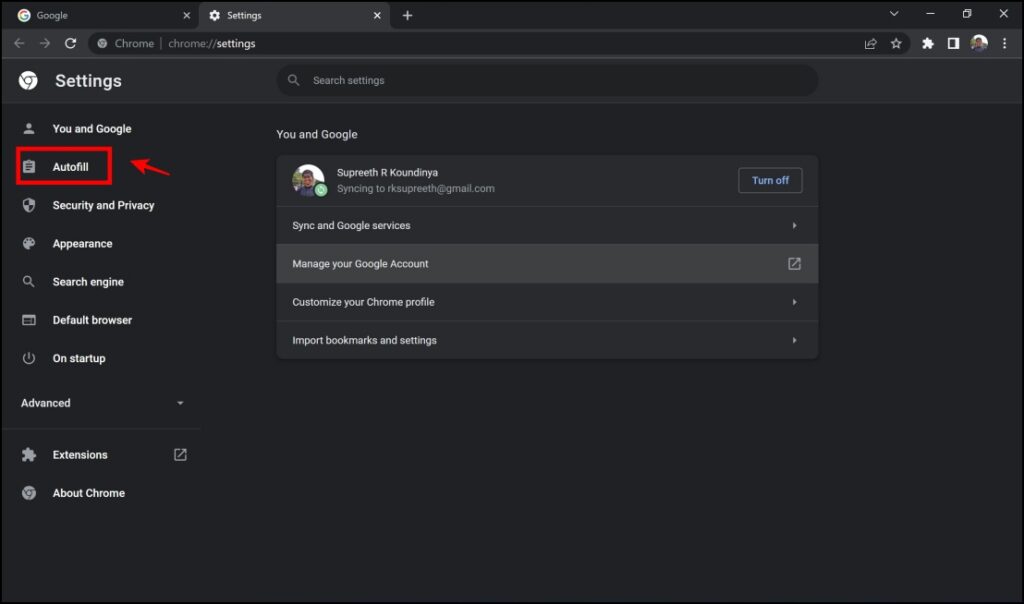
Step 2: Click on Autofill.
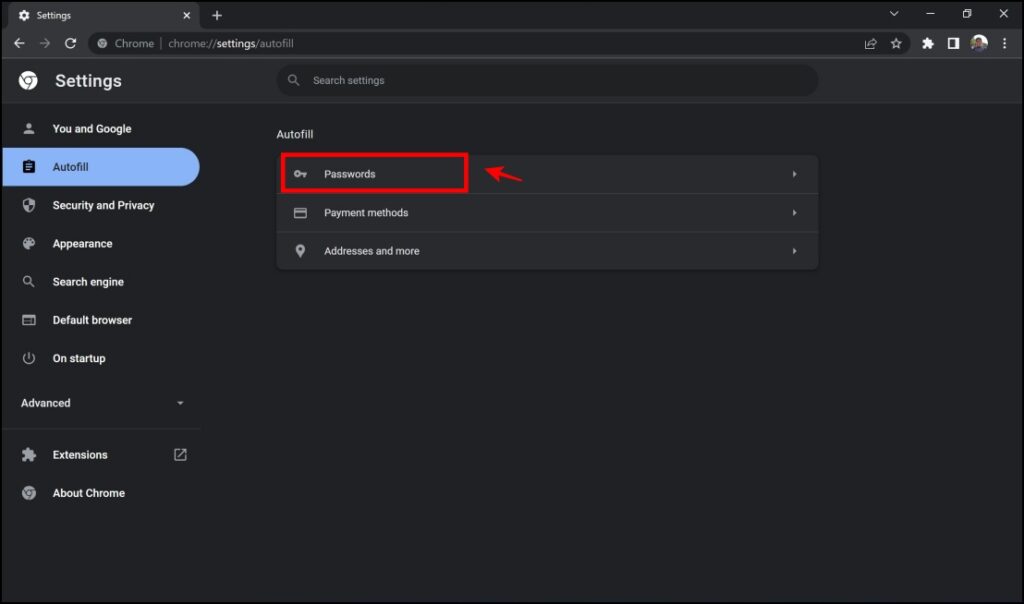
Step 3: As mentioned earlier, Google Chrome provides auto-filling for three different fields – passwords, addresses, and payments. Let us first explore Passwords.
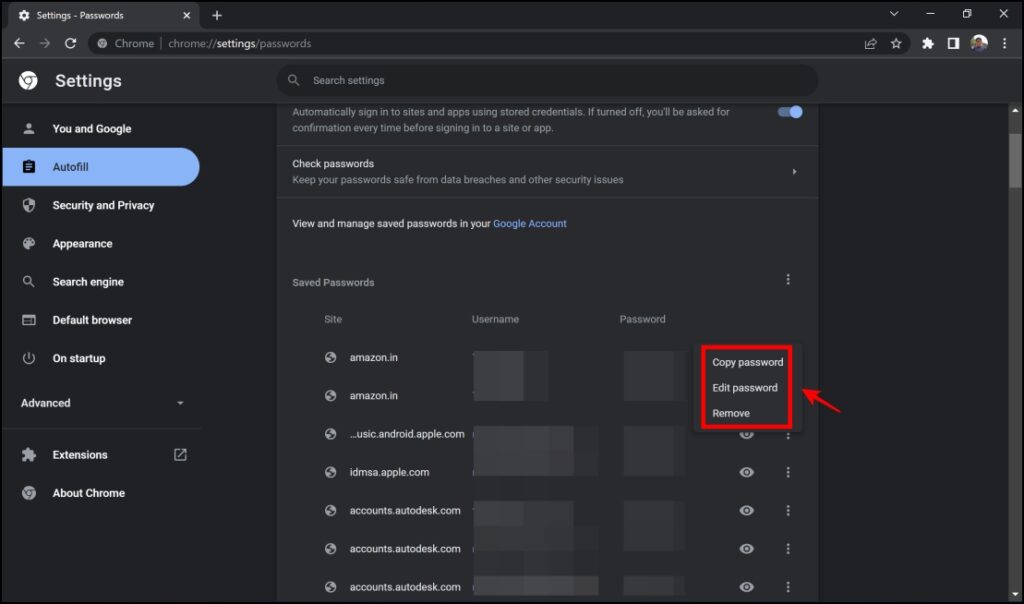
Step 4: You will now be shown the list of saved passwords, as initiated by you when Google Chrome requests to save passwords.
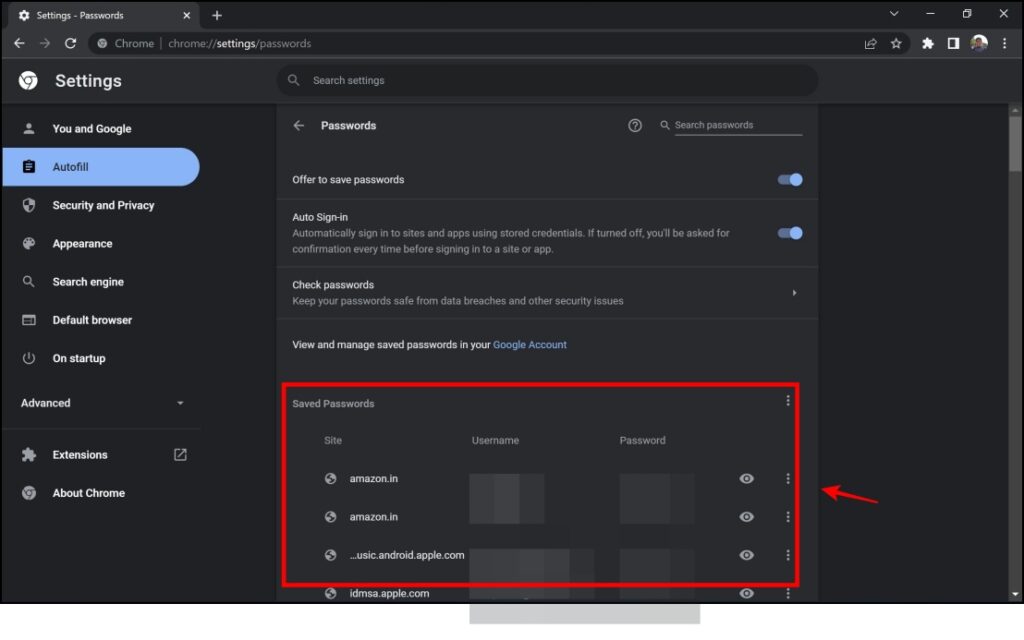
Step 5: You can also edit, delete, or copy the password. Click on the three dots next to the password, and you will find options for the same.
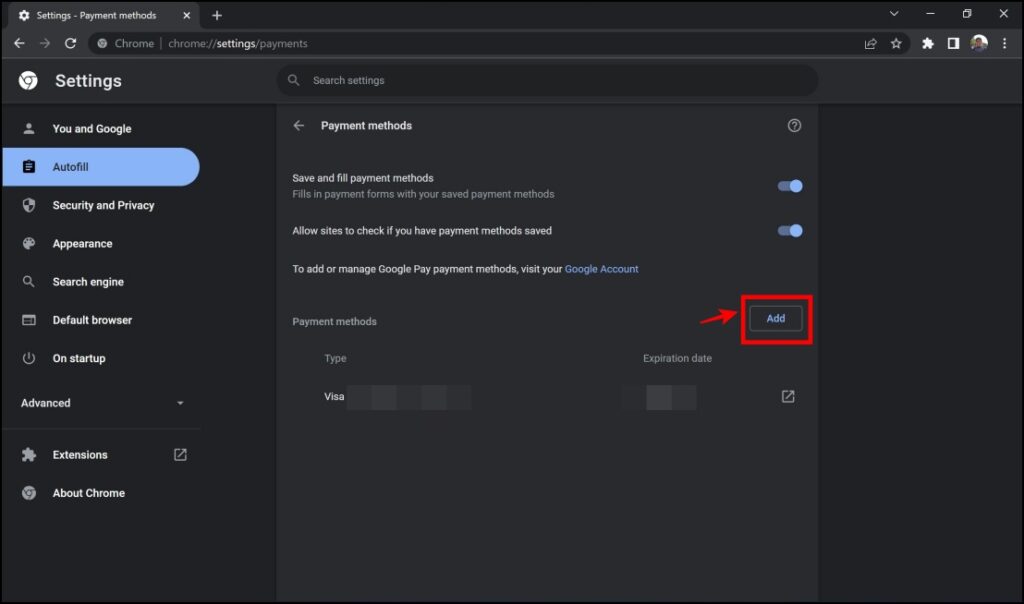
Step 6: To enable auto-filling of payment fields on Chrome, click on Payment Methods in the Autofill main menu (refer to Step 3).
Step 7: If you want to add a payment method, click on Add.
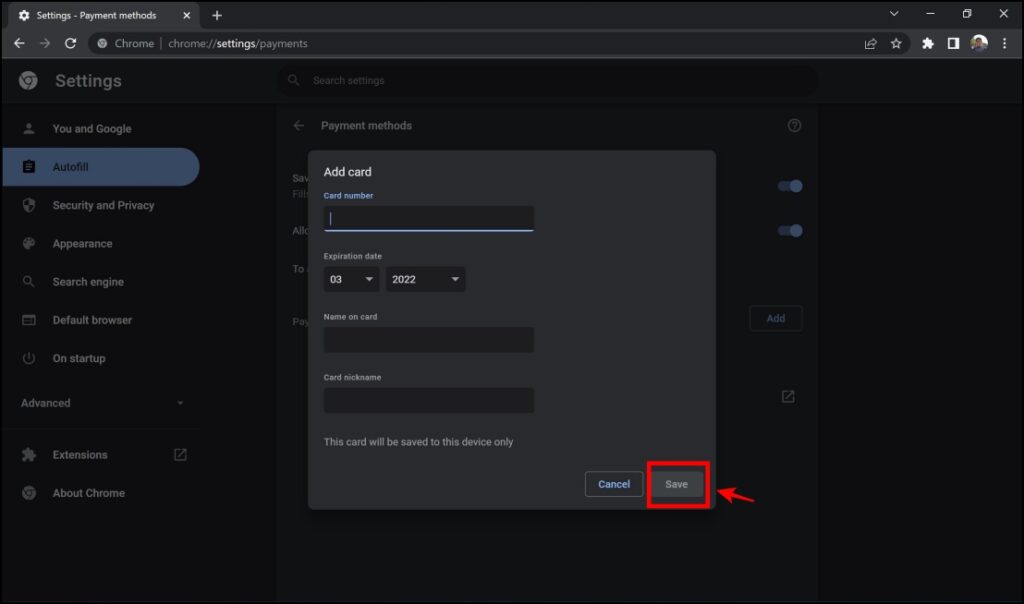
Step 8: Fill in all the details and click on Save.
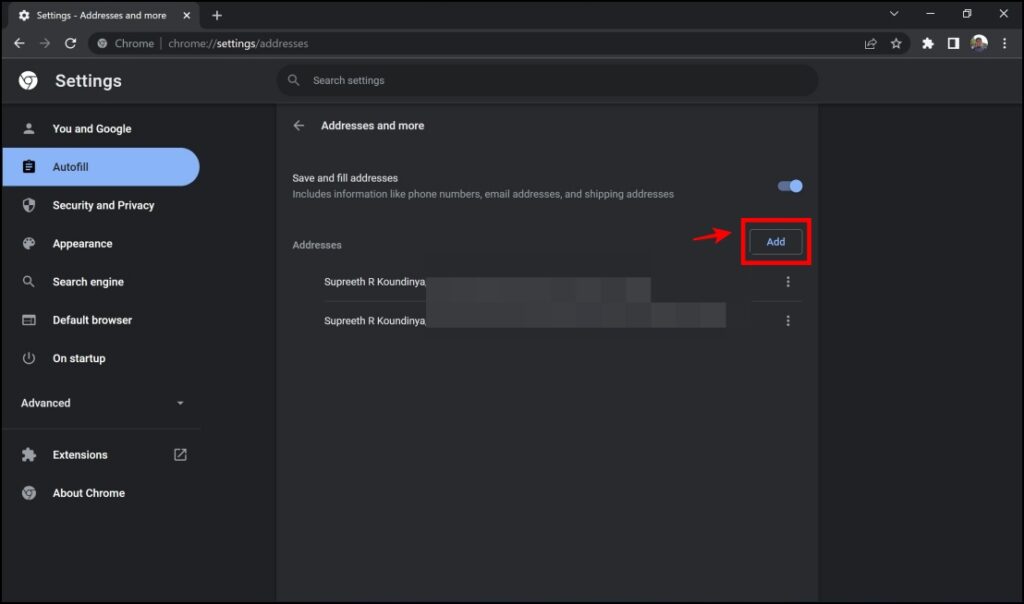
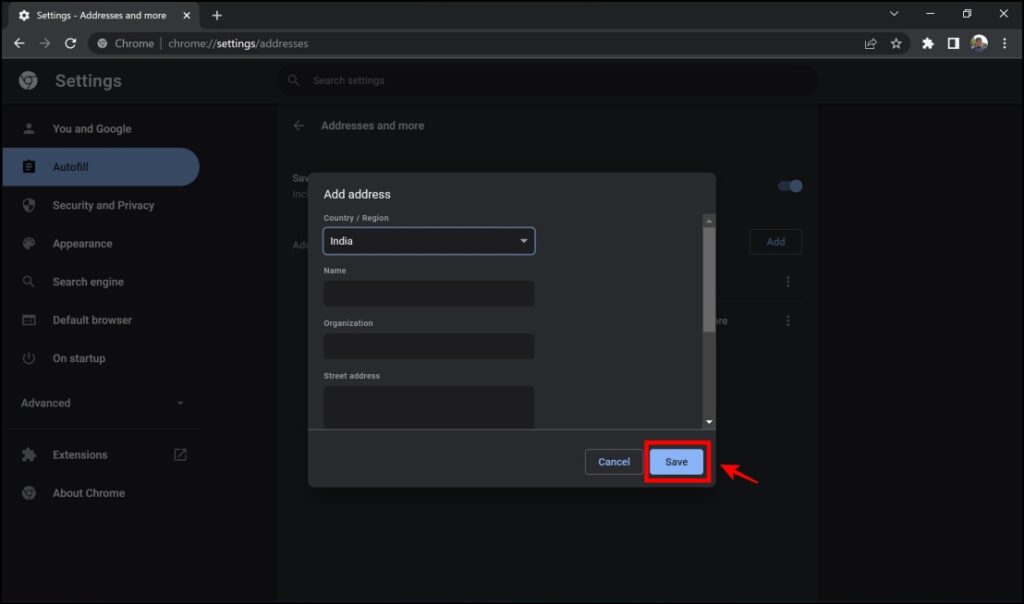
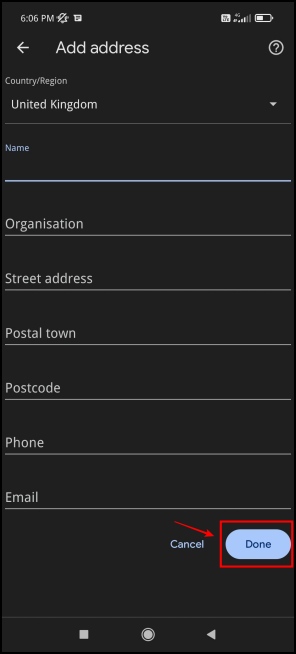
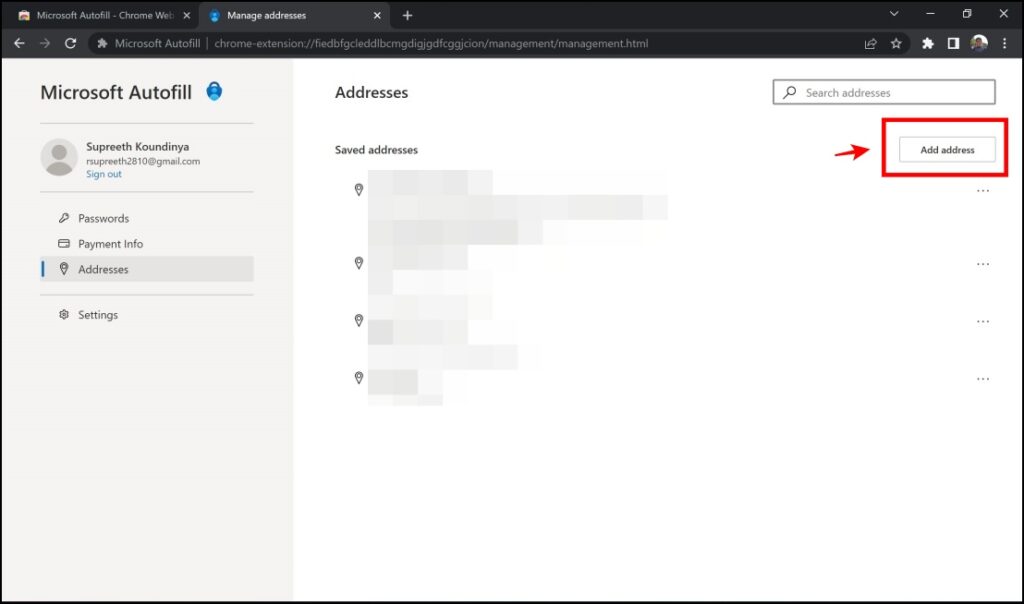
Step 9: To enable auto-filling of addresses on Chrome, In the main menu of Autofill, click on Addresses and More (refer to Step 3).
Step 10: To add a new address, click on Add.
Step 11: Fill in all the fields for your address, and click on Save.
Step 12: The next time you are trying to fill your login, payment, or address fields on Chrome, it will prompt you to autofill. Click on the appropriate option, and your fields will be effectively auto-filled.
On Chrome Mobile (Android, iOS)
Here’s how you can use auto-filling on Chrome Mobile.
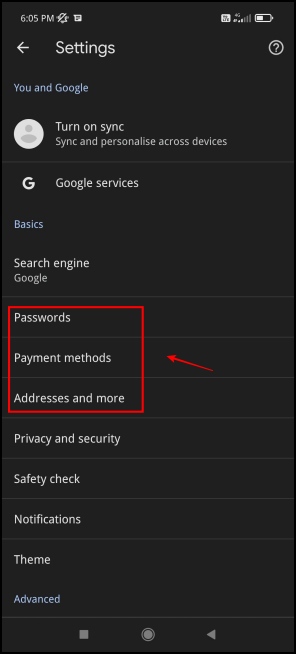
Step 1: Open Chrome Settings.
Step 2: You will find the auto-filling options for Passwords, Payments, and Addresses.
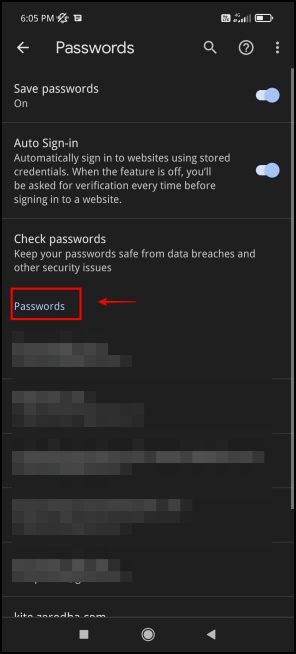
Step 3: In the Passwords section, you can view all the passwords that have been saved.

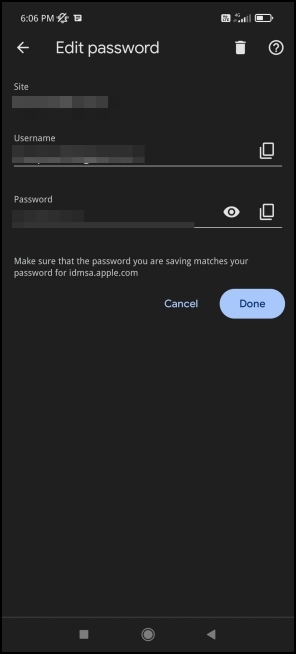
Step 4: To manage a password, you can click on the password and find ways to edit and copy these passwords.
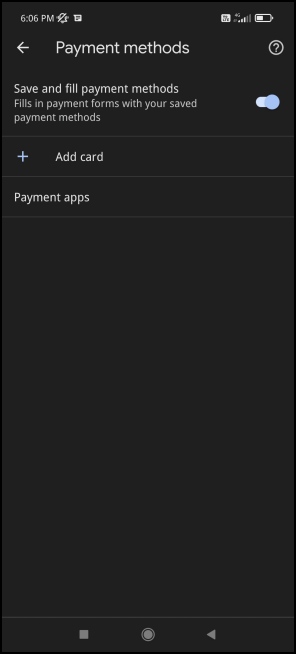
Step 5: Similarly, you can add your payment and address information for autofill in the Payment Methods and Addresses and More section.
Method 2- Microsoft Autofill in Chrome
Microsoft has a well-built extension that helps you enable auto-fill on Google Chrome. While it works similar to Google integrated settings, you can autofill with your data saved on your Microsoft account on Google Chrome.
This can be useful for Edge users who would like to autofill their data in Chrome without importing or transferring data between the browsers. Here’s how to use Microsoft’s autofill extension in Google Chrome:
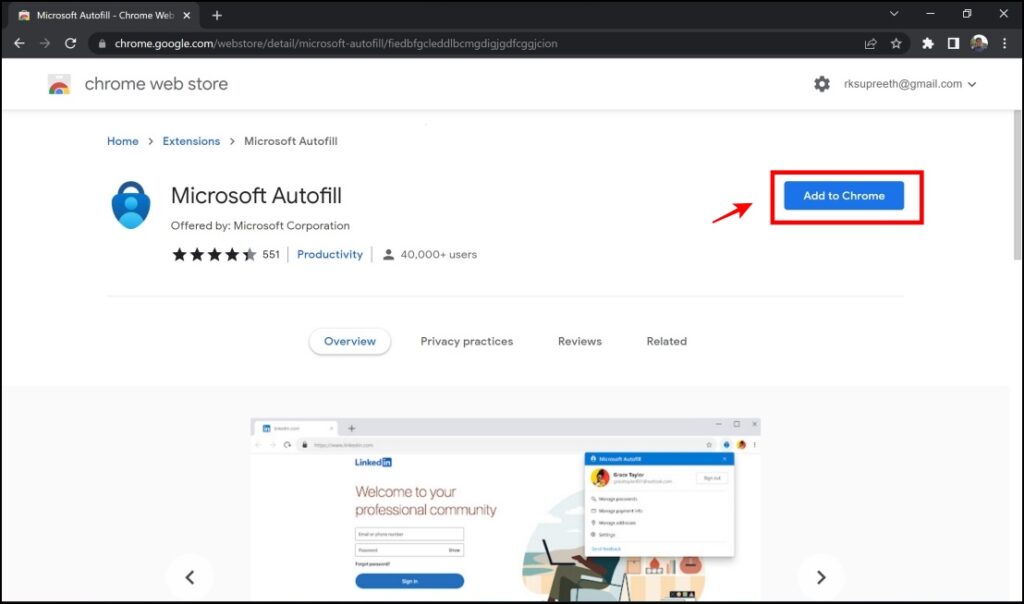
Step 1: Visit the Microsoft Autofill Extension page. Click on Add to Chrome -> Add Extension.
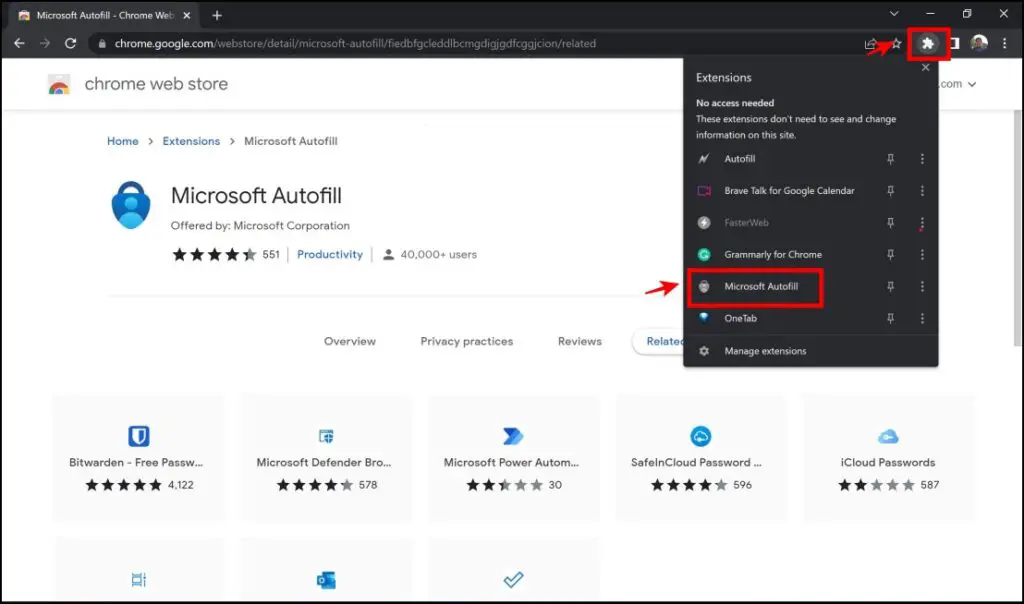
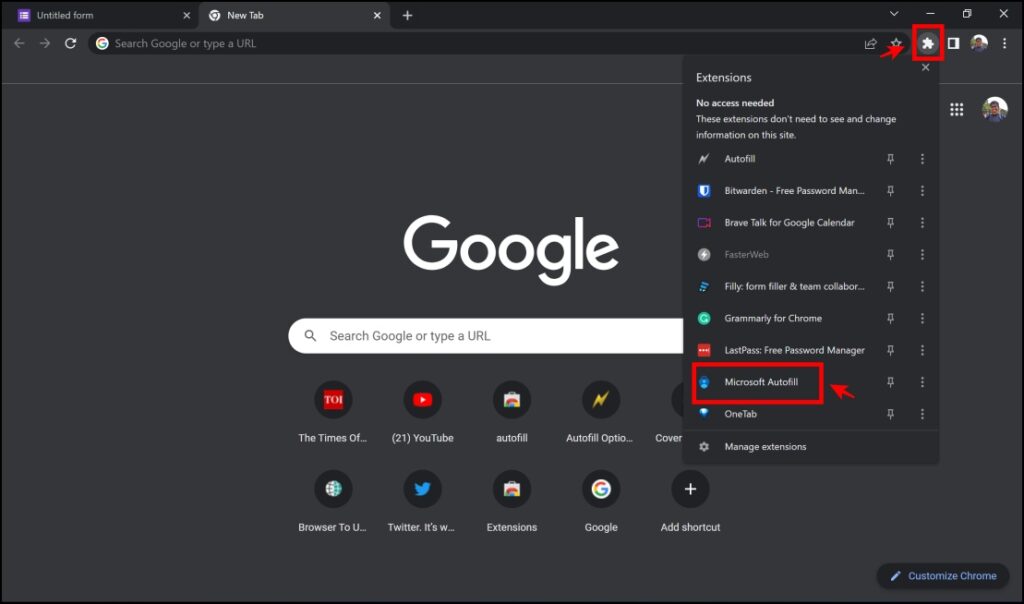
Step 2: Click on the extension menu on the top right corner of the screen. Select Microsoft Autofill.
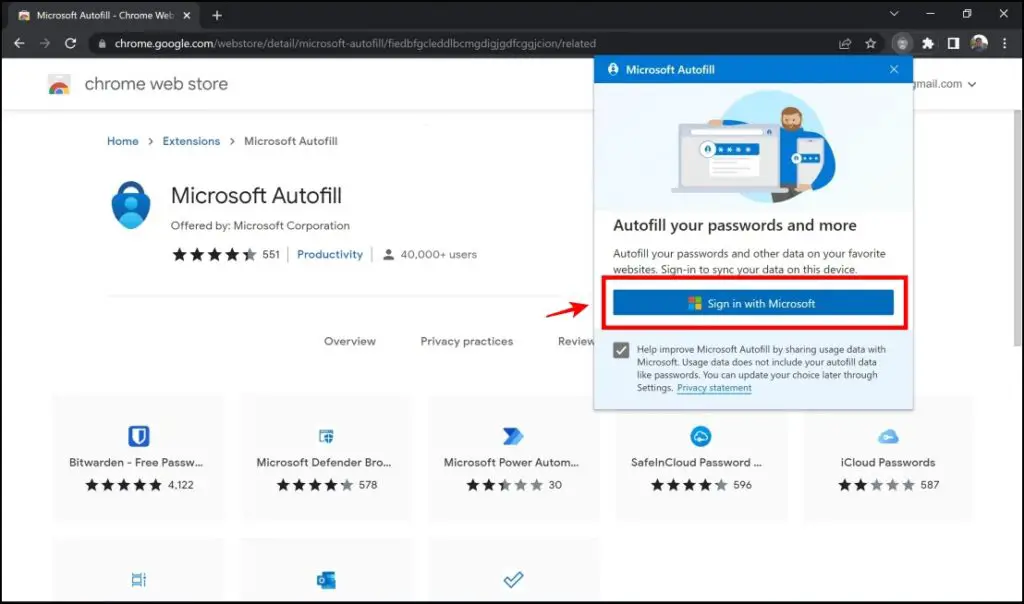
Step 3: Click on Sign in with Microsoft.
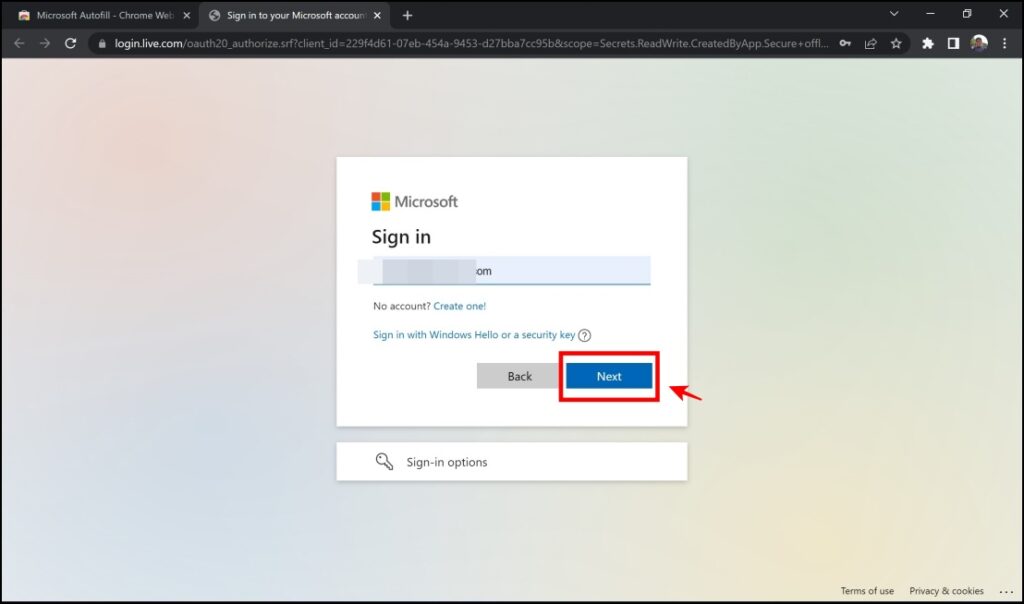
Step 4: Enter your Microsoft account. Click on Next.
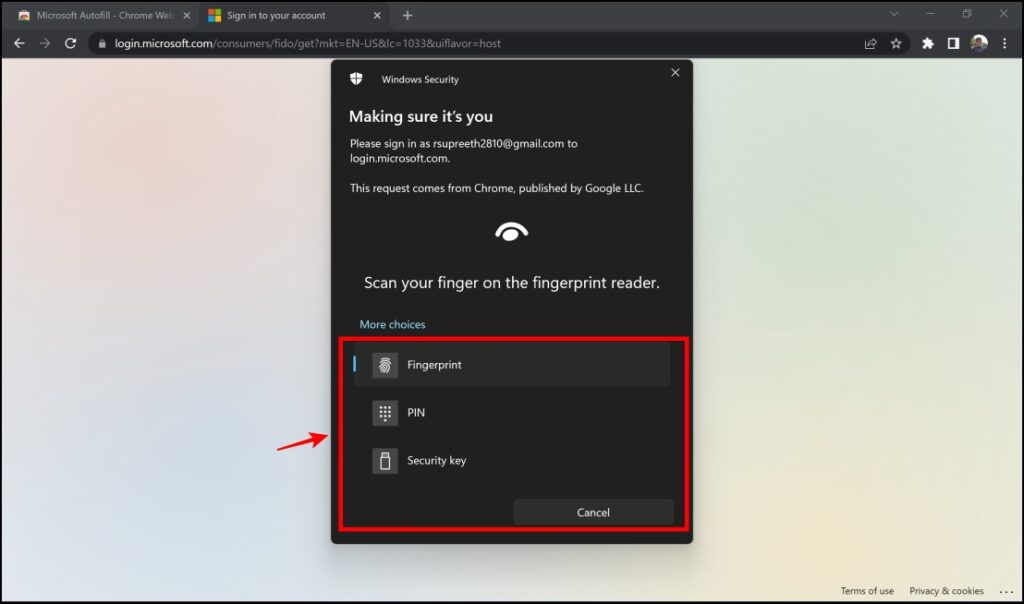
Step 5: You will be prompted to log in through your Windows credentials. Select your preferred method and enter your details.
Step 6: Again, click the extension menu on the top right corner of the screen > Microsoft Autofill.
Step 7: The extension mainly allows you to autofill three different fields- Passwords, Payment Methods, and Addresses.
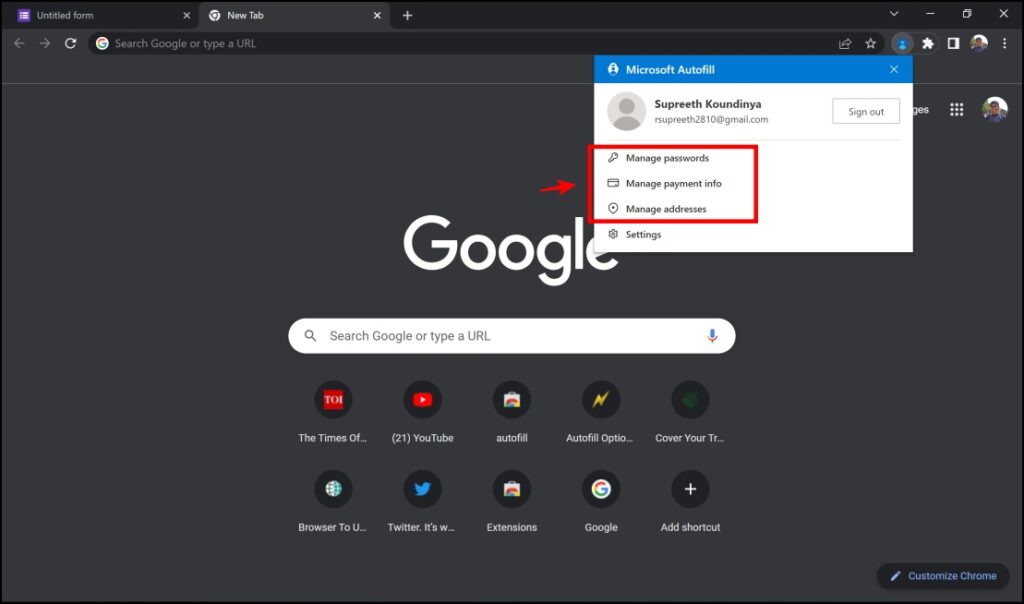
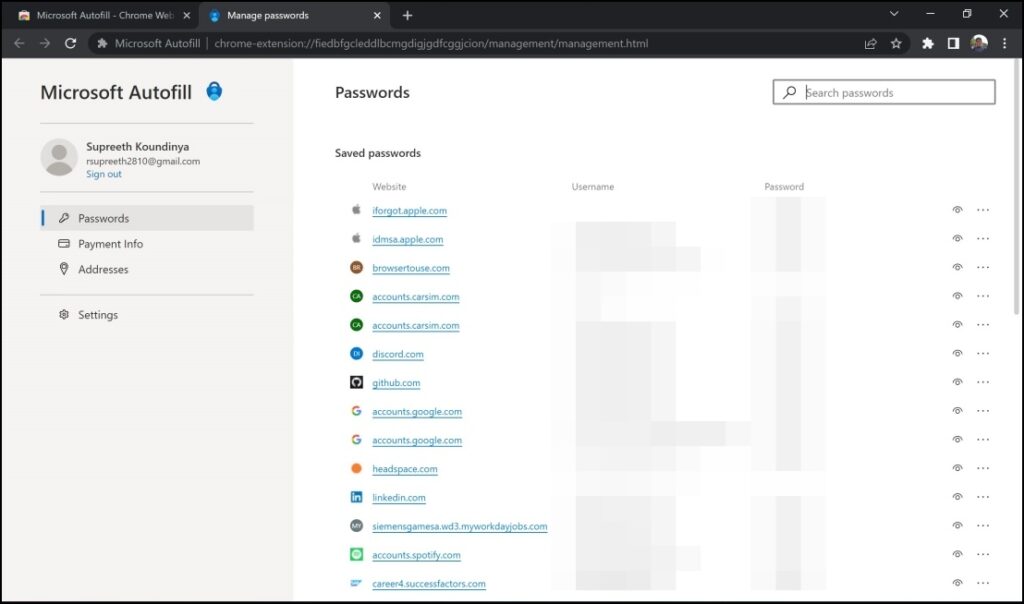
Step 8: In the Manage Passwords section, you will be shown the list of all saved passwords linked to your Microsoft Account.
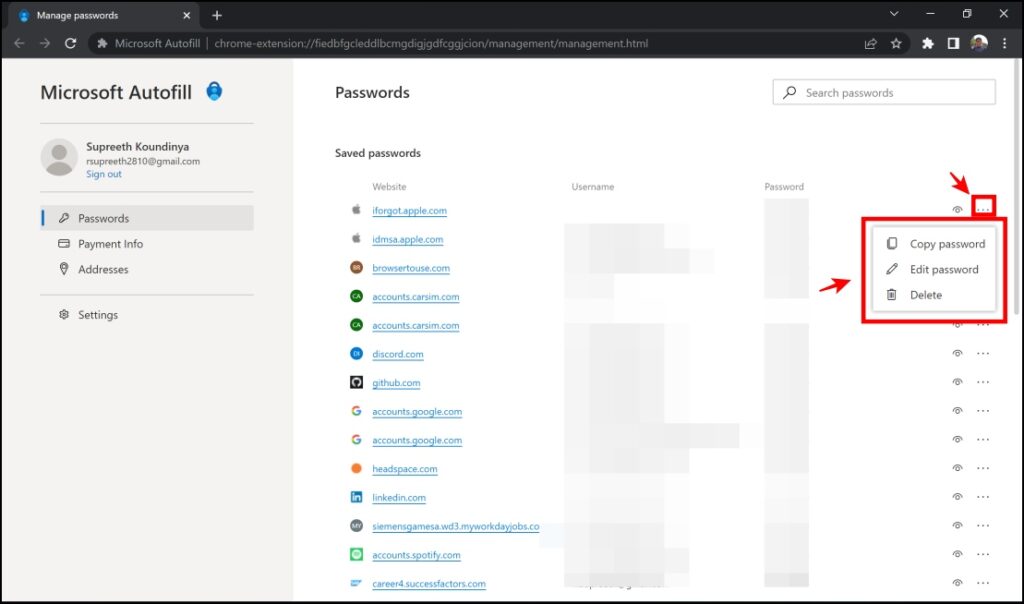
Step 9: To manage a password, click on the three dots icon next to the password. You can now either Copy, Edit, or Delete the password.
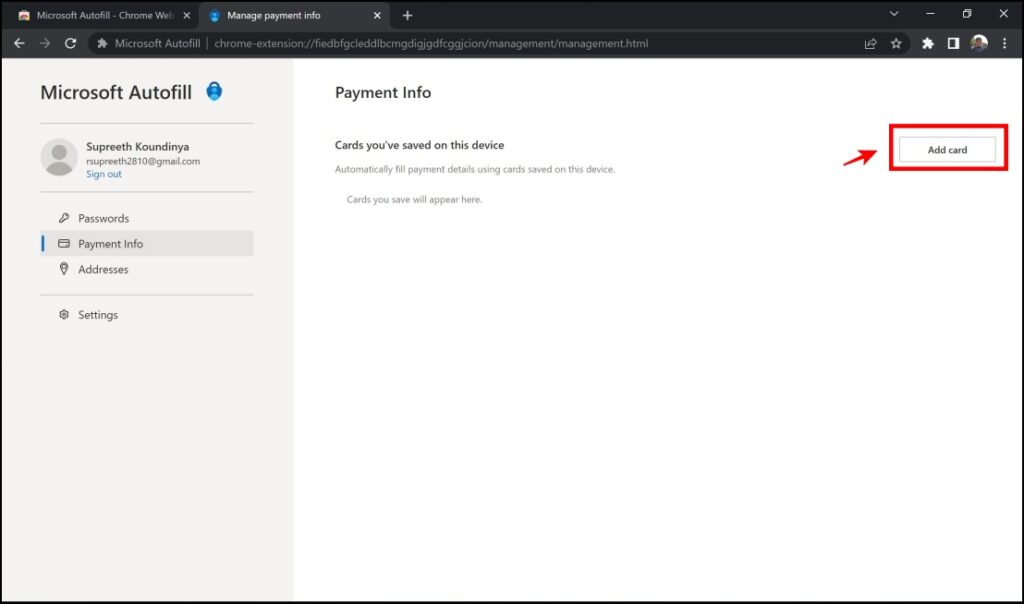
Step 10: In the Manage Payment info section (refer to step 7), you can add your card information for faster checkout. Click on Add Card.
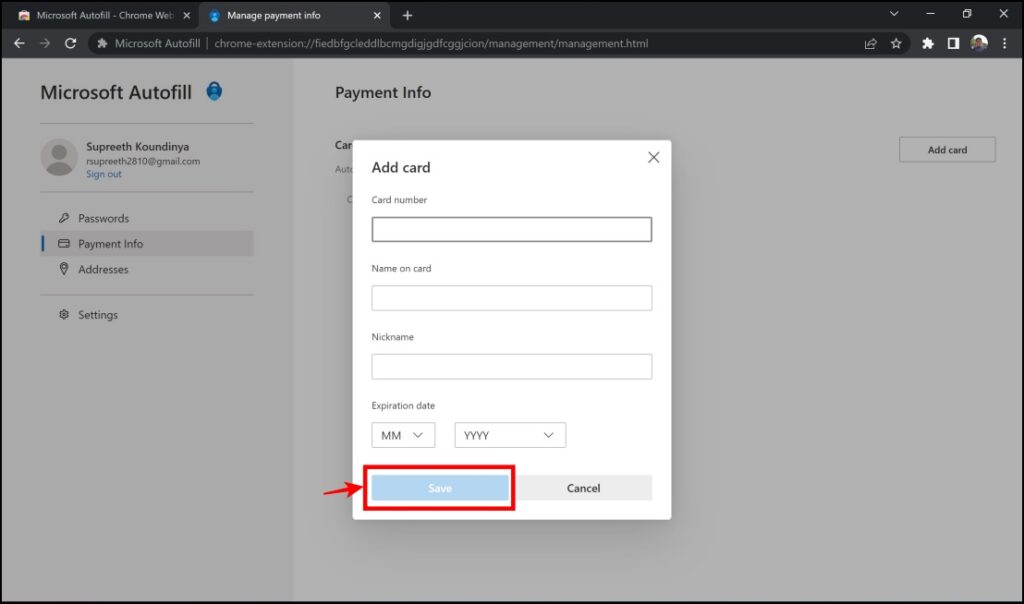
Step 11: Add your payment info and click on Save.
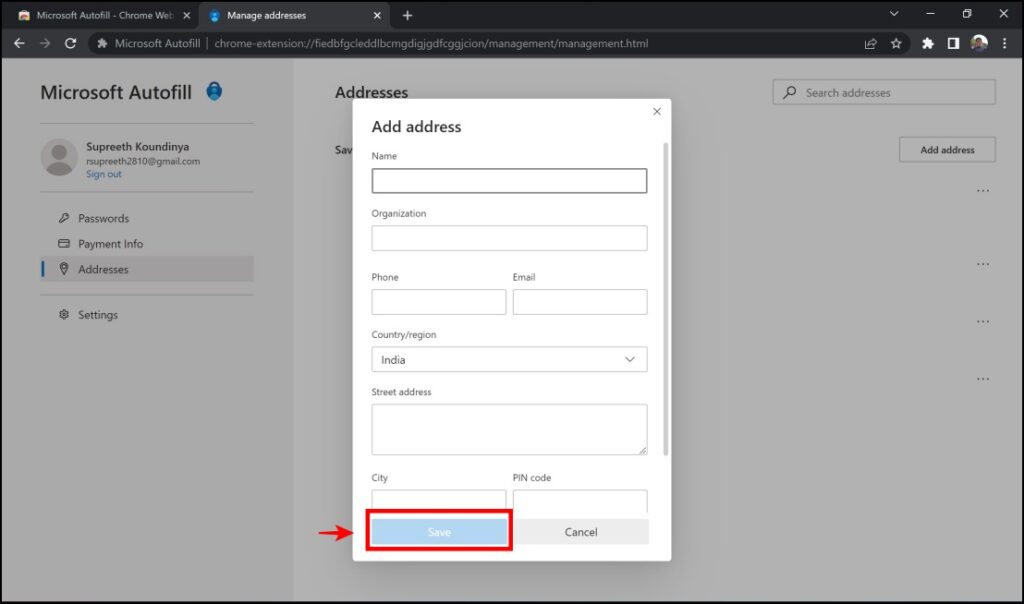
Step 12: In the Manage addresses section (refer to step 7), you can save your addresses. Click on Add Address.
Step 13: Fill in the details and click on Save.
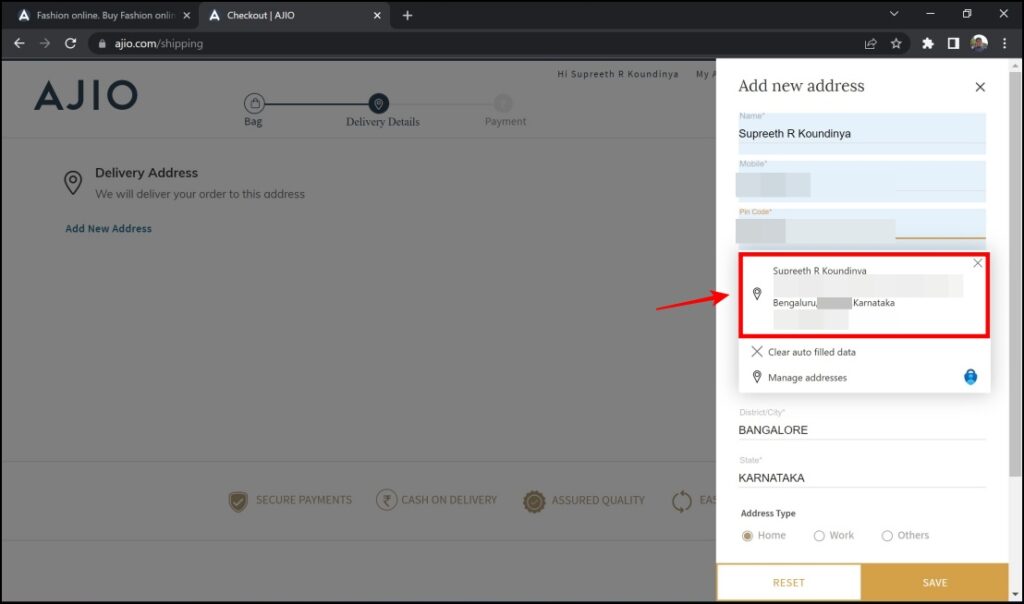
Step 14: The next time you try and fill in any details on a website, the extension will prompt an autofill request, and you can select the appropriate option for the same.
Method 3- Bitwarden Extension
The Bitwarden extension is one of my favorite extensions to enable autofill on Google Chrome. Once you fill in the details in the extension, the extension will allow you to seamlessly autofill all the relevant options on any website. The extension’s interface too is very user-friendly and seems well organized.
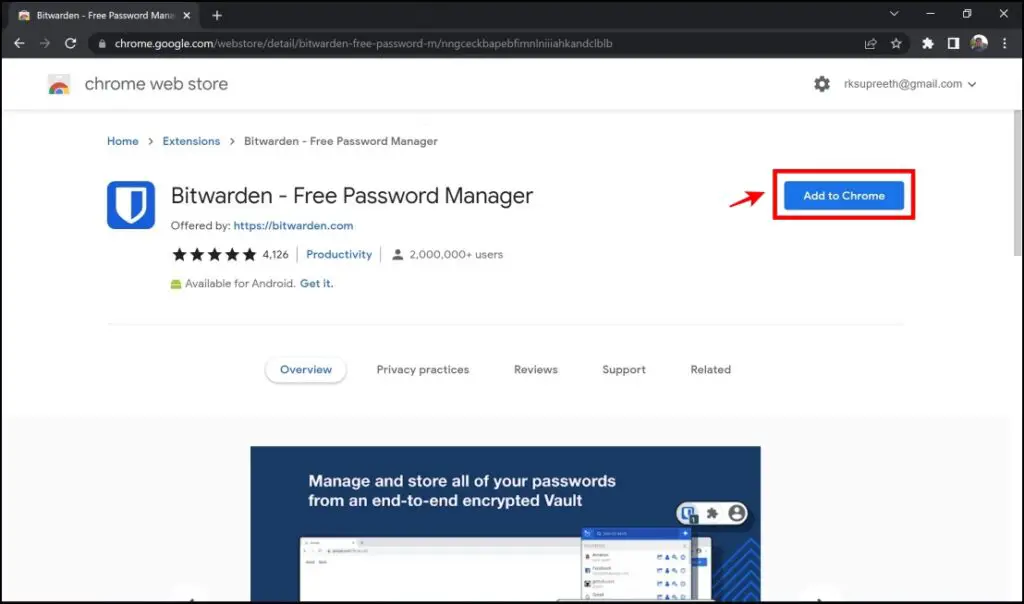
Step 1: Visit the Bitwarden Extension Page. Click on Add to Chrome -> Add Extension.
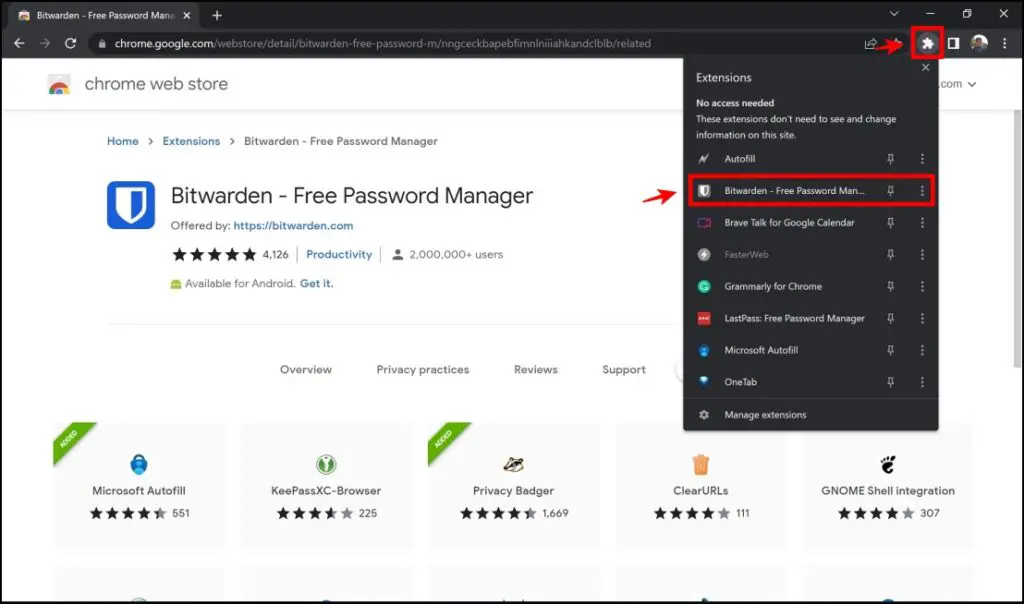
Step 2: Click on the extensions menu on the top right corner of the screen. Select Bitwarden.
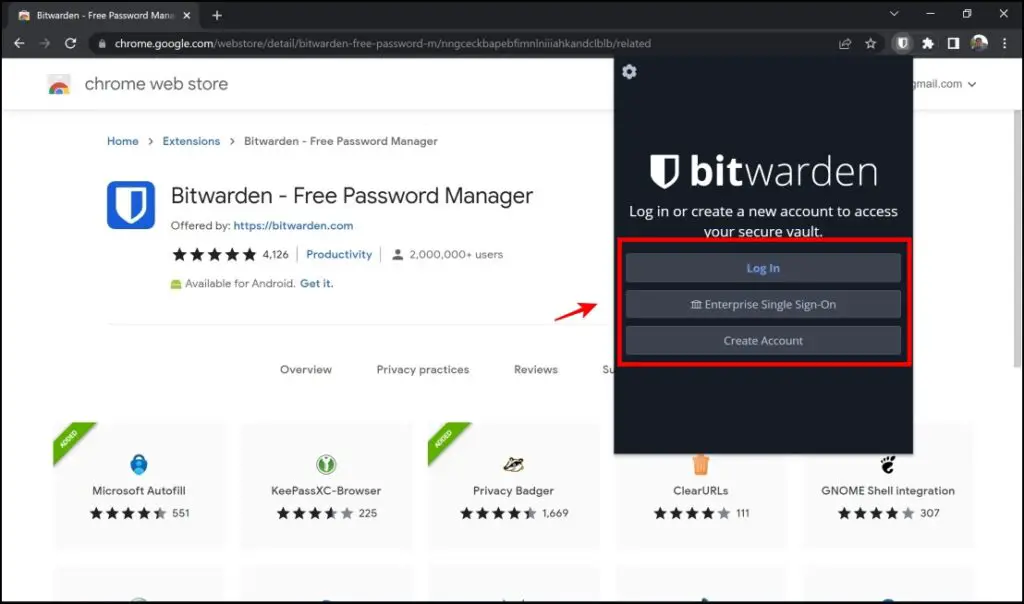
Step 3: Click on Create Account. This will help you create an account for Bitwarden.
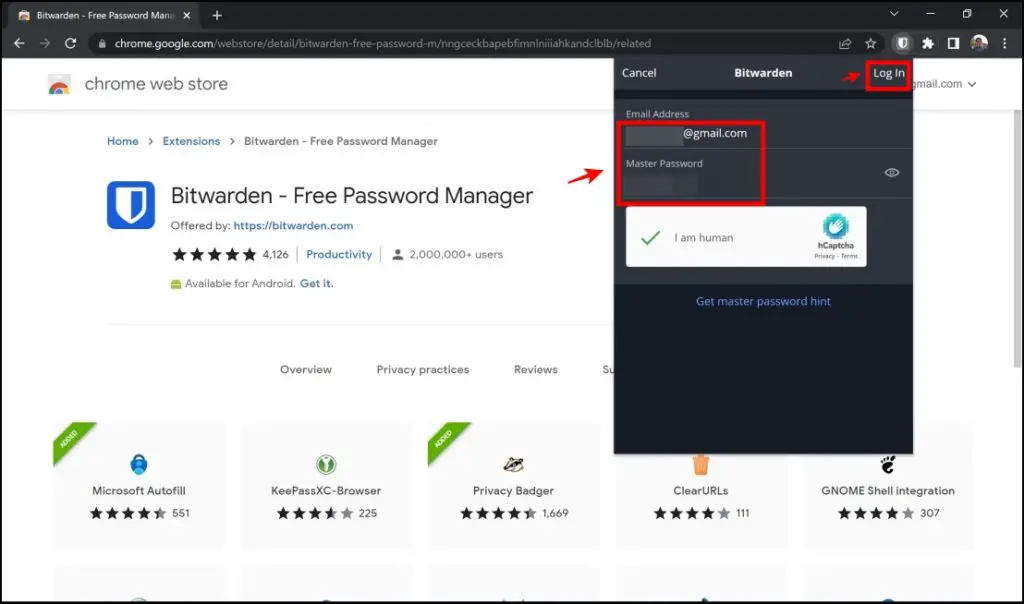
Step 4: Log in with your newly created credentials.
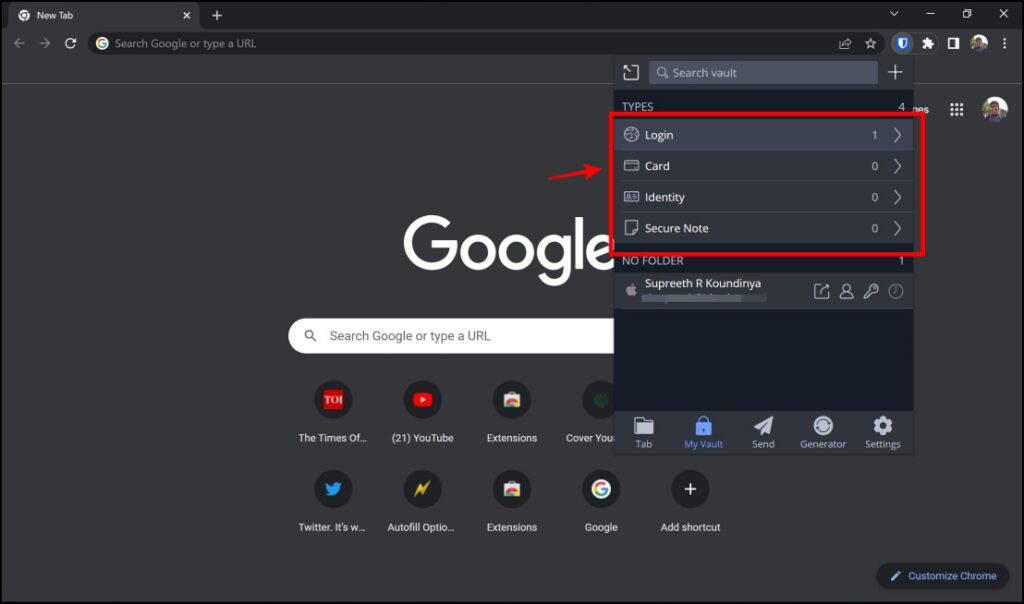
Step 5: After login, you will be taken to the My Vault section. Click on the “+” icon.
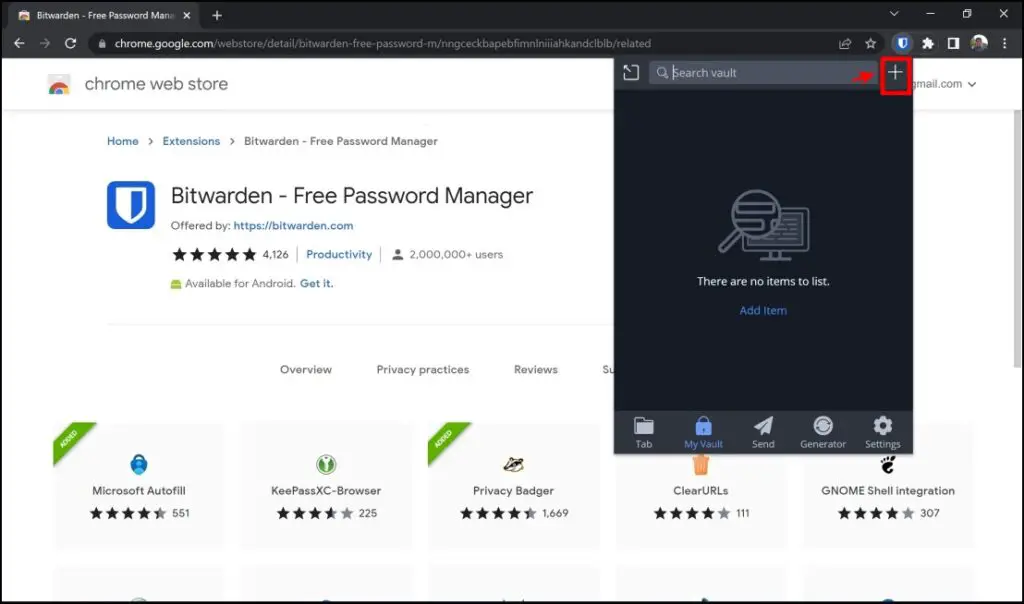
Step 6: You will be presented with the different ways the extension can help you autofill.
Step 7: Click on Login. In this option, you can save your login details.
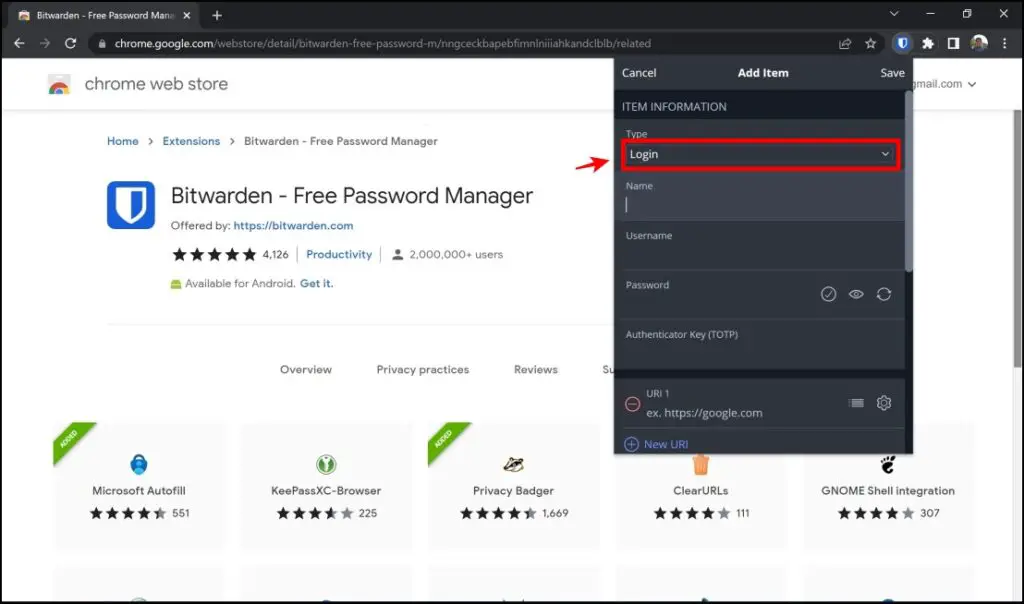
Step 8: Fill in all your login details for a particular website, click on Save.
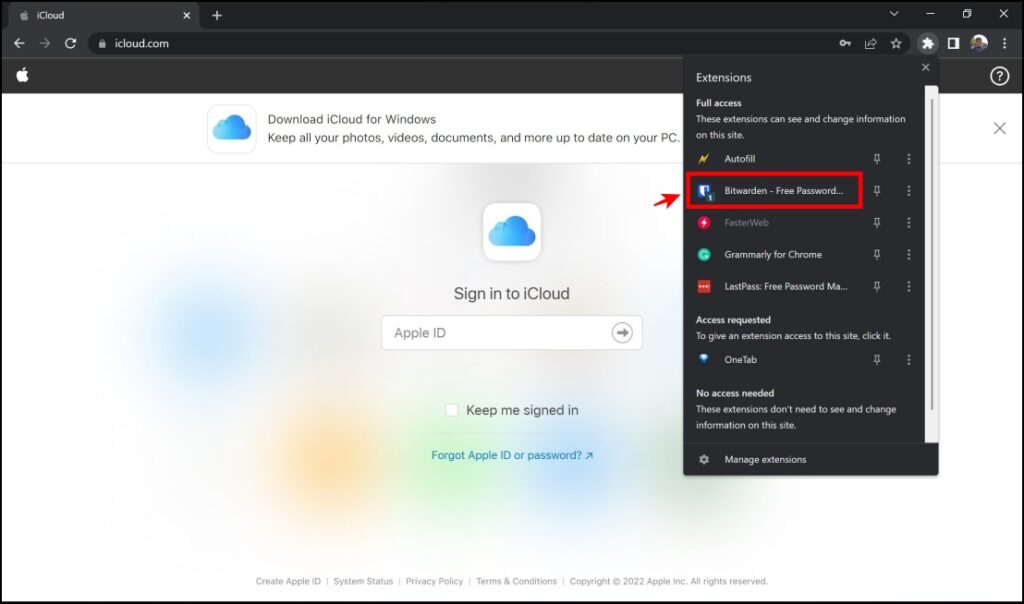
Step 9: When you try to visit the site you saved the login info for, click on the extensions menu on the top right corner and click on Bitwarden.
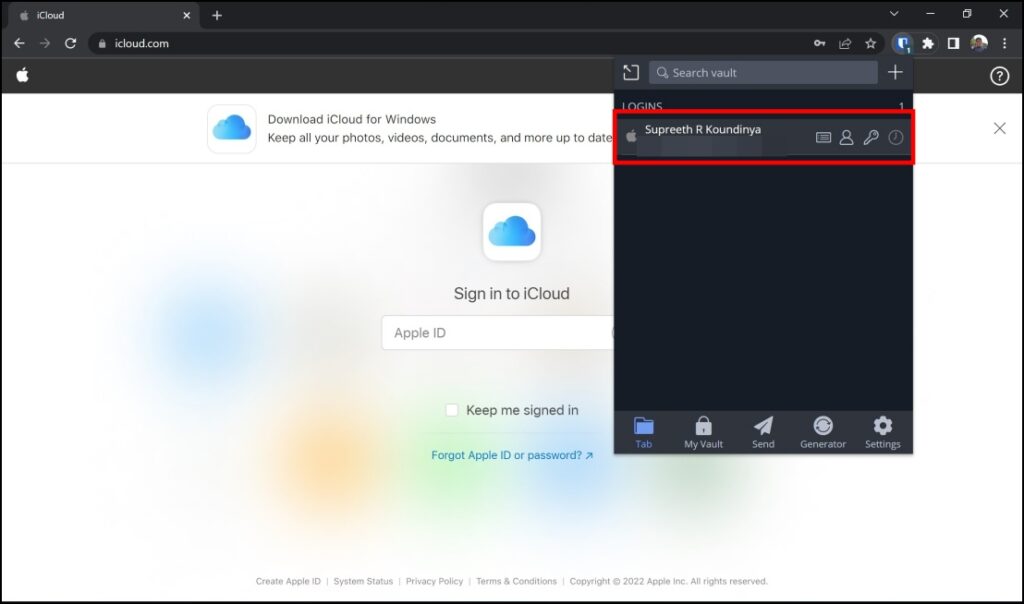
Step 10: It will provide you with the relevant login info. Select the same.
Step 11: It will now autofill the fields and successfully log you on to the website.
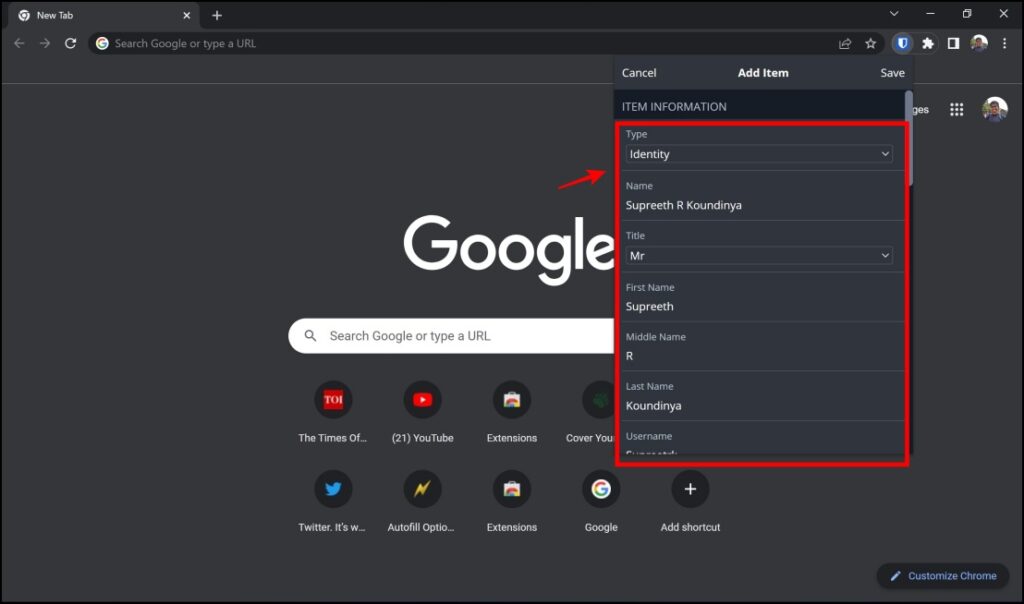
Step 12: One notable feature in this extension is the ability to save Identity info. In the My Vault section (refer to Step 6), click on Identity.
Step 13: Fill in all of your details and click on Save.
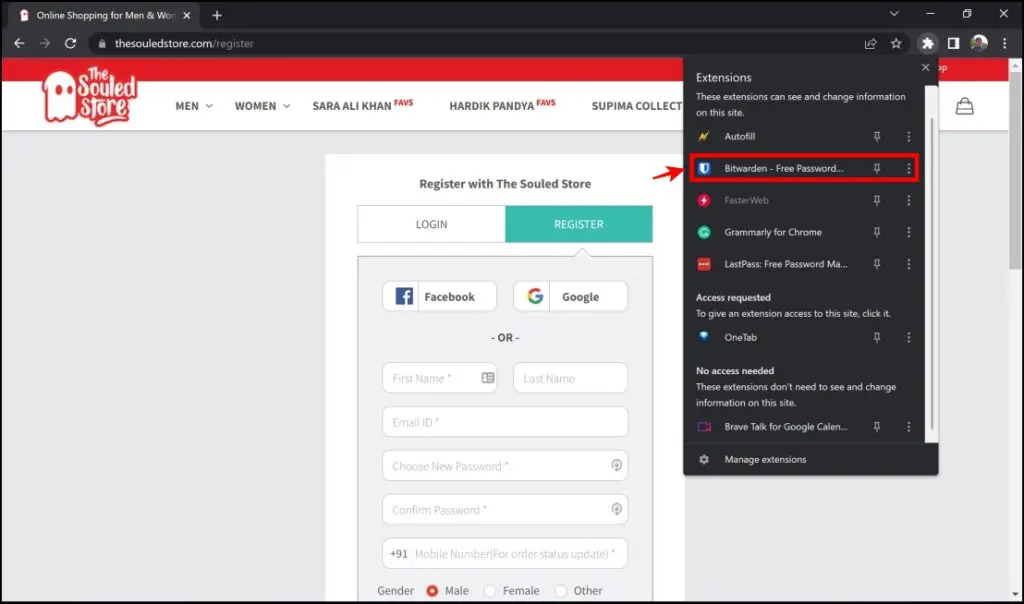
Step 14: Now, visit a site where you need to fill in all your details.
Step 15: Open the extension menu and tap Bitwarden.
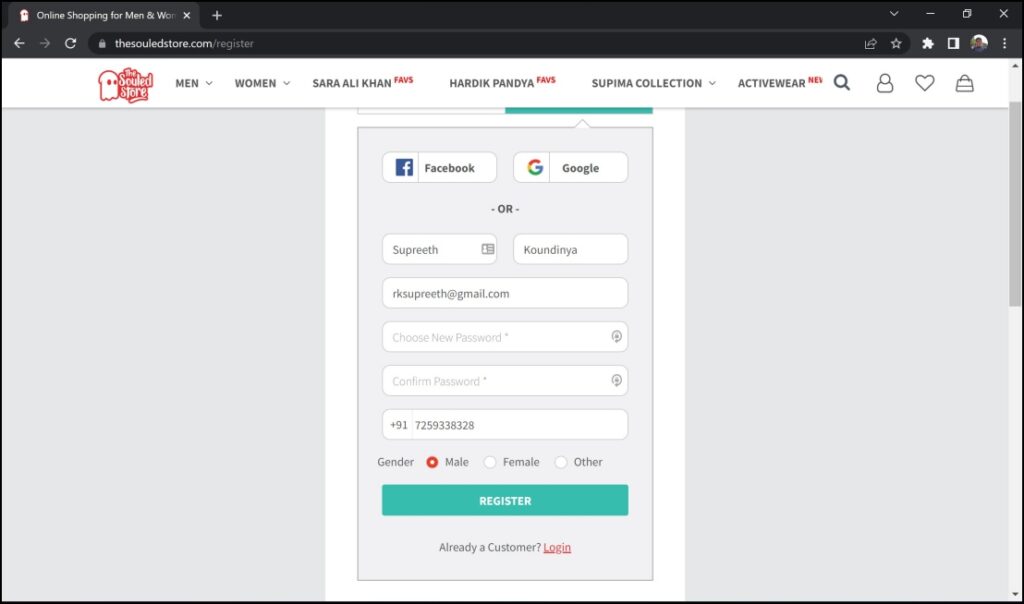
Step 16: It will automatically show you the relevant option for autofill- select the option.
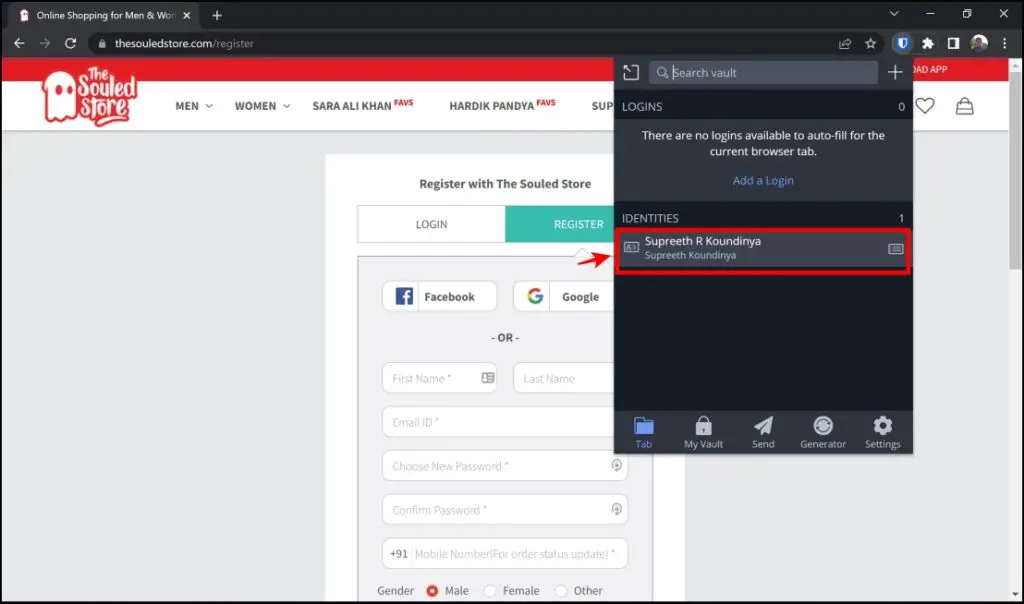
Step 17: All of your fields, including those that don’t involve text too, will be automatically filled with great accuracy.
Method 4- Auto Fill Forms with Chrome Extension
In the previous methods, we dealt with auto-filling details that were mostly personal information, but we also often come across simple forms that require basic and trivial details. Using the Autofill extension, you can quickly autofill forms and fields that can be quite repetitive in your usage.
Here’s you can enable autofill on Google Chrome while filling these forms:
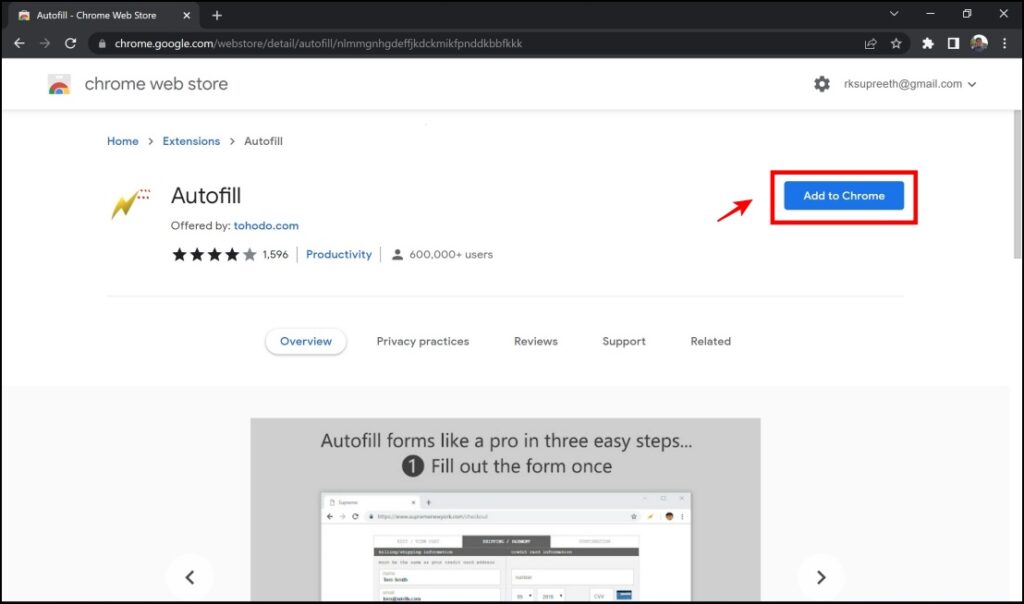
Step 1: Visit the Autofill Extension page. Click on Add to Chrome -> Add extension.
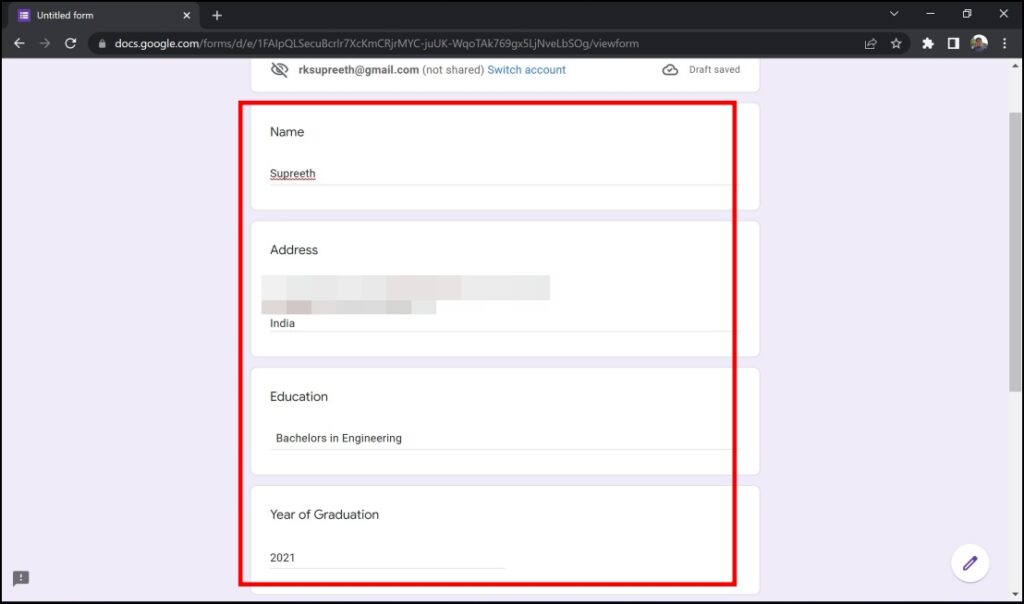
Step 2: Open any form you need to fill in details for and fill in the necessary information.
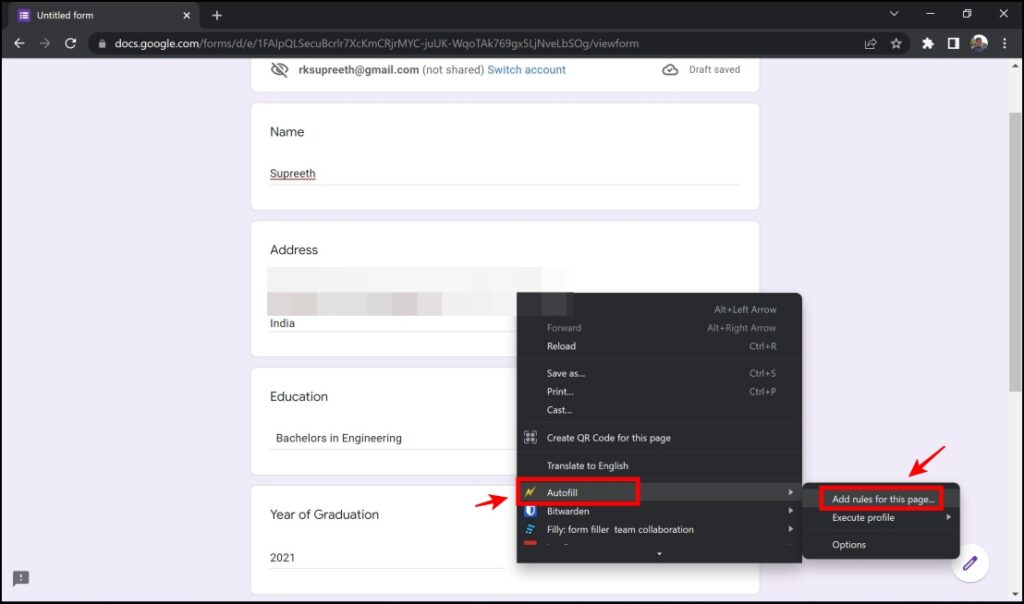
Step 3: Right-click anywhere on the screen. Click on Autofill -> Add rules for this page.
Step 4: You will now be provided with a toolbar from the extension. Click on the drop-down menu next to Choose a profile.
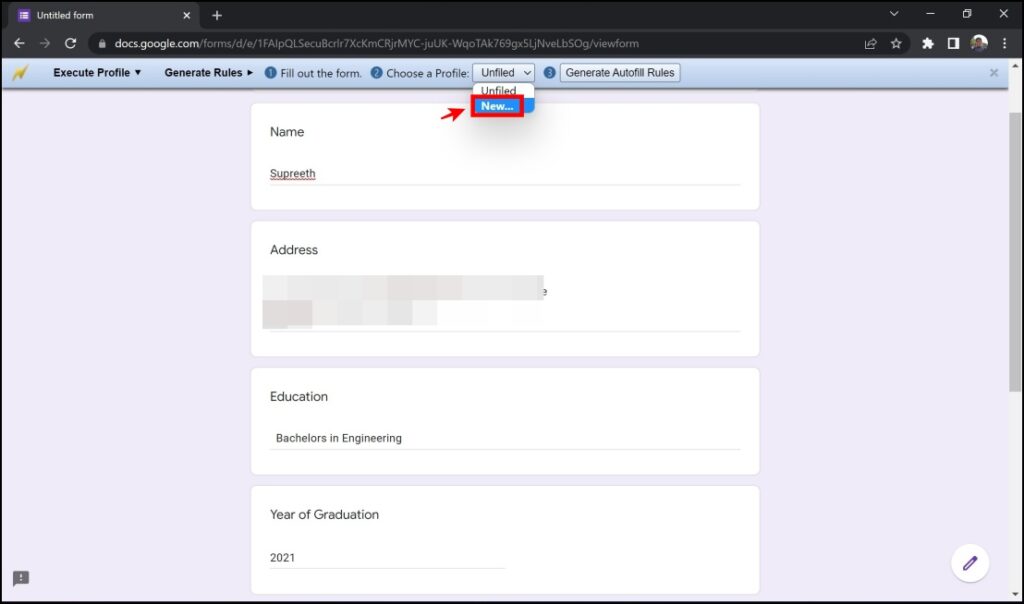
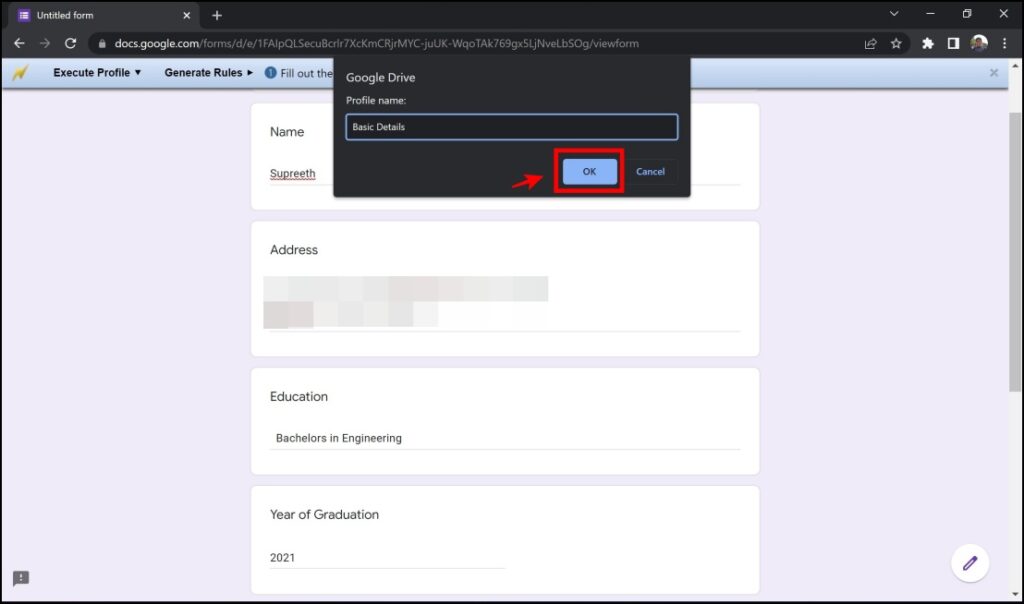
Step 5: Add a relevant name to the profile and click on OK.
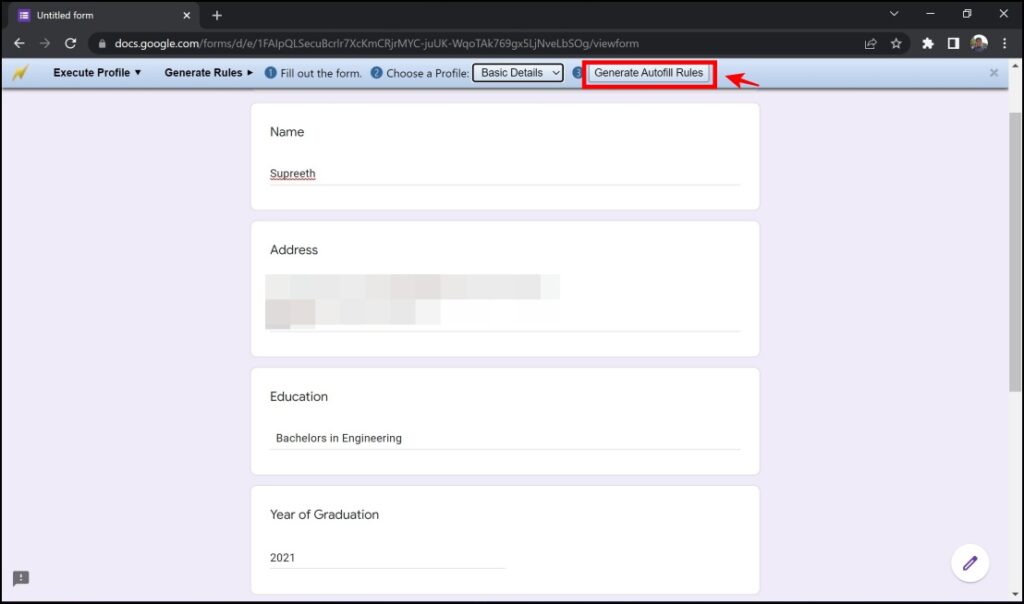
Step 6: Click on Generate Autofill Rules.
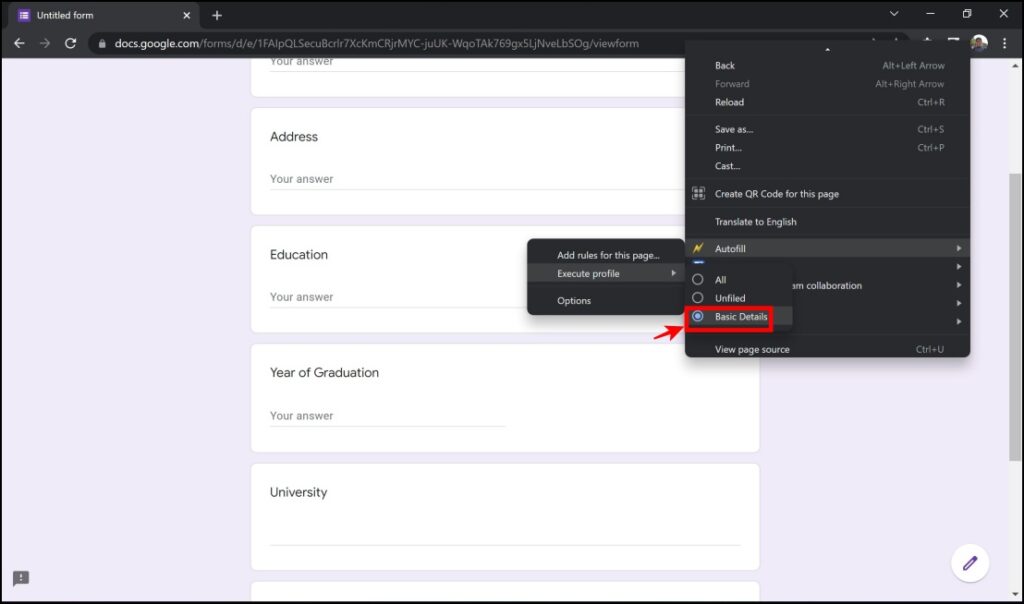
Step 7: Next time when you open the same form to fill in for the second time, right-click anywhere on the screen. Click on Autofill -> Execute profile.

Step 8: Click on the name of your profile (basic Details in our case).
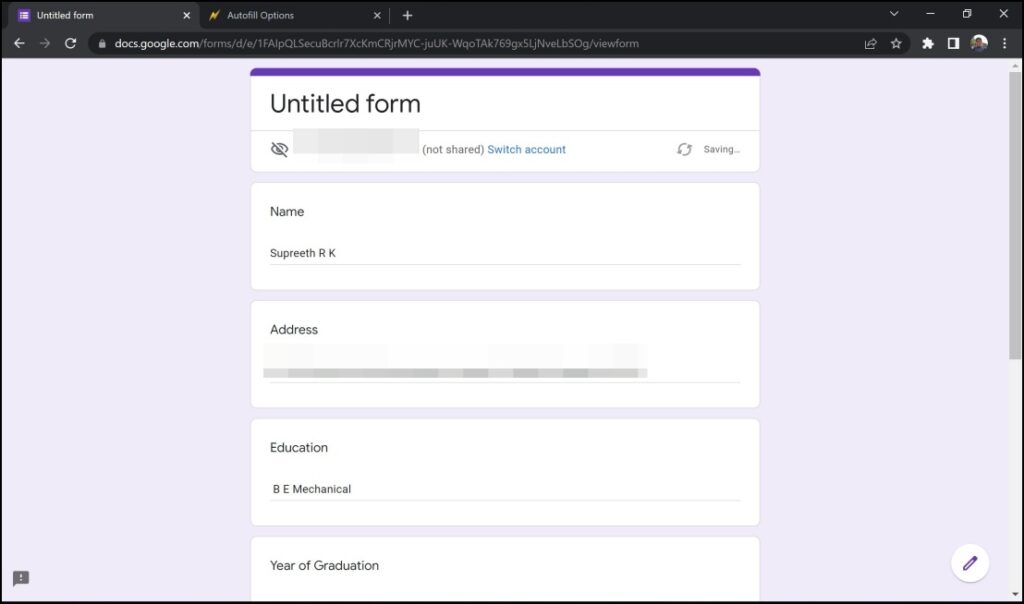
Step 9: Now, all of your details will be automatically filled in.
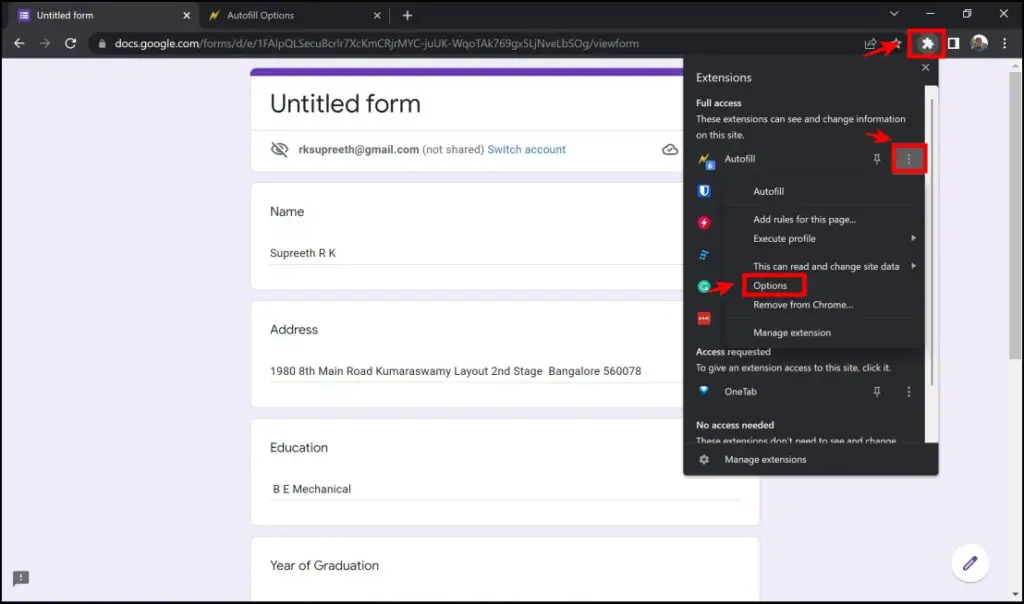
Step 10: Remember that the extension fills these details for the same form. To enable auto-filling for similar forms everywhere – click on the Extensions menu > tap the three dots icon next to autofill > Click on Options.
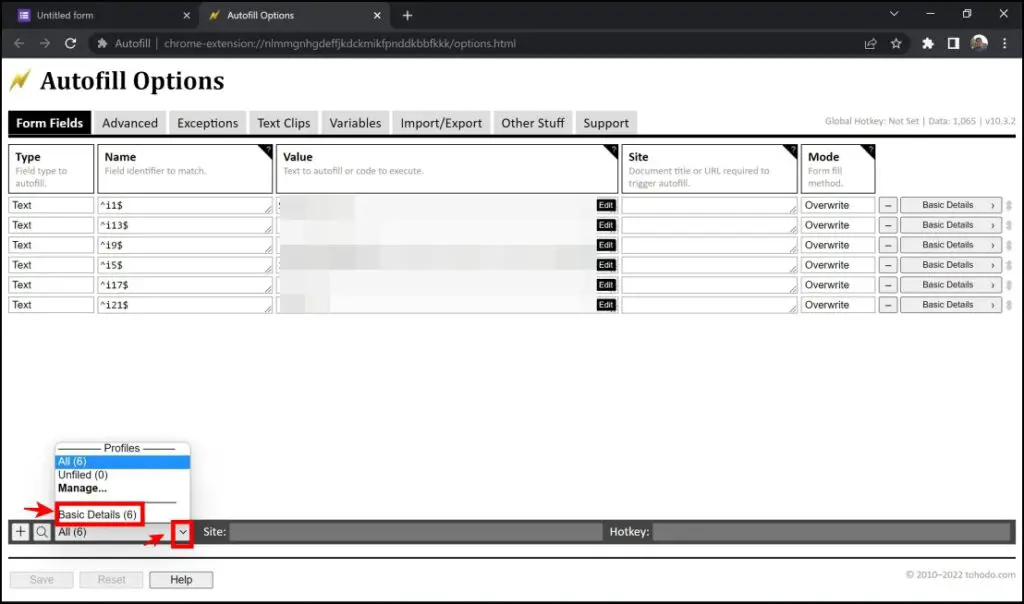
Step 11: In the toolbar on the bottom section, click on the drop-down menu shown in the image. Click on the name of the saved profile (basic Details in our case).
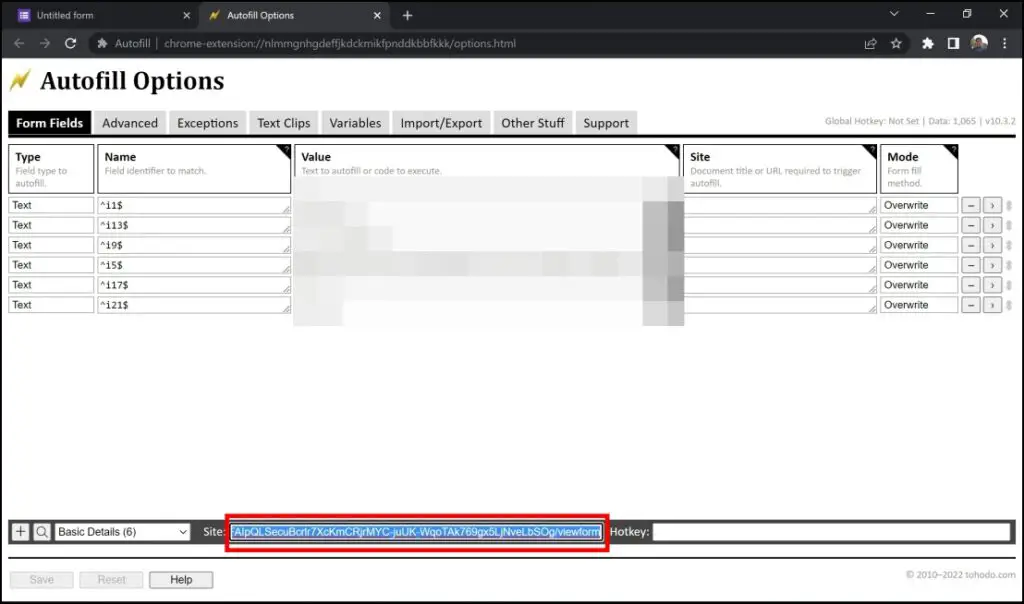
Step 12: Select the URL shown on the toolbar and erase the same by clicking on your Backspace key. You are now ensuring that this profile is used for auto-filling on not just the website corresponding to the URL, but you can also try auto-filling on similar other forms.
Keep in mind that this extension works well on only specific builds of Chrome, and we faced a lot of bugs on the same. While this is an interesting extension, we hope there are timely updates to fix the issue.
Wrapping Up
The auto-fill features on the web browsers add a significant amount of convenience while filling in details online. We hope this article helped you enable and use autofill in Google Chrome. Stay tuned for more articles on similar features.


