Brave is a feature-packed browser that provides enhanced control over privacy and Web3 services built within the browser. It is a great alternative to the ever-so-popular Chrome, and if you are new to Brave, you might not be aware of everything it offers. This is why we have curated a list of tips and tricks for Brave PC and Mobile to give an overview of its feature set and increase your productivity. Read on.

What is Brave Browser?
You must have heard about Brave browser if you have ever searched for a privacy-focused web browser. The browser moves away from the conventional norms of tracking your data in the name of “Improving your experience” and puts the control of your privacy back in the user’s hand.
You can find several features that cater to audiences that care about their privacy and data. And if you so choose to share your data, you are rewarded for it in the form of cryptocurrency, which you can use to support the online creators and websites you enjoy or cash out.
Brave has also developed many first-party features tailor-made to work in tandem with its browser. And not to forget their forward-looking approach towards supporting Web3 services and making them accessible for an average consumer. Read on to check Brave tips, tricks, and steps to use them in detail.
Tips and Tricks To Use in Brave Browser
It has a lot of things in store, and we shall take you through them one by one. We have also covered some of them in detail, so do check out the linked articles if you want to learn more about them.
1. Set Brave as Default Browser
You should start by setting Brave as your default web browser. This will allow you to open any link you come across surfing the web to open up on Brave. This gives you the security of Brave and helps you get the most out of this browser.
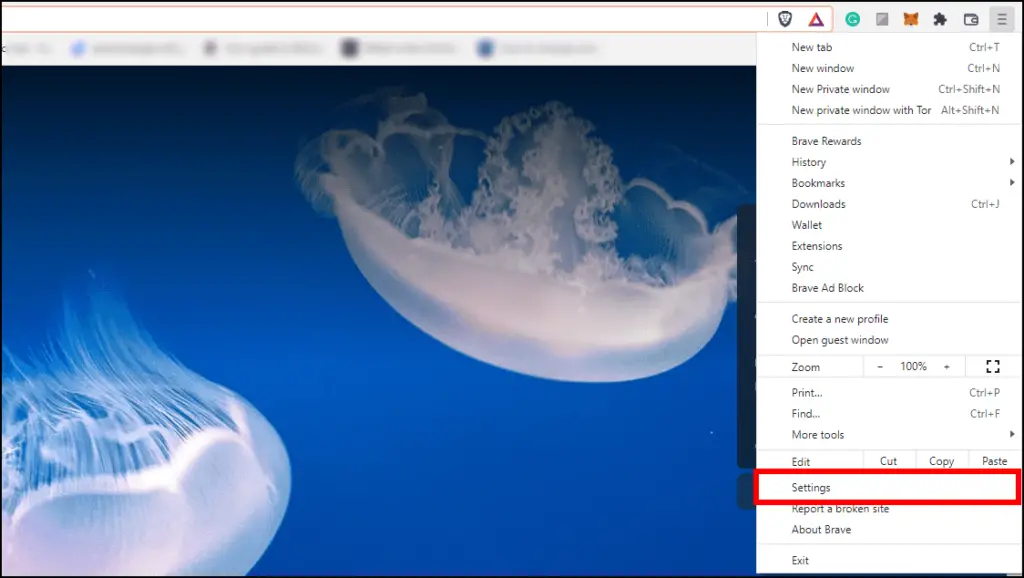
Step 1: Click on the hamburger menu in the top right corner.
Step 2: Go to Settings.

Step 3: Select the Get Started section from the sidebar.
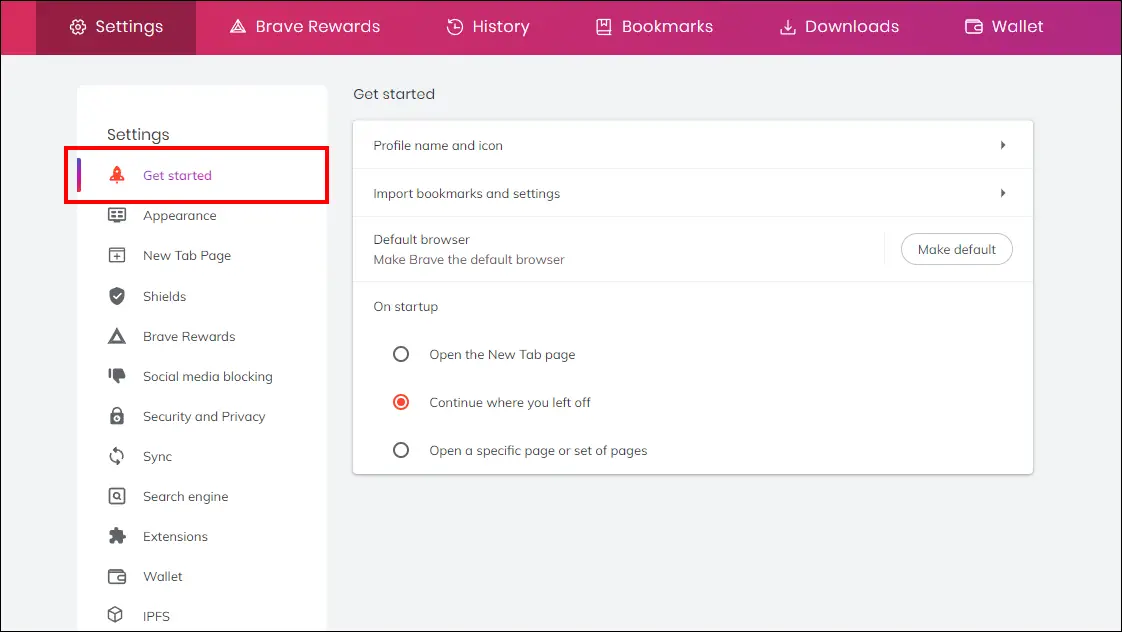
Step 4: Click Make default to set Brave as your default browser.
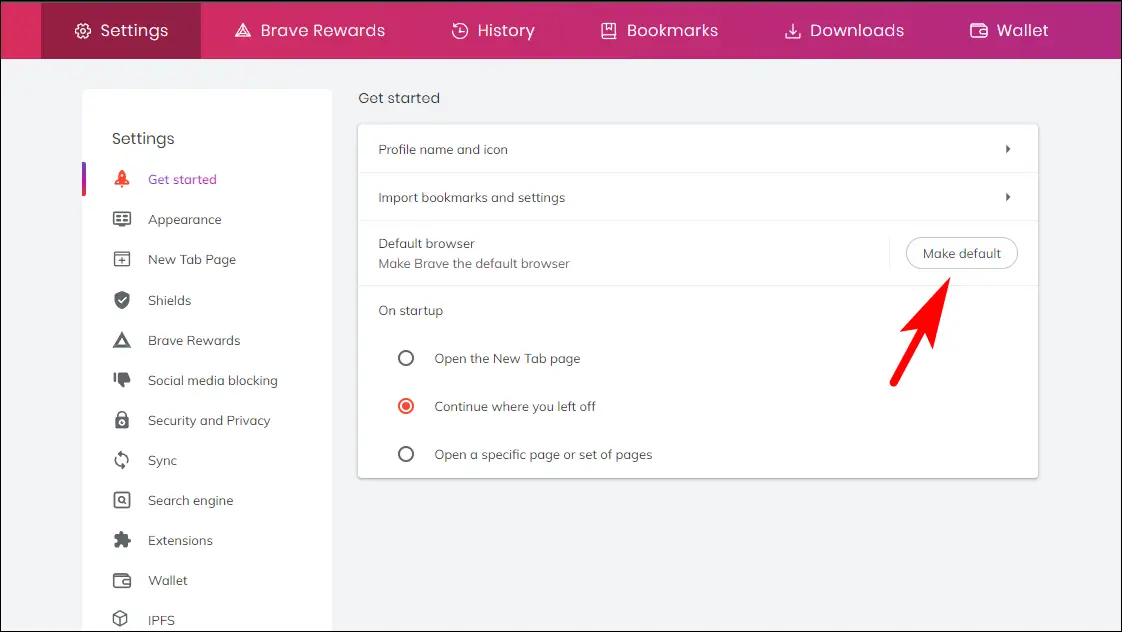
This will set Brave browser as your default web browser.
To do it on the phone:

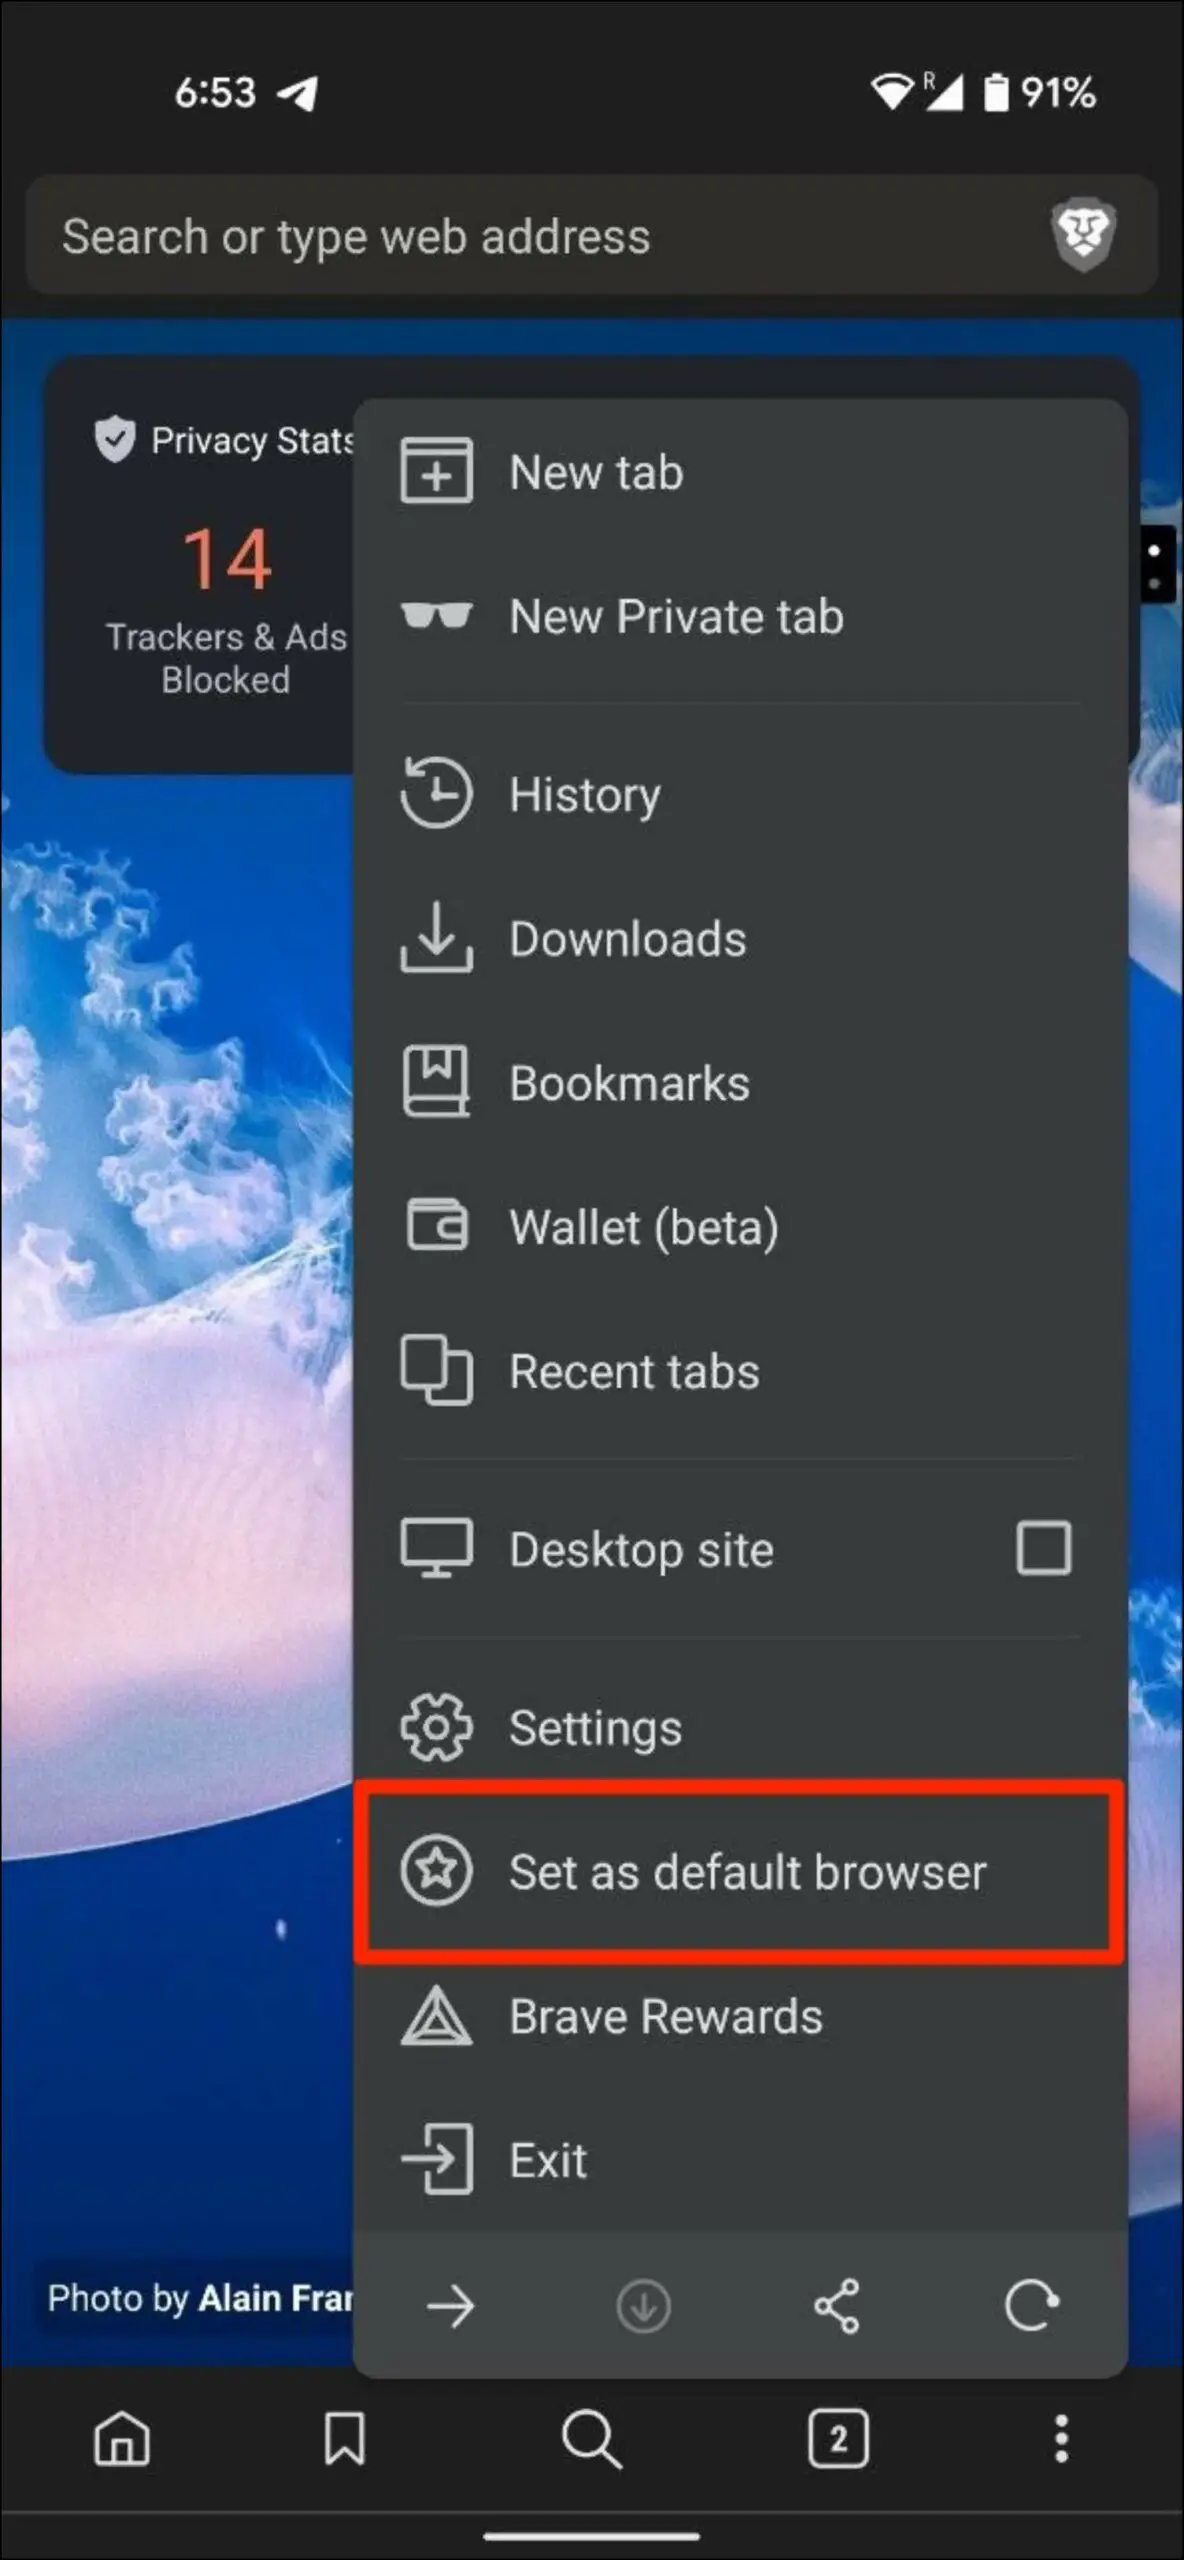
Step 1: Open Brave on your phone.
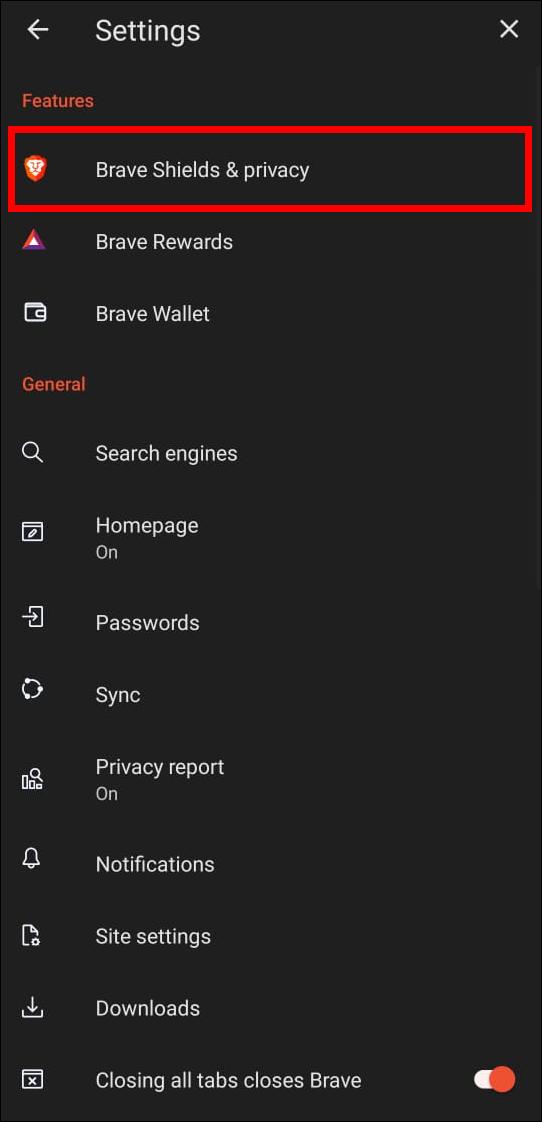
Step 2: Tap the three-dot menu and hit Set as default browser.
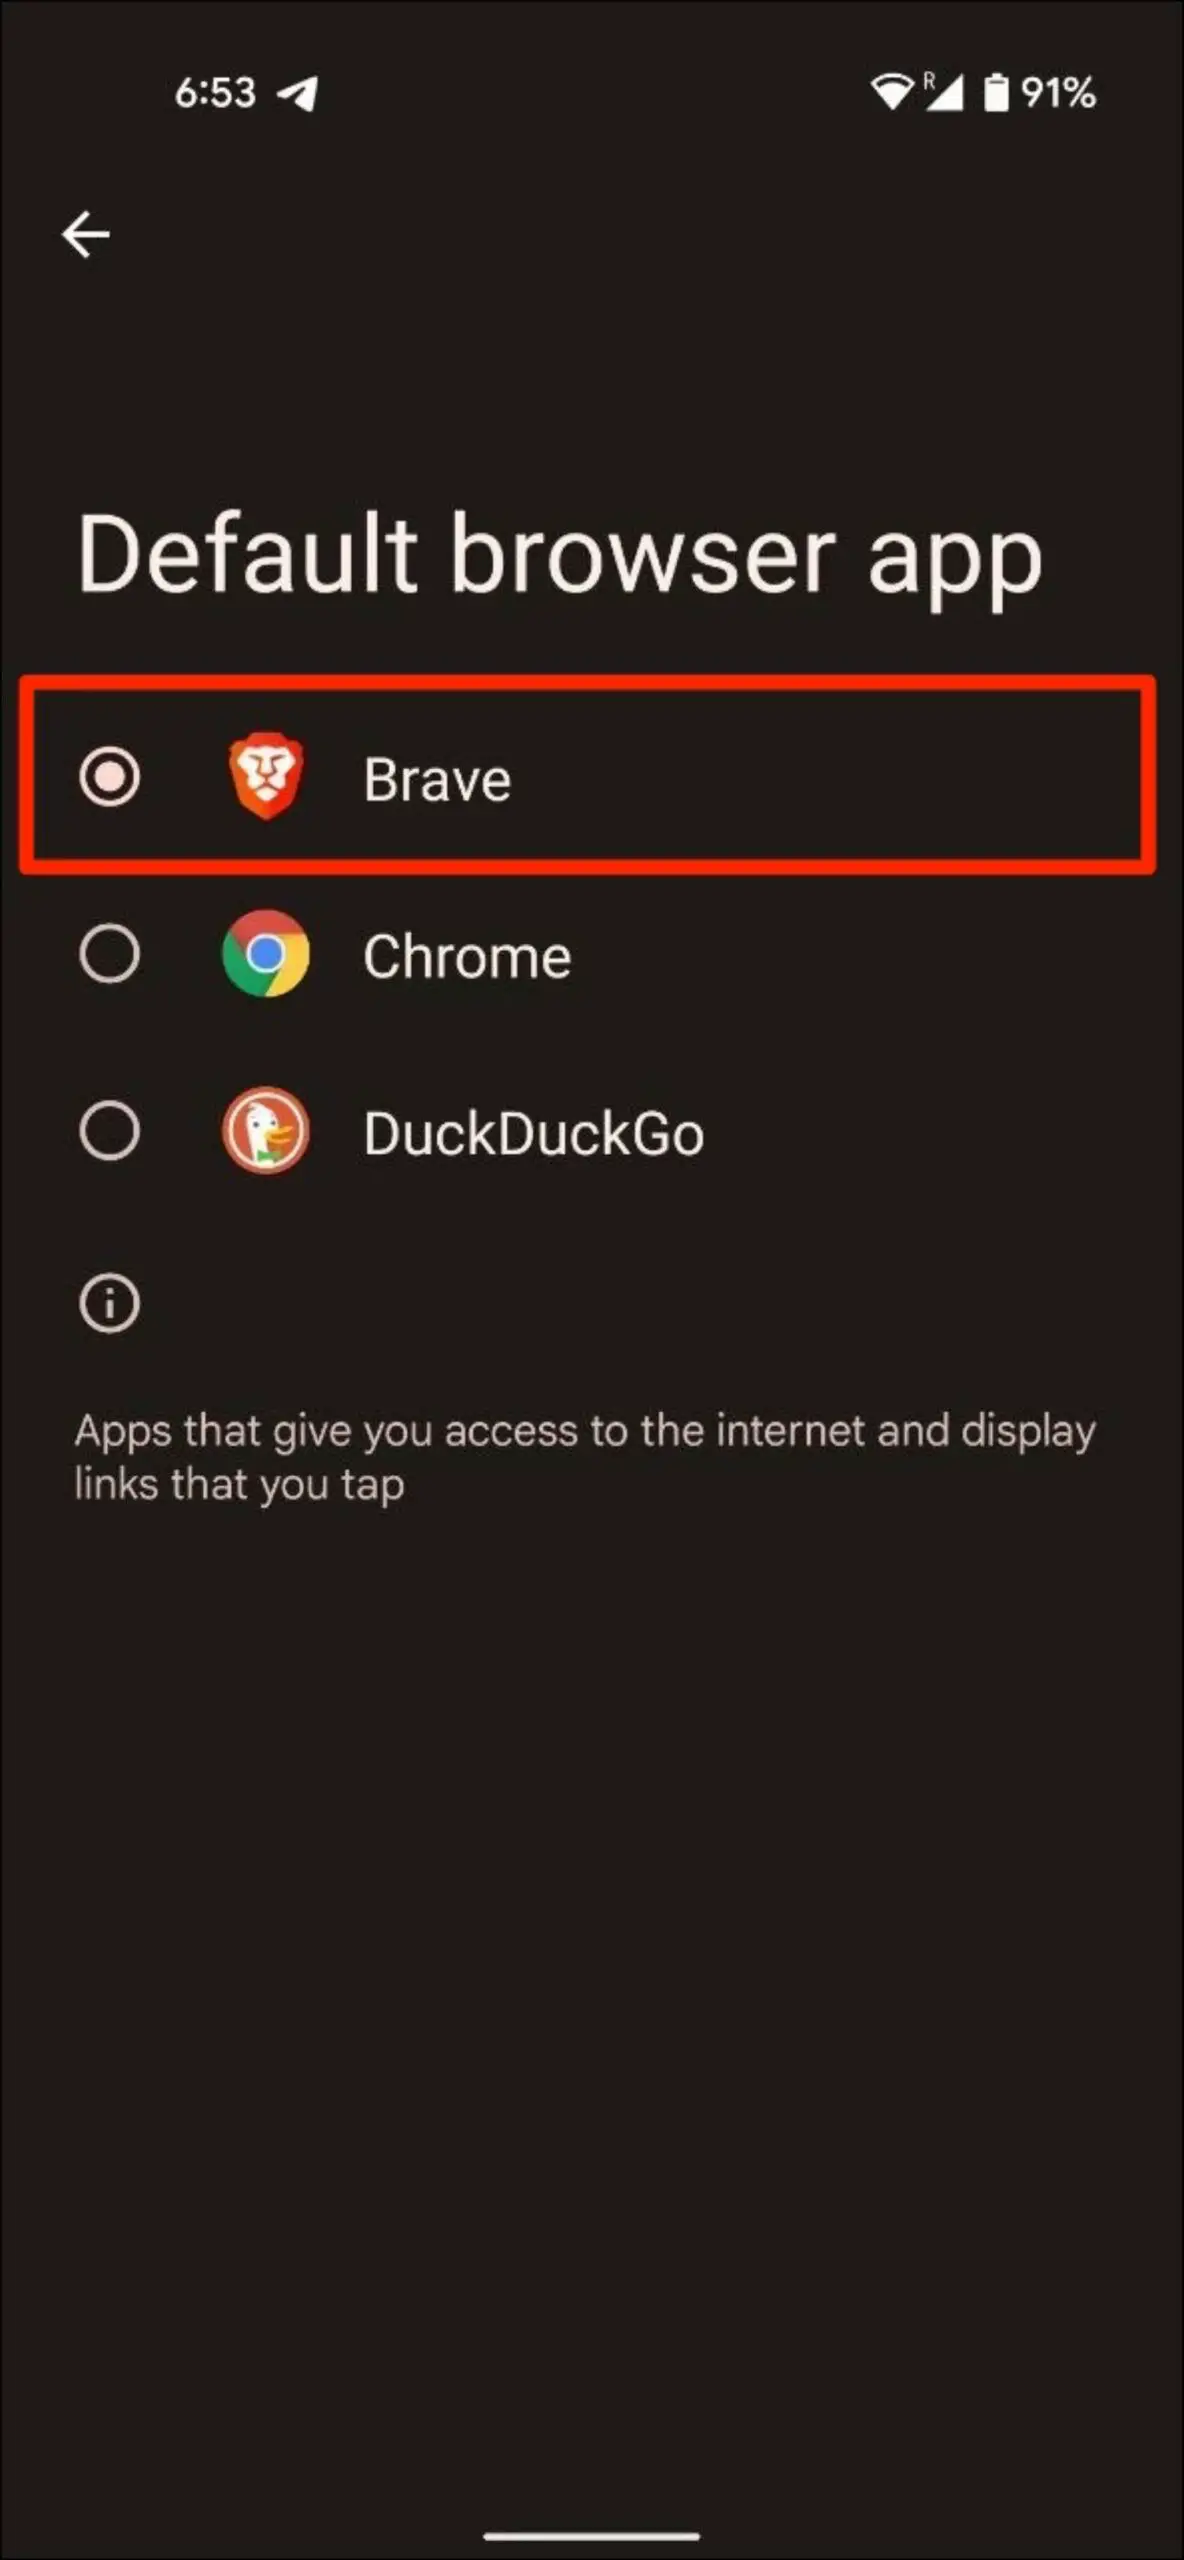
Step 3: Then select Browser app > Brave.
2. Import Bookmarks and Settings (PC Only)
Setting up a new browser from scratch seems like a chore. But Brave makes it easy to import all your settings, saved passwords, and bookmarks so you can feel right at home when you use Brave. This is how you can import settings from your previous browser.
Step 1: Click on the hamburger menu on the top right.
Step 2: Go to Settings.

Step 3: Select the Get Started section from the sidebar.

Step 4: Click on Import bookmarks and settings.
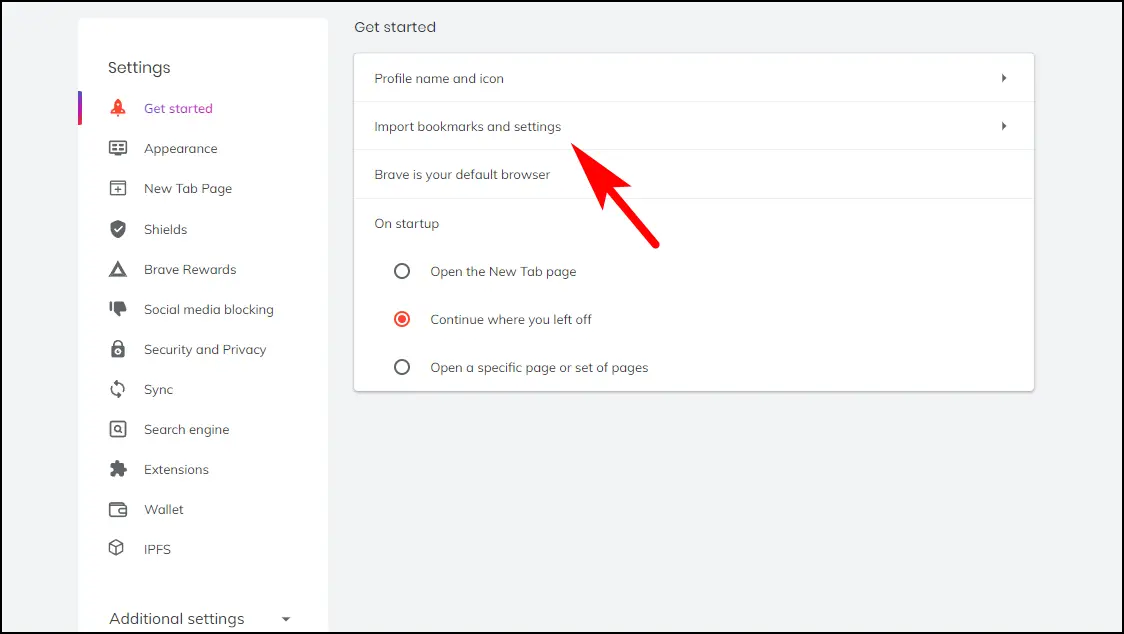
Step 5: Select the browser and items you want to import and click on Import.

The selected items will be imported into the Brave browser. Here’s our complete guide to import and export bookmarks in Brave.
3. Make Brave Your Default Email Client (PC Only)
It is quite annoying when you click on a Gmail link, and it opens up in Outlook or some other apps. One of the best tips is to set Brave as your default email client, allowing you to open mail: to links directly in Gmail on the Brave browser.
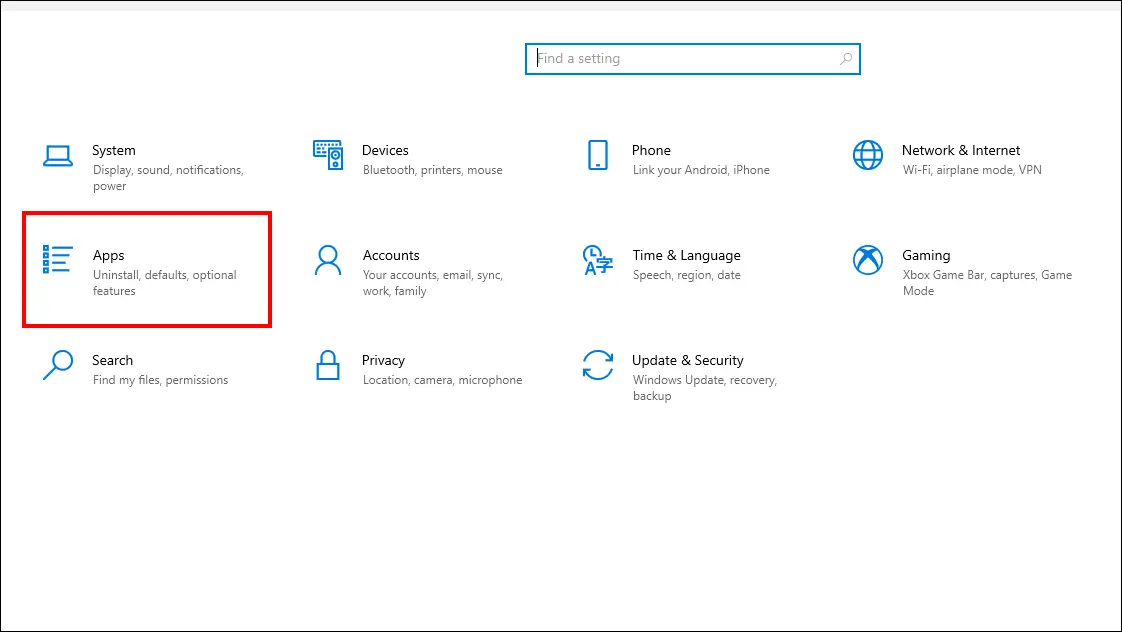
Step 1: Open Settings on Windows and go to Apps.
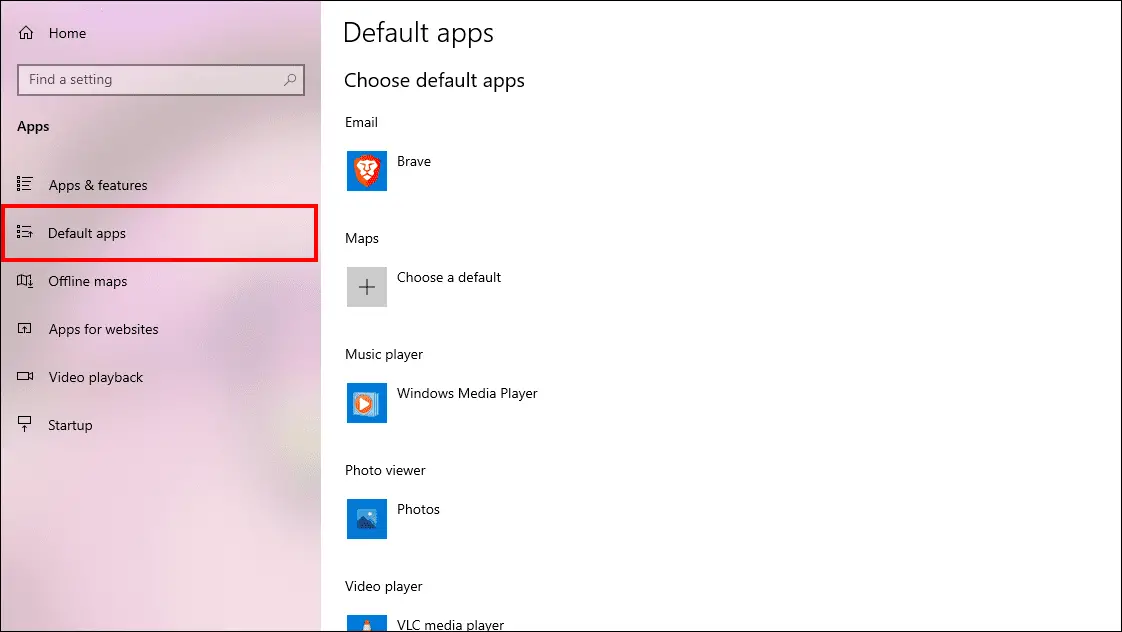
Step 2: Click on Default Apps.
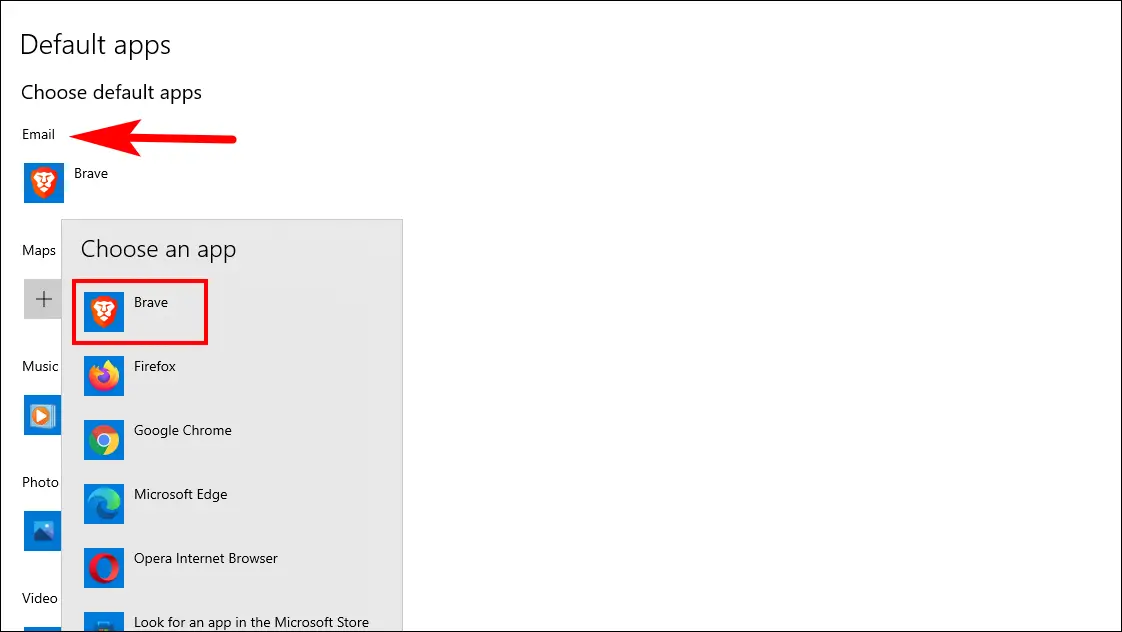
Step 3: Under Email, choose Brave.
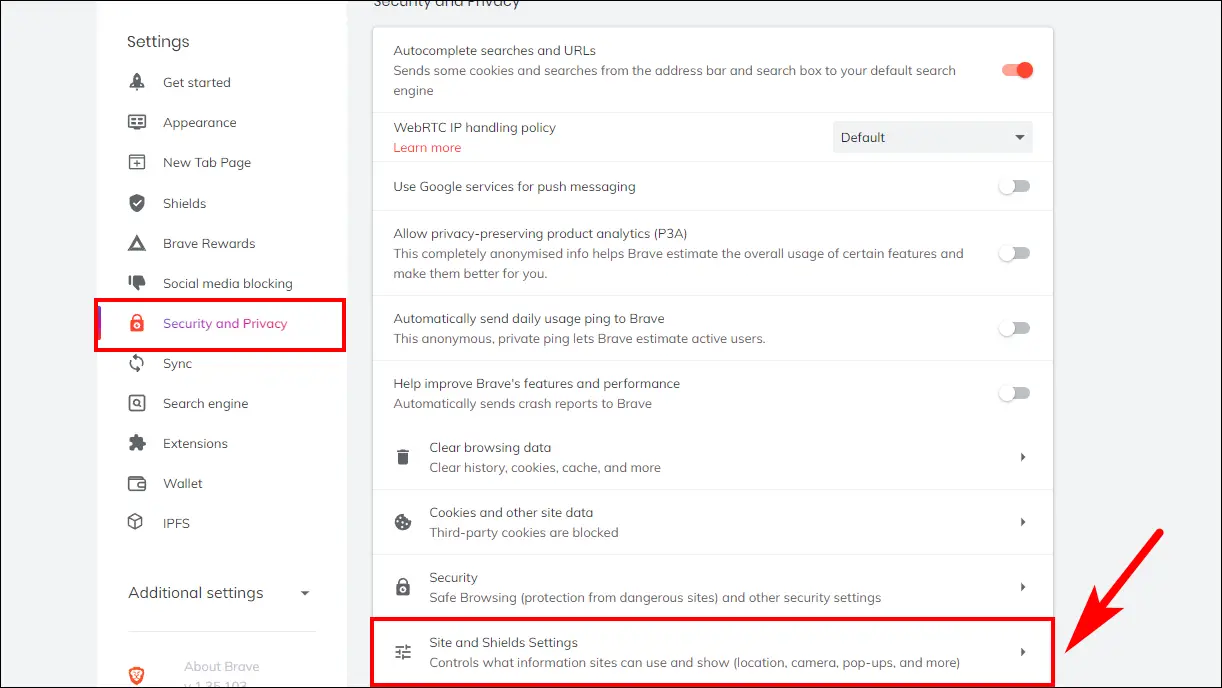
Step 4: On Brave, go to Settings.

Step 5: Go to Security and privacy and then Site and Shield Settings.
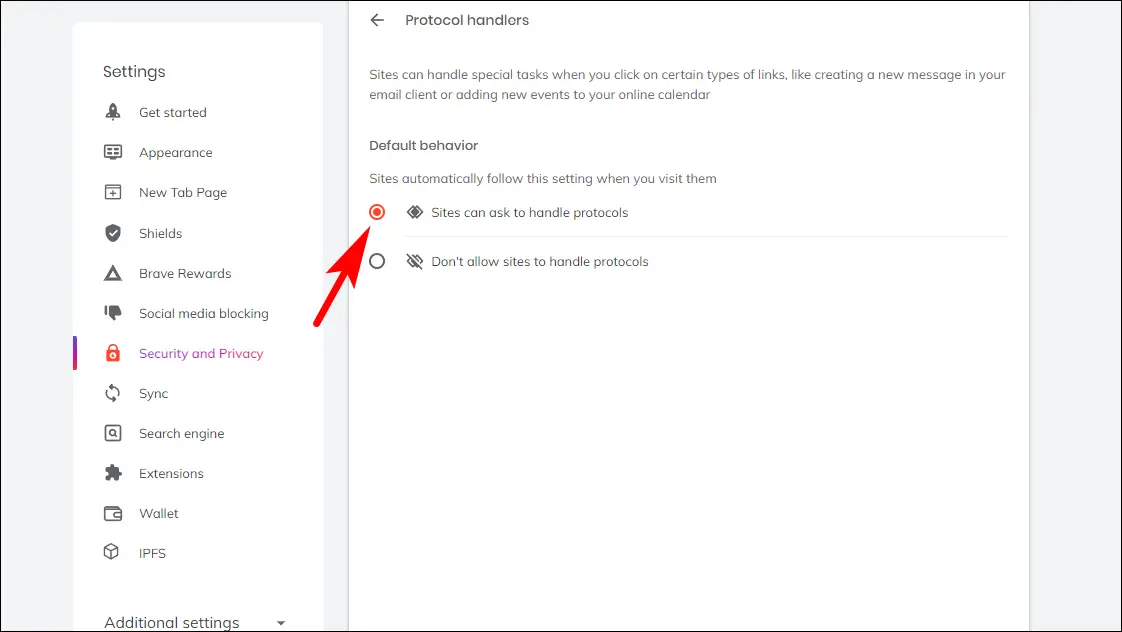
Step 6: Scroll down to Additional Permissions and go to Protocol handlers.
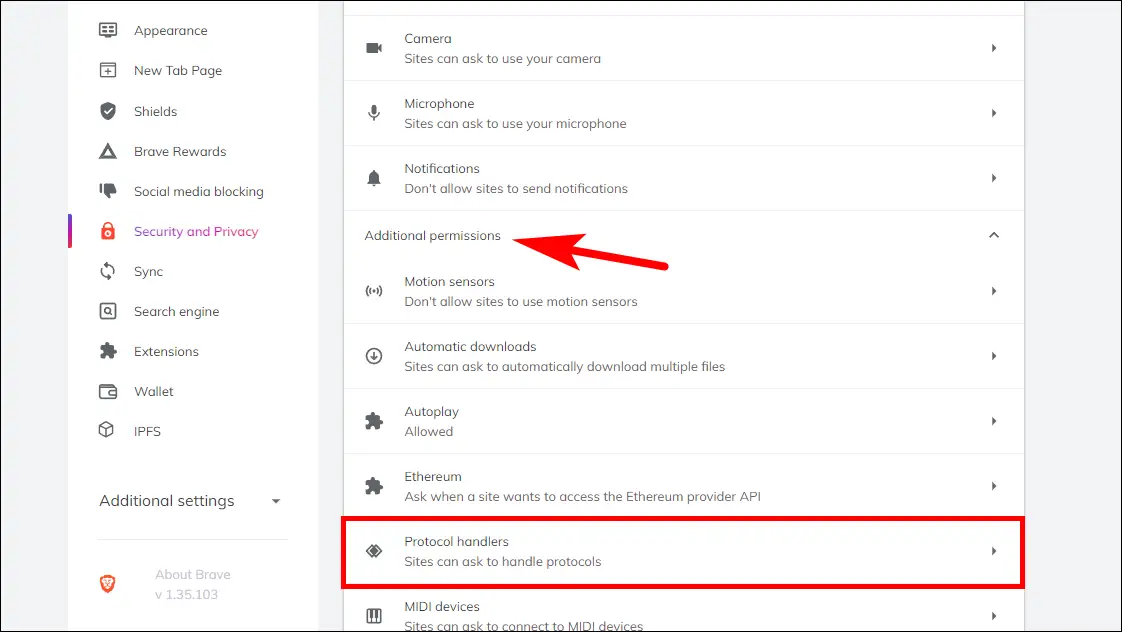
Step 7: Select Sites can ask to handle protocols.
Step 8: Now, open Gmail in a new tab and click the diamond icon in the right corner of the address bar.
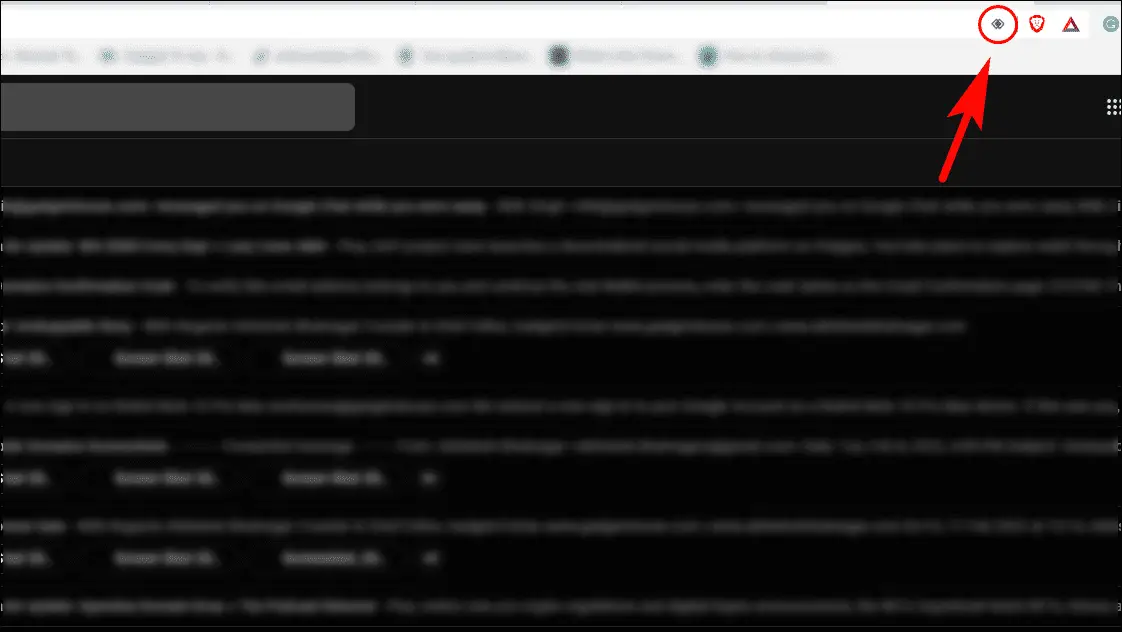
Step 9: Choose Allow when asked whether to Open all links with Gmail. Click on Done.

This will set Brave as your default email client. To learn how to do the same on macOS devices, check this guide to open Email Links in Gmail.
4. Enable Dark Mode in Brave
Another nice addition in Brave is the ability to use Dark mode. Dark mode changes the color of your address bar, toolbar, tabs, and settings to a darker greyish color that is soothing to the eyes and helps focus on the website’s content.
This is how you can enable dark mode in Brave:
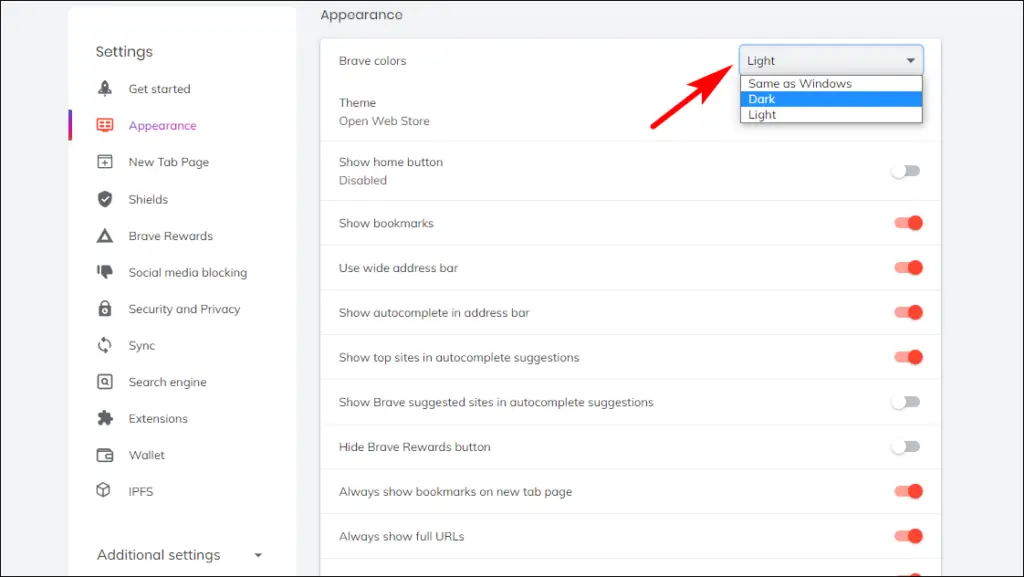
Step 1: Open Brave Settings. Select Appearance from the sidebar.
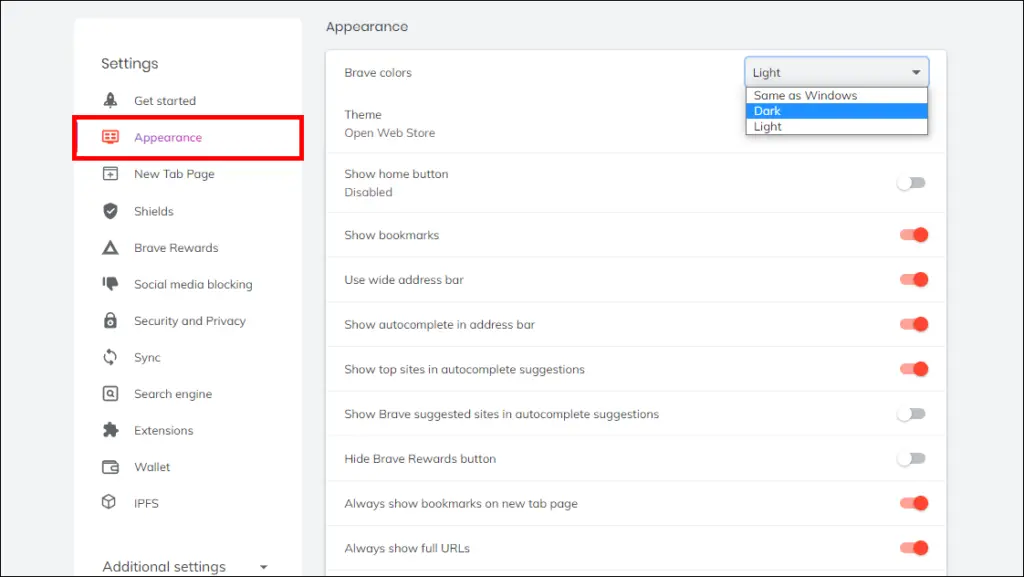
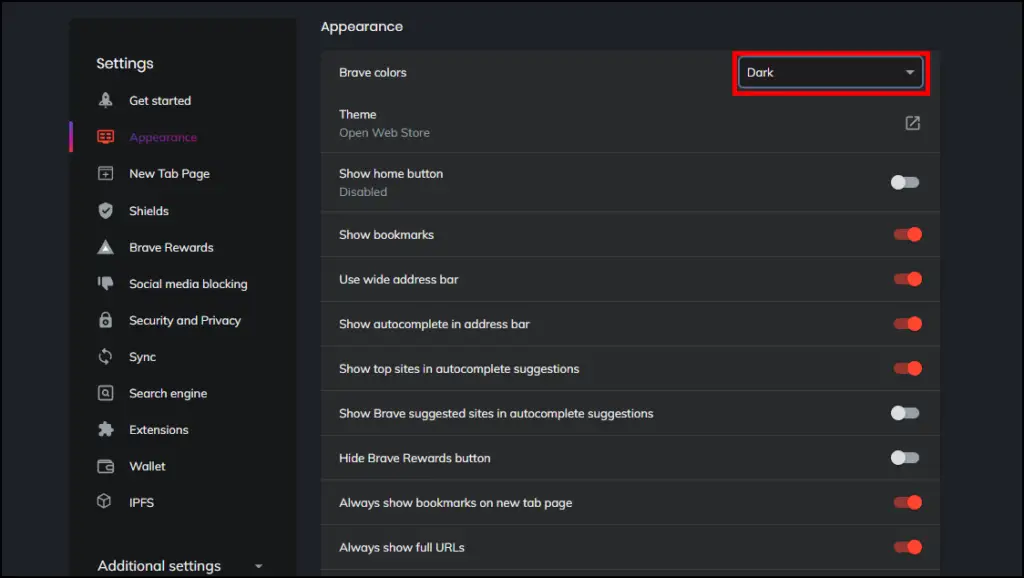
Step 2: Choose the Dark option in Brave colors.
Now, your default theme will be changed to a dark one.
You can also set it to the System Default. It will change the theme based on your OS theme. This method also works on Android and iOS.
Looking for more ways or how to do it on Android or iPhone? Check how to enable dark mode in Brave.
5. Enable Brave Sync
The Sync feature in the Brave browser allows you to easily sync your bookmarks, browsing history and stored passwords with the Brave browser app on your mobile phone. This is handy for importing bookmarks or passwords from your PC to your mobile device.
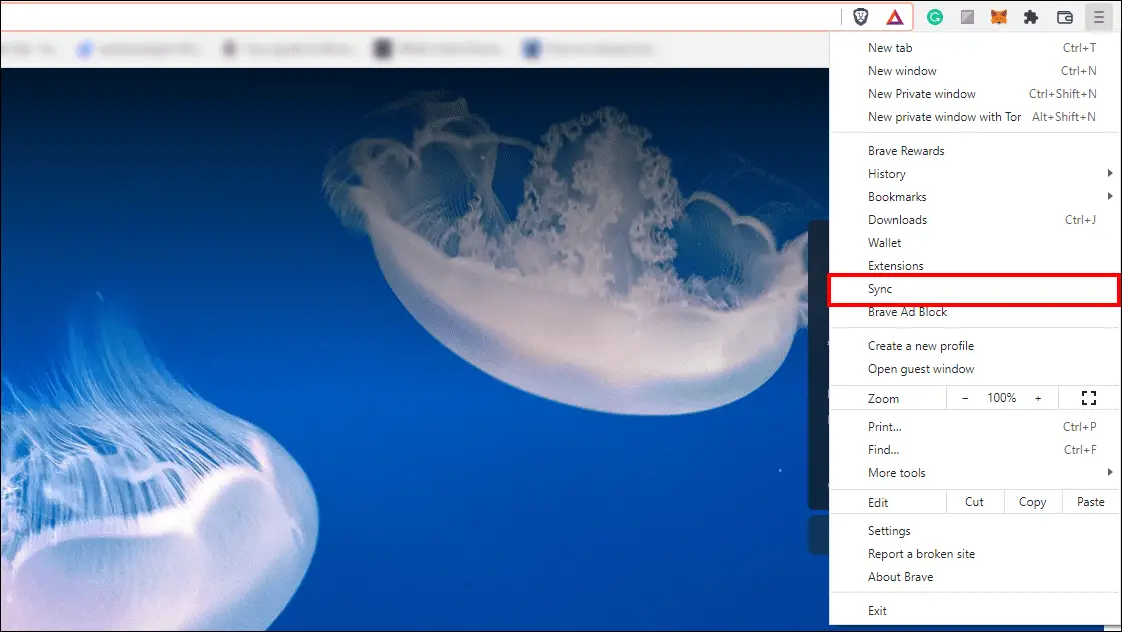
Step 1: On PC, open Brave and click on the hamburger menu.
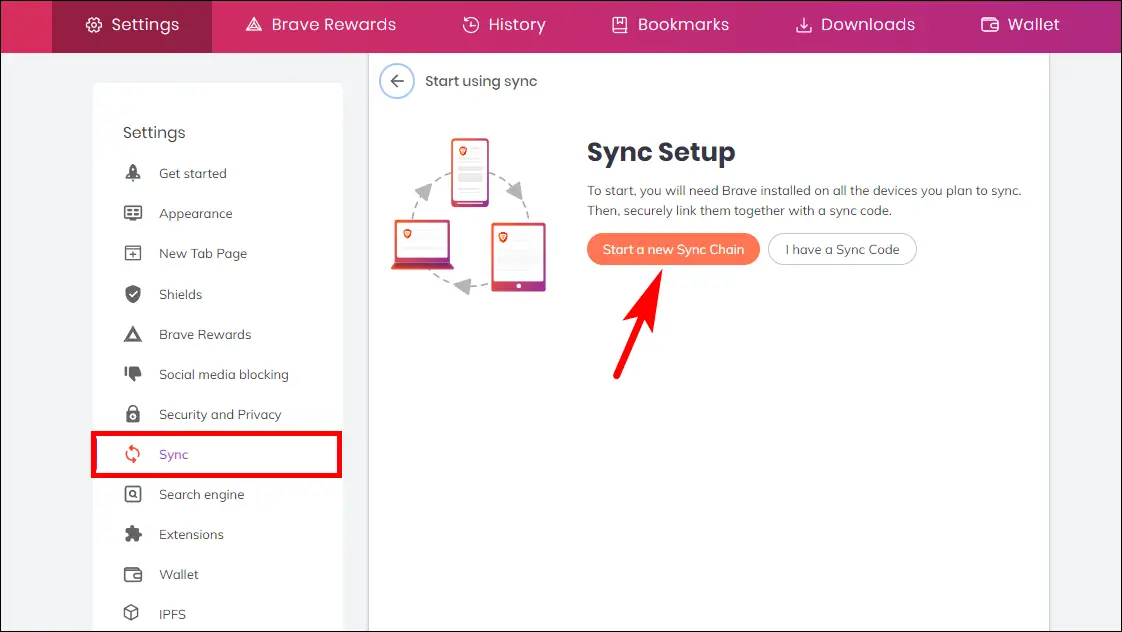
Step 2: Select Sync.
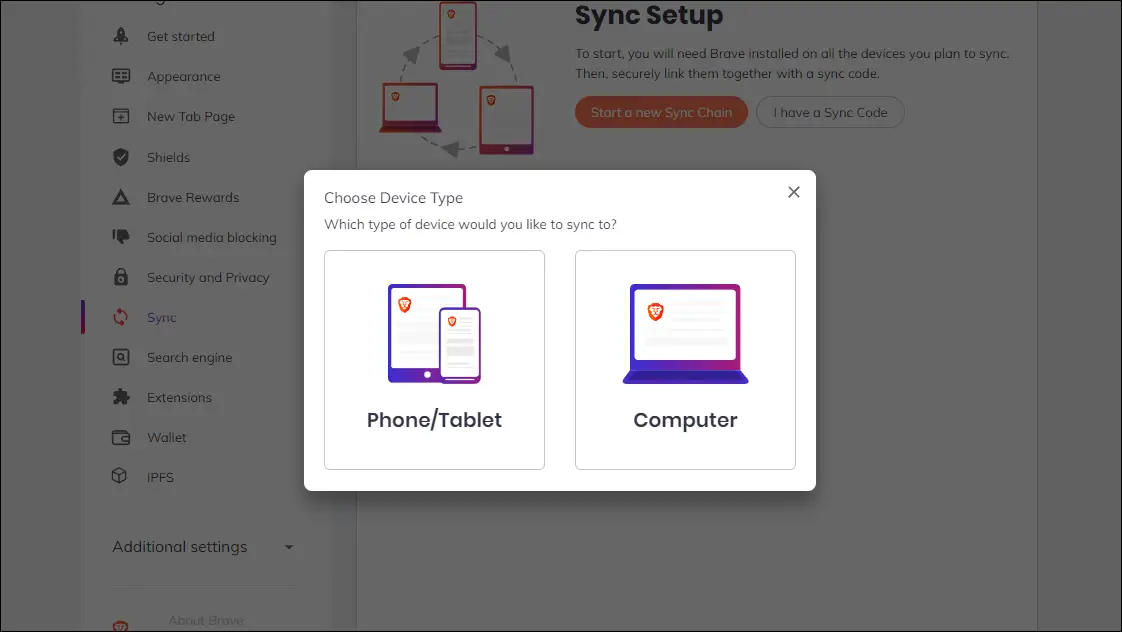
Step 3: Click on Start a new Sync Chain.
Step 4: Select the type of device you want to add.
Step 5: On your Phone, open Brave and tap on the three dots at the bottom right.
Step 6: If you are adding a Phone/Tablet, click on View QR code, and if you are adding a Computer, then click on View Sync Code.
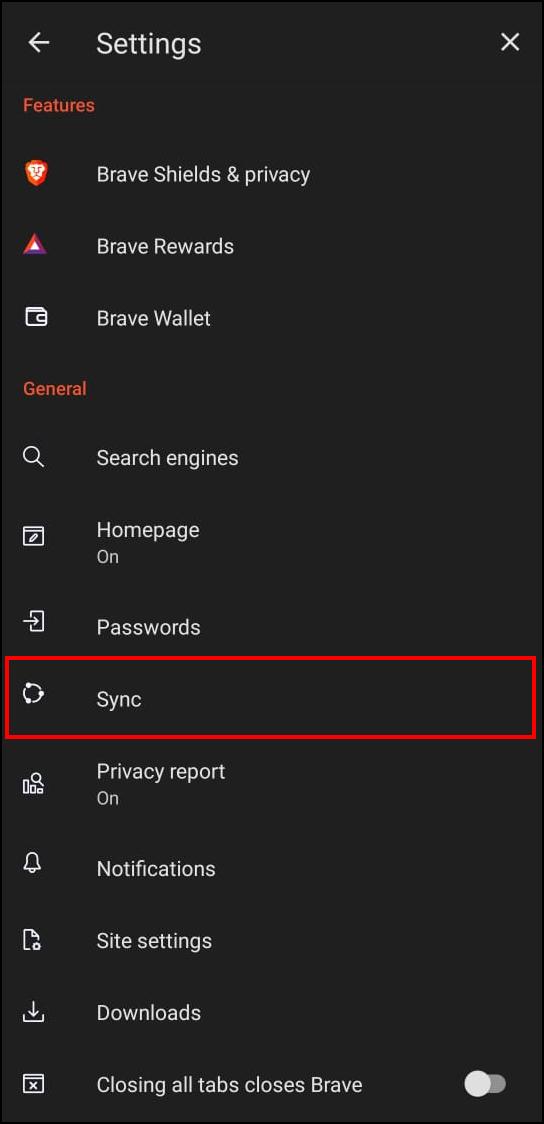
Step 7: Go to Settings and scroll down to Sync.
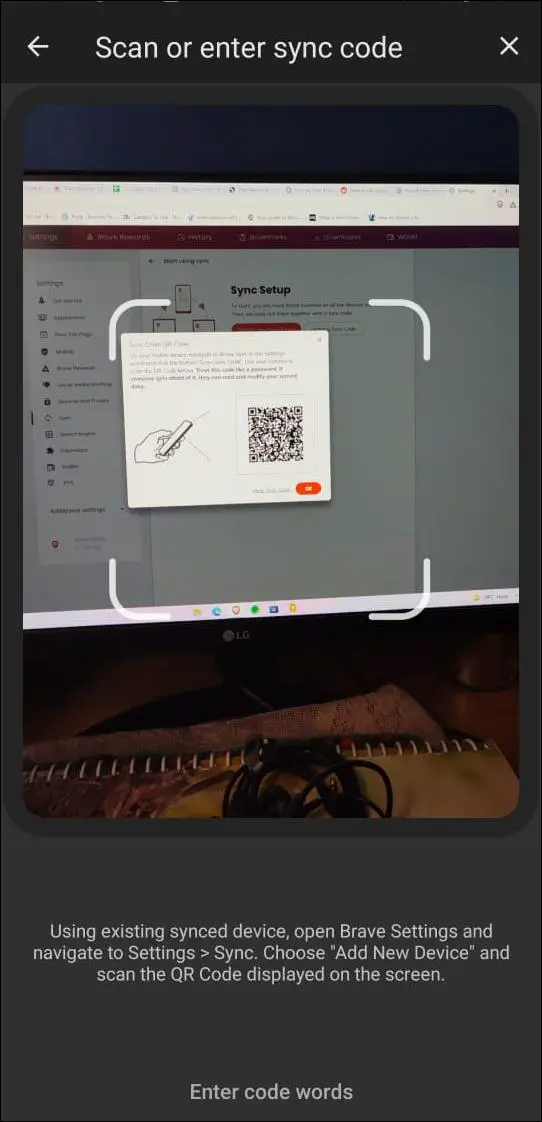
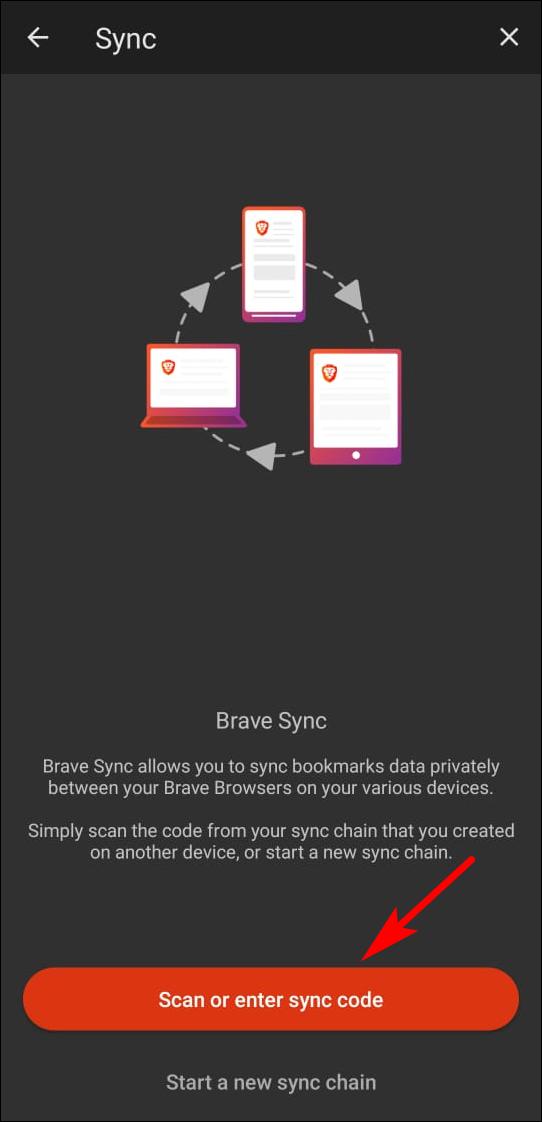
Step 8: Tap on Scan or enter sync code.
Step 9: Now, scan the QR code on your PC with your phone.
Your phone will be synced to your PC, and you should see it appear as a synced device. Now all your bookmarks, addresses, and more will be imported.
6. Earn with Brave Rewards
One of the interesting Brave tips or tricks is Brave Rewards. With Brave, you can choose to see some ads to earn cryptocurrency called BAT. This is a fair practice to let users earn revenue in exchange for showing ads.
Plus, you will control how many ads you get per hour and can turn it off anytime. If this sounds intriguing, then let us take a look at how you can enable brave Rewards:
Step 1: Open Brave and go to Settings.
Step 2: Head to the Brave Rewards section. Now, toggle On Brave Private Ads.
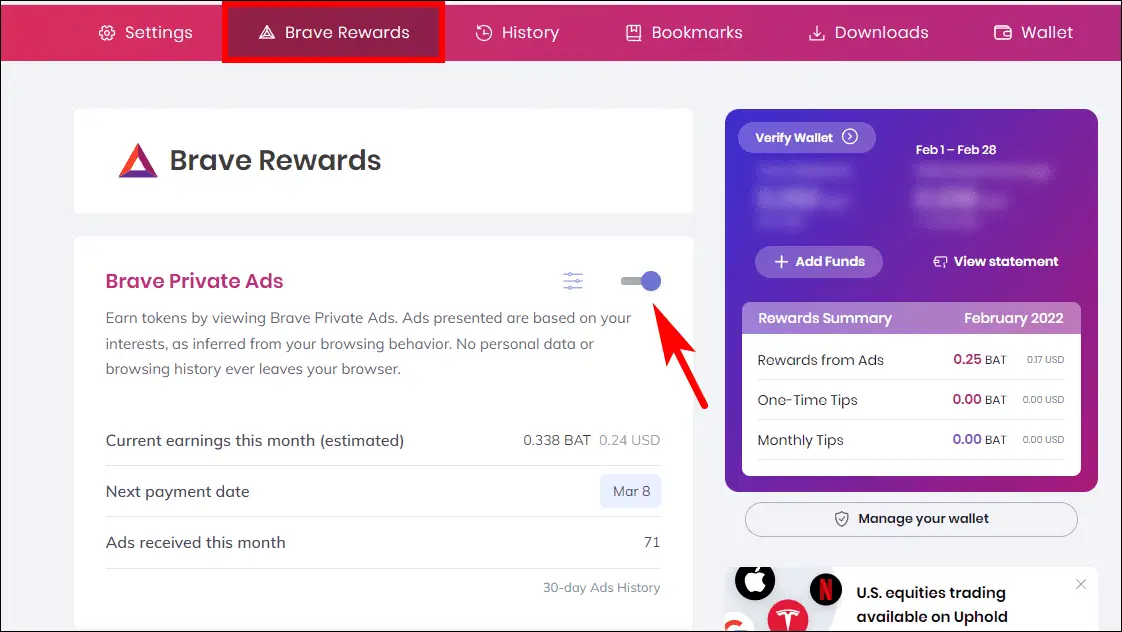
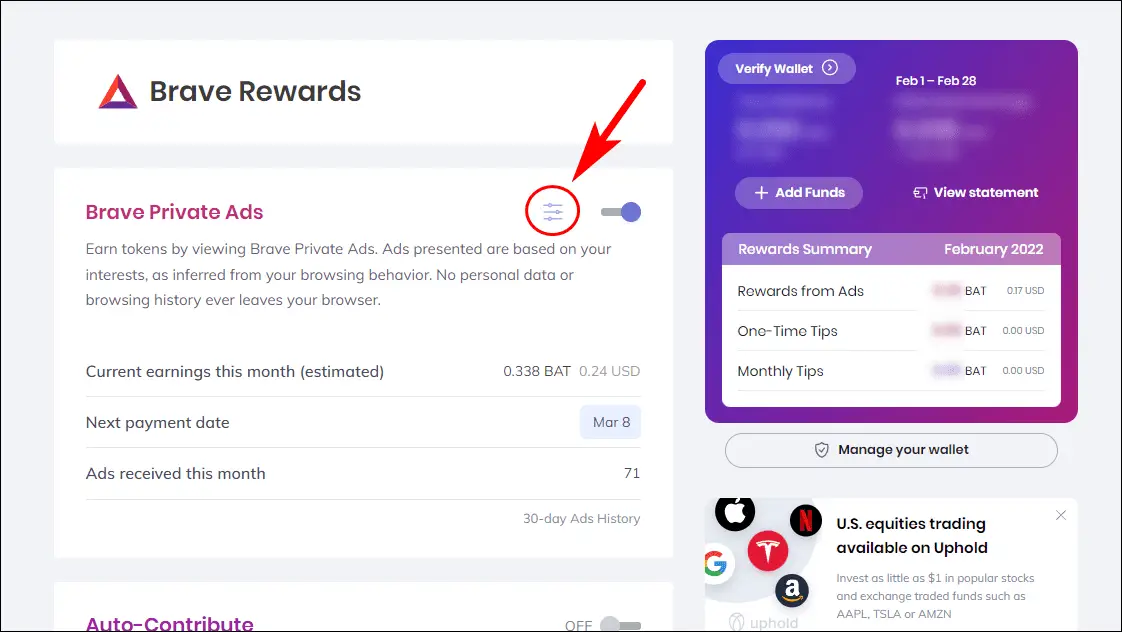
Step 3: Click the hamburger menu next to the toggle.
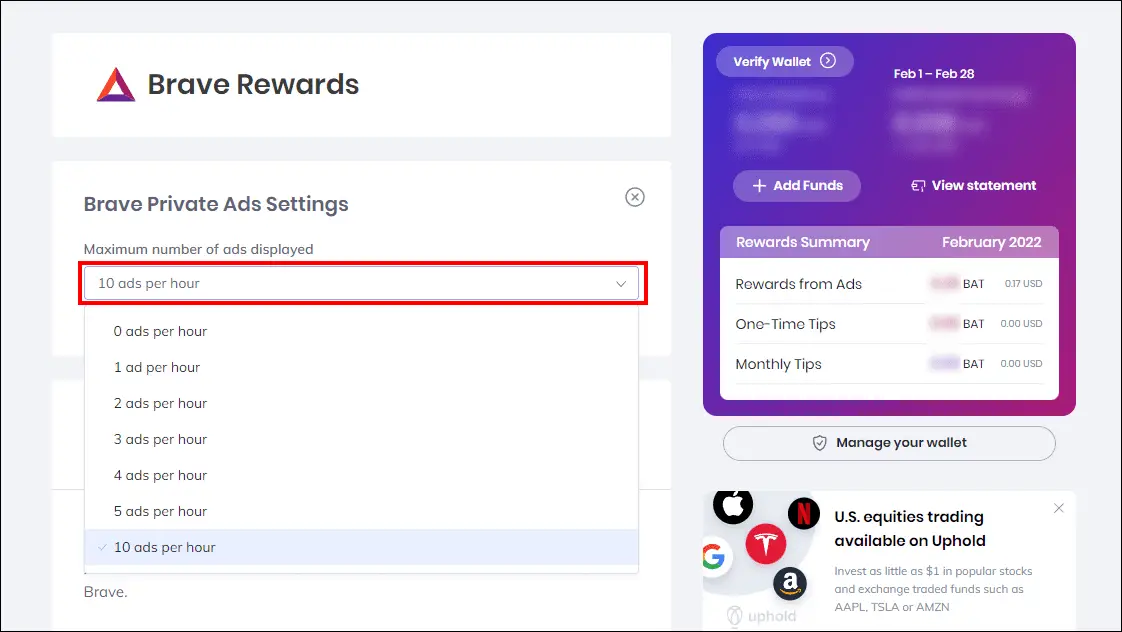
Step 4: Select the number of ads you want to receive per hour.
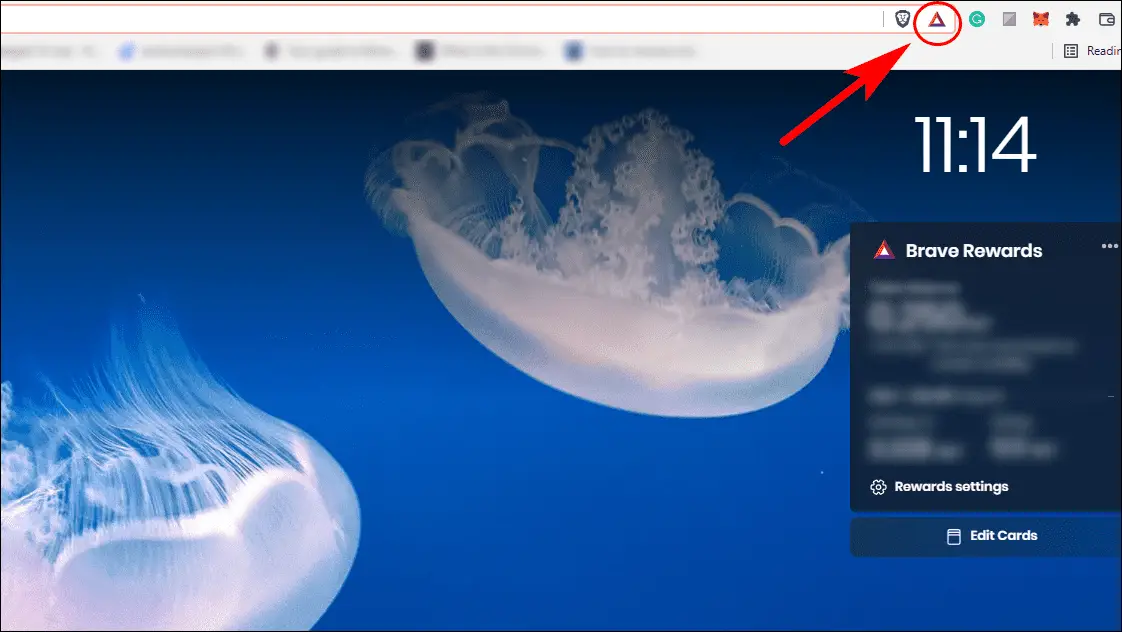
Now, click the triangle icon on the top right to check how much you have earned and its value in dollars. These funds will be deposited in your wallet at the beginning of every month.
To learn more about BAT and different ways to earn them, check the guide to earn money with Brave Rewards.
7. Reward Your Favorite Sites and Creators
We discussed above how you can earn BAT tokens, but how do you spend them? One way is to use BAT to reward your favorite websites and creators. You can enable auto-contribute from Brave Rewards to automatically distribute your BAT among verified Brave creators, or you can tip them manually.
Here is how you can do that:
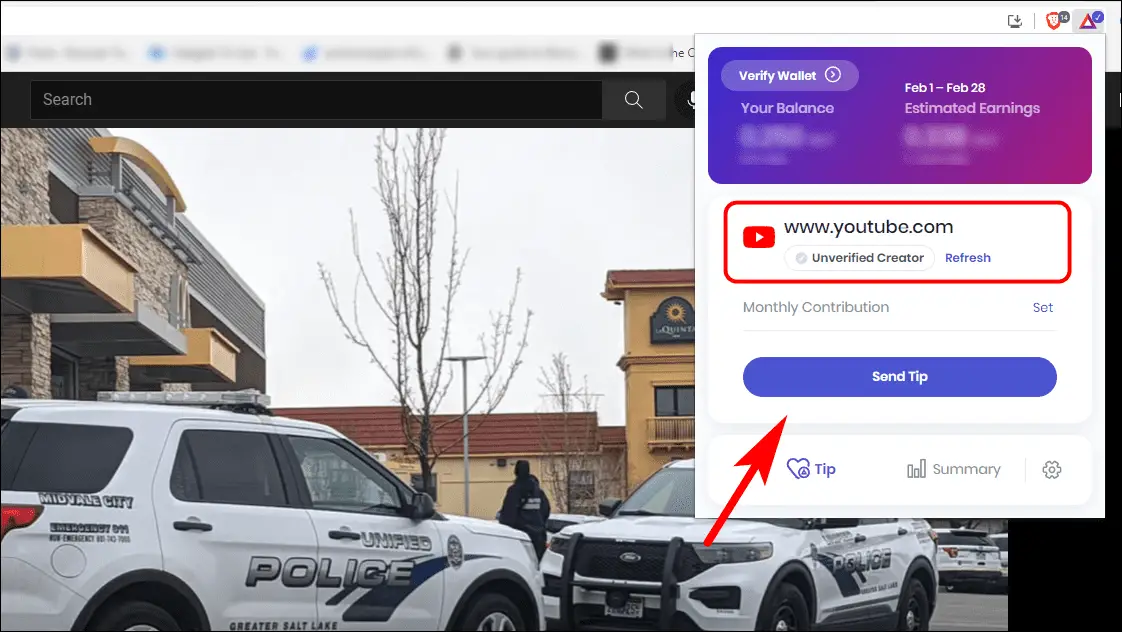
Step 1: Visit the website or creator’s page you want to reward.
Step 2: Click on the triangle Brave icon.
Step 3: Make sure they have a Verified Creator badge below their name, or your reward will not reach them.
Step 4: Click on Send Tip.
Step 5: Choose the amount of BAT you want to reward.

You can also set a custom amount.
Step 6: Click on Continue.
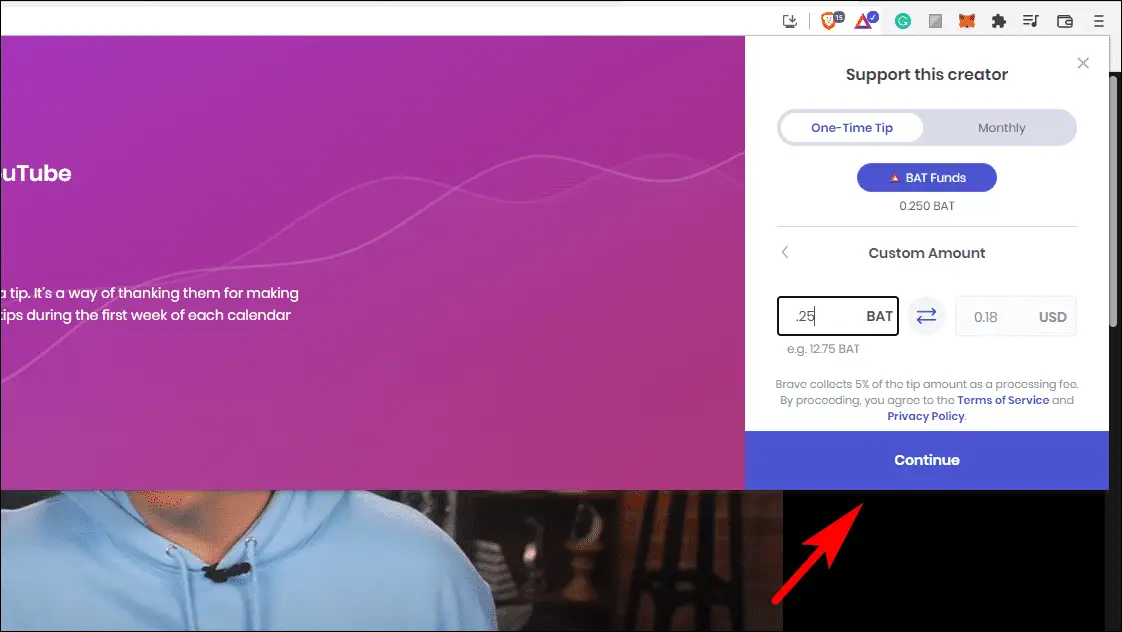
It was that simple. The BAT tokens will be deducted from your wallet and sent to that creator. If you want to become a Verified creator yourself, head over to this article.
8. Set Up Brave Crypto Wallet
Brave comes with its native private crypto wallet, which works almost identically to the popular Metamask wallet and works on the Ethereum Blockchain network. It also lets you buy cryptocurrency via cash and see live market data.
Here is how you can set up Brave Wallet:
Step 1: Click on the hamburger menu on the top right.
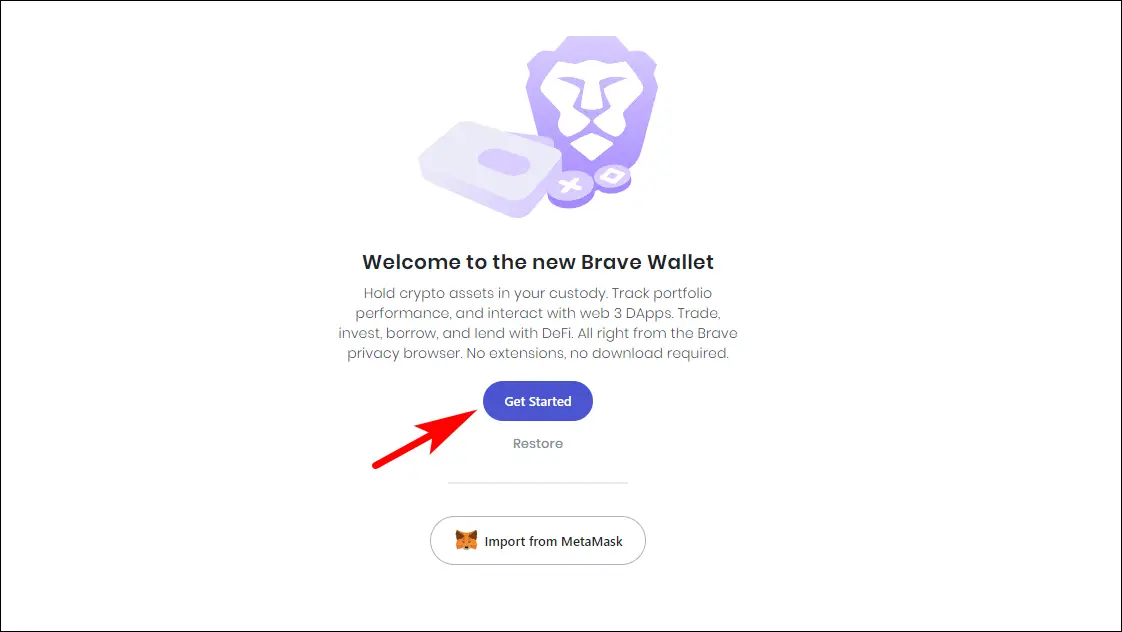
Step 2: Select Wallet from the drop-down menu.
Step 3: Click on Get Started.
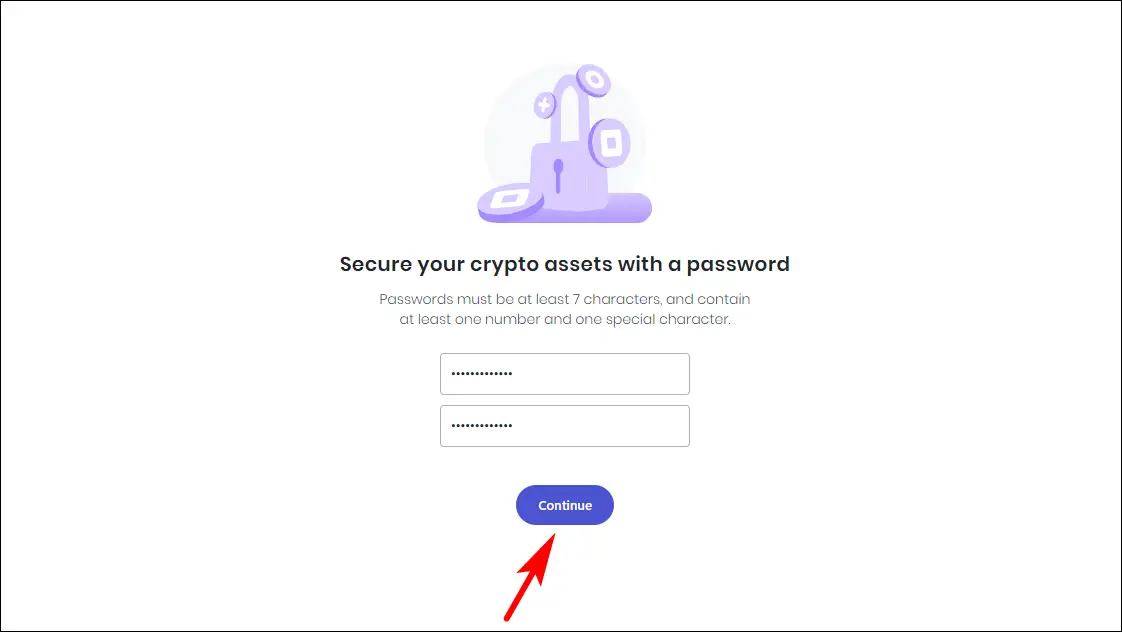
Step 4: Create a strong password and click on Continue.
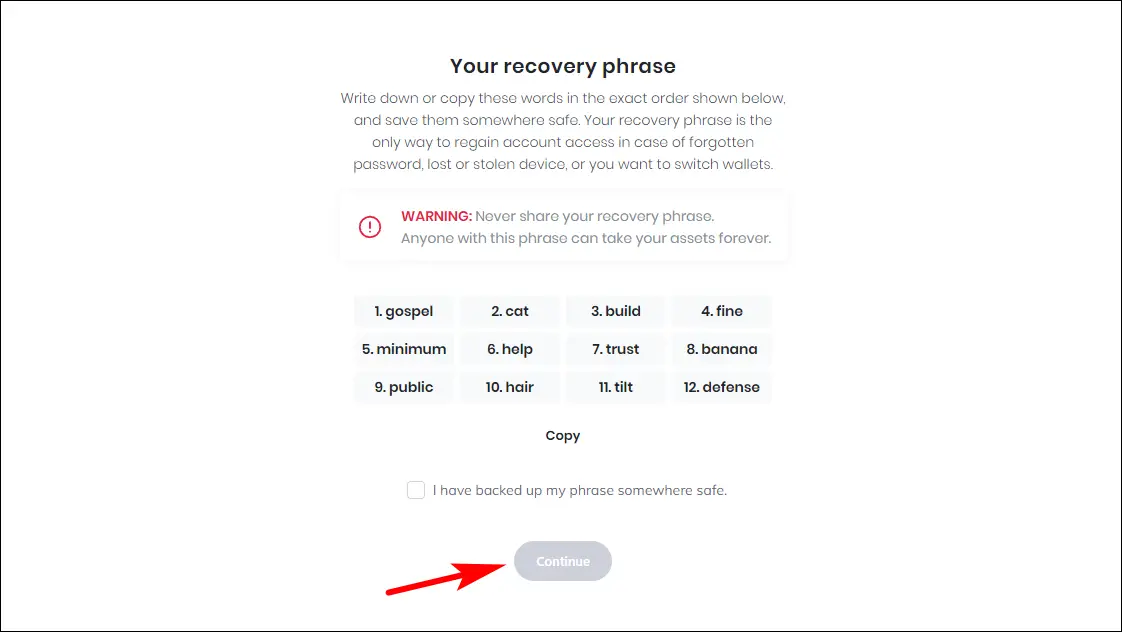
Step 5: Note down your 12 digits’ secret phrase and click Continue.
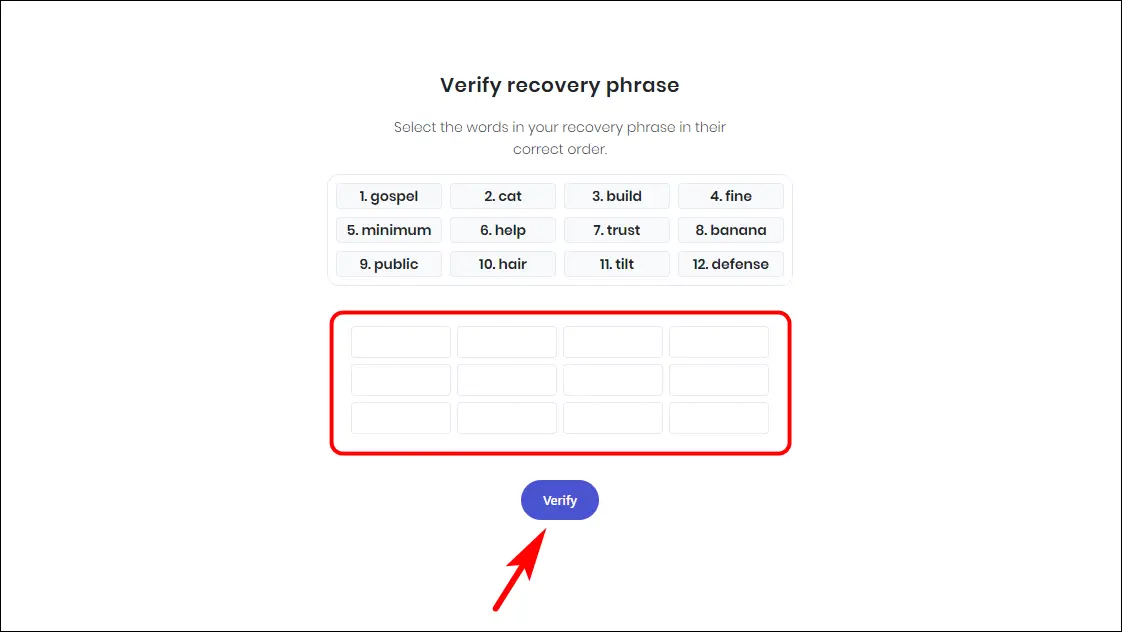
Step 6: Enter the 12 words in the same order and click on Verify.
Step 7: Re-enter your password to Unlock your wallet.
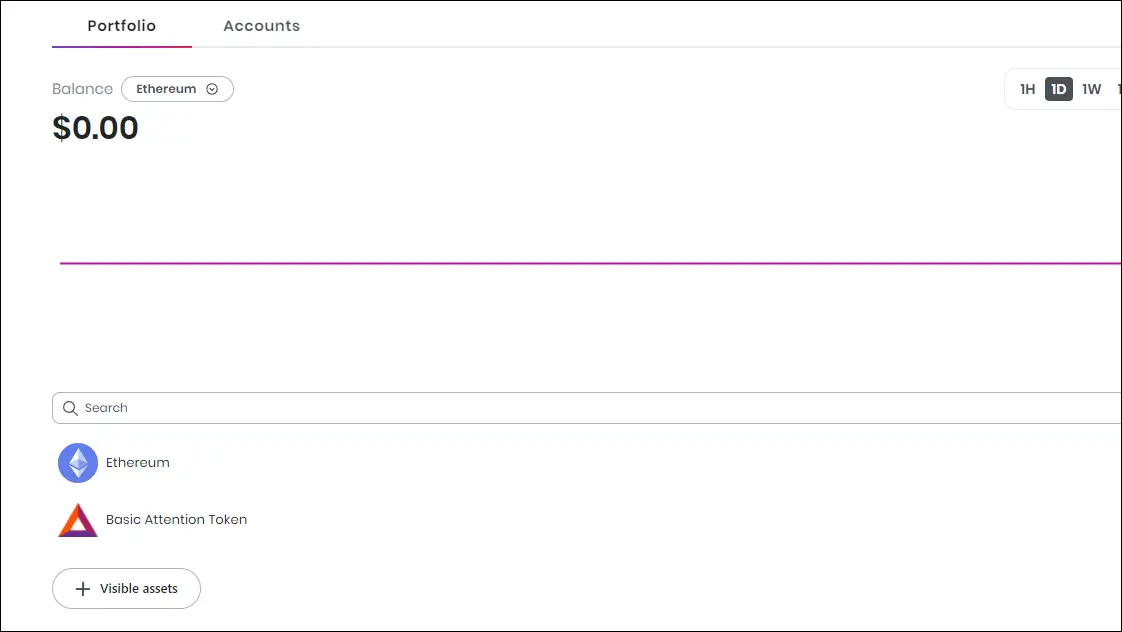
Now you will have access to Brave’s private crypto wallet.
There is also an option to import your Metamask wallet to Brave wallet. Click on the link to learn more.
9. Link Verified Wallet to Store BAT
If you want to cash out your BAT tokens, you will need a verified wallet. You need to create an account in Gemini or Uphold and link it to your Brave wallet to withdraw them in exchange for money.
Here are some benefits to linking a verified wallet to your Brave browser:
- Freely withdraw the BAT you have in your Brave rewards wallet
- Sync BAT tokens between mobile and PC
- Receive rewards directly in the custodial wallet
Do note that you will need to provide identification cards and details to create a verified account in these two wallets. Once you are on board, here’s how you can link verified wallets:
Step 1: Create an account with Uphold or Gemini. On the phone, only Uphold is available as of yet.
Note: Uphold will require a minimum balance of two BAT tokens to link with Brave.
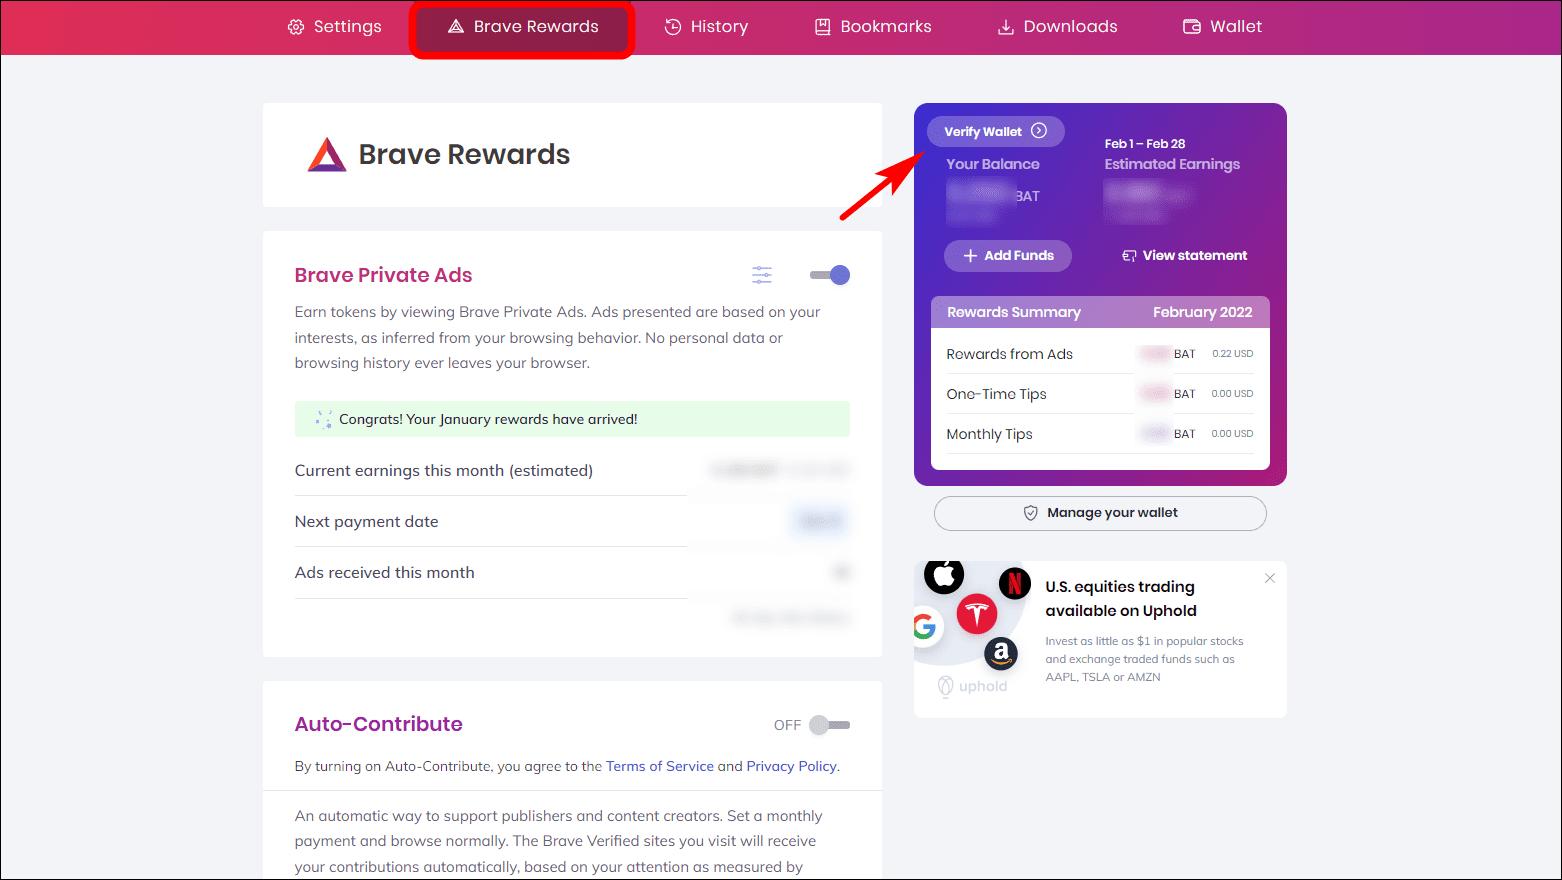
Step 2: Open Brave Settings and Go to Brave Rewards.
Step 3: Click on the Verify Wallet on top of Your Balance.
Step 4: Click on Continue on the new window.

Step 5: Choose Gemini or Uphold Wallet.
Step 6: Click on Continue to Login.
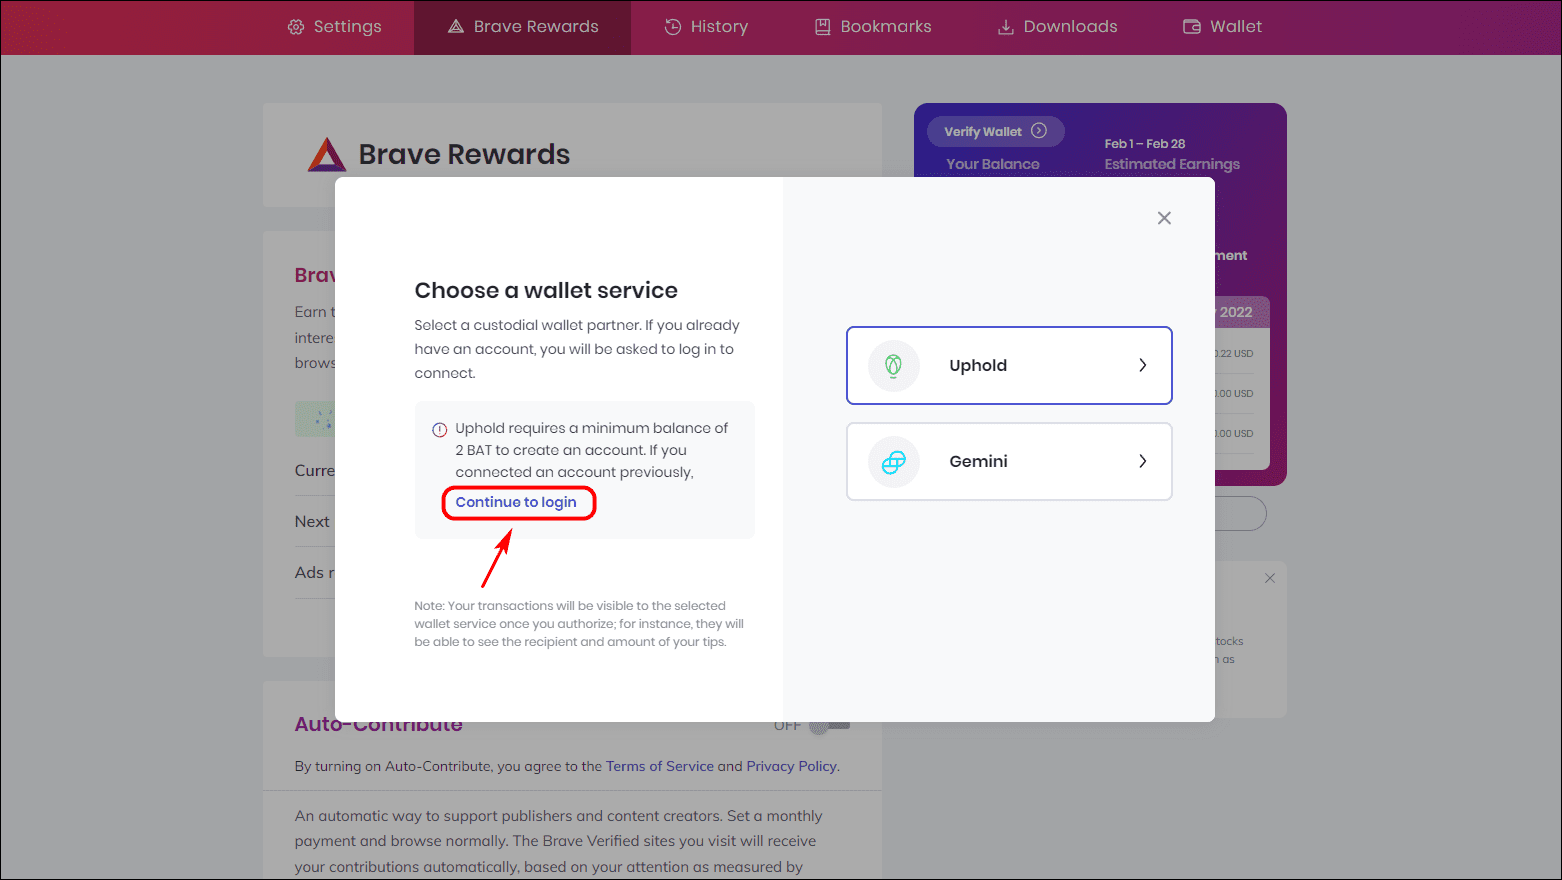
Brave will show a message that you need a minimum balance of 2 BAT to connect your account if you choose Uphold.
Step 7: Log in to your verified wallet and click Authorize.
You can now easily access your BAT and earn simultaneously using Brave on your Phone. Here’s more on syncing your phone and PC wallets.
10. Remove All Crypto Features
Although a welcome addition to the browser, not everyone will be on board with Brave’s crypto features. Features like BAT and Crypto wallets can affect the browsing experience for some people.
Some may prefer a cleaner, simple, more Chrome-like experience on Brave with added security. Check our detailed guide to remove all crypto-related features in the Brave browser on Android, iOS, and PC.
11. Enable Brave Shield & Shield Settings
Brave has some tools to prevent websites from tracking you and collecting your data. You can enable Brave Shield to block cookies and see how many trackers Brave has blocked.
To change ad blocker and cookie settings, visit Shield settings to tweak different settings according to your privacy requirements.
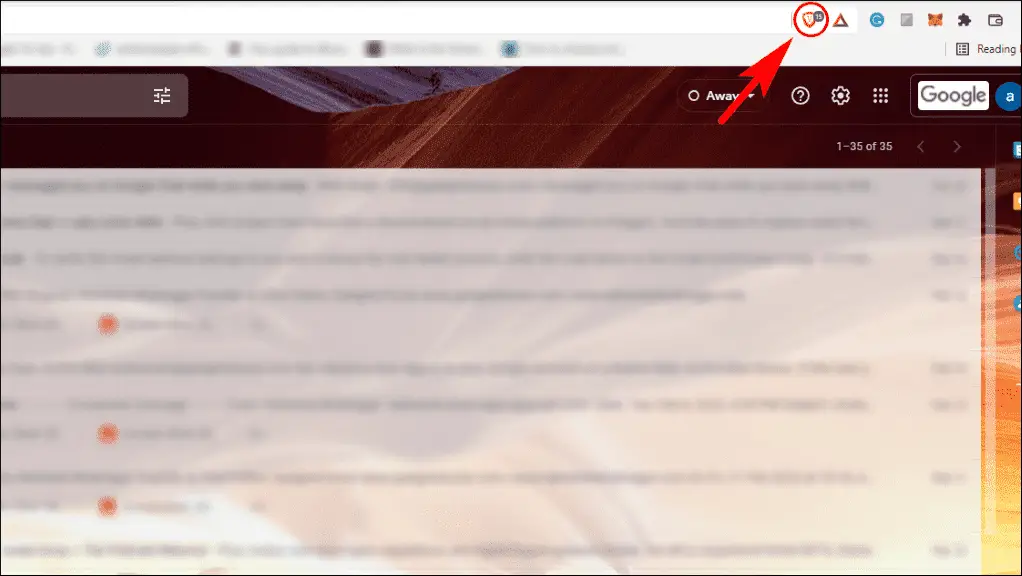
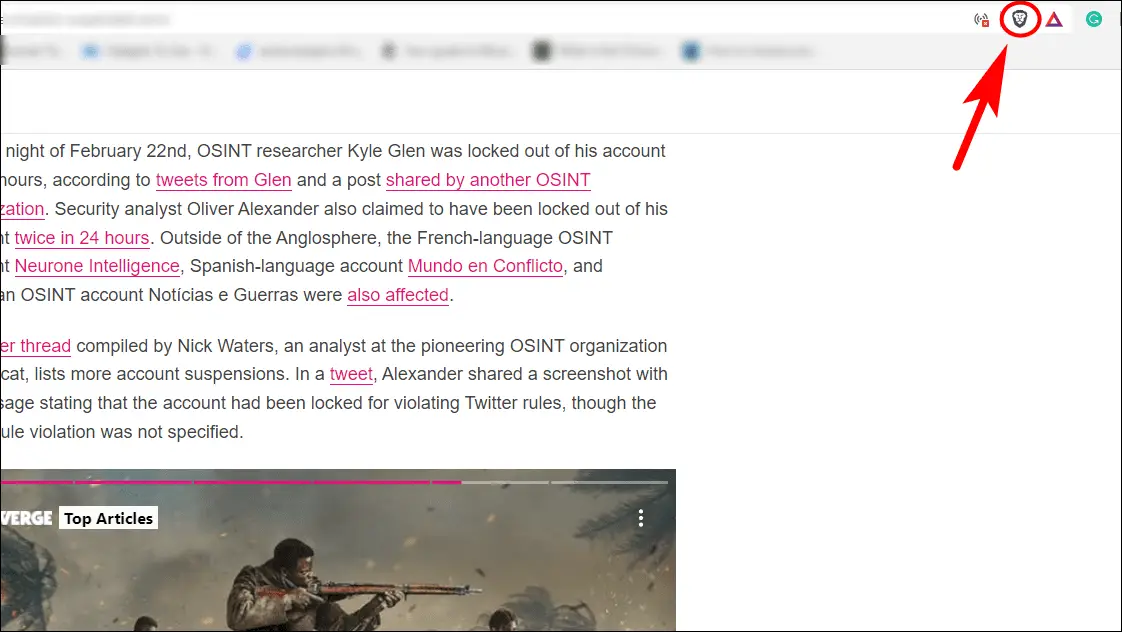
Step 1: On Brave, click the Lion icon on your address bar.
Step 2: Toggle On Shield for the current site.
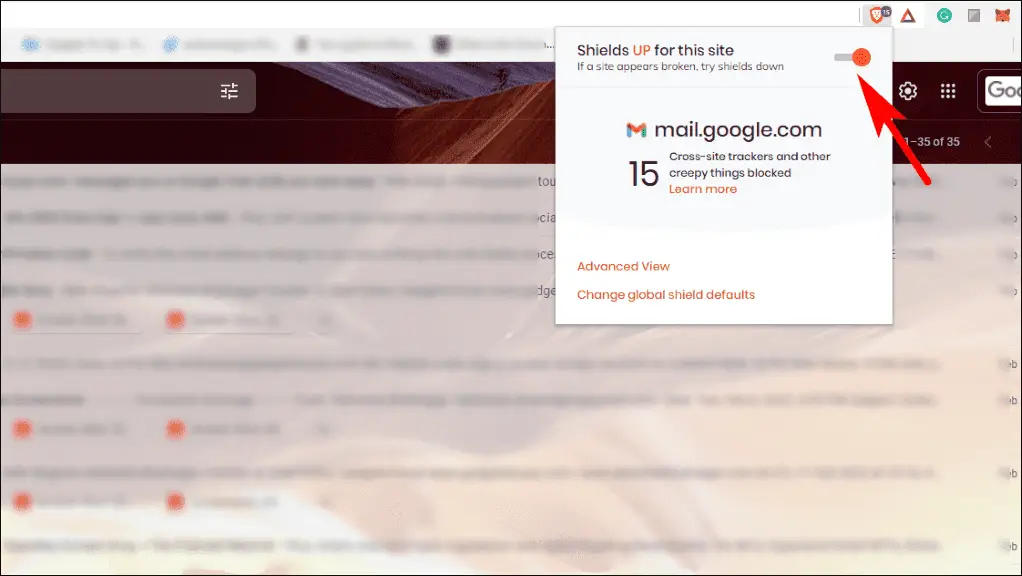
This will enable Shield for the current website and block any trackers and cookies. It also works on mobile.
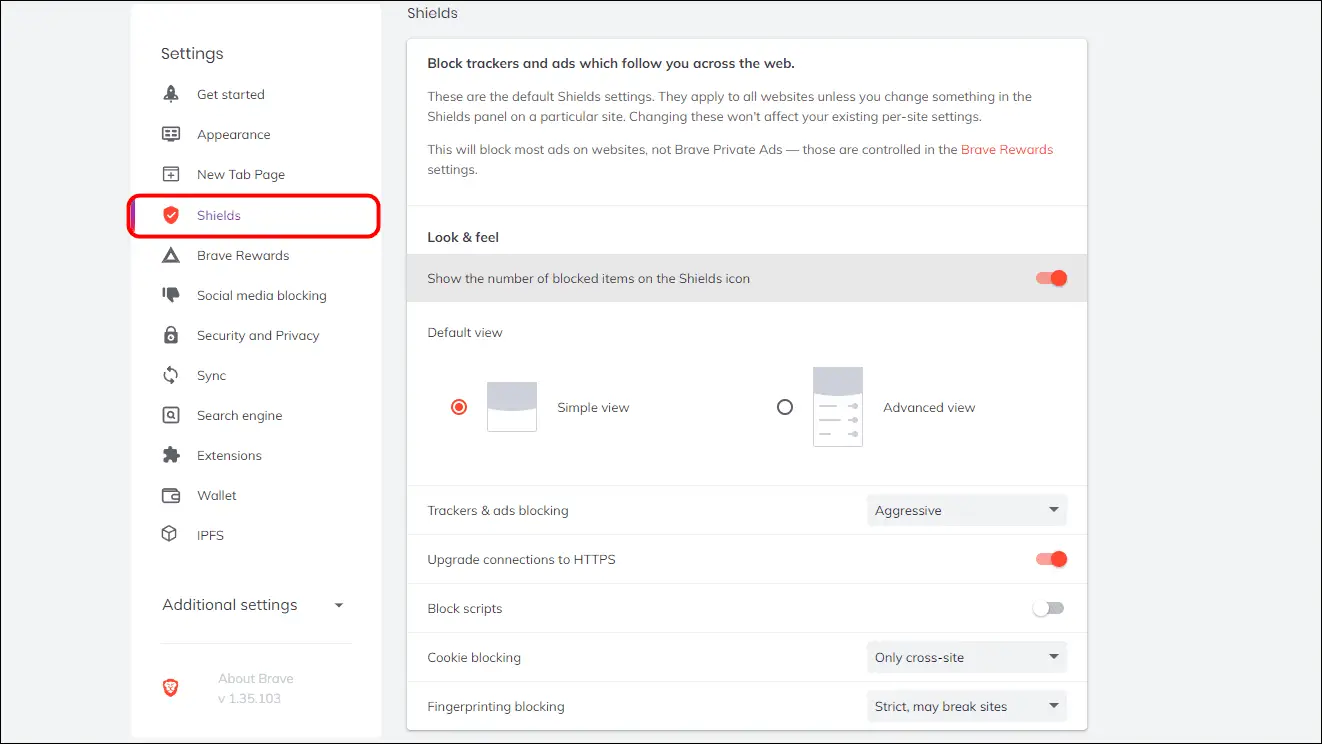
Step 3: To further tweak Shield settings, open Settings and select Shields from the sidebar.
To access Brave Shield advanced settings on your phone:

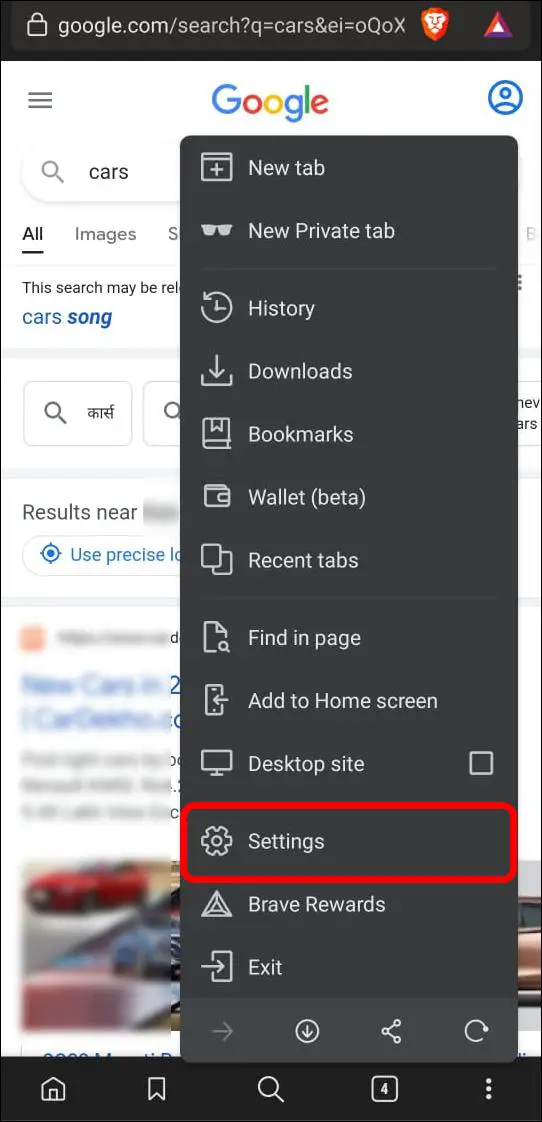
Step 1: Tap on the three-dot menu.
Step 2: Go to Settings.
Step 3: Select Brave Shields & Privacy
Here you can change the Shield view, enable HTTPS, or block ads, cookies, and scripts. Just make sure that some websites might stop working if you set very strict values.
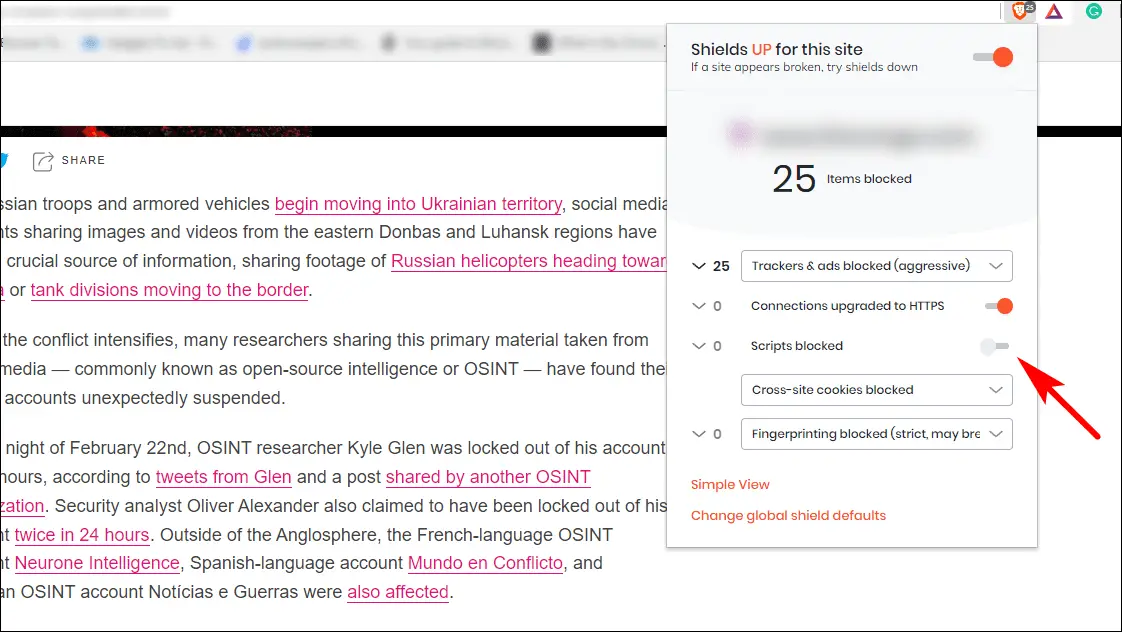
12. Block Scripts and Cross-Site Cookies
Websites these days have a lot of unnecessary scripts like auto-playing videos, pop-up ads, and banners. Especially news and blogging websites. Not to forget cookies to track you across the web.
Brave has an option to disable scripts which helps get rid of all that clutter and junk and get you straight to the content you were looking for. It can also save your data. Here is how you can enable it:
Step 1: Click on the Lion icon in the address bar.
Step 2: Click on Advanced view or Advanced Controls.
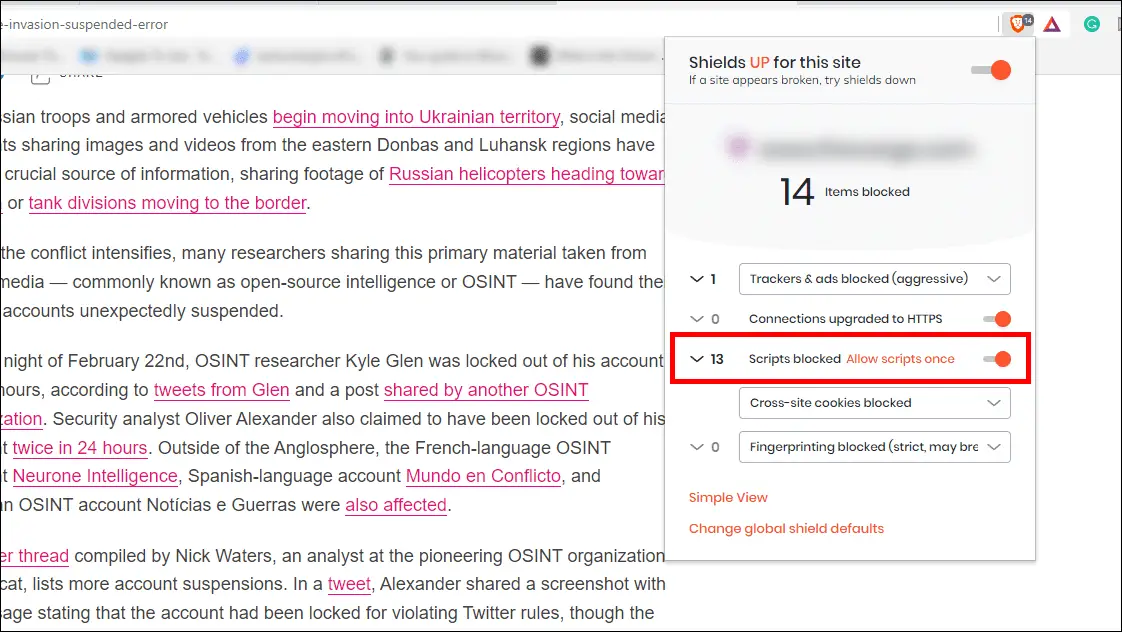
Step 3: Toggle On Block Scripts or Scripts blocked.
The page will load up again, and all the unwanted junk will disappear, leaving only the article itself.
This method works for PC and mobile versions of Brave.
13. Brave Private With Tor (PC Only)
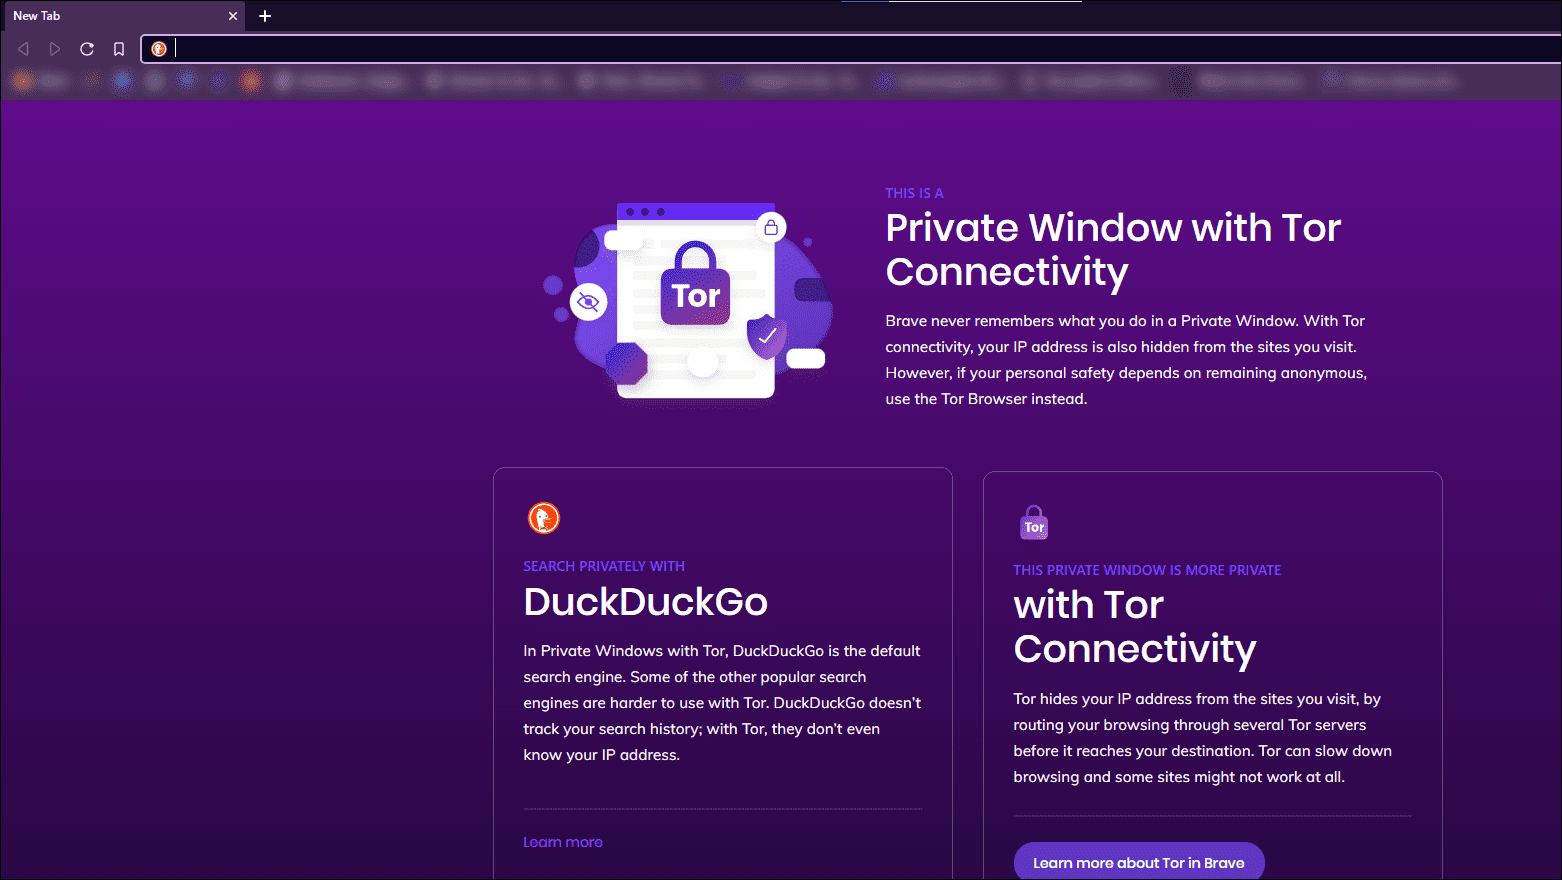
Brave’s Private Window with Tor is an enhanced version of the Incognito Mode. It uses Tor proxy for improved network security. Your default search engine is set to DuckDuckGo, and it allows you to look up onion links and explore the Dark web. Currently, it is only available on the PC version of Brave.
Step 1: Click on the hamburger menu in the top right corner of the toolbar.
Step 2: Select New Private Window with Tor.
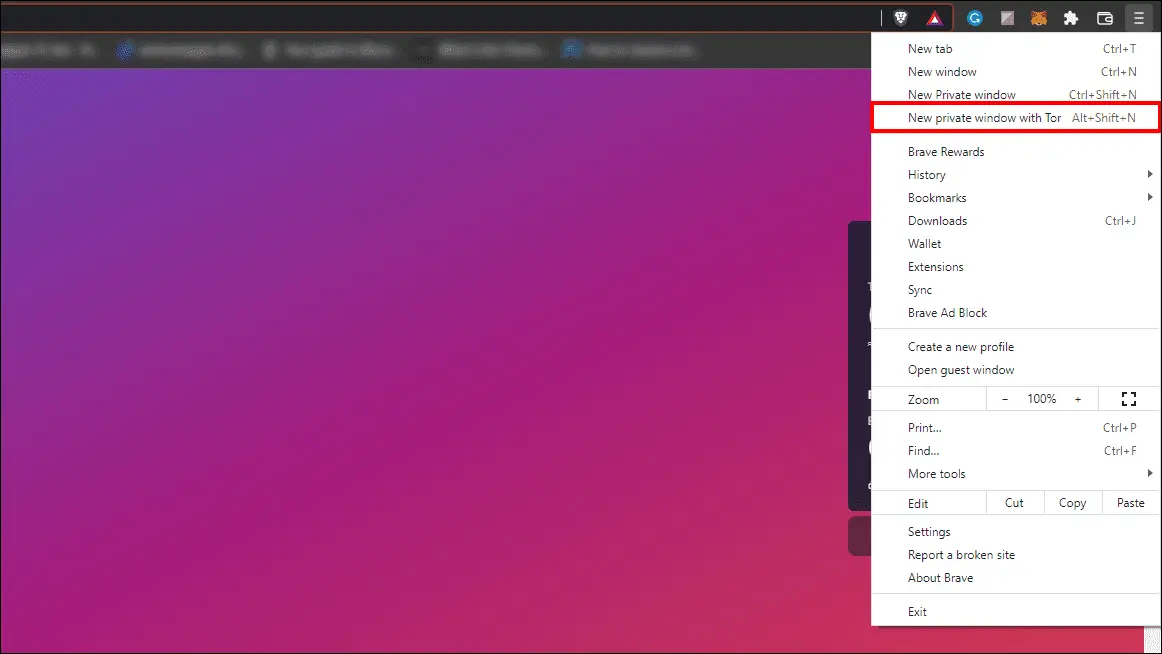
A new private tab running Tor will open up.
If you want to learn more about this feature and whether it provides as much security as the Tor browser itself, check Brave Private with Tor in detail.
14. Enable Reading List in Brave
Reading List works like bookmarks, but you can use it to compile articles and pages around a particular topic or idea and create a specific folder for reading items.
Reading List also syncs up with other devices logged into the same account. Hence, you can access it on your mobile and laptop. Below are the steps to enable it in Brave:
Step 1: In Brave, type and enter brave://flags/#read-later in the address bar to open the Brave experiments page.
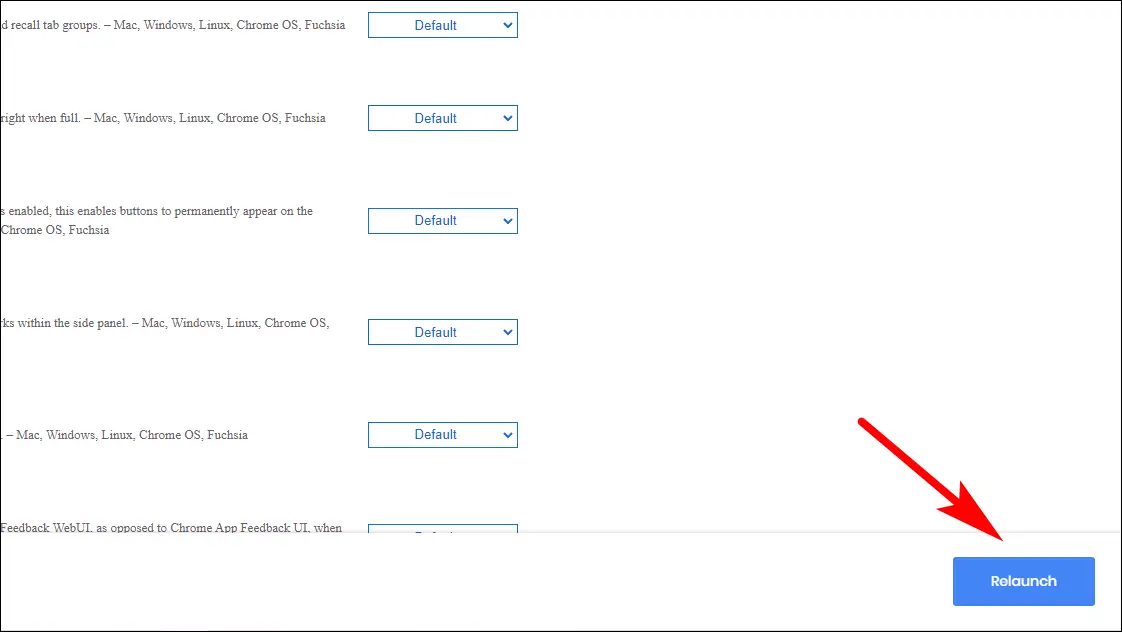
Step 2: The Reading List option will be highlighted in yellow. Click the drop-down menu next to it and select Enabled.

Step 3: Relaunch your browser.
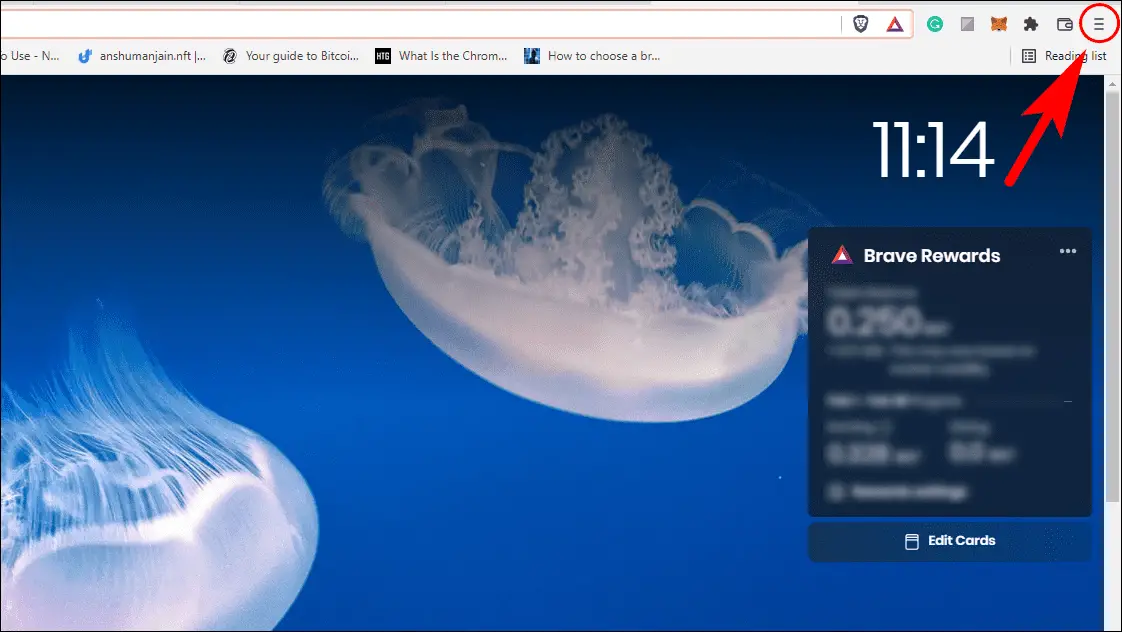
After relaunching Brave, a Reading List menu will appear below the toolbar on the top right corner.

Here are other methods to enable Reading List in Brave.
15. Brave Speed Reader Mode
Speed reader mode changes the layout of the page and removes any unnecessary elements so you can easily read articles and blogs. It also helps in loading the page faster and increases the browsing experience.
Step 1: On the Brave browser, Copy paste and enter brave://flags/#brave-speedreader in the address bar.
Step 2: Enable Speedreader will be highlighted in yellow. Click on the drop-down menu next to it.
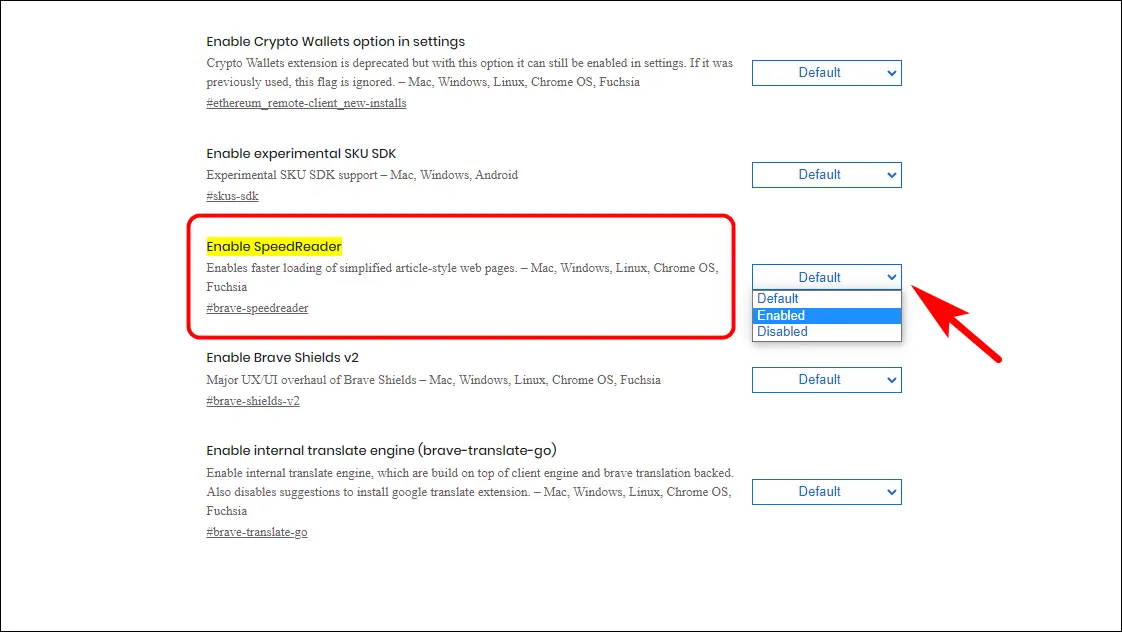
Step 3: Select Enabled and Relaunch Brave.

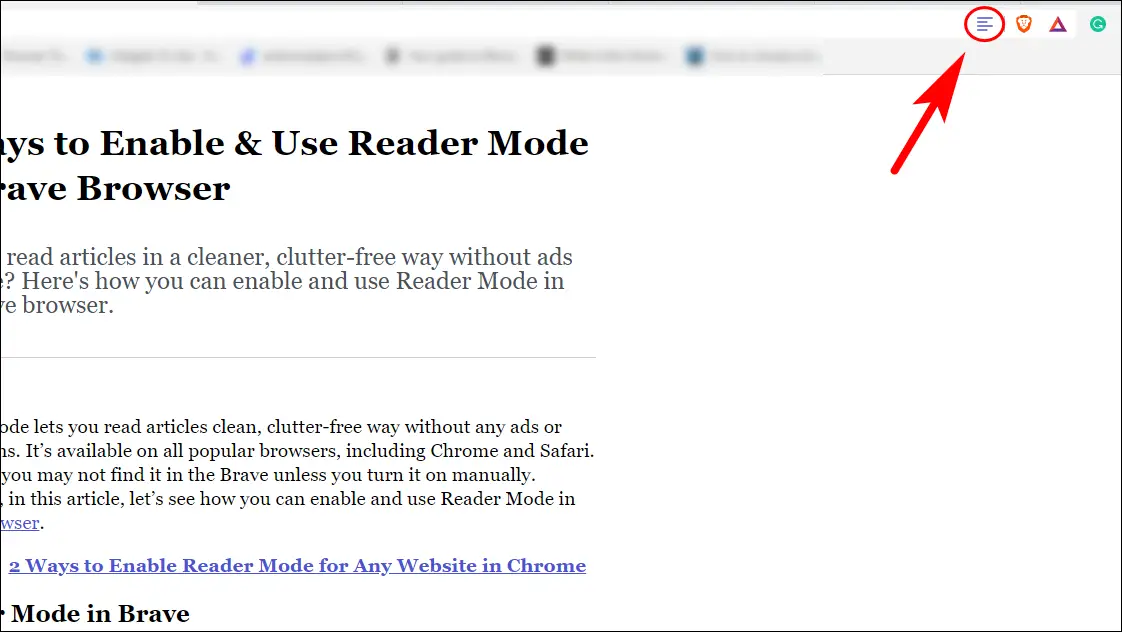
Now, whenever you visit any webpage with an article in Brave browser. Click the Reader Mode icon (horizontal lines), and the article will reload in a simpler format without clutter.
Take a look at this article to learn more about Speedreader mode.
16. Use Brave Search as Default Search Engine
Brave has an independent search engine similar to Google and Bing. Unlike other private search engines like DuckDuckGo, it uses its unique algorithm to index search results. Already it has over 300 million queries per month and continuously growing with time. It works best with Brave, and this is how you can enable it:
Step 1: Click on the hamburger menu in Brave.
Step 2: Go to Settings.
Step 3: Select the Search engine from the Sidebar.
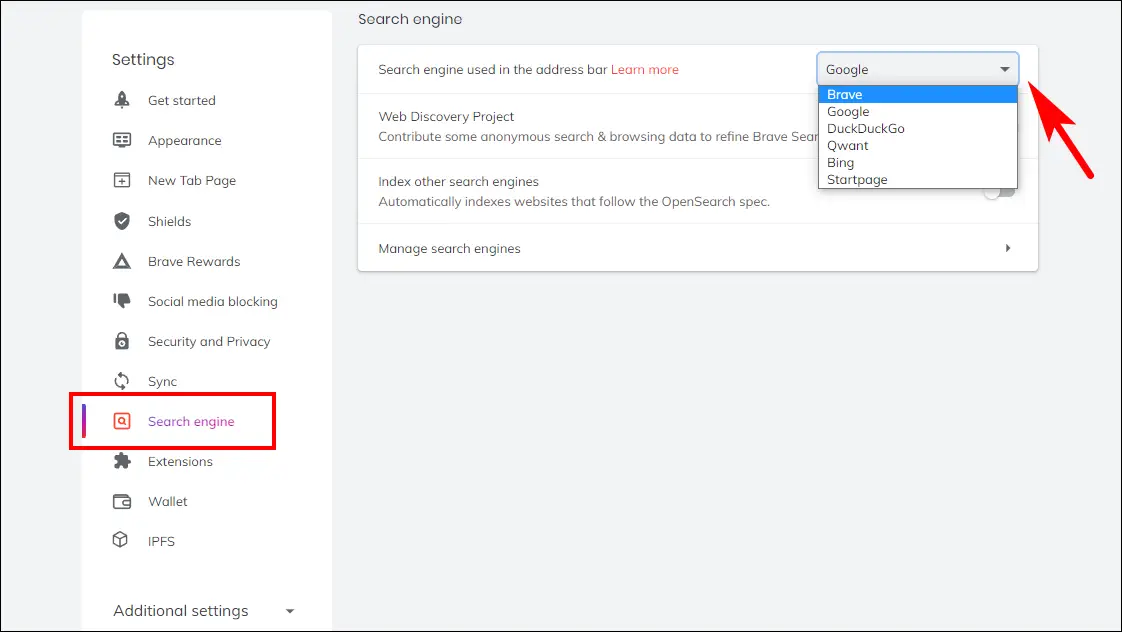
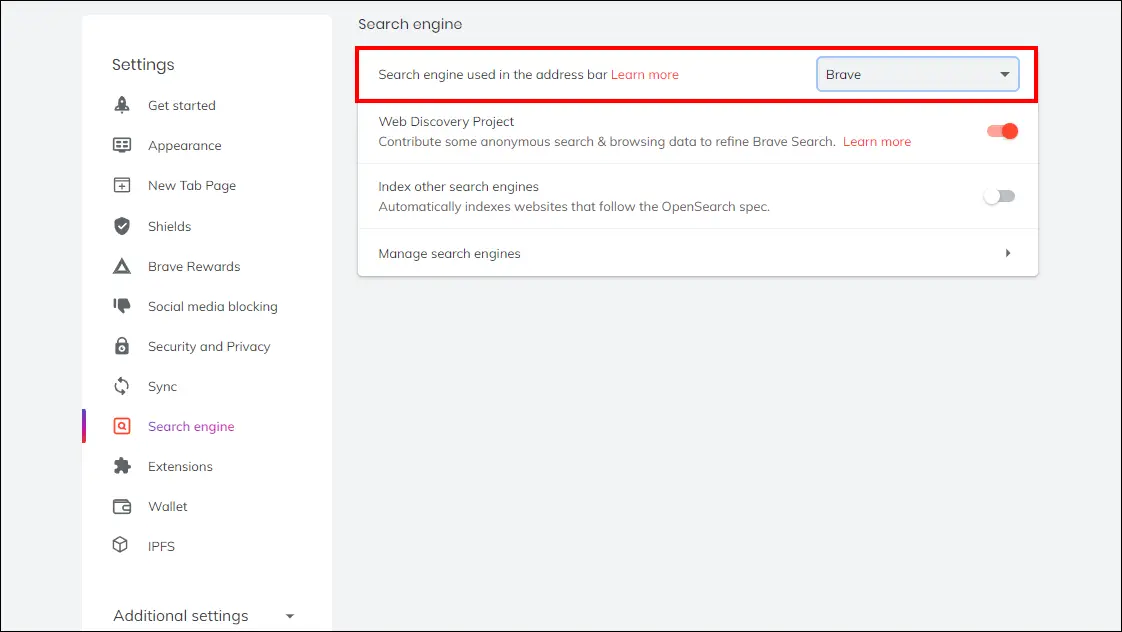
Step 4: Click on the drop-down menu next to the Search engine used in the address bar option and select Brave.
To switch to Brave search on your phone, follow these steps:
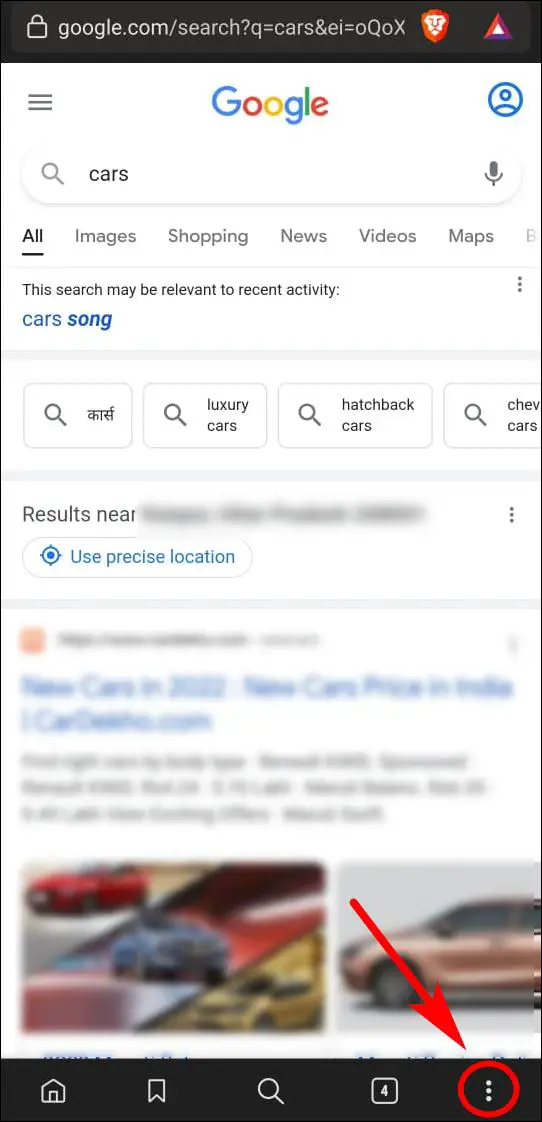

Step 1: Click on the three-dot menu from the bottom toolbar.
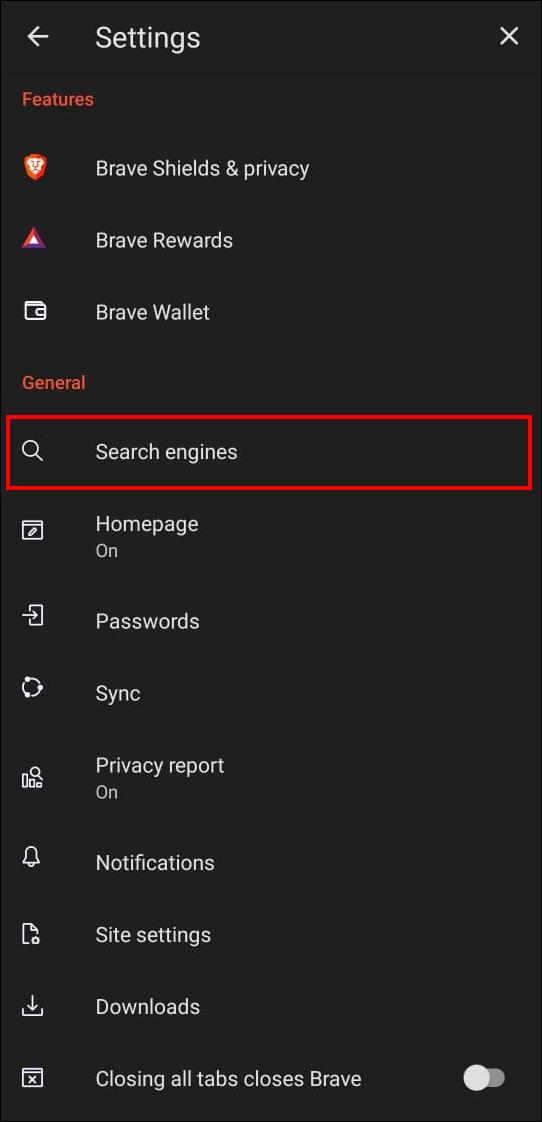
Step 2: Go to Settings.
Step 3: Select Search engines.
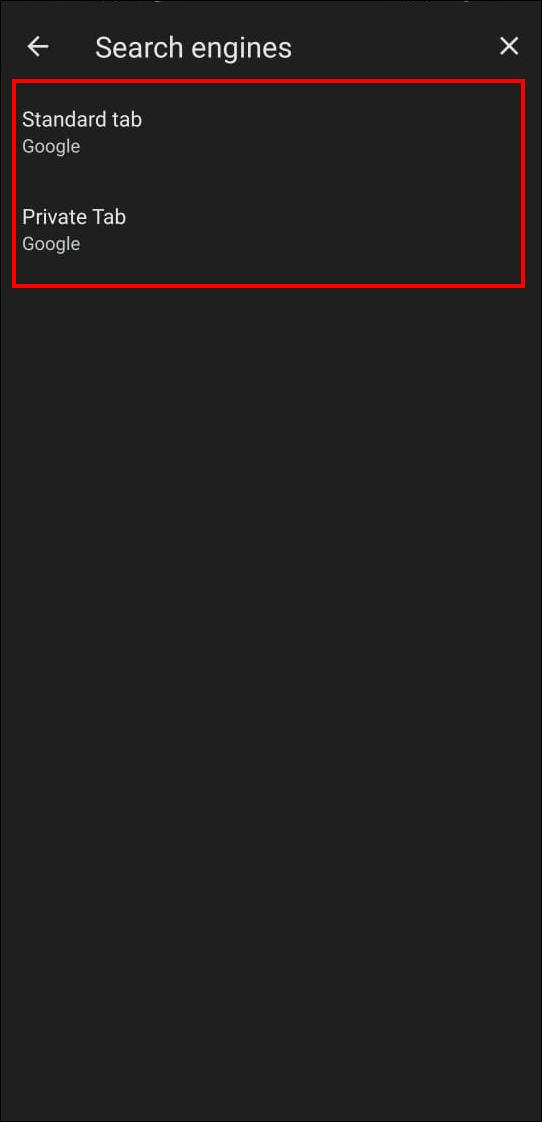
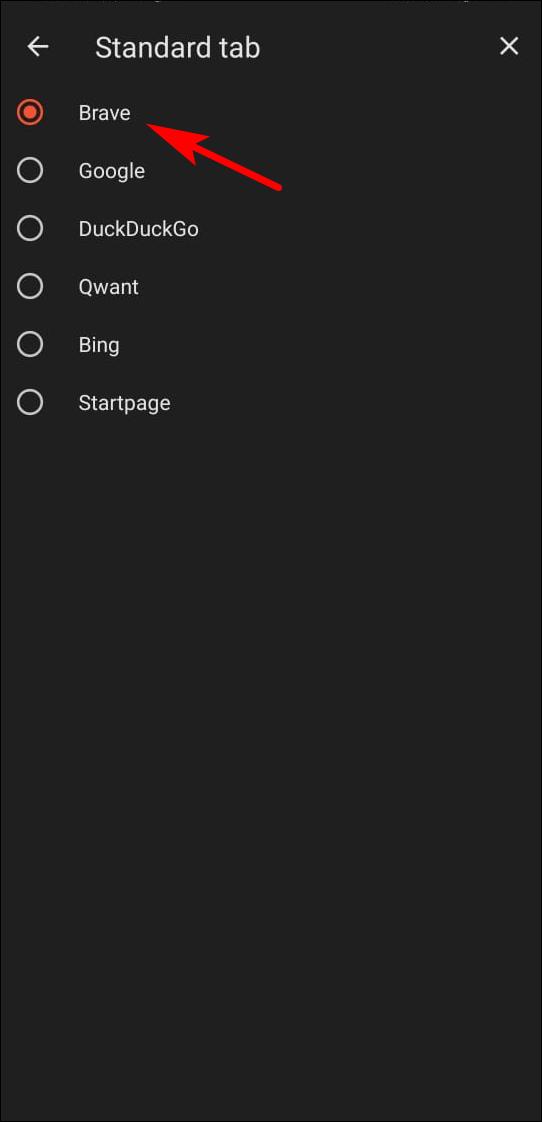
Step 4: Tap on the Standard tab and select Brave.
Step 5: Tap on the Private tab and select Brave again.
Now Brave Search is your default search engine. Here’s a detailed look at Brave search and its unique set of features.
17. Access IPFS content from Brave
IPFS is a Web3 decentralized technology that hosts and stores files and data in nodes instead of servers. Nodes are all the different computers using IPFS. It allows files and any content stored or hosted on IPFS to be easily accessible, resistant to tampering, and prevents censorship of content.
Brave has built-in support to open IPFS hashes. Just type ipfs:// followed by the hash to access the file. It will use the public gateway to access the file. Brave also allows you to create a local node within the browser.
Here’s how to use IPFS in Brave in detail.
18. Brave Talk Video Call service
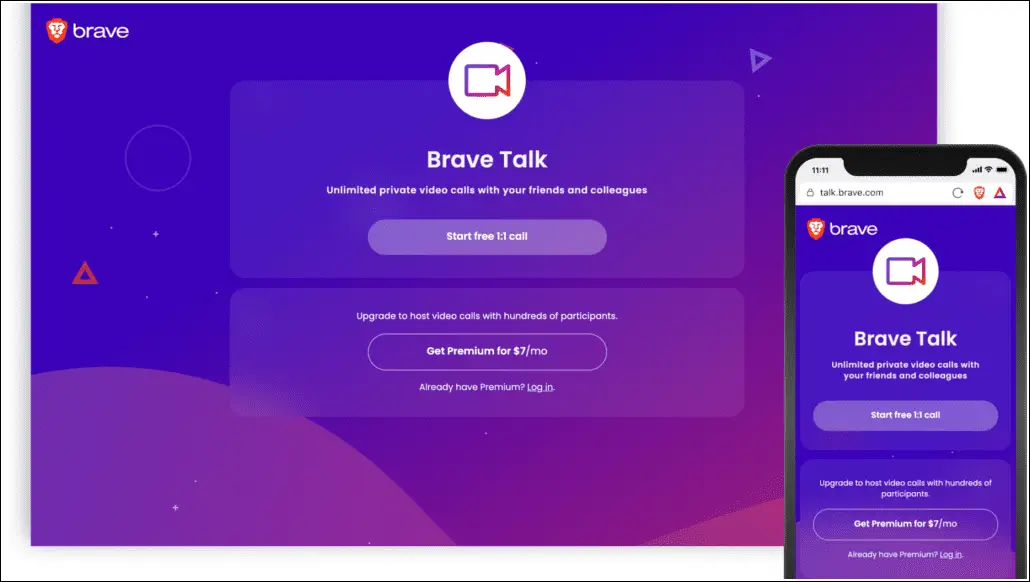
Brave Talk is a first-party Google Meet/ Zoom alternative from Brave. Brave talk does not track you or collect your data. You do not have to download or sign in to use an app.
You can make an unlimited number of video calls for an unlimited duration. The only condition is that the free version only allows a party of four while you can pay 7$ per month for the premium version, which allows up to a thousand people in the session.
Here’s how to use Brave Talk in Brave.
19. Enable Widevine Support in Brave
If you have trouble accessing Prime Video or Netflix within the Brave browser or cannot open other streaming services, you need to enable Widevine support in Brave. It uses Widevine digital rights management (DRM) component to view protected streaming websites, music, and video in the browser.
To enable Widevine in Brave:
Step 1: Open Brave and go to Settings.
Step 2: Select Extensions from the sidebar.
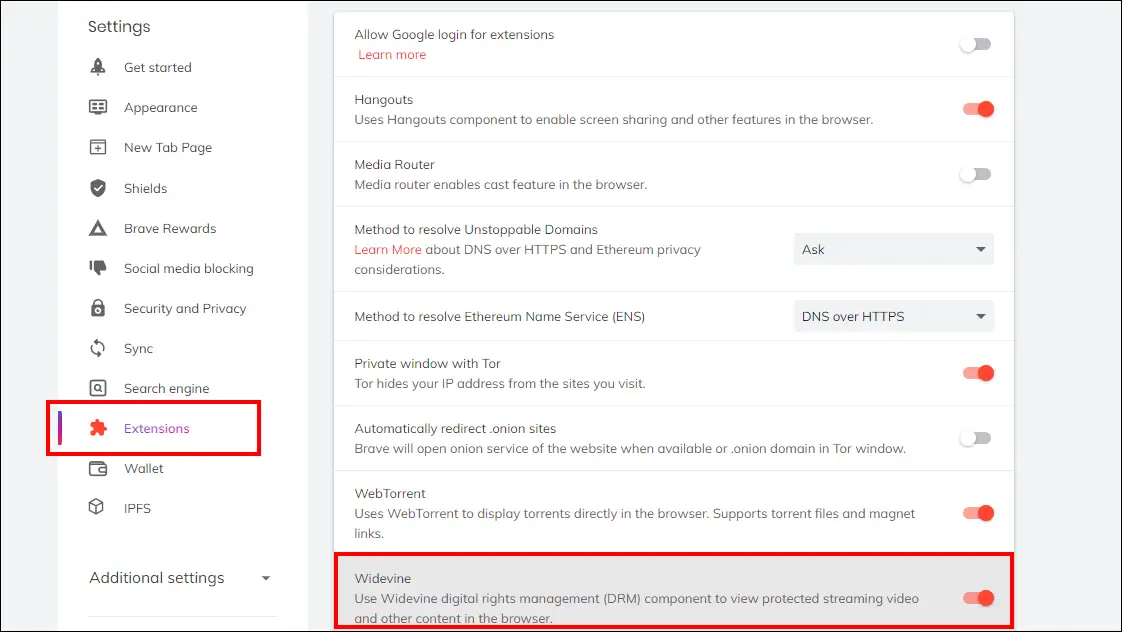
Step 3: Toggle On Widevine option as shown below.
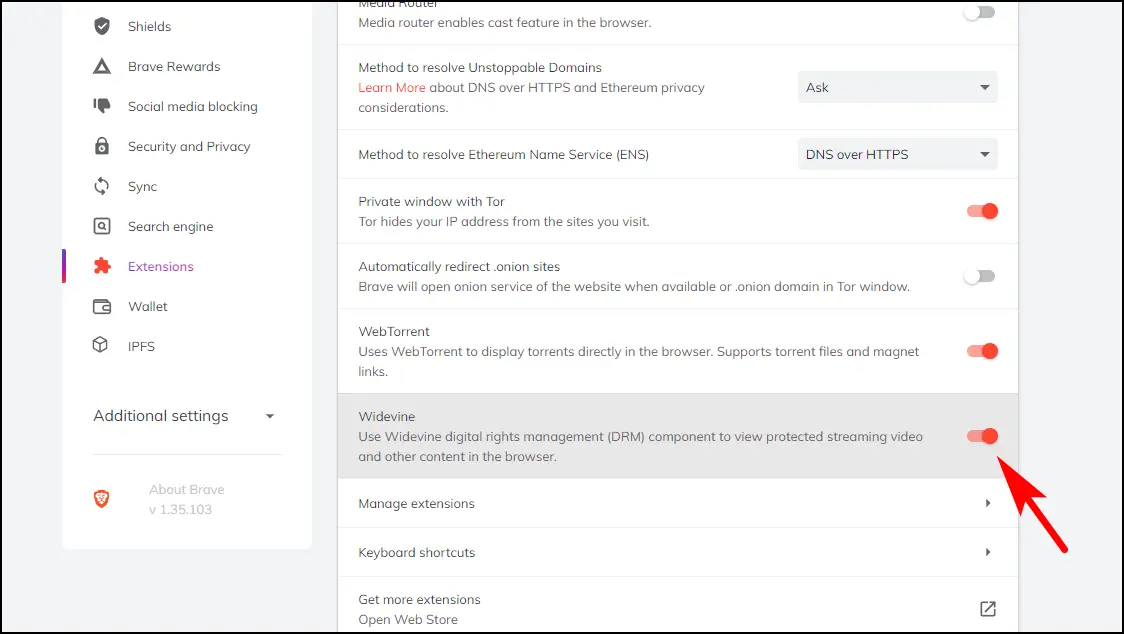
Once enabled, the web player should work properly with streaming services like Amazon Prime and Netflix.
20. Gesture Navigation for Phones
Phones are huge these days, and operating them with one hand is quite difficult. Thankfully, the Brave browser app comes baked in with handy gestures to enhance your browsing experience and make it more comfortable to use the app. We have listed some gestures that you can try out yourself.
For Android Devices:
- You can swipe between open tabs from the address bar, swipe left for previous, right for next.
- Swiping down on the address bar will take you to a preview of all tabs. You can swipe left or right to close them.
For iOS Devices:
- Switch between open tabs on Brave by swiping left or right on the bottom toolbar.
- Close the current tab or all open tabs by pressing and holding the tab indicator icon on the bottom toolbar.
- Open a new tab or a Private Tab by pressing and holding on to the new tab button in the bottom toolbar.
Get the Most Out of Brave With These Tips & Tricks
Even though this list seems pretty long, we can assure you there are more tricks to be found within the brave browser. Brave caters to a privacy-centric audience, but people looking for a less resource-hungry alternative to Chrome will find themselves right at home with the Brave browser. Let us know if you find this guide helpful, and use any Brave tips or tricks mentioned on the list.