
Popular browsers like Chrome, Firefox, Edge, and others come with many built-in security features that you can find the browser’s privacy settings. However, if you are confused about which feature to use and which to avoid in order to stay secure online, in this read, you will learn the 35+ browser security tips, tricks, and features to stay safe online.

Browser Security Tips, Tricks, and Safety Features
In the internet era, one wrong move can lead to the compromisation of your personal information. Also, an insecure browser can easily install spyware without your knowledge. Thankfully, popular browsers take care of users’ privacy and security, but most of them are disabled by default, and to be safer online, you need to use the tips, tricks, and features we have mentioned in the article.
Privacy and Security Settings for Google Chrome
By default, Chrome protects you from dangerous and deceptive sites that might steal your passwords or infect your computer, and you can make it more secure by enabling some browser security tips or features we have mentioned.
1. Enable Enhanced Protection
Chrome lets users choose which protection they want for browsing the web. Enhanced Protection will predict and warn you about dangerous events before they happen, warns you if passwords are exposed in a data breach, and gives you proactive protection against dangerous websites, downloads, and extensions. Here’s how you can enable it.
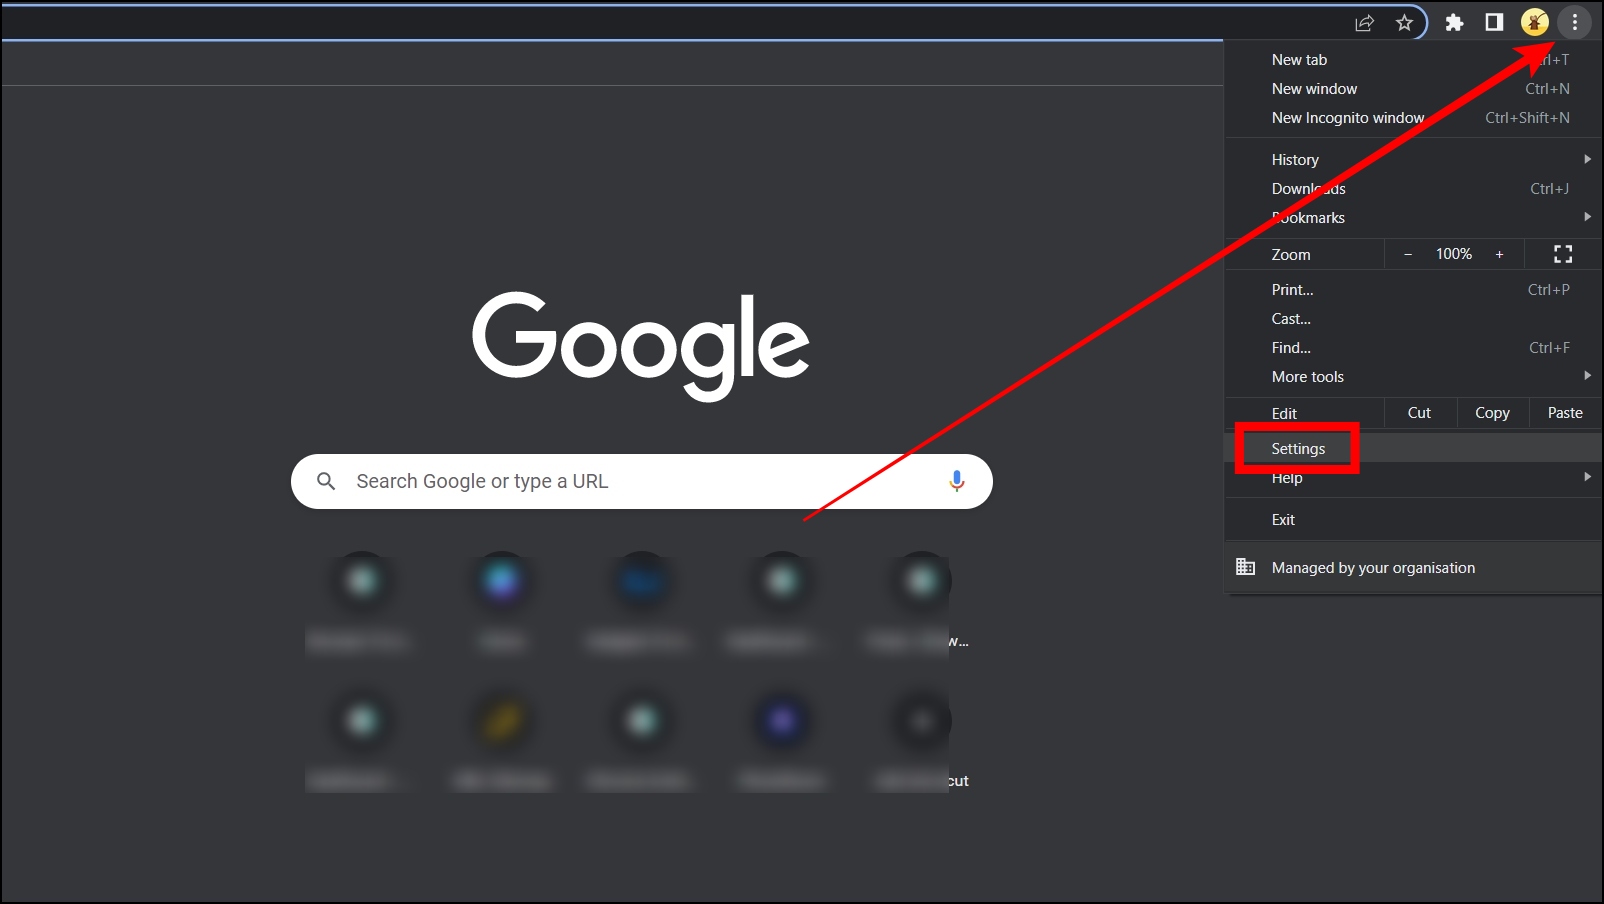
Step 1: Open the Chrome browser, tap the three-dots icon at the top, and select Settings.
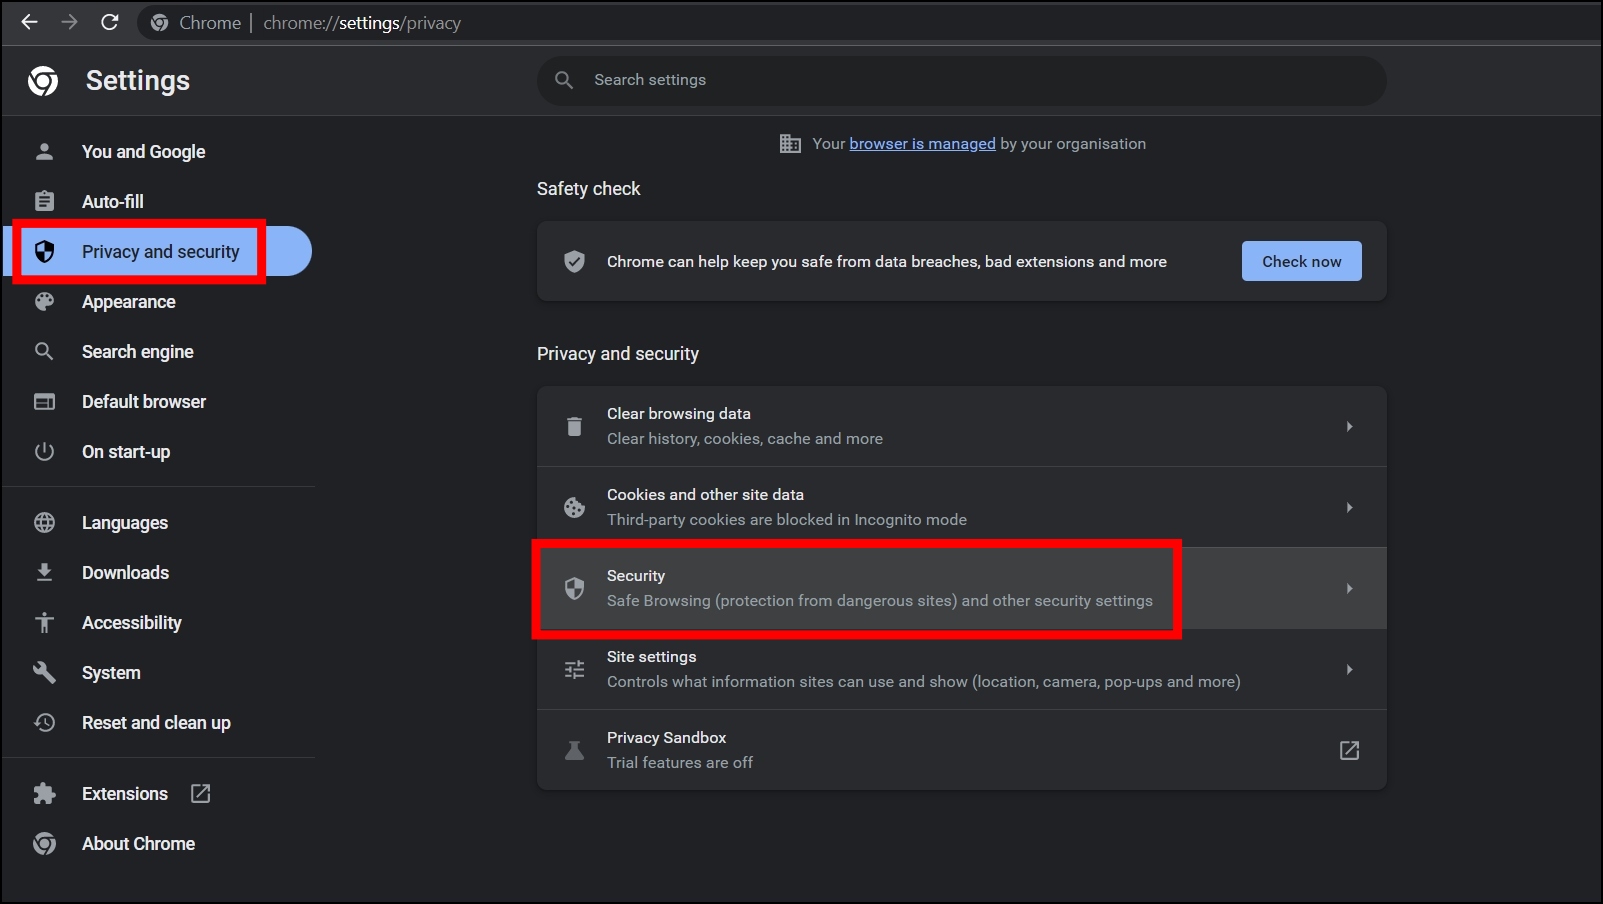
Step 2: Click Privacy and Security from the sidebar and select Security.
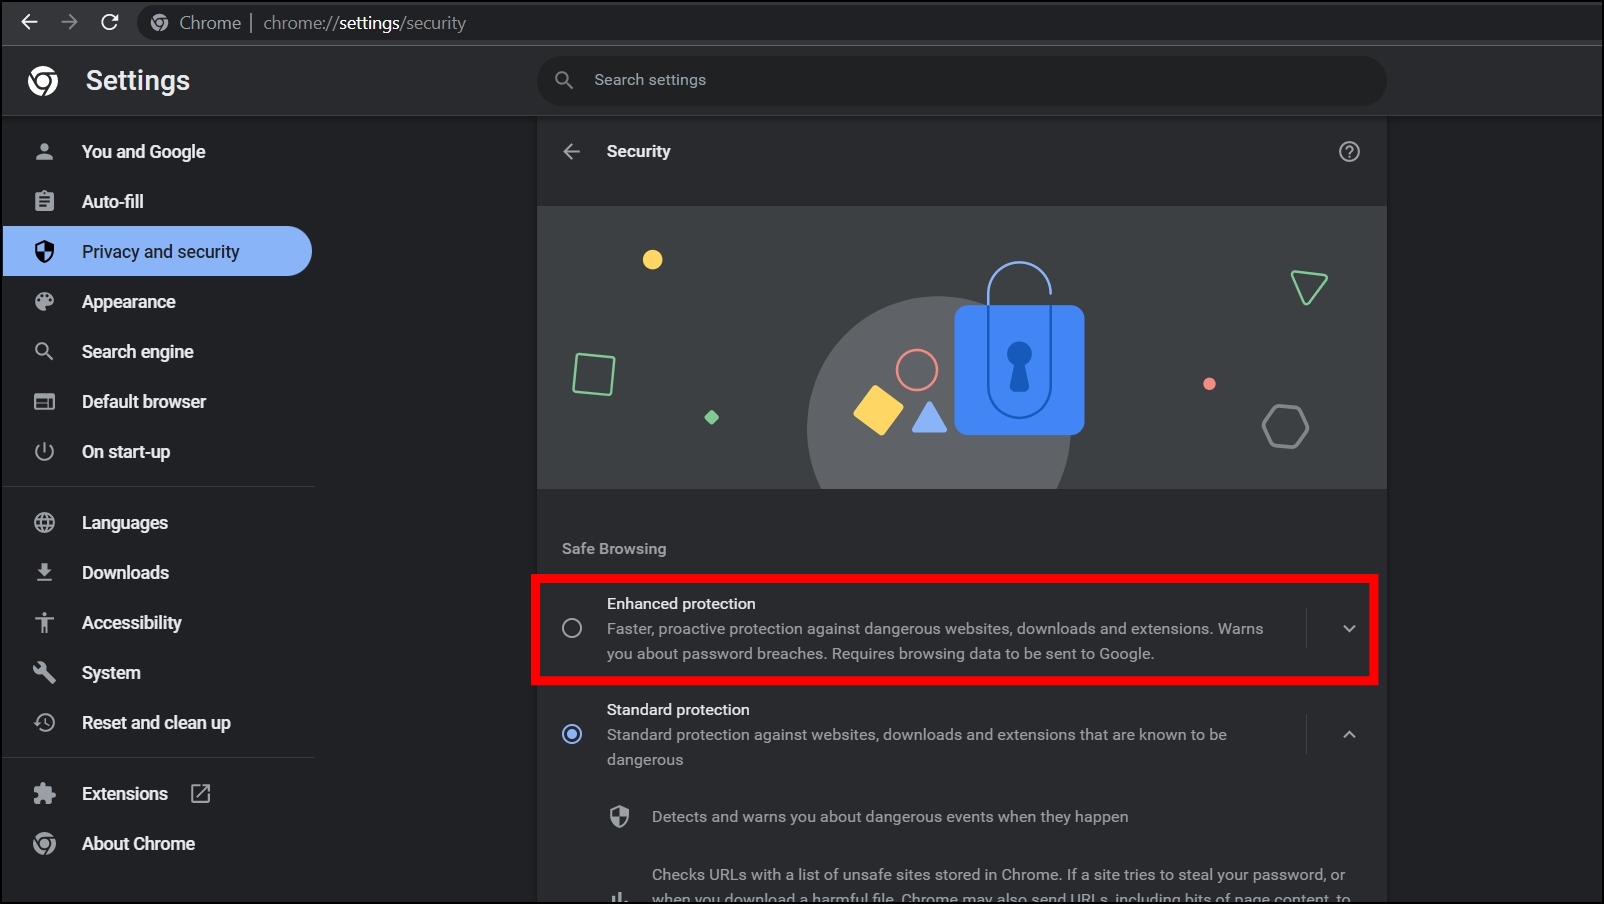
Step 3: Select the checkbox for Enhanced Protection under Safe Browsing.
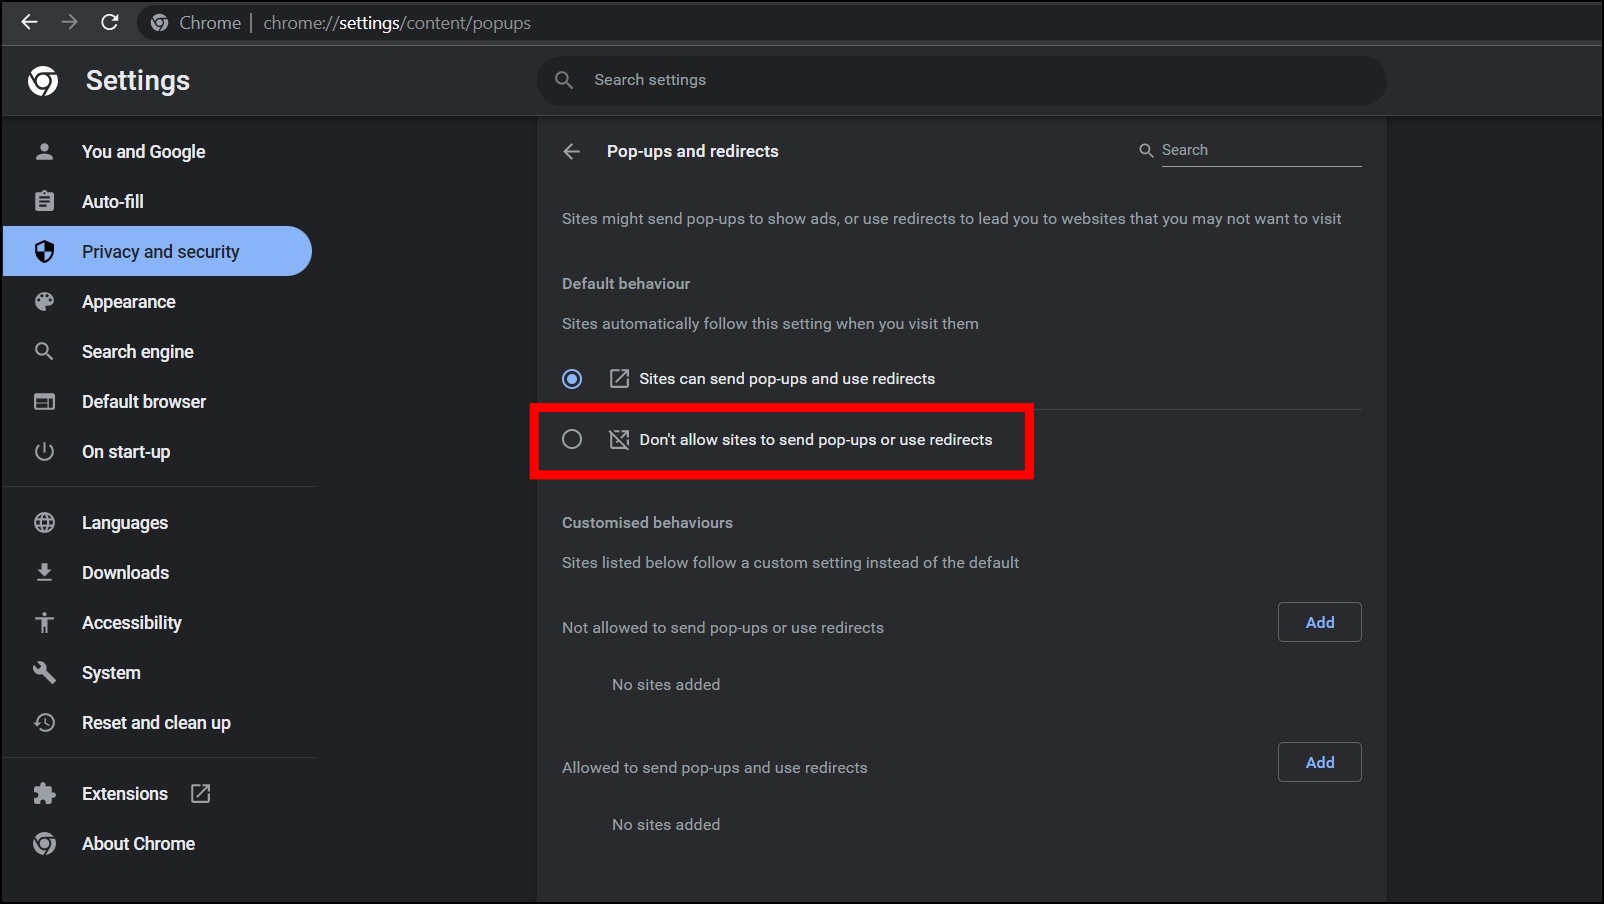
2. Don’t Allow Sites to Send Pop-ups or Use Redirects
By default, Sites send pop-ups to show ads or use redirects to lead you to websites that you may not want to visit. However, Chrome allows users to block sites from sending pop-ups, and below are steps to disable it.
Step 1: Open Google Chrome, tap the three-dots icon, and select Settings.
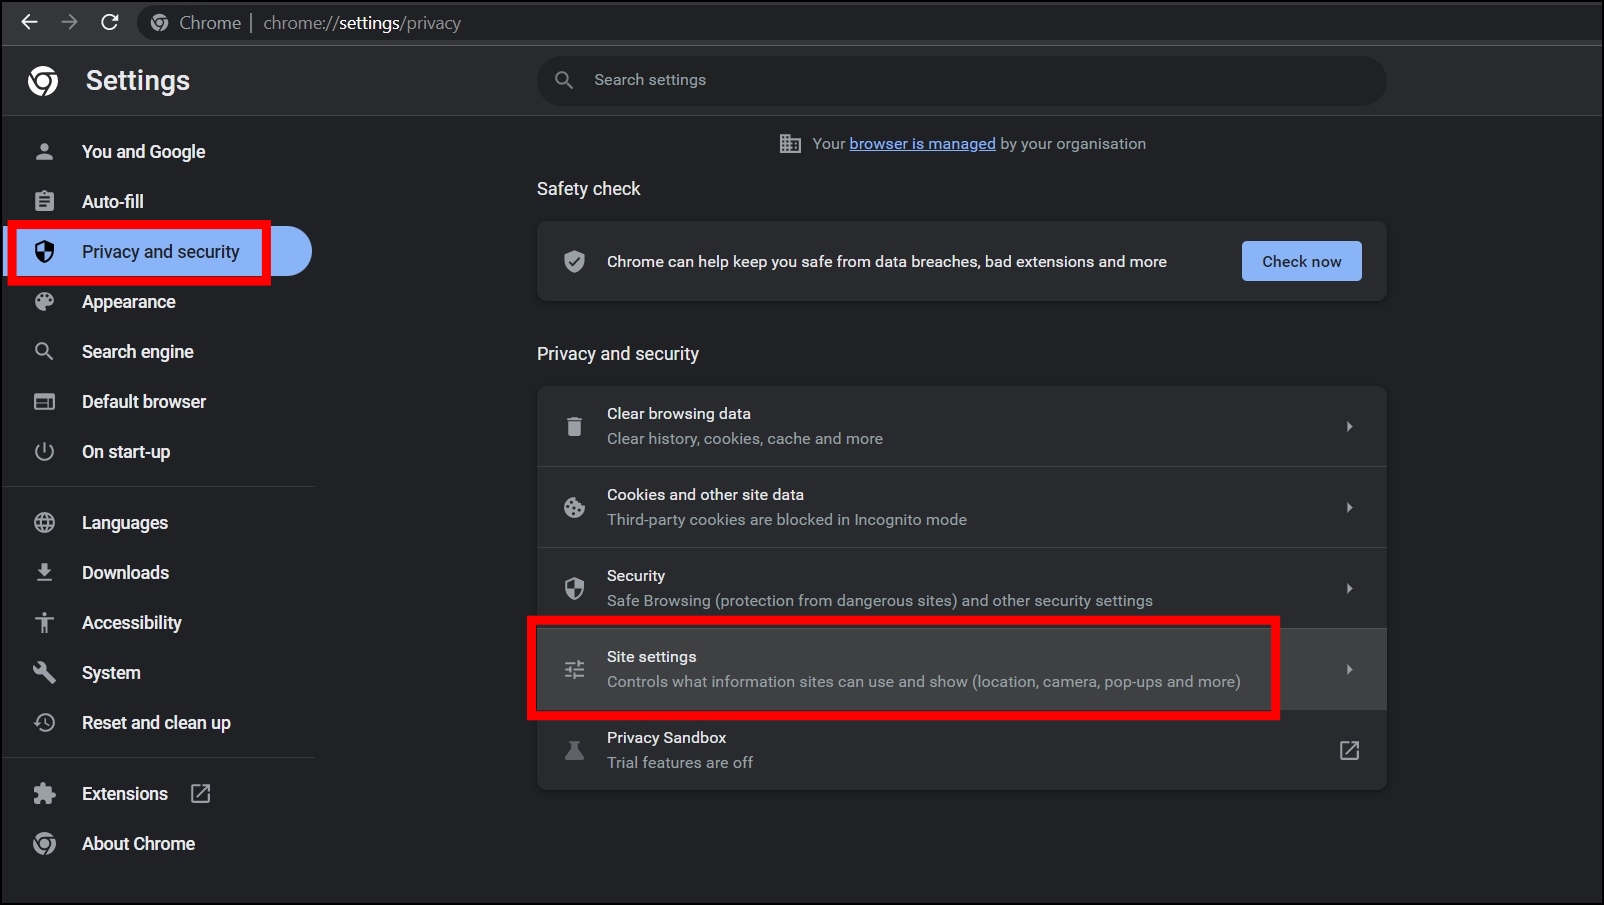
Step 2: Tap on Privacy and Security, then choose Site Settings.
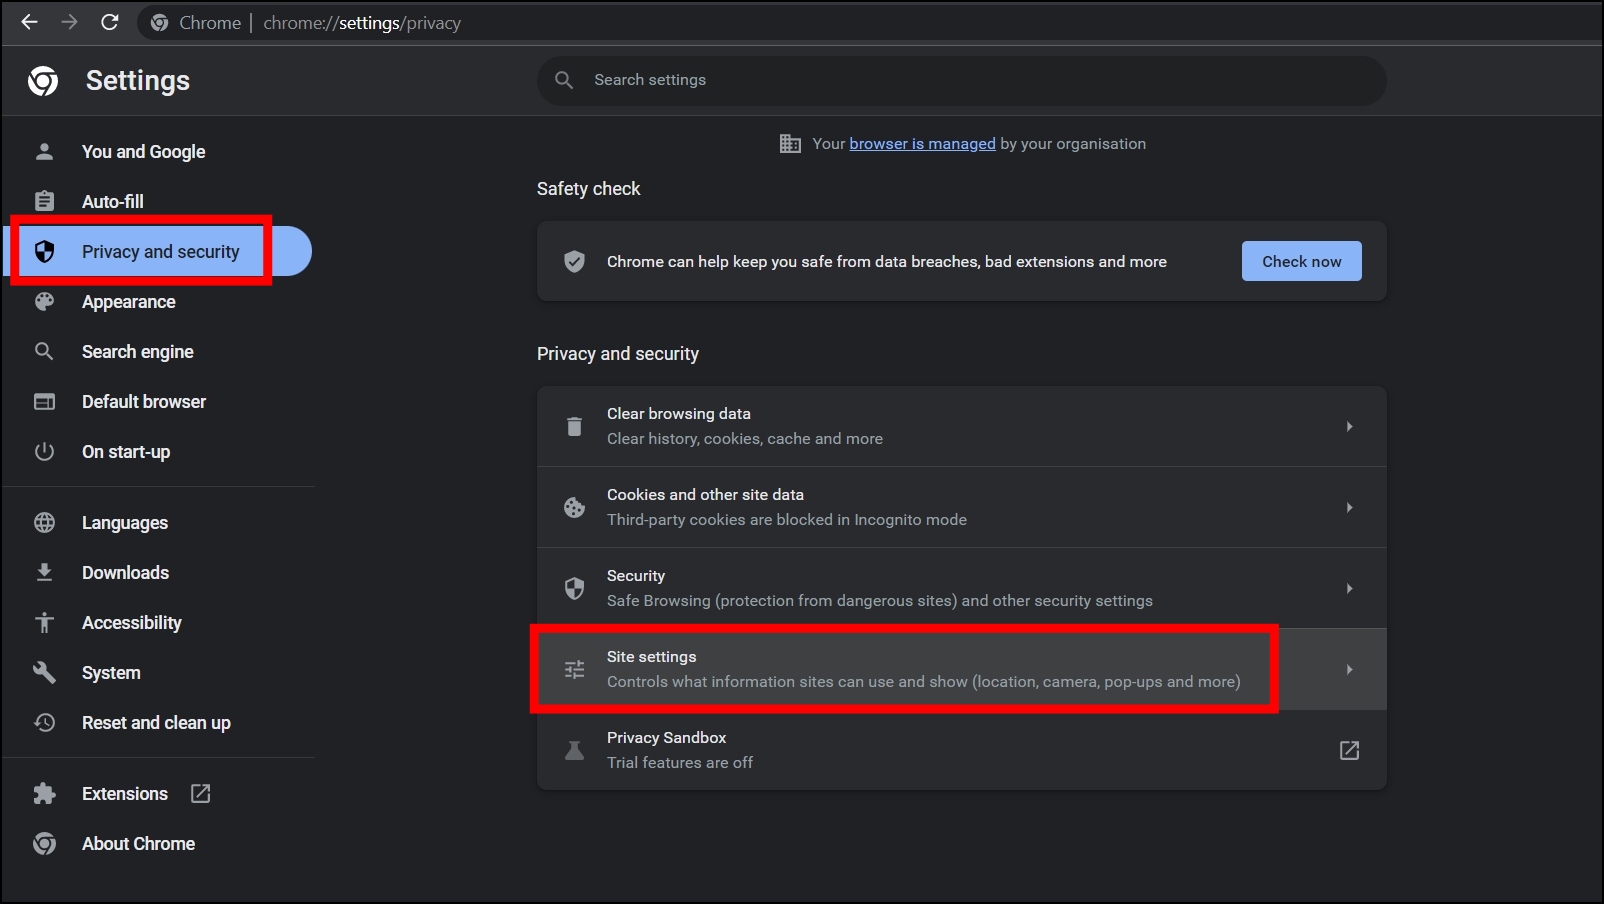
Step 3: Scroll down and tap on Pop-ups and redirects under the Content section.

Step 4: Select the checkbox for Don’t allow sites to send pop-ups or use redirects.
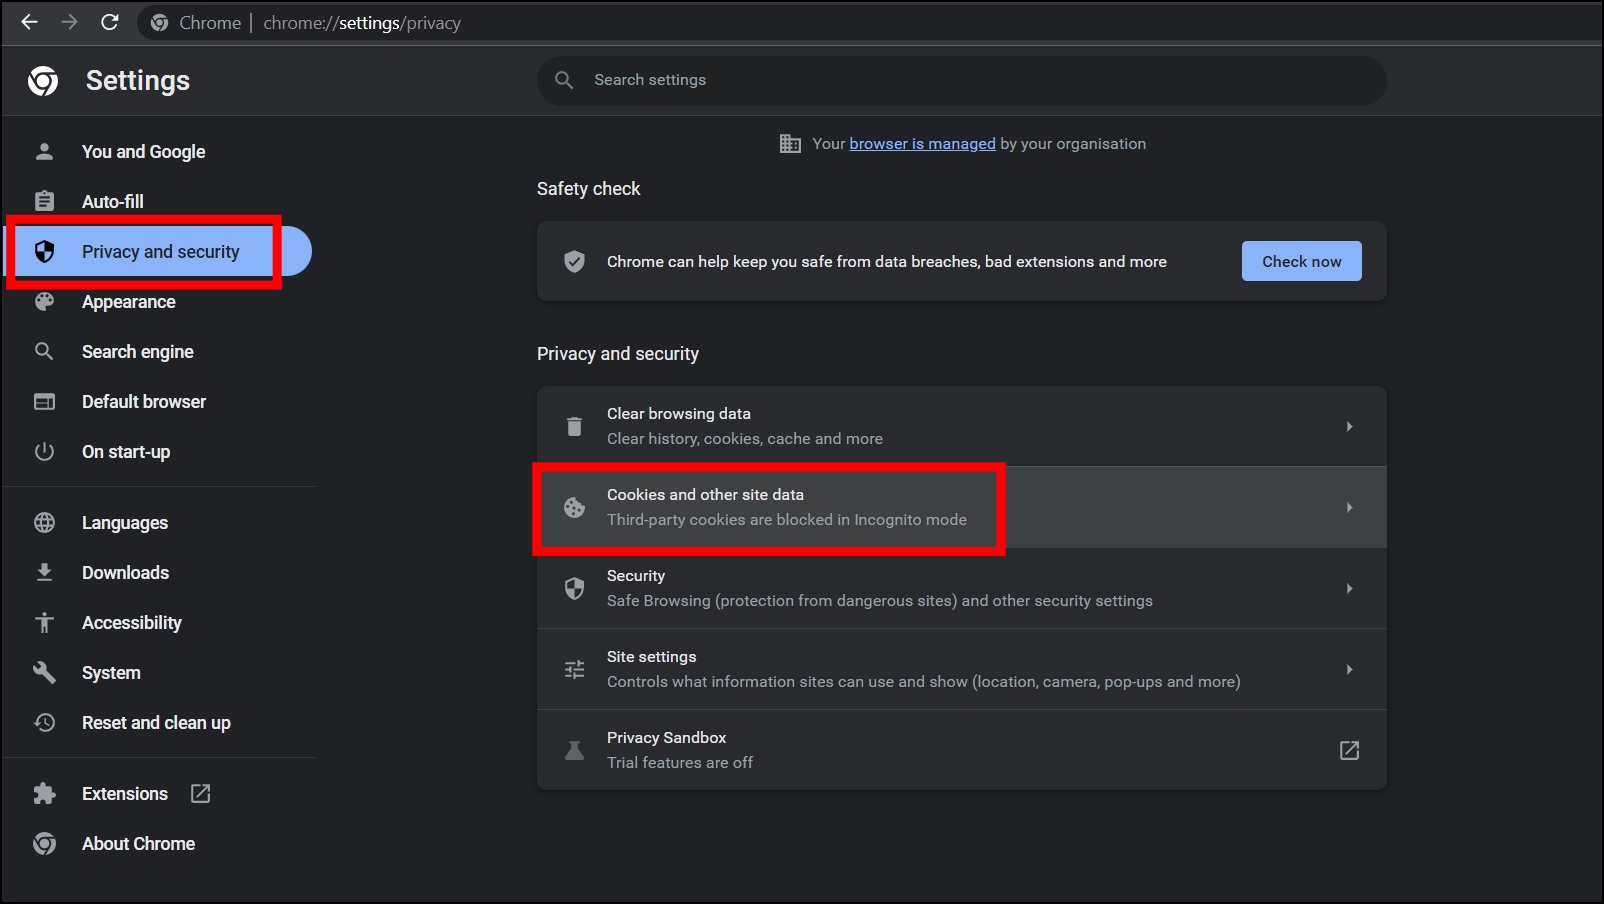
3. Block Third-Party Cookies
Websites use third-party cookies to track you across websites to advertise products and services. Once you disable the feature, it prevents companies and advertisers from tracking down your behavior online, and you will see less intrusive ads. It also improves user security and privacy. Follow the below steps to block it.
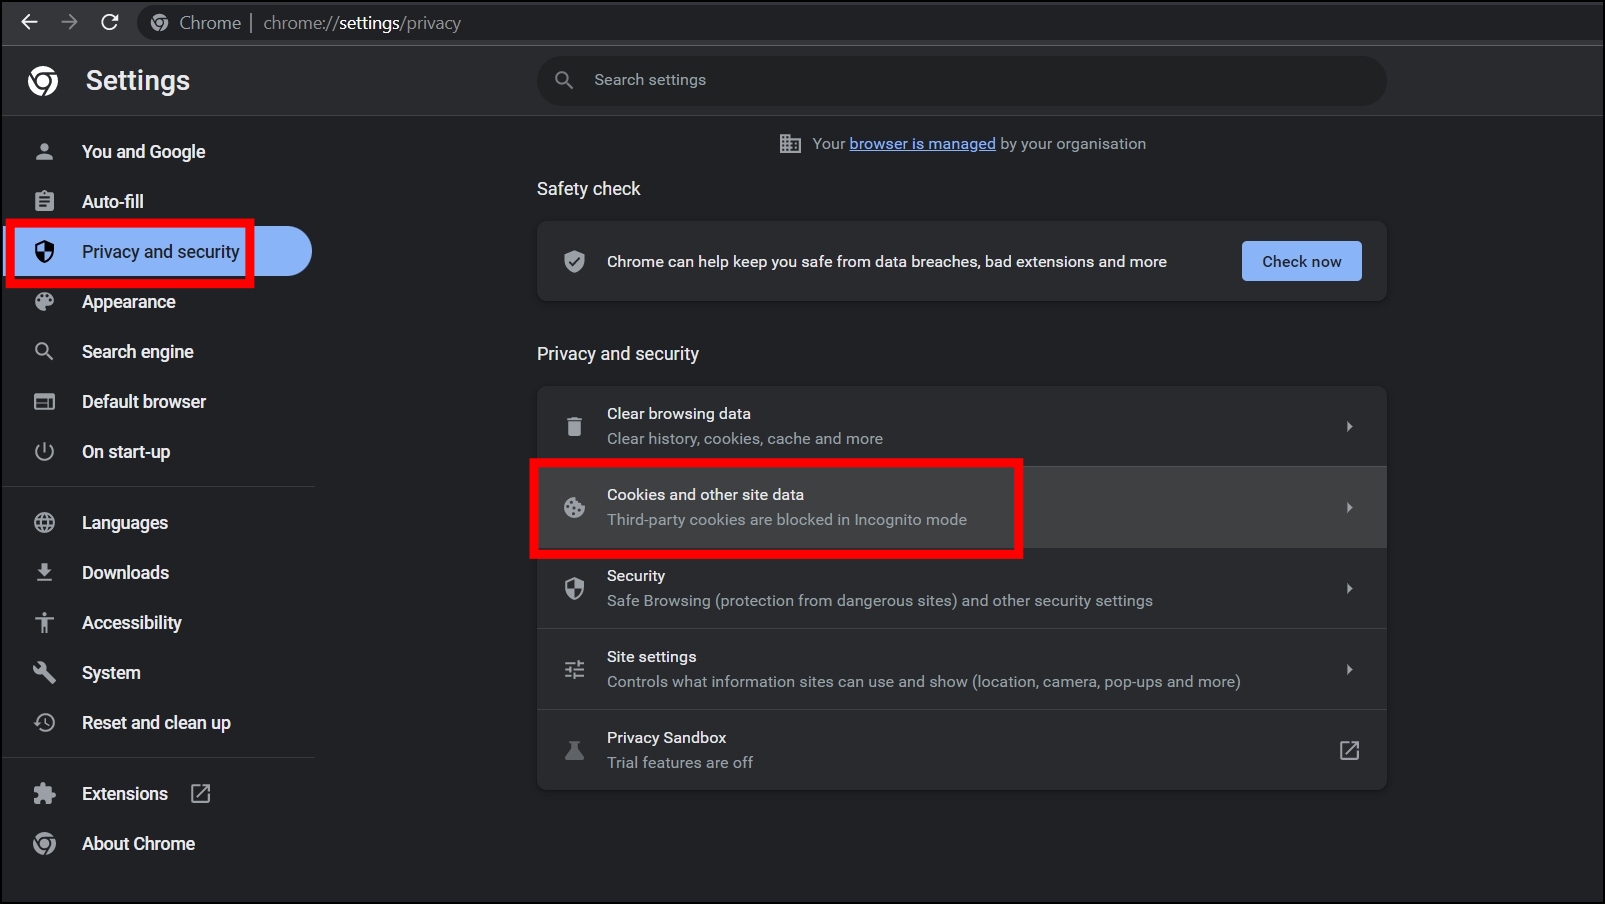
Step 1: Open Google Chrome, then navigate to Settings.
Step 2: Select Privacy and security from the sidebar and choose Cookies and other site data.
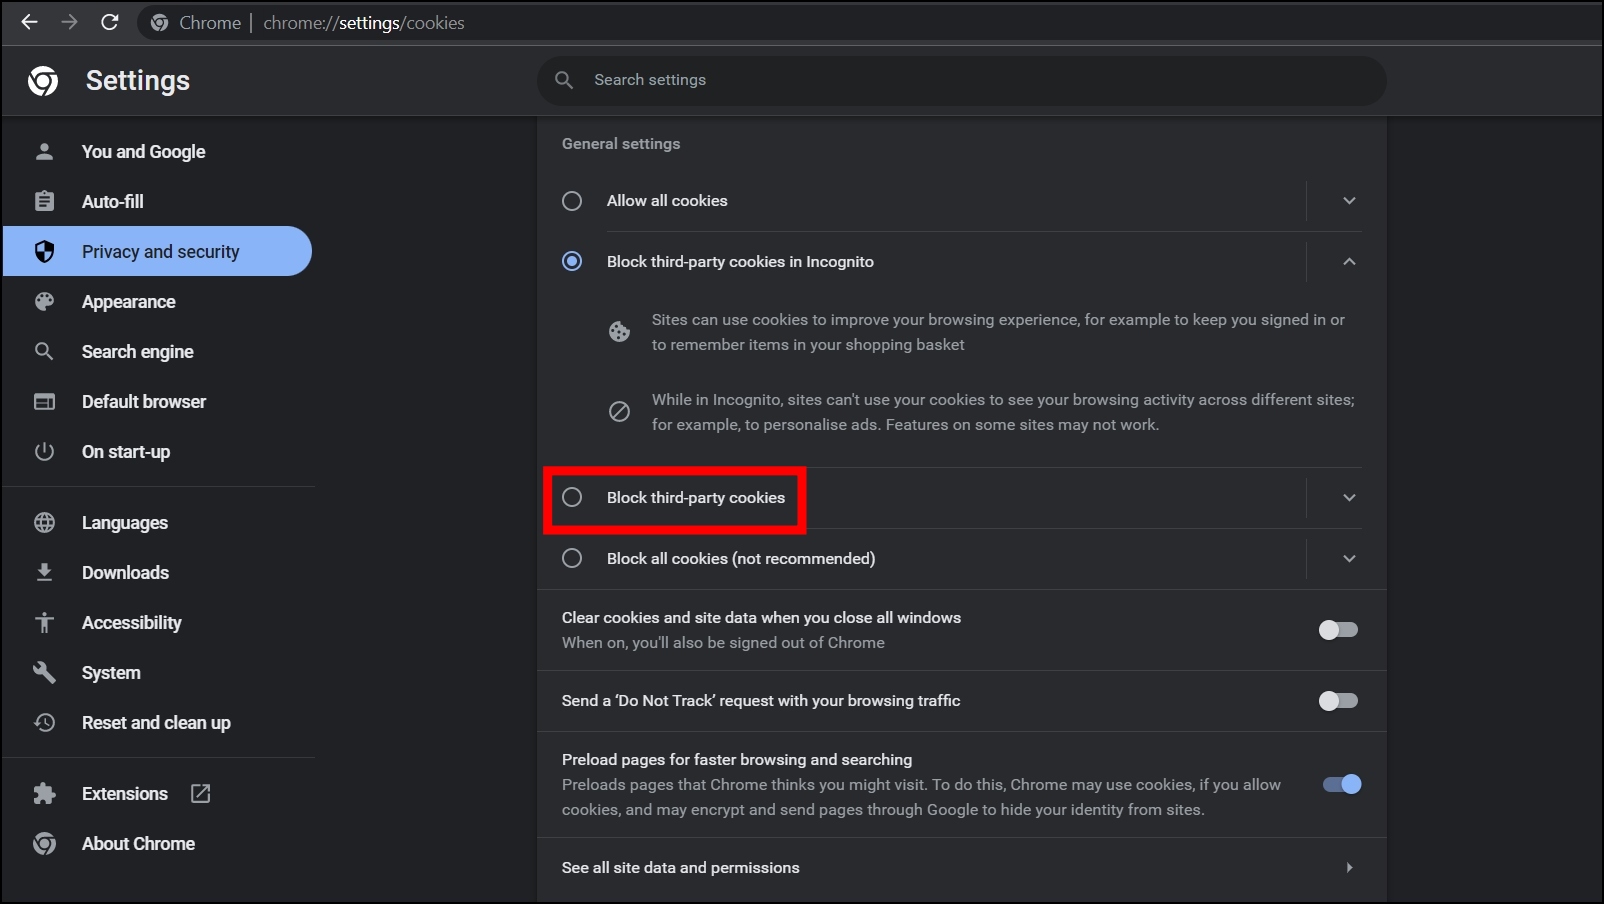
Alternatively, type chrome://settings/cookies in the address, then hit enter to visit the same page.
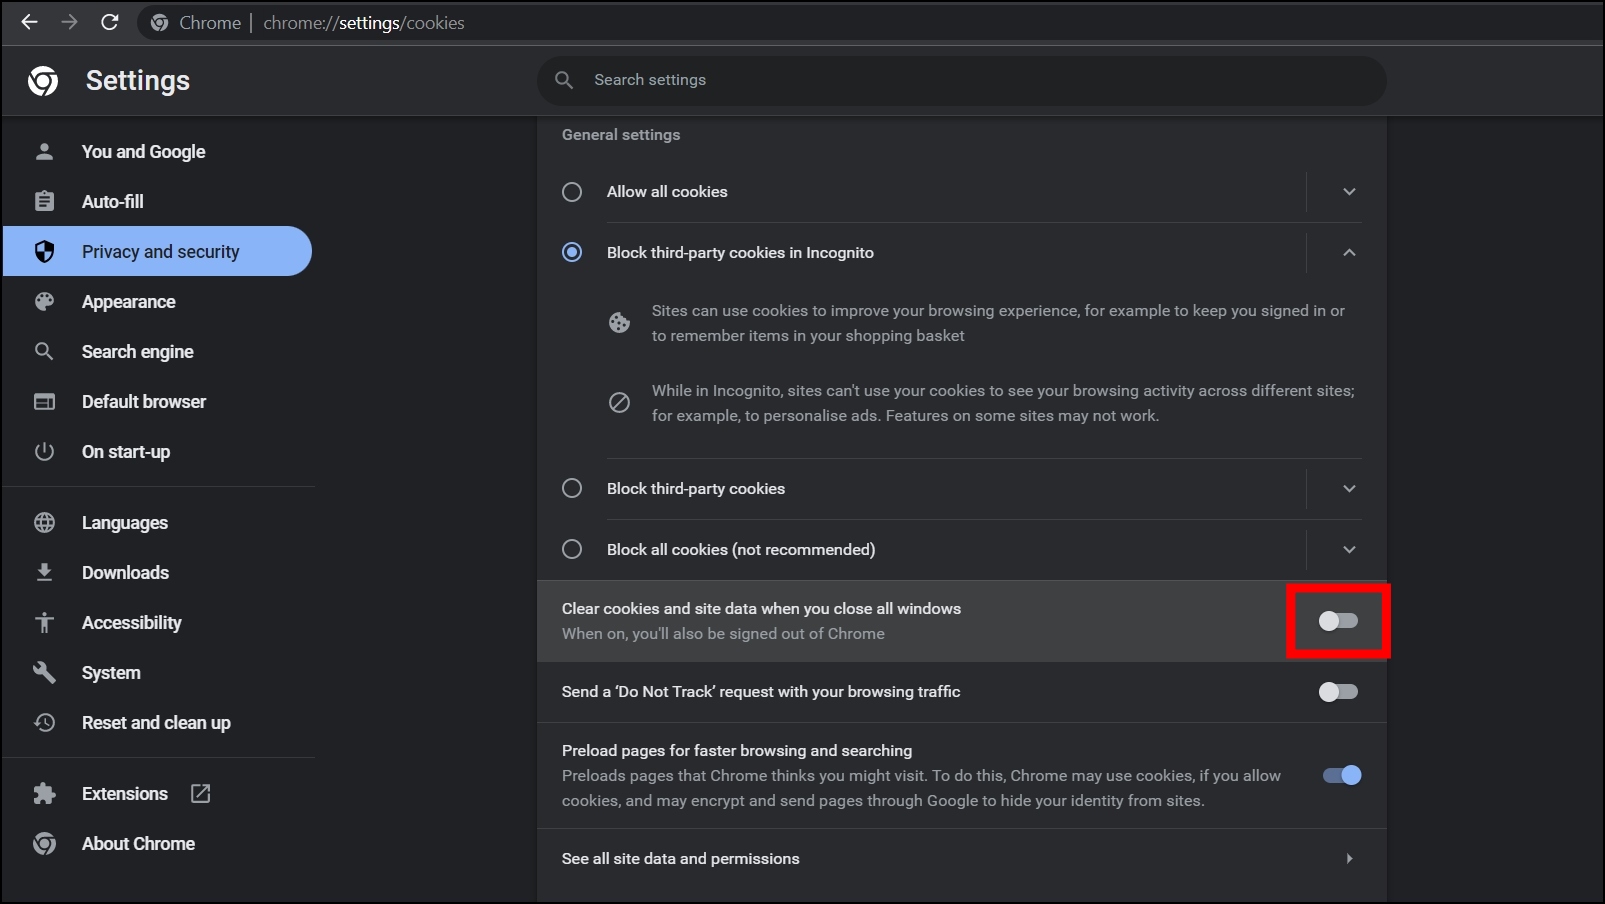
Step 3: Select the checkbox for the Block third-party cookies under the General Settings.
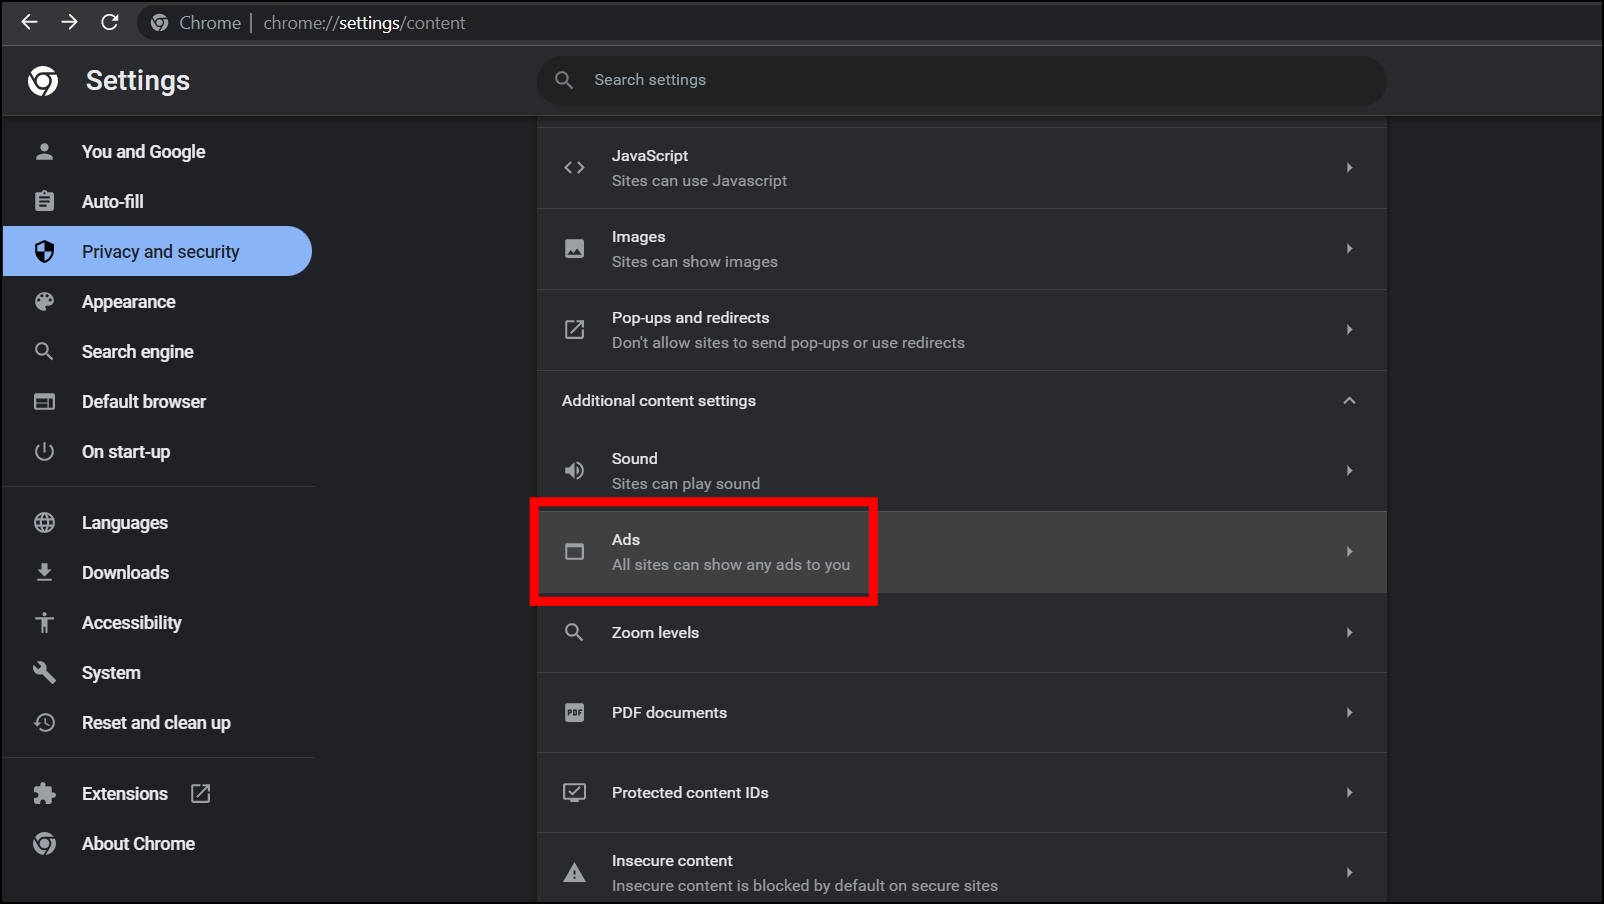
4. Block Ads on Sites that Show Intrusive or Misleading Ads
Generally, sites show ads to provide content or services, but some websites are known to show intrusive or misleading ads. Thankfully, Chrome allows users to block them, and below are the steps to do so.
Step 1: Open the Google Chrome browser then tap on the three-dots icon and select Settings.
Step 2: Click on Privacy and security, then select Site Settings.
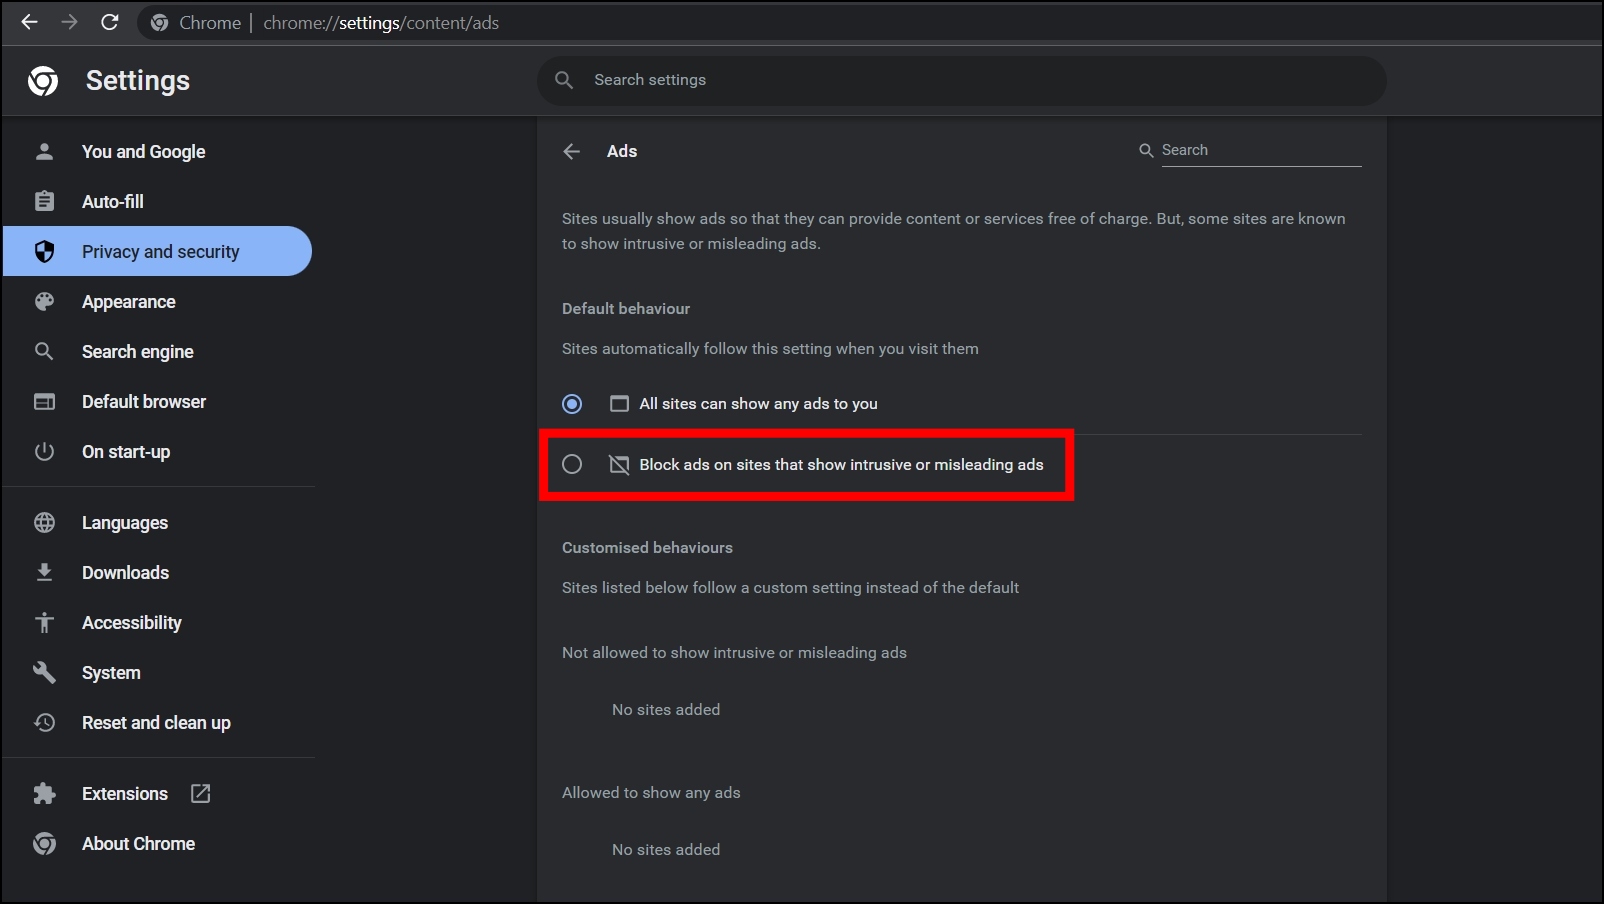
Step 3: Scroll down and tap on Ads under the Additional Content settings.
Step 4: Finally, select the checkbox for Block ads on sites that show intrusive or misleading ads.
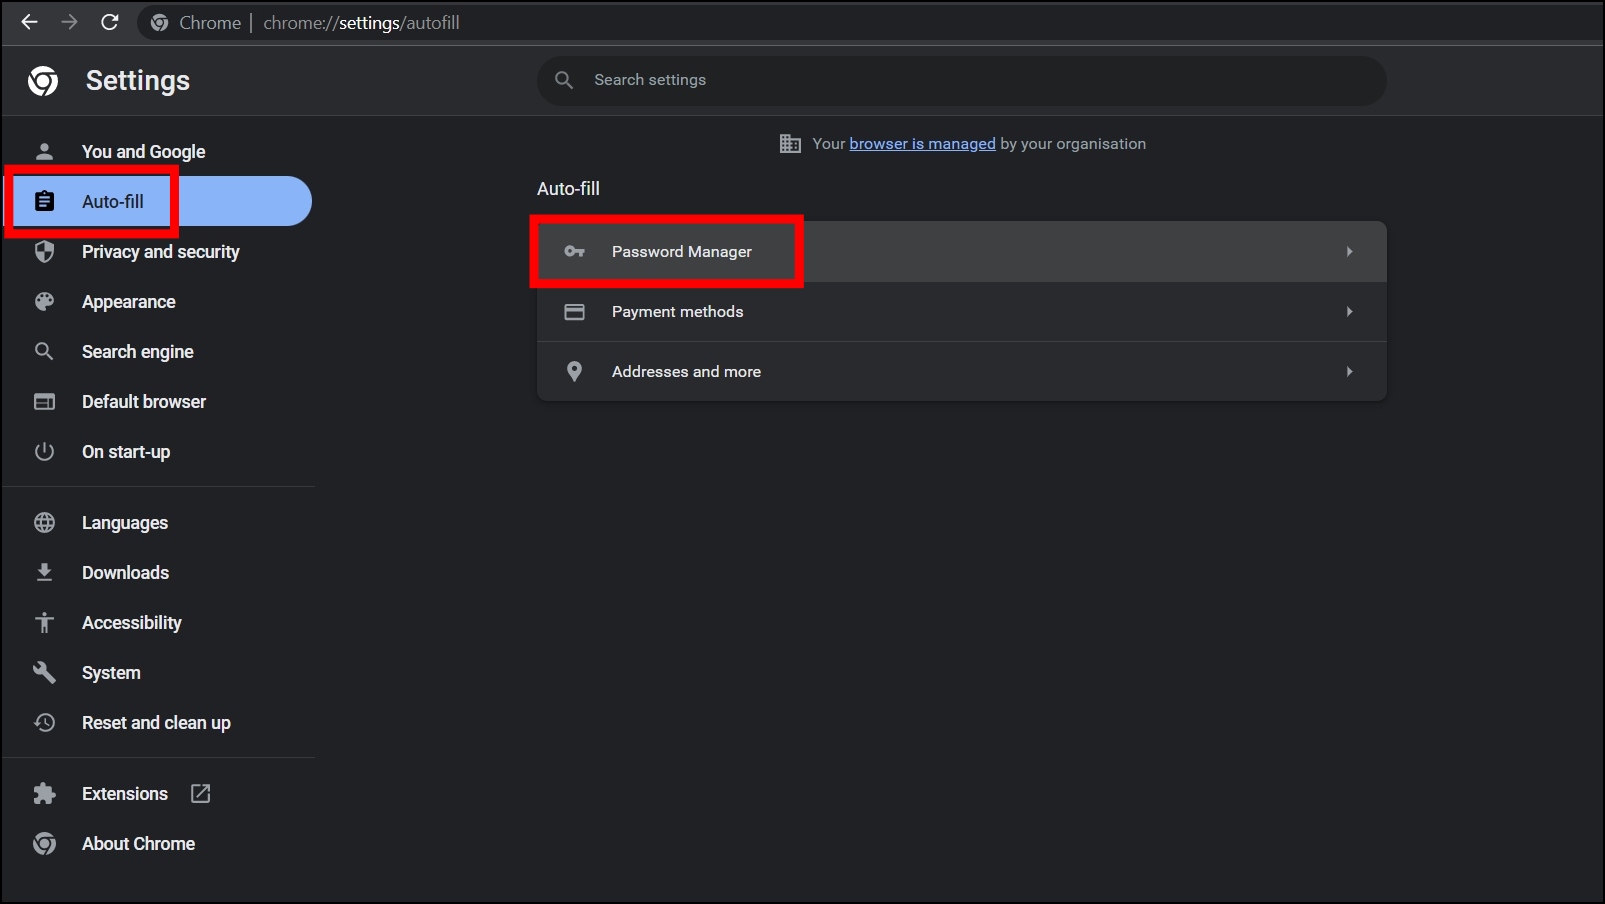
5. Disable the Offer to Save Passwords
Once enabled, you might see the prompt to save passwords on websites. However, you can disable the feature; below are the steps.
Step 1: Open Chrome, tap the three-dots icon, and choose Settings.
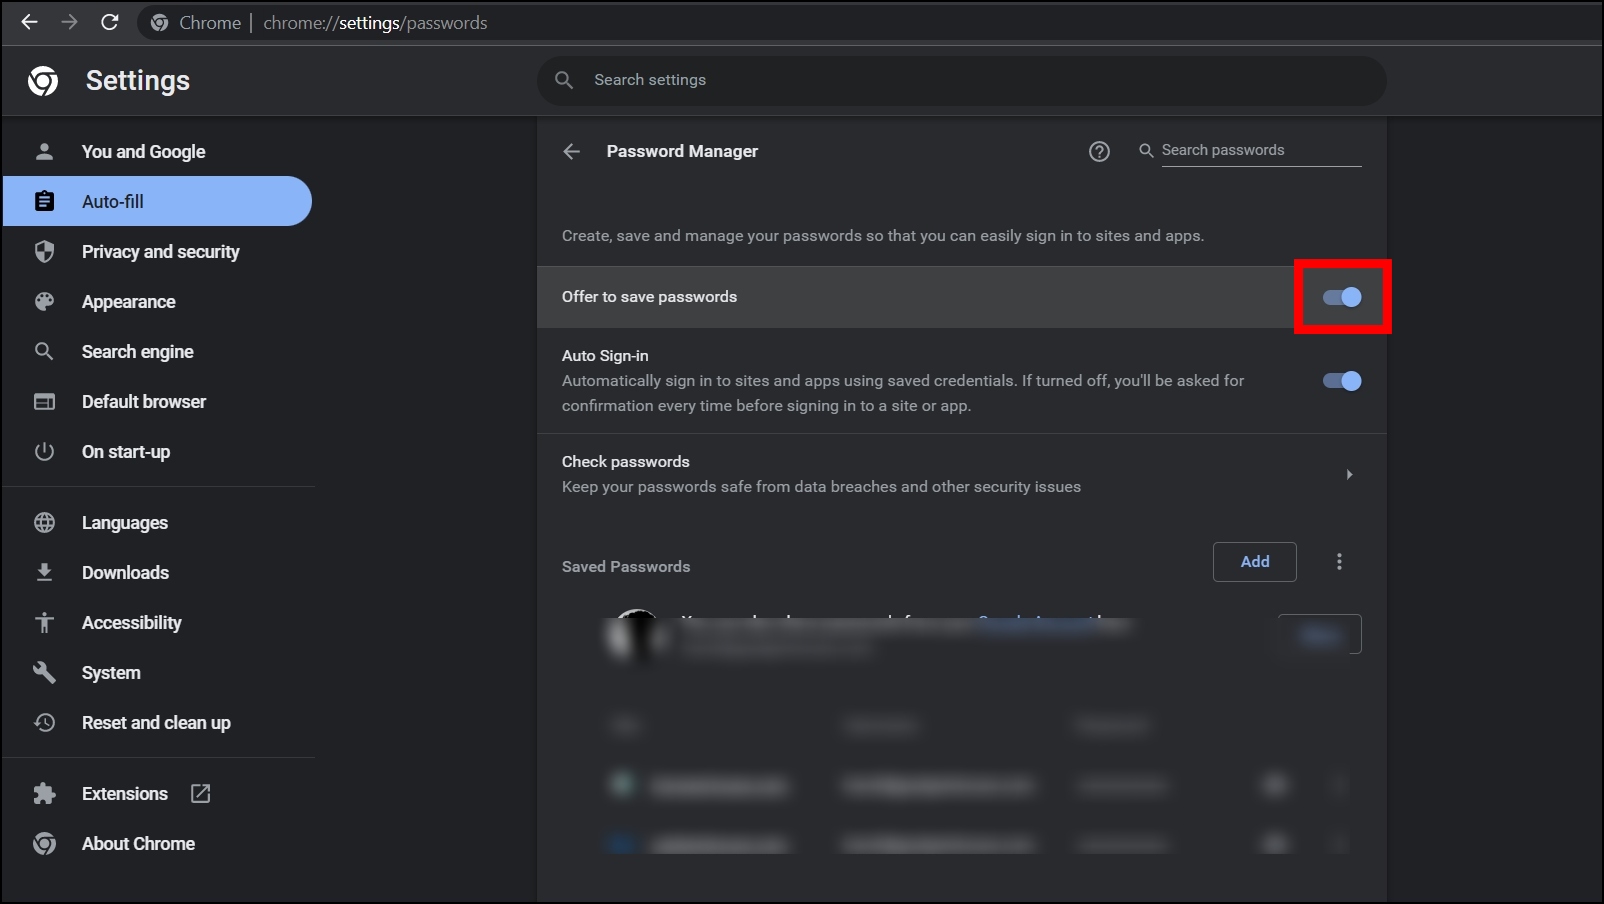
Step 2: Tap on Auto-fill from the sidebar and select Password Manager.
Step 3: Turn off the toggle next to Offer to Save Passwords.
6. Clear Cookies and Site Data When You Close All Windows
Chrome lets its users clear cookies and site data when they close all the windows, and once you enable it, you will also be signed out of Chrome. Follow the below steps to enable it.
Step 1: Open the Google Chrome browser and tap on the three-dots icon b then select Settings.
Step 2: Select Privacy and security from the sidebar and tap on Cookies and other site data.
Step 3: Finally, turn on the toggle next to Clear cookies and site data when you close all windows.
7. Don’t Allow Closed Sites to Finish Sending or Receiving Data
Once you leave a website, it can keep syncing to finish tasks like uploading photos or sending a chat message. However, Chrome allows you to turn off background sync, and below are the steps to disable the feature.
Step 1: Open the Google Chrome’s Settings.
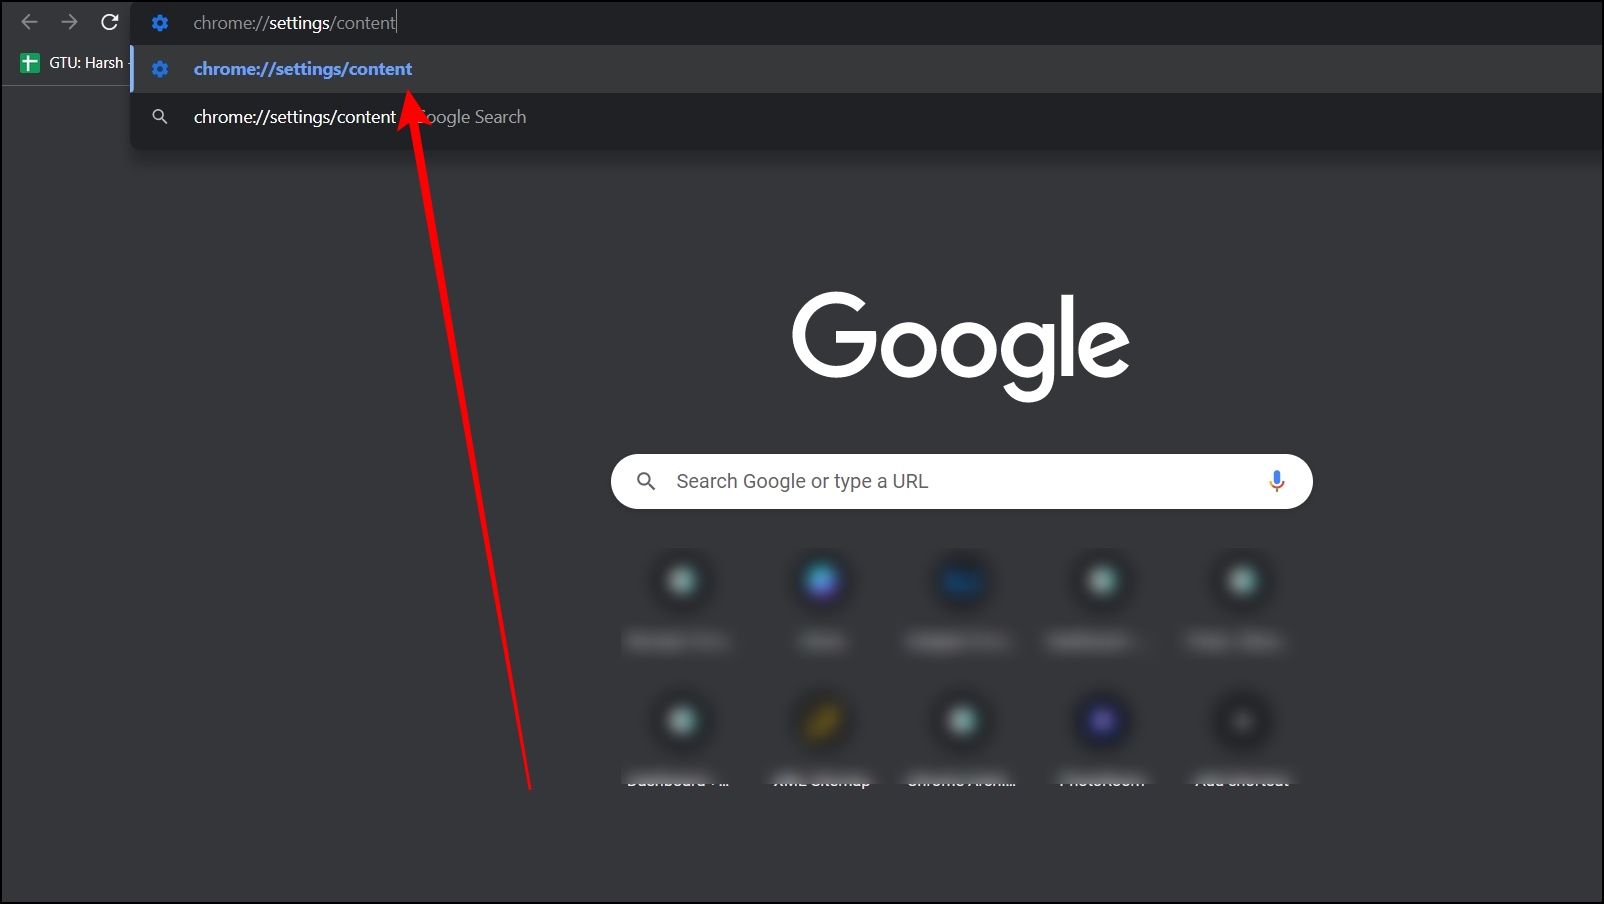
Step 2: Tap on Privacy and security and select Site settings. Alternatively, type chrome://settings/content in the address then hit enter to visit the same page.
Step 3: Scroll down and tap on Background Sync under Permissions.
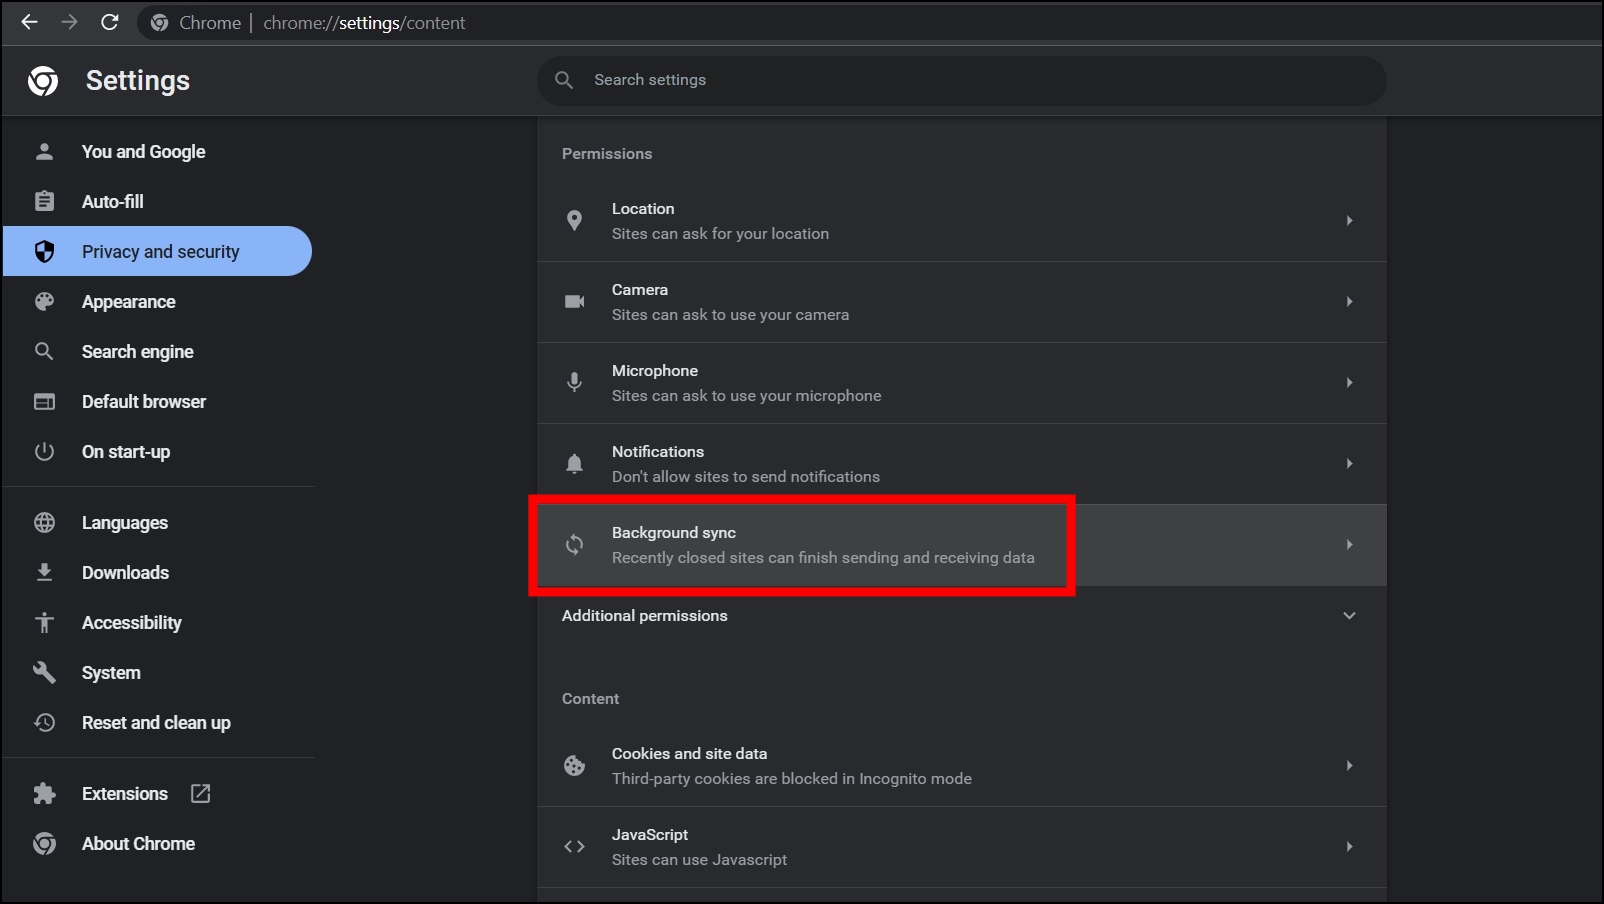
Step 4: Select the checkbox for Don’t allow closed sites to finish sending or receiving data.

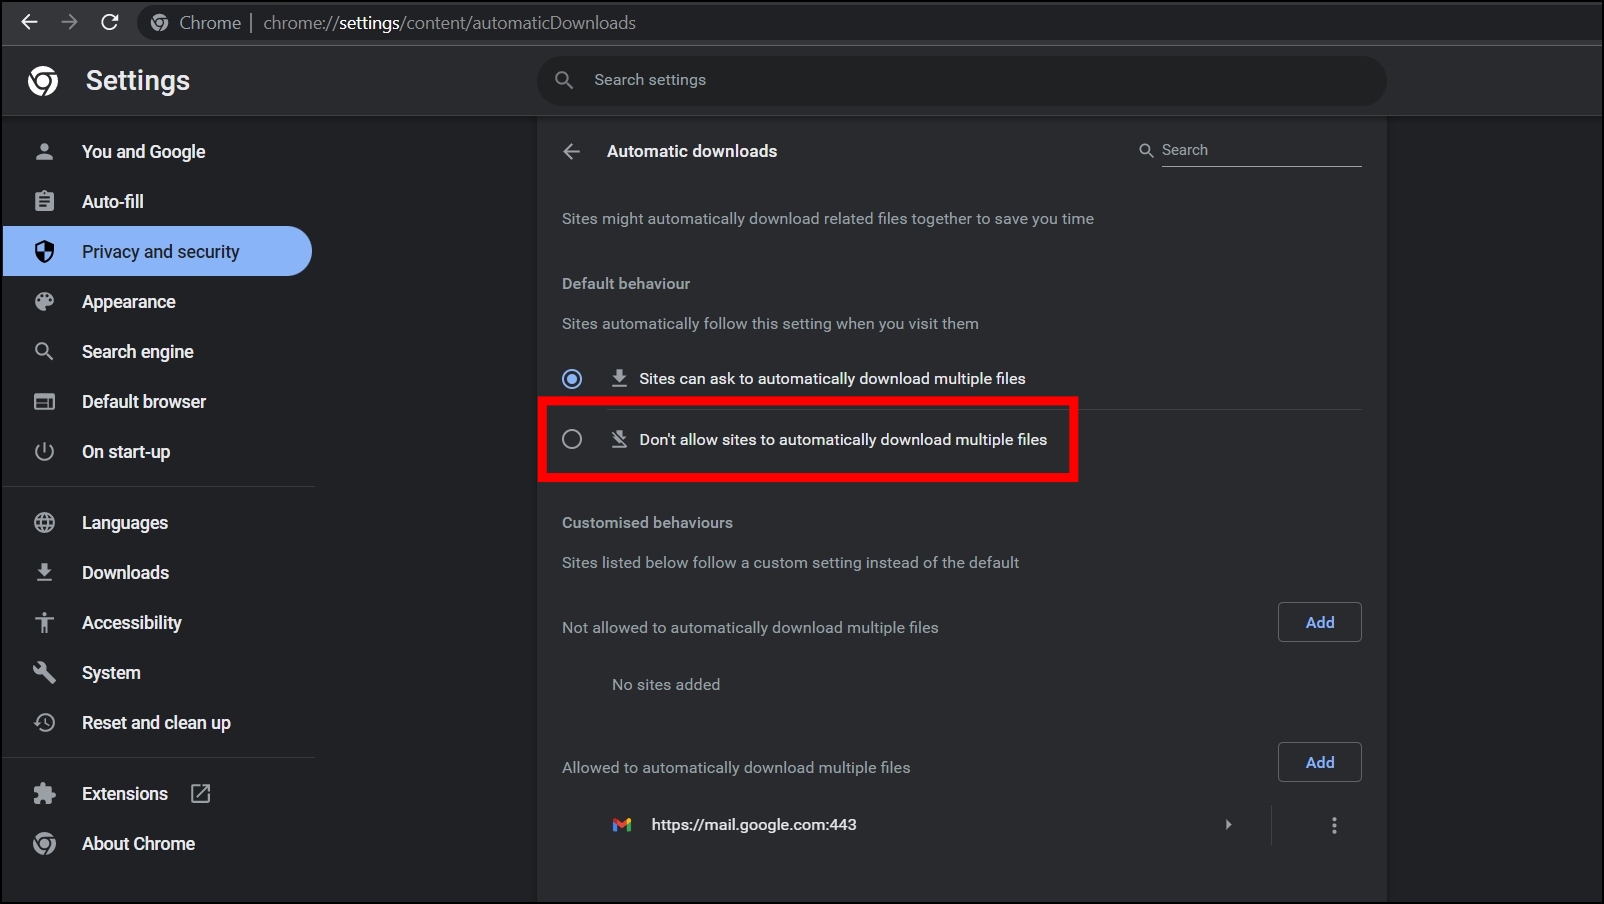
8. Don’t Allow Sites to Download Multiple Files Automatically
You can also disable the automatic download of multiple files as there are instances when sites automatically download related files together to save you time, but they might carry some threat or virus. Follow the below steps to disable it.
Step 1: Head over to Chrome’s Settings page.
Step 2: Choose Privacy and security then select Site settings.
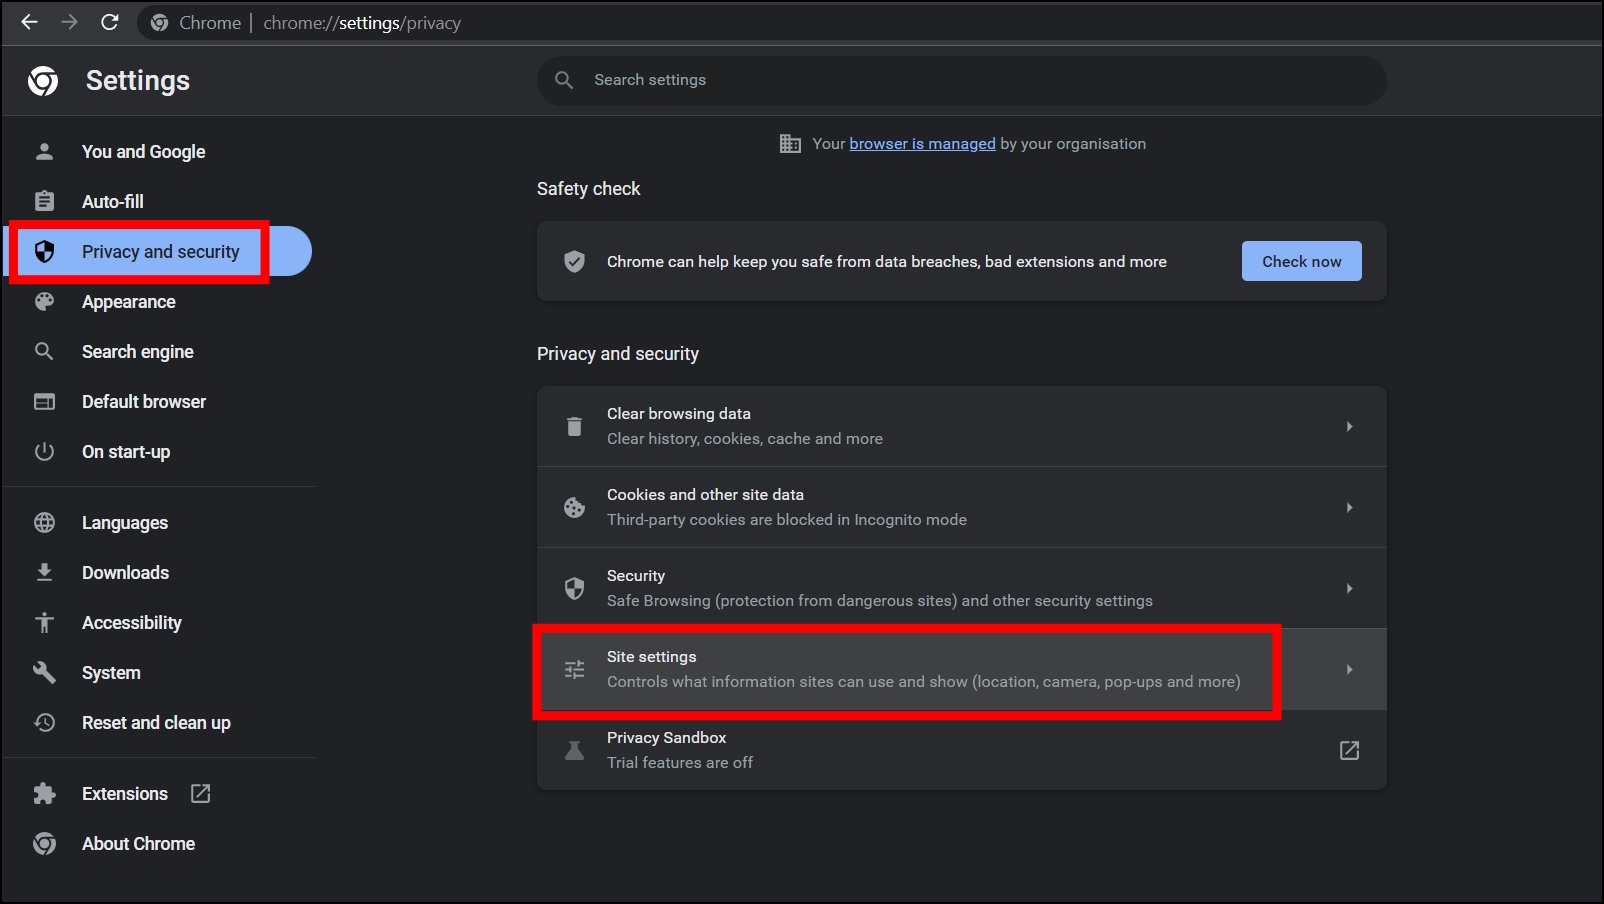
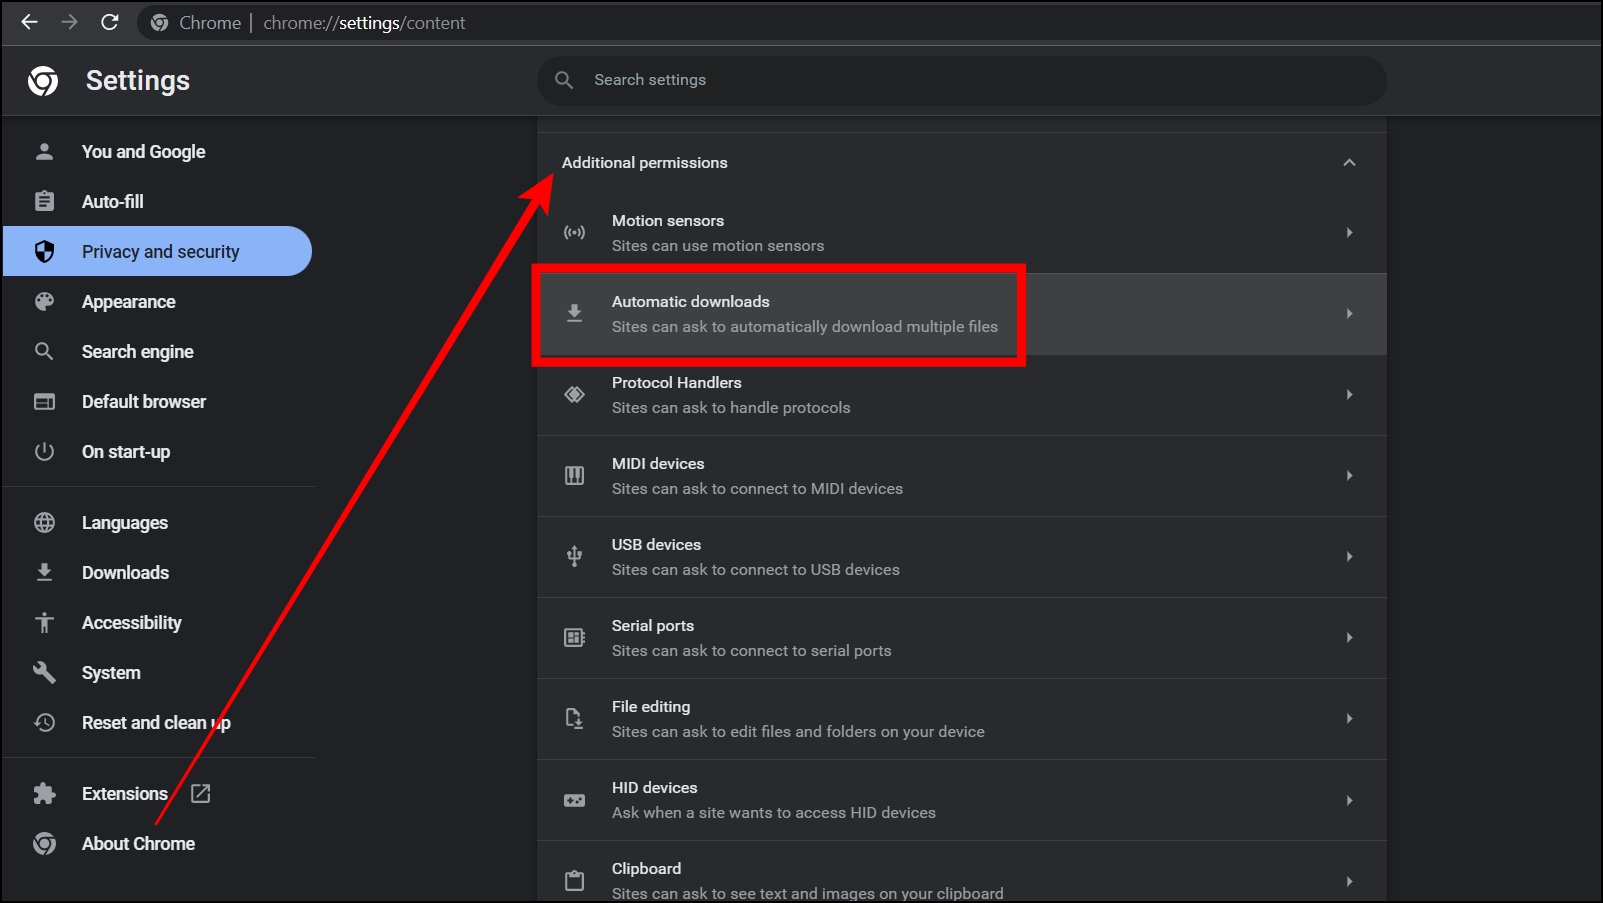
Step 3: Scroll down and tap on Automatic downloads under Additional permissions.
Step 4: Select the checkbox for Don’t allow sites to automatically download multiple files under Default behavior.
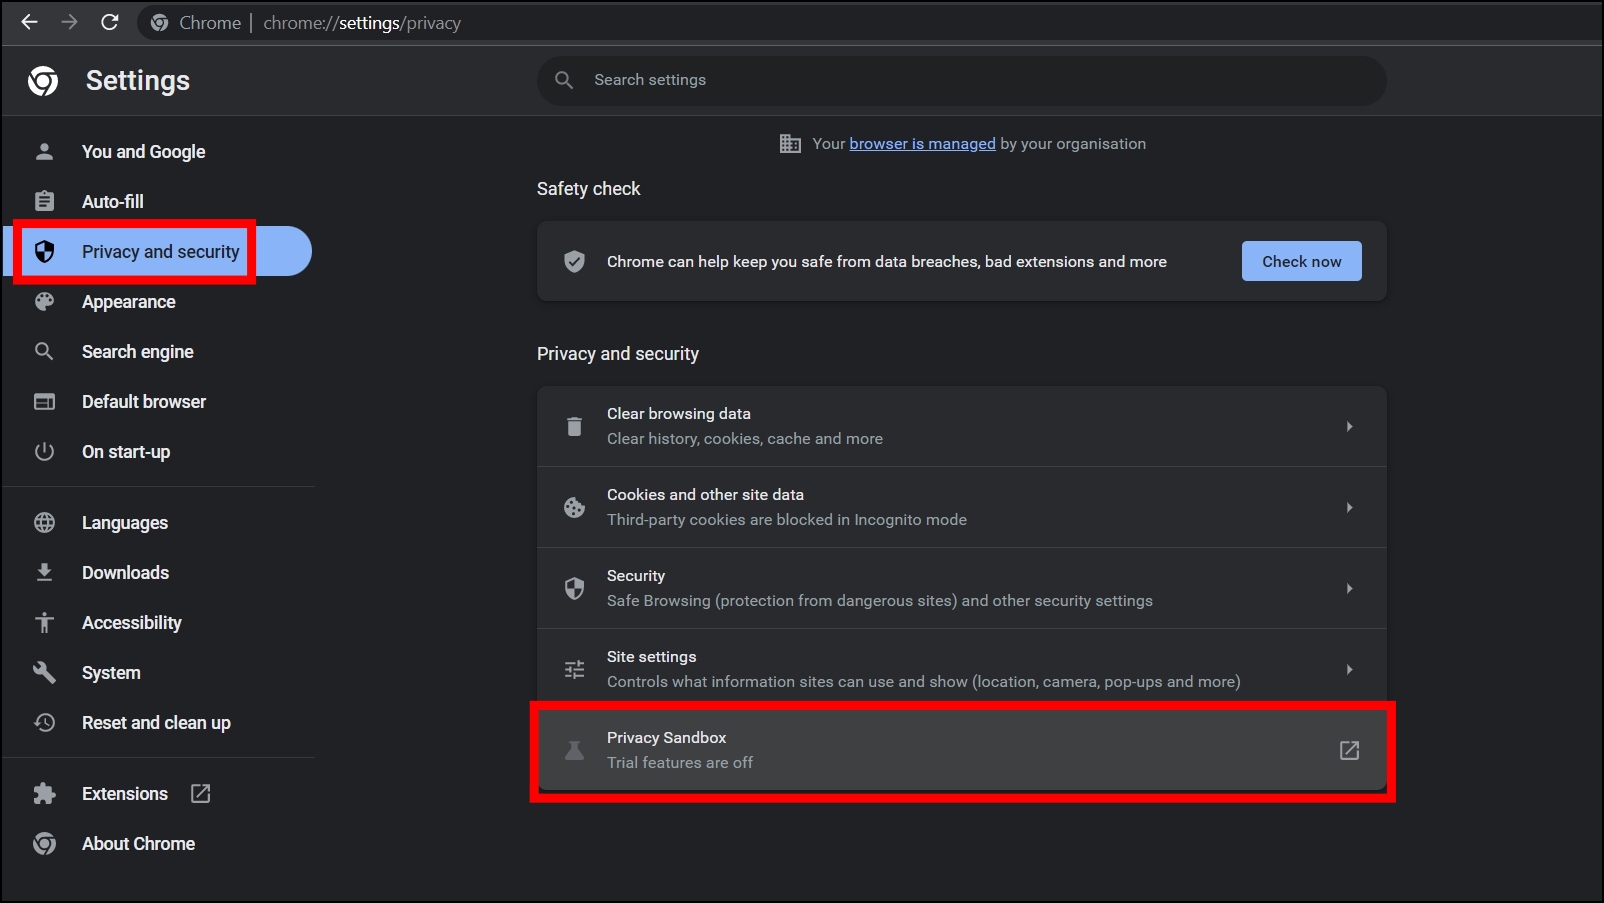
9. Enable Privacy Sandbox
Privacy Sandbox aims to create technologies that protect users’ privacy online and give companies and developers tools to build thriving digital businesses. The Privacy Sandbox reduces cross-site and cross-app tracking while helping to keep online content and services free for all.
Once enabled, sites can deliver the same browsing experience using less of your info, and we can say that it’s one of the best browser security tips to stay safe online. Follow the below steps to enable the feature.
Step 1: Open the Google Chrome browser on your system.
Step 2: Tap on Privacy and security, then choose Privacy Sandbox.
Step 3: Turn on the toggle next to Trials.

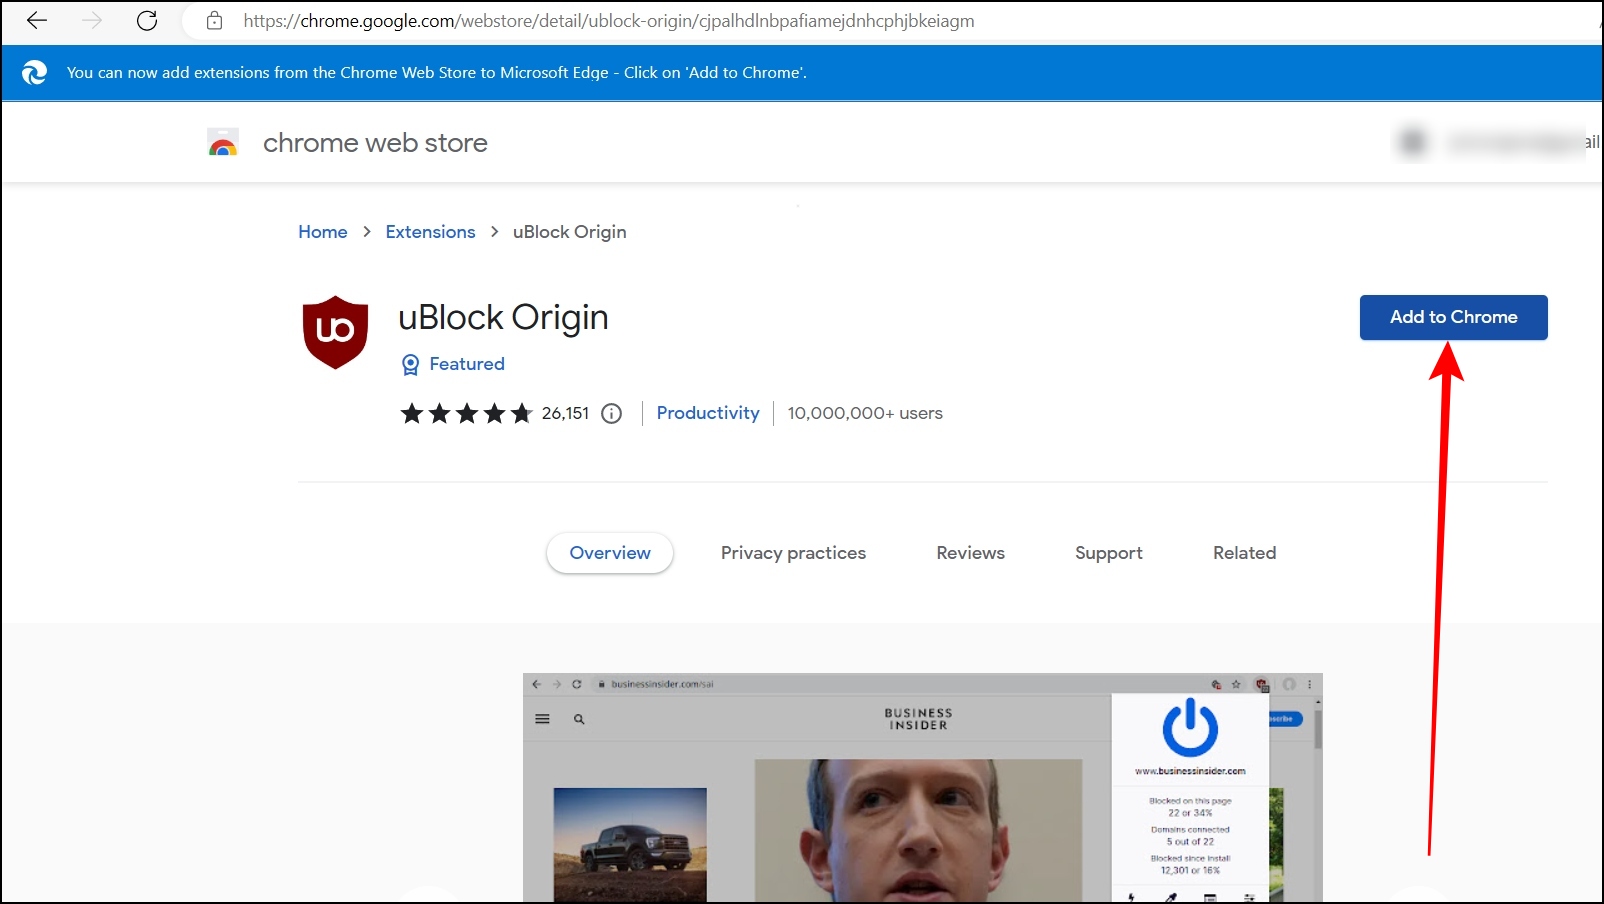
10. Install a Tracker Blocker
You can also install and trackers blocker extension like uBlock Origin that helps you block trackers and advertisements on the website you visit, including video ads. Also, the extension helps users block pop-ups and malicious URLs. Follow the below steps to add and use the extension.
Step 1: Open the Chrome Web Store on your system.
Step 2: Search for uBlock Original and tap to open the extension page.
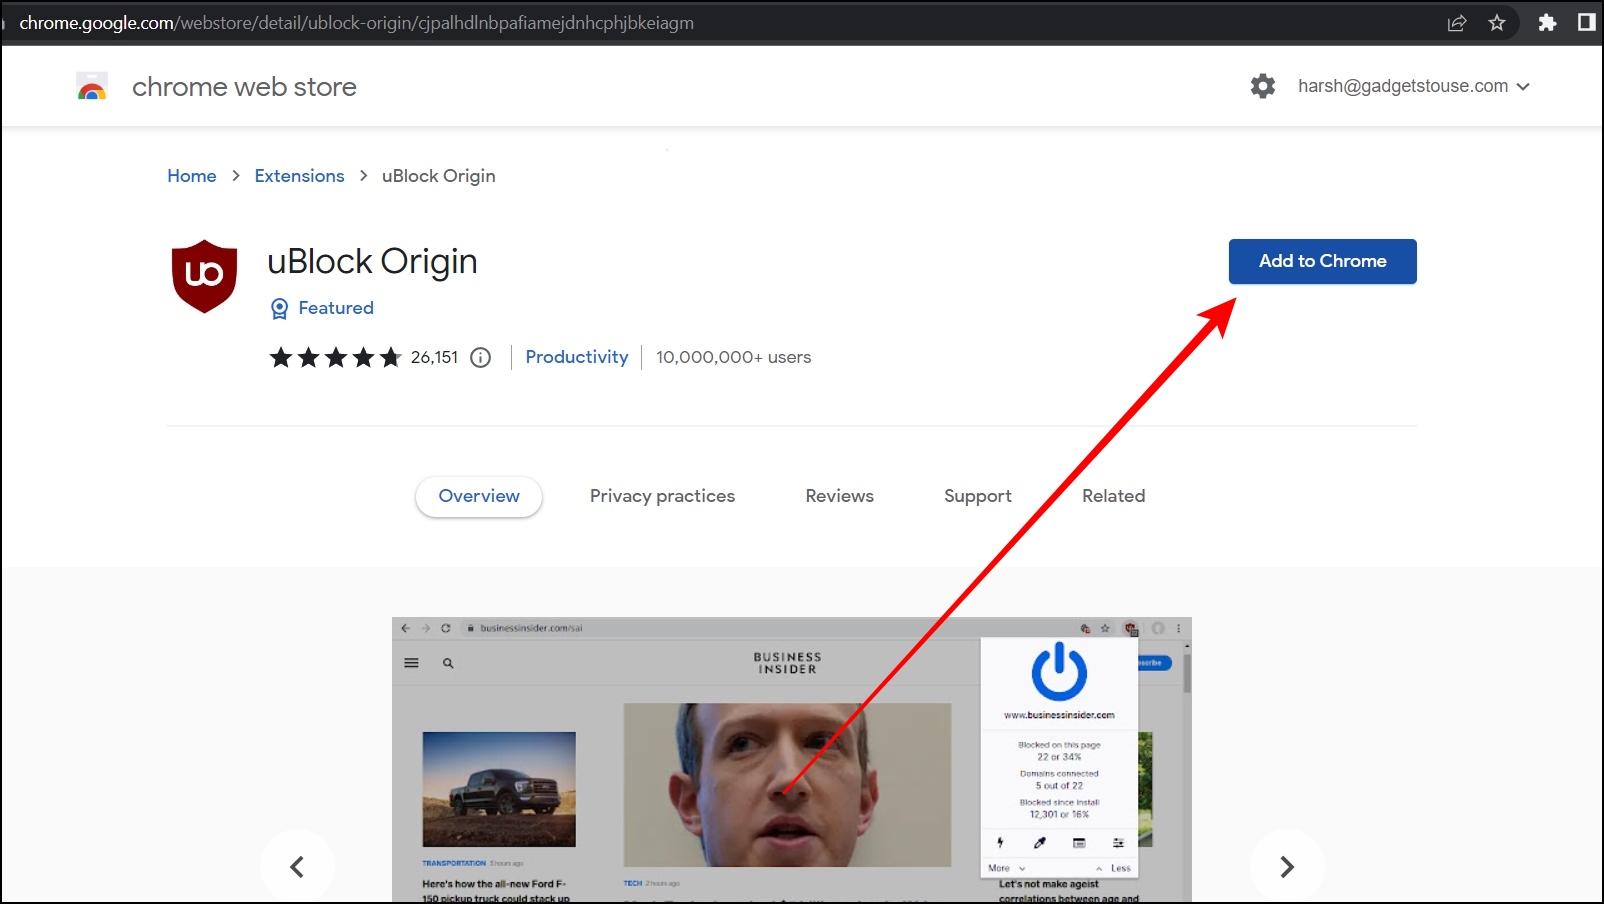
Step 3: Add the extension by clicking on Add to Chrome > Add Extension to confirm the installation.
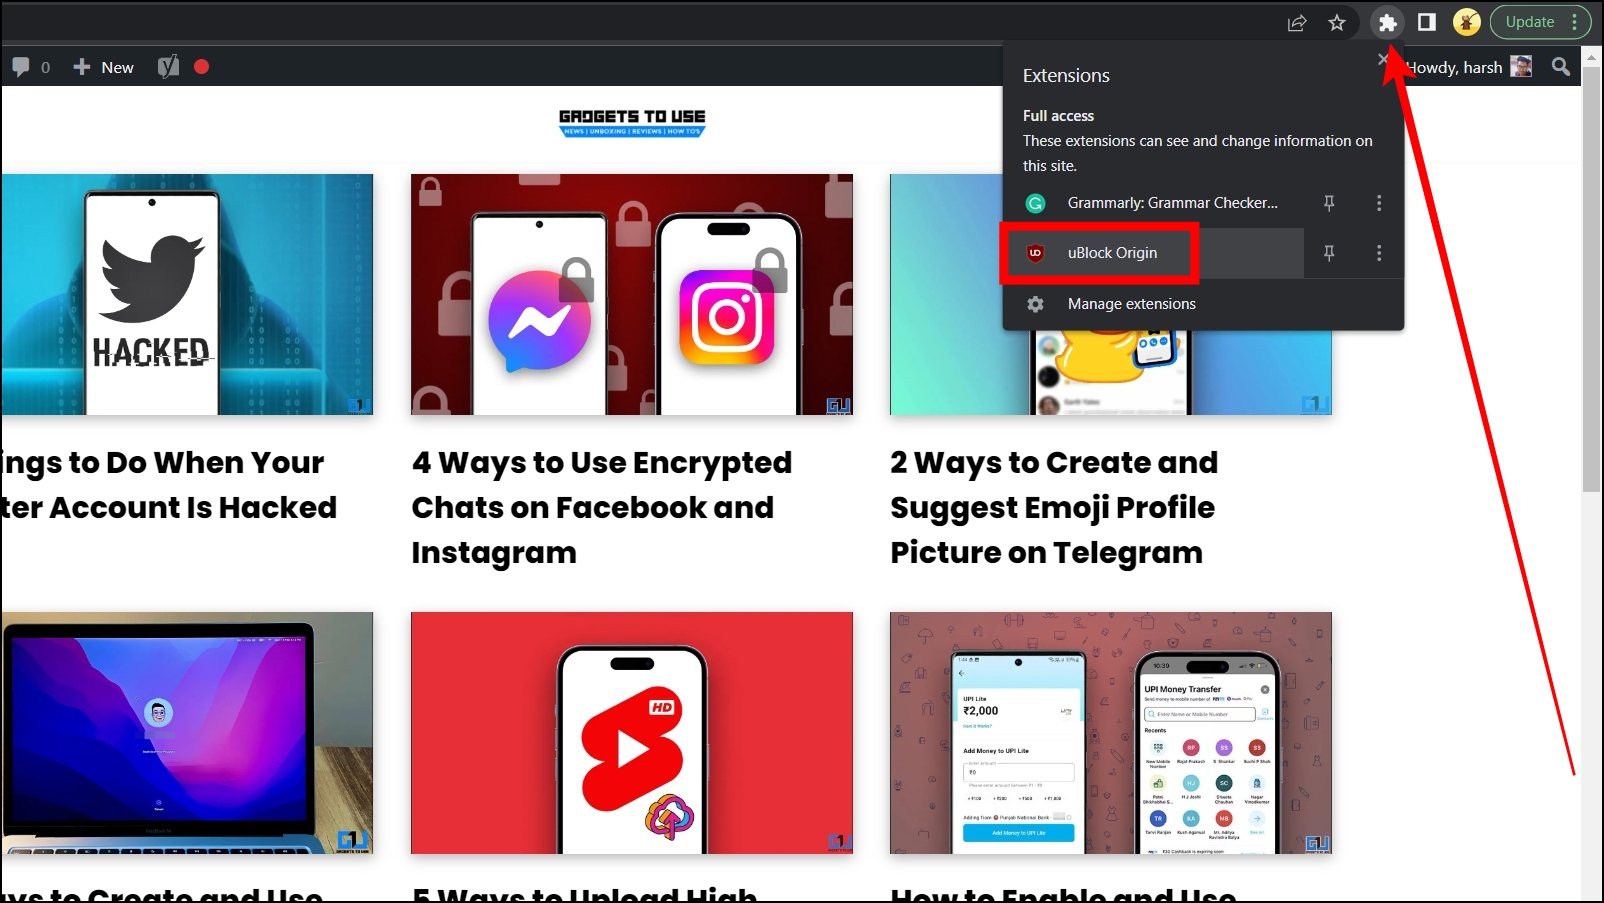
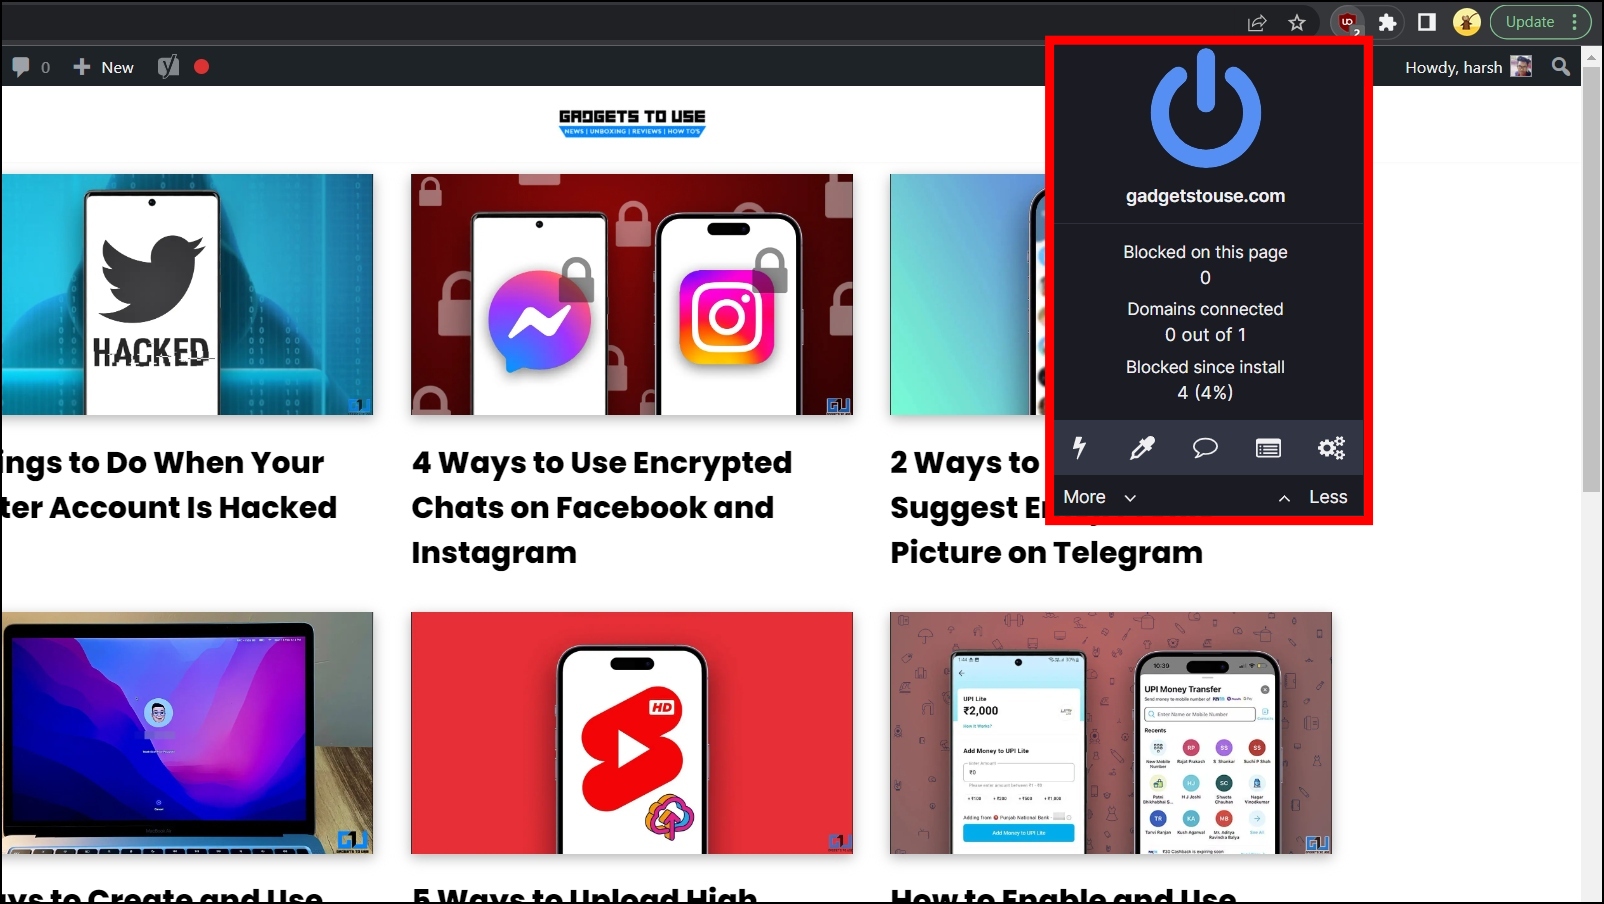
Step 4: In order to see how many trackers are blocked for a particular website, tap on the extension and it will show the details.
Privacy and Security Settings for Firefox Browser
Mozilla Firefox is another popular web browser that protects the user’s privacy. However, many security features are disabled on it by default which you can enable manually by visiting the browser’s settings, and here’s how you can make the most out of these privacy settings for a safer browsing experience.
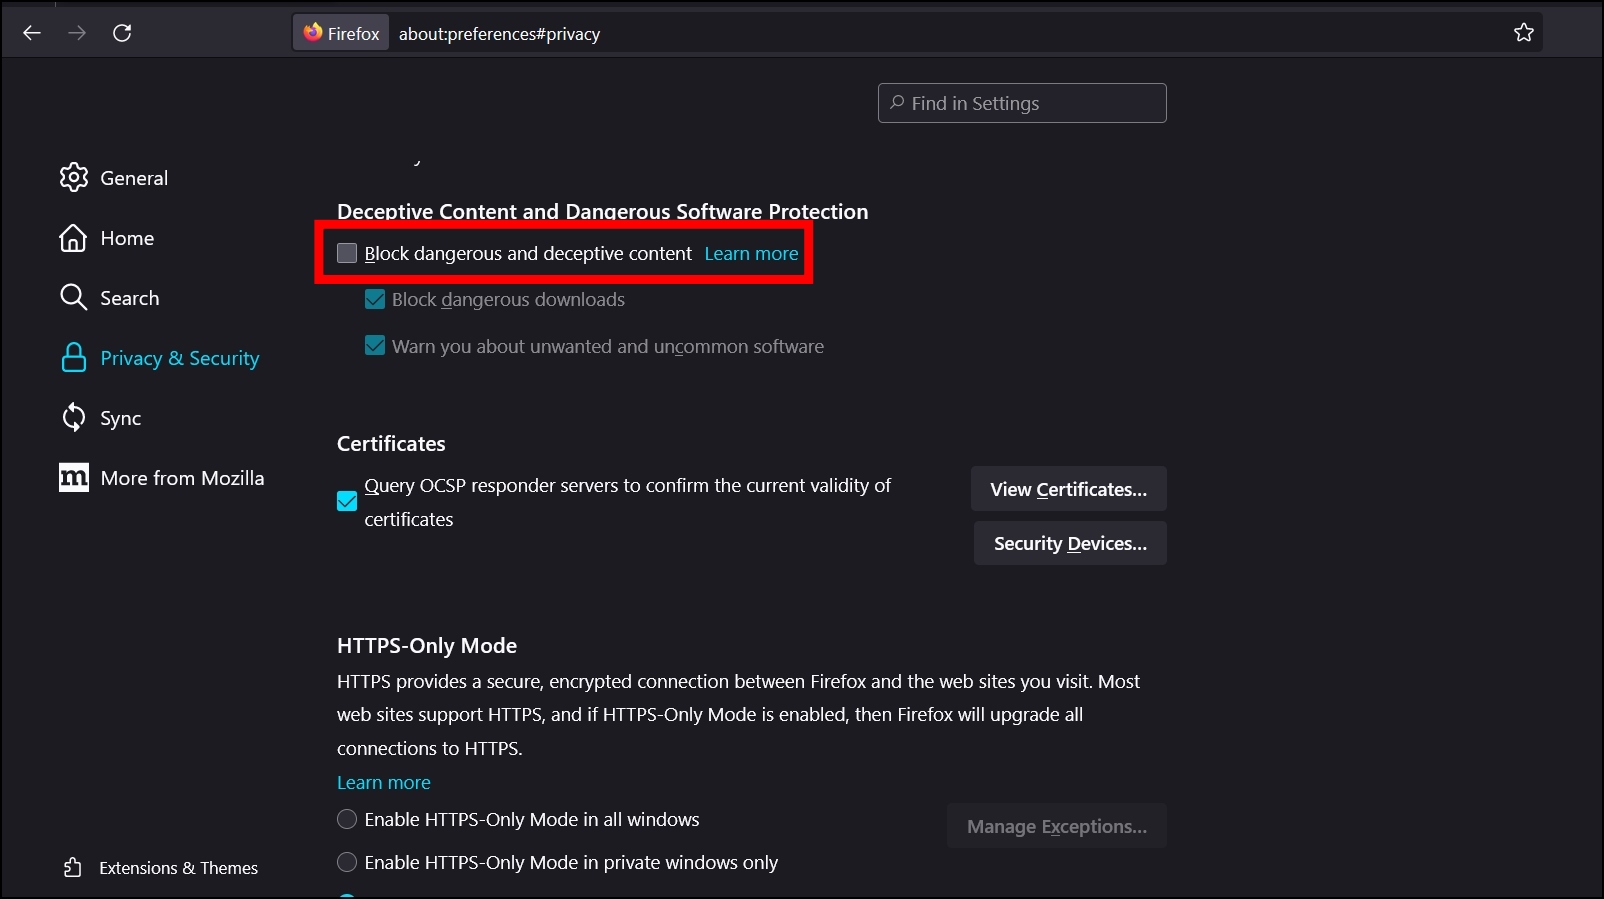
1. Block Dangerous and Deceptive Content
Firefox has a built-in malware and phishing protection feature, which once enabled, blocks dangerous and deceptive content. Follow the below steps to enable the feature.
Step 1: Open the Mozilla Firefox on your PC.
Step 2: Tap on the three-line icon and select Settings.
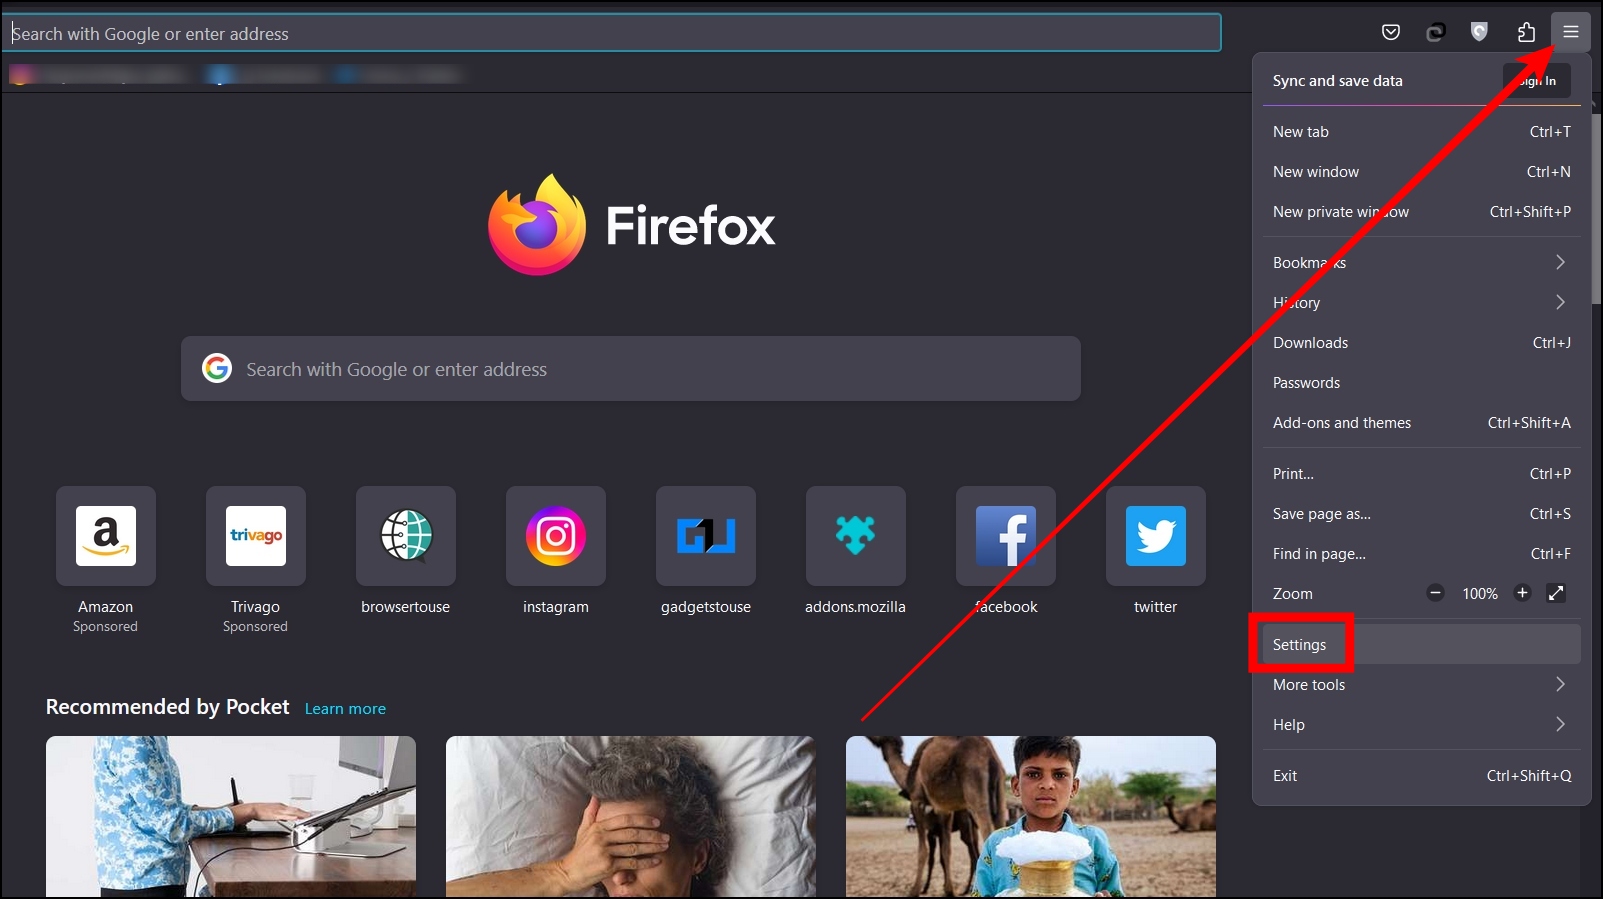
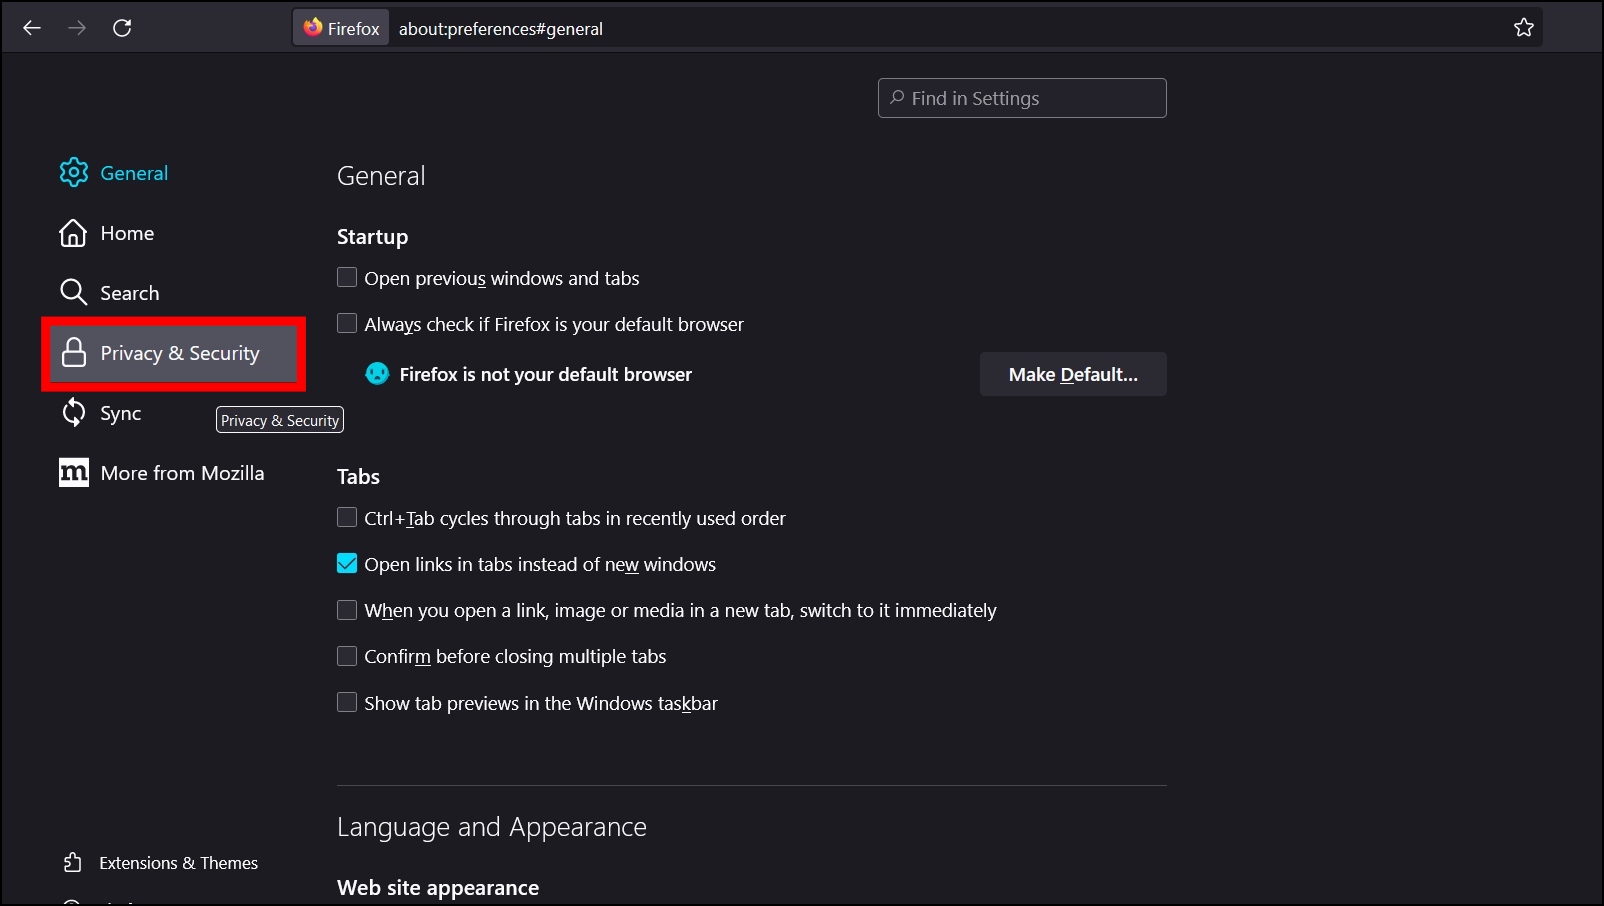
Step 3: Choose Privacy and security from the sidebar.
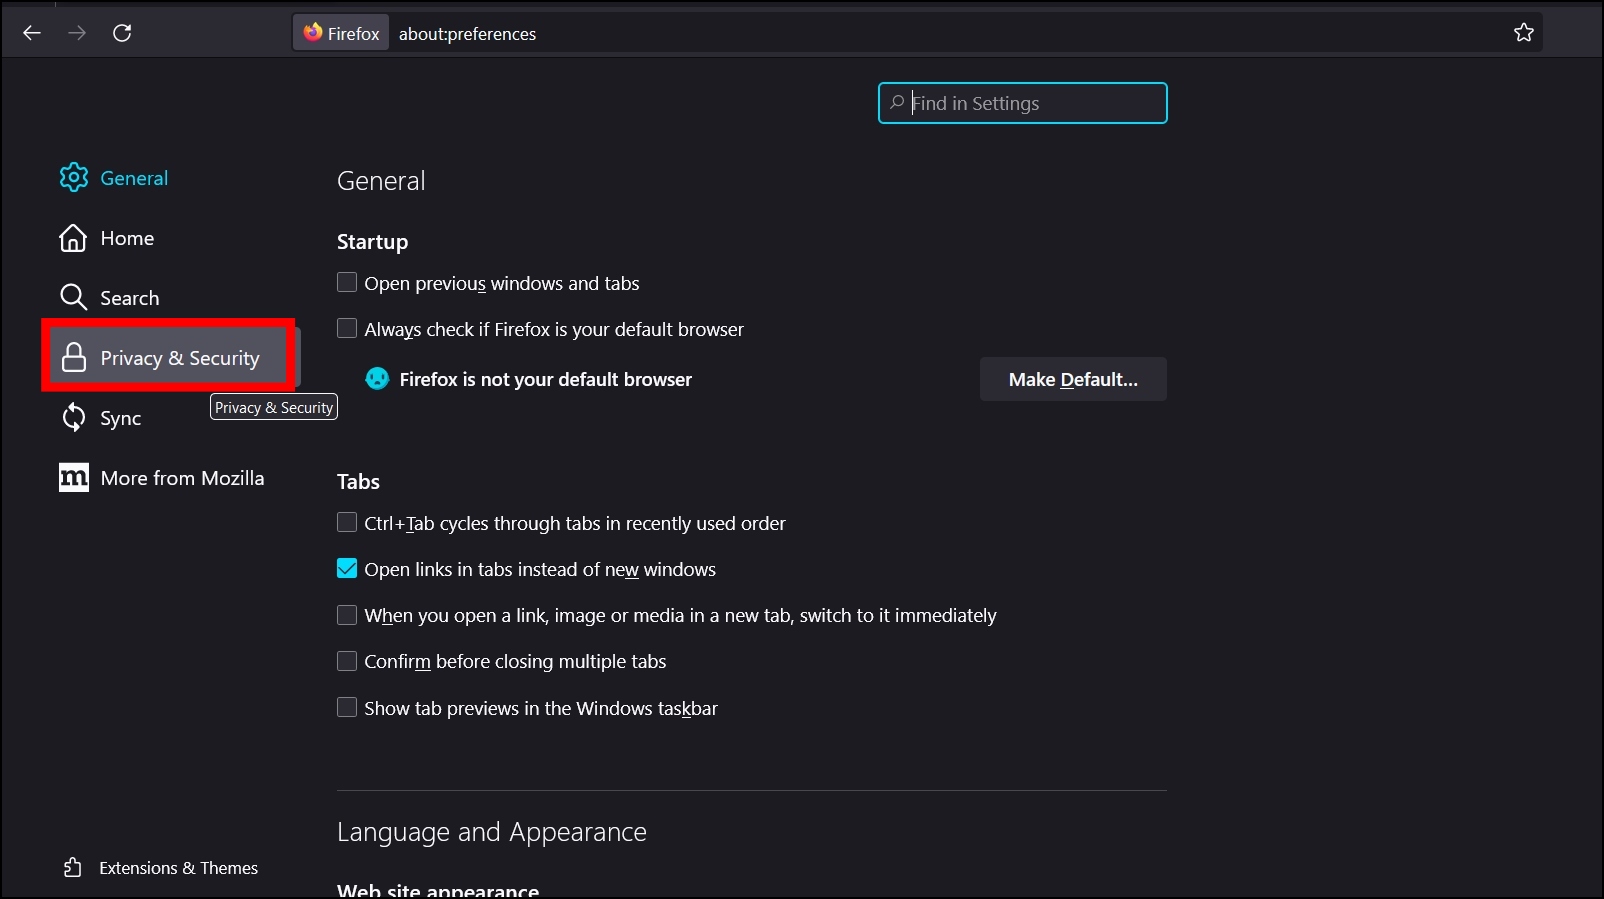
Step 4: Scroll down and select the checkbox for the Block dangerous and deceptive content under the Security section.
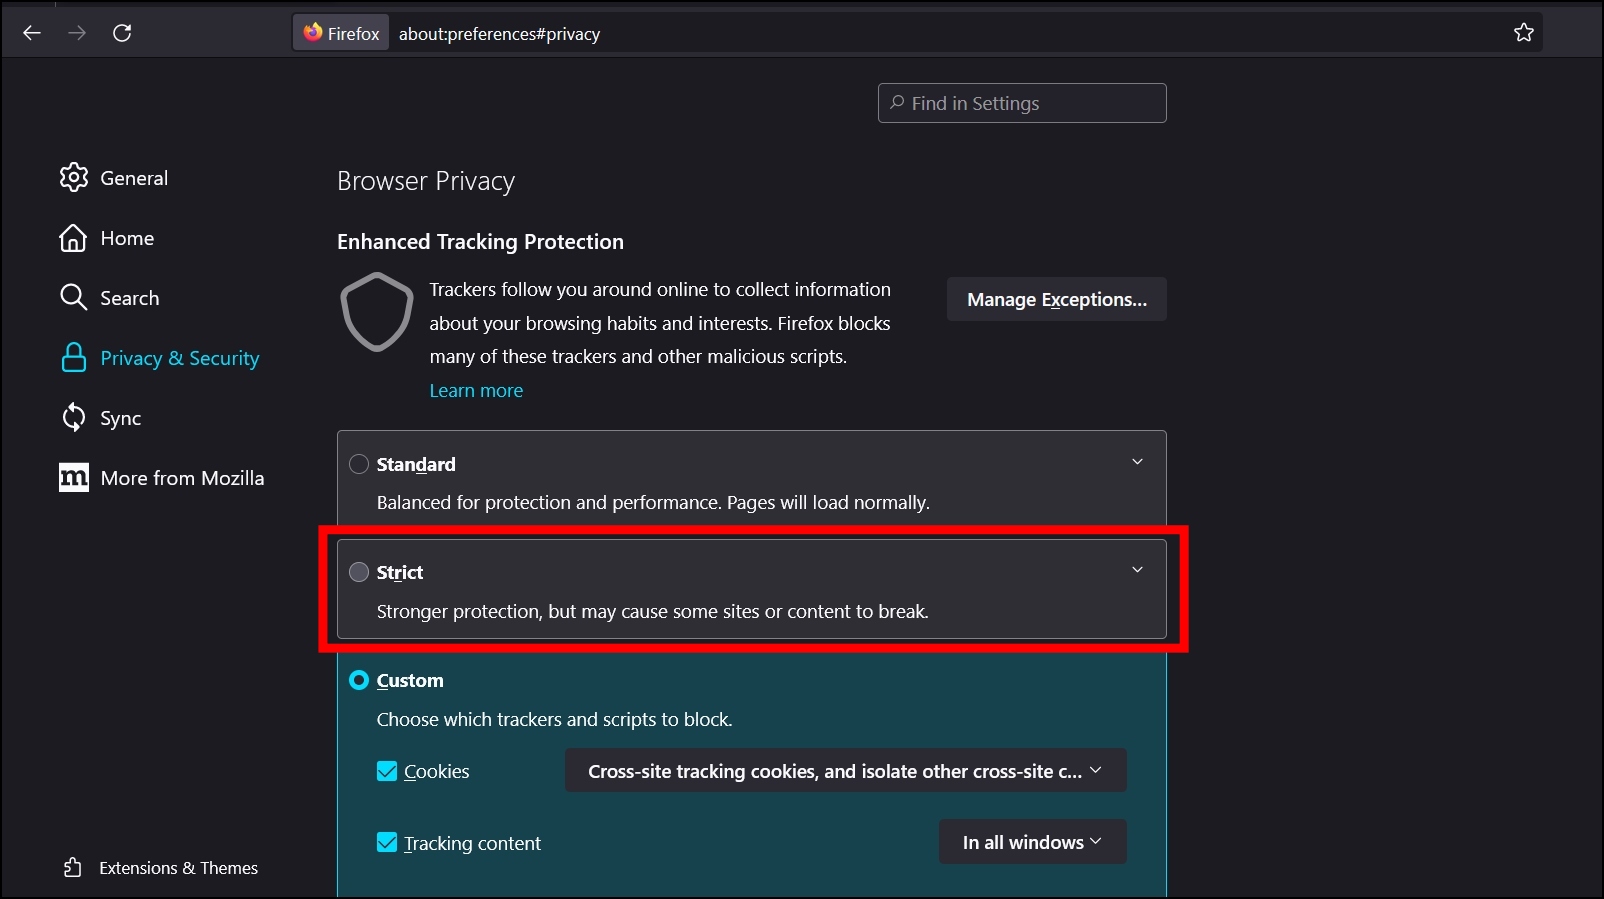
2. Enable Strict Tracking Protection
Firefox has Strict Enhanced Tracking Protection which, once enabled, blocks many trackers and malicious scripts. Follow the below steps to set tracking protection to strict.
Step 1: Open Firefox and tap on the three-line icon at the top then select Settings.
Step 2: Select Privacy and security from the sidebar.
Step 3: Finally, select the checkbox for Strict under Enhanced Tracking Protection.
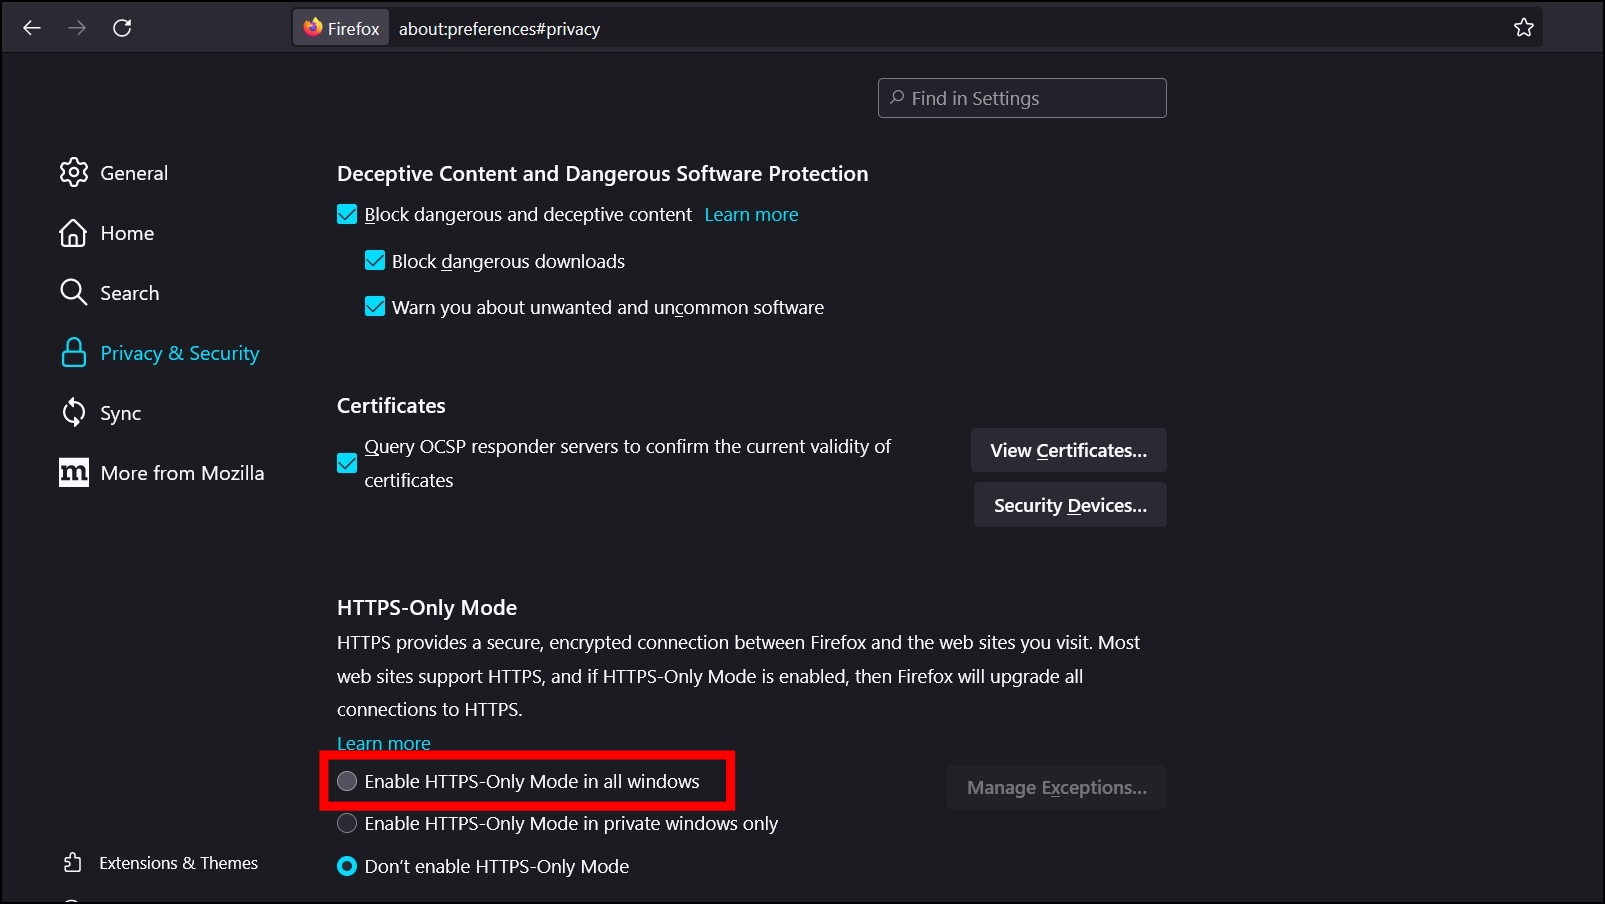
3. Enable HTTPS-only Mode
Once you enable this feature on the browser, Firefox will upgrade all connections to HTTPS. Follow the below steps to enable it.
Step 1: Open the Mozilla Firefox on your PC.
Step 2: Click on the three-line icon and select Settings.
Step 3: Choose Privacy and security from the left sidebar.
Step 4: Scroll down and select the checkbox for Enable HTTPS-Only Mode in all windows under the HTTPS-Only Mode.
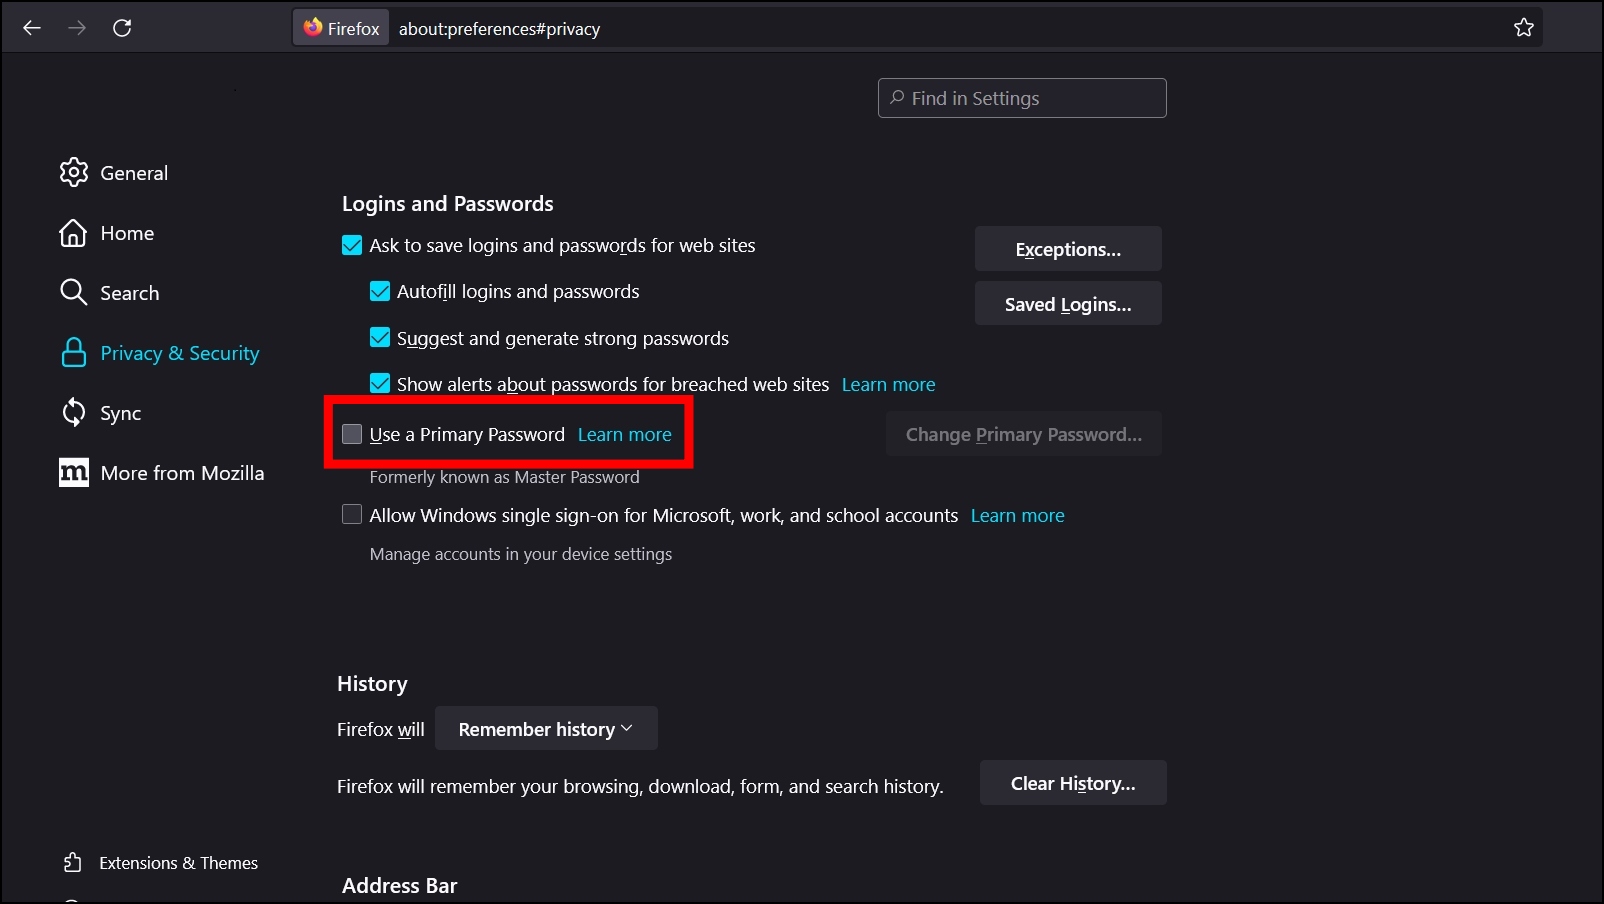
4. Use a Primary Password
Firefox allows users to set a primary password (formerly known as a Master password) that can be used to enter log-in information while being behind a robust security measure. Follow the below steps to set a primary password.
Step 1: Open Firefox and tap on the three-dots icon, then choose Settings.
Step 2: Tap on Privacy and security from the sidebar and tap on Use a Primary Password under Logins and Passwords.
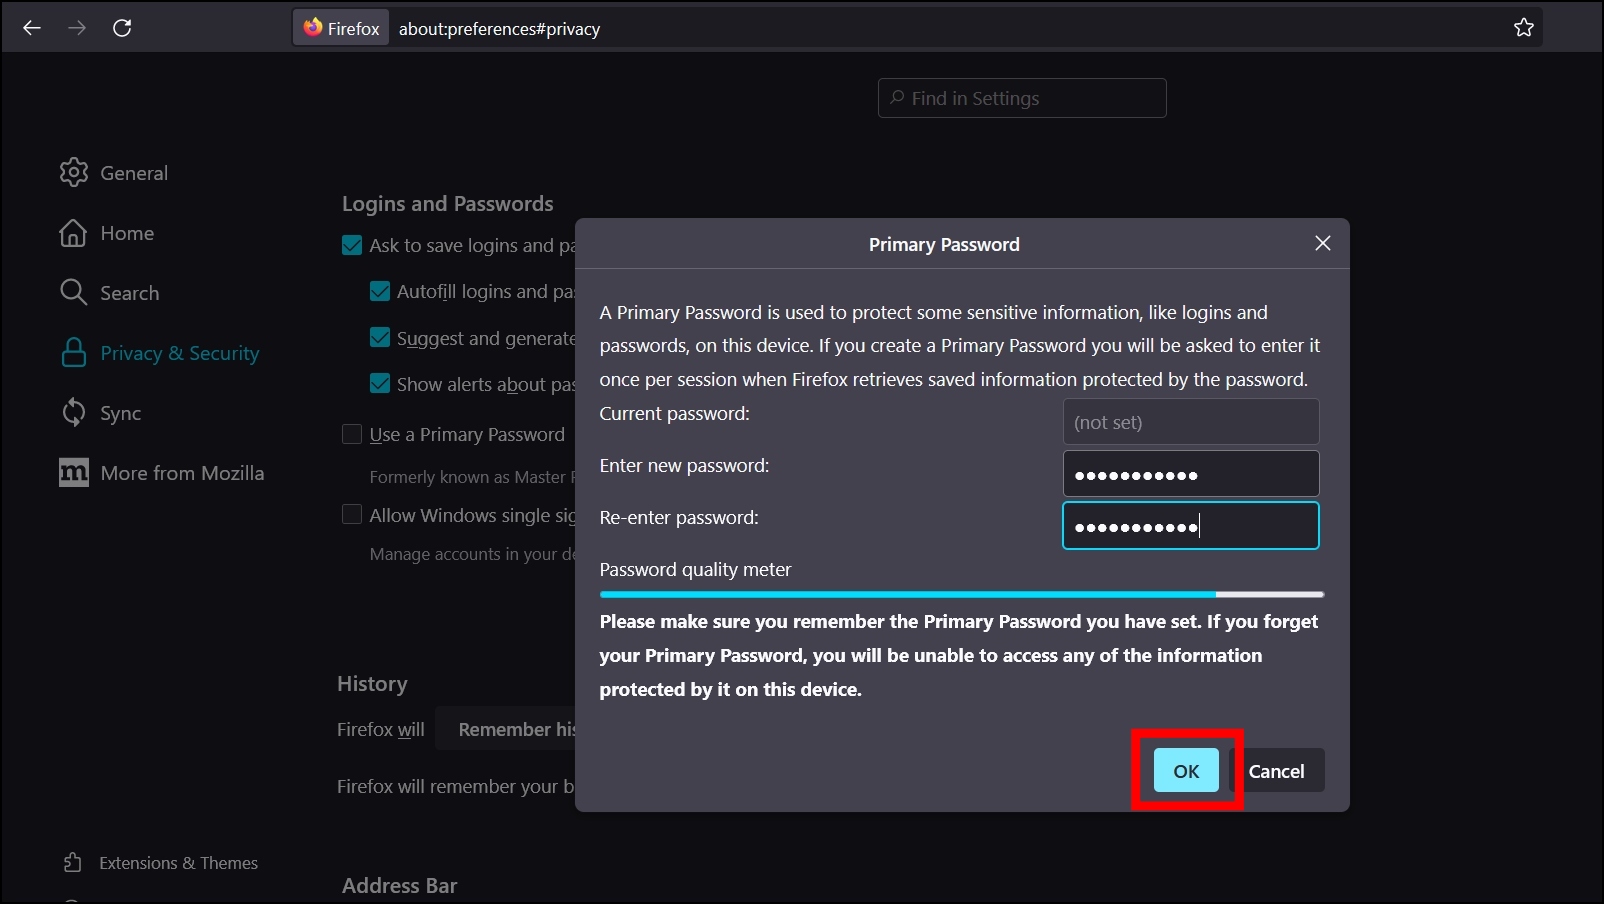
Step 3: Now, enter a password and confirm it then tap OK.
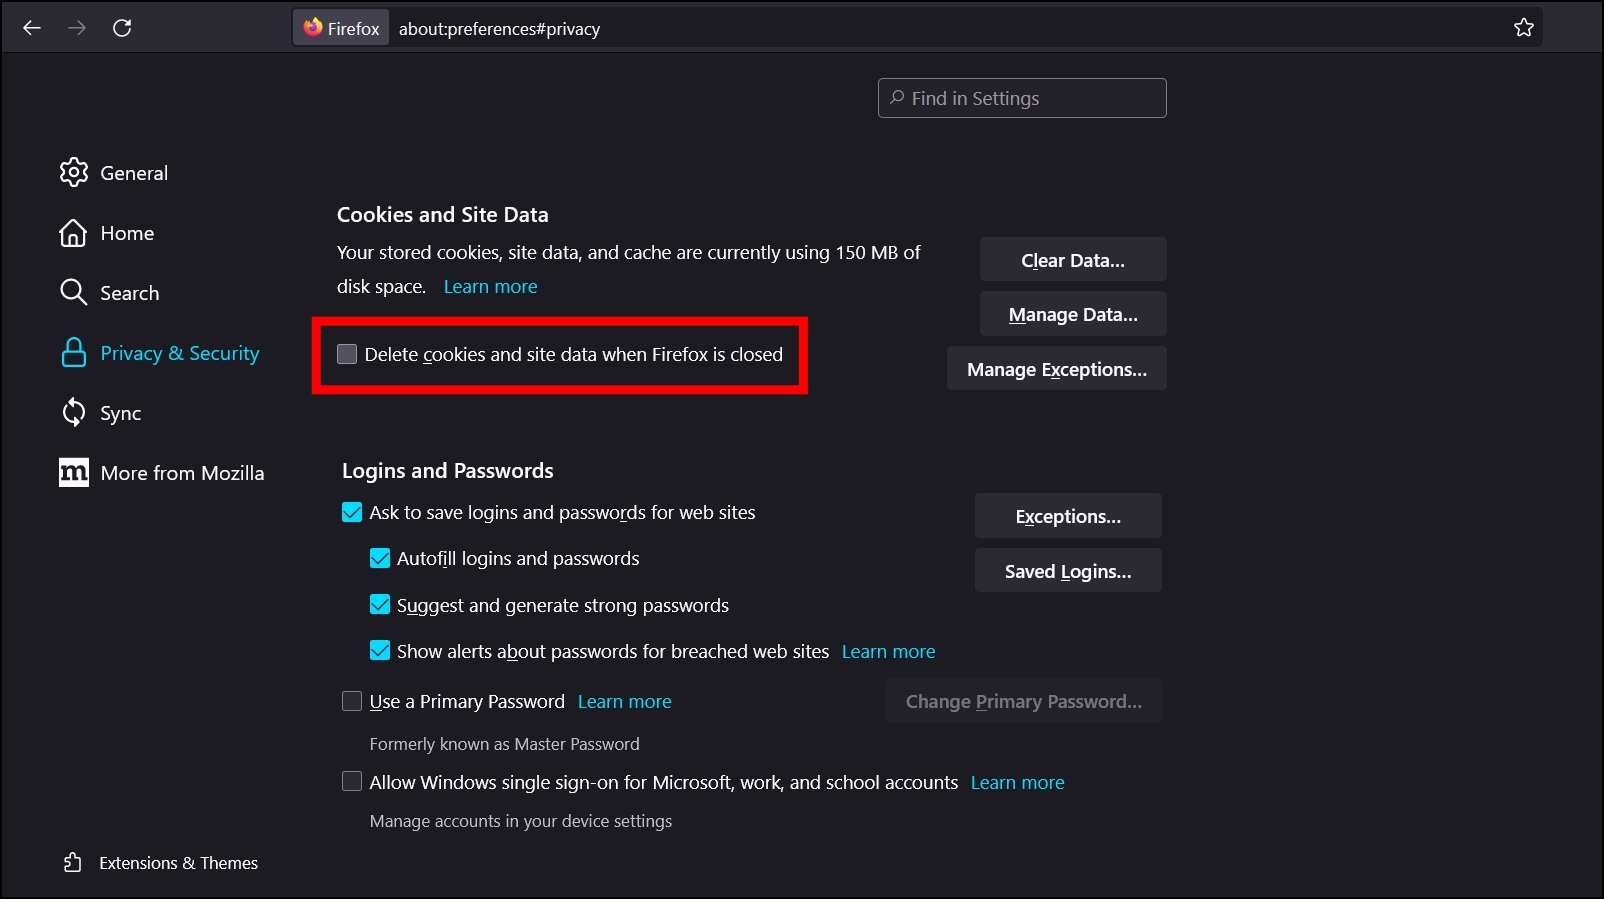
5. Clear Cookies and Site Data When Firefox is Closed
Like Chrome, Firefox allows users to delete cookies and site data when they close the browser. Follow the below steps to enable it.
Step 1: Open Firefox browser and tap the three-line icon, then select Settings.
Step 2: Select Privacy and security from the sidebar.
Step 3: Finally, select the checkbox for Delete cookies and site data when Firefox is closed under Cookies and Site data.
6. Block Pop-ups and Add-ons
Firefox has a feature that, once enabled, allows users to block unwanted pop-ups and warns you when websites try to install add-ons. Follow the below steps to turn it on.
Step 1: Open the Mozilla Firefox browser on your device.
Step 2: Tap on the three-line icon at the top and select Settings.
Step 3: Choose Privacy and security from the left menu.
Step 4: Scroll down and select the checkboxes for Block pop-up windows and Warn you when websites try to install add-ons under the Permissions section.

7. Install a Tracker Blocker
You can install uBlock Origin add-on in the browser to prevent data tracking and browser fingerprinting.

Privacy and Security Settings for Microsoft Edge
Since Edge’s integration with Chromium, it has slightly better privacy and security than the Chrome browser. Moreover, you can enable some features to boost the browser’s security, and here we have added some browser security tips for a safer browsing experience.
1. Clear Browsing Data After Closing
Like other browsers, Microsoft Edge has an option that clears browsing data when you close the browser. Follow the below steps to enable the feature.
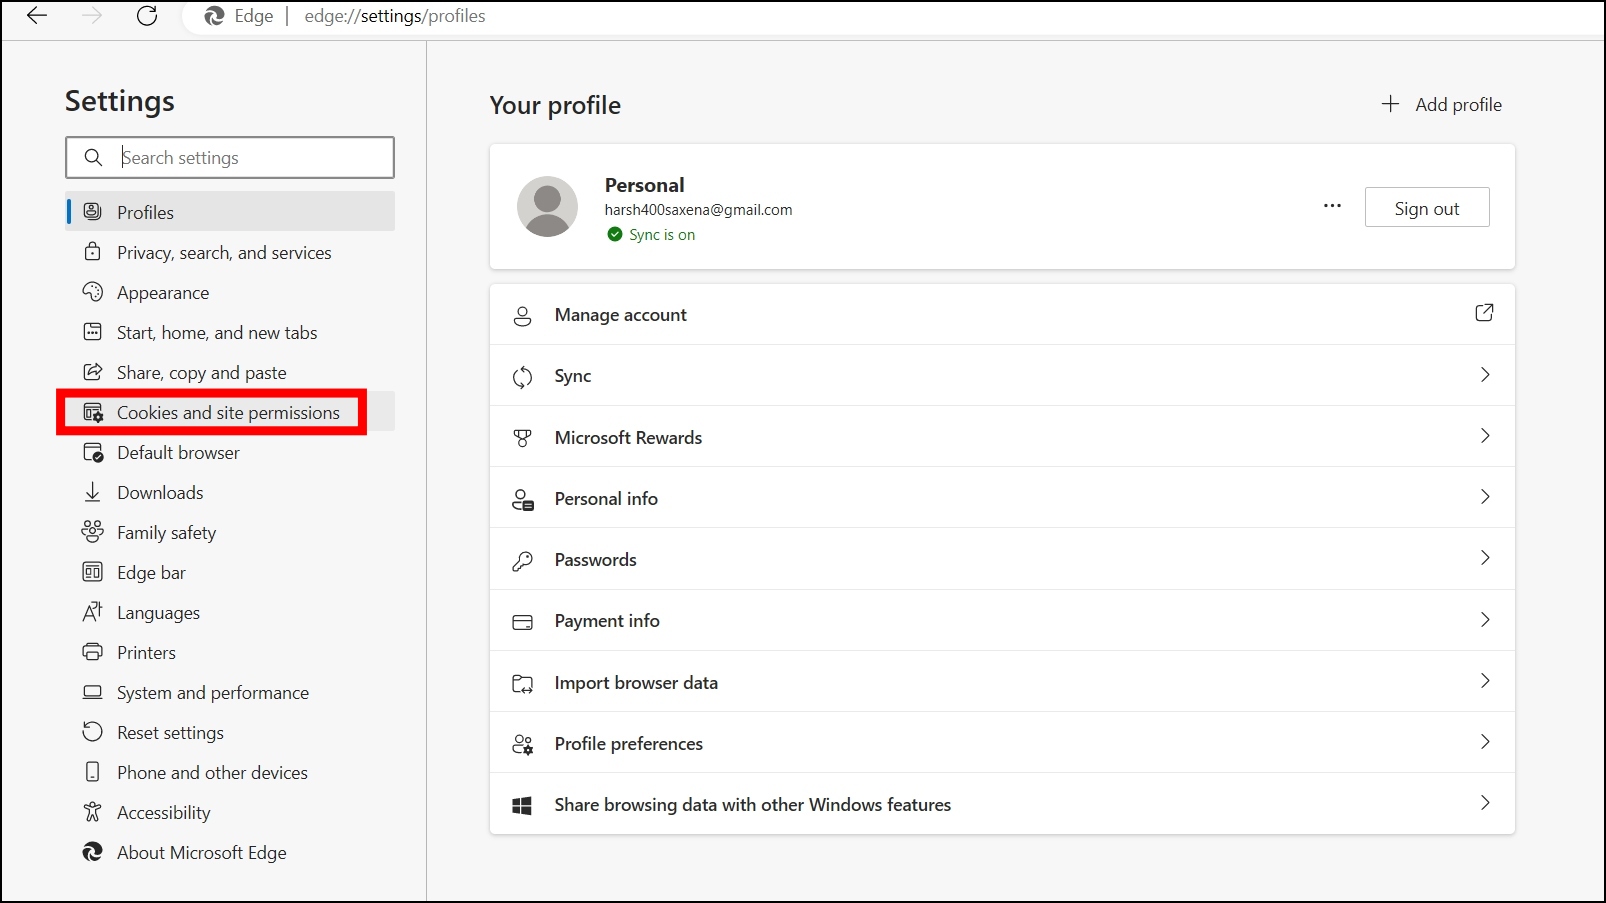
Step 1: Open Microsoft Edge and tap on the three-dots icon at the top, then choose Settings.

Step 2: Click on Cookies and site permissions from the left sidebar.
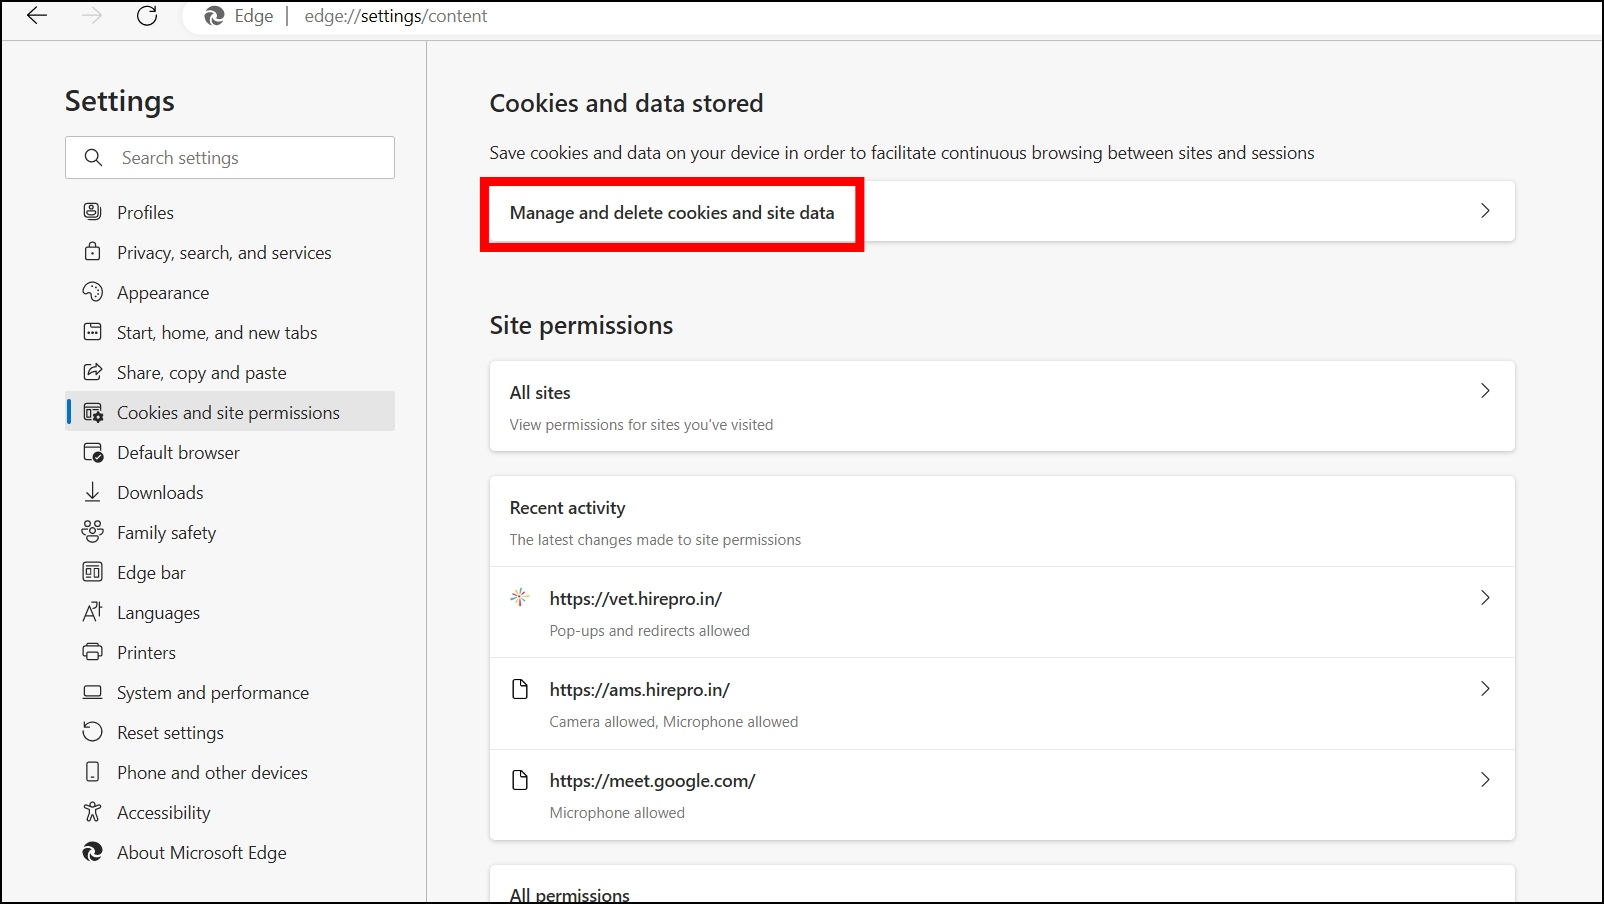
Step 3: Tap on Manage and delete cookies and site data.
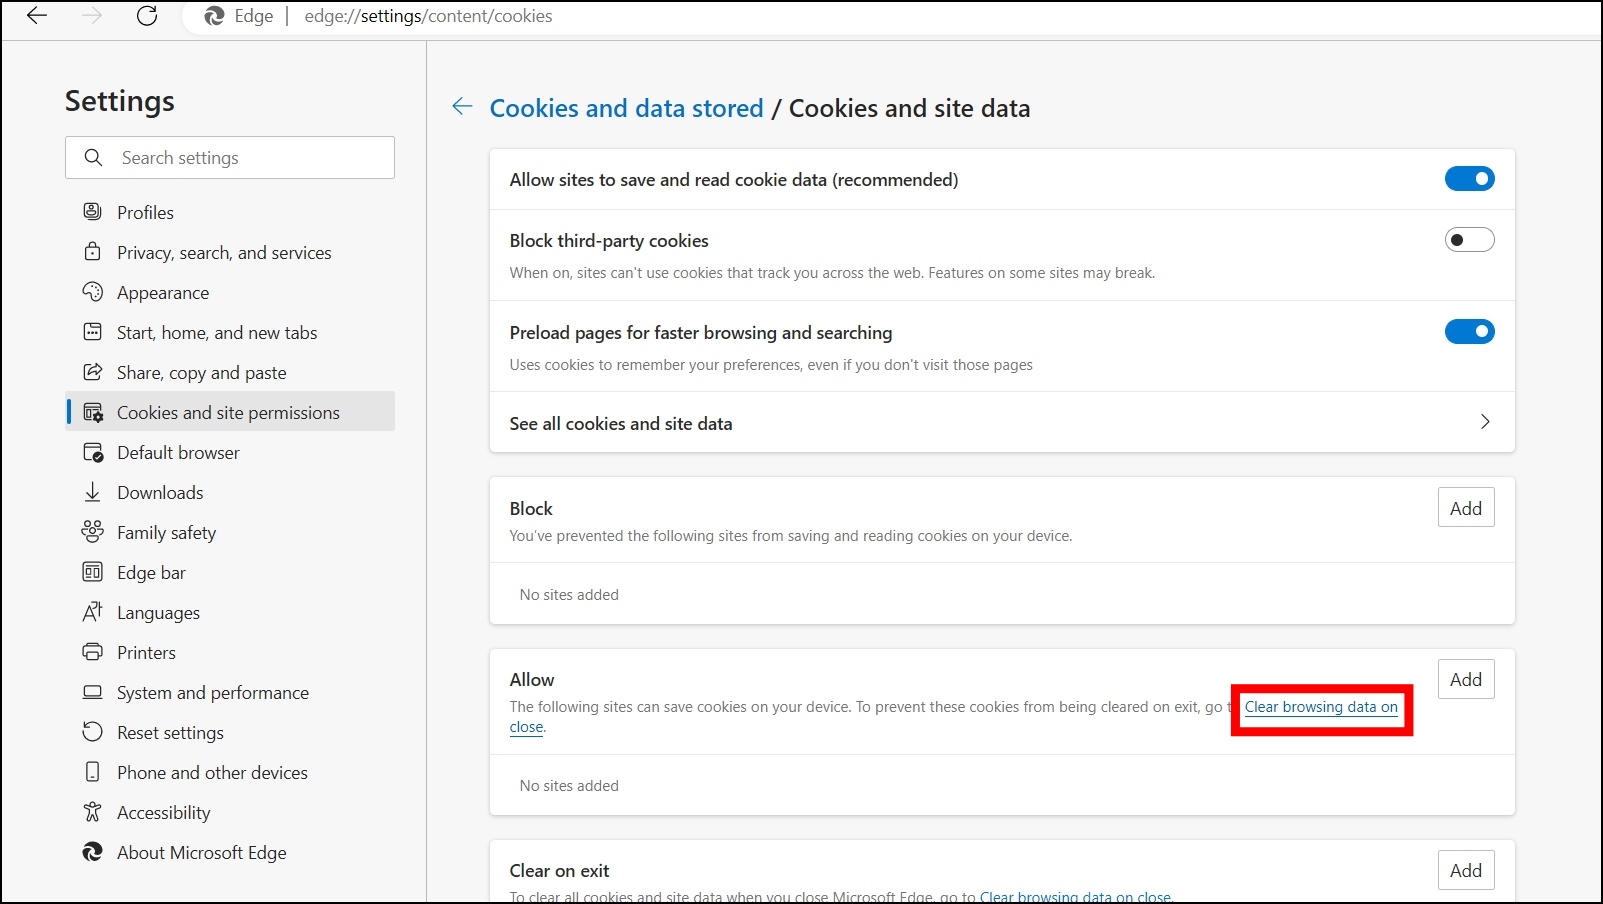
Step 4: Click on Clear browsing data on close under Allow section.
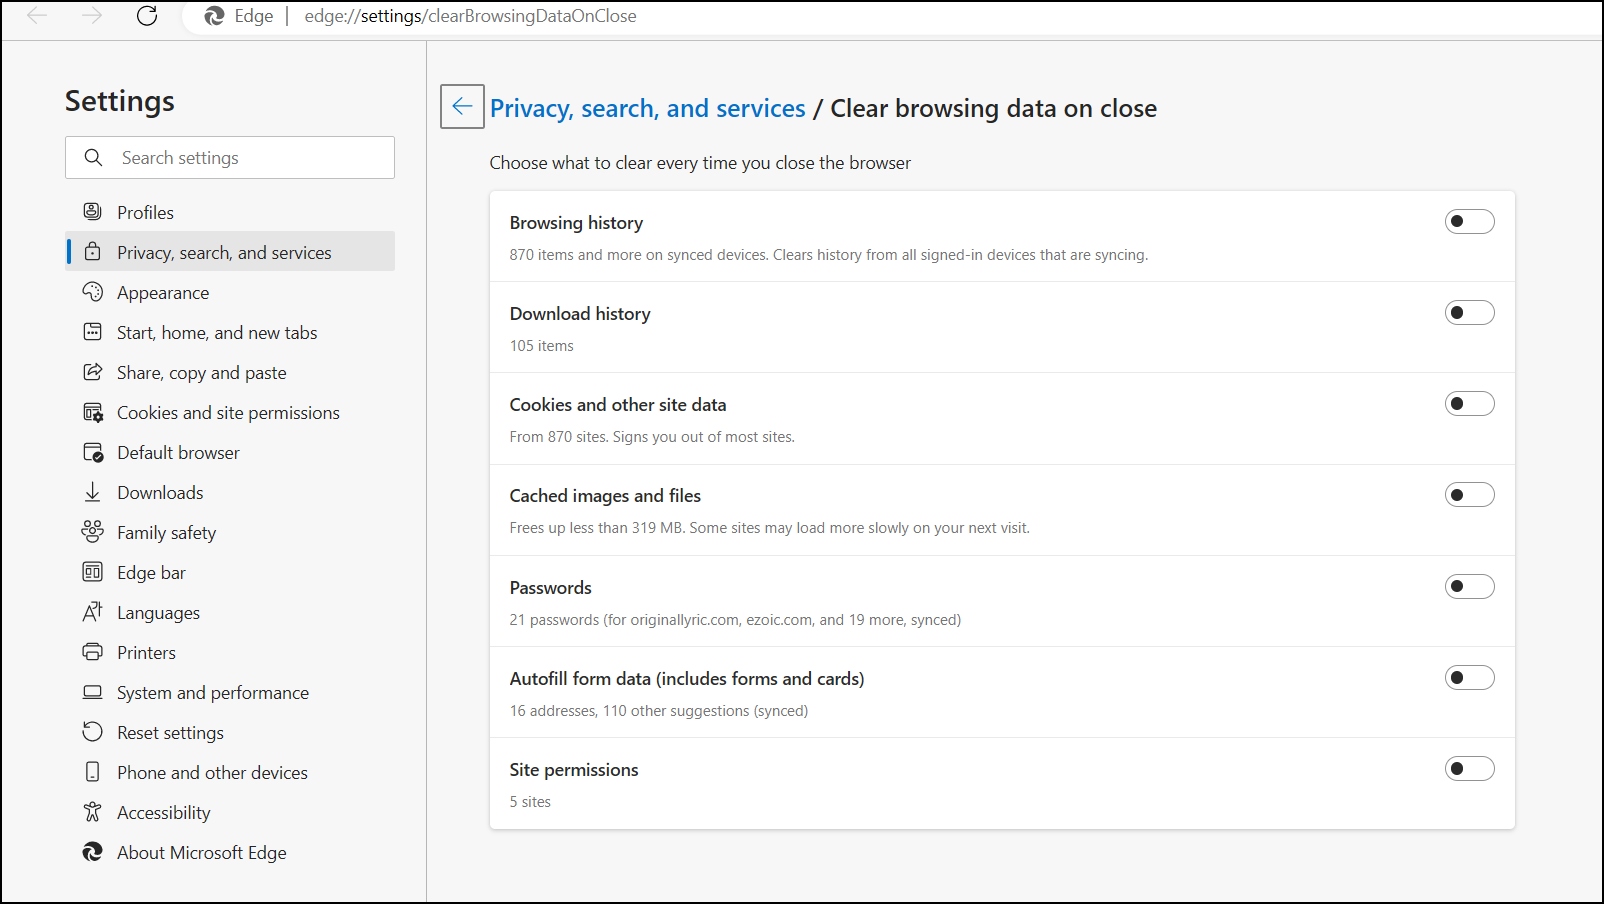
Step 5: Finally, turn on the toggle next to each action you want to clear every time you close the browser.
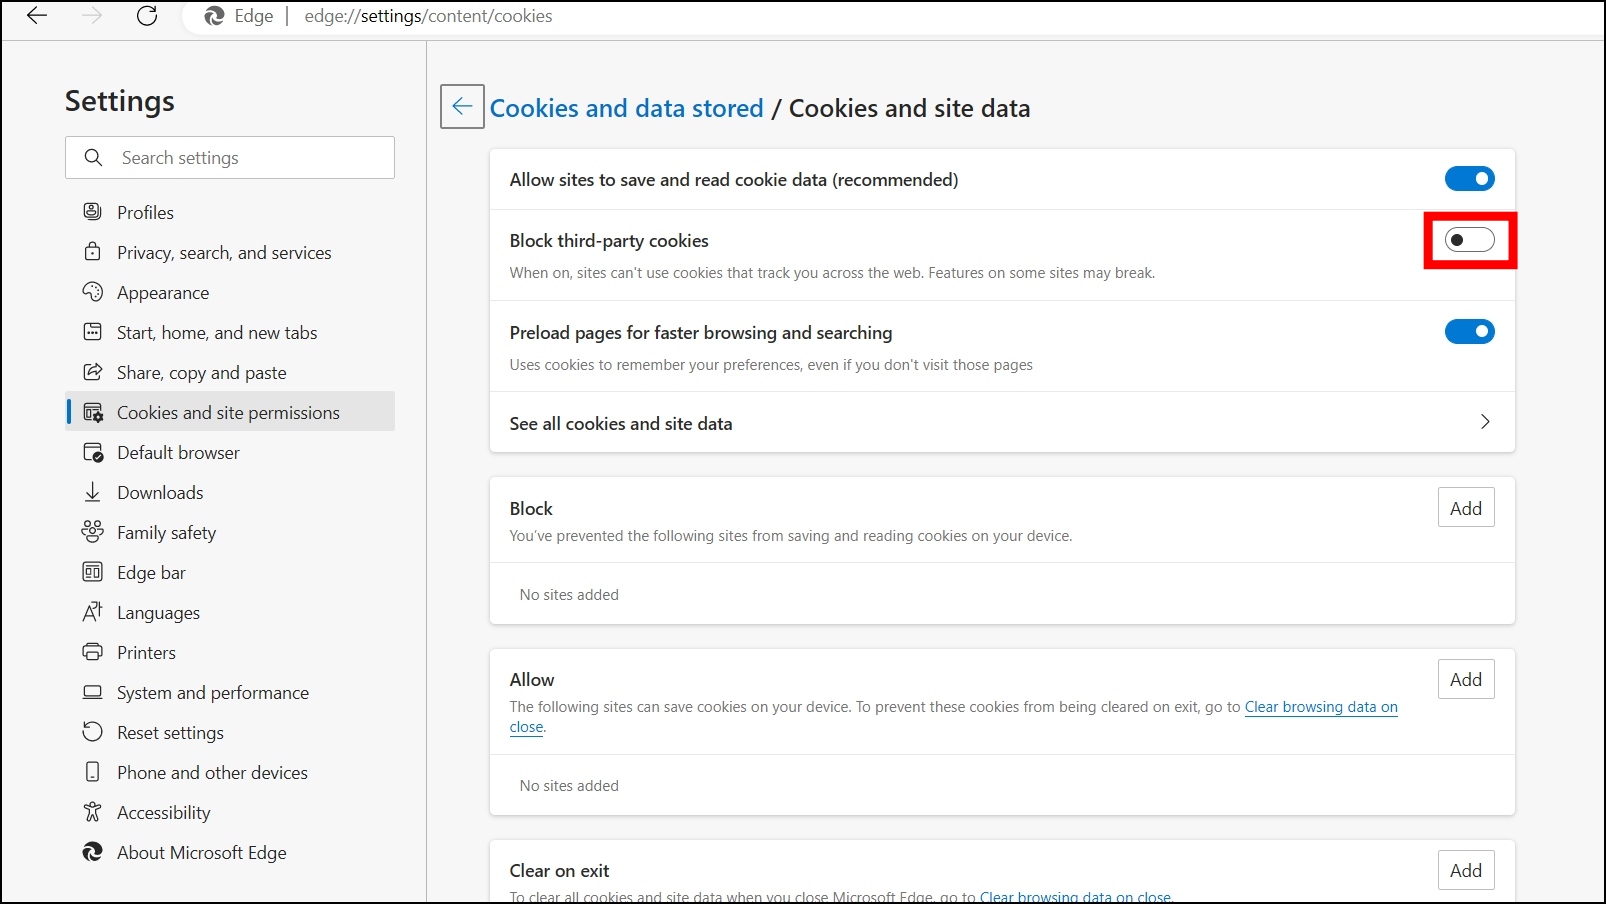
2. Block Third-Party Cookies
Just like Chrome, you can also block third-party cookies on the Microsoft Edge browser, which also improves user security and privacy. To block it, type edge://settings/content/cookies in the address bar, then turn on the toggle for Block third-party cookies.
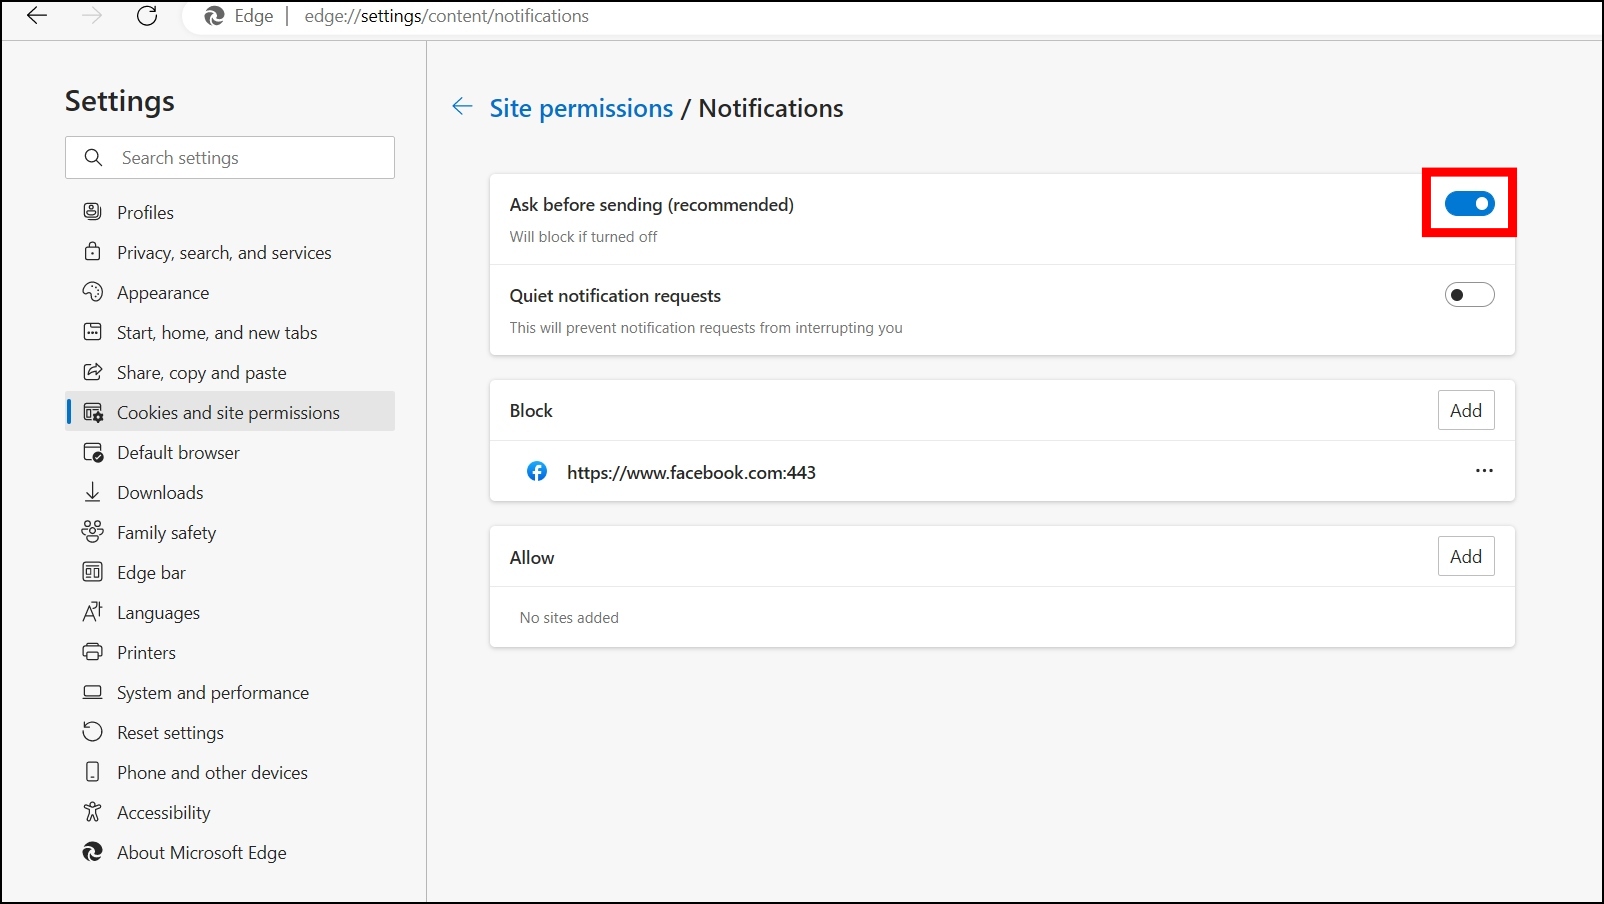
3. Block Site Notifications
Edge also has an option that, once disabled, blocks the website notifications on the browser. To turn it off, type edge://settings/content/notifications, then hit enter and turn off the toggle for Ask Before Sending.
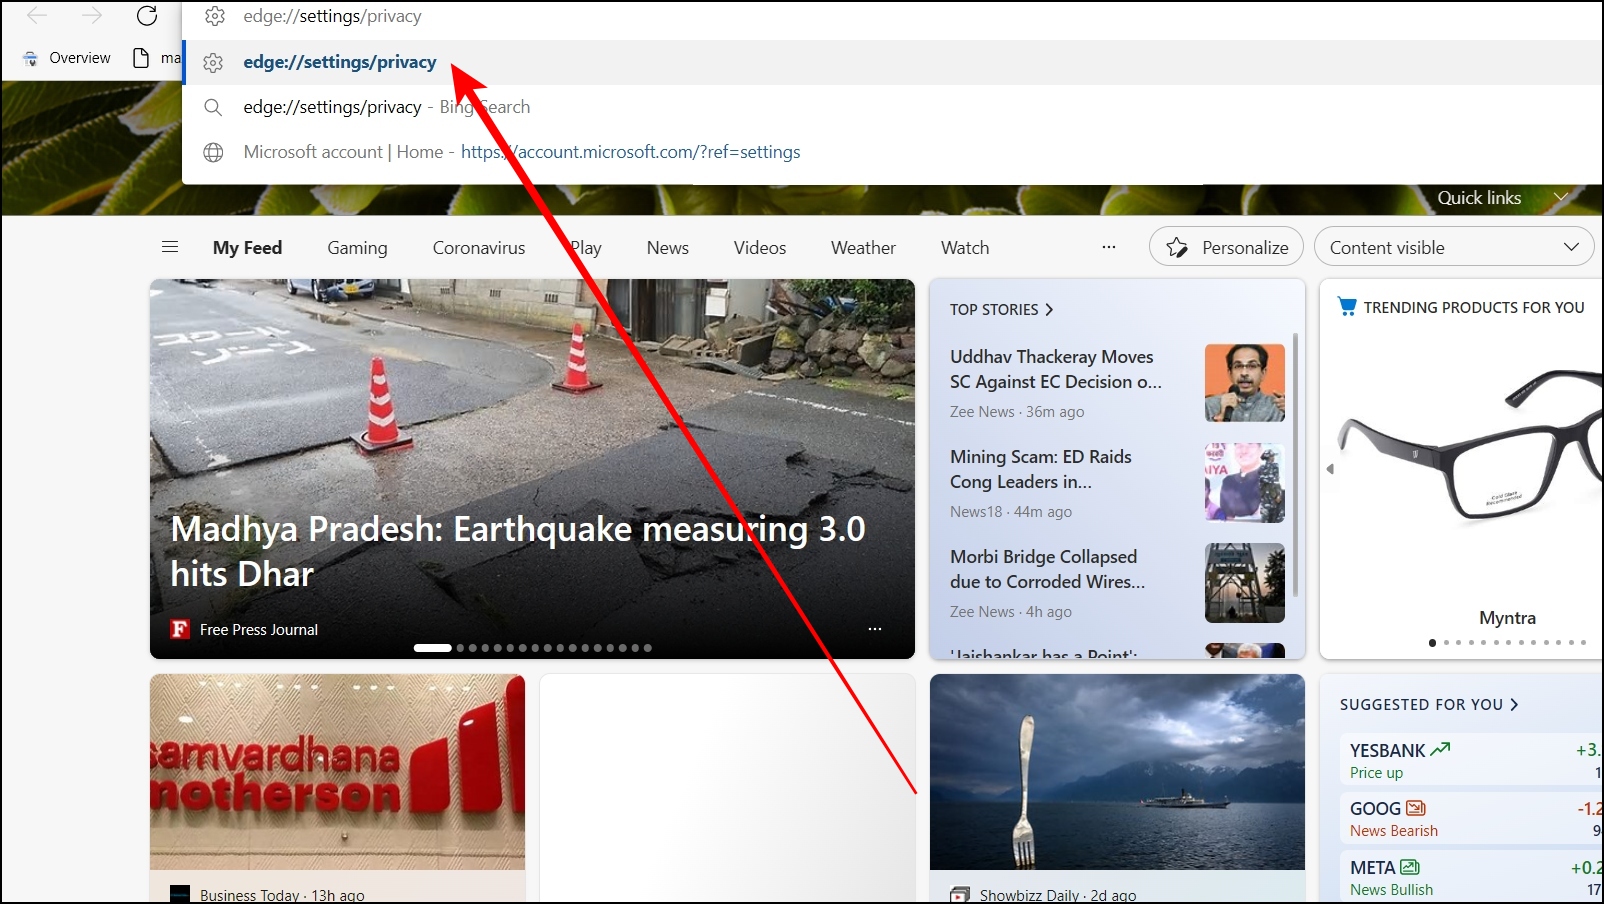
4. Set Tracking Prevention to Strict
Like Firefox’s Enhanced Tracking Protection, Edge has a tracking prevention feature that allows users to limit trackers, improve ad personalization, and more. Once the tracking protection is set to strict, the browser will block most trackers, minimalize the ads and content, and block harmful trackers.
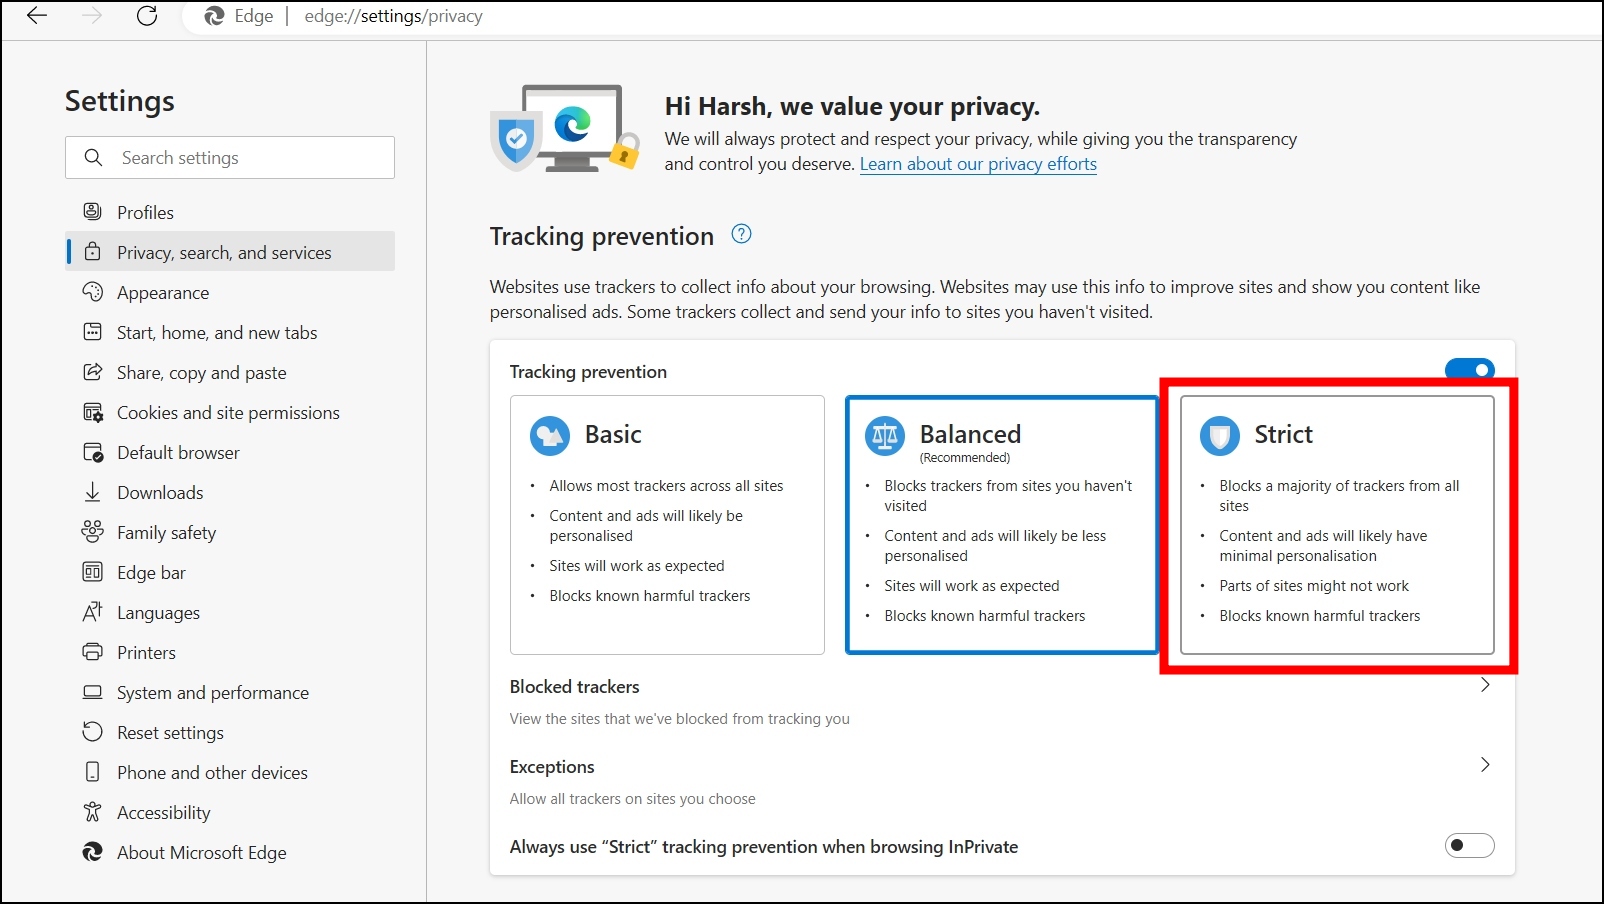
Strict Tracking Prevention is one of the best browser security tips to stay safe online, and below are the steps to enable it.
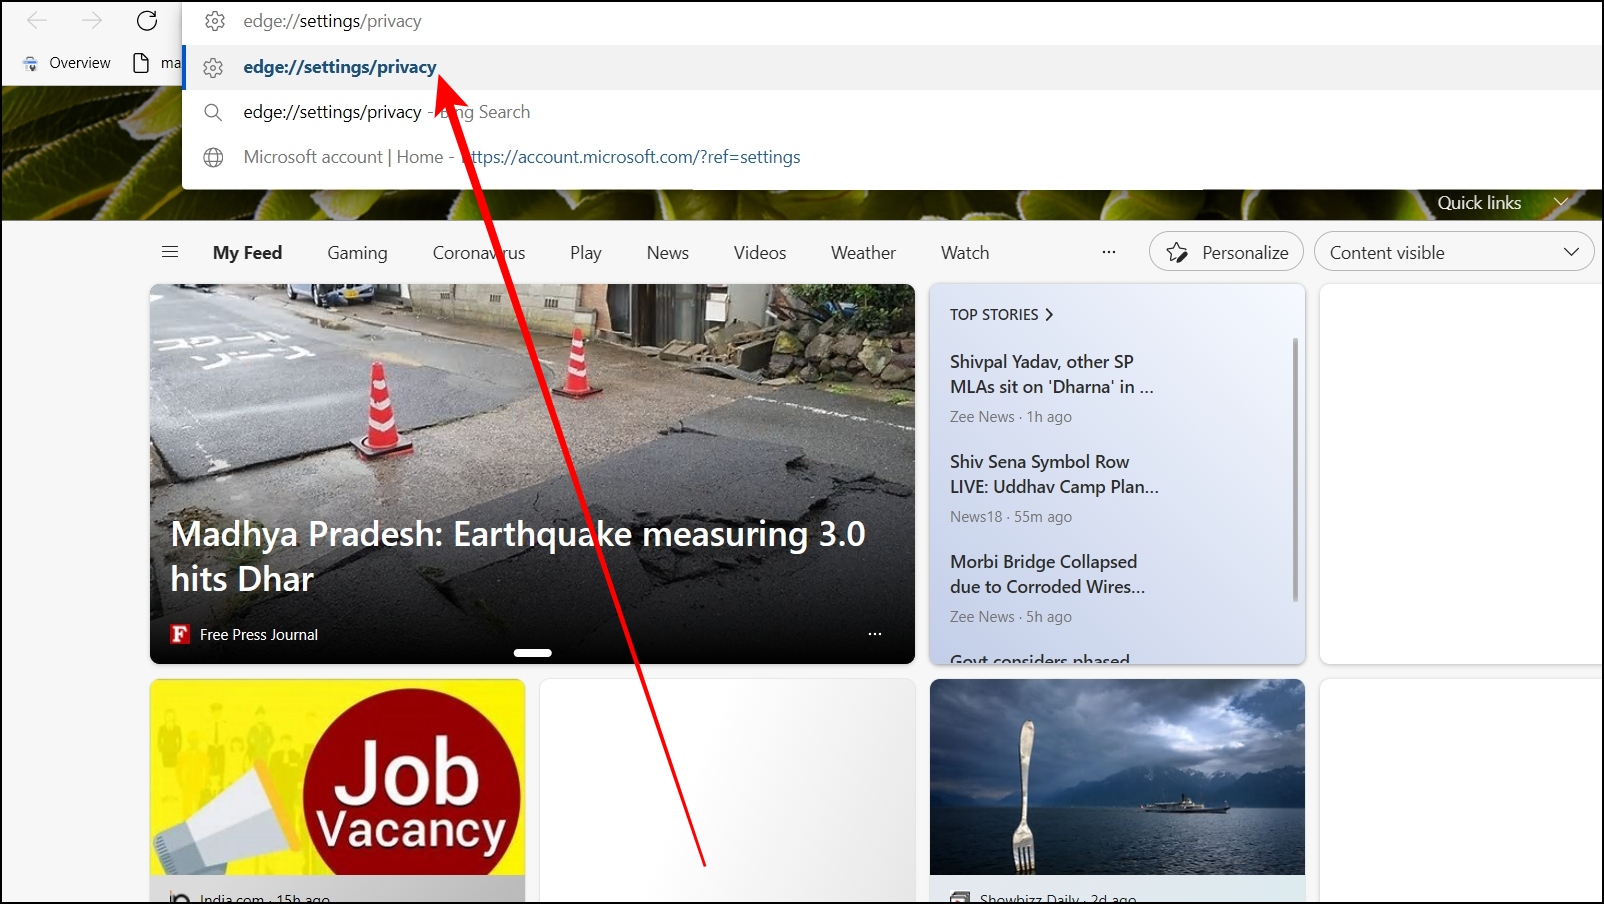
Step 1: Open the Edge browser and type edge://settings/privacy in the address bar, then hit enter.
Step 2: Select the box for Strict under Tracking Prevention.
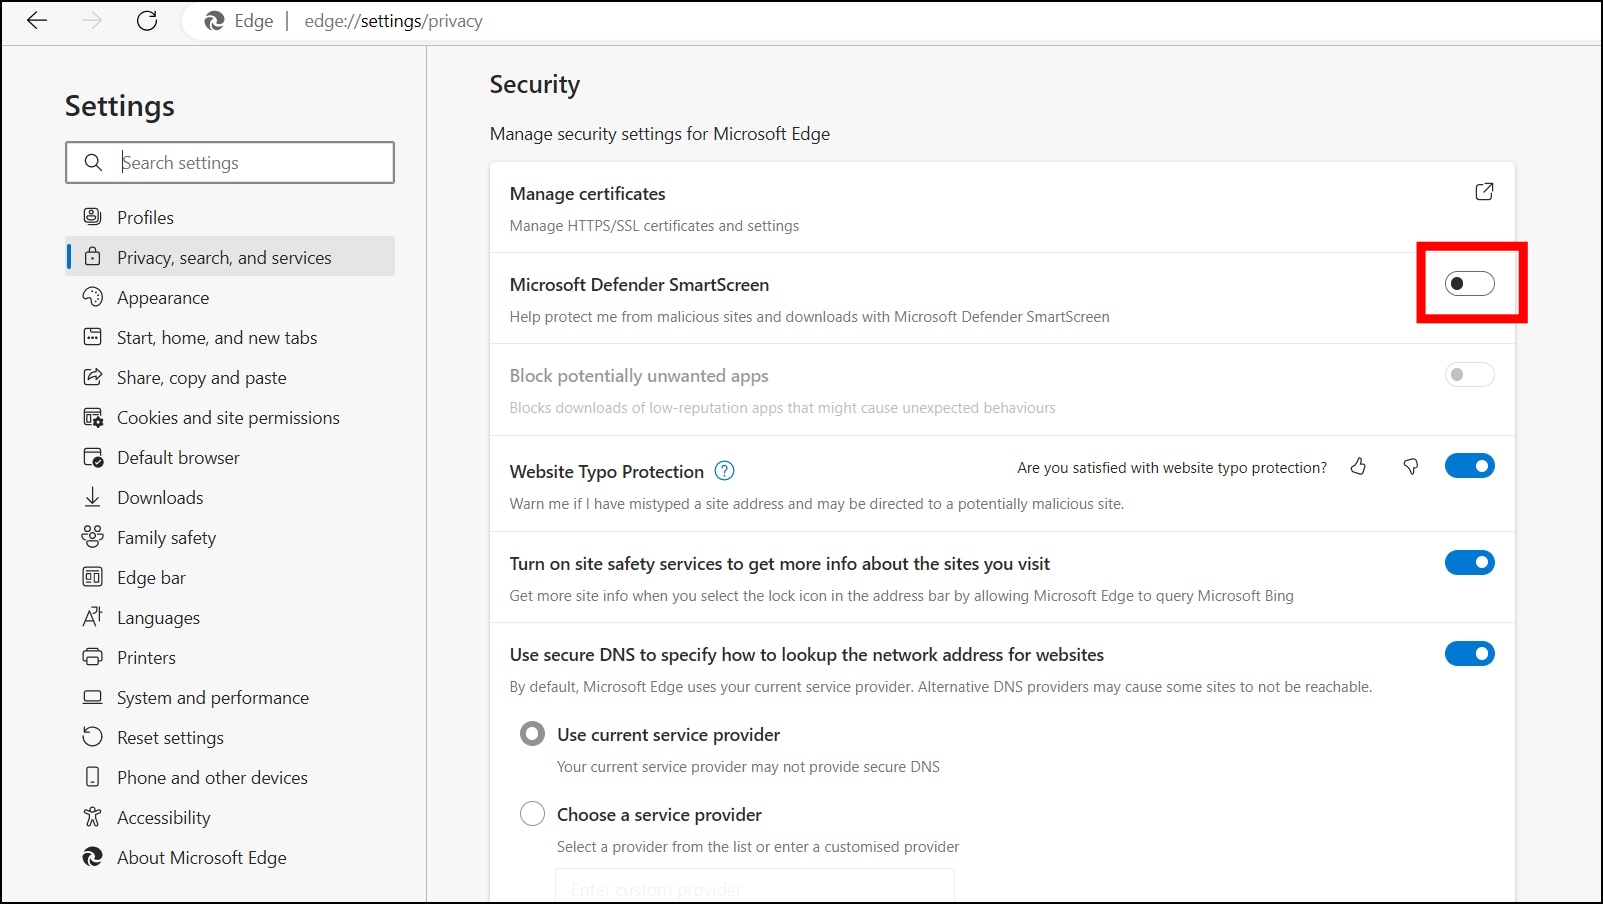
5. Enable Microsoft Defender SmartScreen
Edge also has a Microsoft Defender SmartScreen feature which, when turned on, helps the user protect from malicious sites and downloads. It protects users against phishing attacks and other types of malware by screening potentially infected files. Follow the below steps to enable it.
Step 1: Open the Microsoft Edge browser on your system.
Step 2: Type edge://settings/privacy in the address and hit enter.
Step 3: Scroll down and turn on the toggle next to Microsoft Defender SmartScreen under the Security section.
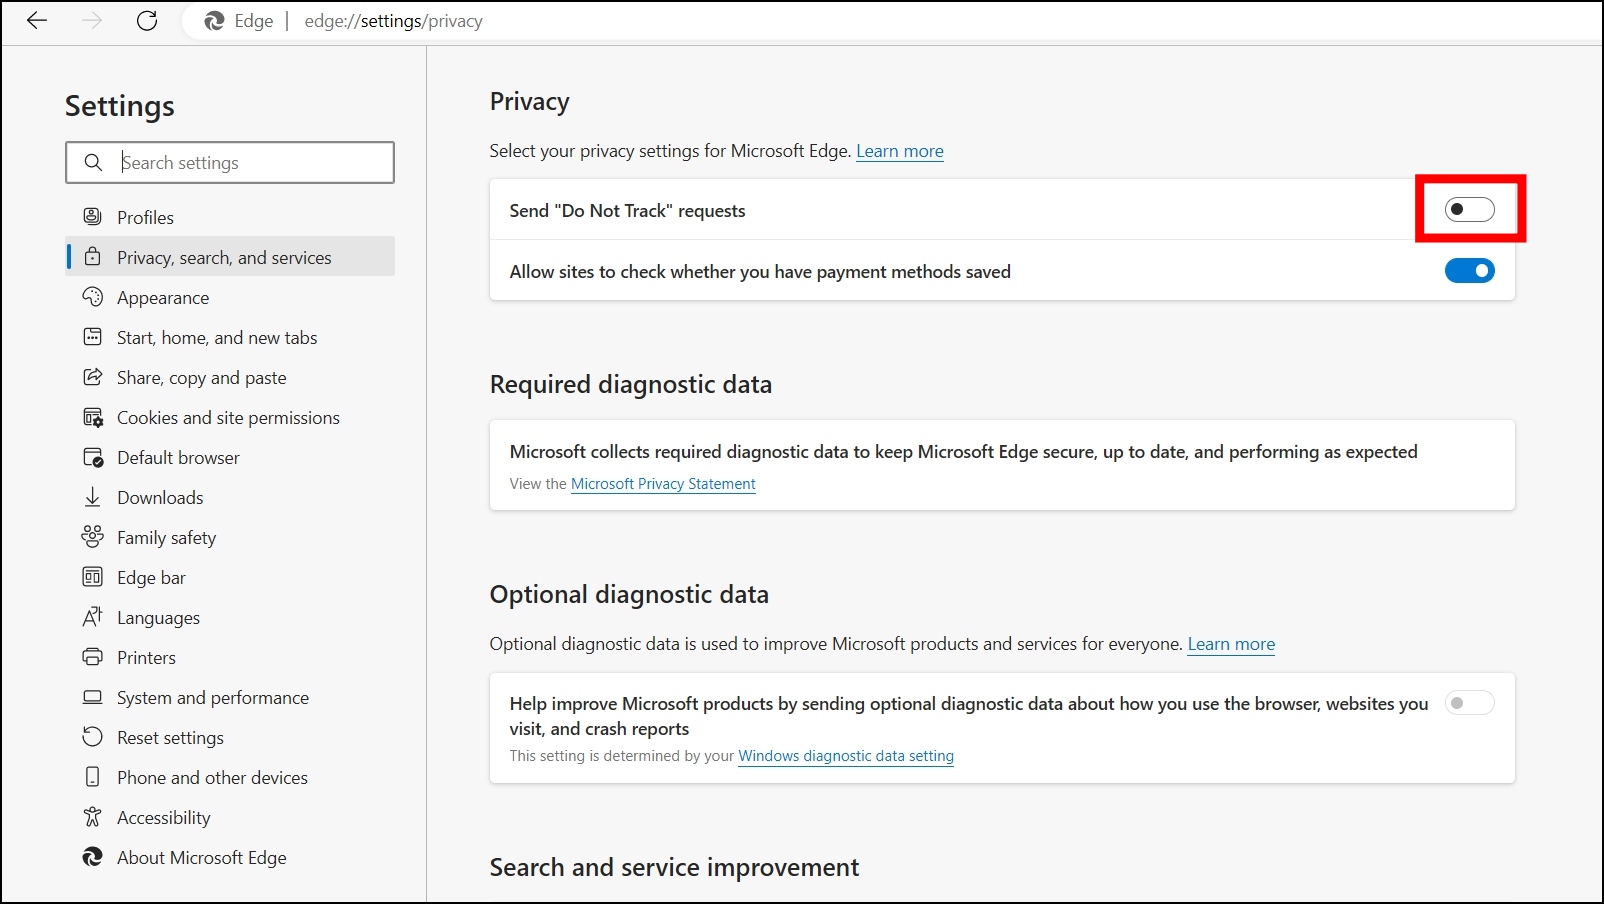
6. Enable Do Not Track
You can also enable the “Do Not Track” feature on the browser. Follow the below steps to turn the feature on.
Step 1: Open the Microsoft Edge browser on your PC.
Step 2: Type edge://settings/privacy in the address bar, then hit enter.
Step 3: Finally, turn on the toggle next to Send “Do Not Track” requests.
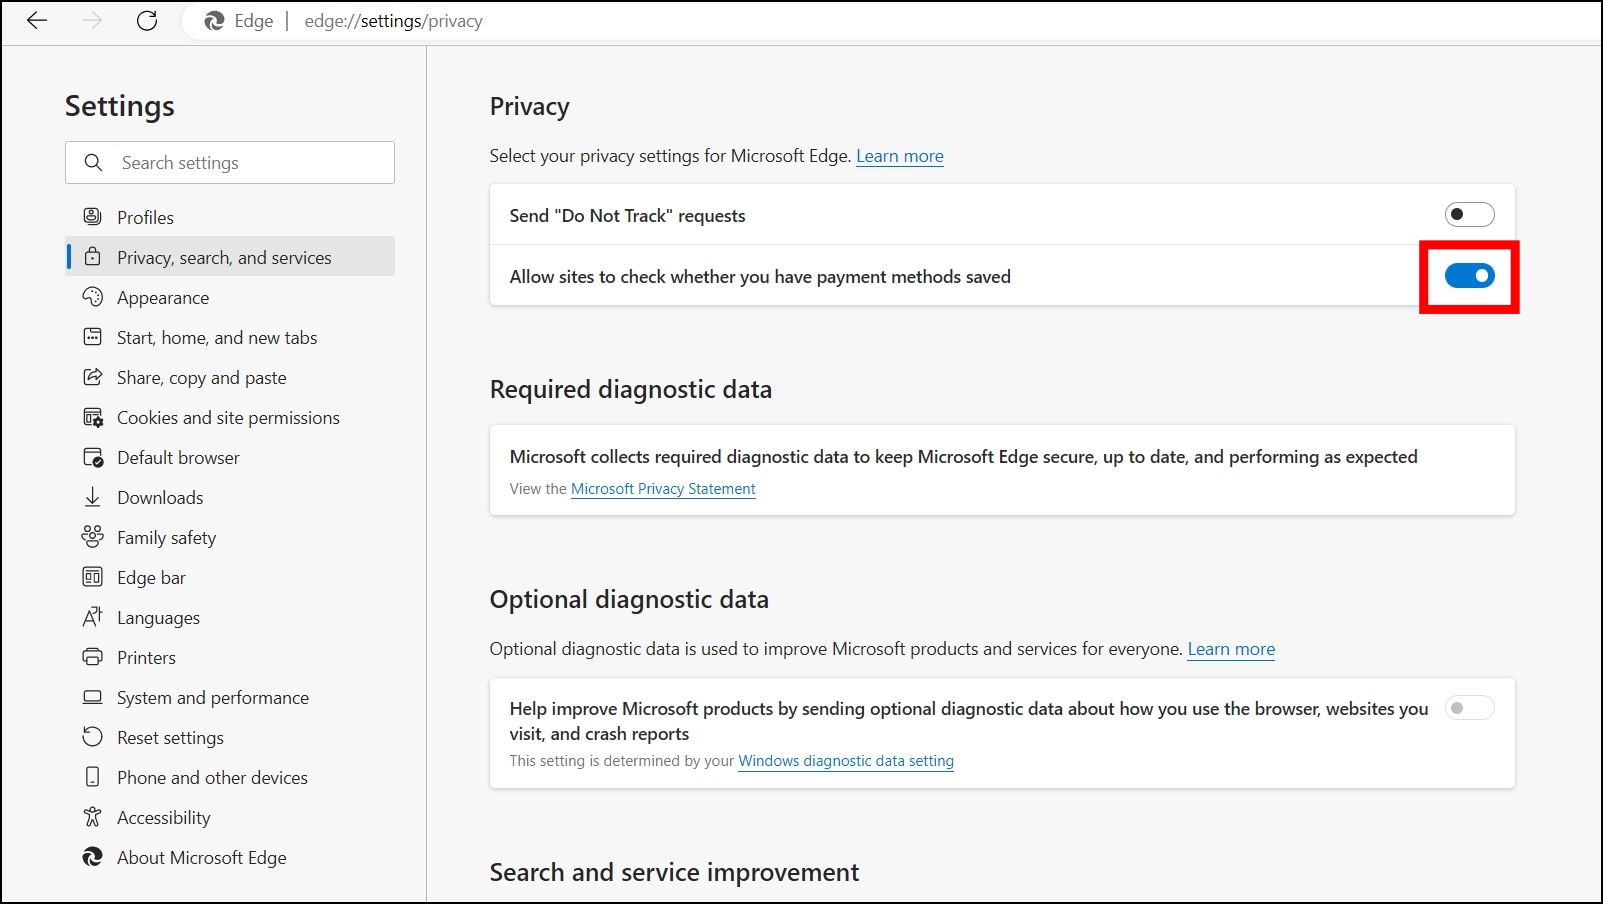
7. Disallow Sites to Check Whether You have Payment Methods Saved
You can also enhance your privacy by disallowing the websites to check whether you have payment methods saved on the browser. Here’s how you can do it.
Step 1: Open Edge and type edge://settings/privacy, then hit enter.
Step 2: Scroll down and turn off the toggle next to Allow sites to check whether you have payment methods saved.
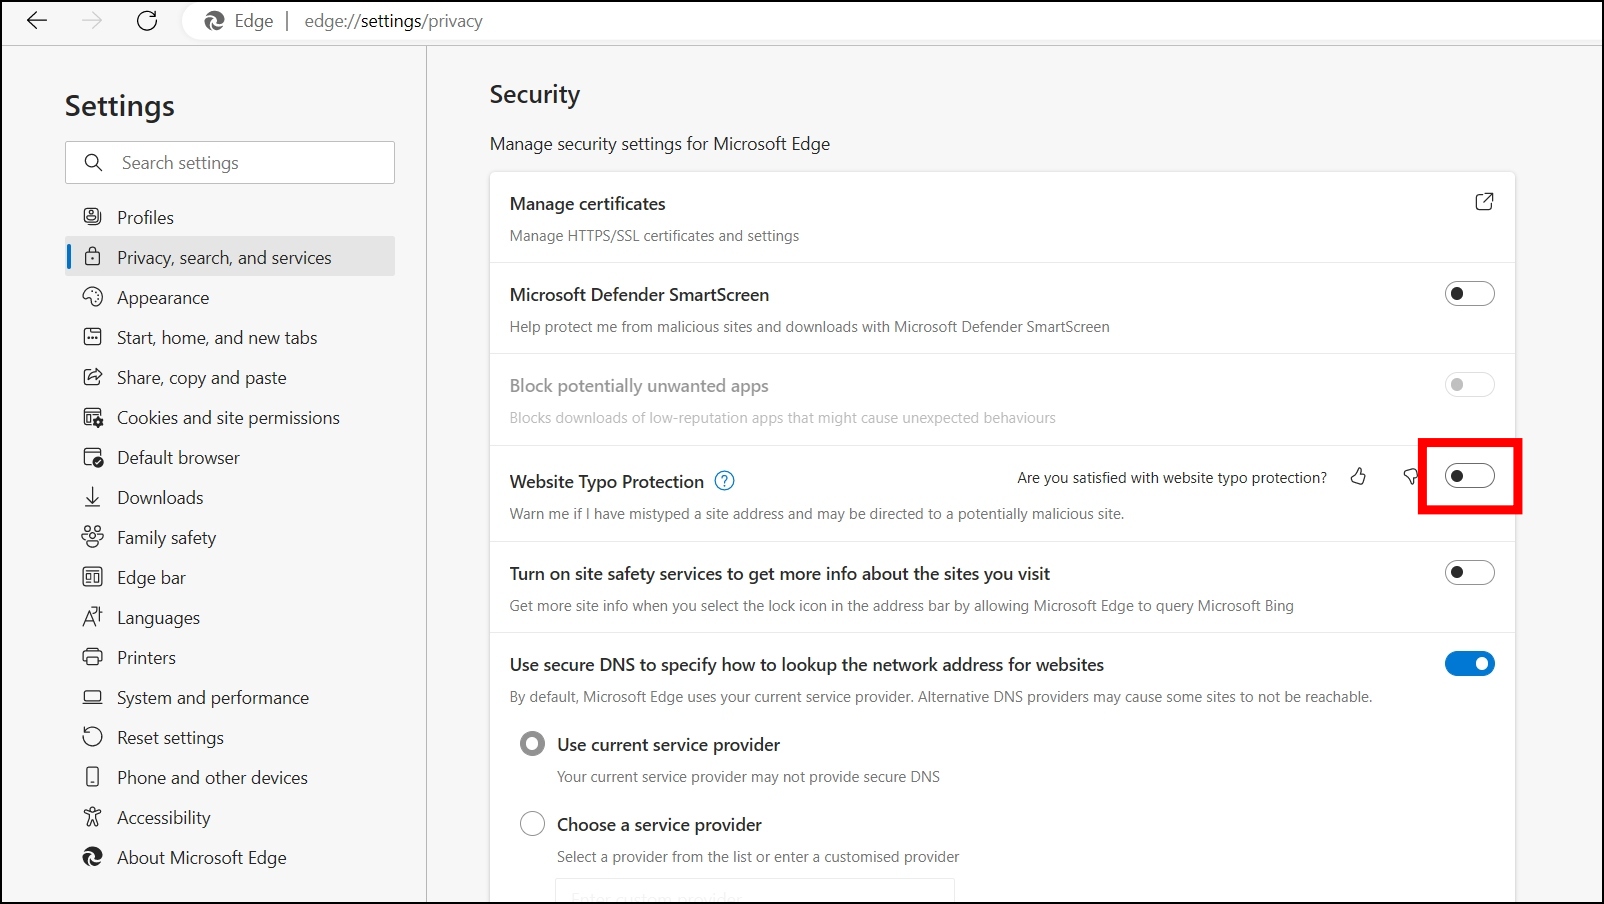
8. Enable Website Typo Protection
Edge has a website type protection that protects against typo-squatting and warns you if you have mistyped a site address and may be directed to a potentially malicious site. Follow the below steps to enable it.
Step 1: Open the Microsoft Edge browser on your system.
Step 2: Type edge://settings/privacy in the address bar to visit the browser’s privacy page.
Step 3: Scroll down and turn on the toggle next to Website Typo Protection.
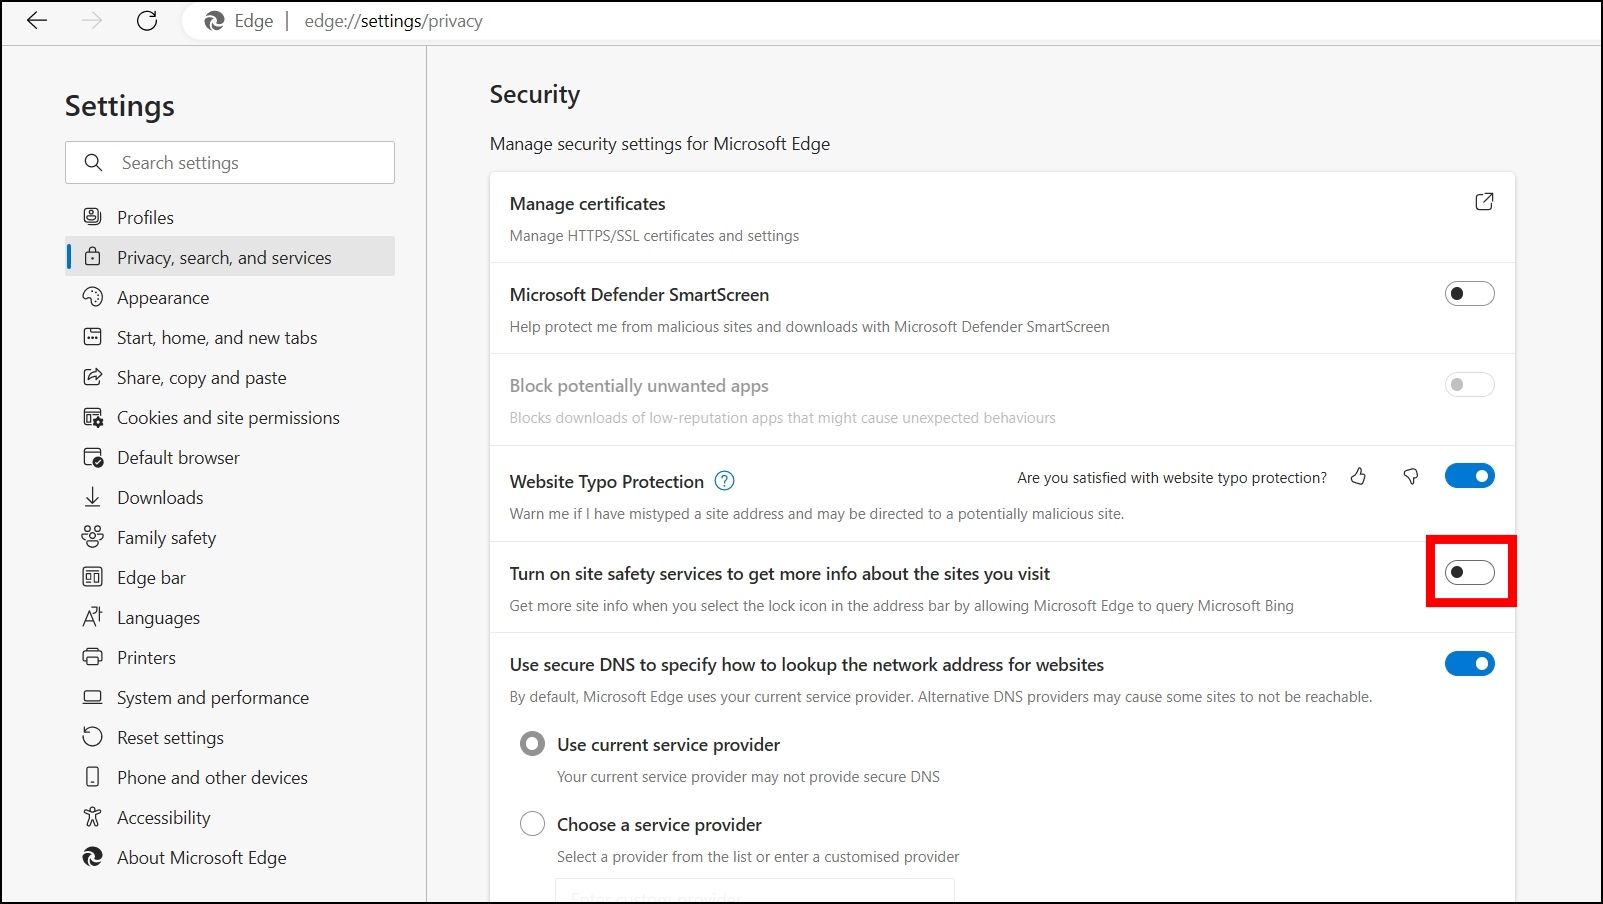
9. Enable Site Safety Services
You can also enable site safety services to get more info about the sites you visit by tapping on the lock icon in the address bar. Follow the below steps to enable it.
Step 1: Open the Microsoft Edge browser and type edge://settings/privacy in the address bar.
Step 2: Enable the toggle for Turn on-site safety services to get more info about the sites you visit.
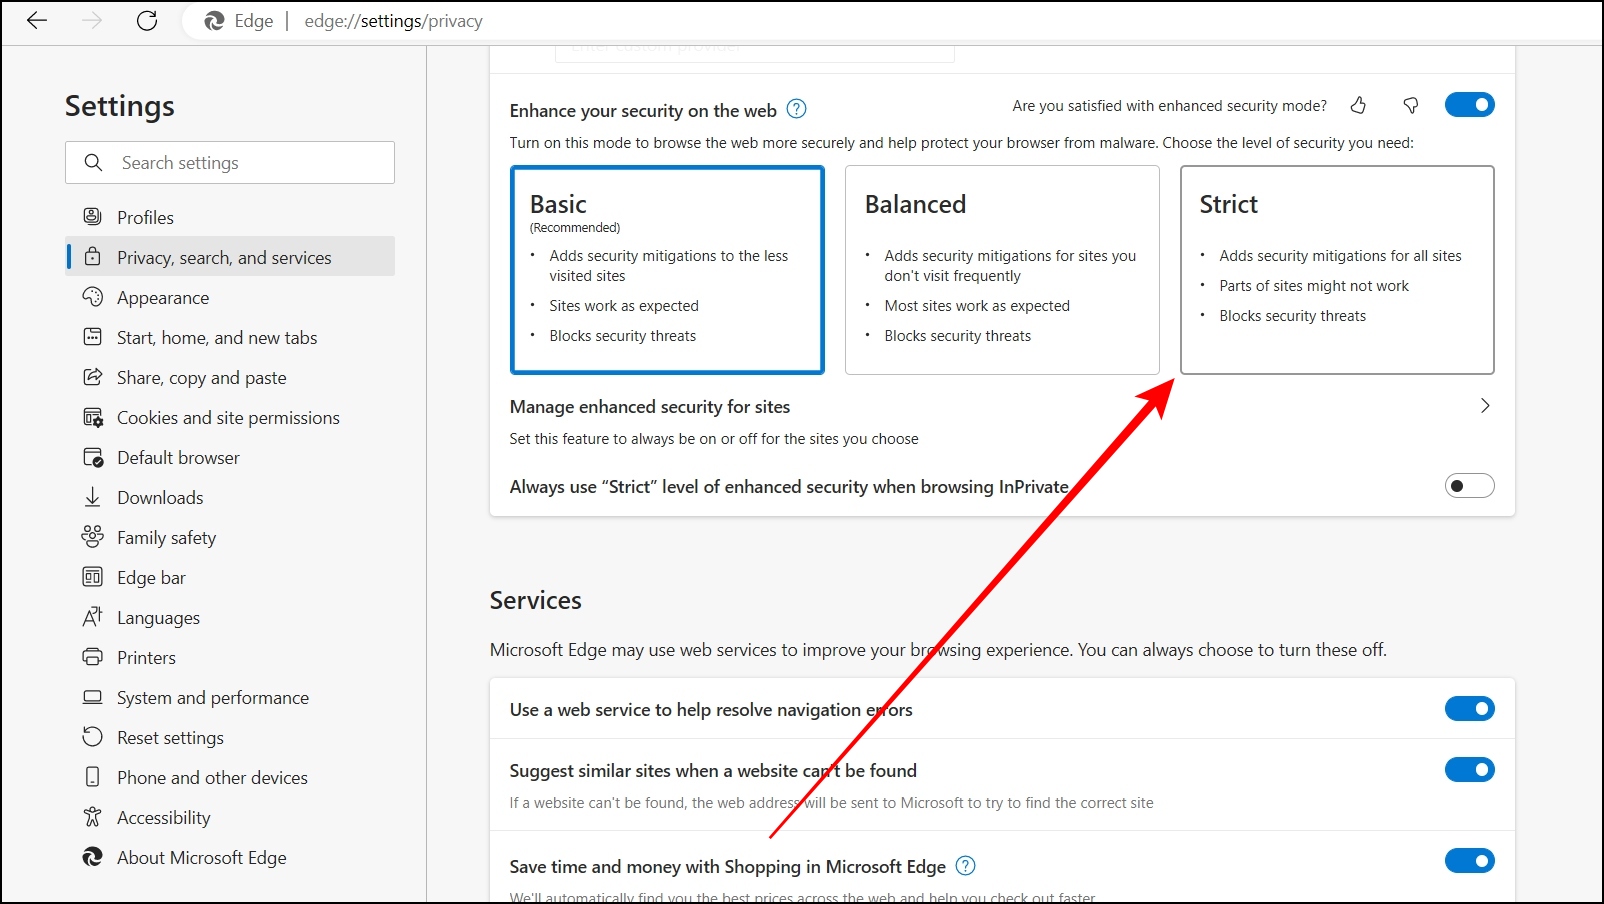
10. Enhance Your Security on the Web
You also enhance your security on the web by enabling the feature and choosing the security level to be Strict. Follow the below steps to enable the feature.
Step 1: Open Microsoft Edge on your system and type edge://settings/privacy in the address bar.
Step 2: Scroll down and turn on the toggle next to Enhance your security on the web.
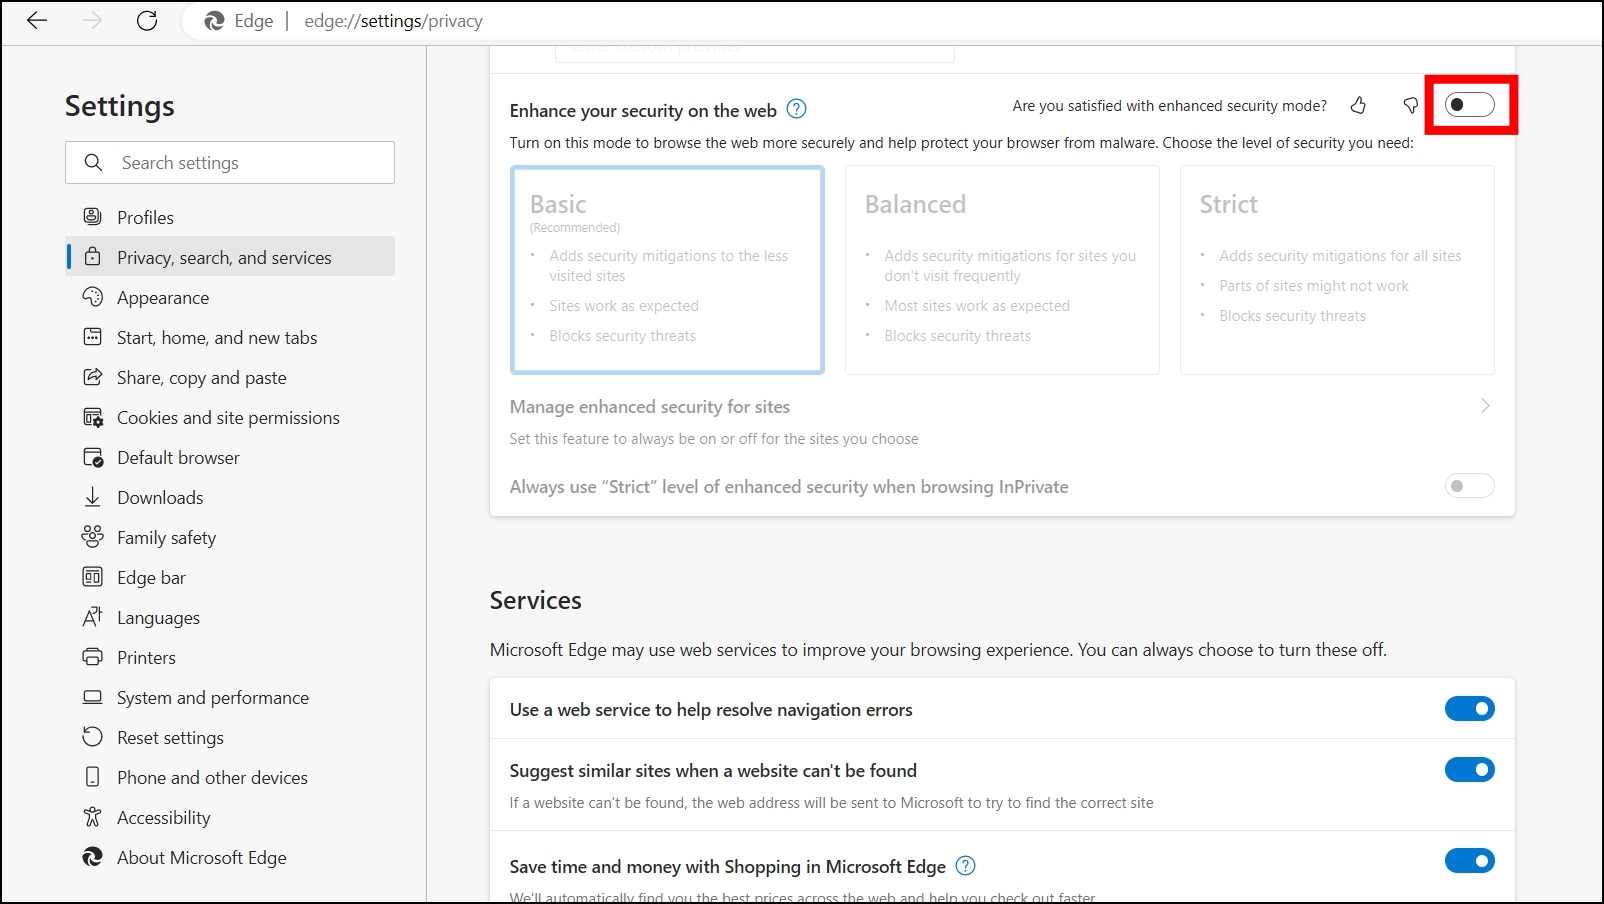
Step 3: Now, select the security level to Strict.
11. Install a Tracker Blocker
Just like Firefox, you can use also Chrome extensions to Microsoft Edge browser, and it also lets users install uBlock Origins on your browser just like you did on Chrome and Firefox.
Privacy and Security Settings for Safari Mac
Safari browser does see frequent updates, and rolling out updates constantly is essential as the malware is never static. However, attackers and hackers always look for ways to steal users’ data, and here, we have added some browser security tips which you can enable to make Safari safer for browsing.
1. Block Pop-ups
Just like other browsers, Safari allows users to block unwanted pop-ups. Follow the below steps to turn it on.
Step 1: Click on Safari at the top and select Settings.
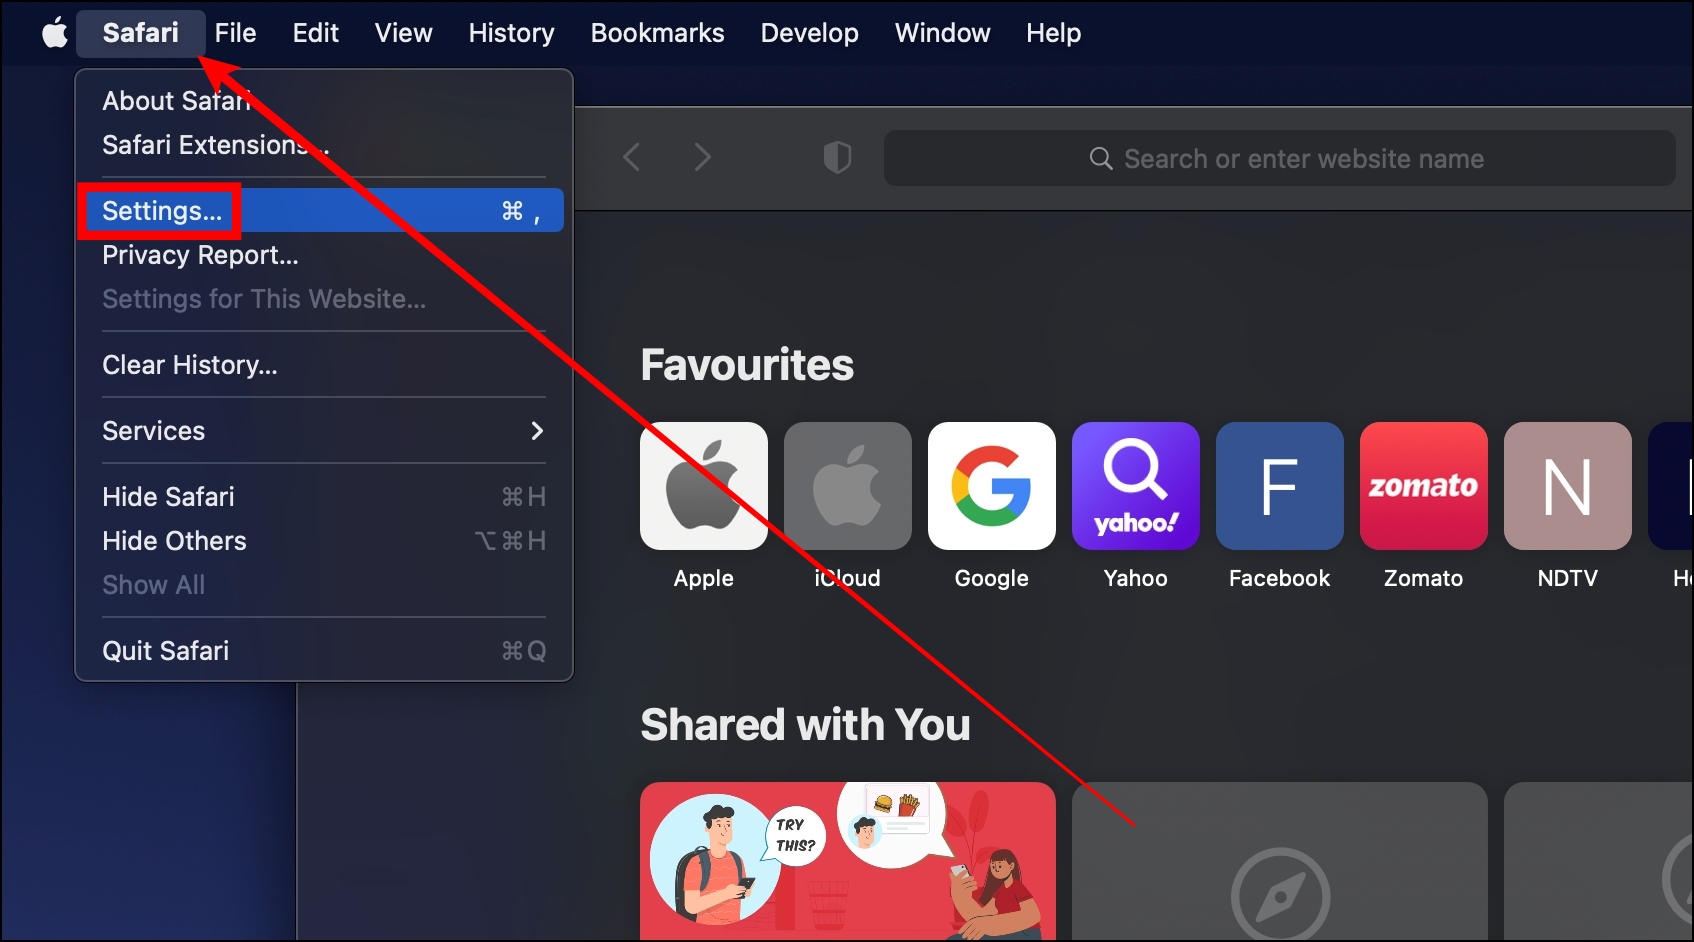
Step 2: Tap on Websites in the Settings window.
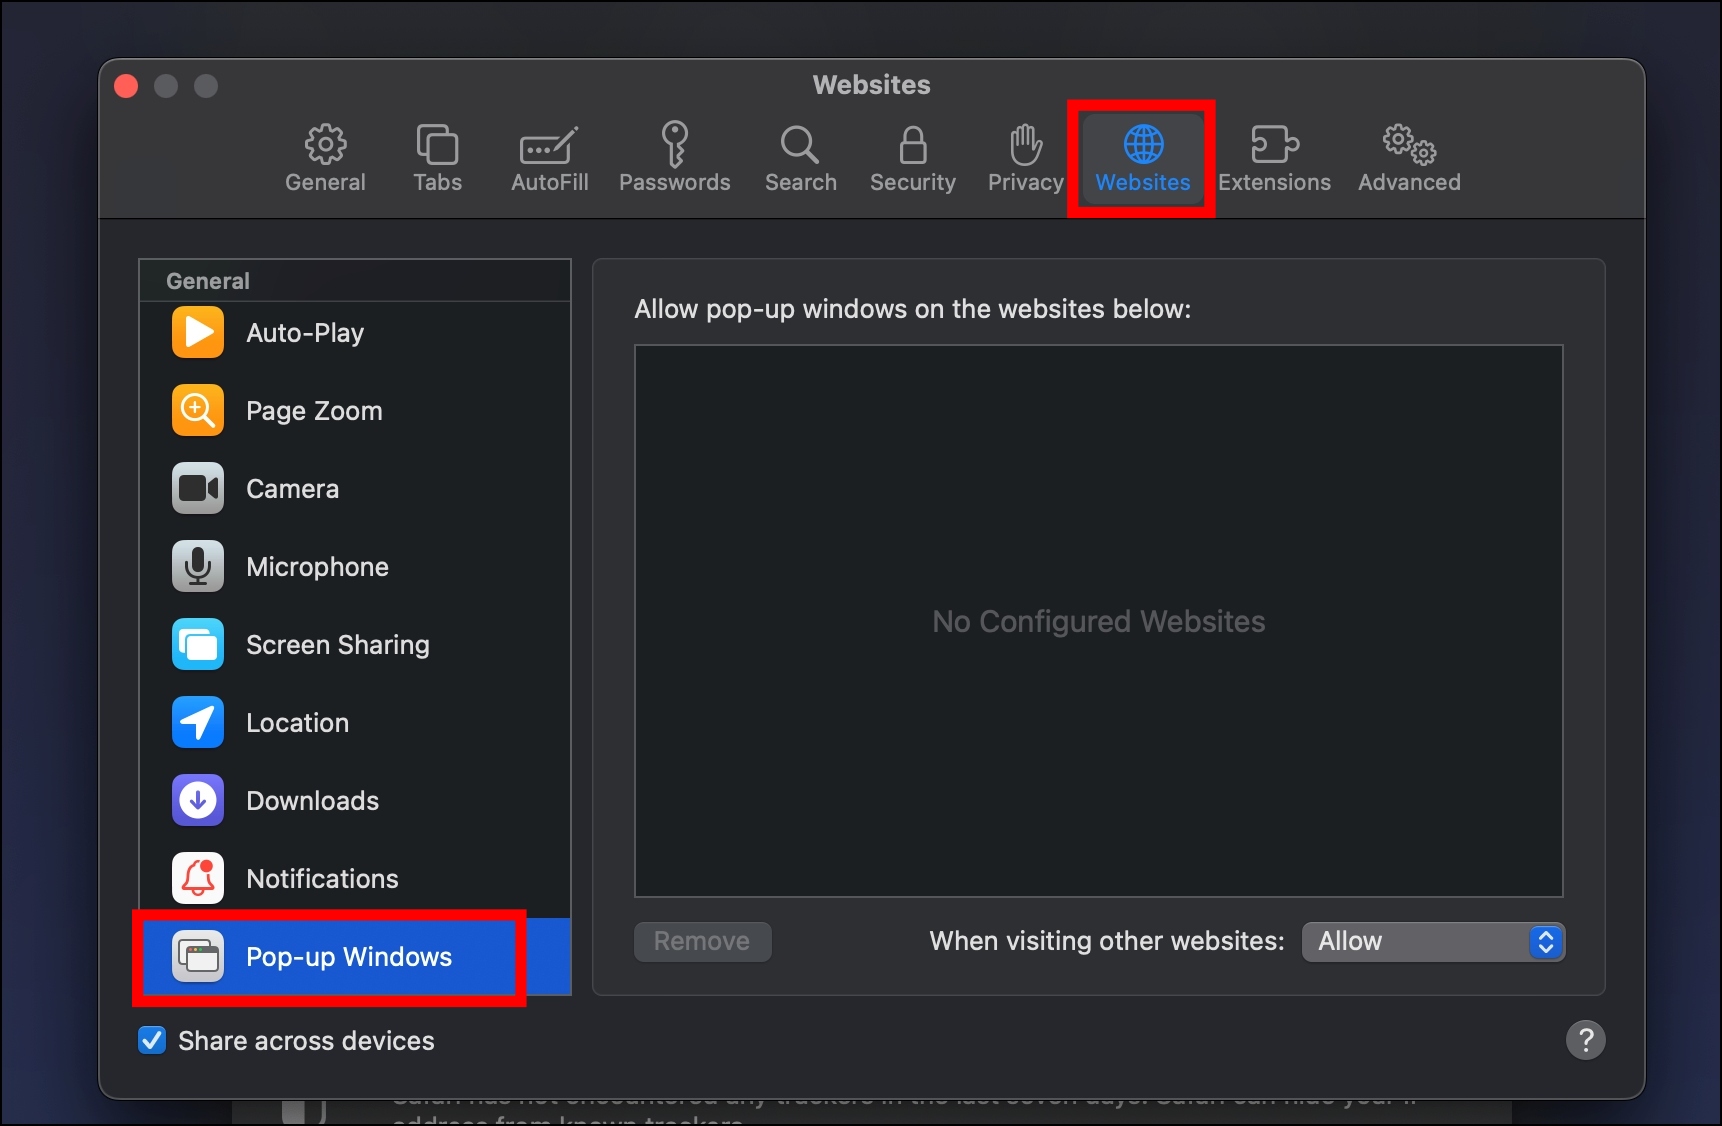
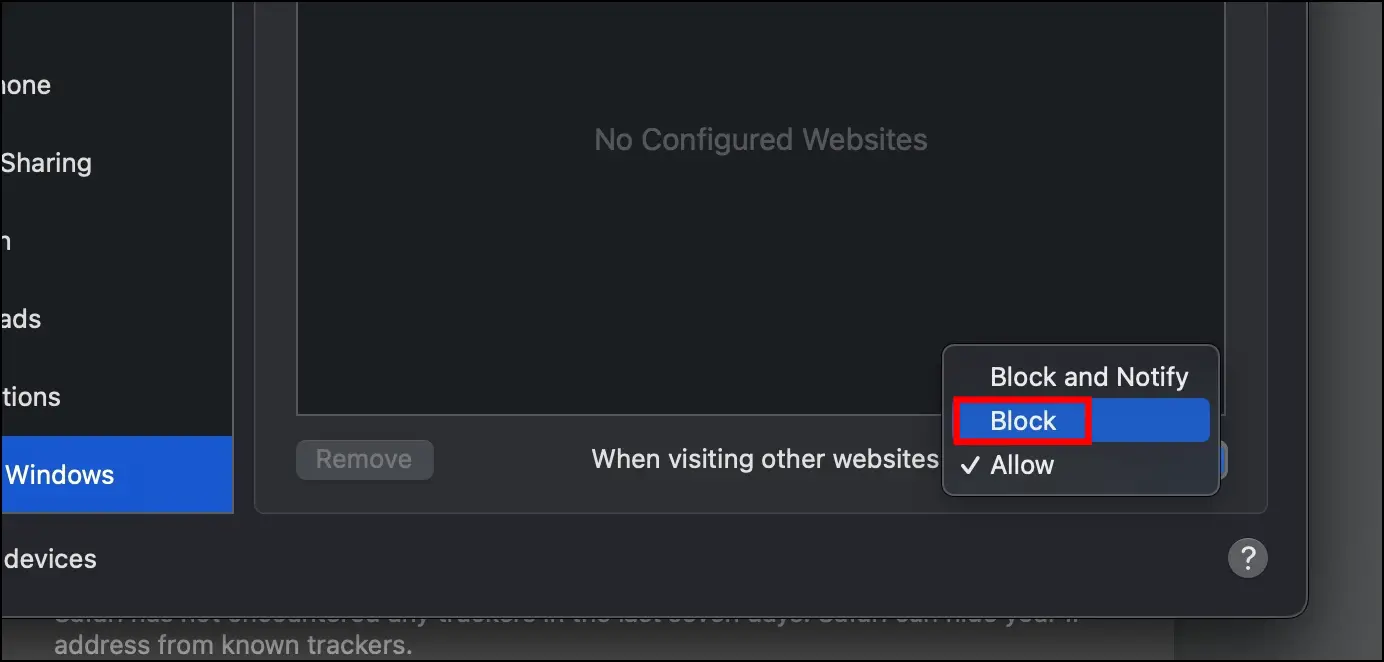
Step 3: Scroll down the sidebar and tap on Pop-up windows.
Step 4: Click on the drop-down next to When visiting other websites and select Block.
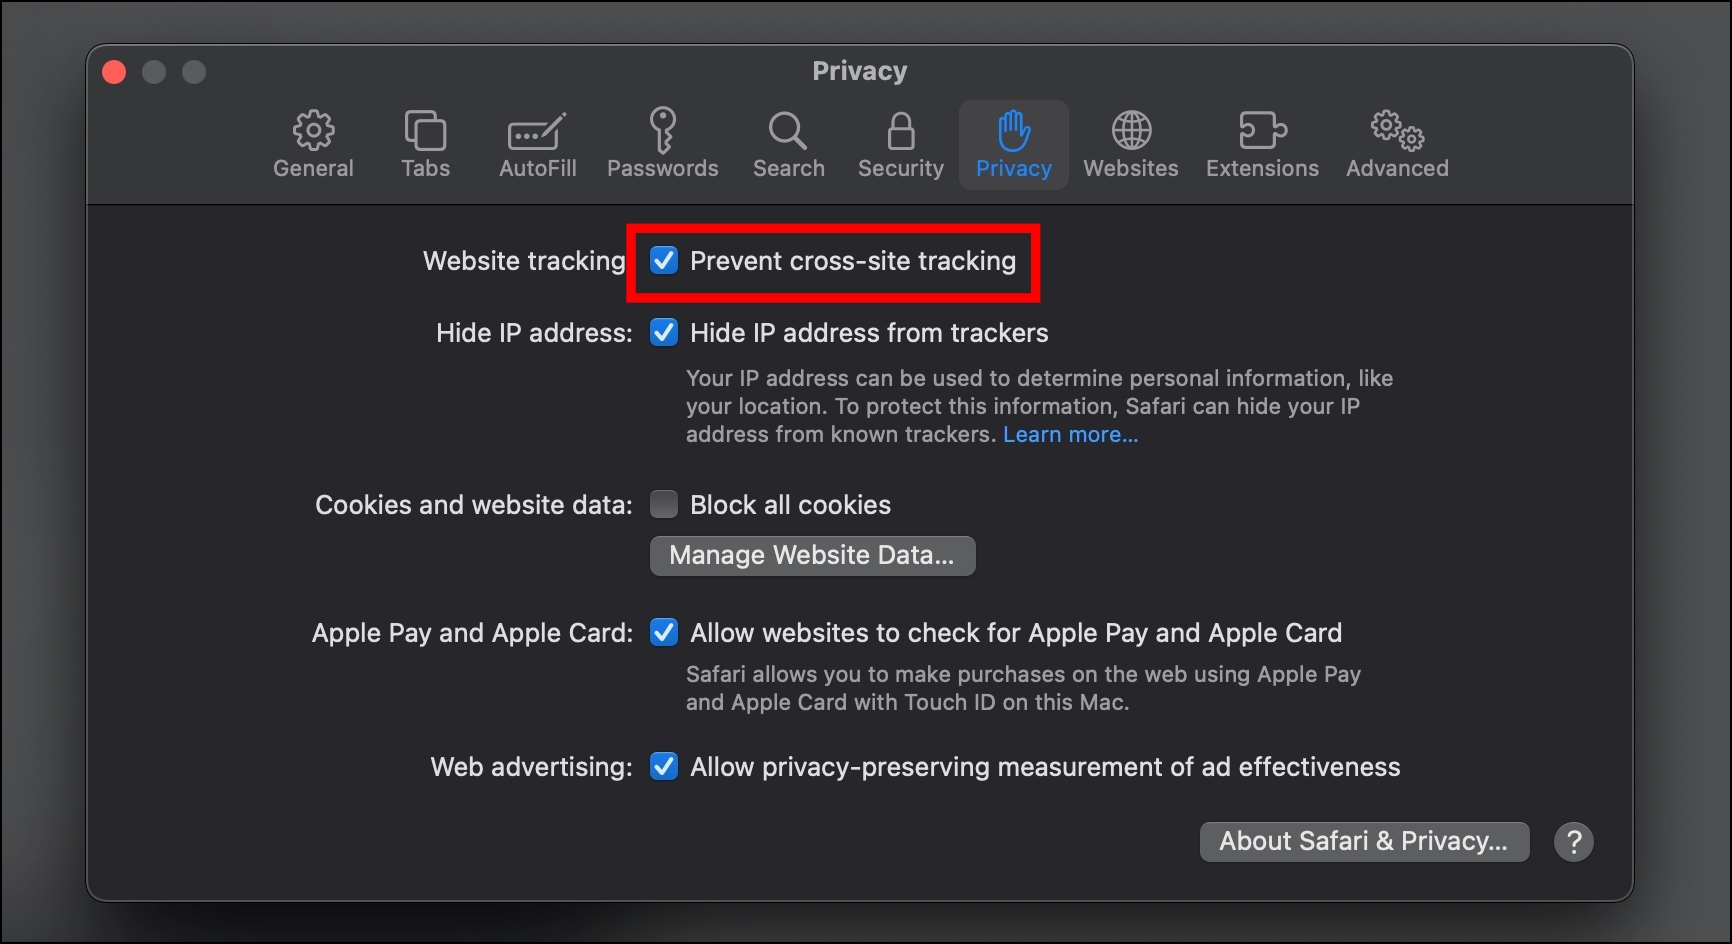
2. Prevent Cross-site Tracking
Some websites use third-party content providers that you can stop from tracking across websites to advertise products and services. Follow the below steps to stop third-party content providers on the Safari browser.
Step 1: Open the Safari browser on your system.
Step 2: Tap on Safari at the top and choose Settings.
Step 3: On the next screen, select Privacy and enable the checkbox for Prevent cross-site tracking.
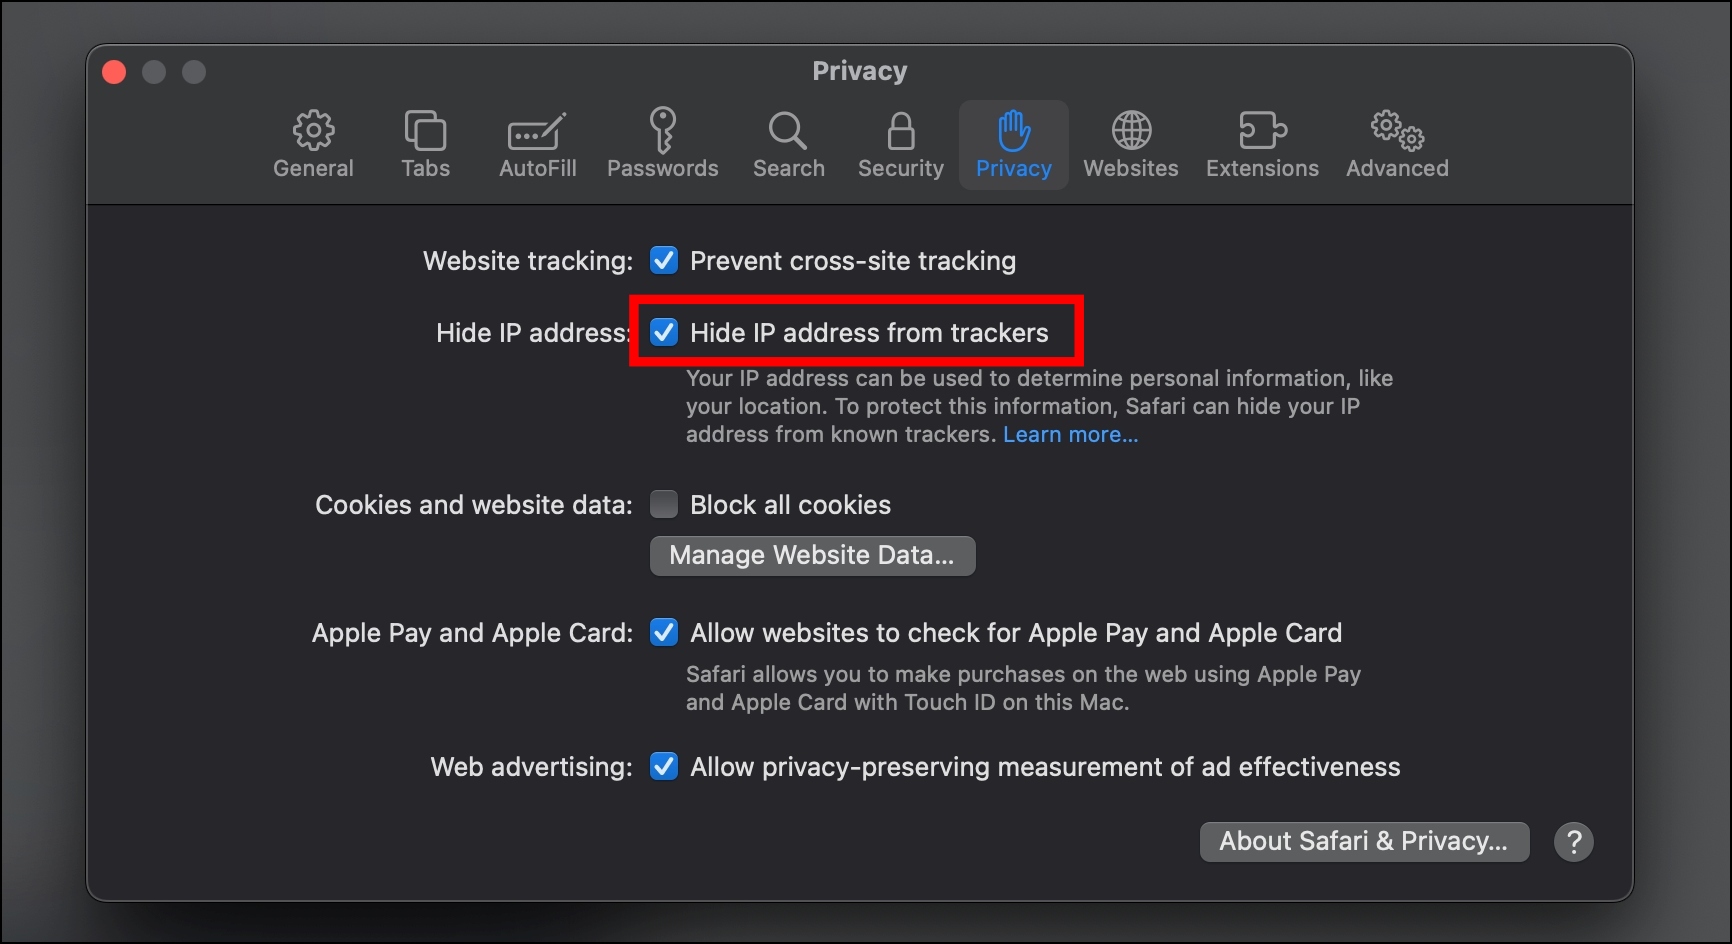
3. Hide IP Address
An IP address determines personal information like your location, device, etc. Safari allows users to hide their IP addresses from trackers to protect this information. Follow the below steps to hide it.
Step 1: Open the Safari browser on your system.
Step 2: Click on Safari from the menu and select Settings.
Step 3: Finally, select the checkbox for Hide IP address from trackers.
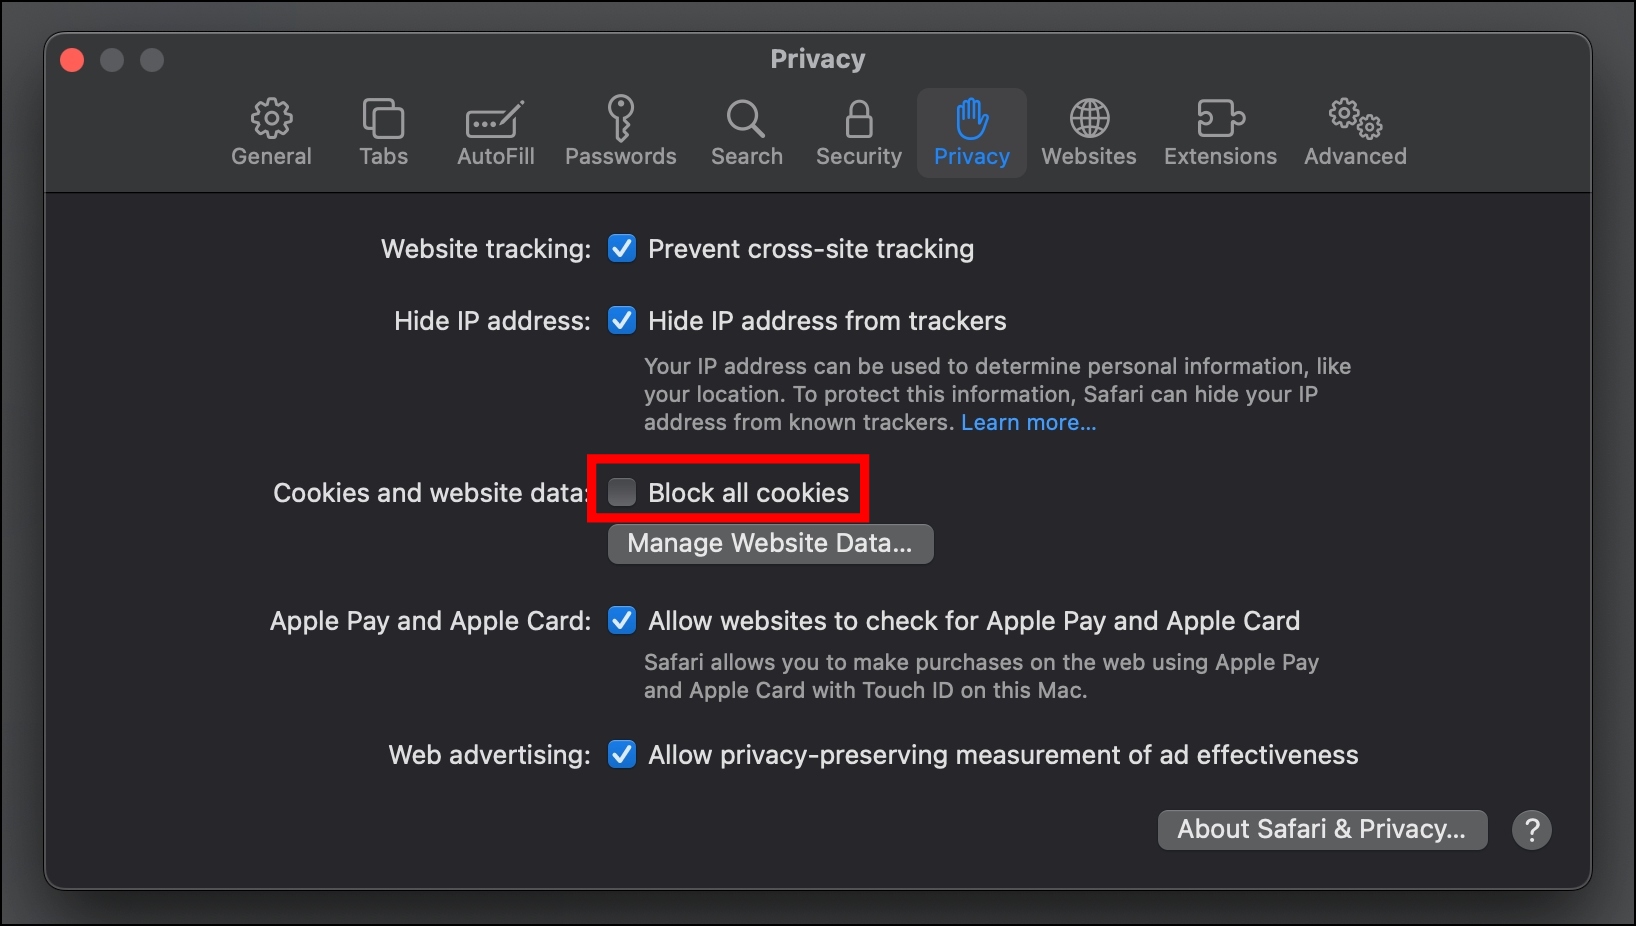
4. Block All Cookies
Safari also lets its users block all the cookies; below are the steps by which you can block it.
Step 1: On the Safari browser, tap on Safari at the top.
Step 2: Select Settings from the appeared menu options.
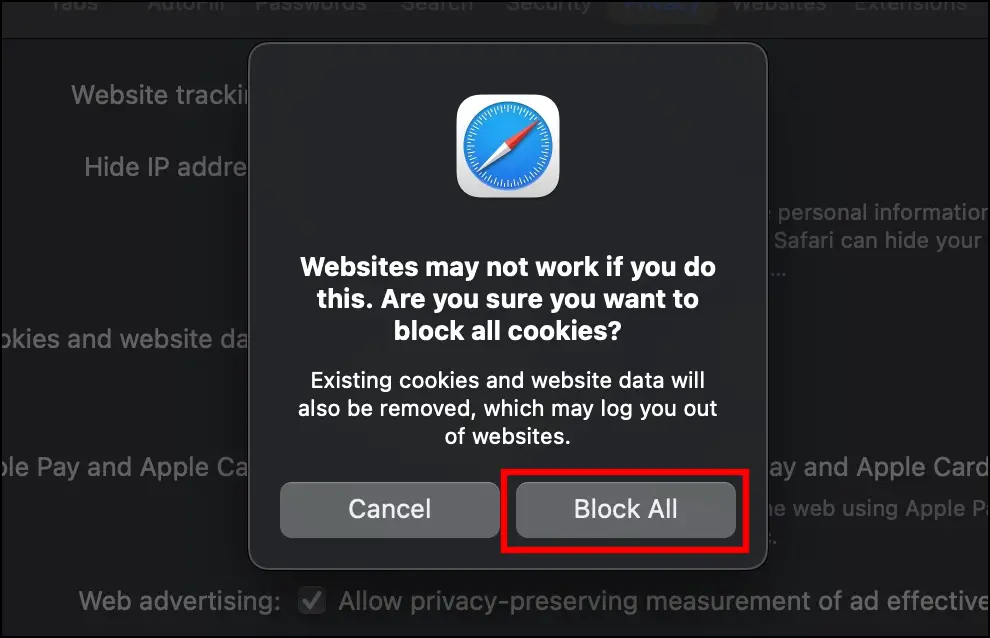
Step 3: Finally, select the checkbox for Block all cookies under Cookies and website data.
Step 4: On the appeared pop-up, tap on Block All.
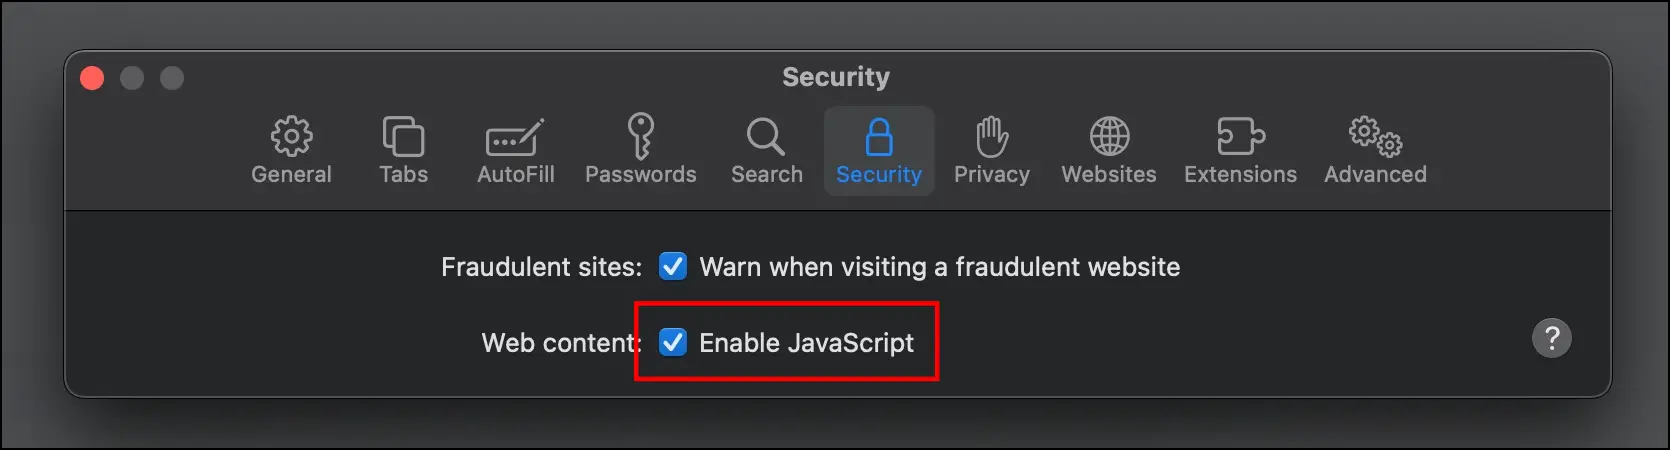
5. Disable JavaScript
You can also disable Javascript on the browser, which puts a pause on websites shoving malware. However, some websites will not work properly if you disable the feature.
Step 1: Open the Safari browser and tap Safari at the top-left side.
Step 2: Select Settings, then choose Security from the appeared window.
Step 3: Uncheck the box for Enable JavaScript next to Web content.
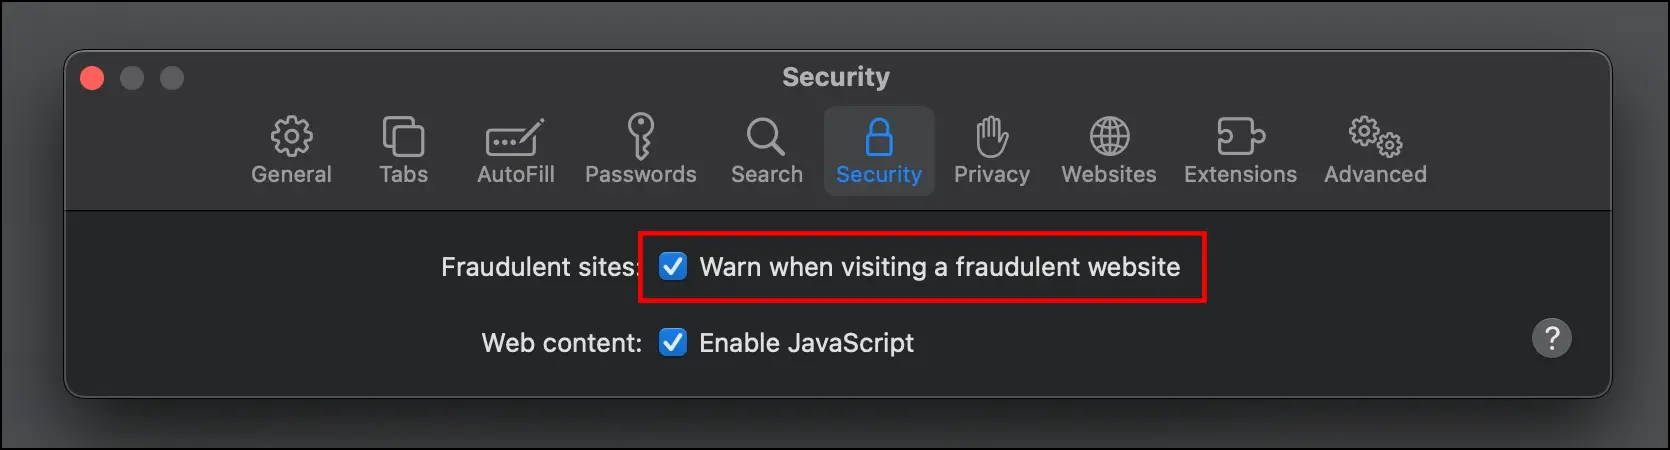
6. Warn When Visiting a Fraudulent Website
Safari also has a feature that, once enabled, uses Google Safe Browsing to identify fraudulent websites and warns users when they visit a suspected phishing website. Follow the below steps to enable the feature.
Step 1: On the browser, tap Safari at the top and select Settings.
Step 2: Once the window appears, tap on Security.
Step 3: Select the checkbox for Warn when visiting a fraudulent website.
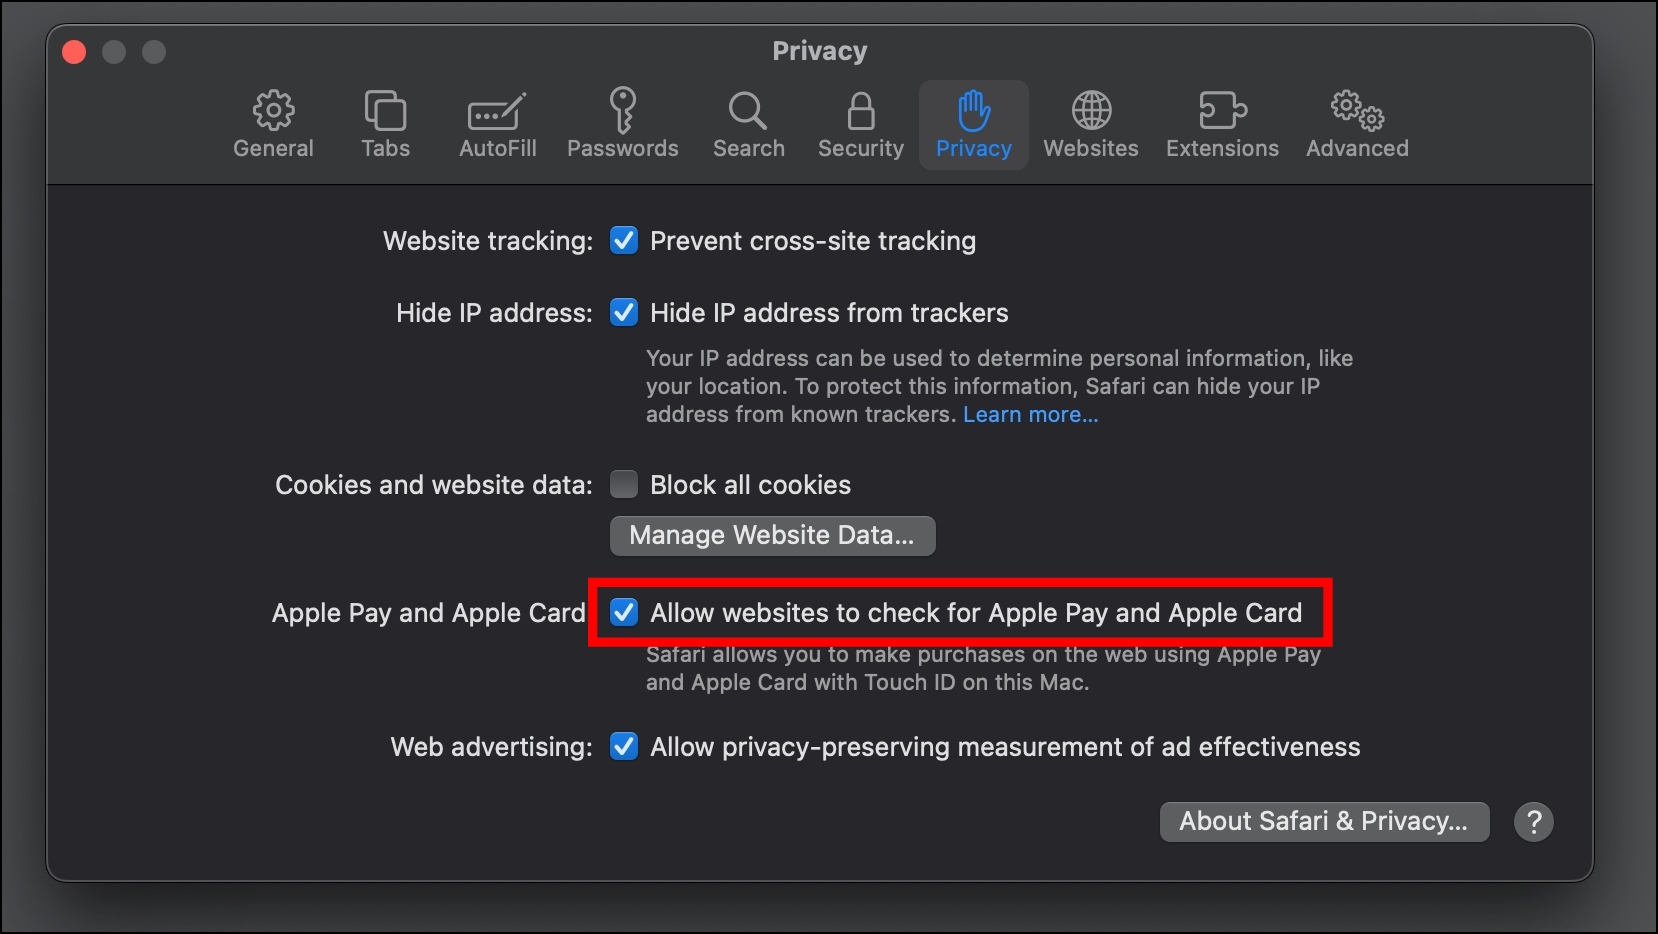
7. Disallow Sites to Check for Payment Methods
Furthermore, you can disallow websites from checking whether you have Apple Pay and Apple Card saved on the browser. Follow the below steps to disallow it.
Step 1: Open the browser and tap on Safari, then select Settings.
Step 2: Click on Privacy on the appeared window.
Step 3: Uncheck the box for Allow websites to check for Apple Pay and Apple Card.
Enjoy Safe and Secure Browsing
These are some browser security tips, tricks, and features that you can use or enable to stay safe online. Moreover, if you see warnings while browsing the web, you shouldn’t ignore them. We hope these browser security tips helped you stay safe online. If you have any queries, let us know in the comments below. Stay tuned on Browser To Use for more such articles and how-tos.
Related:


