
Do you want to pin a website that you visit too frequently so that it can’t be closed accidentally? If so, in this read, you will learn three ways to pin and unpin a tab in the Google Chrome browser. Meanwhile, you can learn to remove website shortcuts from Chrome’s new tab page.
How to Pin and Unpin a Tab in Google Chrome
Once you pin a tab on Google Chrome, you will not see the close button for that tab which avoids the sudden or accidental closing of pinned tabs. Here, we have added ways to pin a tab in the Google Chrome browser.
Steps to Pin a Tab
You can easily pin a tab on the Chrome browser on your Windows and Mac PC. There are some ways to pin a tab on Chrome that includes using your mouse, mouse + keyboard, and an extension. Follow the below steps to do so.
Using Mouse
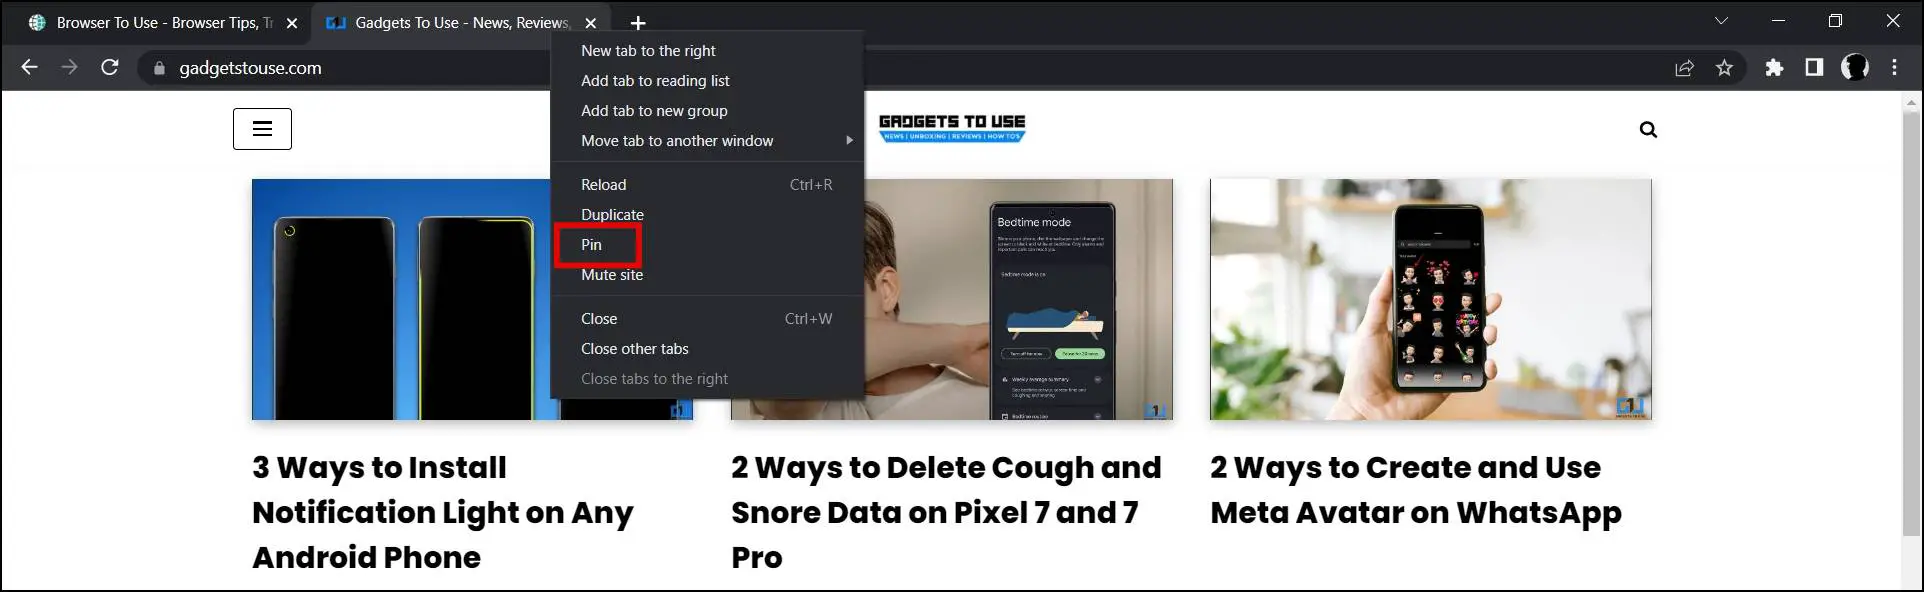
Step 1: Open the Chrome browser on your PC and head to a website you want to pin.
Step 2: Right-click the tab you want to pin.
Step 3: Tap on Pin from the appeared menu to pin it.
Using Keyboard + Mouse
Step 1: Open the Google Chrome app on your system.
Step 2: Visit the tab you want to pin on your browser.
Step 3. Right-click the tab you want to pin.
Step 4: Press the ‘P’ key on your keyboard and hit enter to pin the tab.
Using an Extension
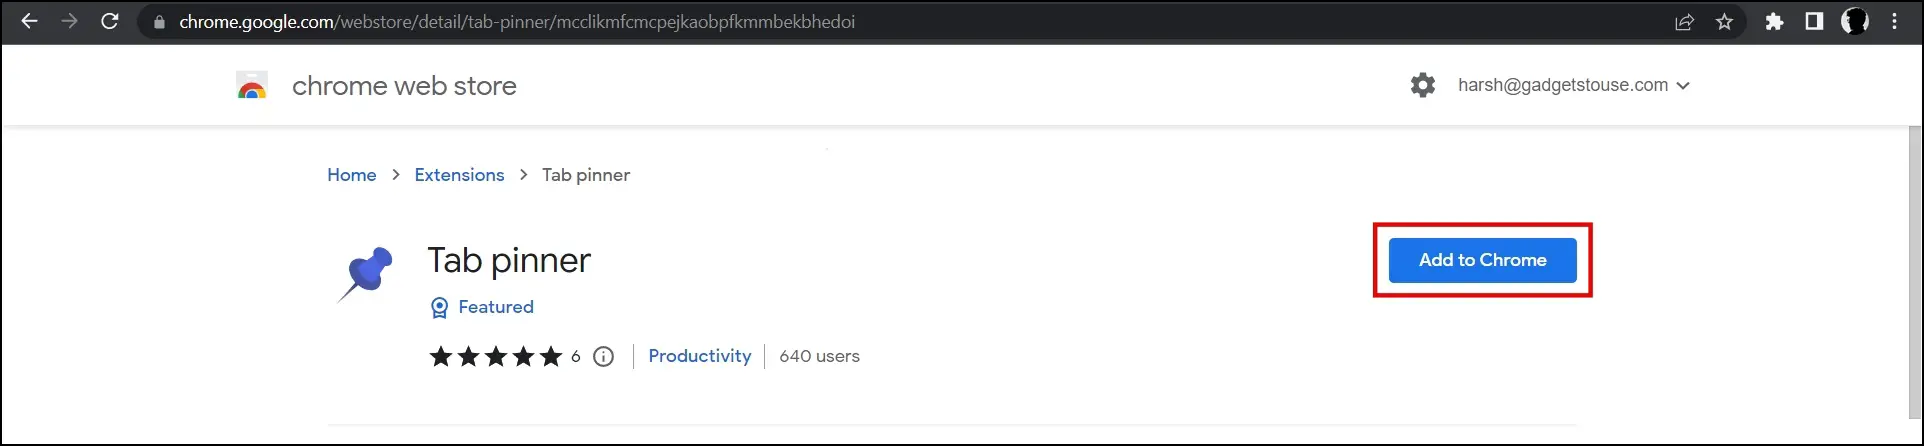
Step 1: Open the Chrome Web Store on your PC.
Step 2: Search for Tab Pinner or directly visit this link.
Step 3: Click on Add to Chrome on the extension page.
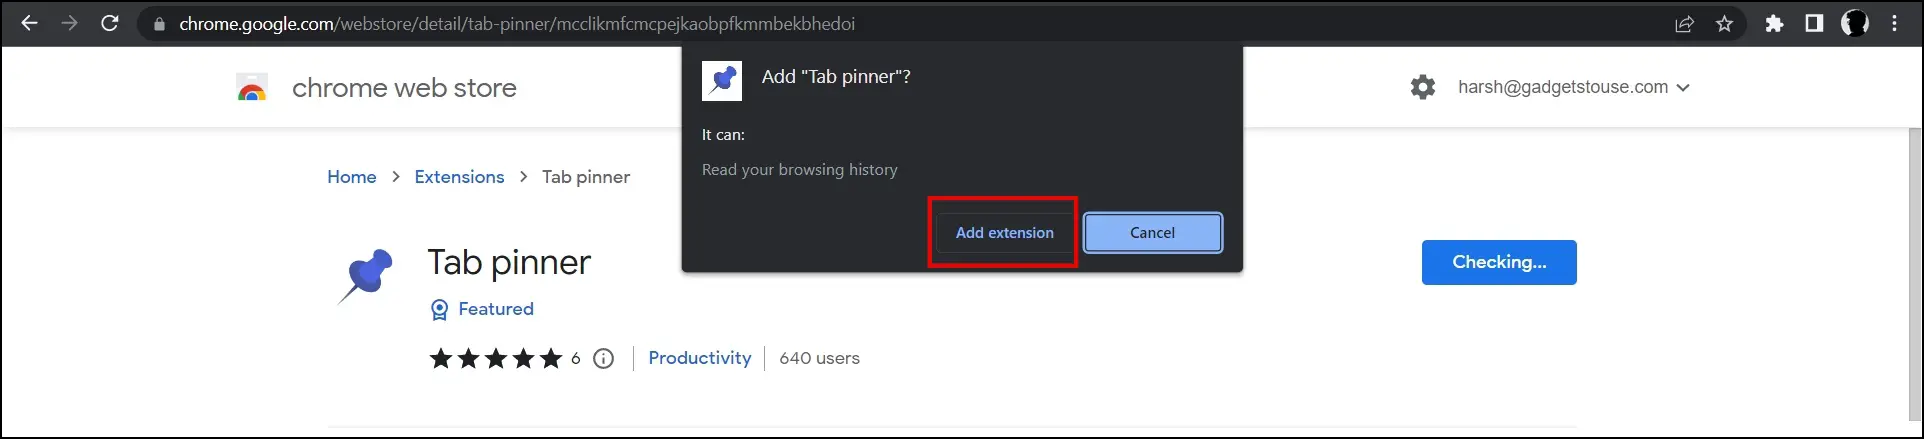
Step 4: Tap on Add Extension to confirm the installation.
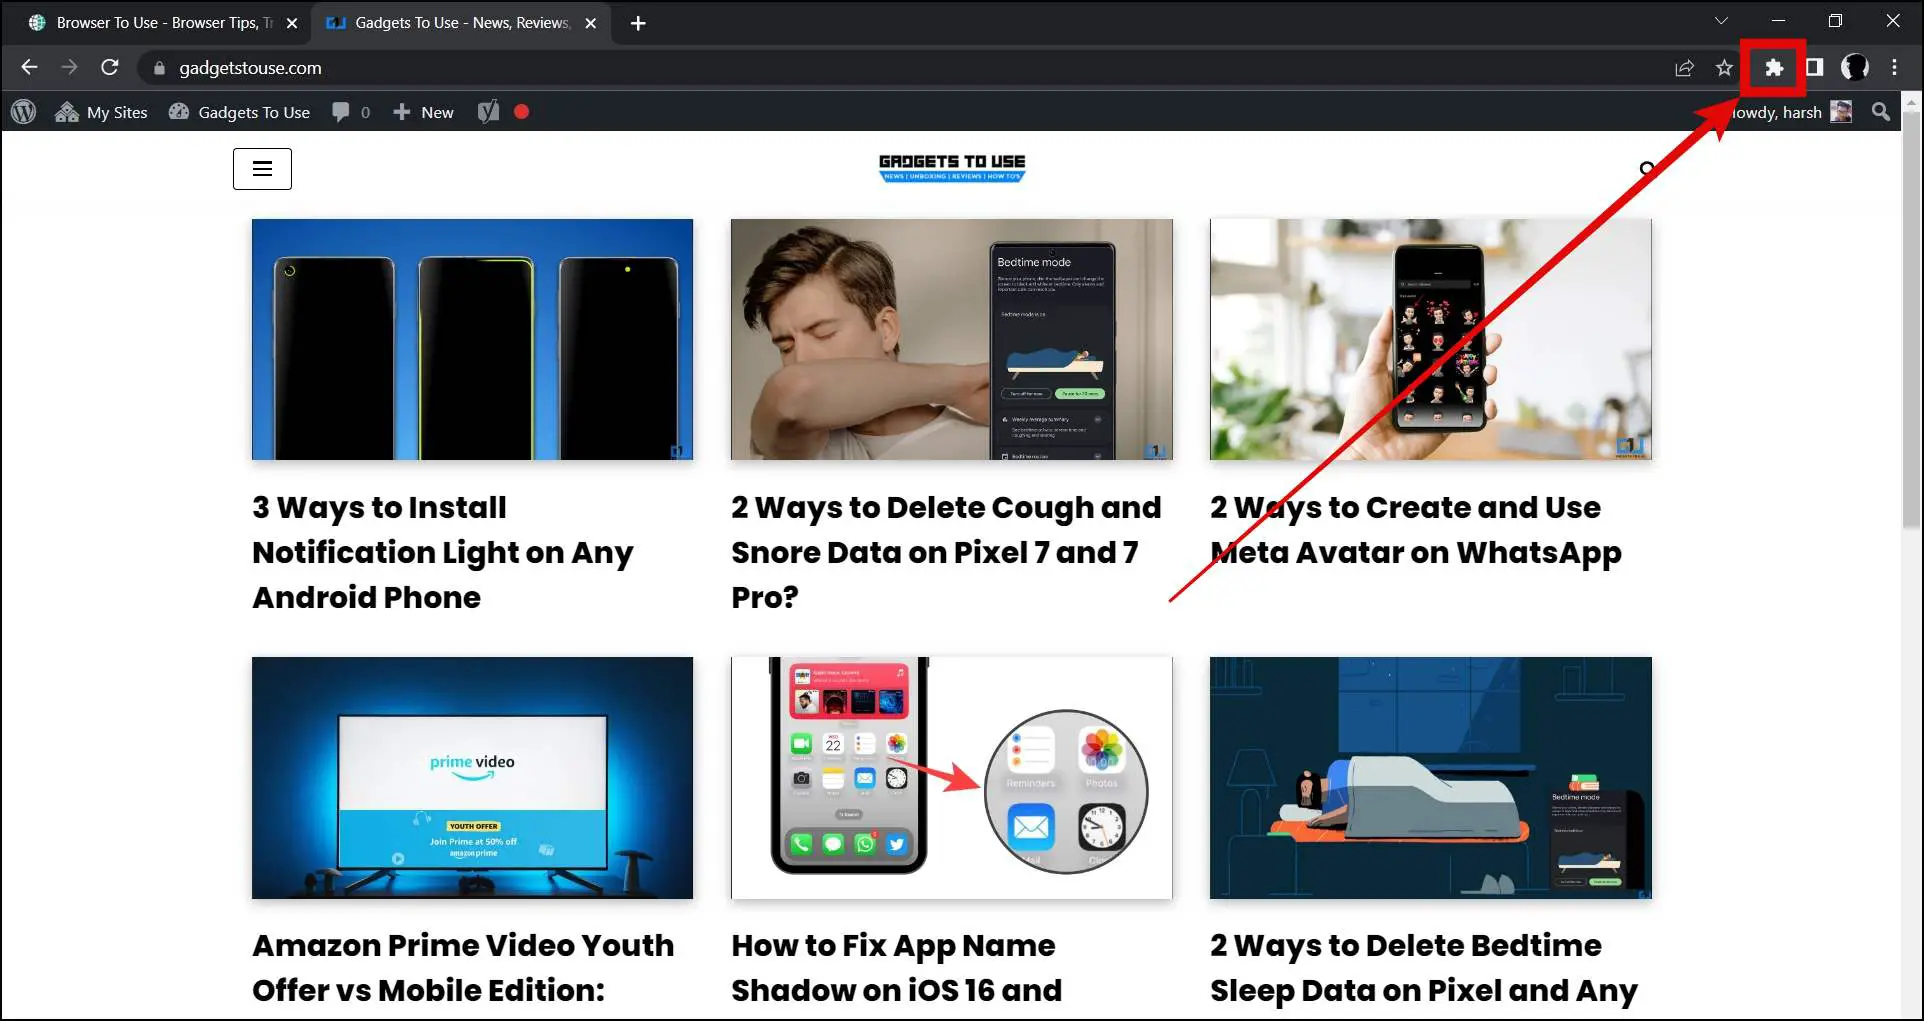
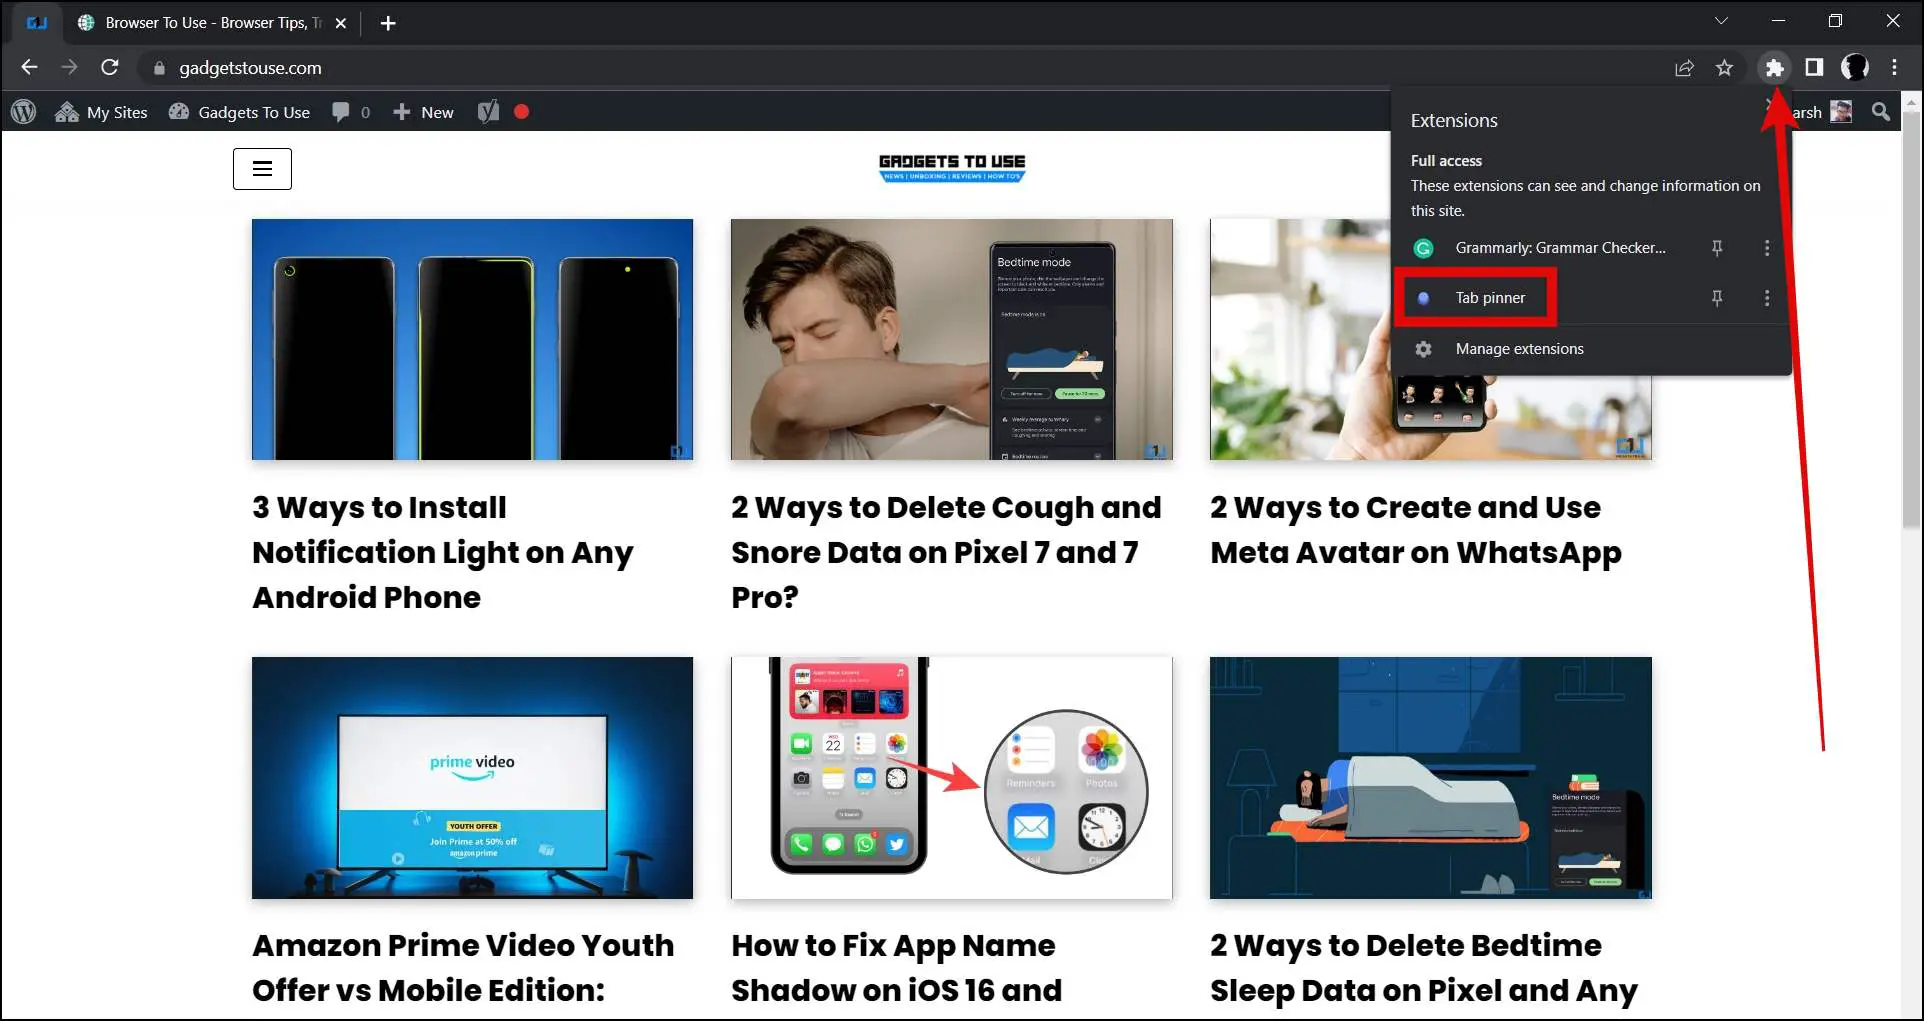
Step 5: Now, head over to the tab you want to pin and click on the extension icon at the top.
Step 6: Select Tab Pinner from the appeared extensions to pin the tab.
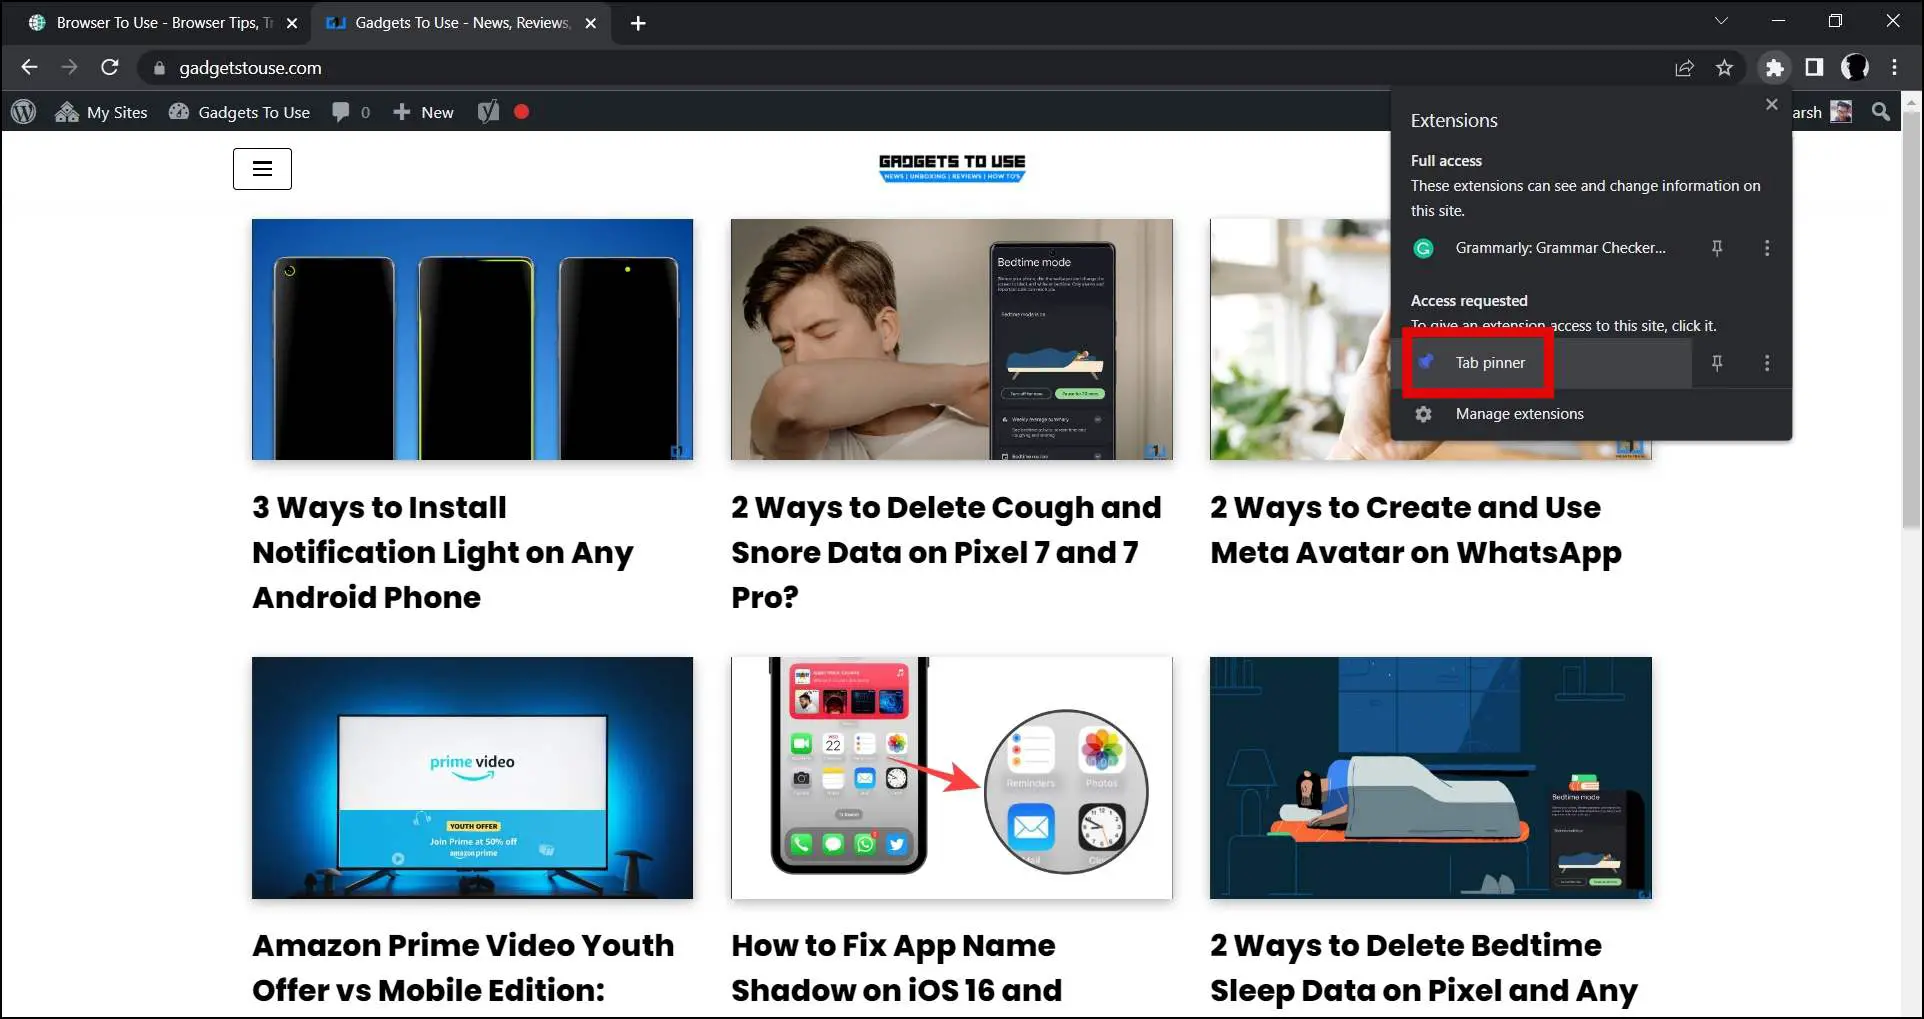
Step 7: Once you tap on the extension, it will automatically pin the tab.
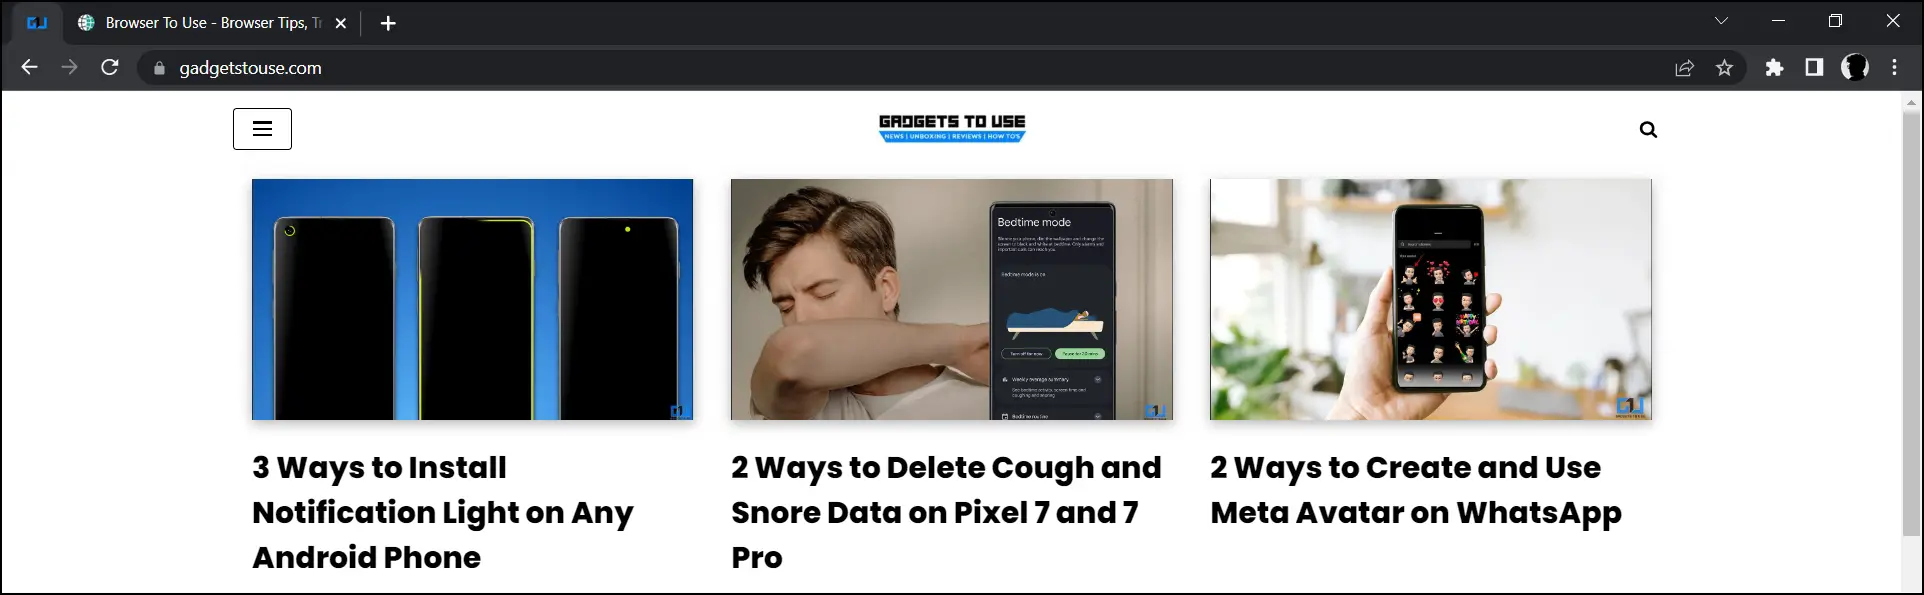
And once you pin a tab, it will shrink to a small size consisting of the website’s favicon without its name and will also move to the left of the window.
Steps to Rearrange Pinned Tabs
Now, once you pin tabs on the browser, you might want to set these tabs in a specific order as you can pin more than one tab in the browser. Hopefully, doing so is straightforward, here’s how you can do it.
Step 1: Select a pinned tab and drag it left or right.

Step 2: Once you drag it, the tab will be rearranged per your choice.
Steps to Unpin a Tab
You can easily unpin a pinned tab on the Google Chrome browser. Follow the below steps to do so.
Step 1: Right-click on the pinned tab.
Step 2: Select Unpin from the appeared options to unpin. Alternatively, press the ‘U’ key to unpin.

Step 3: You can also unpin a tab from the Tab Pinner extension. To do so, click on the extension icon at the top and select Tab Pinner from the extensions to unpin it.
Once you unpin a tab, it will return to a general tab with the website’s favicon and site name.
Wrapping Up
This was how you can pin and unpin a tab in the Google Chrome browser. I hope the above article helped you in pinning, rearranging, and unpinning a tab in the browser. Stay tuned for more such tips, tricks, and how-tos.
Related:


