
Several users have reported that text or font on websites is not displaying properly when browsing in Google Chrome. Well, it’s a widespread issue wherein the text may look pixelated, blurry or gibberish on websites. Thankfully, it can be solved with easy troubleshooting steps. In this read, we have added the best ways to fix improper font rendering or text not displaying correctly in the Chrome browser.
Text Not Displaying Correctly in Chrome? Here’s the Fix
Google Chrome users have commonly reported the following issues with text rendering (images attached):
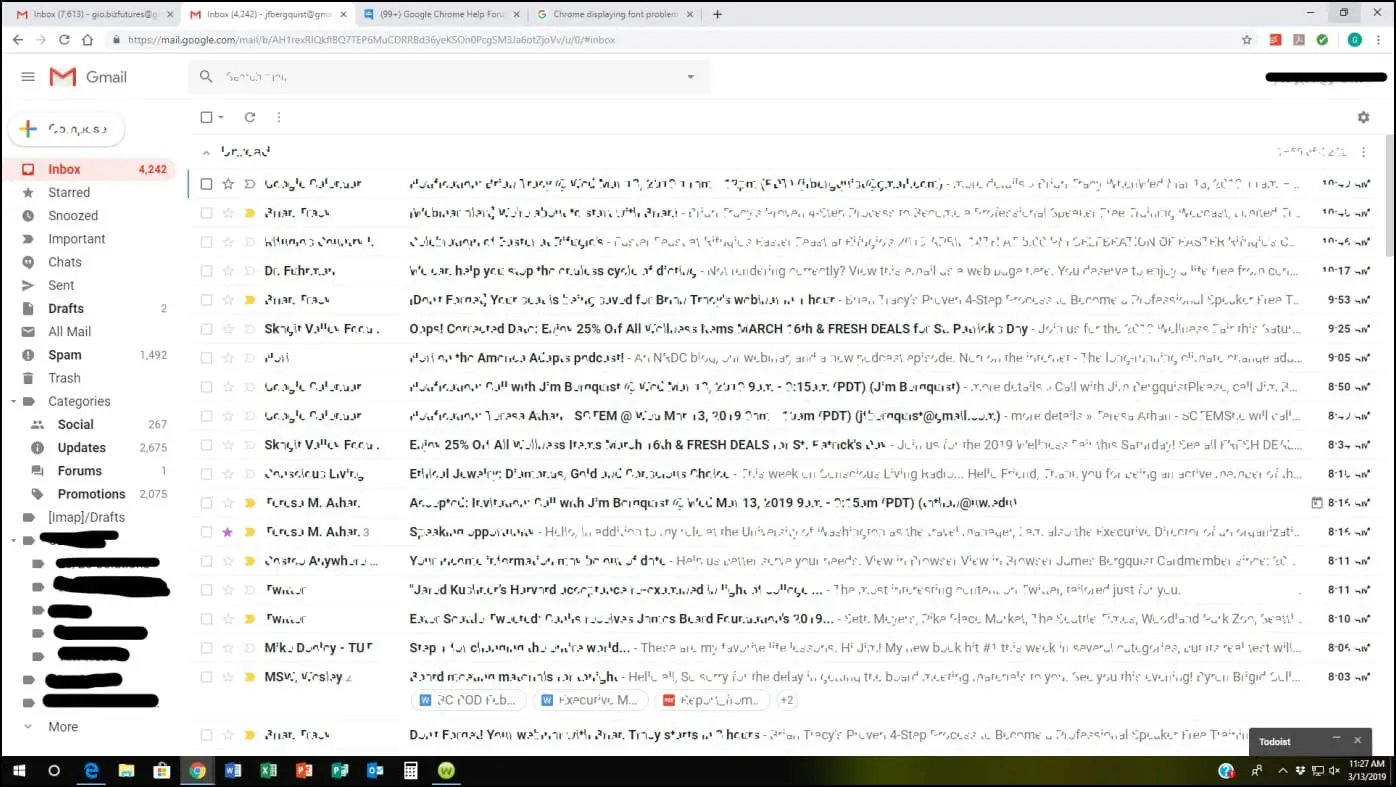
- Google Chrome displays pixelated text
- Text on websites looks blurry when browsing in Chrome
- Chrome cannot render text or content properly on your computer
- The font looks over-smoothened or jagged in Chrome
- Text is replaced with special characters like $ @ # % or !
- The text does not appear at all or disappeared in some areas
- Content is faded or too light to read
For starters, there can be multiple reasons for Google Chrome’s text not displaying correctly on Windows. It could be either due to wrong browser settings, rogue extensions, or experimental features. Here, we have added over ten troubleshooting methods that will help you fix the issue. Read on.
1. Turn On ClearType
ClearType is a Windows-specific software technology by Microsoft that improves the readability of text on an LCD screen. Tweaking it will likely fix the text rendering Chrome as suggested by folks at Google themselves. Here’s how to do it:
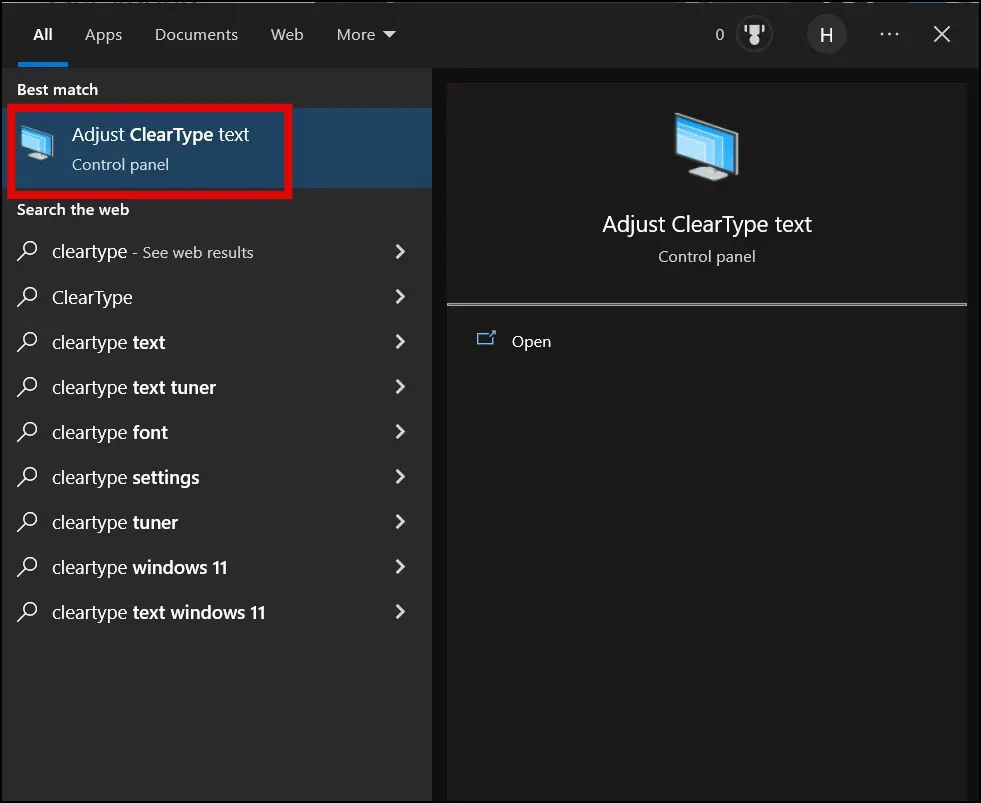
Step 1: Open the search by tapping the Windows key.
Step 2: Type ClearType and tap on Adjust ClearType text to open it.
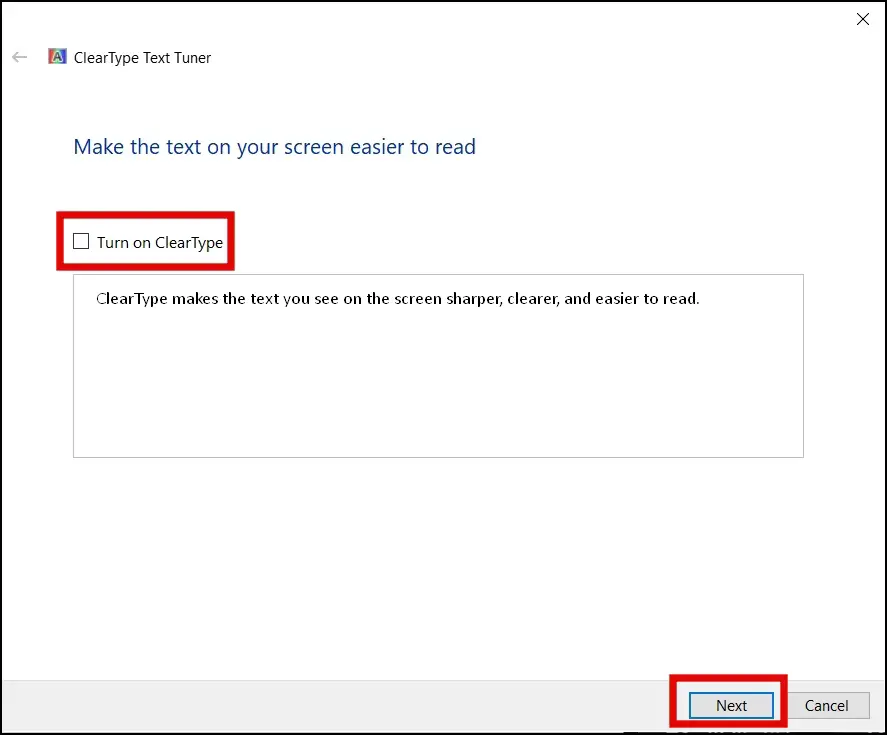
Step 3: Select the checkbox for Turn on ClearType.
Step 4: Tap on Next to proceed.
Step 5: It will show that Your Display monitor is set to its native resolution, tap Next.
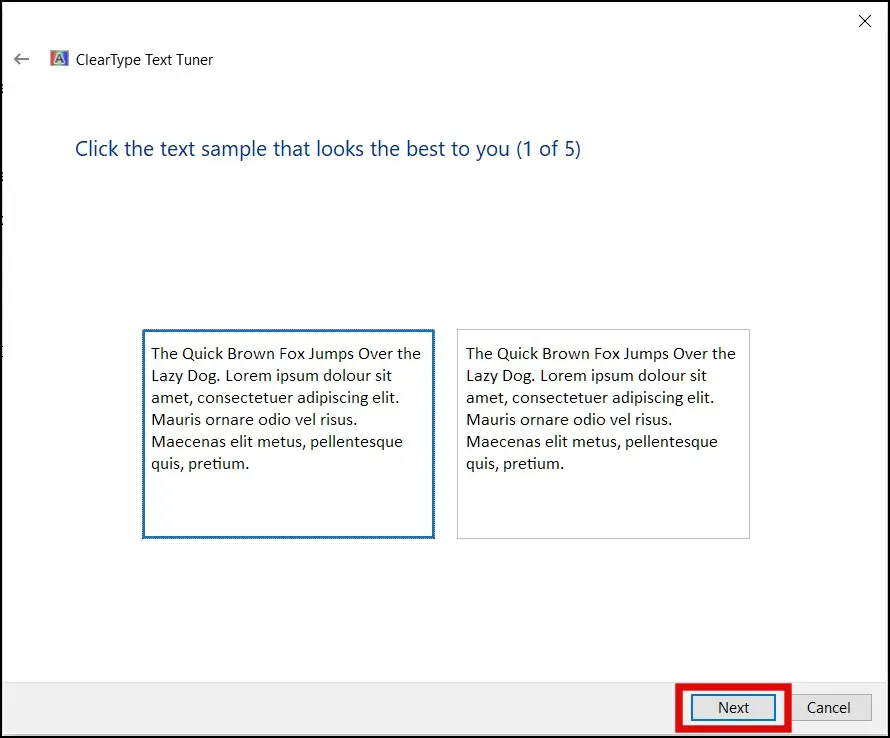
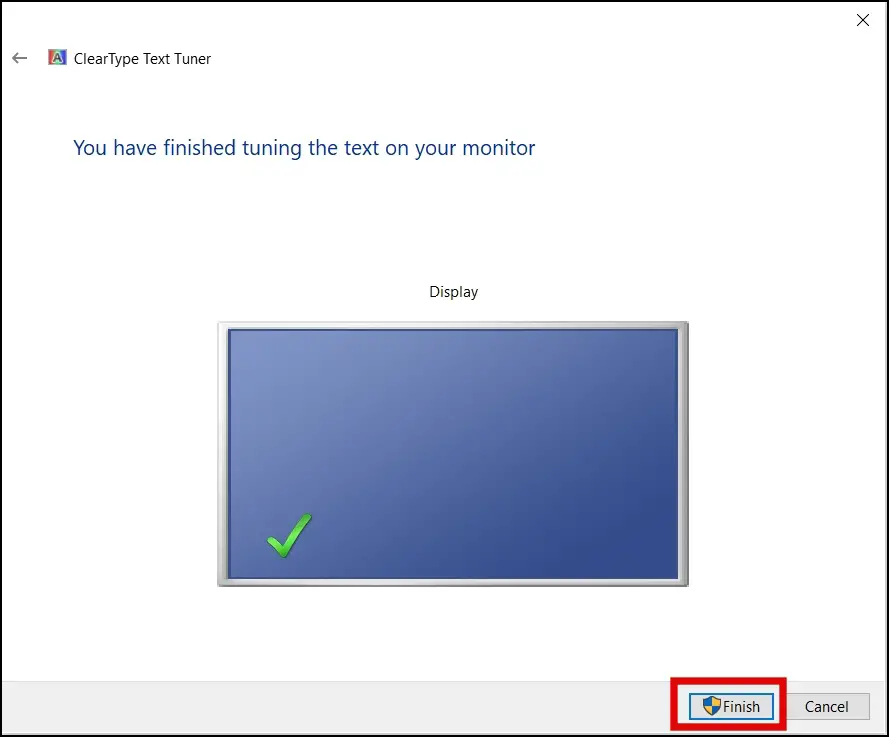
Step 6: ClearType will then show some text samples. Select one of them which looks best to you and tap Next.
Step 7: Once done, tap on Finish to apply the changes.
Now open Chrome and head to any search results page or website to see if the text looks normal. If the font still does not render properly, proceed with the other methods below.
2. Reset DPI Scaling to 100% or Recommended
If you are using a custom scaling like 125%, 150%, or 200% on your Windows computer, it may cause issues with how text appears in Chrome and other browsers. Hence, you need to reset it back to the original defaults, i.e., 100%. Follow the below steps to reset DPI scaling on your Windows PC.
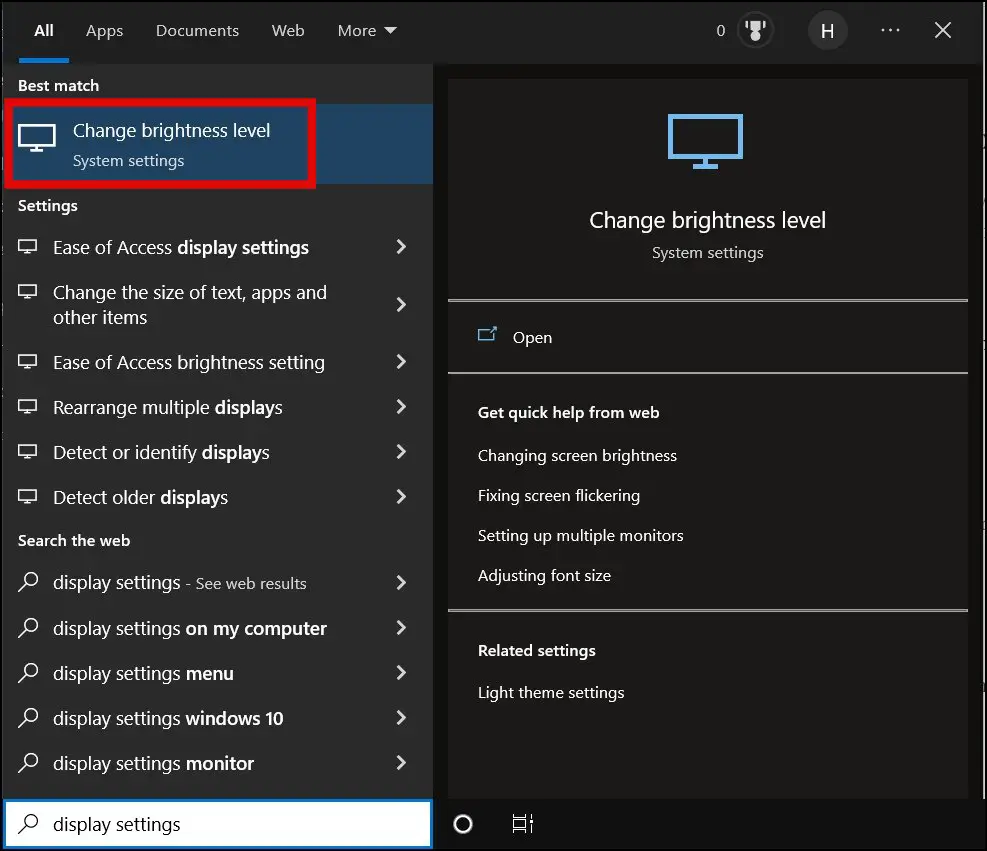
Step 1: Press the Windows+S key to open the search.
Step 2: Search for Display Settings and tap on Change Brightness Level to open it.
Step 3: Click on the drop-down below Change the size of texts, apps, and other items under Scale and layout.
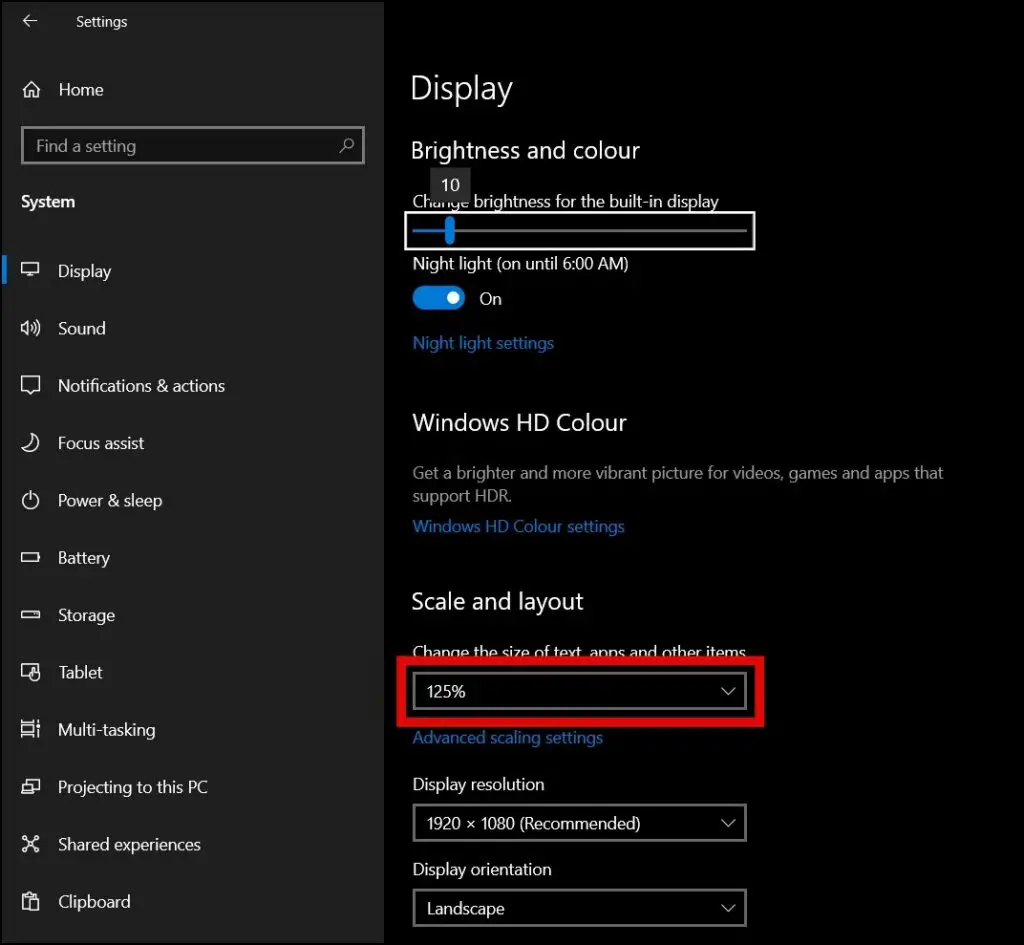
Step 4: Select the 100% scaling or recommended one from the drop-down menu.

3. Turn Off the Smooth Edges of Screen Fonts
Some Reddit users have reported that disabling smooth edges of screen fonts helps them in fixing the text rendering problems in Google Chrome and Edge. Follow the below steps to disable it.
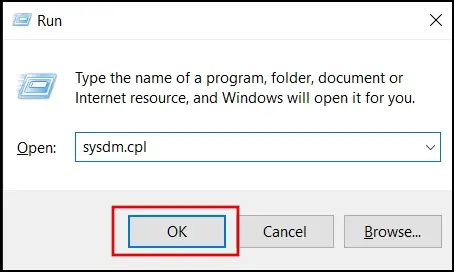
Step 1: Press the Windows+R key at once to open Run.
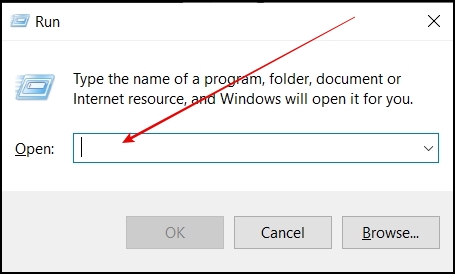
Step 2: Type sysdm.cpl and hit enter to open System Properties.
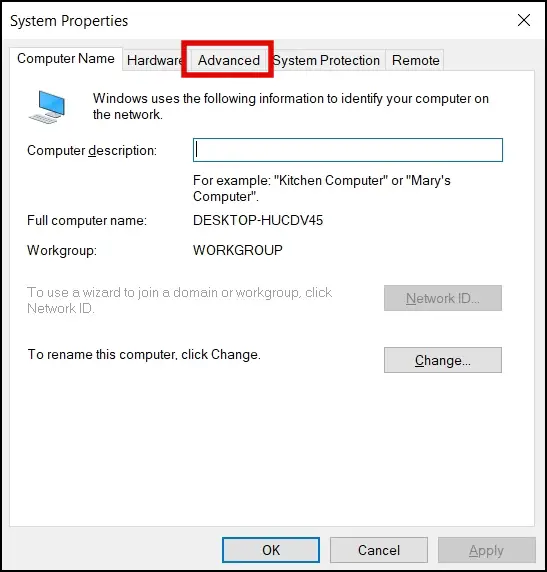
Step 3: Click on the Advanced tab at the top.
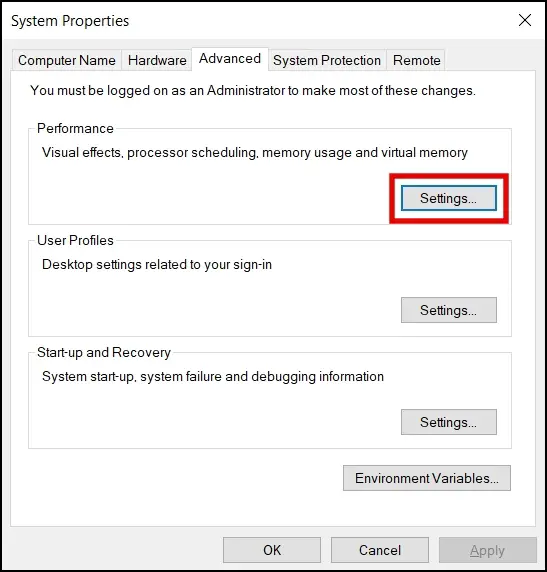
Step 4: Select Settings under the Performance section.
Step 5: On the next screen, unselect the Smooth edges of screen fonts.
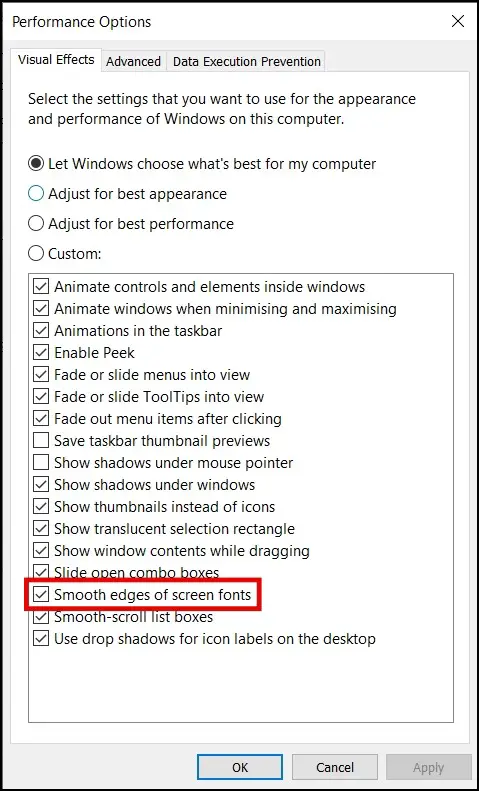
Step 6: Finally, click on Apply then tap OK.

4. Adjust Font settings
There are also chances that the issue might be related to font settings. Follow the below steps to adjust the font settings of Chrome.
Step 1: Open the Google Chrome on your PC.
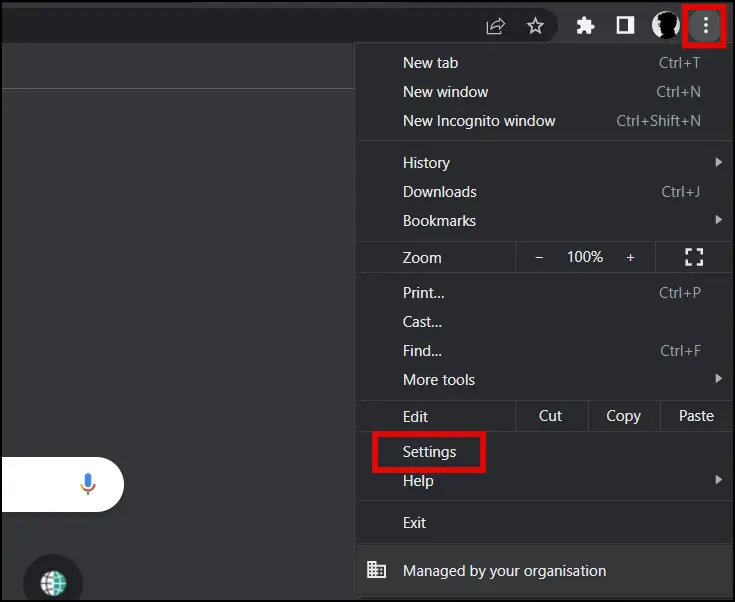
Step 2: Tap on three dots and select Settings.
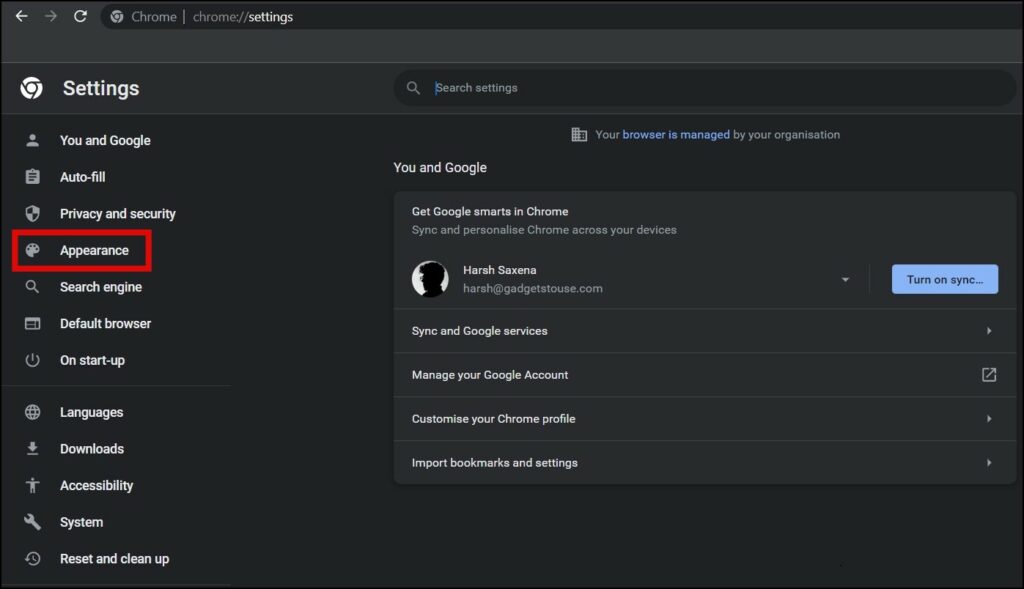
Step 3: Click on Appearance from the sidebar.
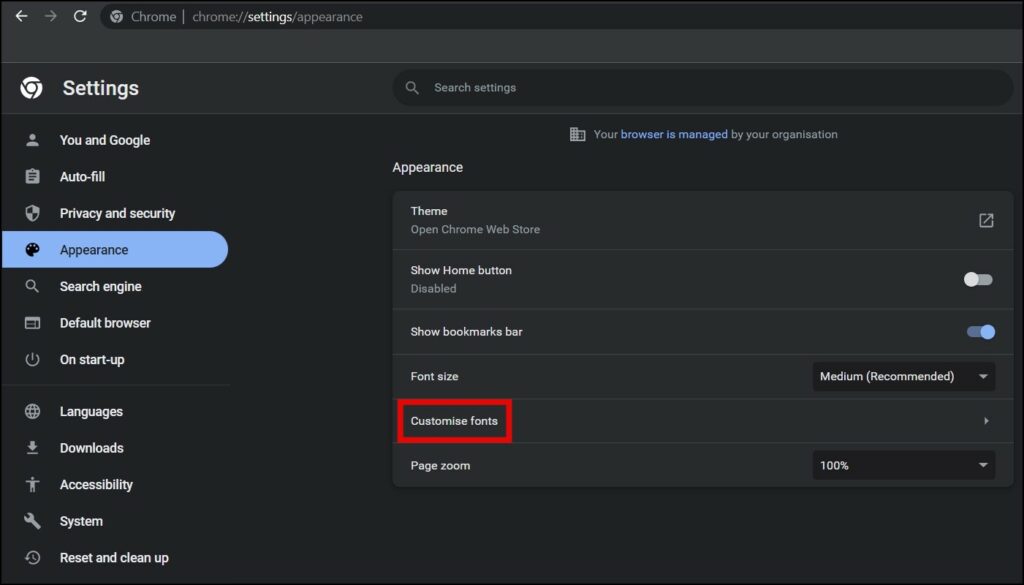
Step 4: Select Customize fonts.
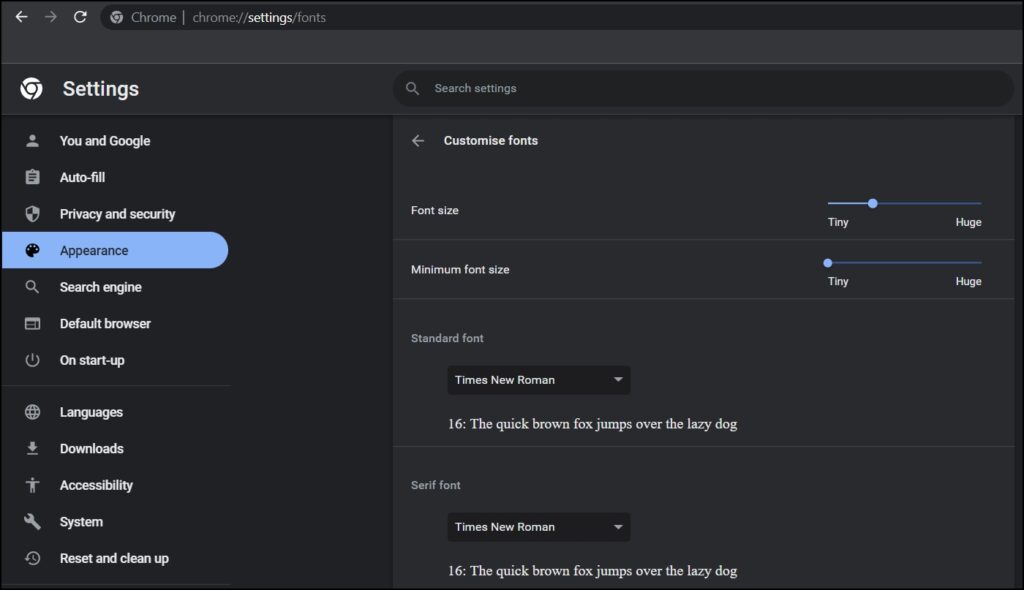
Step 5: On the next screen, adjust the fonts and your issue should be fixed.
5. Let Windows Fix Blurry Apps Issue
Windows 10 have a built-in feature to fix the blurry app issue. Many users have reported that after enabling the feature, they are able to fix the text not displaying correctly problem. Follow the below steps to enable it.
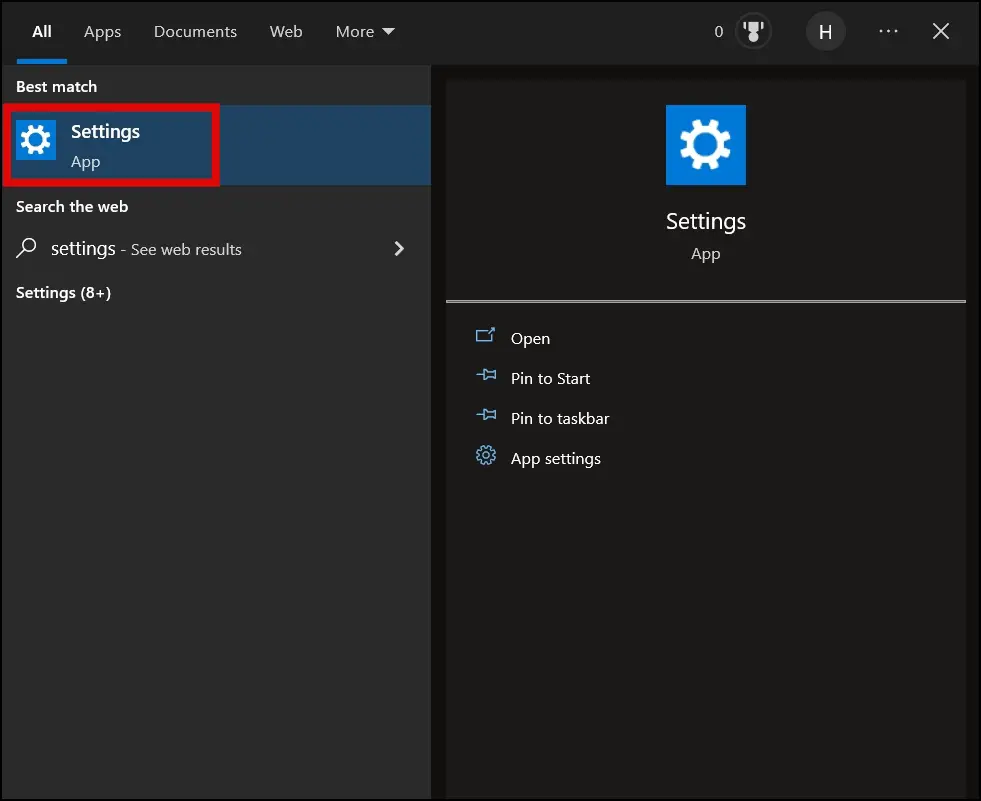
Step 1: Press the Windows+S key at once.
Step 2: Search for Settings and open the settings app.
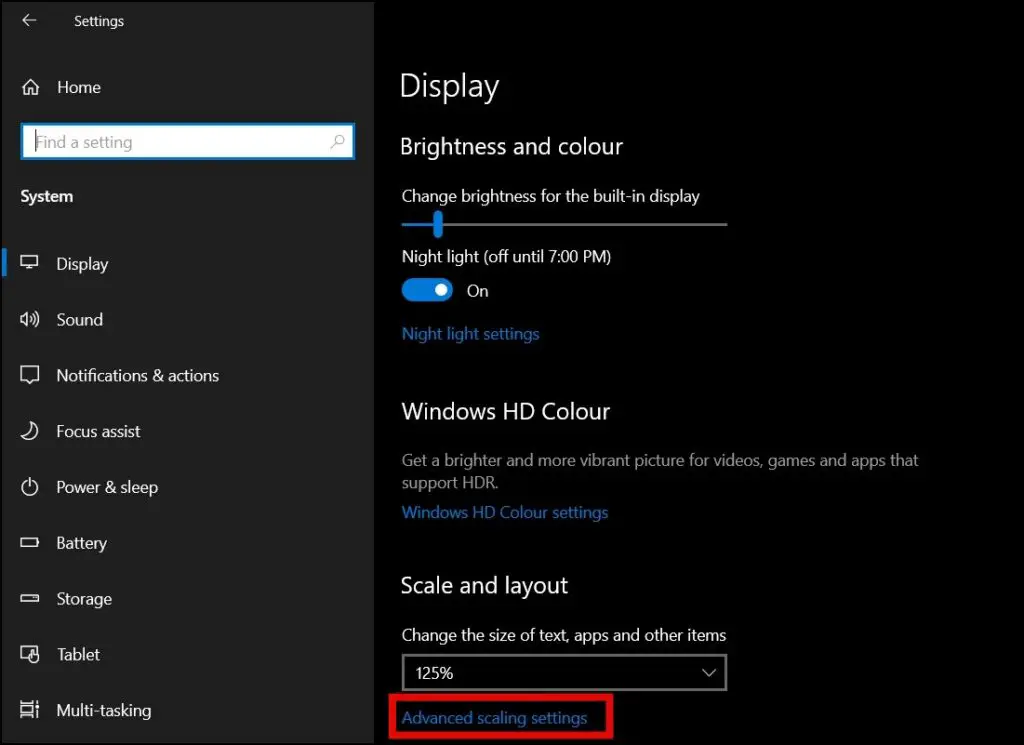
Step 3: Tap on System under the Settings.

Step 4: Click on Display on the next screen.

Step 5: Tap on Advanced scaling settings under Scale and layout section.
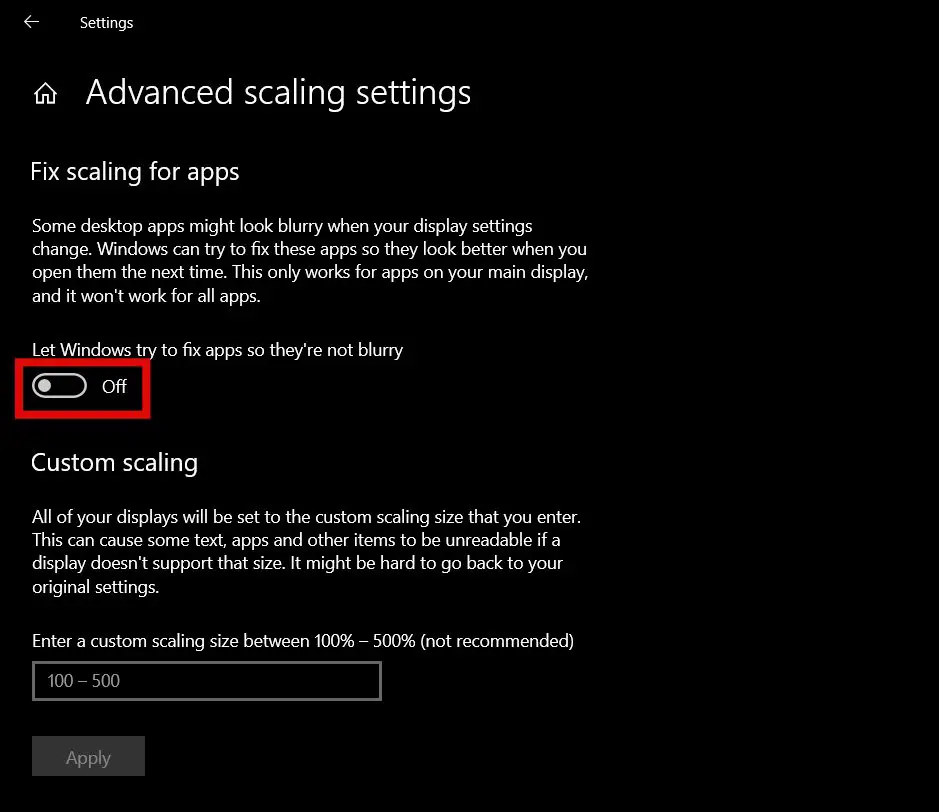
Step 6: Turn on the toggle next to Let Windows try to fix apps so they’re not blurry.
6. Clear the Chrome GPUCache Folder
For some users, deleting the Google Chrome’s GPUCache folder from the Windows PC may help them fix issues with font and text display in the browser. Here’s how to do it:
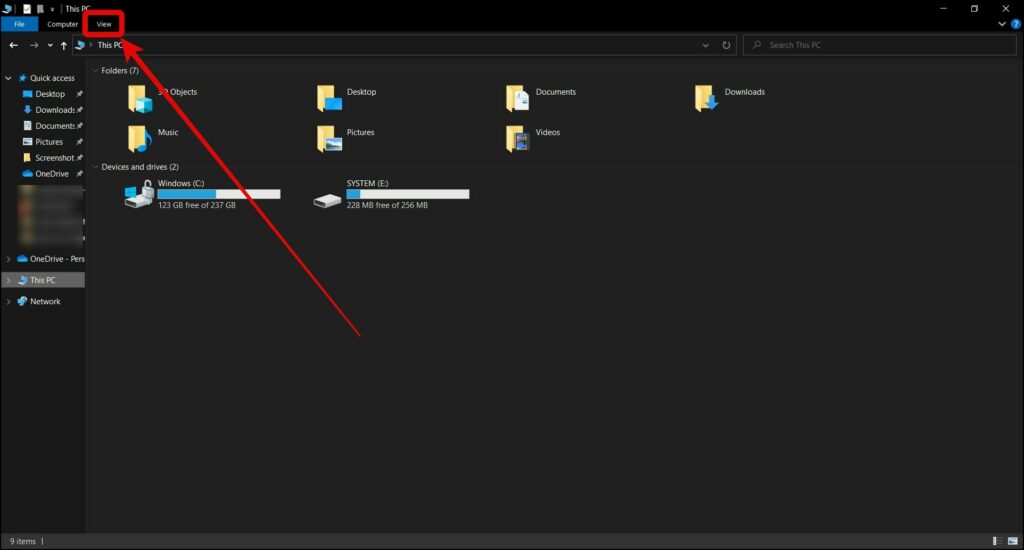
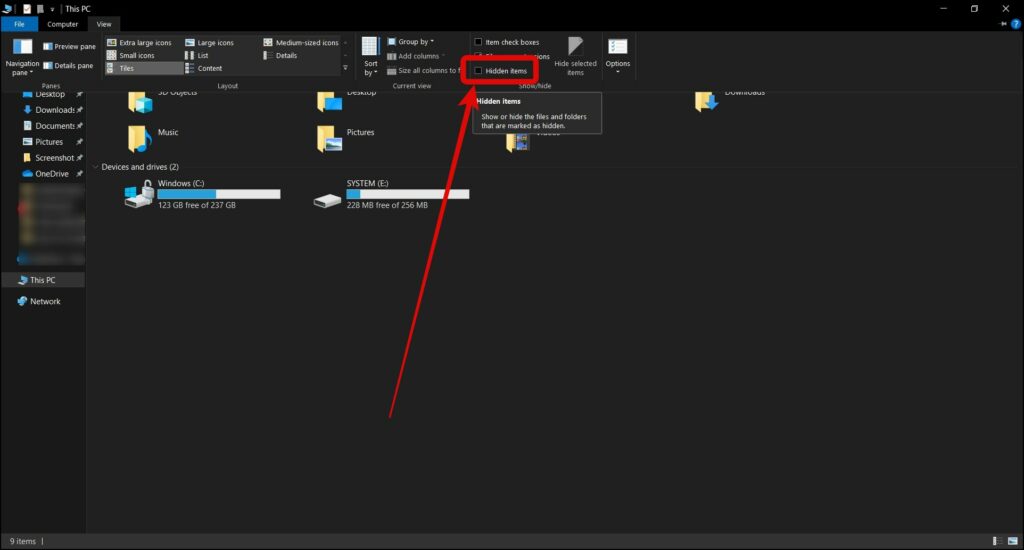
Step 1: Open My Computer on your Windows Computer.
Step 2: Click on View at the top menu.
Step 3: Here, select the checkbox for Hidden Items to see all the hidden files and folders.
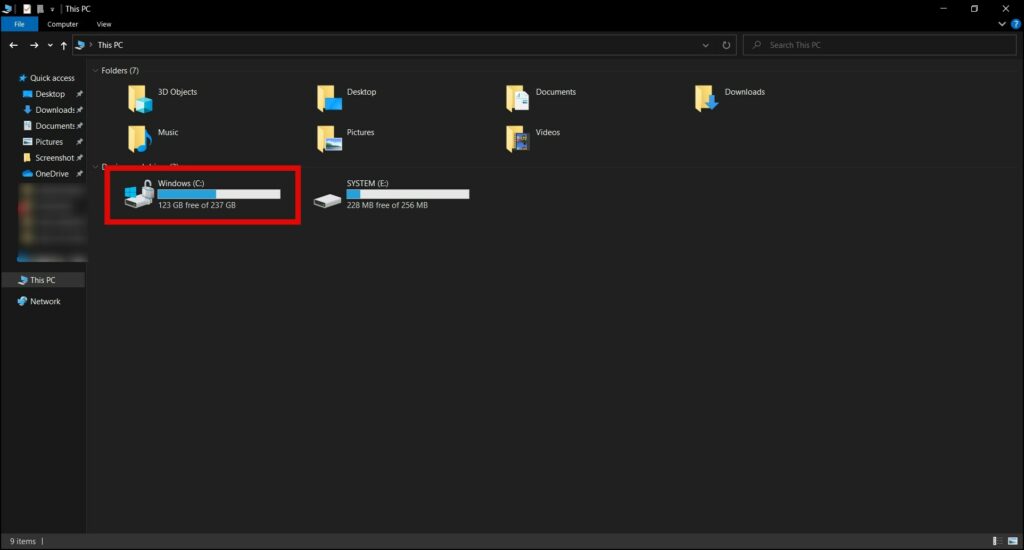
Step 4: Now, open Windows (C:) or Local Disk (C:) Drive.
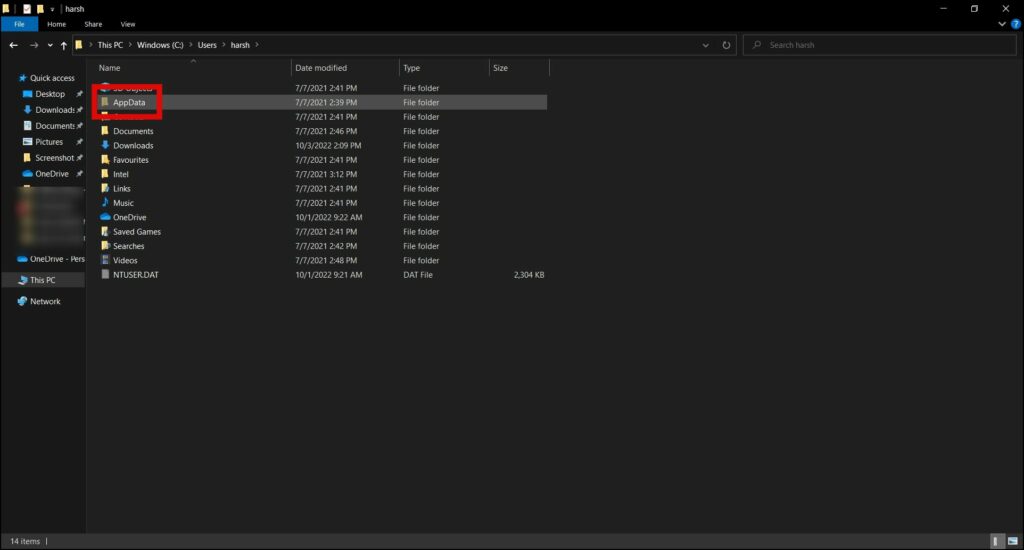
Step 5: Go to Users, select the user, and then tap AppData.
Step 6: Now, go to Local >> Google >> Chrome >> User Data >> ShaderCache and here you will see a GPUCache folder.
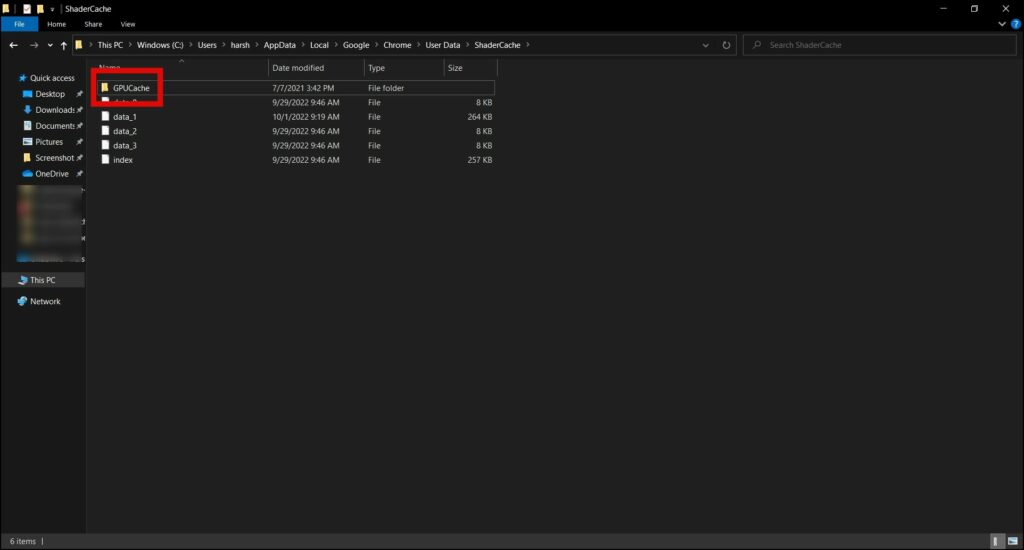
Step 7: Right-click on the GPUCache folder and select Delete from the menu to delete the folder.

Step 8: After deleting, restart your system and your issue should be fixed.
7. Update Graphics Driver
Outdated or incompatible graphics drivers may cause errors with the display of text and other content like images and videos. Here’s how to check and update the graphics drivers on your computer to the latest available version.
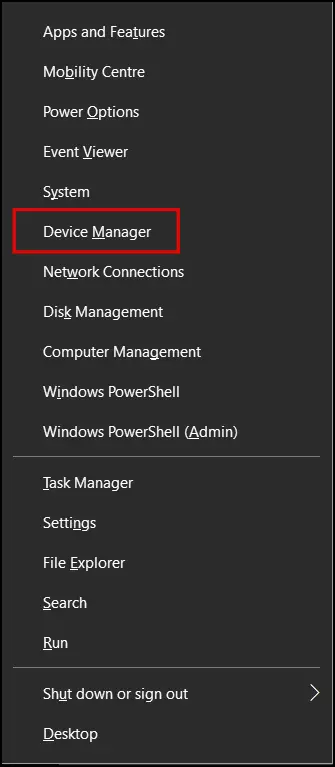
Step 1: Press the Windows + X key at once.
Step 2: Tap on Device Manager from the appeared menu.
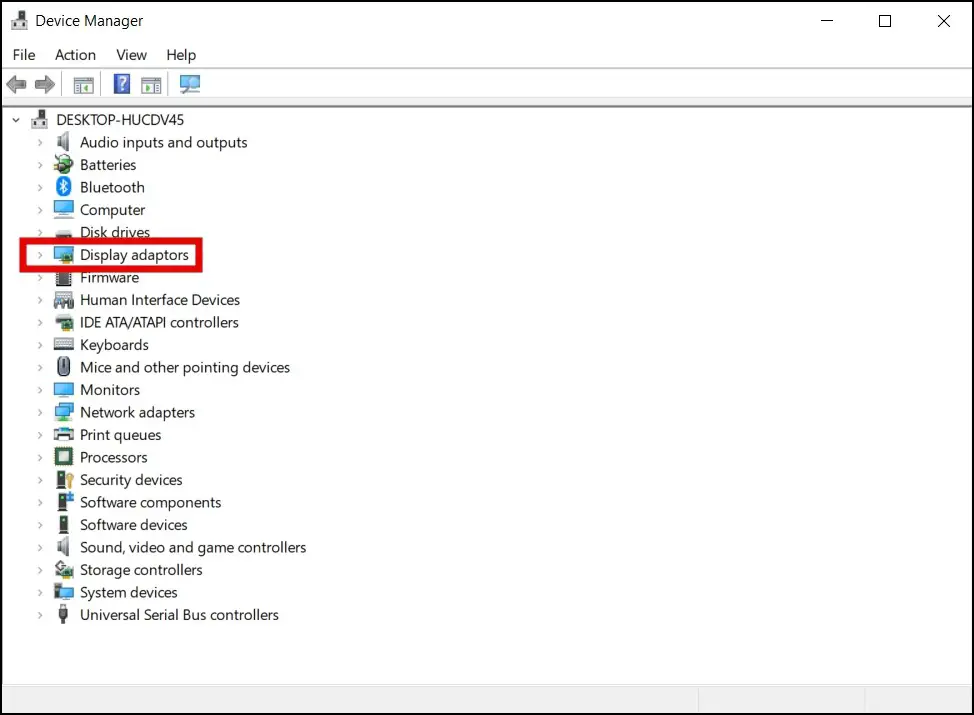
Step 3: On the next screen, click on the expand button before Display Adapters.
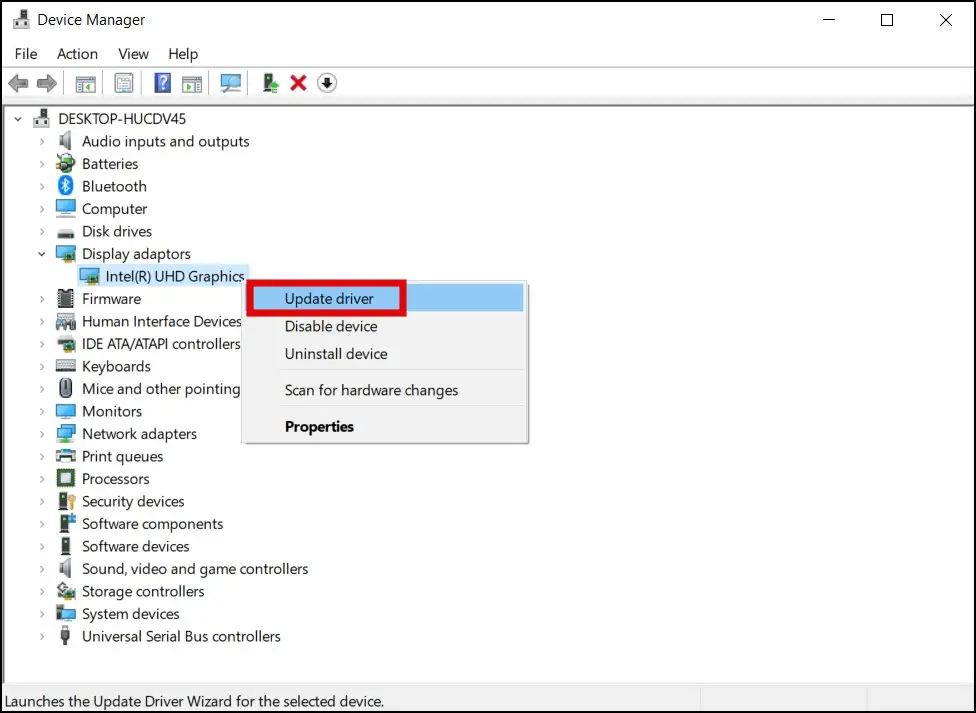
Step 4: Right-click on your graphics card driver then tap on Update driver.
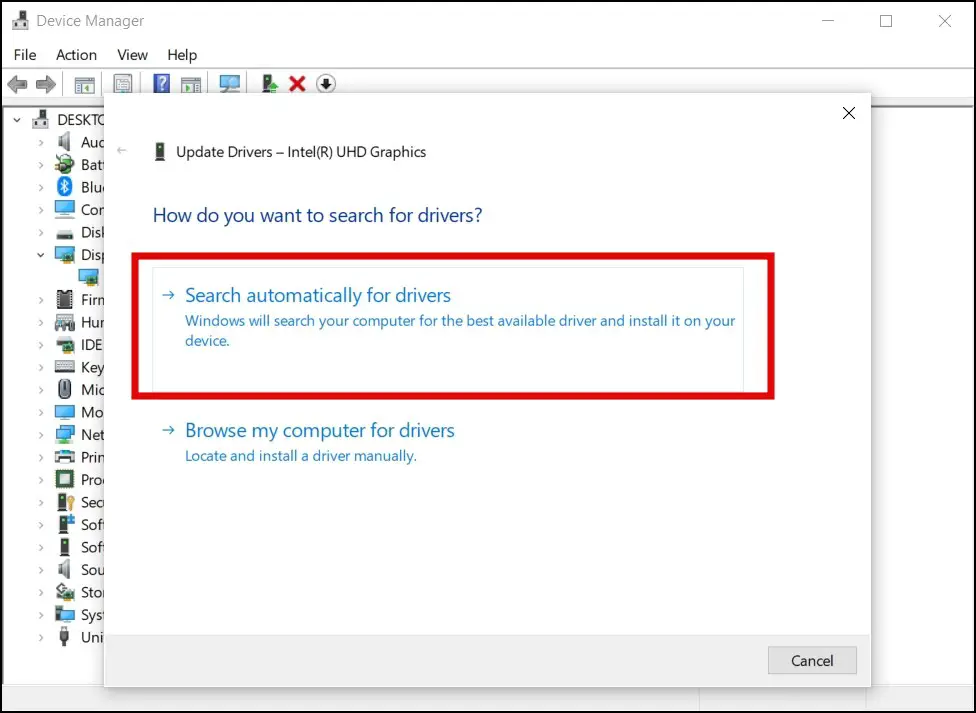
Step 5: Click on Search automatically for updated driver software and your issue should be fixed.
8. Turn Off Hardware Acceleration
Google Chrome uses Hardware Acceleration to give users better performance. However, there are many instances when it might cause a problem on the browser. In fact, it’s one of the biggest culprits in issues like screen tearing, font rendering, and video playback problems.
Follow the below steps to disable Hardware Acceleration in Chrome:
Step 1: Open the Chrome Browser on your system.
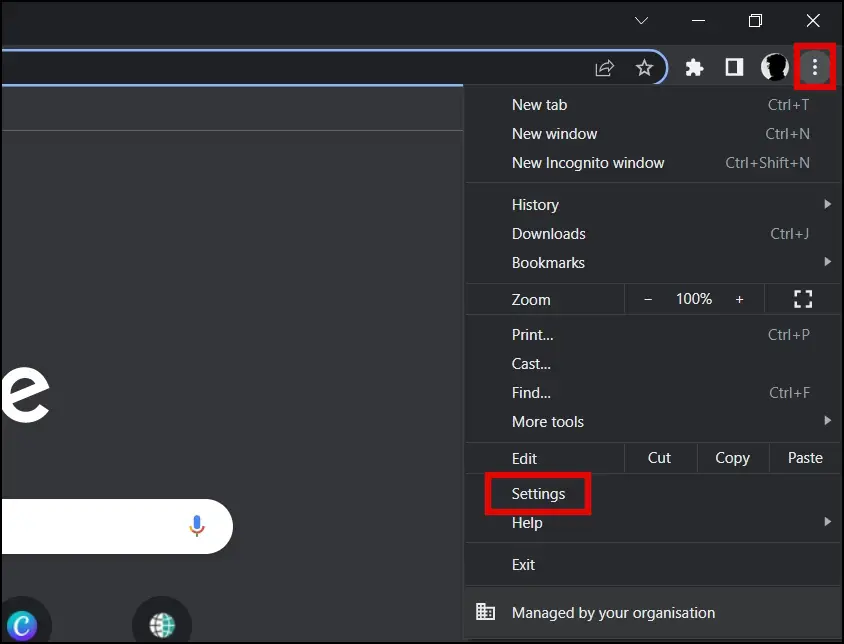
Step 2: Tap on three dots at the top and choose Settings from the menu.
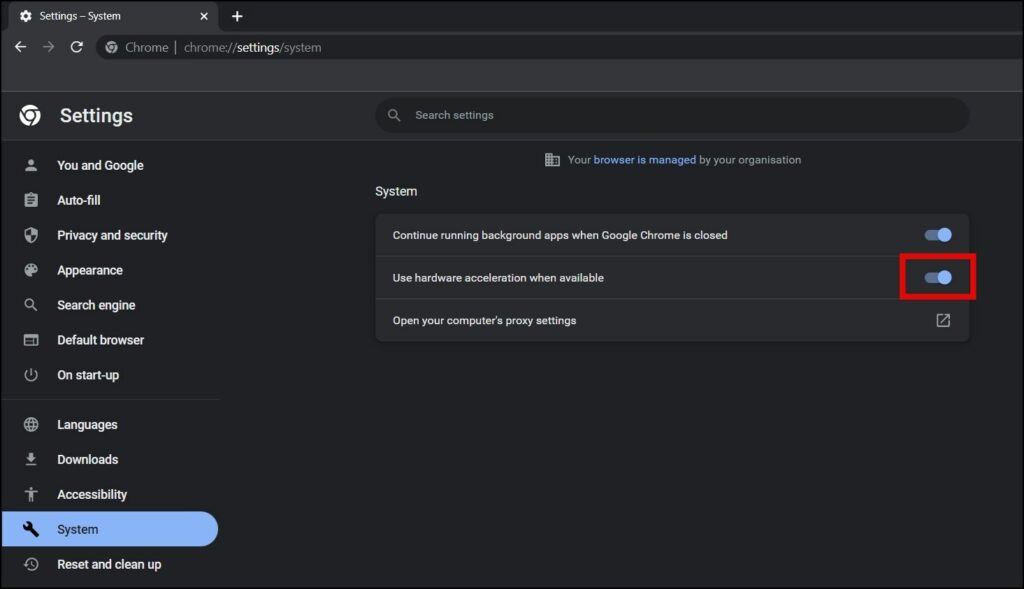
Step 3: Click on System from the side menu.

Step 4: On the right panel, turn off the toggle next to Use hardware acceleration when available.
Step 5: Finally, click on relaunch to re-open the browser and your issue should be fixed.
9. Disable Flags
Flags let you try new and experimental features on Chrome. However, using certain flags may also break the normal functioning of the browser. And hence, it’s advisable to reset flags to ensure they’re not causing issues with font rendering and display in Chrome. Follow the below steps to disable it.
Step 1: Open the Google Chrome browser on your computer.
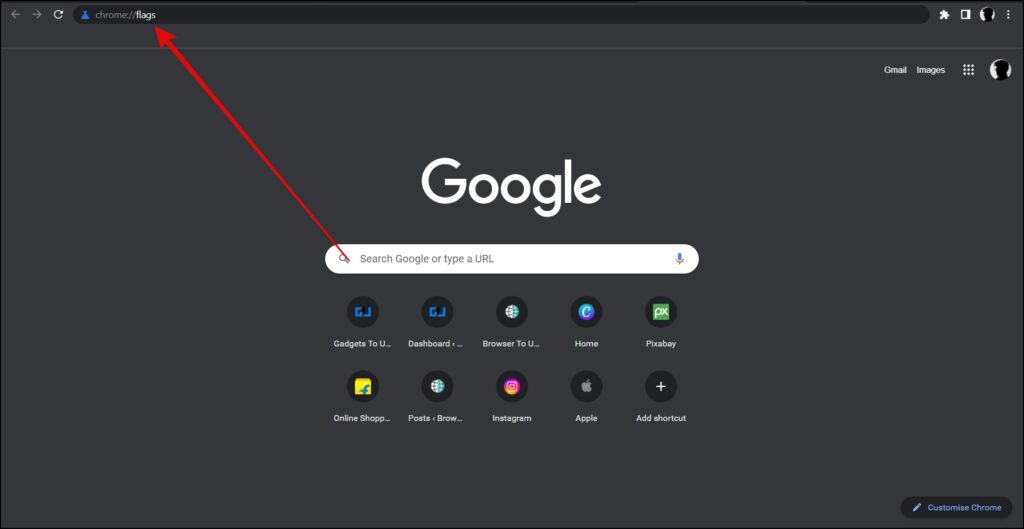
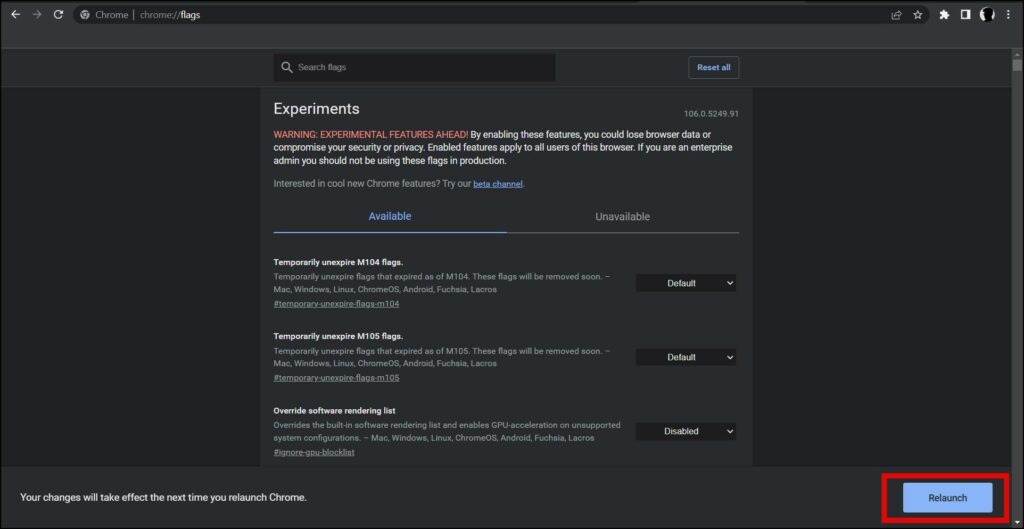
Step 2: Type chrome://flags in the address box and hit enter.
Step 3: Click on the Reset all button at the top to reset all the Chrome flags settings back to normal.
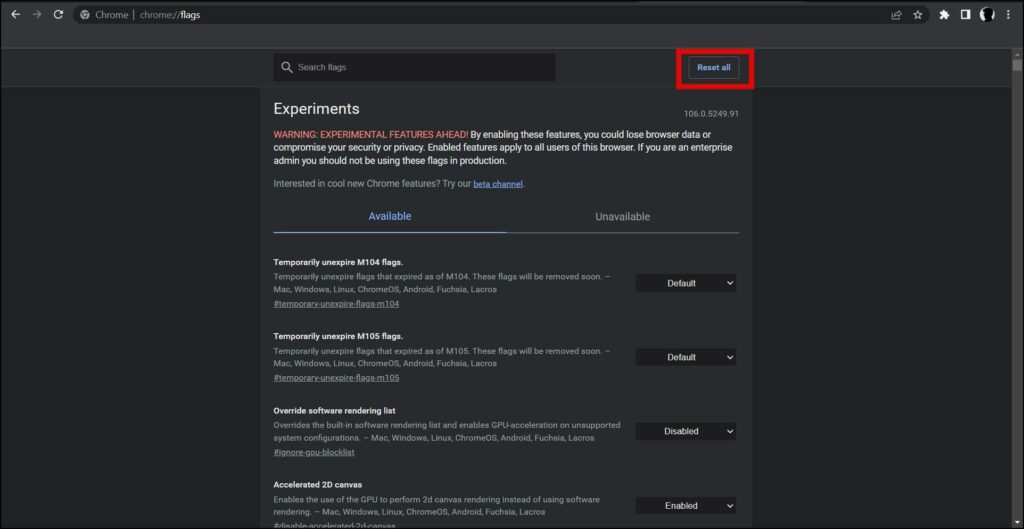
Step 4: Tap on the Relaunch button at the bottom to reopen the browser and your issue should be fixed.
10. Clear Browser Data
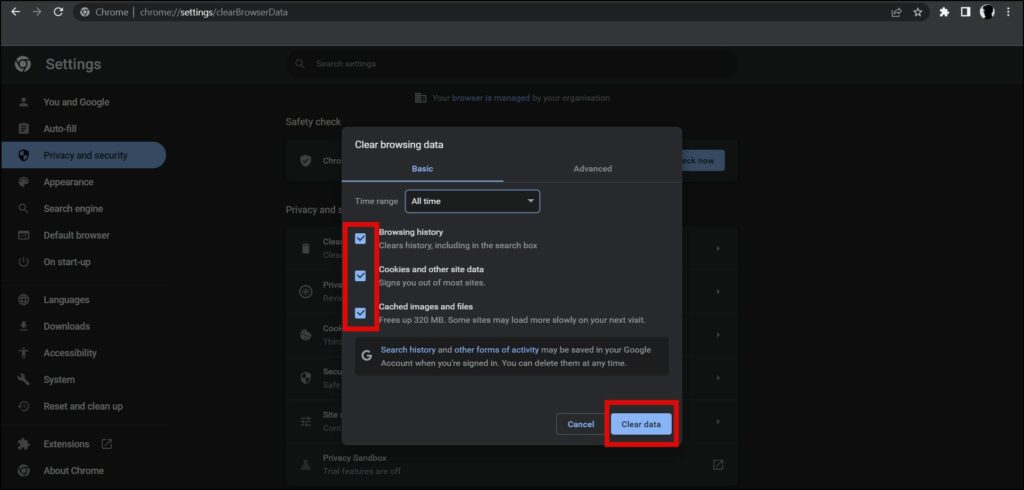
You can also try clearing the browser cache which includes browsing history, cookies, other site data, and cached images and files. Follow the below steps to clear browsing data.
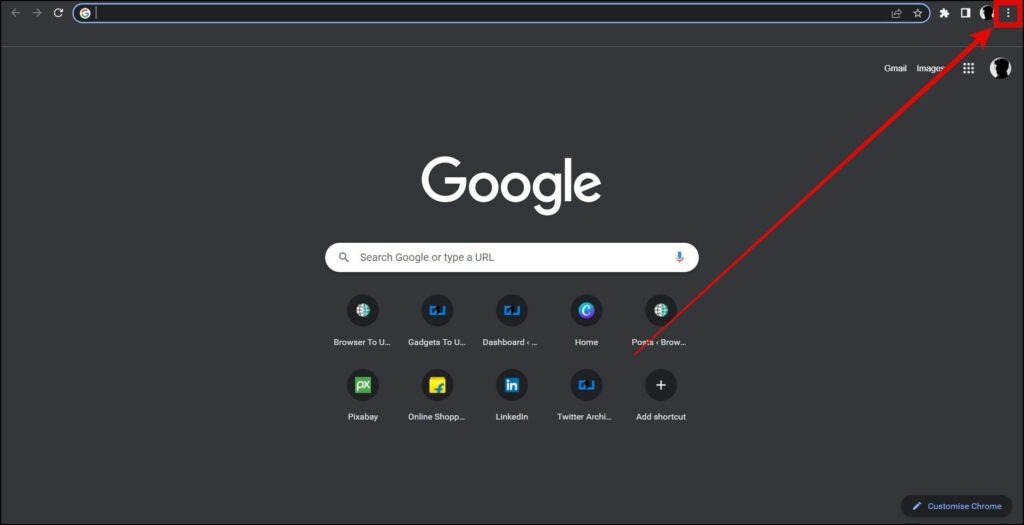
Step 1: Open the Google Chrome browser on your computer.
Step 2: Click on the three-dots icon at the top.
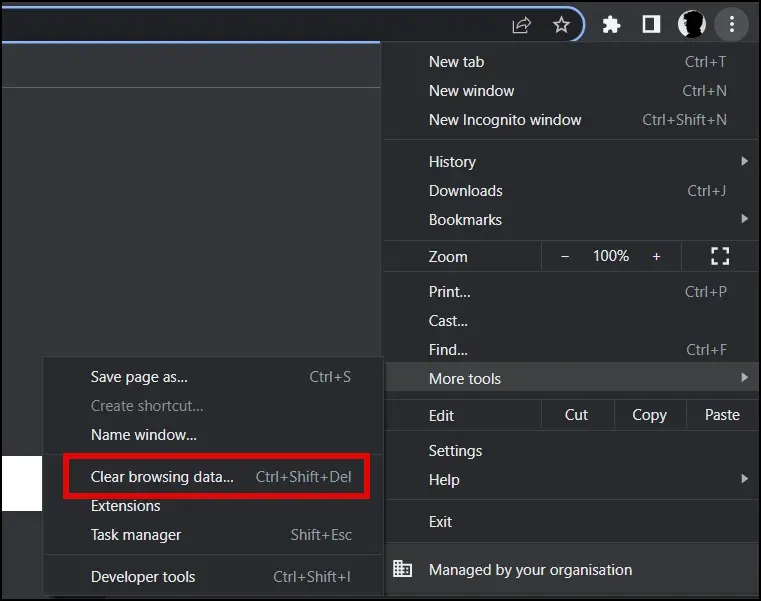
Step 3: Hover the mouse over More Tools and tap on Clear Browsing Data.
Step 4: Set Time Range to All Time.
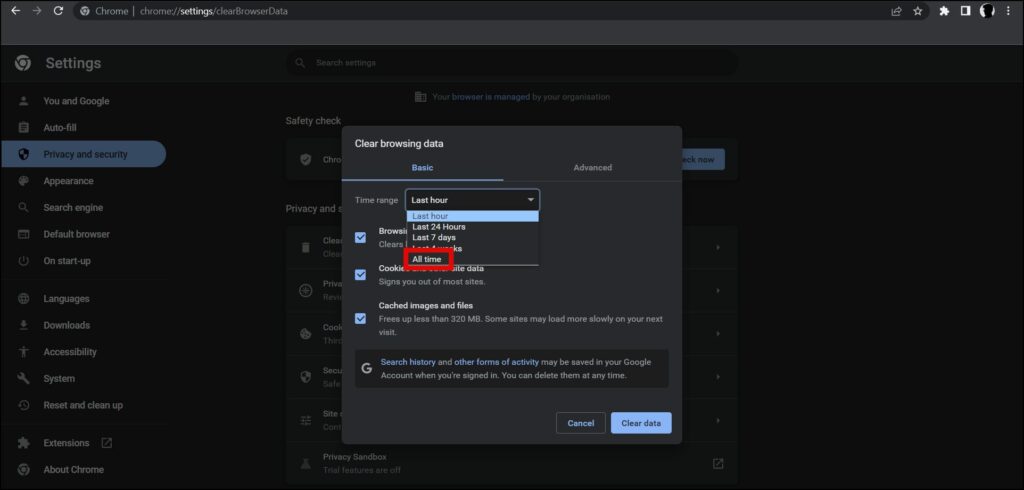
Step 5: Finally, select all the checkboxes and click on Clear Data to clear the browsing data.
11. Update the Browser
Updating the browser may fix existing bugs/glitches in the browser which could be causing the problem of text not displaying correctly. Here’s how you can update the Google Chrome browser:
Step 1: Open the Chrome browser on your system.
Step 2: Tap on the three-dots icon and select Settings.
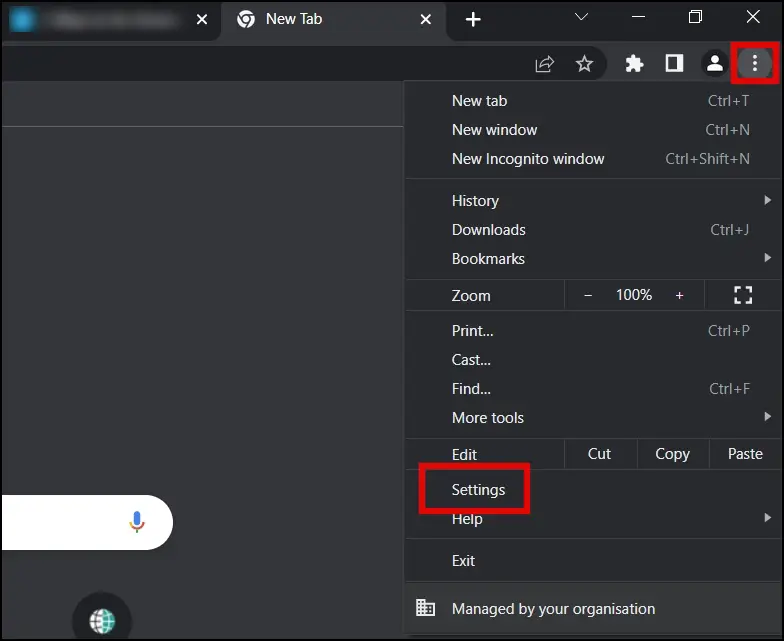
Step 3: On the next screen, tap on About Chrome from the sidebar.
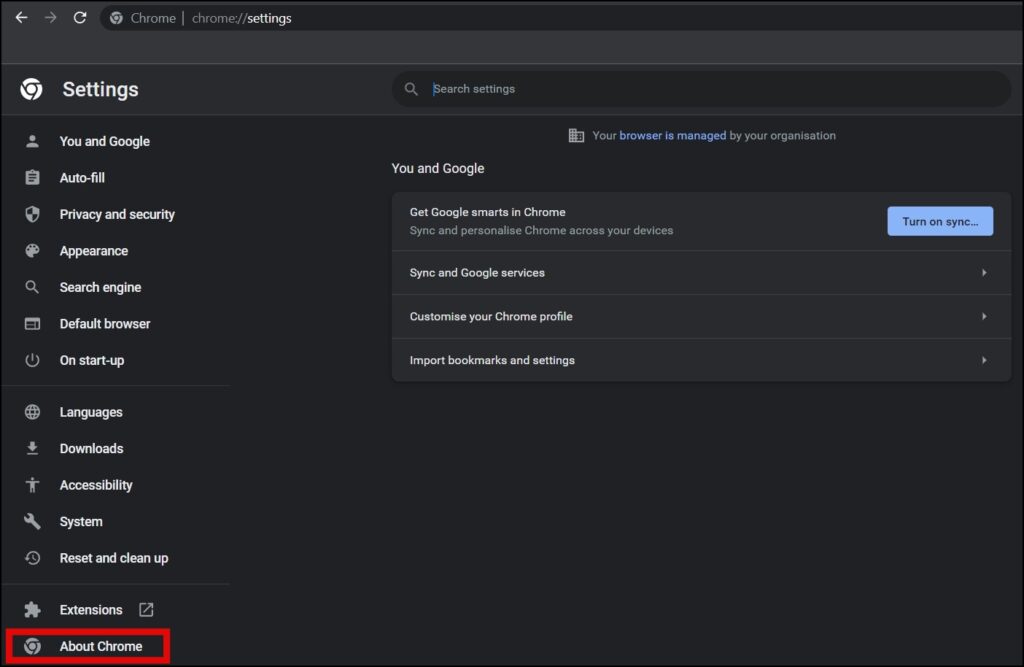
Step 4: Chrome will automatically check for updates, if there is a major update available, tap on Update to update the browser.

If nothing works, you can even go ahead and uninstall Chrome completely from your computer. And then, install the fresh build based on your computer’s CPU architecture from the official website.
Wrapping Up
This was how you can fix the problem of Google Chrome not displaying text correctly on your PC or computer. I hope the article helped you with restoring the font rendering back to normal in the browser. Stay tuned for more such tips, tricks, and how-tos.
Related:


