Google Chrome now has a built-in tool to take and edit screenshots within the browser. While you still have to rely on third-party extensions for scrolling screenshots, you can still capture, draw, and annotate any part of a webpage with Chrome’s native screenshot feature. In this guide, we’ll explore how to enable and use all features of the Screenshot tool to make the most out of it in Google Chrome.
How to Enable Screenshot Tool in Chrome
Screenshot Editor is an experimental feature available only on some builds of Google Chrome- it is not yet rolled out to all users. Also, it is currently quite unstable and buggy. While some users could utilize the feature smoothly, others like us had bad luck on our side.
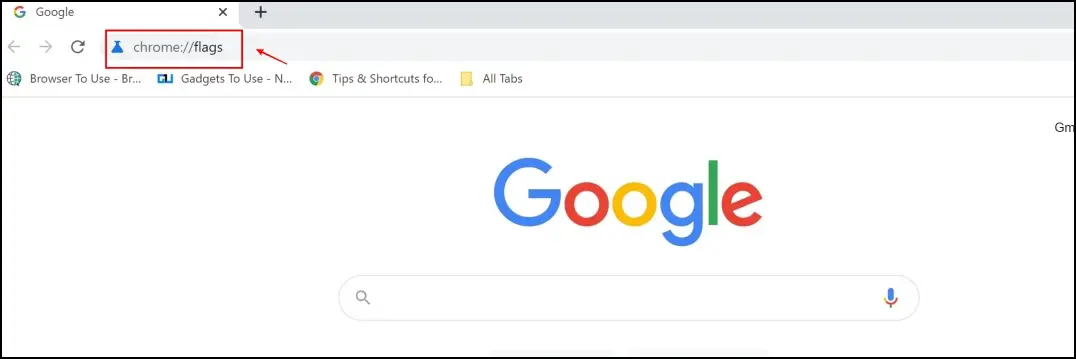
By default, the experimental screenshot feature is not present in Google Chrome. You need to access Google Flags to enable these features. When we dug into the flags, we found that there are two flags that you need to enable and then restart the browser, as shown below:
Step 1: Open Chrome and enter chrome://flags in the address bar.
Step 2: In the flags search bar, search for screenshots. You will find two flags with the screenshot tag. You need to turn on both of them.
Step 3: Click on the Desktop Screenshots drop-down box and click on Enabled. This will enable the Google Chrome screenshot feature.
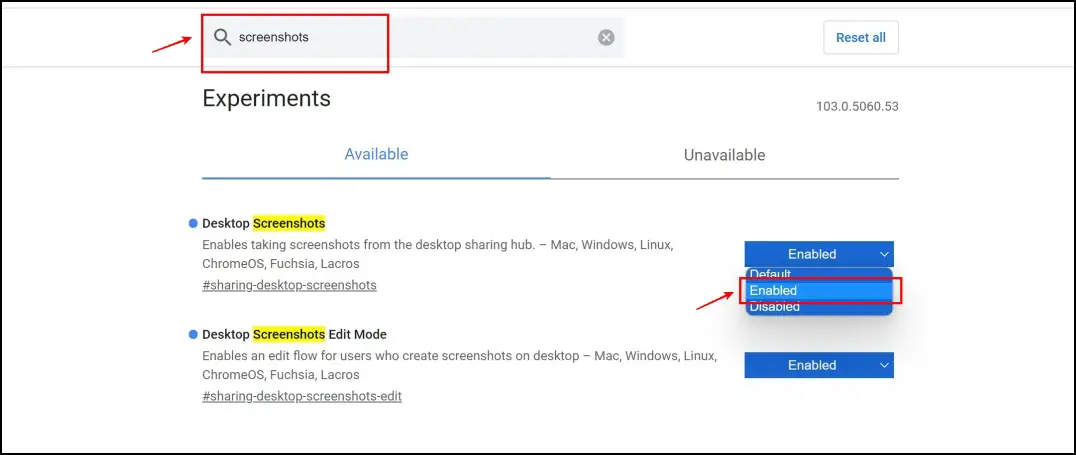
Step 4: Now click on the drop-down box next to Desktop Screenshots Edit Mode. Click on Enabled.
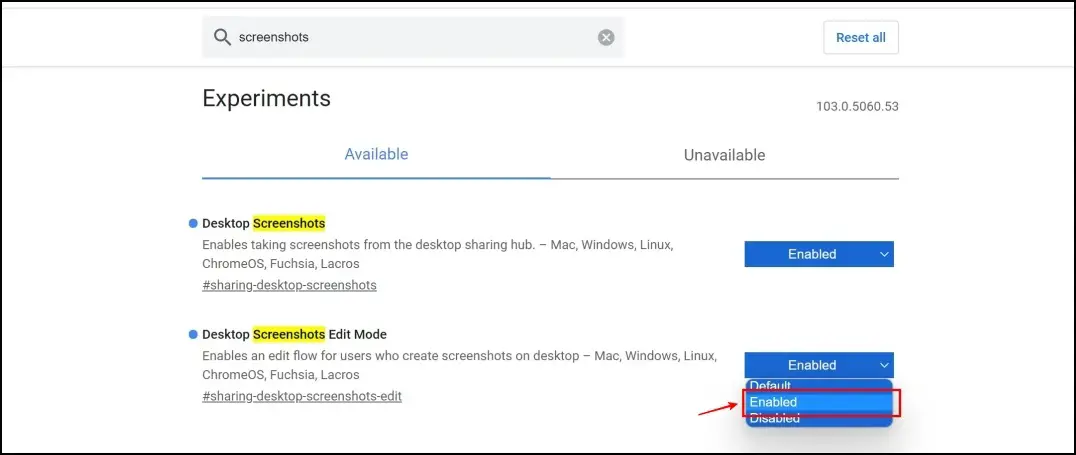
Step 5: You can now relaunch Google Chrome from the prompt.
You will now be able to edit and capture screenshots in Chrome.
Capturing and Editing a Google Chrome Screenshot
Let us now take a quick look at how to capture and edit screenshots in Chrome using the built-in tool.
How to Capture a Google Chrome Screenshot
Now that the feature is enabled, here’s how you can capture and edit a Google Chrome screenshot.
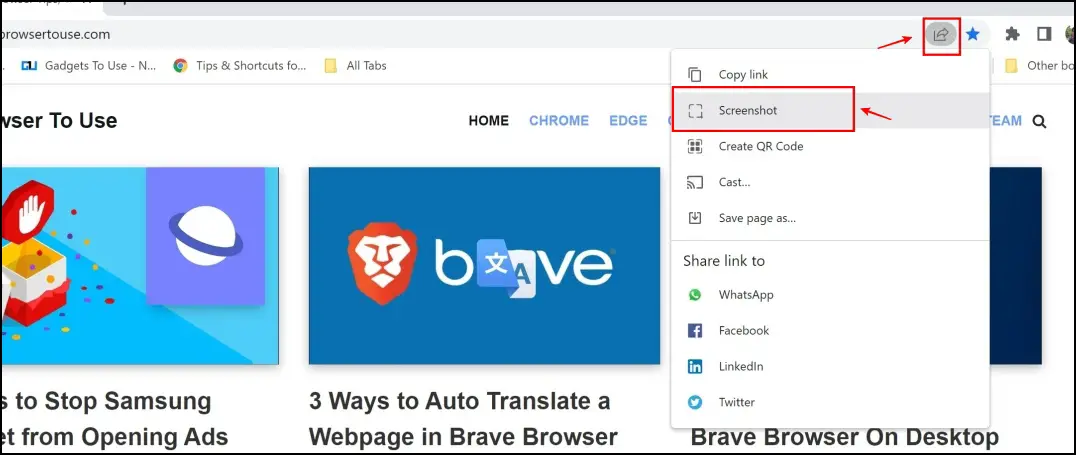
Step 1: Click on the Share button on the Google Chrome toolbar.
Step 2: Now click on the Screenshot option in the drop-down menu.
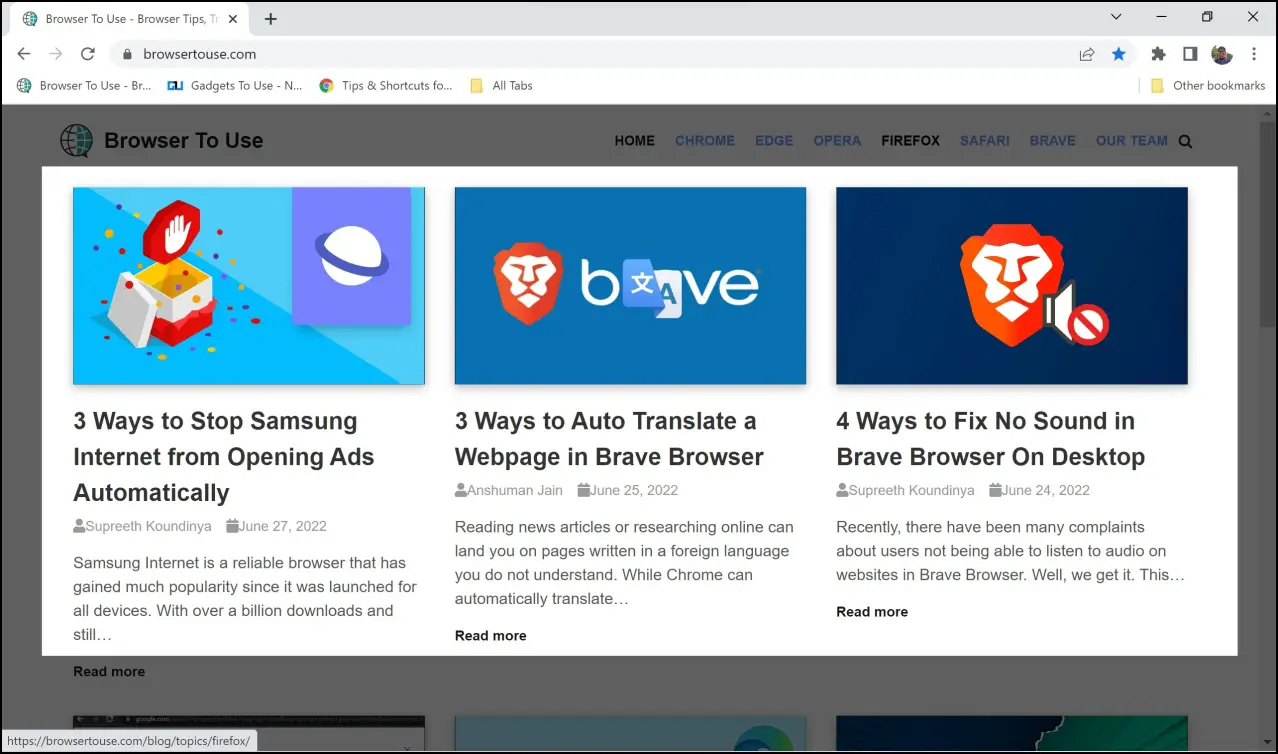
Step 3: You will now have to make a selection on the website you want to take a clipping of.
Step 4: Once you make a selection, you will now find options to Edit and/or Download the Screenshot.
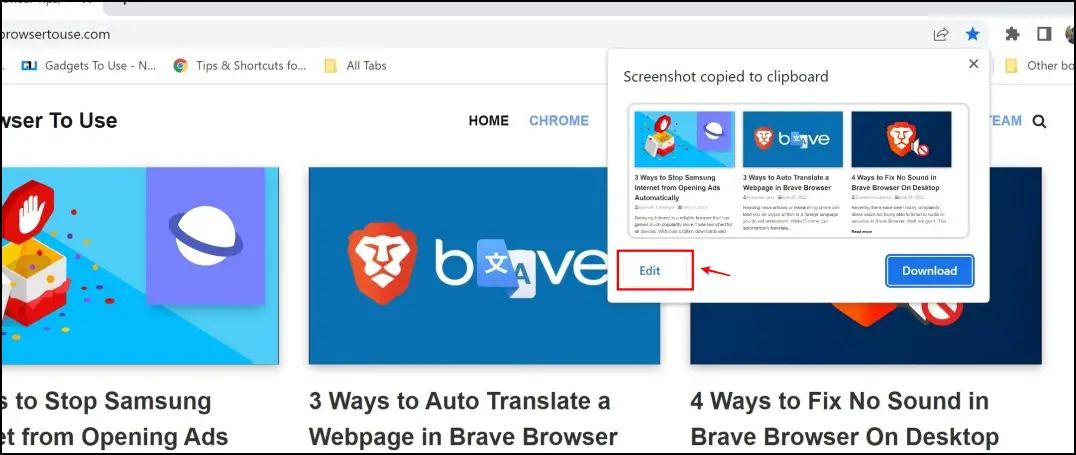
To explore how you can edit a Google Chrome screenshot, go ahead and click on Edit.
How to Edit Google Chrome Screenshots
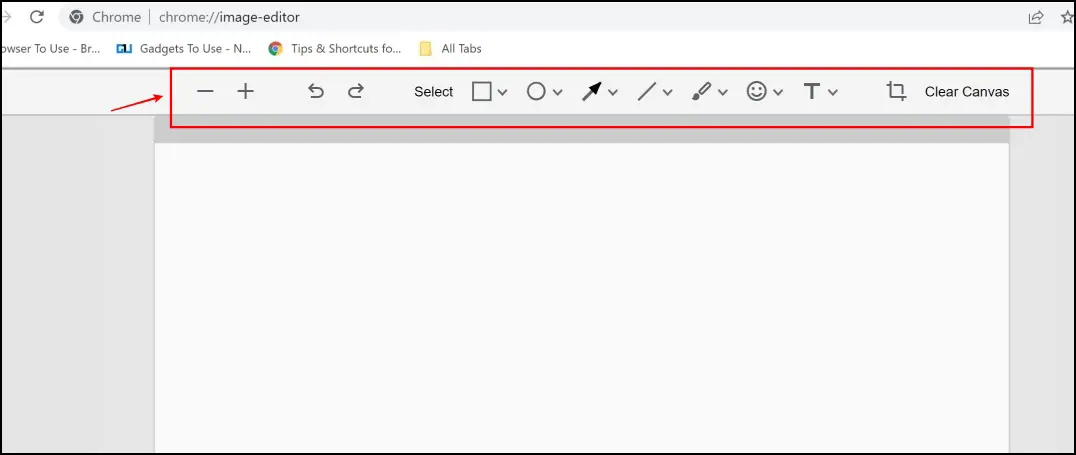
Once you are in the edit window, you can now see a set of features in a toolbar. These features help you add a lot more custom information, and annotations on the captured screenshot.
Here are some of the options that are available :
- Zoom in and Zoom out : You can use this tool to zoom in and magnify the screenshot, and vice versa.
- Selection Tools : Just like how we select elements of screenshots to help users find things as they fix issues, you can do the same on your screenshots as well. You can add a square shape, or a circular shape for your selection.
- Arrow Marks : You can also add arrow marks to point out to elements on your screenshot.
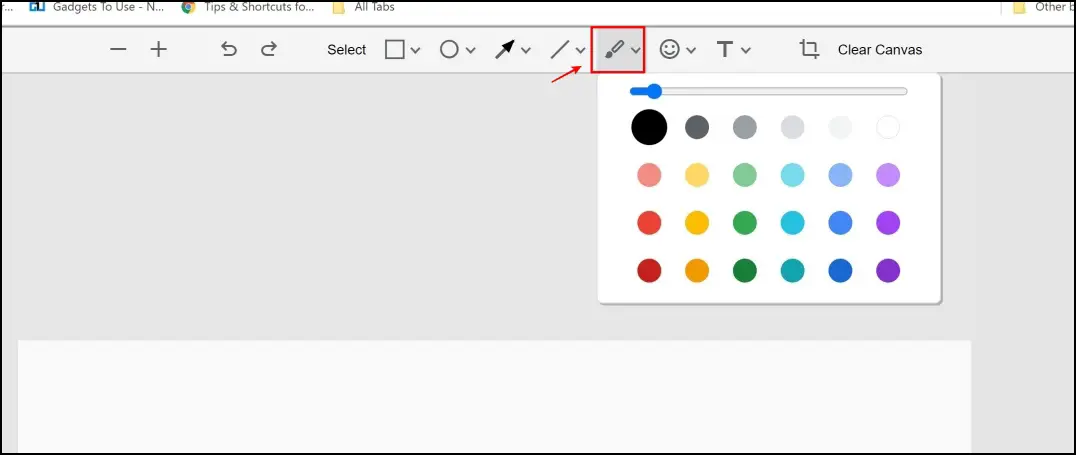
- You can also quickly add lines, and paint your screenshot. You can also change the color, and the thickness of the tool.
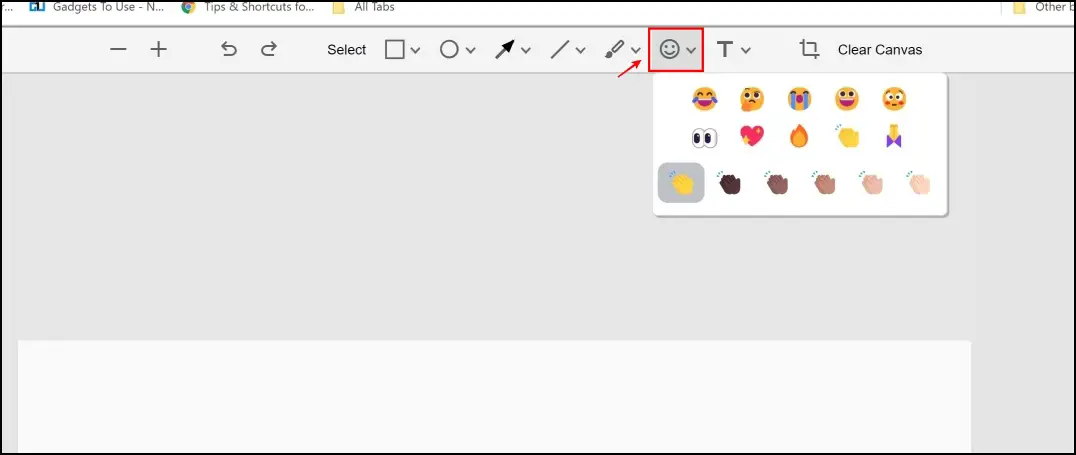
- Another good feature is that you can add all of your favorite emojis to your Google Chrome Screenshot.
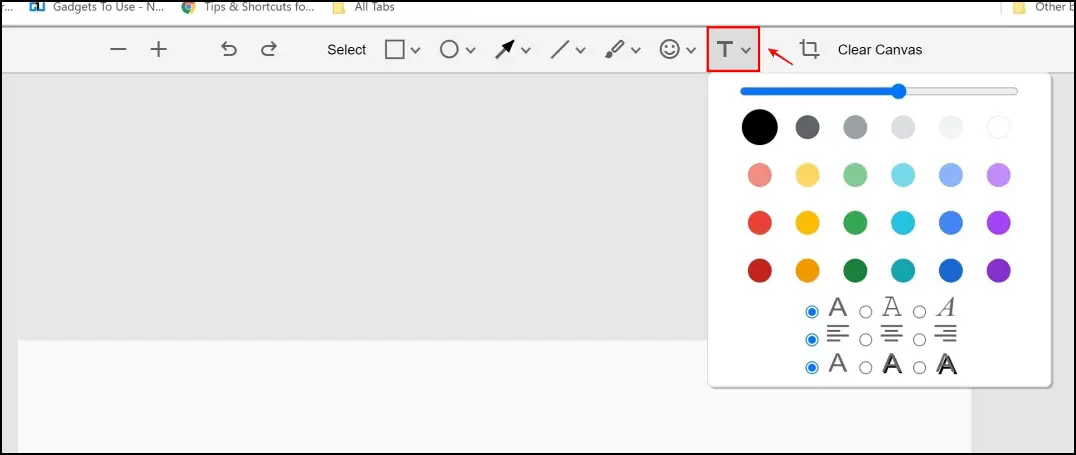
- Lastly, you also have the Text feature. This lets you add text to the screenshot. Like every other tool, you can increase the size of text, and change the color as well. You can also format, and align the text that you have added to the screenshot as well.
- In case you want to erase all of your additions, you can quickly do so by clicking on the Clear Canvas button.
Wrapping Up
This is what you need to know about the Google Chrome screenshot feature, and how to go about editing the same. We hope you found this article interesting. Stay tuned to Browser To Use as we help you explore and understand more such features which help you enhance your web browsing experience.
Related:
